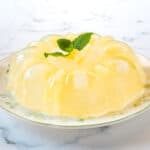
Nata de Coco Jelly with Pineapple
A truly tropical dessert, this pineapple nata de coco jelly is not only refreshingly light and yummy, its super easy to make too!
Servings: 1 tray
Calories: 941kcal
Ingredients
- 10 g konnyaku jelly powder (Japanese jelly/agar)
- 150 g granulated sugar
- Water
- 550 g pineapple cubes in syrup (approximate can size )
- 550 g nata de coco (approximate can size)
Instructions
- Prepare the mold. Set it aside (see Note 1).
- Combine the konnyaku powder and sugar in a small bowl. Mix until both are well combined (see Note 2). Set aside.
- Drain the nata de coco. Discard the syrup and set the fruit aside.
- Drain the pineapple syrup from the can into a measuring cup. Add water to the syrup until it reaches 950ml (see Note 3). Pour the measured liquid into a medium sized pot.
- Add the sugar-jelly powder into the pot and cook it until the sugar and jelly is all dissolved and reaches a rolling boil. This should take approximately 10 minutes over low heat. Turn off the heat (see Note 4).
- To assemble the nata jelly, arrange a layer of pineapple cubes and nata de coco at the bottom of the tin. Spoon a layer of jelly into the bundt tin until the fruits are about two-thirds submerged in the jelly (see Note 5).
- Let the jelly set, for about 3 to 4 minutes. To speed up the setting process, place the bundt tin in a larger tray filled with cold water.
- Once the first layer of the nata jelly is set, pour the second layer of jelly and arrange another row of pineapple cubes and nata de coco on the jelly layer as it cools down (should still be liquid so that you can press the fruits in slightly. Let the jelly set again.
- Spoon on the final layer of jelly into the mold. Transfer the mold into the refrigerator and let the jelly set completely (for about 4 hours) before serving.
- Turn the jelly out onto a serving plate. Add more pineapple cubes and nata de coco in the center if you wish.
Notes
- The first step when making jellies is to prepare the containers or molds. This is because the jelly will start to set as it cools down, so it is important that the molds are prepared in advance.
- Mixing the jelly powder with sugar will avoid the powder from clumping when added to liquid.
- If the jelly package comes with instructions on the amount of water to use, it is best to follow the instructions on the package. Mine indicated 950ml hence the total liquid (pineapple sugar syrup + water) I used in making the jelly was 950ml.
- If the jelly powder is not fully dissolved, you jelly will not set properly. You can follow the cooking time indicated on the jelly package (if any).
- The reason for not submerging the fruits completely is to make sure they are connected to the next layer of jelly. If there is nothing to connect the layers, they will separate as you remove the jelly from the mold and when you cut it.
Nutrition
Calories: 941kcal | Carbohydrates: 244g | Protein: 3g | Fat: 1g | Saturated Fat: 1g | Sodium: 17mg | Potassium: 795mg | Fiber: 8g | Sugar: 228g | Vitamin A: 275IU | Vitamin C: 52mg | Calcium: 151mg | Iron: 4mg