

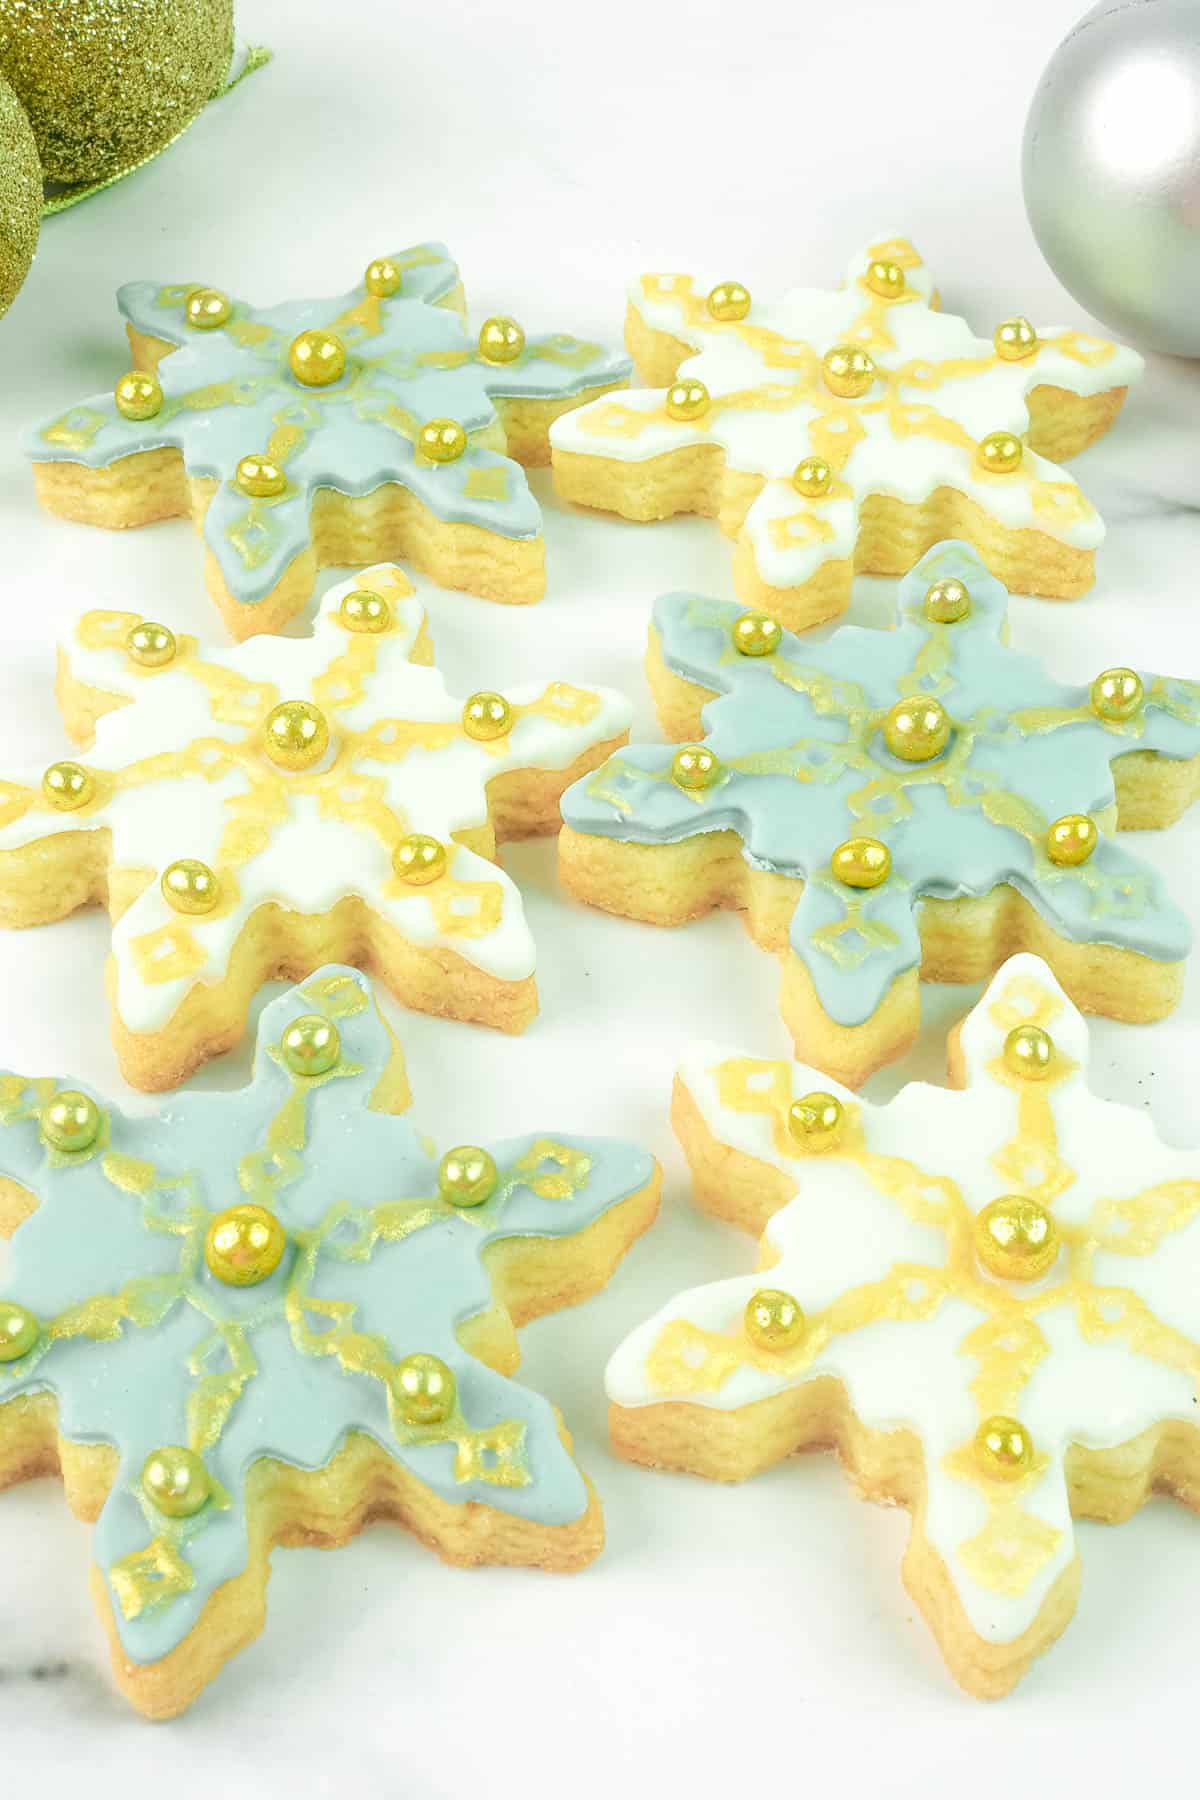
This snowflake cookies recipe makes absolutely pretty cookies. Decorated with fondant snowflakes, gold sugar dragees and edible gold paint, these cut out sugar cookies are easy and make perfectly gorgeous treats for Christmas.
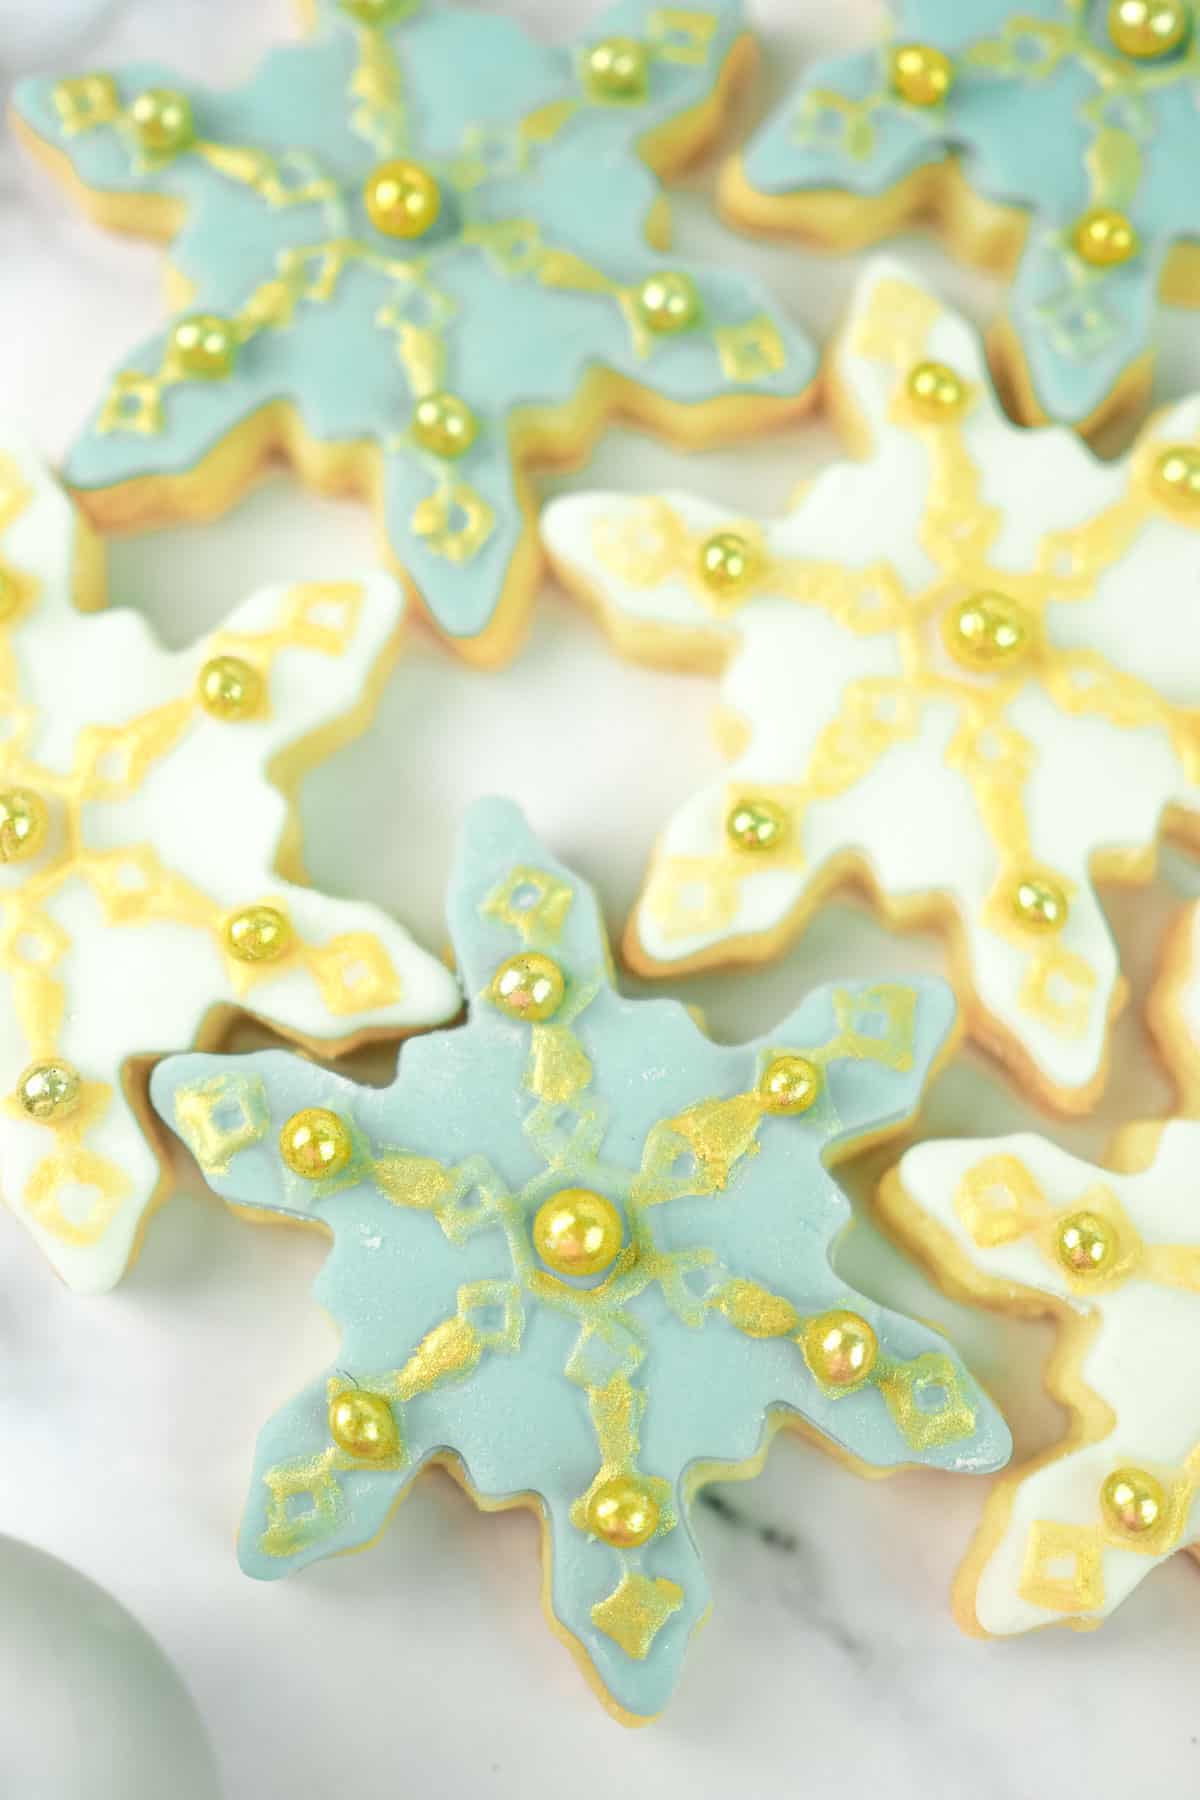
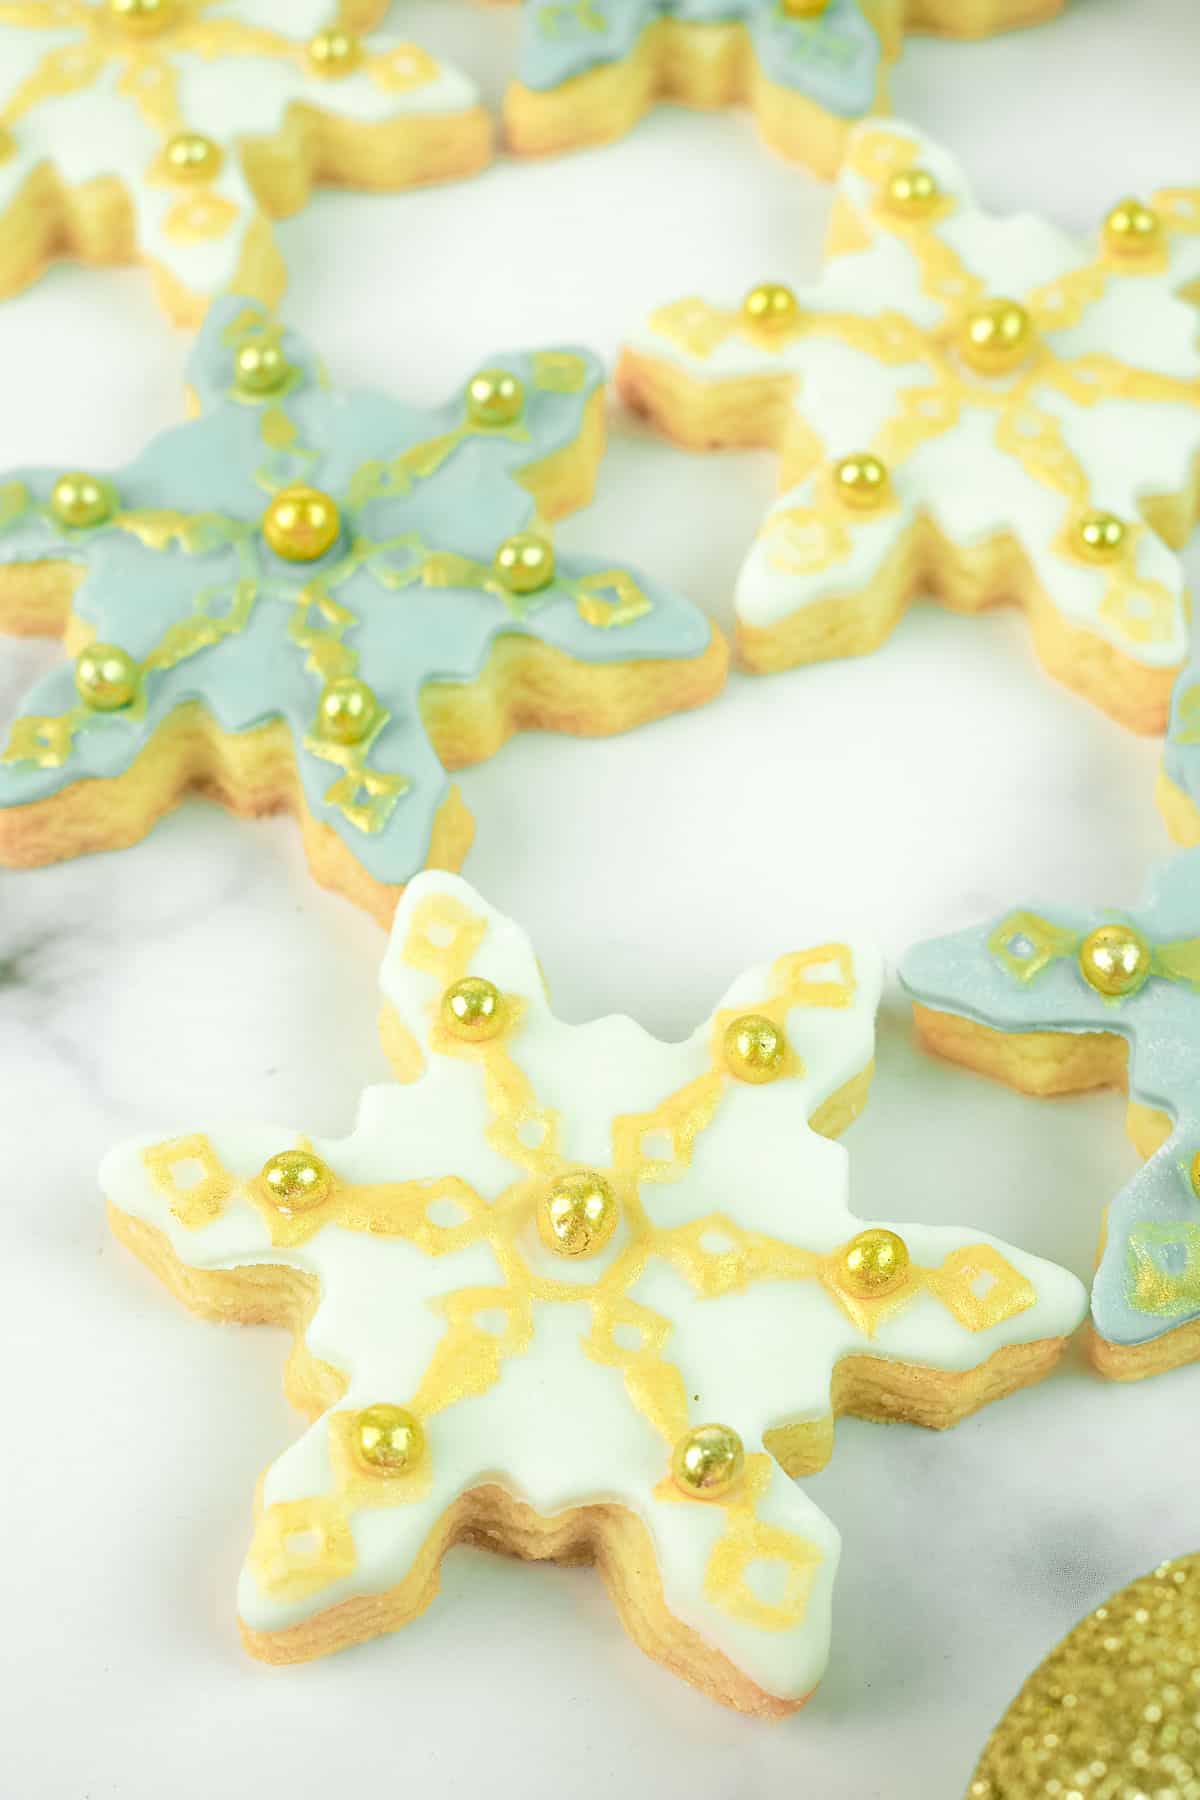
The cookies are made with my no spread sugar cookie recipe that holds its shape so perfectly after baking. I used the same snowflake cookie cutter to cut the rolled dough and to also cut the fondant. See how the fondant fits perfectly on the cookies (in the image above), and this is how well the cookie dough hold its shape and does not spread after baking.
The design on the cookies is embossed with a cookie press mat. The embossed lines are then painted with edible gold paint and decorated with gold dragees.
If you don't have an embossing mat, you can always paint the cookies free hand or use a snowflake cookie press to decorate.
If you like these cookies, you should also try out my Christmas wreath cookies, Christmas tree cupcakes, reindeer cupcakes and easy Christmas cake decorating idea. They make equally cute and pretty treats for Christmas.
Jump to:
❤️Why You Will Love This Recipe
- The cookies are easy to make and decorate.
- They don't spread and hold their shape perfectly well after baking.
- The cookies are very pretty.
- You can add them to your cookie platter or wrap them individually as gifts for cookie exchange or hang them to your Christmas tree with a matching gold ribbon.
📋Ingredients
For the Cookies:
- All purpose flour (plain flour) - sift before using.
- Granulated sugar (caster sugar) - avoid using coarse sugar as it will leave sugar marks on your cookies after baking.
- Butter (salted) - I use salted butter but if you are using unsalted butter, add ⅛ teaspoon of fine salt to flour and sift them together.
- Egg - use large egg.
- Vanilla extract - adds a lovely flavor and aroma to the cookies.
For the Decoration:
- Fondant & Americolor food color in Silver Spruce - I used Satin Ice in white and tinted some of it with Americolor Silver Spruce for the blue snowflakes and used the non tinted white fondant for the white snowflakes. You can use any other blue food coloring you like. You can also make your own fondant with this marshmallow fondant recipe or homemade fondant recipe.
- Edible gold dust + lemon extract - these are mixed to form the thick gold paint.
- Gold dragees - I used gold dragees in 2 sizes; a slightly larger ones for the cookie centers and smaller dragees all around it.
- Fondant glue - I used this to stick the fondant cutouts onto the cookies as well as to stick the gold dragees to the cookies.
Tools & Other Supplies:
- Snowflake cookie cutter & embossing mat - I used metal snowflake cookie cutters (6 inches in diameter) and embossing texture set by Autumn Carpenter. This set comes with a number of snowflake cookie cutters in various sizes along with a matching embossing mat for a variety of snowflake shapes.
- Fine tipped cake decorating brush - A fine-tipped brush will help you achieve fine painting on the cookies, so it is important to use a food-grade, fine-tipped brush for the painting work.
*Refer to the recipe card below for full list of ingredients and exact quantities. For best results, use a digital kitchen scale where applicable*
🧾Variations
The sugar cookie recipe on this page makes vanilla snowflake cookies. The dough can be customized to other flavors you like:
- For lemon snowflake cookies - omit vanilla extract and add 1 tablespoon of freshly grated lemon rind.
- For almond snowflake cookies - omit vanilla extract and replace with almond extract.
- Funfetti snowflake cookies - mix the cookie dough as indicated, and mix in some colorful sprinkles into the dough before chilling it. Cut, bake and decorate the cookies as usual.
- Cocoa snowflake cookies - reduce the flour by 50 grams and add 50 grams of cocoa powder. Sift the cocoa powder with flour before adding into the creamed cookie batter.
This recipe has not been tested with other substitutions or variations. If you do try, please let me know in the comments section below!
👩🏻🍳How to Make
Step 1: Mix the Cookie Dough
Preheat oven to 170°Celsius. Line baking tray with parchment paper.
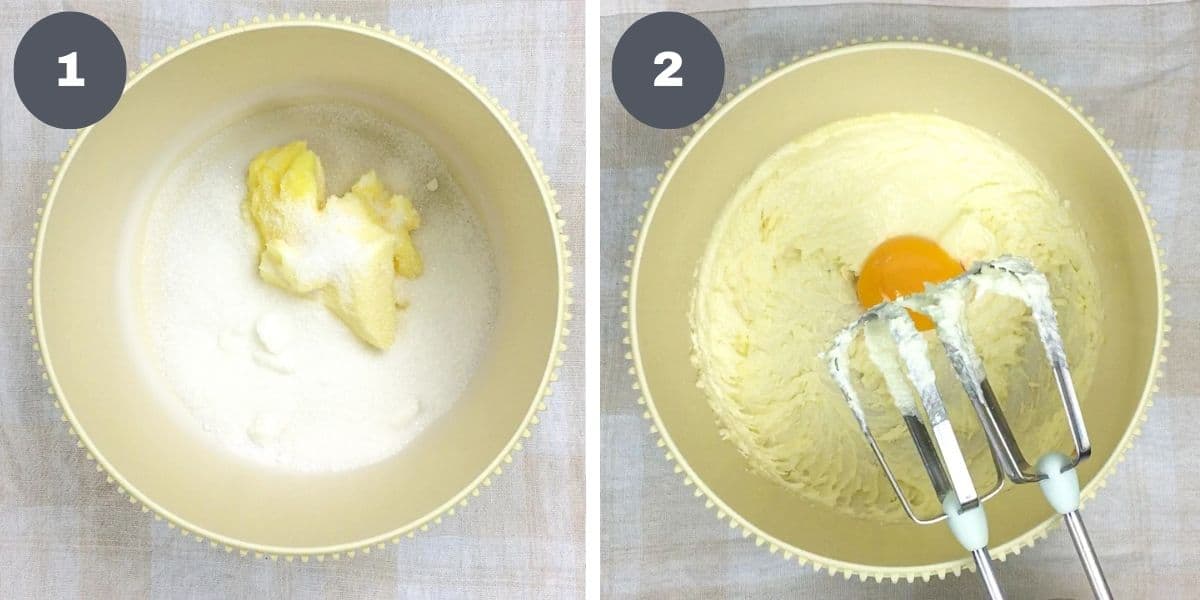
Cream the butter and sugar. Use a large bowl (image 1) and medium speed on an electric mixer until the mixture turns light and creamy. Do not over mix. Add the egg (image 2) and vanilla extract. Beat until the egg is well incorporated before adding the vanilla. Mix well.
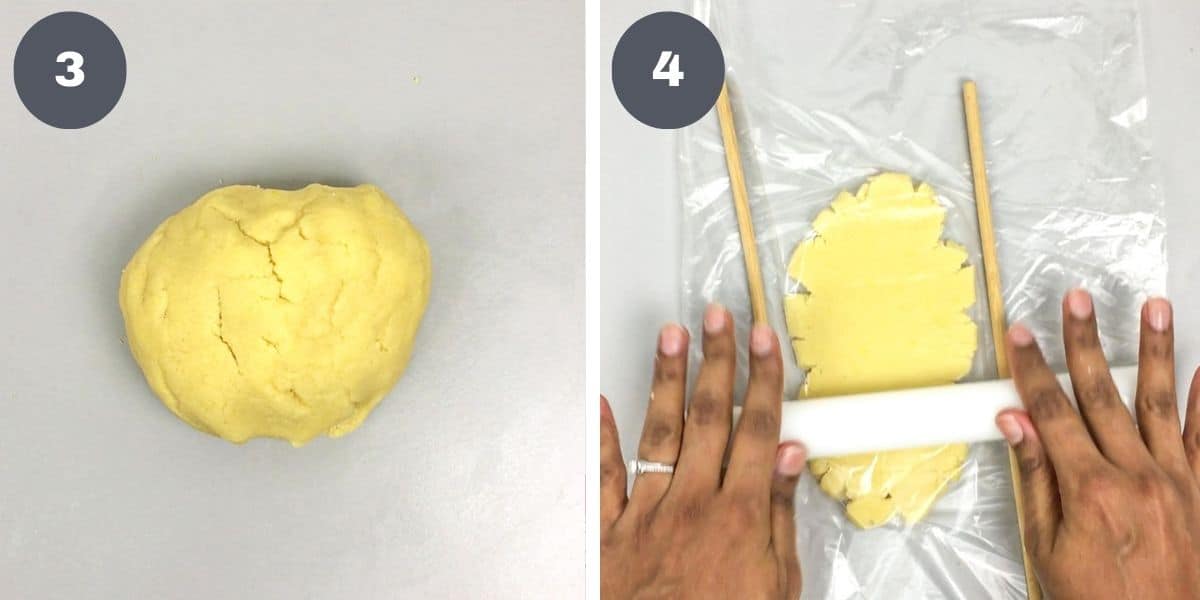
Add the flour. Mix on low speed until the dough comes together (image 3). Place the dough in a covered bowl (or wrap it in plastic wrap) and refrigerate until it is firm (but not too hard) for approximately 15 to 20 minutes.
Note: Do not leave the dough too long in the fridge as it will be too hard to roll. If that happens, leave the dough at room temperature until it softens to a rolling consistency.
Step 2: Roll and Cut the Cookies
Remove the chilled dough from the fridge and place it between parchment paper or plastic sheets. Use dowel rods on either side of the dough as a guide for the thickness of your cookies (image 4).
Note: If not using the parchment or plastic sheets, roll the dough on a lightly floured surface to avoid the dough from sticking.
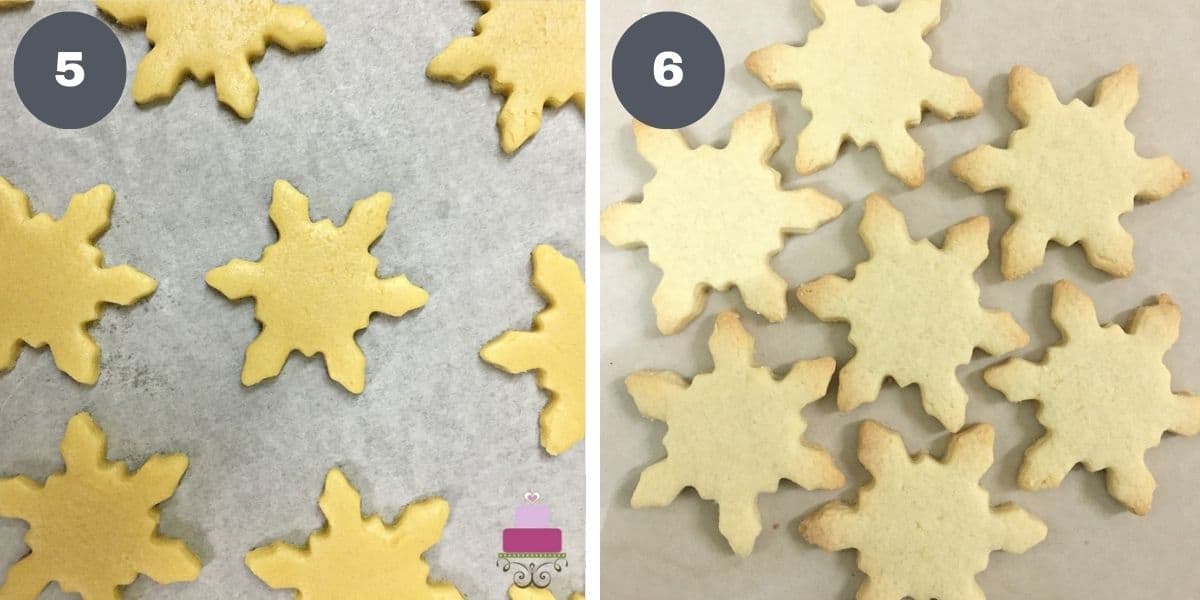
Cut and refrigerate the snowflake cookies. Use a medium sized snowflake cookie cutter (6 inches in diameter) and place the cut outs on the prepared tray (image 5). Refrigerate until they are firm.
Step 3: Bake the Cookies
Remove the cookies from the fridge and place them in the preheated oven. Bake for about 12 minutes until they turn golden brown on the sides (image 6). Remove cookies from the oven and cool them on a wire rack to room temperature. Keep cookies in an airtight container until ready to decorate.
Note: The cookies can also be baked a few days in advance before decorating.
Step 4: Cut the Fondant Snowflakes
To make the snowflakes, divide white fondant into 2. Tint the first part with Americolor Silver Spruce or blue gel food coloring. Leave the other part white.
Note: You can decorate all the blue snowflake cookies first and then decorate white ones. Since the decorating method is the same for both colors, this tutorial shows the step for the blue ones, and you just need to replicate the same steps to make the white snowflake cookies.

Roll and emboss the fondant. Begin by rolling the blue fondant to about one tenth of an inch thick (image 7). Make sure you dust it well with either powdered sugar (icing sugar) or cornstarch (I used cornstarch) to prevent it from sticking to your work space.
Dust the embossing mat generously with cornstarch or powdered sugar, with the raised pattern on the mat facing down (image 8). You can make your own dusting pouch for fondant with my easy tutorial here.
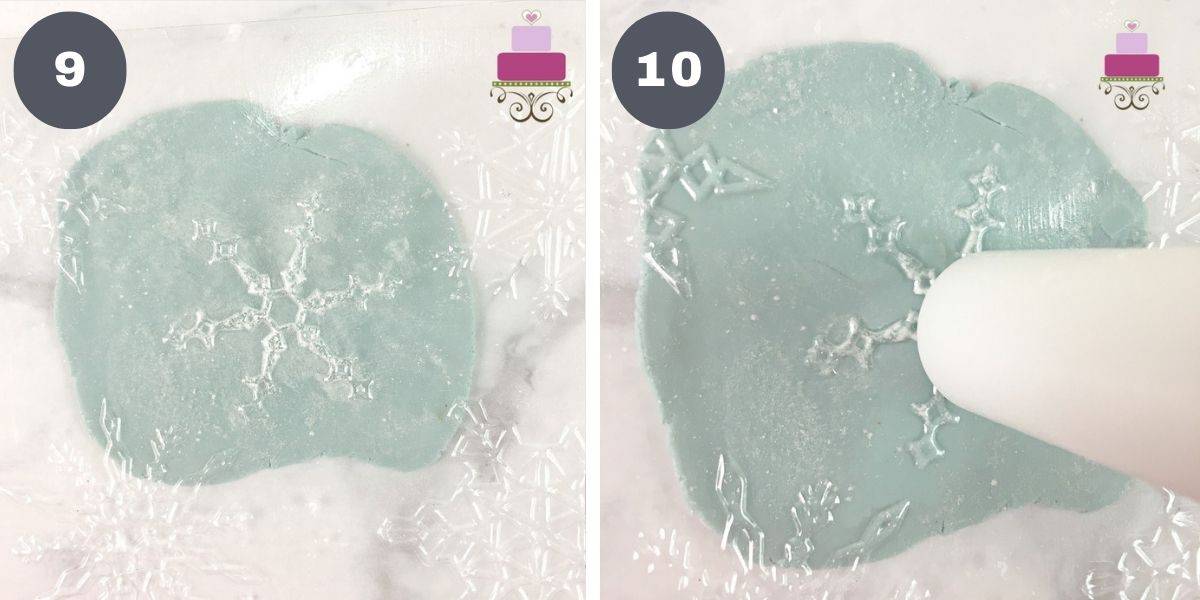
Turn the mat over onto the rolled fondant and gently but firmly press the pattern on the mat onto it (images 9 and 10).
Note: Press the pattern gently with your fingers or using the end of a small rolling pin.
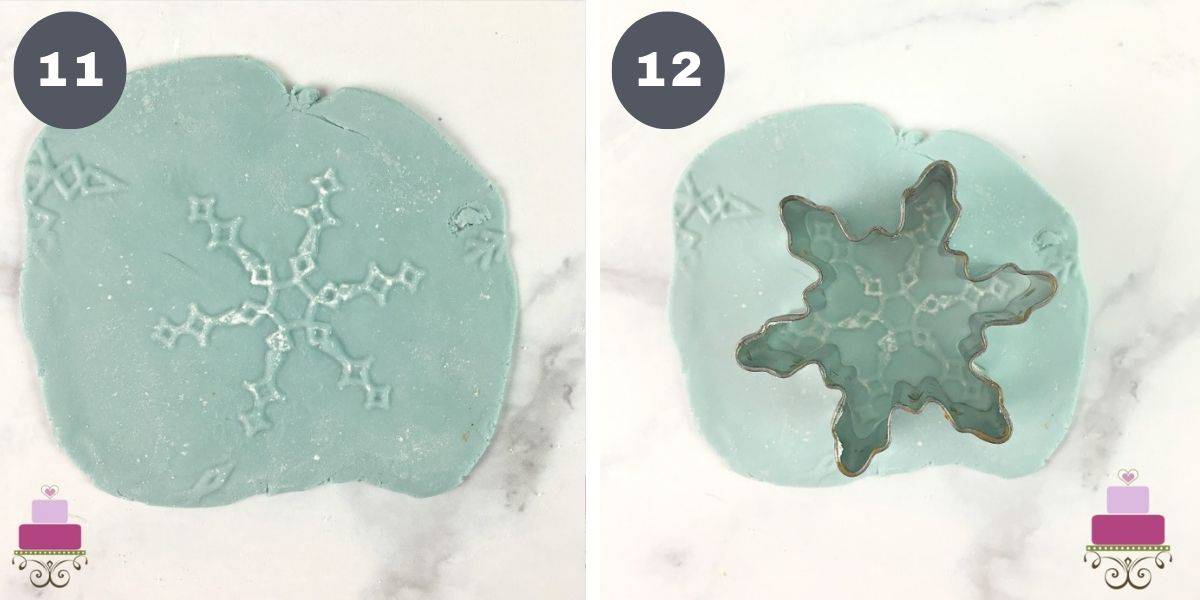
Lift the mat up and you will see the snowflake pattern embossed beautifully on the fondant (image 11).
Using the same cookie-cutter used to cut the snowflake sugar cookie dough, cut out the rolled fondant into snowflake shape, making sure the embossed pattern is well centered within the cookie cutter (image 12).
Step 5: Attach the Cut Out Fondant to the Cookies
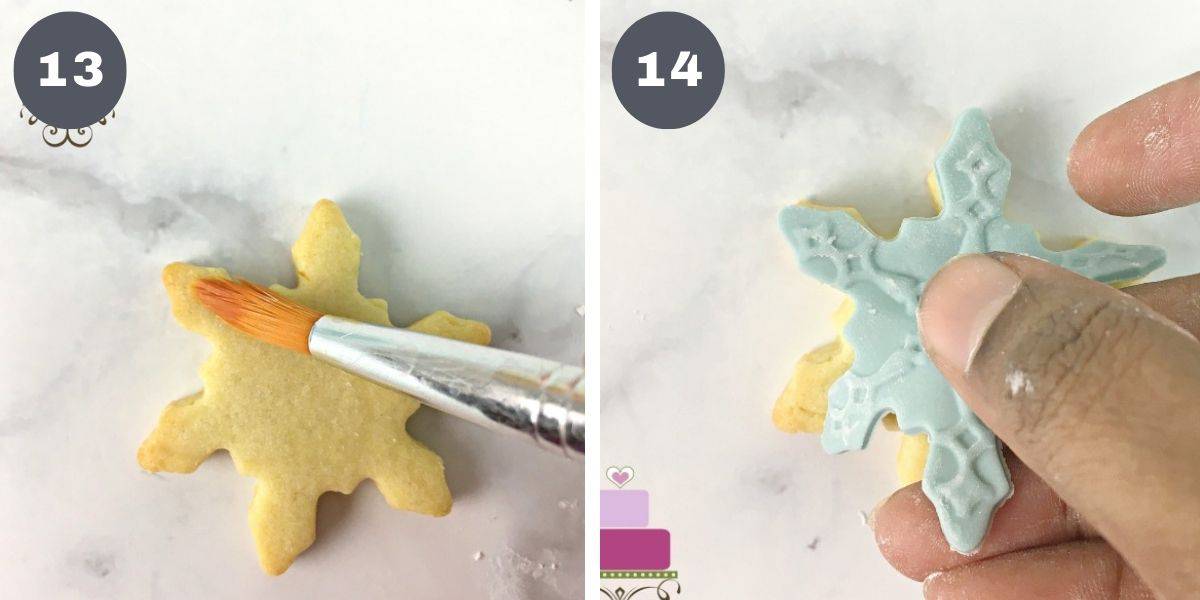
Brush the baked snowflake cookies very lightly with glue (image 13) before attaching the fondant (image 14). Start with the pointy ends on one side of the cookie before moving slowly to the center and other parts of the snowflake. Adjust the ends of the snowflake so that they are all well aligned with the cookie underneath.

Once the fondant is attached to the cookie, use a large soft brush to very gently brush off excess dusting flour on the fondant (image 15).
Step 6: Decorate the Fondant Snowflakes
Mix the edible gold dust with some lemon extract to turn it into gold paint (start with a few drops of extract at a time so that the paint does not become too diluted).
Use a fine-tipped brush (food grade) to paint the embossed snowflake pattern on the fondant (image 16).
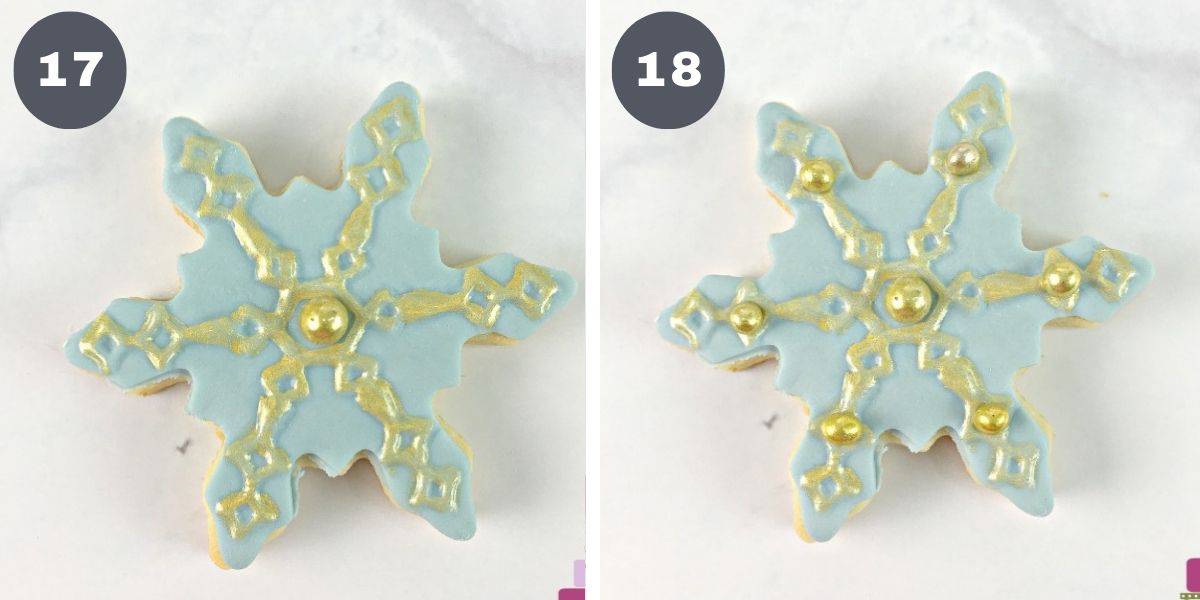
Attach the dragees. Use a larger dragee at the center of each cookie and the smaller ones on the sides. Attach these with a light brush of fondant glue to make sure they stick securely to the fondant (images 17 and 18).
Repeat the process for all the snowflake cookies, including the white ones.
💡Expert Tips
- Baking time and cookie texture - this recipe makes crisp and crumbly cookies. For soft cookies, reduce the baking time slightly. Similarly, if your cookie cutter is larger than 6 inches diameter, you may need to increase the baking time, vice versa for smaller cookies.
- Chilling time - the dough (before rolling and cutting) should not be chilled for too long or it will become to hard to roll. If that happens, let the dough stand at room temperature until it softens to roll. The chilling time after the cookies are cut, however, can be much longer. You can even leave them overnight.
- Use dowel rods and plastic or parchment paper - these will help achieve consistent thickness for your cookies and prevent the dough from sticking to your rolling pin and workspace.
💭FAQs
Yes, you can. Fit a piping bag with a small round tip and pipe an outline on the cookies with stiff royal icing before filling them with royal icing. Once the icing is set, paint the gold patterns on them with the edible gold paint and attach the gold dragees.
It is advisable to wait until the icing is completely set before attaching the dragees.
Keep the cookies in an airtight container, in a cool, dry place at room temperature. Humidity can cause the fondant to become sticky so make sure to keep the cookies in a dry place.
The cookies can last for a good two weeks, provided they are kept in an airtight container.
❤️More Recipe You Will Love


Do you like this recipe? Please leave a 5-star ⭐⭐⭐⭐⭐rating in the recipe card below and consider a review further down this page. I would love to hear from you. Thank you!
📖Recipe

Snowflake Cookies
Equipment
- Metal snowflakes cookie cutters
- Embossing mat
- Fine tipped brush (food grade)
- Rolling Pin
For best results, use the metrics measurements. US customary measurements have not been tested and are only meant for guide.
Ingredients
For the cookies
- 400 g all purpose flour
- 180 g granulated sugar
- 200 g butter (salted)
- 1 egg
- ½ teaspoon vanilla extract
For the decoration
- Fondant
- Gold dragees
- Edible gold paint
- Lemon extract
- Food coloring
- Powdered sugar/cornstarch for dusting
Instructions
- Preheat oven to 170°Celsius. Line baking trays with parchment paper and set aside.
- Add butter and sugar into a large bowl. Cream both on medium speed with an electric mixer until the mixture turns light and creamy. Do not over mix.
- Add egg. Continue beating until all the traces of the egg are no longer visible. Next, add vanilla extract. Mix well.
- Mix flour into the creamed ingredients on low speed until the dough turns crumbly. Transfer the dough onto a clean workspace and press it together into a ball.
- Place the dough in a covered bowl (or wrap it in plastic wrap) and refrigerate until it is firm (but not too hard) for approximately 15 to 20 minutes (see Note 1).
- Remove from fridge and place it between parchment paper or plastic sheets (see Note 2). Use dowel rods on either side of the dough as a guide for the thickness of your cookies. Roll the dough.
- Use a medium sized snowflake cookie cutter (6 inches in diameter) to cut the rolled dough and place the cut outs on the prepared tray. Refrigerate until they are firm (for at least 30 minutes).
- Bake the cookies for 12 minutes until they turn golden brown on the sides. Remove cookies from the oven and cool them on a wire rack to room temperature. Keep cookies in an airtight container until ready to decorate (see note 3).
- To decorate the snowflake cookies, divide white fondant into 2. Tint the first part with Americolor Silver Spruce or blue gel food coloring. Leave the second part white (see note 4).
- Dust your workspace with powdered sugar or cornstarch and roll the blue fondant thin (about 1/10 inch thick).
- Next, dust the embossing mat generously with cornstarch or powdered sugar, with the raised pattern on the mat facing down (see note 5).
- Turn the mat over onto the rolled fondant and gently but firmly press the pattern on the mat onto it with your fingers or the end of a small rolling pin.
- Lift the mat up and using the same cookie-cutter used to cut the snowflake cookie dough, cut out the rolled fondant into a snowflake shape, making sure the embossed pattern is well centered within the cookie cutter.
- Brush the snowflake cookies very lightly with fondant glue and carefully attach the fondant snowflake. Start with the pointy ends on one side of the cookie before moving slowly to the center and other parts of the snowflake. Adjust the ends of the snowflake so that they are all well aligned with the cookie underneath.
- Brush off excess dusting sugar or cornstarch gently with a large soft brush.
- Mix the edible gold dust with a few drops of lemon extract into gold paste (start with a little extract at a time so that the paint does not become too diluted).
- Use a fine-tipped brush (food grade) to paint the embossed snowflake pattern on the fondant.
- Attach a large sugar dragee at the center of each cookie and smaller ones on the sides with a light brush of fondant glue to make sure they stick securely to the fondant.
- Repeat the process for all the snowflake cookies, including the white ones.
- Store cookies in an airtight container.
Notes
- The dough (before rolling and cutting) should not be chilled for too long or it will become to hard to roll. If that happens, let the dough stand at room temperature until it softens to a rolling consistency. The chilling time after the cookies are cut, however, can be much longer. You can even leave them overnight and bake them directly.
- If not using the parchment or plastic sheets, roll the dough on a lightly floured surface to avoid it from sticking.
- The cookies can also be baked a few days in advance before decorating.
- You can decorate all the blue snowflake cookies first and then decorate white ones. Since the decorating method is the same for both colors, this recipe shows the steps for the blue ones. Replicate the same steps to make the white snowflake cookies.
- You can make your own dusting pouch for fondant with my easy fondant dusting pouch tutorial here.
- This recipe makes crisp and crumbly cookies. For soft cookies, reduce the baking time slightly. Similarly, if you cookie cutter is larger than 6 inches diameter, you may need to increase the baking time, vice versa for smaller cookies.


Leave a Reply