

Looking for quick coconut candy recipe? Here's one you should try!
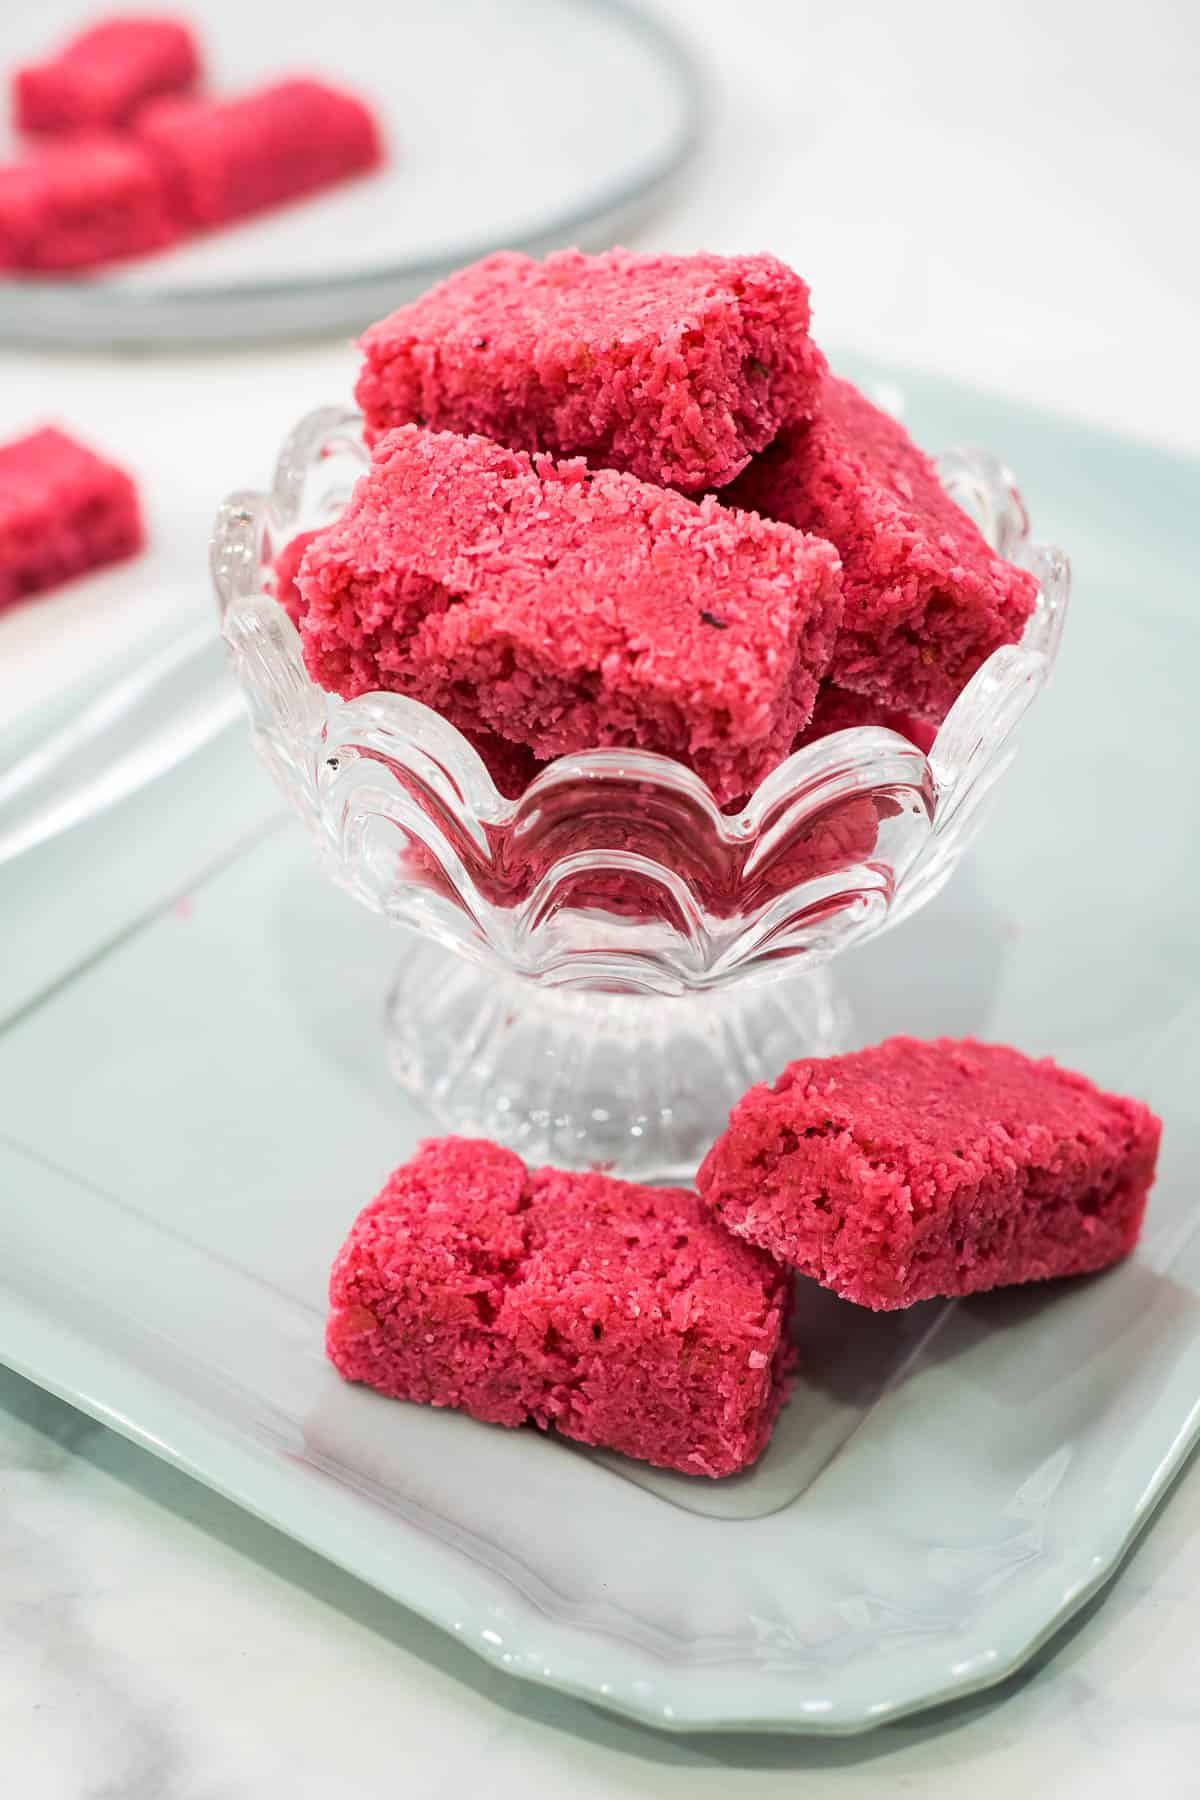
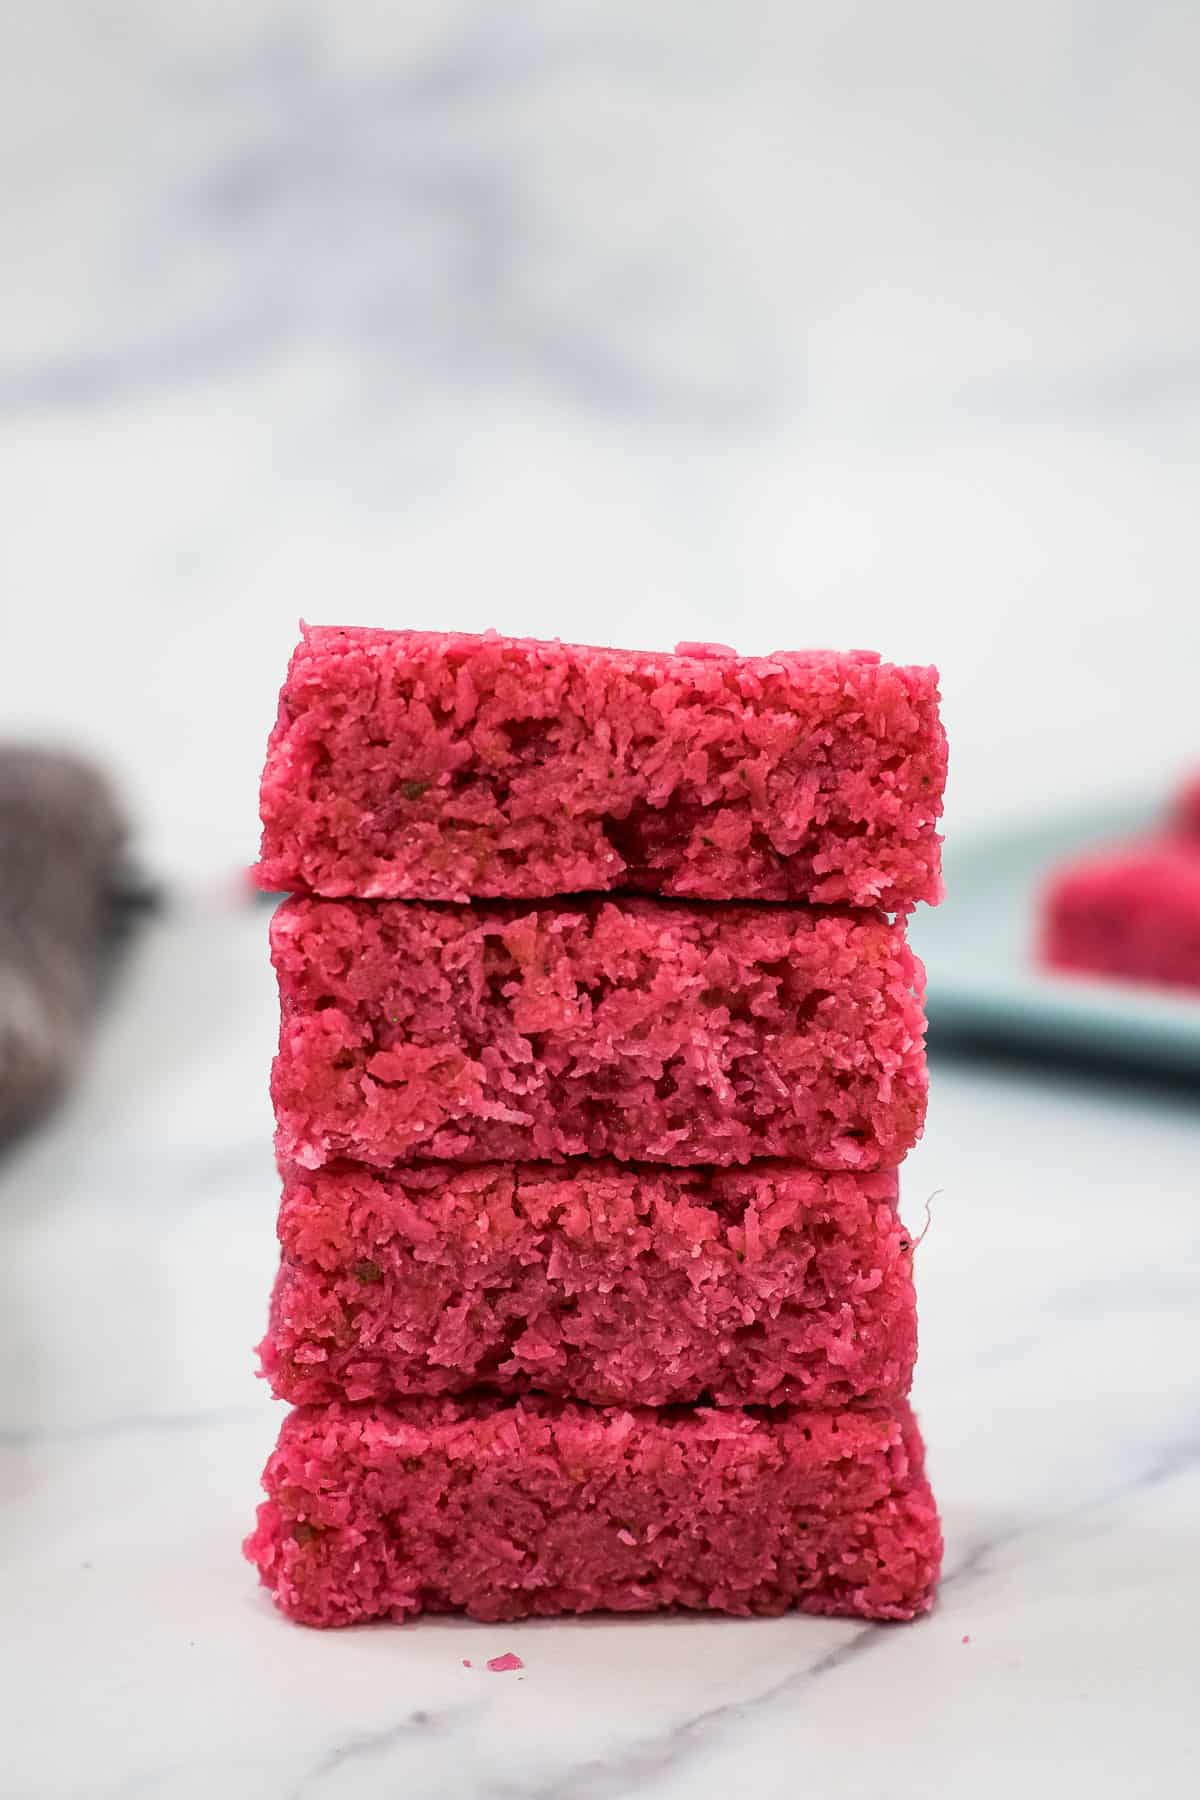
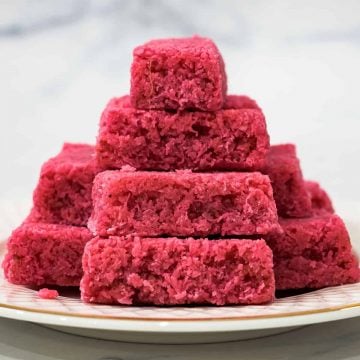
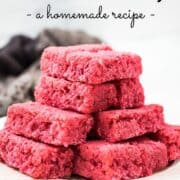
This coconut candy is a famous sweet treat in Malaysia. You often see it in bright pink and green cubes sold by street vendors and is truly loved by many.
The candy recipe calls for the use of 3 main ingredients i.e. grated coconut, condensed milk, and sugar. To these, I also add butter, vanilla, and coloring for a yummy tray for coconut candy.
Jump to:
❤️Why you will love this recipe
- This is a simple recipe for homemade candy and requires only 6 simple ingredients.
- This is a no bake dessert and very easy to make.
- This coconut candy recipe uses fresh coconut with loads of fresh coconut flavor. It is firm and crusty on the outside, but soft on the inside.
- The candy can be cut into bars or squares and tinted in any color you like. It can also be wrapped in pretty candy wrappers for gifting. You can make your own candy for any special occasion like parties or Valentine's Day.
- It makes a delicious treat and perfect for coconut lovers and those with sweet tooth.
Like this easy coconut recipe? Here are my other posts you might want to check out:
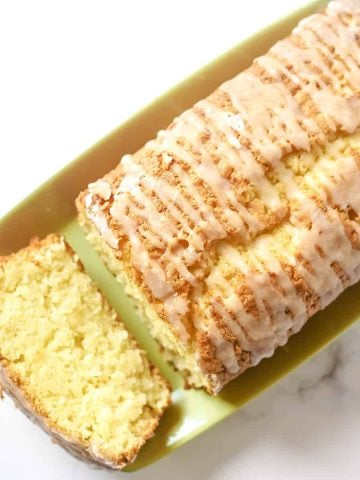
- Coconut Loaf Cake with Lemon Glaze Topping
- Cherry Coconut Cookies - Easy Christmas Cookie Idea
- Sago Pudding with Coconut Milk
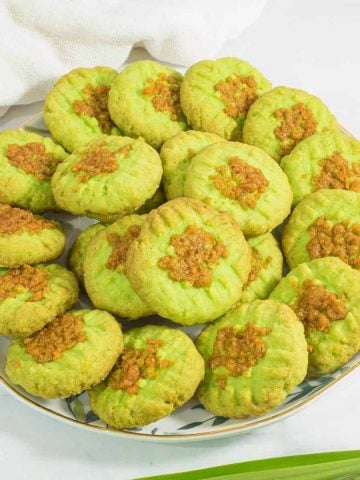
- Pandan Jelly with Coconut
- Pineapple Cheesecake with Coconut
📋Ingredients
- Grated coconut - this is the key ingredient in this coconut treat. Use fresh, unsweetened coconut. Dry desiccated coconut will not work for this recipe.
- Condensed milk - sweetens the candy and gives it a creamy taste.
- White sugar - sweetens the candy. Use coarse sugar.
- Butter - I use salted butter, but unsalted butter will also work fine.
- Vanilla extract - adds a lovely aroma and flavor to the candy.
- Food color (Americolor Electric pink)
*Refer to the recipe card below for full list of ingredients and exact quantities. For best results, use a digital kitchen scale where applicable*
🧾Substitution and Variations
- If you do not have grated coconut, you can also use fresh or frozen shredded coconut (coconut shreds) or coconut flakes, but process it to break the shreds and flakes into smaller bits. Also, make sure the coconut is not sweetened or else your candy will be too sweet and make sure the flakes and shreds are not dry coconut.
- White coarse sugar can be substituted with granulated sugar and even powdered sugar. But it really is not necessary to use fine sugar as the sugar will be cooked to dissolve it.
- Pink food coloring can be replaced with any other color of your choice. You can also leave the candy untinted.
This recipe has not been tested with other substitutions or variations. If you do try, please let me know in the comments section below!
👩🍳How to Make
Cooking the candy
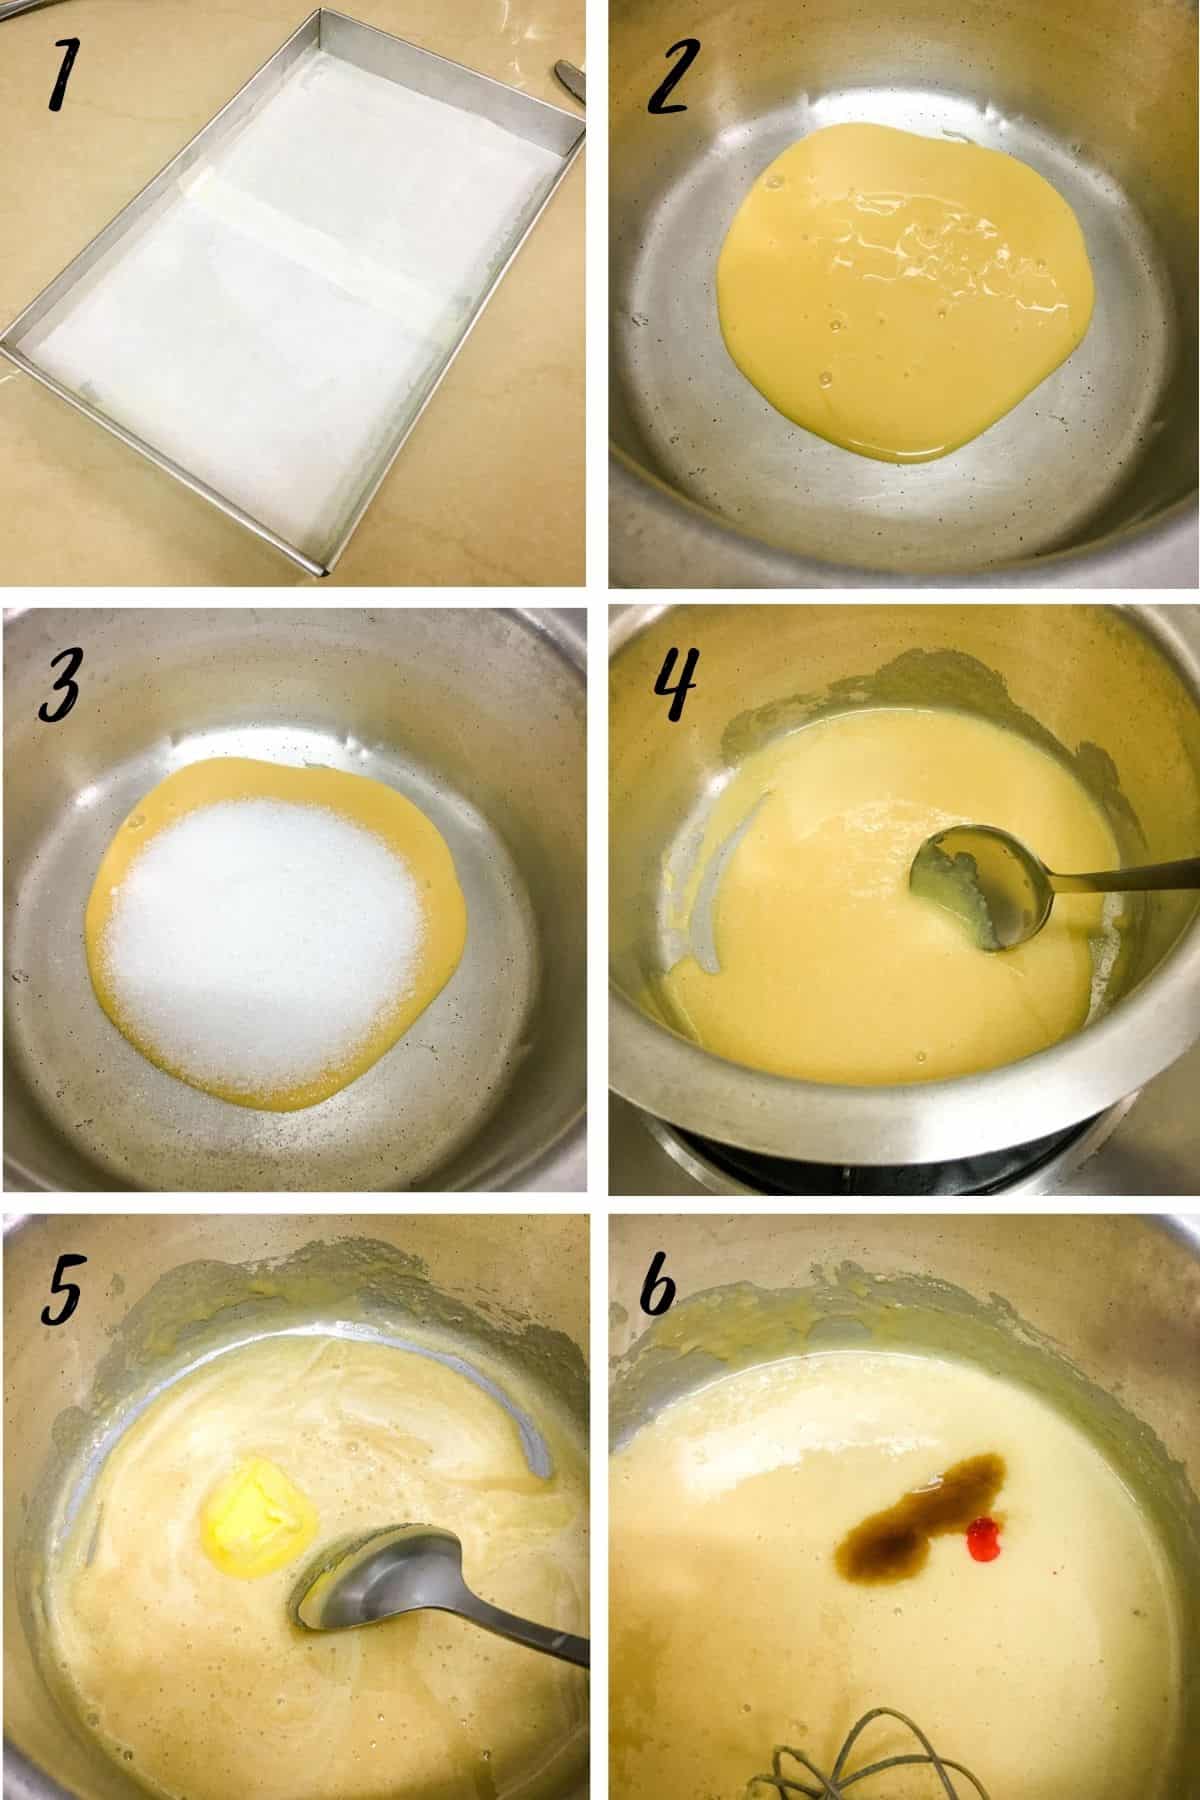
- Prepare the tray for the candy. Line it with parchment paper (wax paper) and apply some butter to it.
- Measure the condensed milk into a large pot or pan.
- Add sugar and turn on flame to low to medium heat .
- Keep mixing until the sugar starts to melt.
- Add in the butter and stir until the butter is melted.
- Also, add the vanilla and food coloring at this stage.
- Stir until the color is well distributed. Turn off the heat if the condensed milk is turning too thick.
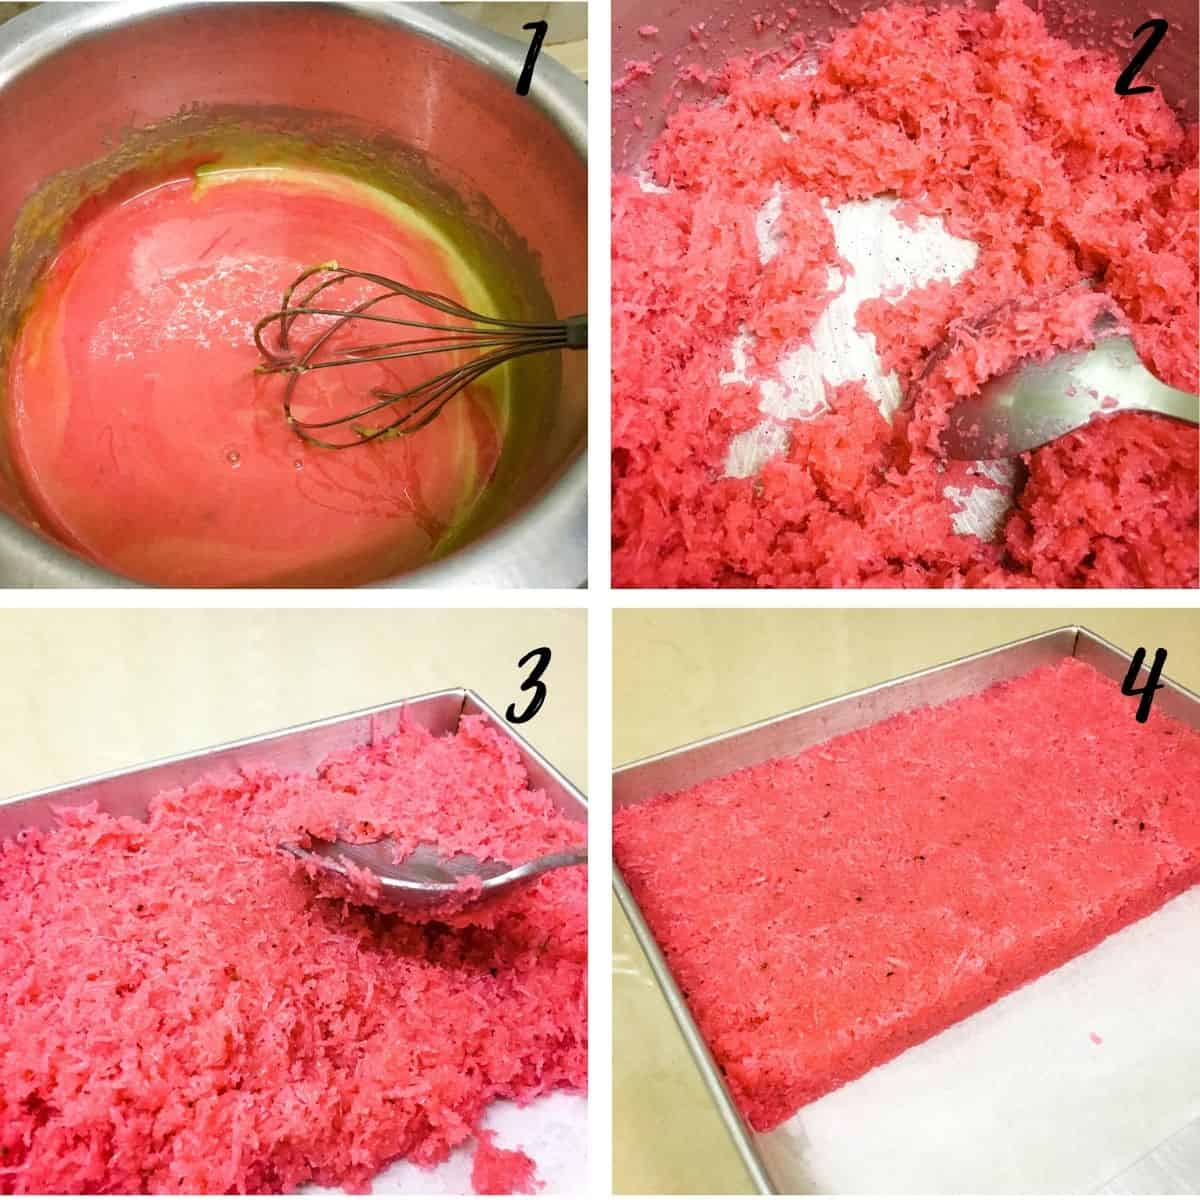
- Next, add the grated coconut. Mix thoroughly. Continue to cook the coconut mixture over low heat until it becomes dry. To know if the candy is ready, you will see the sugar traces at the side of the pot turning white.
- Turn off the heat. Transfer the candy into a greased and lined tray.
- Press the coconut candy with the back of a spoon (butter the spoon to avoid sticking) until it is packed and forms an even layer. You can also place a parchment paper on the candy and press it down with your palm. Whichever way, do it when the candy is still hot. Once the top is all flat and even, leave the candy tray to cool down completely.
Cutting the candy
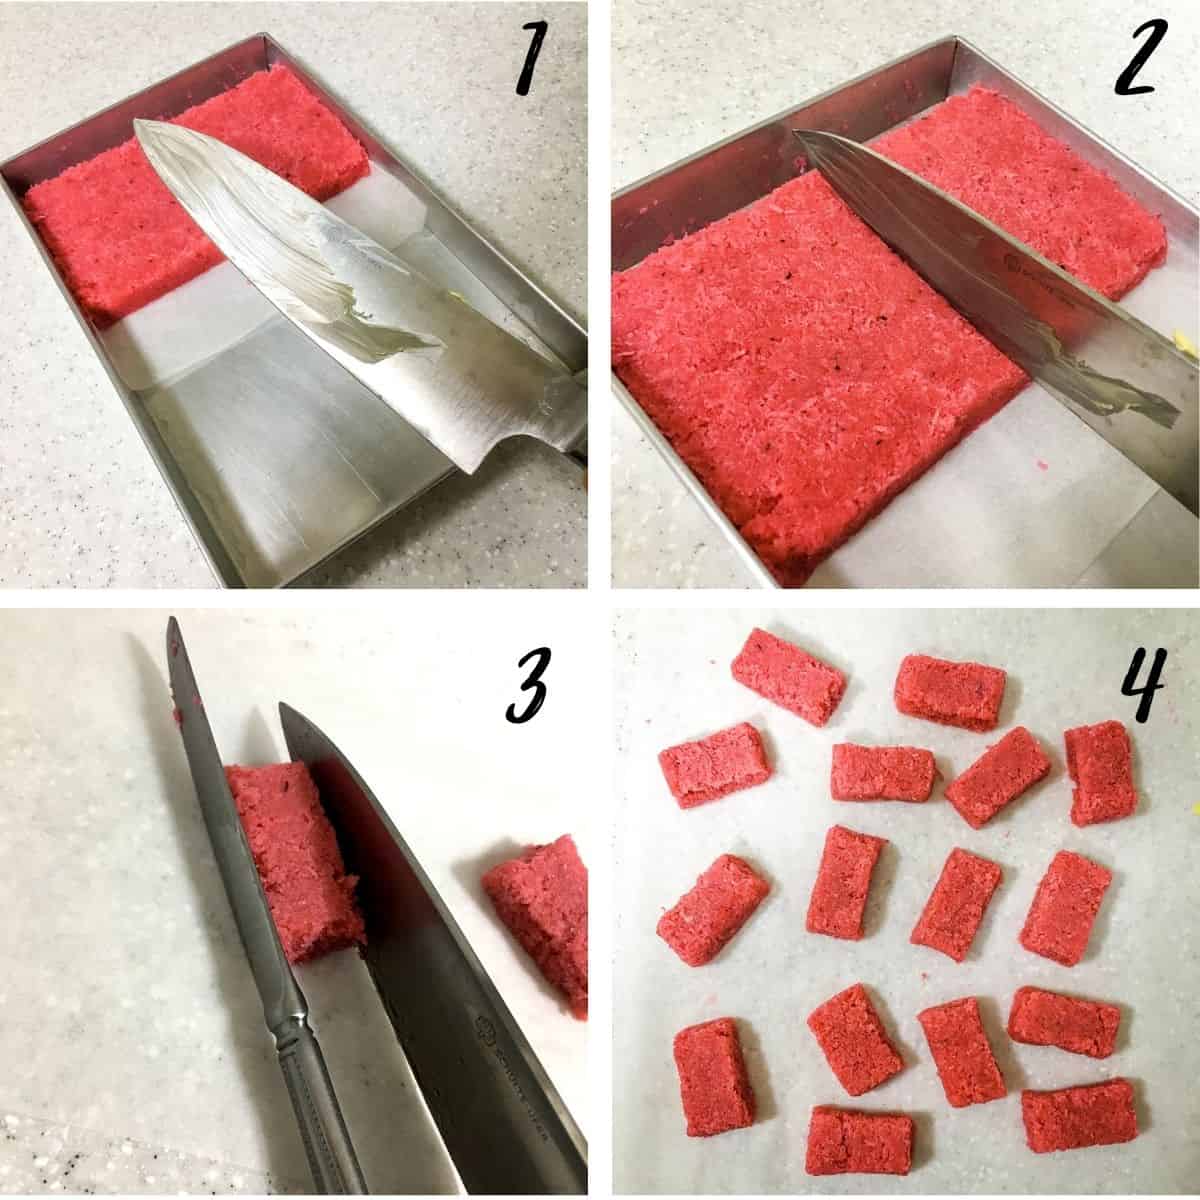
- Le the candy cool to room temperature before cutting it. Use a sharp, buttered knife (apply some butter to the knife) to cut the candy into squares or bars.
- You can cut the candy directly in the tray or carefully lift it out onto a cutting board to cut.
- If you see any stray strands of coconut as you cut the candy, use 2 knives to tidy them by pressing them to the sides of the cut candy.
- Store the coconut candy in an airtight container. This candy can last at least one week, provided it does not come into contact with any moisture.
🍽️Serving & storage
- This recipe makes one block of candy measuring 12 cm by 18 cm, with a thickness of about 1.5 cm.
- The candy can be stored in any container at room temperature. It is probably best to use a flat and wide container rather than a tall and narrow cookie jar to avoid the candy from breaking from being stacked on one another. If you stack them, it is a good idea to have a piece of wax paper or parchment paper in between.
- This coconut candy lasts for a good one week. However, it is very sensitive to moisture, hence make sure the candy container is free from moisture. If you wish to keep longer, refrigerate the candy.
💡Expert Tips
- When heating up the condensed milk and sugar, keep stirring the solution all the time. The condensed milk tends to burn very quickly especially as it starts to boil and thicken, hence, always keep stirring to avoid the bottom from burning. Avoid using high heat.
- If you cut the candy while it is still warm, it will tend to stick to the knife.
- The best way to cut this candy is to wait until it has completely cooled down. This can take at least about an hour.
- Also, buttering your knife will help ensure a smooth cutting process. Buttering the knife simply means applying some butter to the knife, similar to greasing a cake tin for baking cakes.
- Once the candy is set, use a sharp knife to cut it into squares or bars. If you see any loose coconut strands after cutting, press them to the sides of the candy with the knife to tidy them up.
💭FAQs
Grated coconut is the white coconut meat in grated form. It is a lot finer than coconut flakes or coconut shreds and is normally sold fresh form. The freshly grated coconut has high moisture content. Desiccated coconut, on the other hand, is the grated coconut in dry form. It is literally dehydrated grated coconut and is often a lot lighter in weight than freshly grated coconut.
This recipe calls for the use of unsweetened, fresh grated coconut.
This is quite tricky. If the coconut candy is not cooked well, it will not set as it should, once transferred out onto a tray.
The key is to cook it until it appears dry and there are no longer any traces of liquid in the pot. You will notice the sugar traces on the side of your pan turning white, which means the candy is ready.
If your candy remains very soft, it is not cooked enough. Simply return it to the pot, and continue to cook for a little longer.
Yes, you can. Simple dip the cut candy bars in melted chocolate and place the coconut candies on a wire rack to let excess chocolate drip off. Place the candies on a baking sheet or cookie sheet and let the chocolate set completely before serving the candy. Dark chocolate, milk chocolate and white chocolate will all work fine.
When melting the chocolate, use the double boiler method to avoid the chocolate from burning.
❤️More Recipes You Will Love

Do you like this recipe? Please leave a 5-star ⭐⭐⭐⭐⭐rating in the recipe card below and consider a review further down this page. I would love to hear from you. Thank you!
📖Recipe
Coconut Candy Recipe
For best results, use the metrics measurements. US customary measurements have not been tested and are only meant for guide.
Ingredients
- 200 g grated coconut (fresh)
- 75 g white sugar
- 110 g condensed milk
- 7.5 g butter (salted)
- 1 teaspoon vanilla extract
- Food color
Instructions
- Line and grease a square or rectangle tin measuring at least 12cm by 18cm.
- Measure the condensed milk into a medium-sized pot or pan. Add sugar and turn on the heat.
- Mix continuously until the sugar starts to dissolve. Pay attention to the bottom of the pan to avoid the sugar and condensed milk from burning.
- Add butter and vanilla. Stir until the butter is melted.
- Add food coloring. Mix well. Turn off the heat if the condensed milk is too thickened.
- Add the grated coconut and stir until it is well combined. Turn on the heat again and retain it on low.
- Stir the coconut continuously until it turns dry. The sugar traces on the sides of the pan should be turning white.
- While the candy is still hot, transfer it into the prepared tray.
- Press the candy down with the back of a buttered spoon or with a parchment paper.
- Leave the candy aside to cool completely, for at least one hour. The candy should be firm to touch.
- Turn the candy out onto a cutting board and cut into squares or bars with a sharp, butterred knife.
- Store the candy in a container.
Notes
- If you do not have grated coconut, you can also use fresh or frozen shredded coconut (coconut shreds) or coconut flakes, but process it to break the shreds and flakes into smaller bits. Also, make sure the coconut is not sweetened or else your candy will be too sweet and make sure the flakes and shreds are not dry coconut.
- White coarse sugar can be substituted with granulated sugar and even powdered sugar. But it really is not necessary to use fine sugar as the sugar will be cooked to dissolve it.
- Pink food coloring can be replaced with any other color of your choice. You can also leave the candy untinted.
- When heating up the condensed milk and sugar, keep stirring the solution all the time. The condensed milk tends to burn very quickly especially as it starts to boil and thicken, hence, always keep stirring to avoid the bottom from burning. Avoid using high heat.
- If you cut the candy while it is still warm, it will tend to stick to the knife.
- The best way to cut this candy is to wait until it has completely cooled down. This can take at least about an hour.
- Also, buttering your knife will help ensure a smooth cutting process. Buttering the knife simply means applying some butter to the knife, similar to greasing a cake tin for baking cakes.
- Once the candy is set, use a sharp knife to cut it into squares or bars. If you see any loose coconut strands after cutting, press them to the sides of the candy with the knife to tidy them up.
Moop Brown
These look like the perfect treat and like something everyone will enjoy!
Chenée
Delicious! I love how easy this coconut candy was to make! I'll be making it so often!
Jacqueline
This coconut candy looks so pretty. Love the colour. Great for a party too!
Loreto and Nicoletta
Thank you so much for sharing part of your cultural treats with us. These are so colirfuk, just looking at them makes me smile, but I am very tempted to grab one. I can only imagine the richness and sweetness, so vivid and ultra yummy especially if you are a voconut lover!😋🥰❤
Cheers!
Luca
This was super quick to make and so yummy!
Lilly
This is such a sweet treat! My family loved them and they were super fun to make! Thanks for the recipe!
Amy Casey
I made this delish coconut treat for one of my personal chef clients. They just love coconut and this special treat was a hit!
veenaazmanov
This is such a quick and easy dessert. Love the color too. Perfect for any festive occassion.
Jeri
Oh my! This coconut candy was so much fun to make! I loved that we used natural coconut, and it was so easy to make! Thanks for the great instructions!
Millie Louise Mae
I made this for my brother in law and his 2 kids. They were so happy and loved them. A great recipe for some home-made cooking (with love) to gift to friends and family. Thank you for the recipe. x
Lucy
Coconut is my favourite flavour. This candy is such a delicious indulgent treat. The colour is absolutely beautiful too!
Debra
Super easy to make...and so much fun. We made it purple!
Amanda
I just love making homemade candy, and this was delicious! Every bite was full of coconut flavor, and they were so simple to make.
Allyssa
Thank you so much for sharing this delicious and really tasty coconut candy recipe! So easy to make as well! Highly recommended! Will surely have this again!
Angie
Your coconut candy looks so pretty! I love to bake sweet treats with coconut though most of my family do not share my love for coconut. But I can just imagine tasting the buttery sweetness of your sweet coconut treats.
Sharon
This coconut andy is so sweet and tropical. I love that it uses fresh coconut instead of the bagged stuff.