

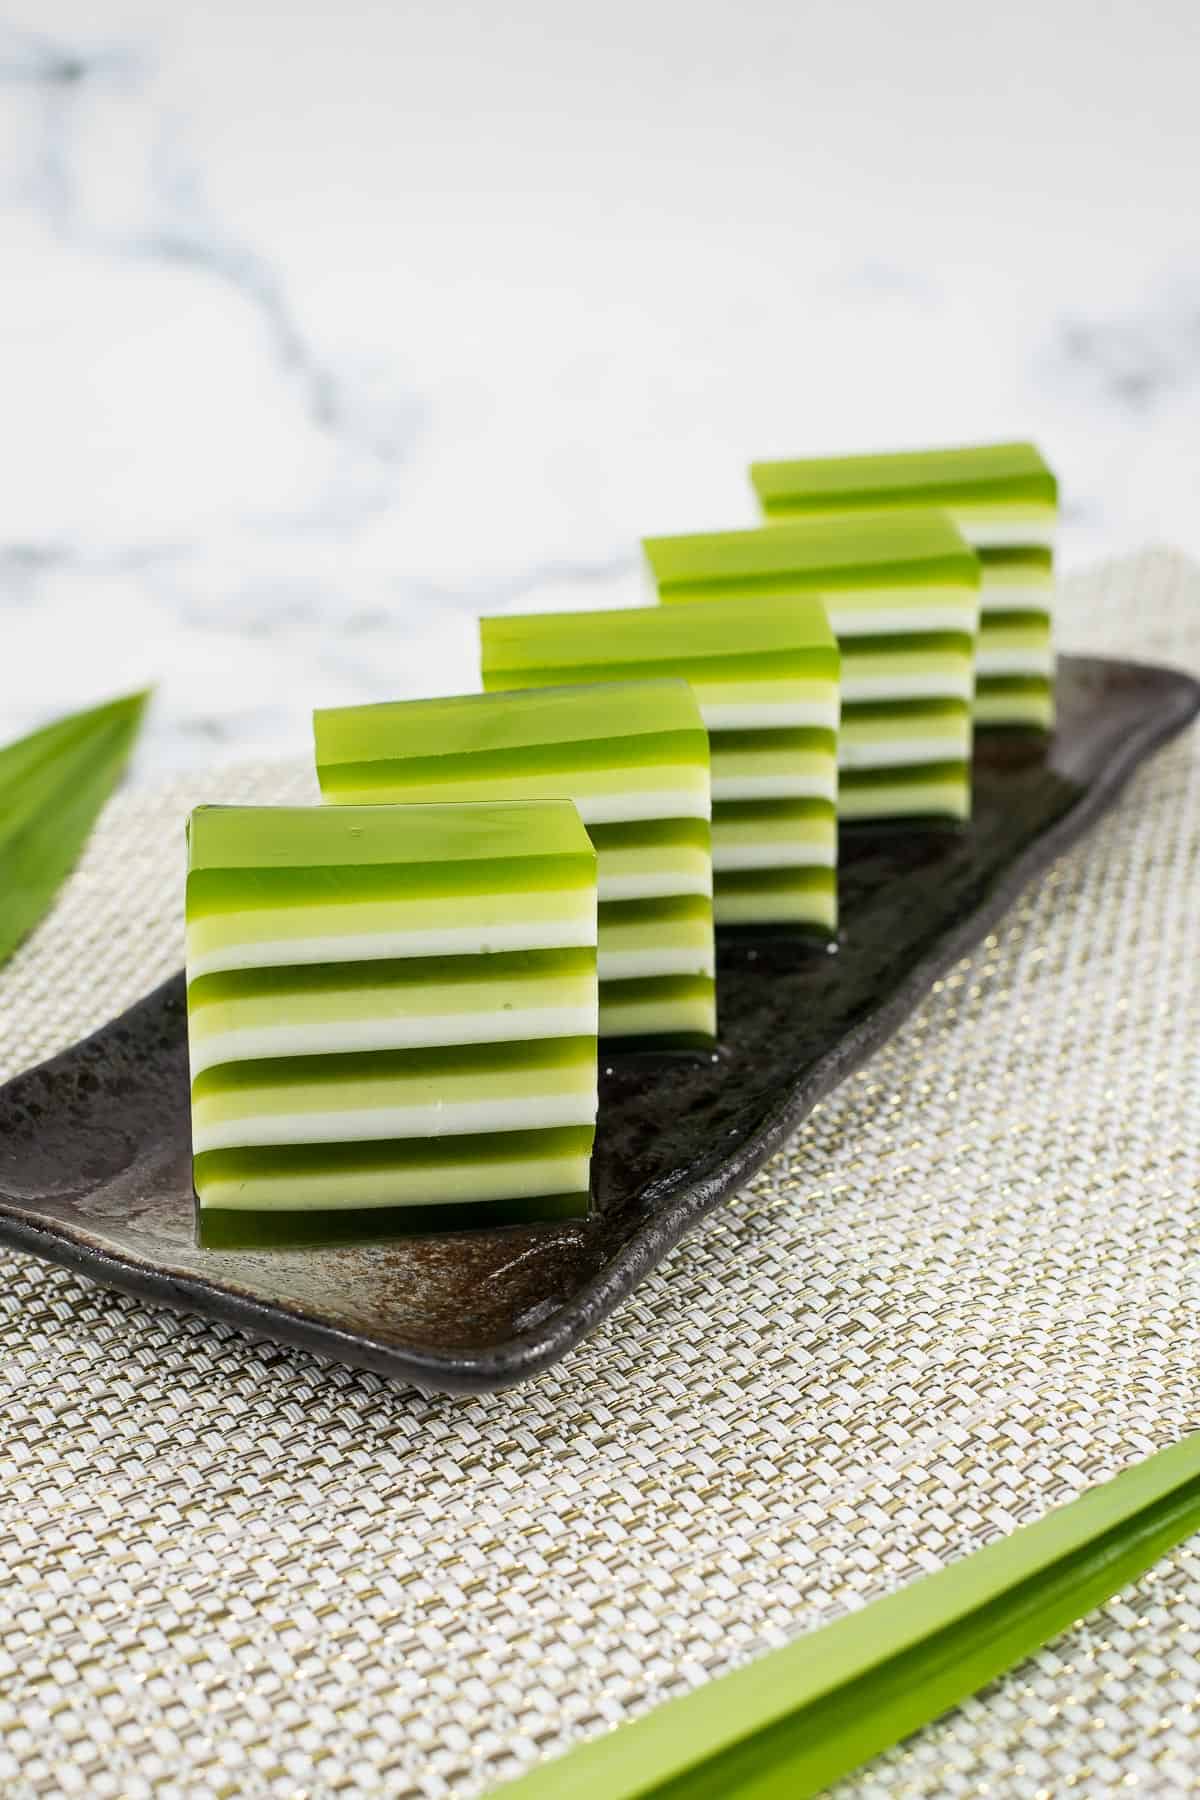
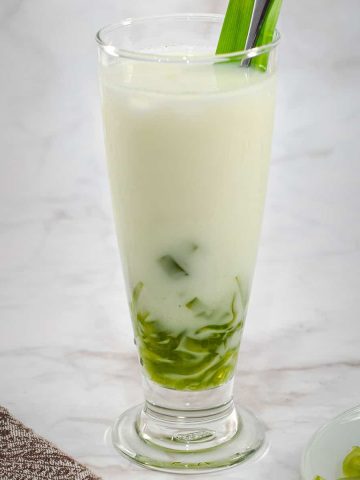
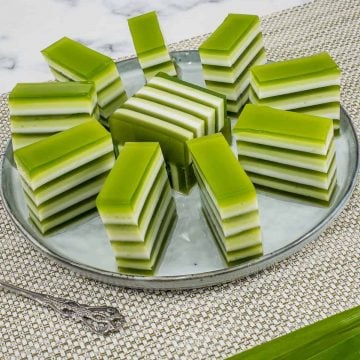
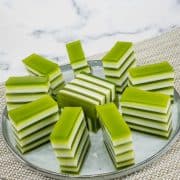
This pandan jelly (agar agar pandan) is cooling and refreshing, making it perfect for a hot summer day. It is colored naturally with fresh pandan leaves and combined with layers of thick coconut milk jelly layers into a truly delectable treat!
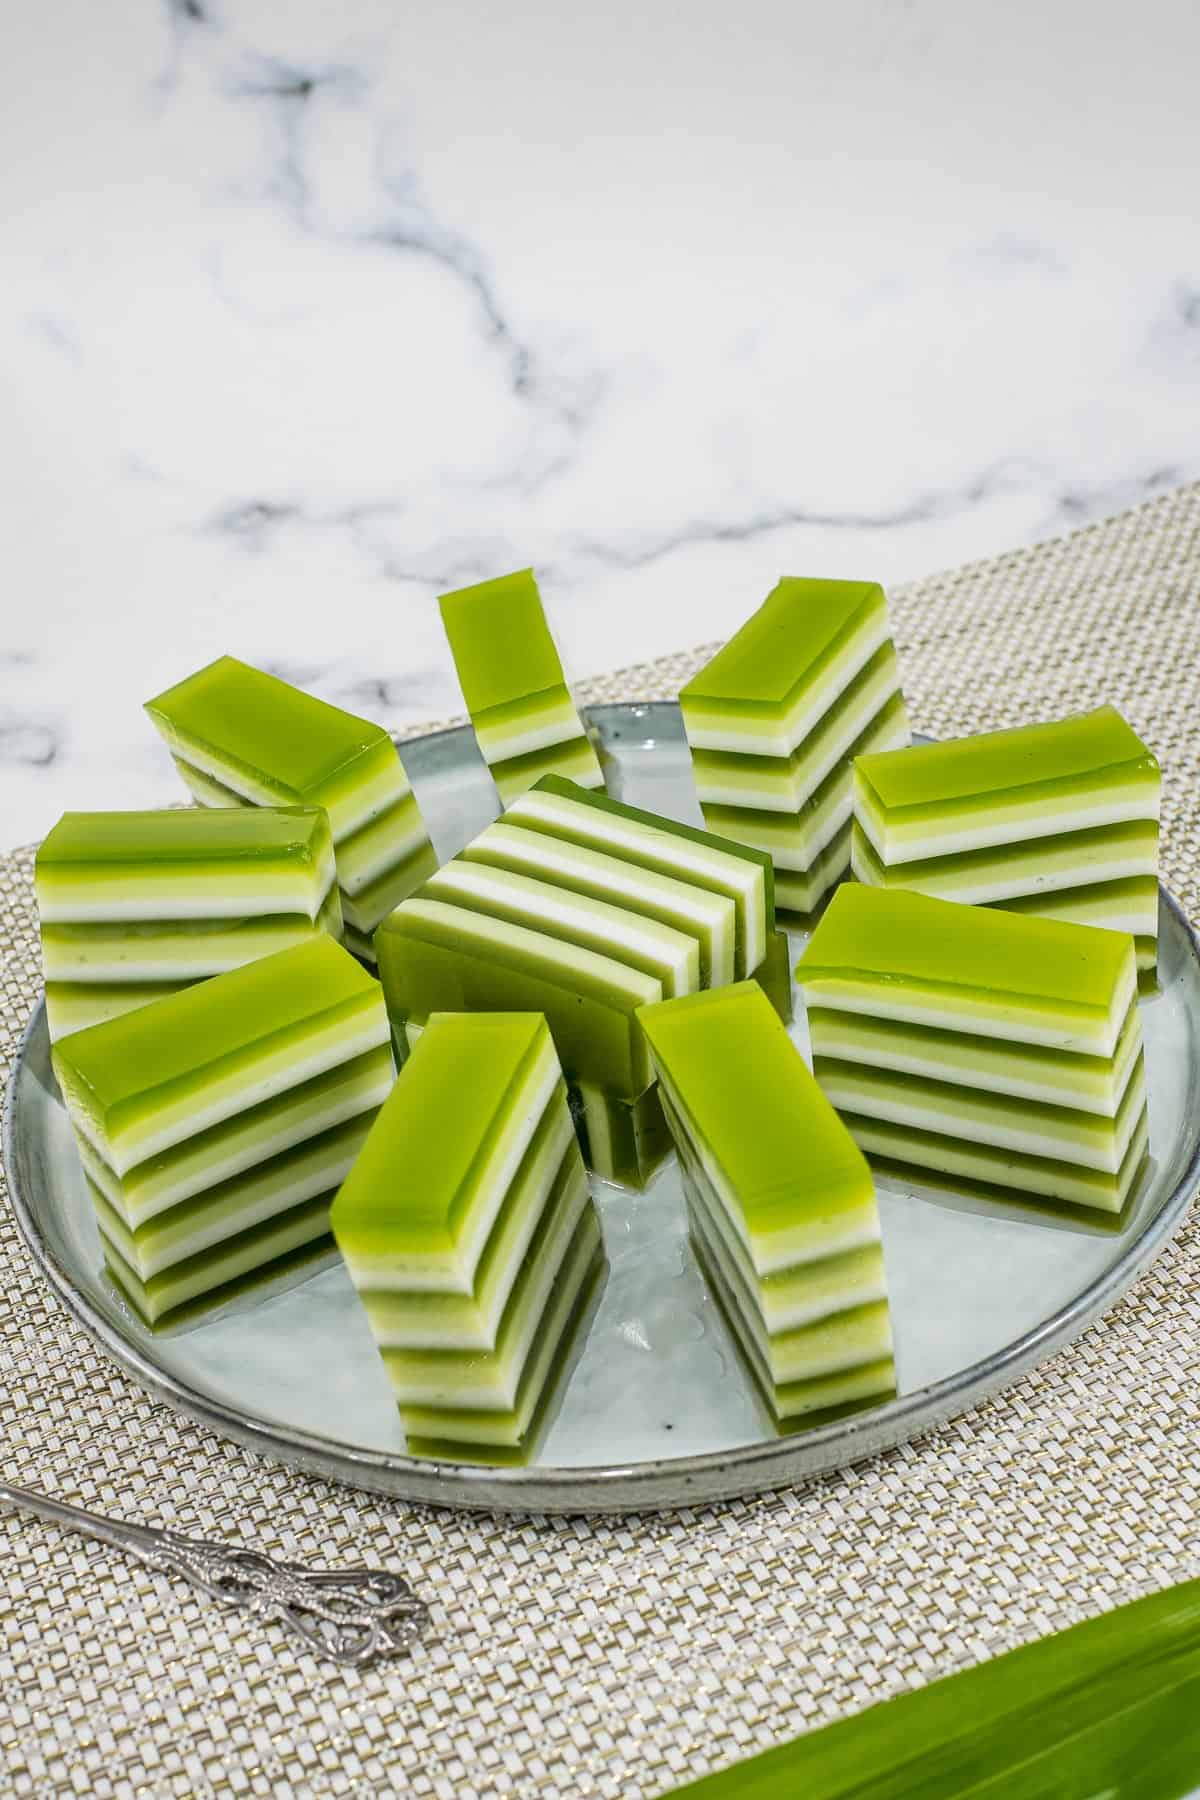
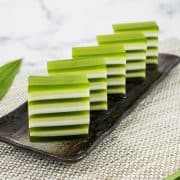
There are 3 different colors of jelly layers in this jelly. First is the green layer, followed by a milky green layer, and the third, a pure white layer.
The green layer is made up of plain agar agar solution that has been added pandan juice. The white layer is made up of coconut milk (the creamy white liquid that is derived from the white flesh of a coconut). The milky green layer is a combination of both the green pandan jelly solution and the white coconut milk jelly solution.
If you like agar agar jelly, you should also check out this basic agar agar jelly recipe, and for more flavors, try this coconut jelly, coffee jelly and butterfly pea jelly. You can also add a variety of fruits in your agar agar jelly like these fruit jelly cups, fruit jelly cake and mango jelly.
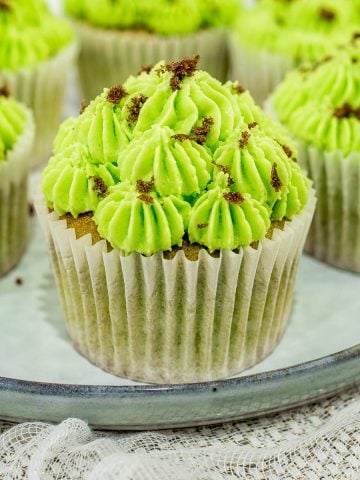
And for more pandan based treats, check out this deliciously moist and fluffy pandan pound cake, pandan cupcakes with pandan buttercream frosting and these buttery pandan cookies with coconut and gula melaka.
Jump to:
❤️Why You Will Love This Recipe
- This pandan jelly makes a delicious dessert.
- It is an easy to make pandan dessert. There is no baking required and you only need 5 ingredients to make it.
- Served chilled, this pandan coconut milk agar agar jelly makes a refreshing sweet treat on a hot summer day.
- The jelly is made using fresh pandan leaves. There is no artificial food coloring used.
- This makes a great vegetarian and vegan dessert too.
What is pandan?
Pandan (screwpine leaves) is a tropical plant with long, green, blade-like leaves. It is commonly grown in the Southeast Asia region. The leaves are widely used in making Asian dishes (both food and drinks), both to enhance the flavor and aroma of the food as well as to provide natural green coloring to them. Pandan leaves are well known for their unique flavor and are also referred to as the vanilla of the east.
Pandan leaves can be used in fresh and frozen form. These can be purchased from Asian grocery stores or Asian supermarkets.
Pandan is also sold in extract form (pandan extract or pandan essence) and these are easy and convenient alternatively for those who are not able to get the natural leaves.
📋Ingredients
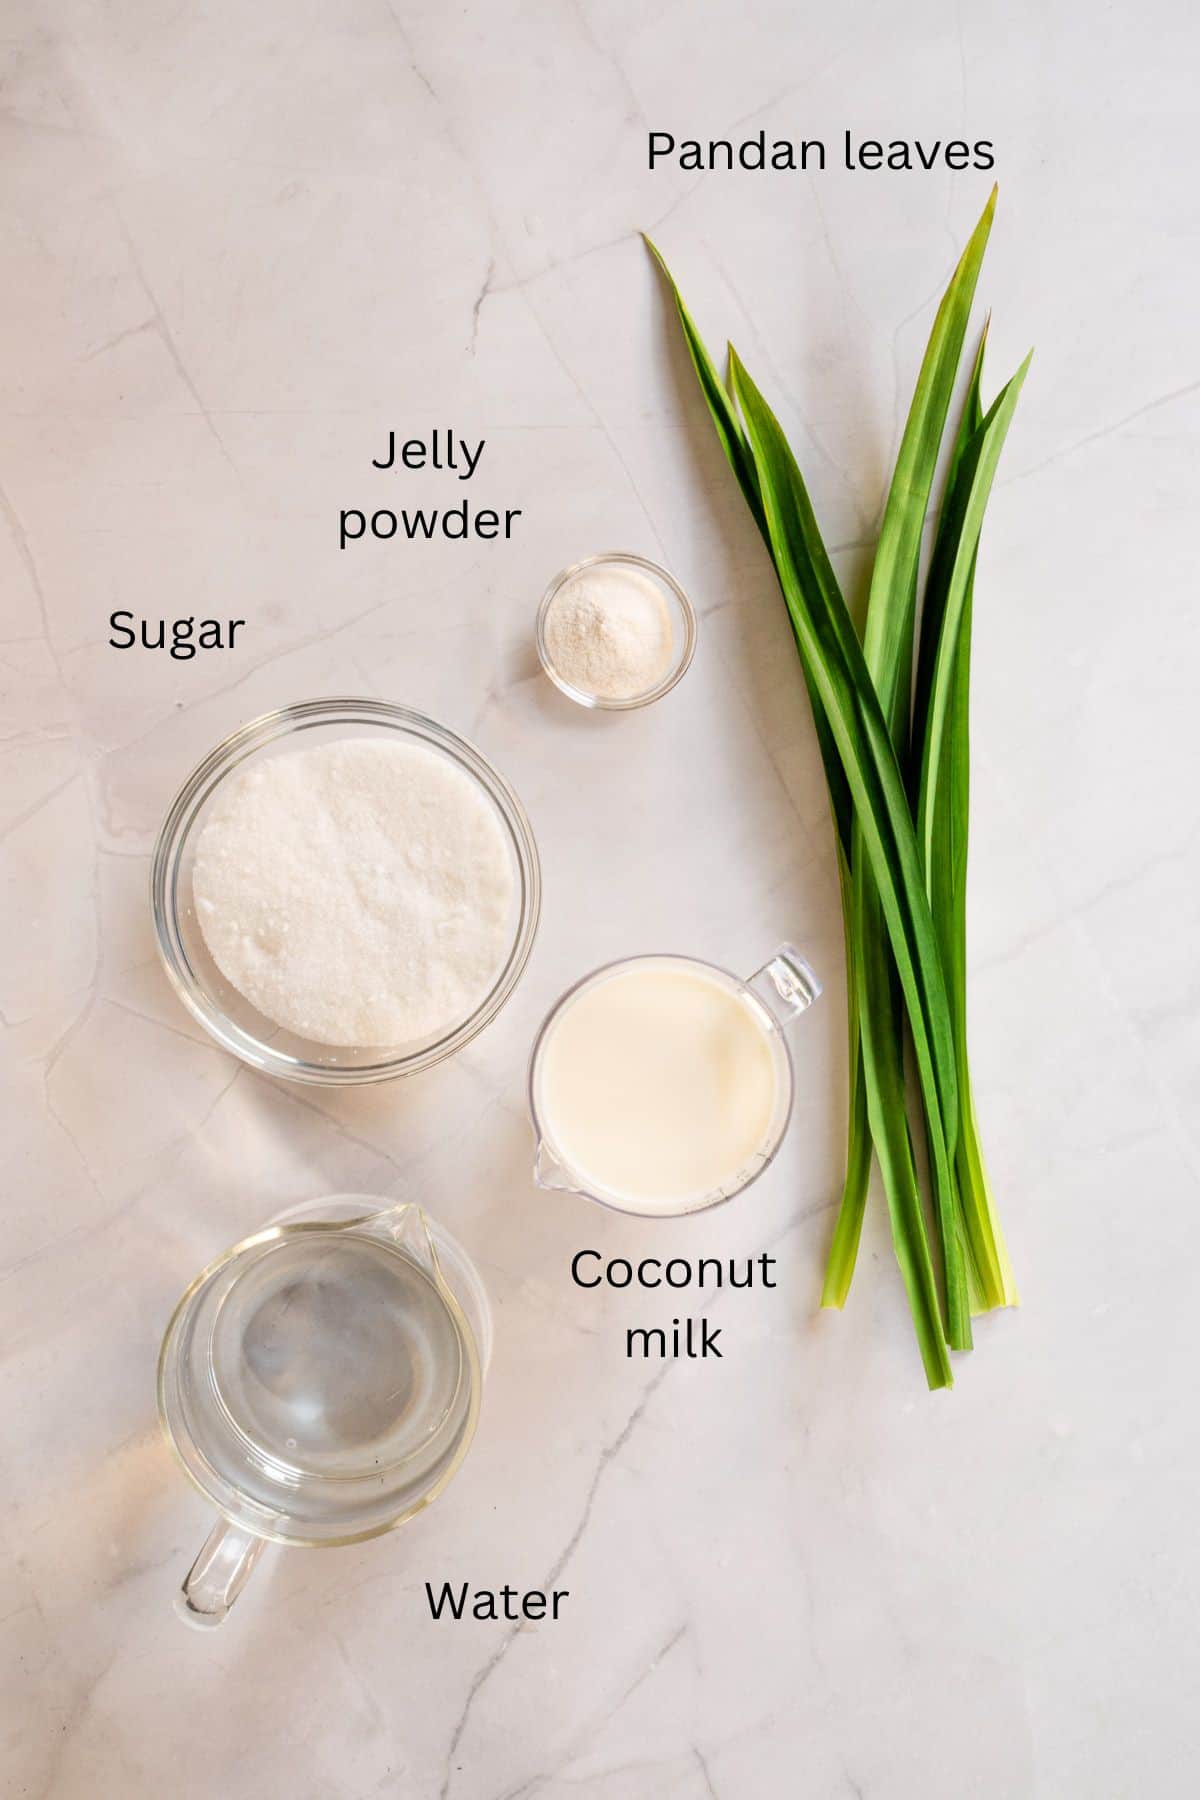
- Jelly powder (agar agar powder) - this is sold in powder form. Use clear, unflavored jelly.
- White sugar - white sugar helps maintain the green color of the pandan, unlike brown sugar, hence it is recommended to use white sugar when making this jelly. Both coarse white sugar or granulated sugar will work for this recipe.
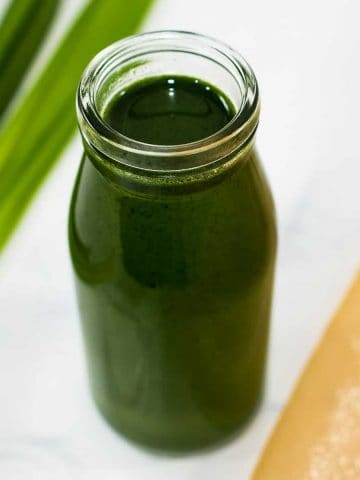
- Pandan juice (made from fresh pandan leaves) - contributes to the lovely aroma and pretty green color of the agar agar jelly.
- Coconut milk - This is the white substances that is squeezed out of the white coconut meat. It is not the clear coconut water that is natural present in coconuts. Coconut milk used in this recipe to make the white and creamy green layers. Coconut cream will also not work for this recipe as it is too thick. Use full fat coconut milk for best results.
- Water - use filtered water.
*Refer to the recipe card below for full list of ingredients and exact quantities. For best results, use a digital kitchen scale where applicable*
🧾Substitution and Variations
- Fresh pandan juice can be replaced with green pandan extract or pandan essence (store bought). Start with half a teaspoon and increase in small quantity for a stronger pandan flavor. You can also use frozen pandan leaves to make the juice.
- Instead of pouring the jelly into multiple layers, you can pour each color into a single layer, creating a 3-layer pandan jelly.
This recipe has not been tested with other substitutions or variations. If you do try, please let me know in the comments section below!
👩🍳How to Make
Step 1: Make the pandan juice. Wash the pandan leaves to remove any dirt. Cut them into 1-inch small pieces and place them in a food processor.
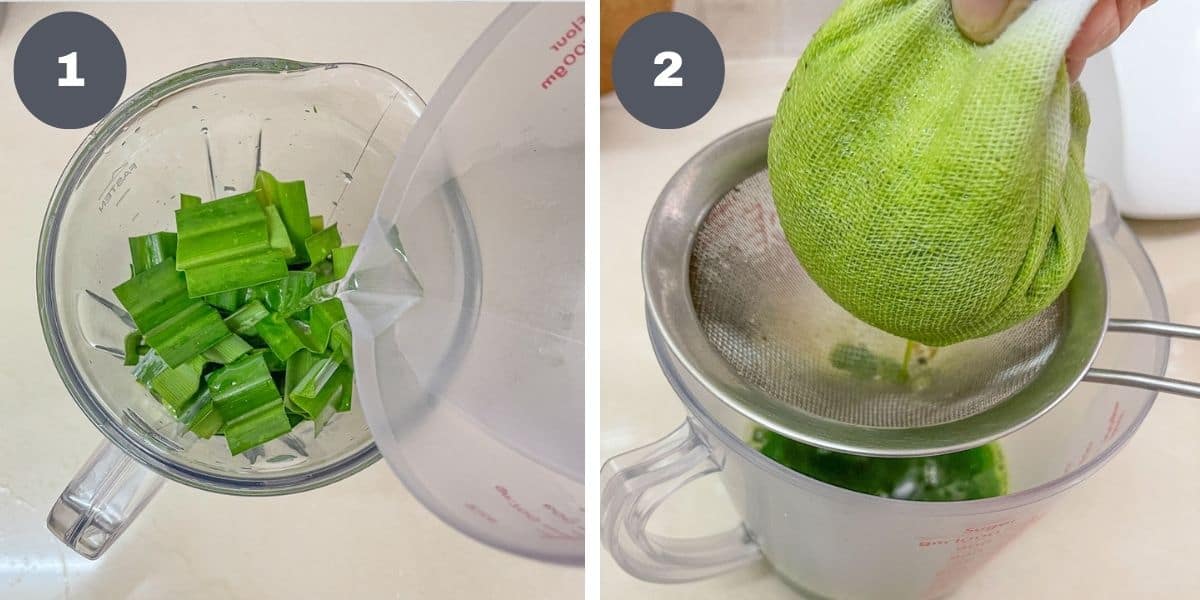
Add water and process until fine (image 1).
Strain the pandan water with a fine mesh strainer or a cheesecloth. Squeeze out all the juice such that the amount of juice extracted equals the amount of water added to the leaves in the blender (image 2). Set the juice aside.
Step 2: Cook the jelly. In a medium-sized pot, measure the water.
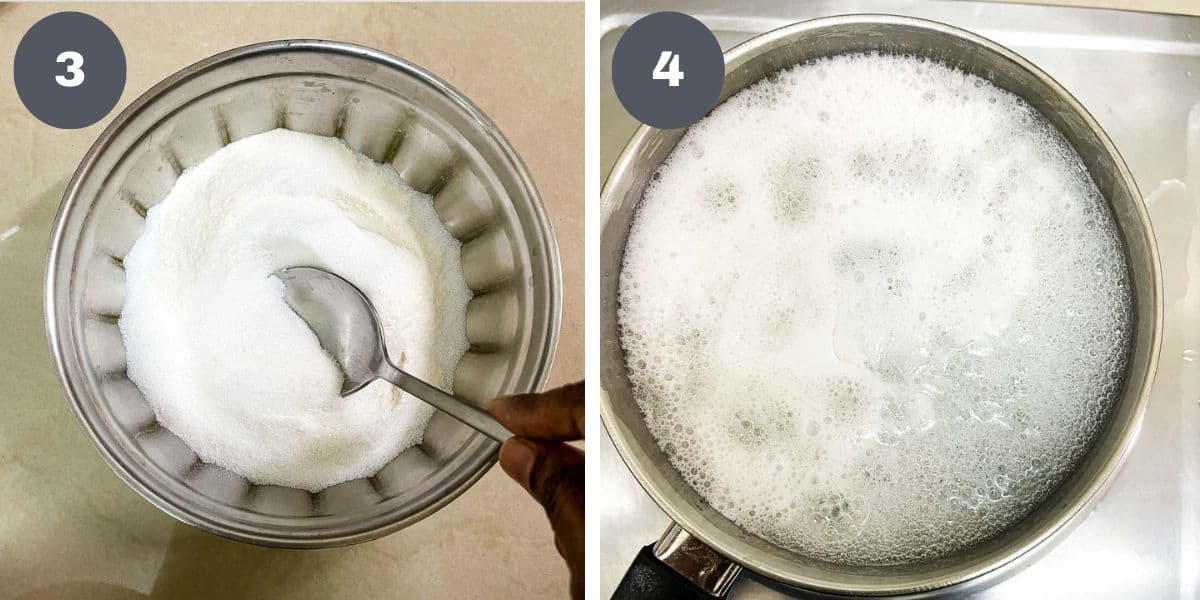
In a separate bowl, measure the agar agar powder (jelly powder) and mix well (image 3). Pour this mixture into the water and stir well.
Note: Mixing the jelly powder with sugar before adding it to any liquids will prevent it from clumping.
Turn on the flame to medium heat and cook the jelly solution until the sugar and jelly are completely dissolved. Stir to avoid the jelly from settling to the bottom of the pan. Let the jelly cook over medium low heat until it comes to a rolling boil (image 4). Stir occasionally.

Once cooked, divide the jelly solution into 2 equal portions. Add the strained pandan juice into one portion (image 5).
Add the coconut milk into the other portion (image 6). Mix well.
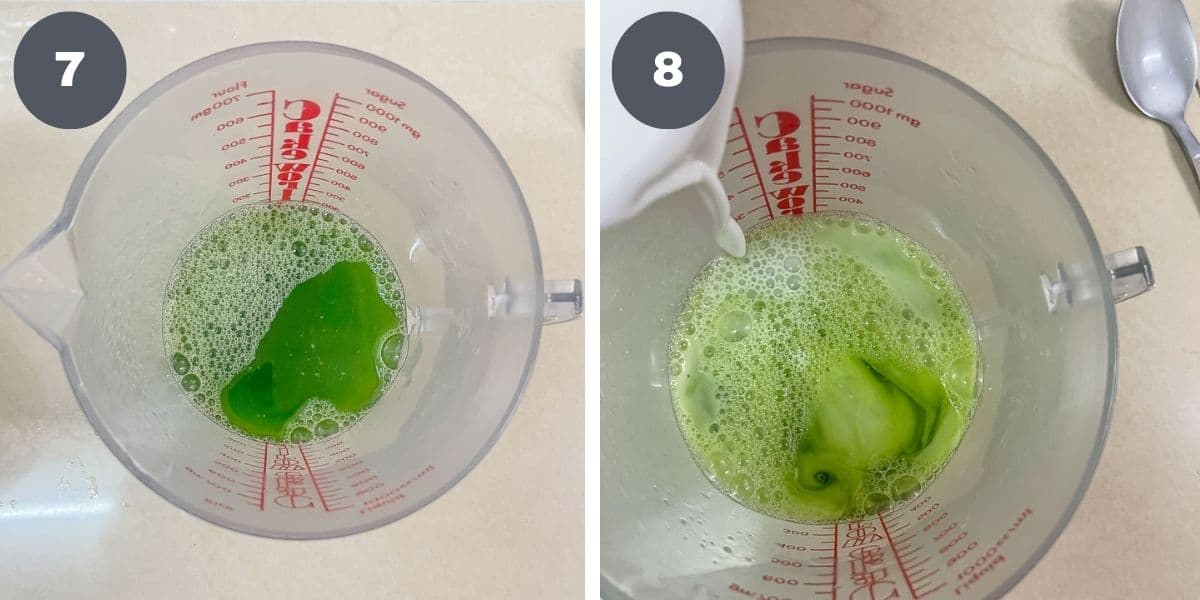
Transfer one third of the pandan juice jelly solution into a measuring jug (image 7). Add one third of the coconut milk jelly solution to it and mix well (image 8). This will make the milky green jelly layers in the pandan jelly. Cover all 3 jelly solutions to prevent them to cooling down to room temperature as that will set the jelly.
Step 3: Assemble the jelly layers.
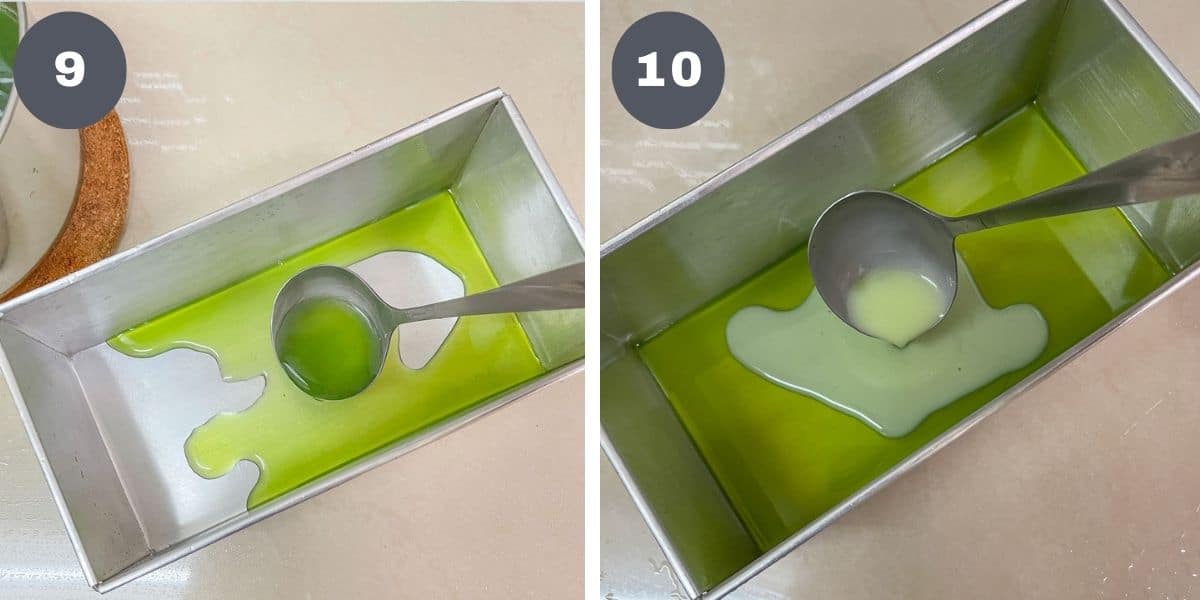
Spoon the first layer (bottom layer) of jelly into the prepared mold. The first layer should be the green pandan layer (image 9). Refrigerate to set.
Remove from the fridge and gently pour in the next layer, this time the milky green jelly layer (image 10). Refrigerate to set.
Note: For even thickness of the jelly layers, measure the quantity of jelly poured so that it is consistent for each layer. I use a count of 5 small ladles for each jelly layer.

For the third layer, pour the same amount of white coconut layer (image 11). Refrigerate again.
Repeat the process in the exact same order until all the jelly solution is used up (image 12). If there is any residual that is not enough for full layering, you can combine all three colors into one and pour it as a final layer. Return the pandan jelly to the fridge and let it set and chill completely for at least 2 hours.
Step 4: Unmold and cut the jelly. Once the jelly is completely set, remove it from the fridge.
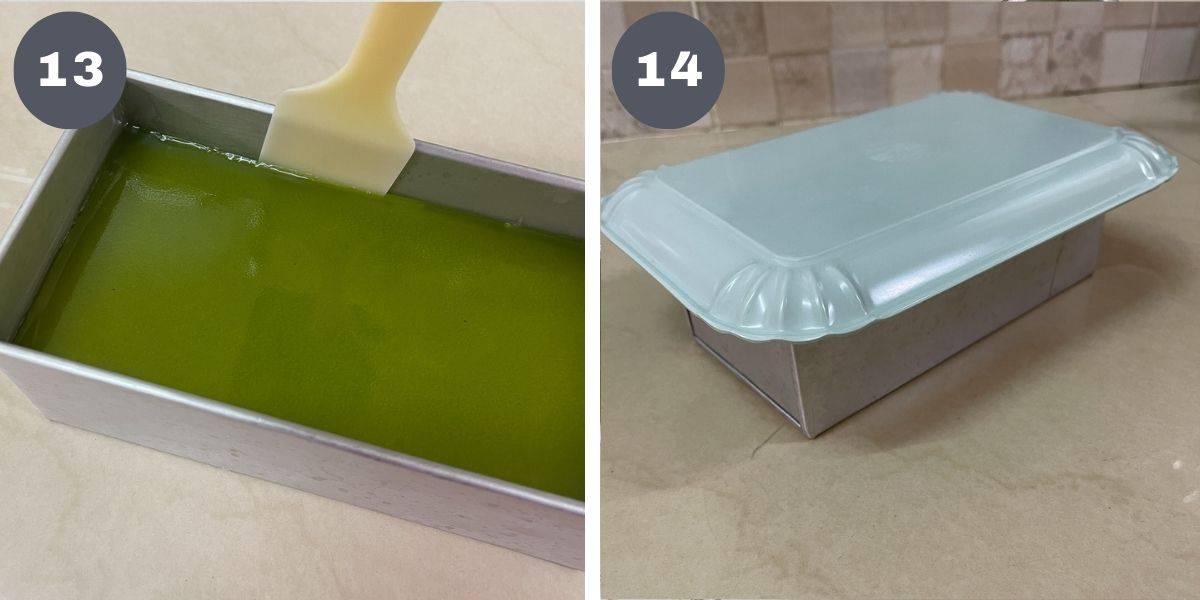
Use a thin flat spatula to loosen the sides of the jelly from the mold (image 13).
Cover the mold with a tray and turn it over, along with the mold (image 14).
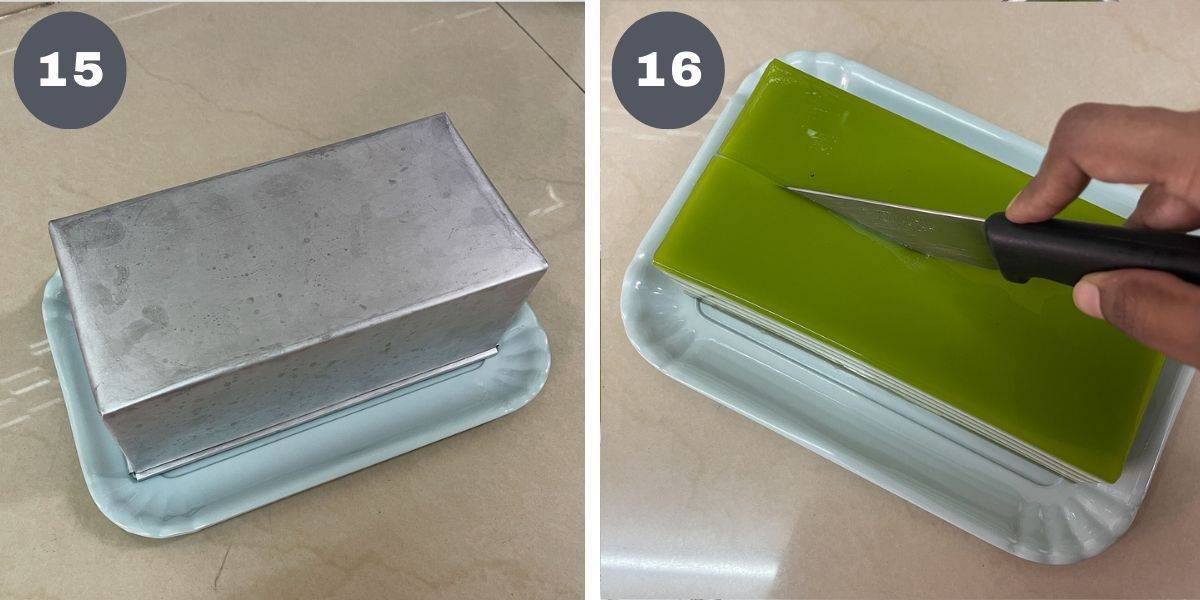
Tap gently to release the pandan jelly onto the tray (image 15). If you find it difficult to release the jelly from the tin, insert two toothpicks on each side of the jelly (between the jelly and the tin) before turning the jelly over. The little air pockets created around the toothpicks (between the jelly and the tin) will help to release the jelly.
Cut as desired and serve (image 16). The jelly is best served chill. Keep leftovers refrigerated. Consume within 4 to 5 days.
💡Expert Tips
- To prevent the jelly solution in the pots from setting while assembling the jelly layers, keep them warm by placing them over pots of hot water (double boiling) or simply heat them up intermittently to ensure they don’t cool down. Keep stirring the solutions every now and then to prevent any jelly films (skin) from forming on the surface and the sides of the pots.
- To ensure you get even layers of each color, use the same sized ladle or cup to pour each layer.
- To prevent the jelly layers from sliding off after cutting, make sure the jelly you pour over each layer is hot (steaming). This will help the layers to adhere better.
💭FAQs
There is definitely a tendency of the jelly layers to come apart as you cut and arrange the jelly.
One way to ensure the layers do not slide off too easily is by making sure the jelly solution you pour over the previous layers is steaming hot. This helps the layers stick together better.
Other ways include handling the jelly gently. When holding it, try to hold all the layers together instead just one part of it.
Also, cutting the jelly into wider pieces can help too.
Another way is to pour the jelly in individual serving cups. That way, you will never have the problem of the jelly layers separating.
Technically you can. However, too much of pandan juice will result in your jelly (especially the green layer) to taste like grass and that might not sit well with some people. Hence, it is important not to use too many pandan leaves to make the juice.
Reducing the leaves is also fine. It will have an impact on the depth of the green color of your pandan jelly.
Yes, they can. This is probably a good option if you are intending to serve the jelly at parties as you will have one less task of having to cut the jelly and making sure the layers do not separate as you move the jelly.
This pandan jelly does take some time to assemble and with each layer added, you have to give it sufficient time to set before adding a new layer. All this waiting time can result in your unused jelly solution in the pots to also cool down and set.
One way to avoid that is to heat them up intermittently. You don’t want to keep the heat on continuously as that will result in the jelly solution evaporating and reducing is quantity, but suffice if you heat it up every time you notice it cool down.
Also remember to keep stirring the solution every now and then to avoid the surface of the jelly from forming a thin layer of film (as the surface will cool down quicker than the rest of the jelly).
The other way to keep the jelly from setting is to place the each jelly pot over another pot of hot water (similar to double boiling). The heat from the steam will help keep the jelly warm and prevent it from setting.
Yes, you can. If you are pressed for time or simply do not have the patience to go with the many layers in this pandan jelly, you can make this agar agar jelly in 3 simple layers.
Start by pouring in all the green jelly into the mold as the first layer. Let it firm up and then pour in the milky green layer (all of it) followed by the coconut milk jelly layer. Let the jelly set and chill completely before unmolding and cutting.
❤️More Recipes You Will Love
Do you like this recipe? Please leave a 5-star ⭐⭐⭐⭐⭐rating in the recipe card below and consider a review further down this page. I would love to hear from you. Thank you!
📖Recipe
Pandan Jelly (Agar Agar Pandan)
For best results, use the metrics measurements. US customary measurements have not been tested and are only meant for guide.
Ingredients
- 10 g agar agar powder
- 200 g white sugar
- 300 ml coconut milk (thick)
- 900 ml water
- 6 pandan leaves (30 cm length each)
Instructions
- Prepare the mold and set it aside.
- Wash the pandan leaves.
- Cut them into 1-inch sizes and add them into the blender.
- Add 300ml of water and process the leaves until fine.
- Strain with a fine mesh strainer or a cheesecloth and squeeze out all the juice. Measure the juice. If it is less than 300ml, add water to reach 300ml. Set aside.
- Measure 600ml water into a medium saucepan. Separately, mix the sugar and jelly powder in a bowl (see Note 1). Add this mixture into the water in the saucepan and stir to combine.
- Turn on the heat and cook the jelly over medium heat. Stir to prevent the jelly from settling to the bottom. Continue cooking until the sugar and the jelly powder are dissolved and until the solution comes to a rolling boil. This should take approximately 5 to 10 minutes.
- Divide the jelly solution into 2 equal portions. Add the pandan juice to the first portion. Stir over low heat. Cover and turn off the heat. This is for the green jelly layer.
- Pour the coconut milk into the second portion. Stir over low heat. Cover and turn off the heat. This is for the white jelly layer.
- Transfer 200ml of the pandan juice jelly and 200ml of the coconut milk jelly into a separate heat-proof pot. Mix until well combined. This is for the milky green jelly layer.
- To prevent the jelly solutions from setting in the pots, keep the solution warm as you assemble the jelly. If you notice the solutions cooling down, heat them up lightly and stir well. Keep them covered.
- Spoon 5 small ladles of the green pandan jelly solution into the prepared mold (see Note 2). Refrigerate until the jelly sets lightly (you should be able to feel the surface of the jelly set if you touch lightly with your finger, but the bottom can still be wobbly).
- Remove from fridge and very gently, pour 5 ladles of the milky green jelly on the pandan juice layer. Spoon the jelly as close to the top surface as possible to prevent it from breaking. If it breaks, the jelly layers will get mixed up and you will not get the distinctly colored jelly layers (see Note 3).
- Refrigerate until the second jelly layer sets lightly.
- For the third layer, pour 5 ladles of coconut milk jelly. Refrigerate until it sets lightly.
- Repeat the process until all the 3 jelly solutions are used up. For the final layer, if there is not enough of either solution to make a full layer, combine the solutions and pour them into the mold as one final layer.
- Refrigerate the jelly until it is completely set and thoroughly chilled for about 2 hours.
- Once completely set, remove the jelly from the fridge. Run a thin spatula along the sides of the mold to loosen the jelly.
- Place a plate on top of the mold and turn it over with the mold underneath it. Tap to remove the jelly onto the plate. If the jelly does not release, try to insert 2 toothpicks between the jelly and the tin before turning the jelly over. The little air pockets created between the jelly and the mold (by inserting the toothpick) will help release the jelly.
- Cut the jelly into small pieces before serving.
Notes
- Mixing the jelly powder with sugar before adding it to any liquids will prevent it from clumping.
- For even thickness of the jelly layers, measure the quantity of jelly poured so that it is consistent for each layer. I use a count of 5 small ladles for each jelly layer.
- To prevent the jelly layers from sliding off after cutting, make sure the jelly you pour over each layer is hot (steaming). This will help the layers to adhere better.


Leave a Reply