

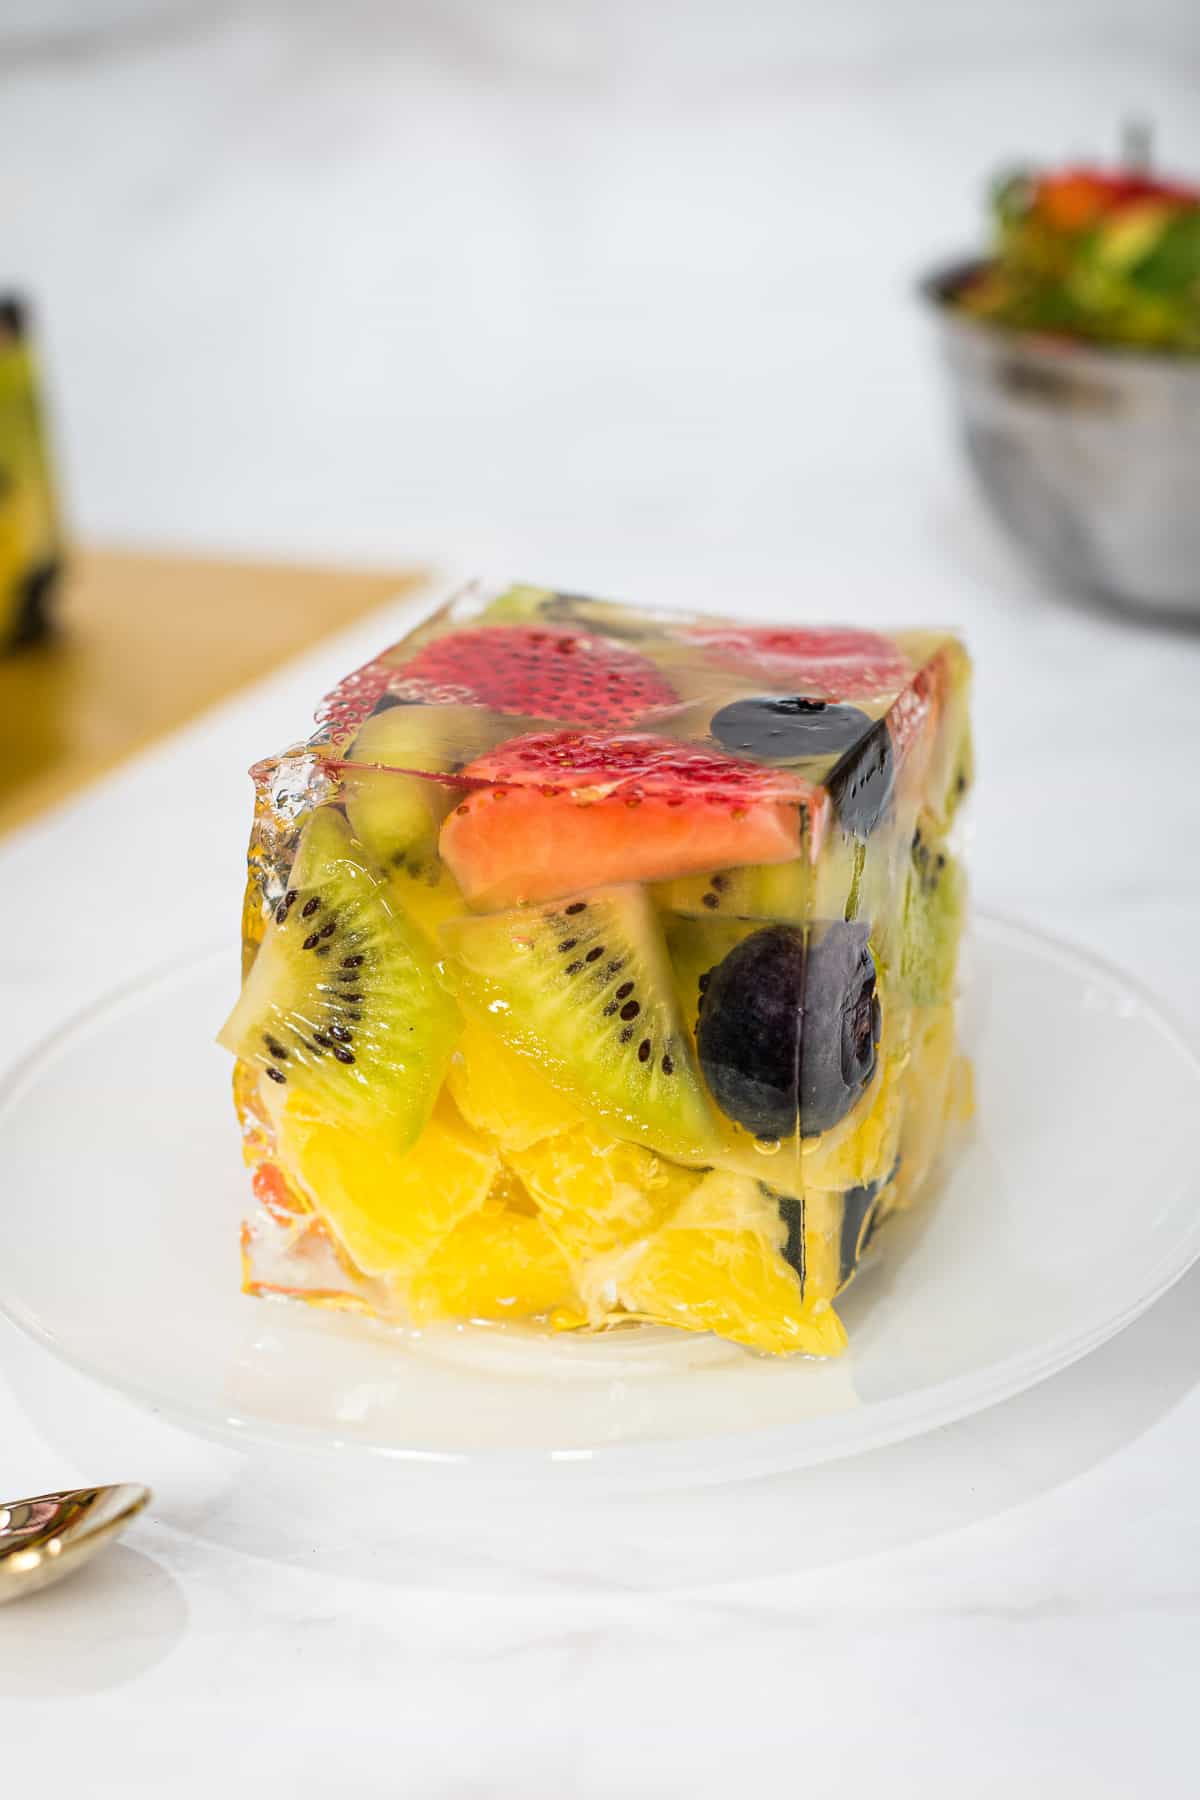
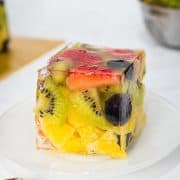
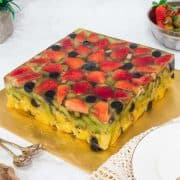
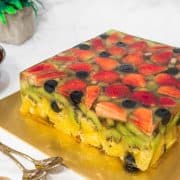
This fruit jelly cake is made using agar agar jelly and a delicious combination of fresh fruits. With the bright natural colors of the fruits, this jelly cake is not only great to be enjoyed as a dessert, it can also be turned into an easy and healthy birthday cake.
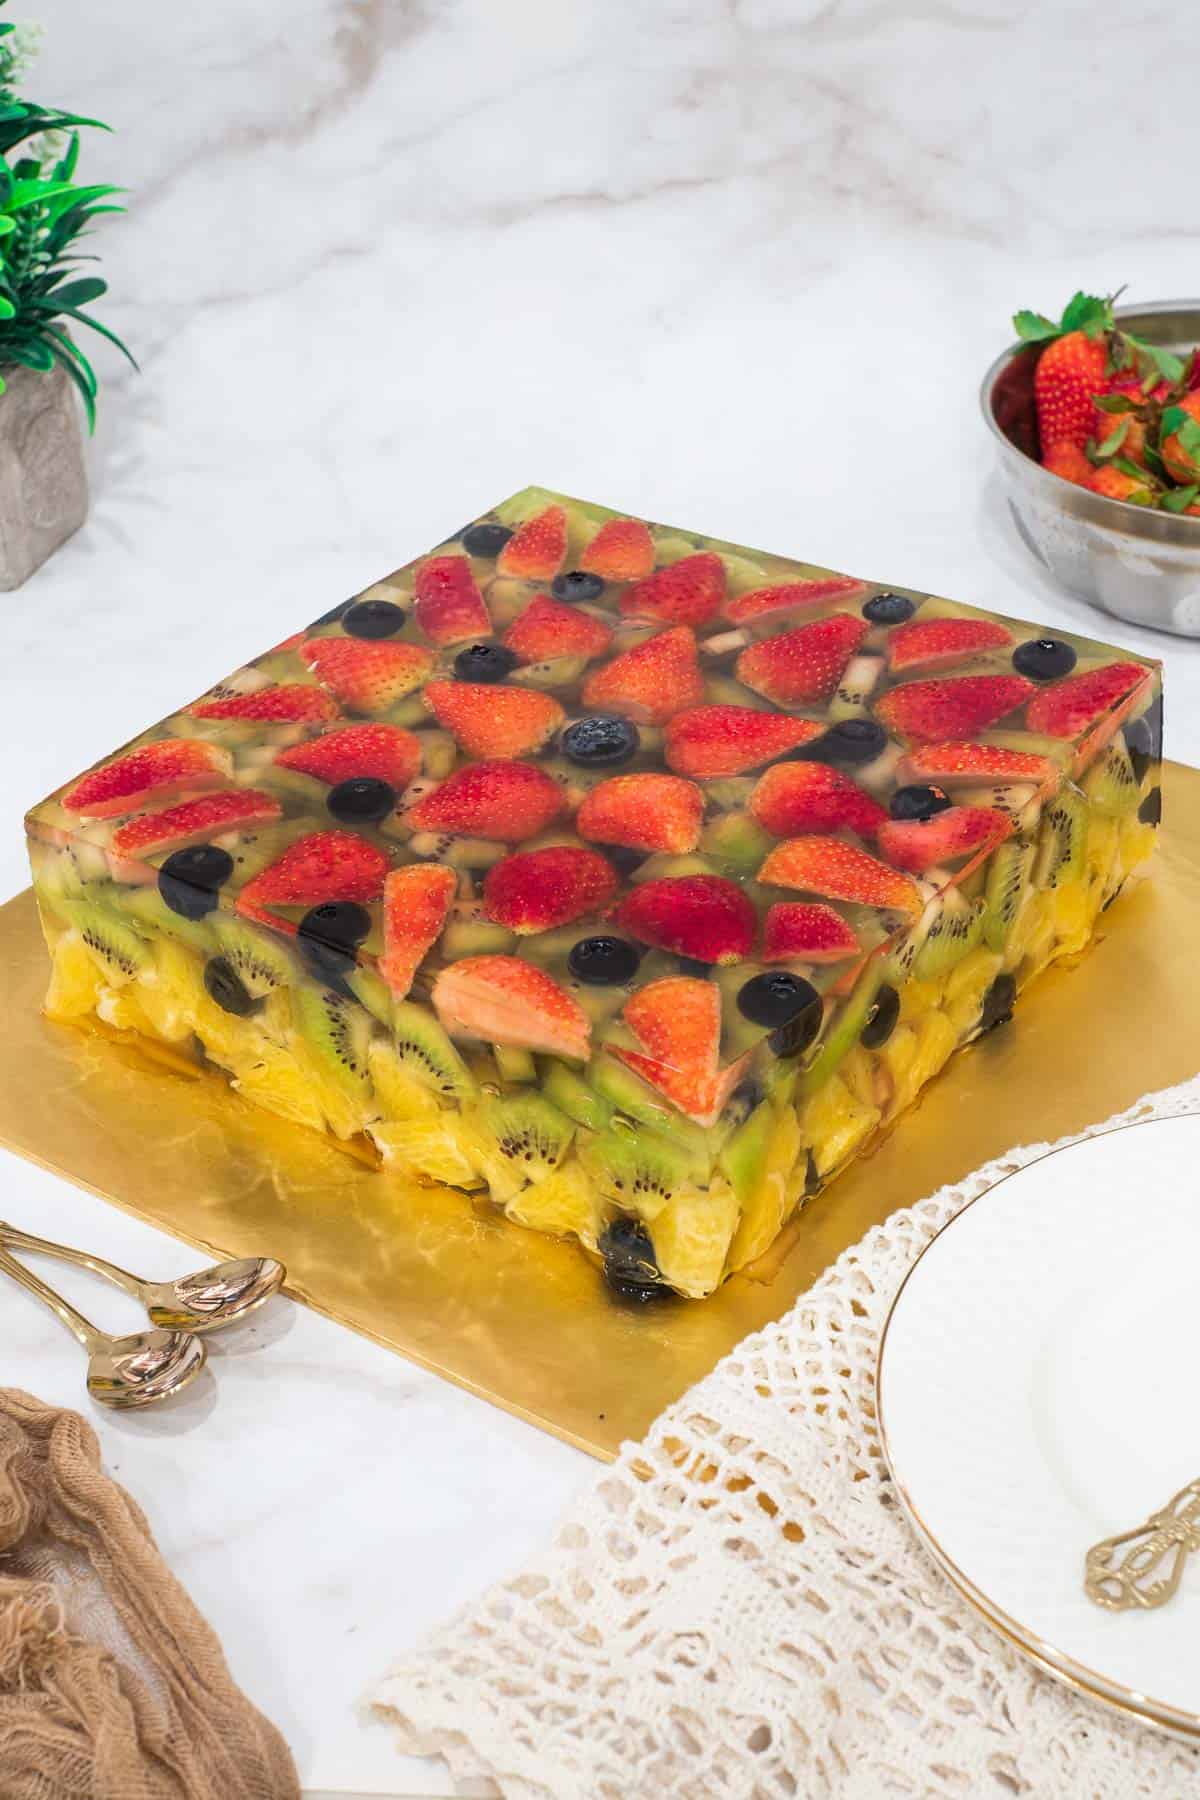
Set in a square cake tin, this fruit jelly cake consists of layers of strawberries, oranges, kiwis and blueberries held together with agar agar jelly. This is literally a fruit packed jelly, with the jelly holding all the fruits together in a pretty, bright colored delicious cake.
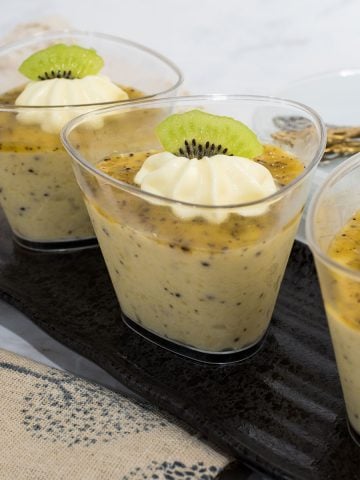
If you like fresh fruit jellies, you should also check out these fruit jelly cups made in a combination of rainbow colored fresh fruits, and this mango jelly which is made using fresh mango puree. You might also want to check out this butterfly pea flower jelly in pretty blue tone that is naturally colored with butterfly pea flowers.
Jump to:
❤️Why You Will Love This Recipe
- The recipe makes a really beautiful jelly fruit cake with a variety of fruits in bright colors (rainbow colors).
- It is served cold, making it a perfectly cooling and juicy treat for hot summer days.
- This delicious jelly fruit cake is made using fresh fruits and agar agar powder which are all plant based, making it a perfect vegan dessert.
What is Agar Agar
Agar agar powder, derived from red algae, is a plant-based jelly substance commonly used in desserts throughout Asia. Known by various names in different regions (such as kanten jelly, China grass, Japanese Isinglass, Ceylon Moss, or Jaffna Moss), it serves as a popular plant based alternative to animal gelatin.
Agar agar is sold in powder form as well as in strips and flakes form. It can be purchased in local Asian stores or online.
📋Ingredients
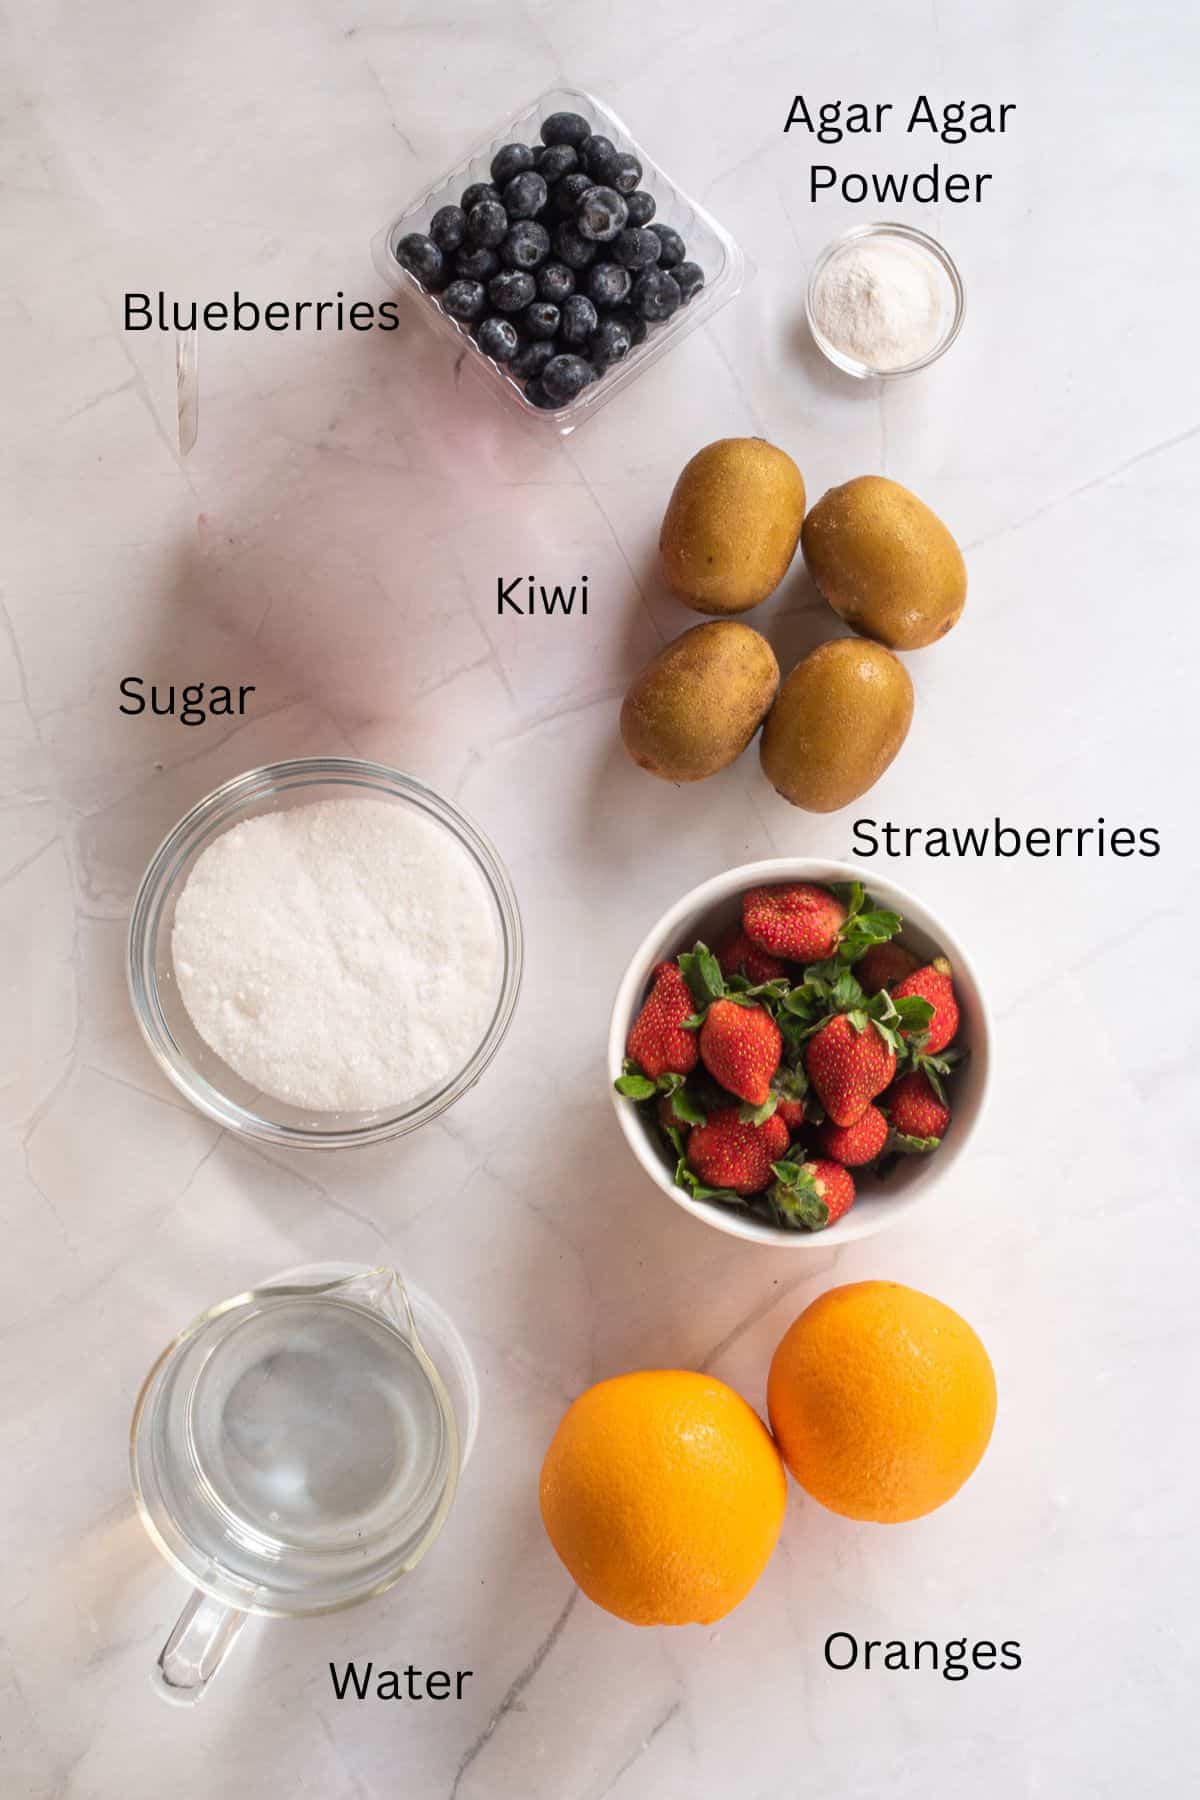
- Agar-agar powder - this is the gelling agent in the cake that keeps the fruits together as a cake. Look for agar agar powder sold in packets of 10g for convenience of measuring.
- White sugar - adds sweetness to the jelly. Since sugar will be cooked, you can use both coarse sugar or granulated sugar. Brown sugar is not recommended as it will change the color of the jelly from clear to brown.
- Water - use filtered water.
- Strawberries
- Blueberries
- Oranges
- Kiwis
*Refer to the recipe card below for full list of ingredients and exact quantities. For best results, use a digital kitchen scale where applicable*
🧾Substitution and Variations
- Agar agar powder can be replaced with konnyaku jelly powder. Keep to the measurement provided in the recipe card below.
- Water can be substituted with coconut water or any fruit juice of your choice such as lychee juice. Or you can add some lemon juice into the water to make lemon flavored fruit jelly cake. For best results, the juice should be clear or else it will cloud the bright colors of the fruits.
- You can use a variety of fresh fruits of your choice in making this fruit jelly cake. Some of my preferred fruits (other than the ones I have included in this recipe are dragon fruit, green grapes and red grapes, mangoes, peaches, pineapple and lychees).
- Other than fresh fruits, you can also use canned fruits. In fact, canned fruit cocktail is also another option for making this jelly cake.
This recipe has not been tested with other substitutions or variations. If you do try, please let me know in the comments section below!
👩🍳How to Make
Step 1: Prepare the fruits. For best results, make sure your fruits are fresh.
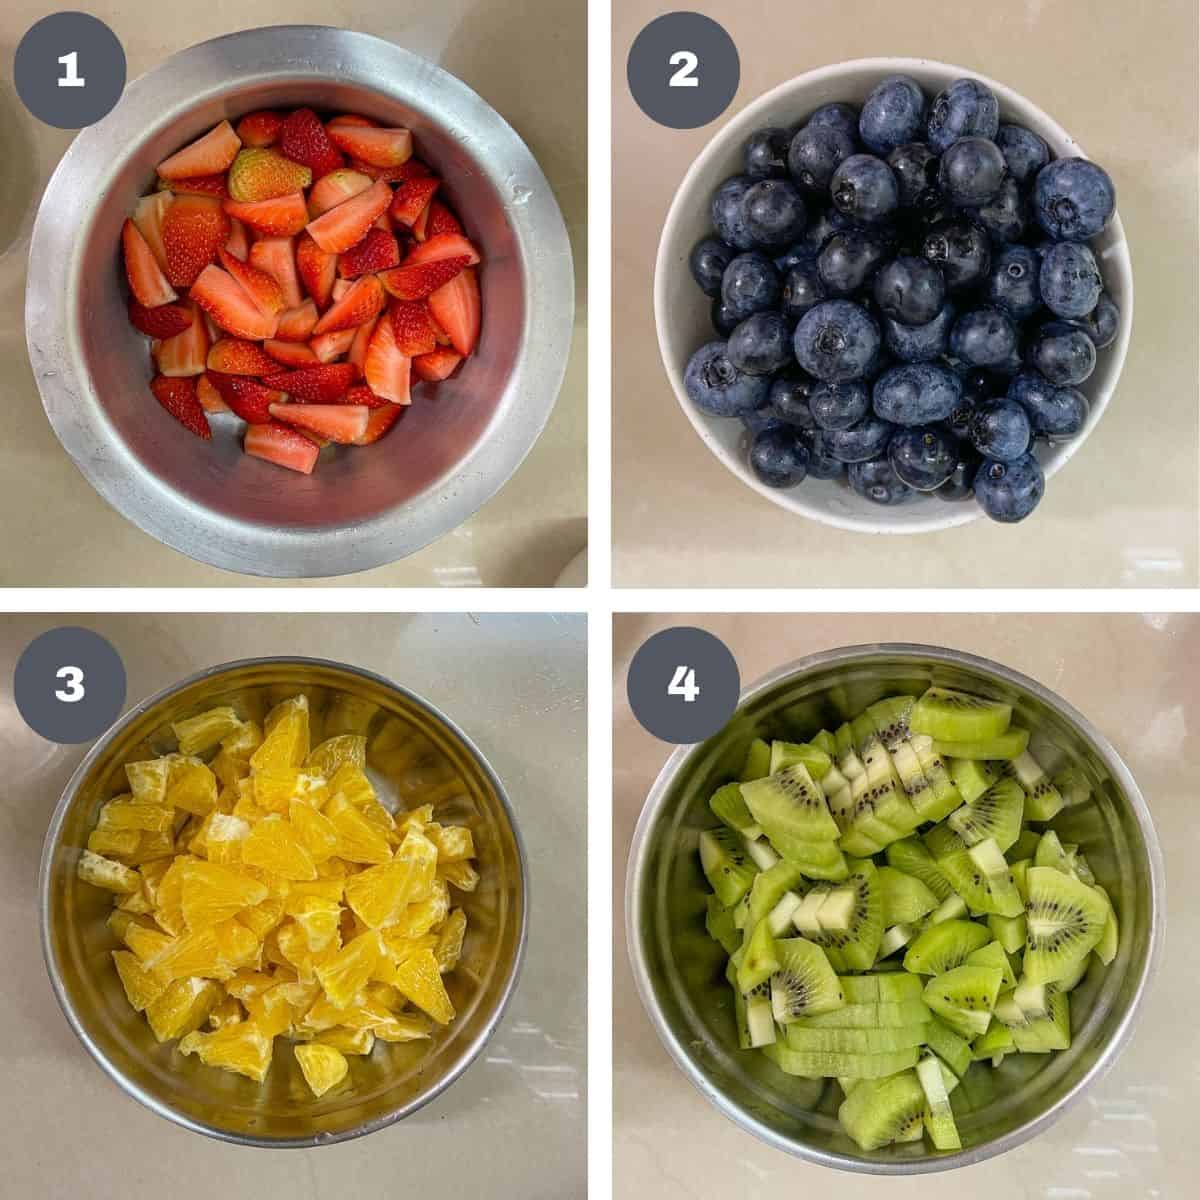
Wash and hull the strawberries. Gather about 5 o 6 fruits of almost the same size and slice them into halves. For the remaining, cut them into quarters. Set aside (image 1).
Wash and pat the blueberries dry. Set aside (image 2).
Peel the orange skin and remove all the white pith that is attached to the fruits. Divide the oranges into segments. Slice the segments into small pieces (image 3).
Wash and peel the kiwi fruits skin. Cut each fruit into 4 quarters and slice each quarter into thin pieces (image 4) .
Step 2: Cook the jelly. Measure water into a small cooking pot or saucepan. Set aside.
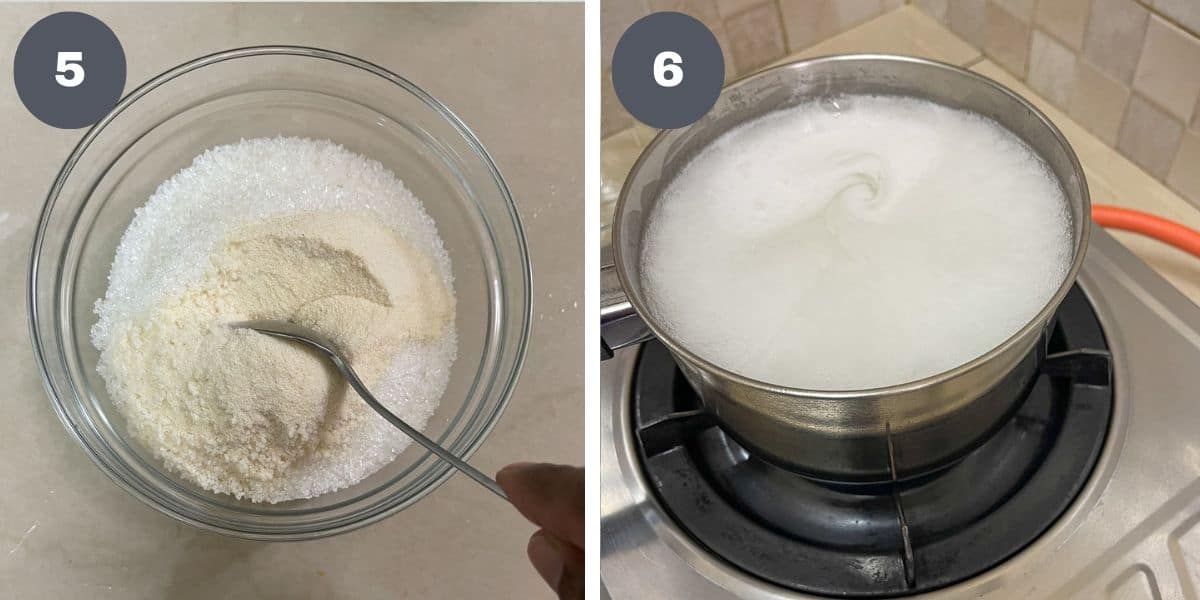
In a separate bowl, measure the sugar. Add the agar agar powder and mix well (image 5).
Pour the agar agar jelly and sugar mix into the water. Stir to combine. Turn on the heat to a medium flame and cook the jelly. Stir constantly for the first 2 or 3 minutes to disperse the jelly into the water and avoid clumping. Thereafter, stir occasionally, but keep close watch to avoid the agar agar from boiling over the pot.
Cook the agar agar until it comes to a rolling boil. Turn off the heat and let it cool down for about 2 or 3 minutes (image 6).
Step 3: Arrange the first layer of fruits in the mold. To make the flower shape and to make sure it is well centered in the tray, identify the mid point on the tray. You can do this with a ruler. Once you identify it, place a blueberry at that point. And then arrange the strawberries that were sliced into half into a 5 petal flower. From there, add more petals to make a large flower.

Once you reach the towards the edge of the tin, you can fill up the gaps with the quartered strawberries. And then place the blueberries in the gaps between the strawberries (image 7).
To hold this arrangement in place, carefully spoon some of the agar agar jelly solution onto the fruits and let it set. Make sure to pour enough jelly such that it forms a thin layer all over the bottom of the tin, about half a centimeter deep (image 8).
Set it aside for a few minutes to allow the jelly to set.
Note: If you do not wish to arrange the fruits in layers or in the flower pattern, you can mix them all up and pack them into the mold and pour the hot jelly all over them to set.
Step 4: Add the remaining fruits and pour the jelly. For the next layer, arrange the sliced kiwis above the strawberries. In arranging them, try to place some on the sides of the tin as well so that you will be able to see a layer of kiwis from the sides as well (after unmolding). Also add some blueberries randomly.
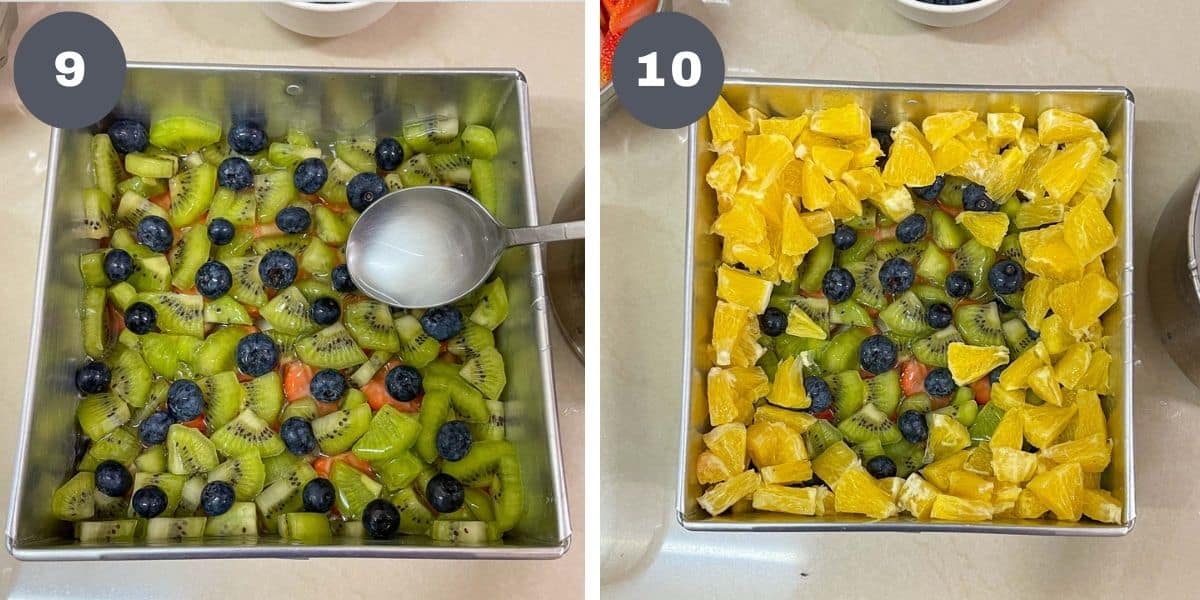
Pour some more of the jelly solution to hold these kiwis in place (image 9).
For the next layer, arrange the cut orange slices. Arrange them towards the sides of the tin so that they show on the sides of the jelly once unmolded (image 10).

And fill the center of the arrangement with all remaining fruits i.e. the cut strawberries and the blueberries (image 11).
Pour the remaining jelly solution all over to ensure it covers all the fruits. If the solution seems to have cooled down, reheat it again and pour it over (image 12).
Tap the tin lightly to release any air bubbles in the tin and in between the fruits. Let it cool slightly at room temperature before placing it in the fridge to set completely for at least 2 to 3 hours.
Step 5: Unmold the jelly. Unmolding jellies can be a little tricky as they tend to attach to the tins or molds. This is not so much the case when using silicone or rubbery molds as you can bend and twist the molds to get the jelly out. But this is not the case with metal mold or baking pan.
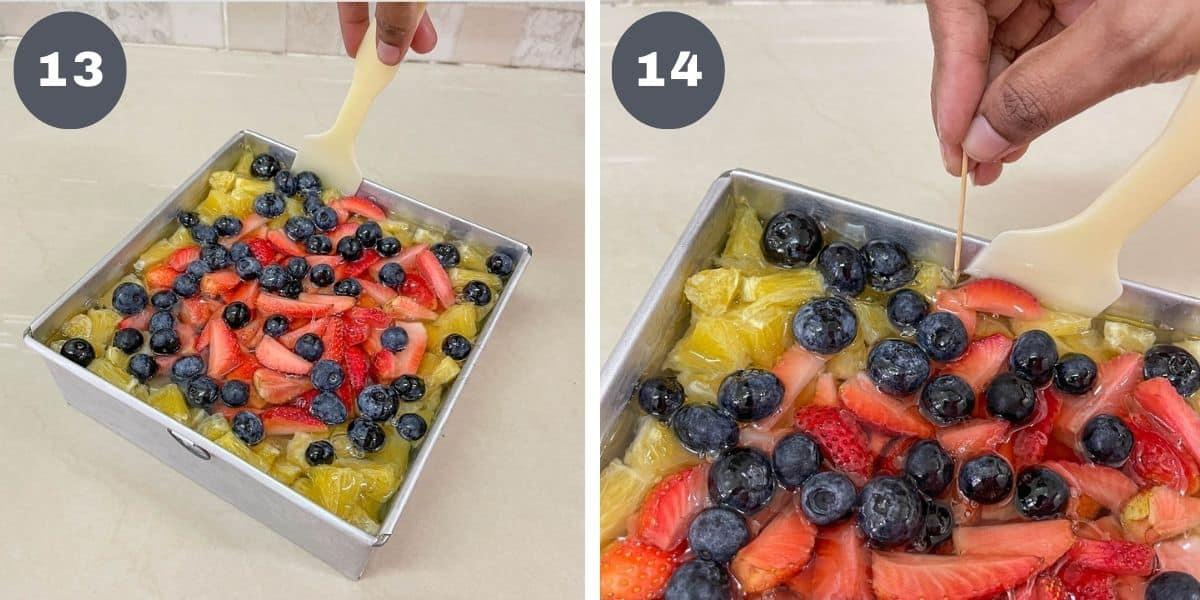
To unmold effectively from metal molds, run a thin rubber spatula along the edges of the jelly to loosen it (image 13).
And then, insert 4 toothpicks (on on each side of the tray) between the jelly and the tin (image 14).
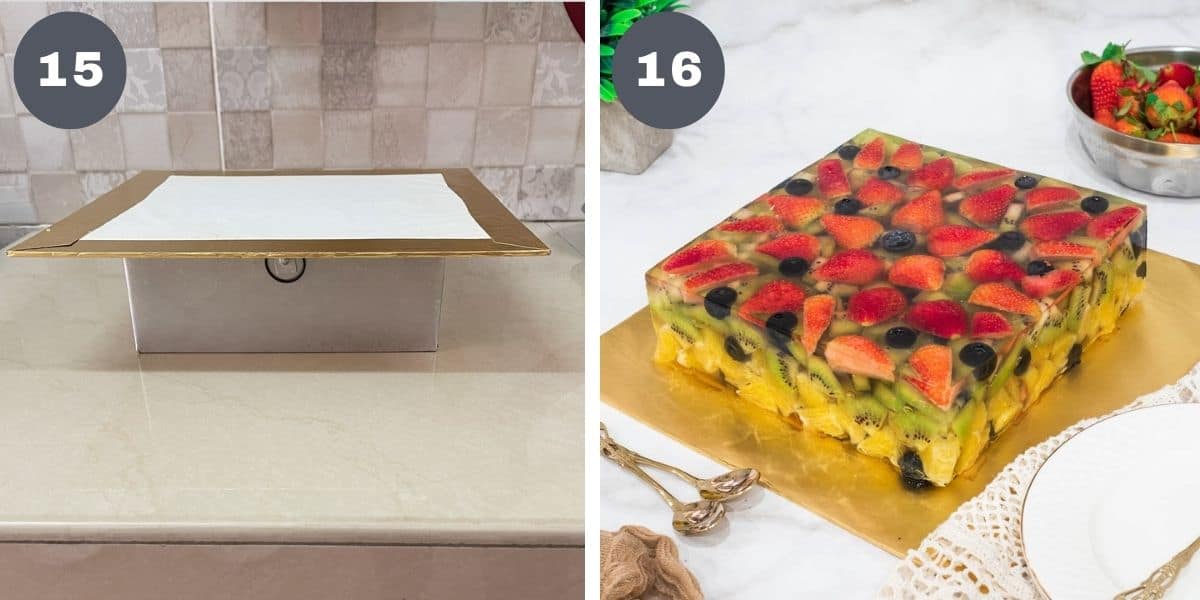
Place your serving plate or cake board on the jelly mold (make sure it is well centered) and turn the jelly mold over, holding the serving plate tight against the mold and making sure it does not move (image 15).
The jelly should drop onto the plate and if it does not, tap it lightly to release from the mold. Lift the mold away, and remove the toothpicks (image 16).
Cut into bars or squares and serve. The jelly is best served chilled.
Note: If unmolding is difficult, you can also scoop the jelly out directly from the mold and serve it that way if you like. But if you prefer to cut it into nice squares or bars, it is best to unmold the jelly first.
💡Expert Tips
- When making jellies, there is no need to line the tin or mold.
- To prevent the jelly powder from clumping when added into water, it is advisable to mix it with the sugar first. This will disperse the jelly powder and prevent it from clumping.
- Undercooked jelly will not set well. To make sure the jelly powder is fully dissolved, cook the jelly on low to medium heat until it reaches a rolling boil.
💭FAQs
Jelly cakes, unlike normal baked cakes are not made of flour. They are just agar agar jelly poured into round or square cake tins which makes them look like cake.
Most often, once released from mold and stored for more than 24 hours, the jelly tends to release liquid.
This is normal and does not mean the jelly has gone bad. You can discard the liquid and still consume the jelly without any worry.
This jelly fruit cake can last for a good one week but requires refrigeration. Keep it covered in an airtight container to prevent the jelly and the fruits from drying.
❤️More Recipes You Will Love
Do you like this recipe? Please leave a 5-star ⭐⭐⭐⭐⭐rating in the recipe card below and consider a review further down this page. I would love to hear from you. Thank you!
📖Recipe

Fruit Jelly Cake
For best results, use the metrics measurements. US customary measurements have not been tested and are only meant for guide.
Ingredients
- 10 g agar agar powder
- 250 g white sugar
- 1 liter water
- 475 g strawberries (appromixately 35 fruits)
- 250 g blueberries
- 375 g kiwis (4 fruits)
- 375 g oranges (2 large fruits)
Instructions
- Wash and pat the mold dry. Set aside (see Note 1).
- Prepare the fruits. Wash and hull the strawberries. Choose around 5 or 6 fruits and cut them into halves. Cut the remaining into quarters. Set aside.Wash the blueberries and pat dry. Set aside.Peel the oranges and remove as much of the white pith and thread that is attached to the fruits. Divide each fruit into segments and cut the segments into thin slices. Set aside.Peel the kiwi skin and quarter the fruits. Slice each quarter into thin pieces. Set aside.
- Measure sugar and agar agar powder into a small bowl and stir well to mix (see Note 2).
- Add water into a medium pot. Add the agar agar and sugar mixture into the water and mix well. Turn on the heat and let the agar agar cook until it reaches a rolling boiling point (see Note 3). Stir the solution constantly for the first few minutes to disperse the agar agar powder well and to avoid it from clumping. Thereafter, stir occasionally.
- Once the jelly is completely cooked, turn of the heat. Let it rest for about 2 to 3 minutes before pouring onto the fruits.
- While waiting for the jelly to cool slightly, arrange the fruits in the mold. Identify the mid point on the mold and place one blueberry on that spot.
- Arrange the half-cut strawberries into a flower pattern with the blueberry as the center. Continue arrange the strawberries until a large flower is formed and reaches the sides of the tin.
- Fill the remaining space with the quarterly strawberries and blueberries.
- Spoon some hot jelly onto the fruits arrangements to seal them in place. In doing it, you need not submerge the fruits, suffice if the jelly layer is about 3 or 4 mm deep.
- Let the jelly set for a few minutes. Once set, arrange the kiwis in a layer over the strawberries and blueberries, and some extras on the sides of the tin so that the kiwis form a visible layer on the sides of the jelly. Pour a few more spoons of jelly to hold these fruits in place.
- Next, add the orange slices. Arrange them towards the sides of the mold and fill the center with the remaining strawberries. Top with the remaining blueberries.
- Pour the remaining jelly solution all over the fruits making sure it touch the entire layer of the fruits. If the jelly solutions appears to have cooled down, heat it up slightly before pouring onto the fruits.
- Tap the mold gently a few times to release any air bubbles. Let it set at room temperature for a few minutes before transferring to the fridge to set completely for at least 3 hours (see Note 4).
- To unmold the jelly cake, run a thin plastic or rubber spatula along the sides of the jelly and the mold to detach the jelly. Carefully insert toothpicks between the jelly and the mold on each side of the mold.
- Place the serving plate on the mold (with the toothpicks intact) and turn the mold over to release the jelly onto the plate. Tap light if it does not release automatically (see Note 5).
- Cut and serve the jelly. Keep extras refrigerated.
Notes
- When making jellies, there is no need to line the tin or mold.
- To prevent the jelly powder from clumping when added into water, it is advisable to mix it with the sugar first. This will disperse the jelly powder and prevent it from clumping.
- Undercooked jelly will not set well. To make sure the jelly powder is fully dissolved, cook the jelly on low to medium heat until it reaches a rolling boil.
- If you do not wish to arrange the fruits in layers or in the flower pattern, you can mix them all up and pack them into the mold and pour the hot jelly all over them to set.
- If unmolding is difficult, you can also scoop the jelly out directly from the mold and serve it that way if you like. But if you prefer to cut it into nice squares or bars, it is best to unmold the jelly first.

Leave a Reply