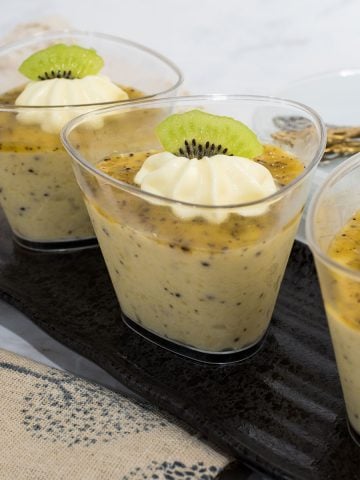
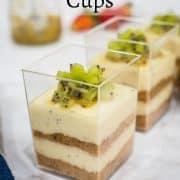
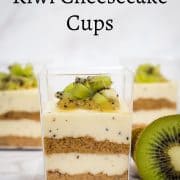
These kiwi cheesecake cups make a perfect quick and easy dessert with pretty layers of creamy, tangy filling made from cream cheese and homemade kiwi sauce (kiwi coulis), and crunchy biscuit crust.
These individual-sized desserts are perfect for parties, potlucks, or any time you're craving a sweet treat and are sure to impress your guests!
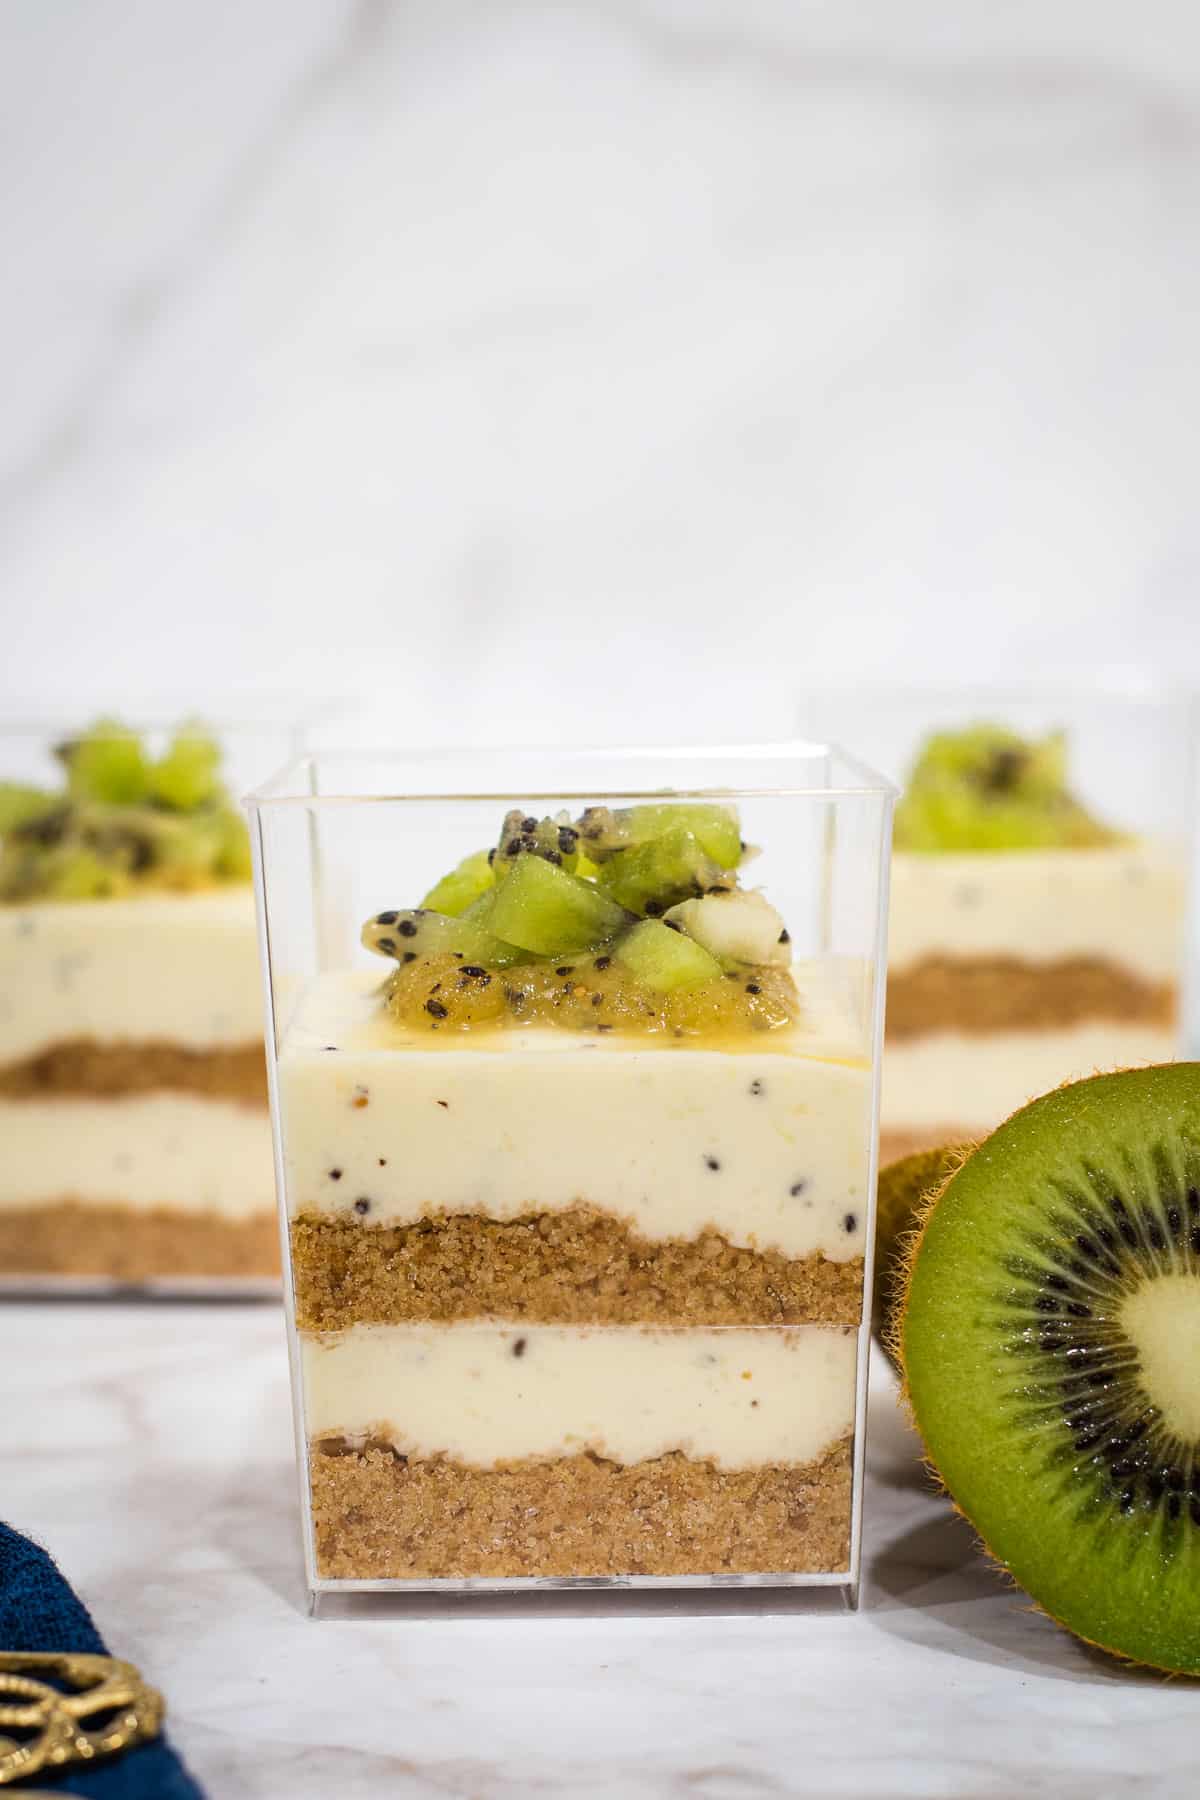
And the best part? They're no-bake, meaning you can whip them up in just a few minutes without even turning on the oven.
Jump to:
❤️Why you will love this recipe
- Easy to make, no baking required.
- A lovely variation of the classic cheesecake.
- Made with fresh kiwis, so the cake is filled with natural goodness. They make a perfect dessert for kiwi fruit lovers.
- There is no egg in this recipe, making it perfect for vegetarians.
- These mini cheesecakes in individual servings make perfect cheesecake at parties. They are easy to serve and no messy cutting involve.
📋Ingredients
Cookie crumbs layer
- Digestive biscuits (or Graham Crackers) - these form the crunchy crust layers in the cheesecake cups.
- Melted butter - I use salted butter. Unsalted butter will also work fine.
- Granulated sugar (caster sugar) - Sweetens the crust.
Cheesecake filling
- Cream cheese - use full fat cream cheese that is sold in blocks like Philadelphia cream cheese. Spreadable cheese will not work for this recipe as it will be too soft.
- Granulated sugar (caster sugar) - use fine sugar as it dissolves better than coarse sugar.
- Heavy cream - use full fat cream for best results.
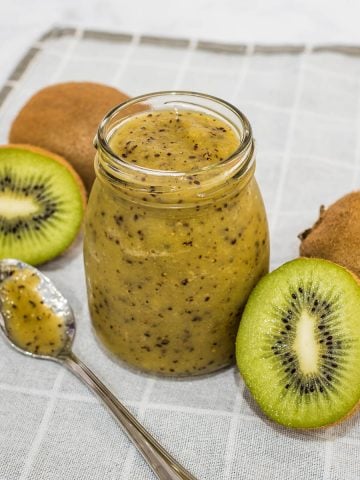
- Kiwi coulis - kiwi puree made with fresh kiwi fruit, granulated sugar, lemon juice
- Vanilla extract (optional) - adds a lovely flavor to the cheesecake cups.
Topping
- Kiwi Coulis
- Fresh kiwi fruit - choose ripe fruits.
*Refer to the recipe card below for full list of ingredients and exact quantities. For best results, use a digital kitchen scale where applicable*
🧾Substitution and Variations
- I have used Digestive biscuits to make the cookie crust. Other options include Graham Crackers or vanilla wafers. You can also use Oreo cookies if you like.
- If you do not have heavy cream, you can substitute it with sour cream. Use the exact same quantity as the cream.
- I chose to top these kiwi cheesecake cups with chopped fresh kiwis. Instead of chopping them, you can also add fresh kiwi slices to the top. Cut them into thin slices and cut each slice further into 4 sections and arrange these onto each cheesecake cup.
- You can also add a dallop of whipped cream as a topping for these cheesecakes.
- Another option is to top the kiwi cheesecake cups with other fresh fruit. Strawberries are a good option. Other fruits that will pair well with this kiwi cheesecake are mango, blueberries and raspberries.
This recipe has not been tested with other substitutions or variations. If you do try, please let me know in the comments section below!
👩🍳How to Make
Making the kiwi coulis (cooked kiwi puree/sauce)
I have a full post on how to make a larger batch of kiwi coulis/puree. The recipe quantity provided for making kiwi coulis in the recipe card below is reduced to produce just the right quantity to make these kiwi cheesecakes, hence the measurements are small. You can refer to the full post on my kiwi coulis for larger measurements.
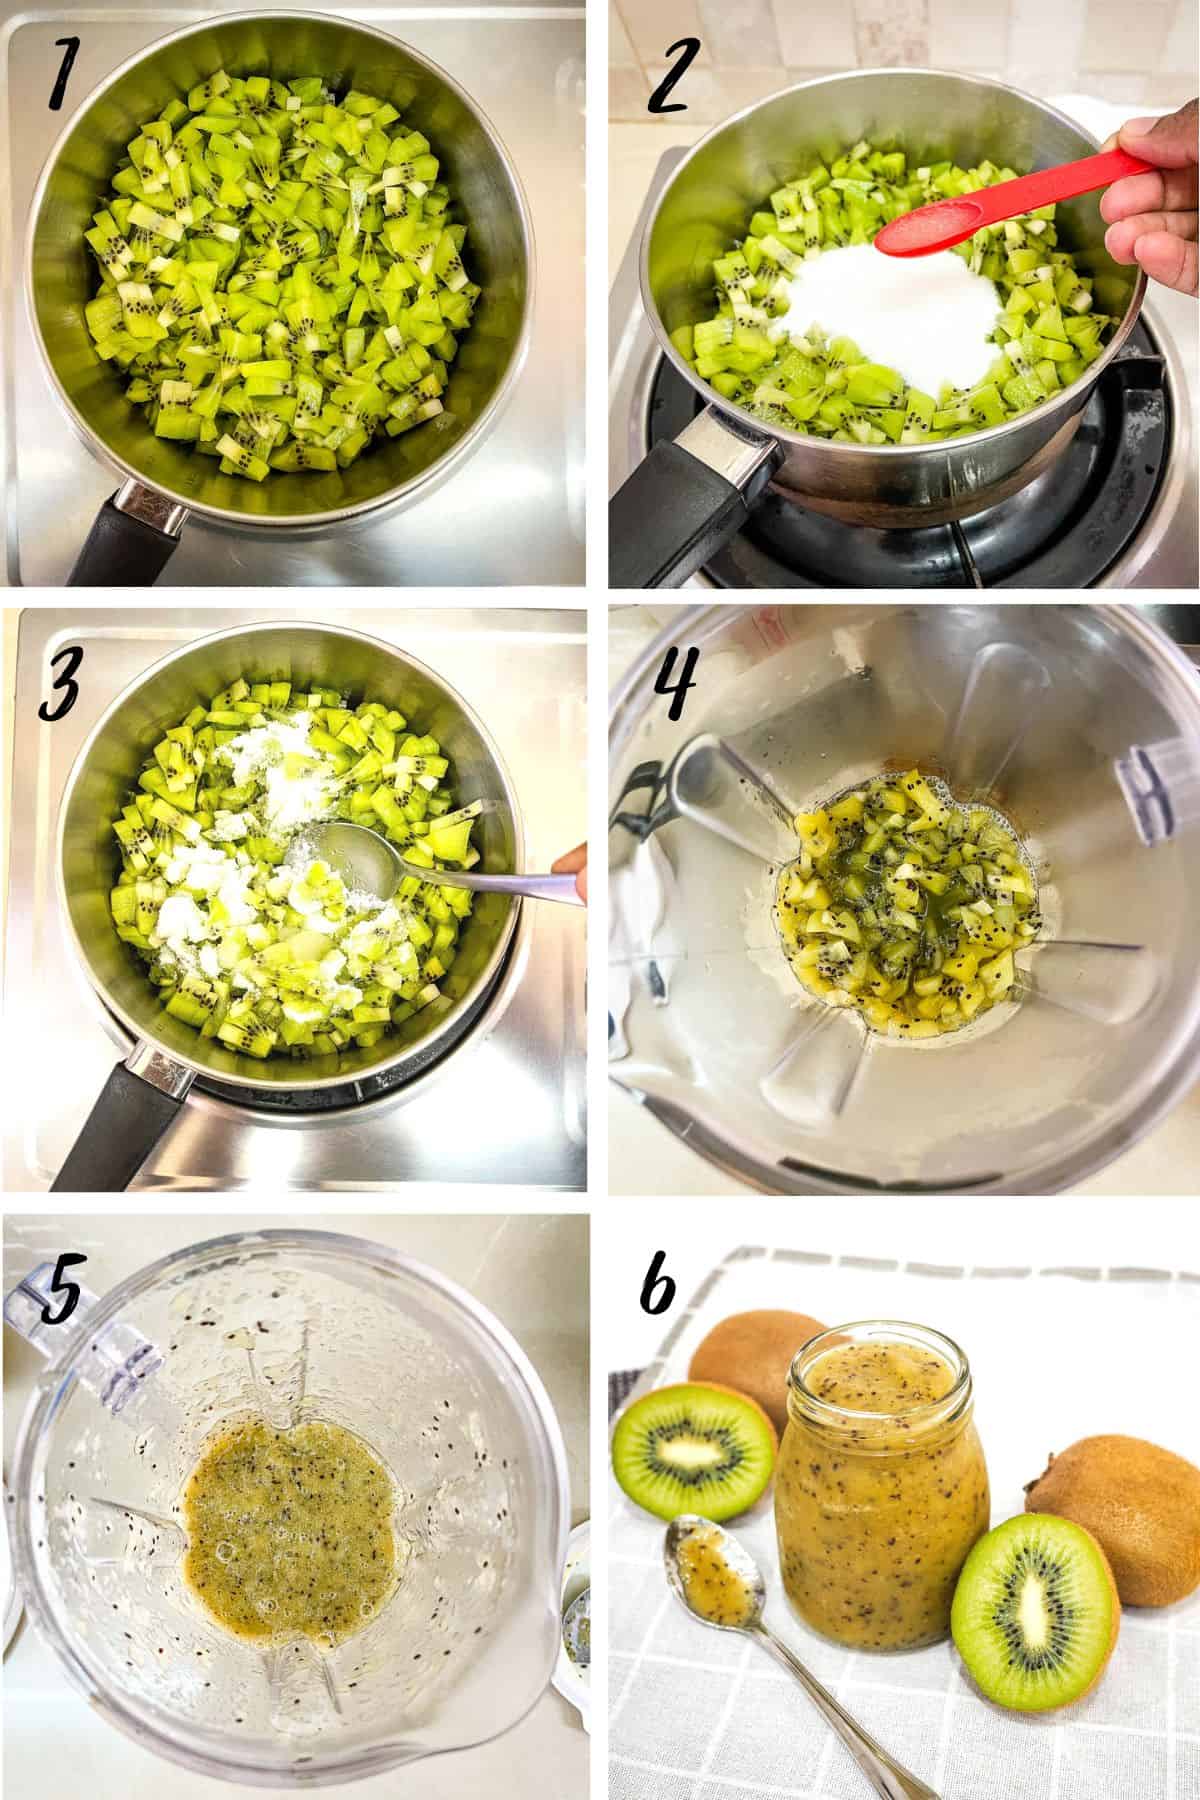
- To prepare the kiwi coulis (sauce), begin by peeling the fruits. Cut them into small cubes. Place the fruit in a small saucepan.
- Add sugar and lemon juice and stir to mix.
- Heat the mixture on medium-low until the fruit becomes soft, stirring occasionally to avoid burning.
- After turning off the heat, let the mixture cool slightly before transferring it to a food processor to blend into a puree.
- Puree until smooth.
- Pour the puree into a dry container. Let it cool completely to room temperature and then chill until ready to assemble the kiwi cheesecake. The coulis can be made a few days in advance and will last up to six days in the refrigerator. It is important to ensure the sauce is fully chilled before adding it to the cheesecake.
Preparing the cookie crust
To make the cookie crust, you need to break the cookies into fine crumbs. There are 2 ways you can do this. First method is to process them in a food processor. The second method is to place the cookies in a ziplock bag and use a rolling pin to roll on the cookies (while applying pressure) to break them into fine crumbs. The method below is the first option.
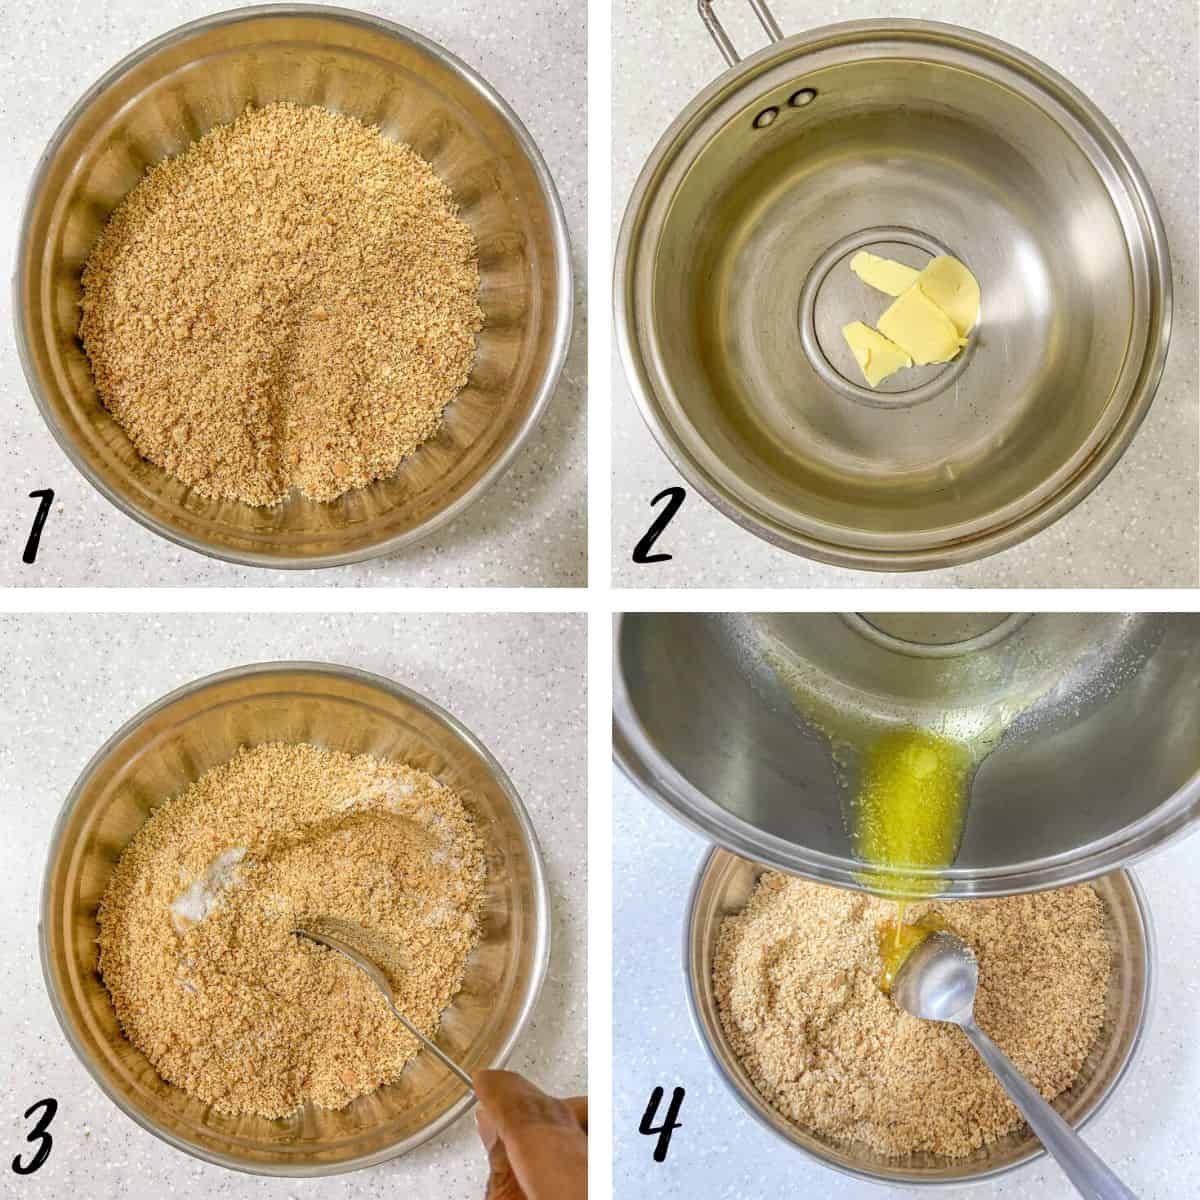
- Break the cookies and place them in a food processor. You can add them to the food processor without breaking if your food processor is able to fit the cookies. Blend until they turn into fine crumbs and then transfer the crushed biscuits into a small bowl.
- Melt the butter over low heat. Let it cool slightly.
- In the meantime, add sugar to the Digestive cookie crumbs (or Graham Cracker crumbs if using). Mix well.
- Pour the cooled down melted butter into the crumbs and sugar mixture and mix until the crumbs are well moistened. Set the biscuit mixture aside until the cheesecake filling is ready.
Preparing the cheesecake filling
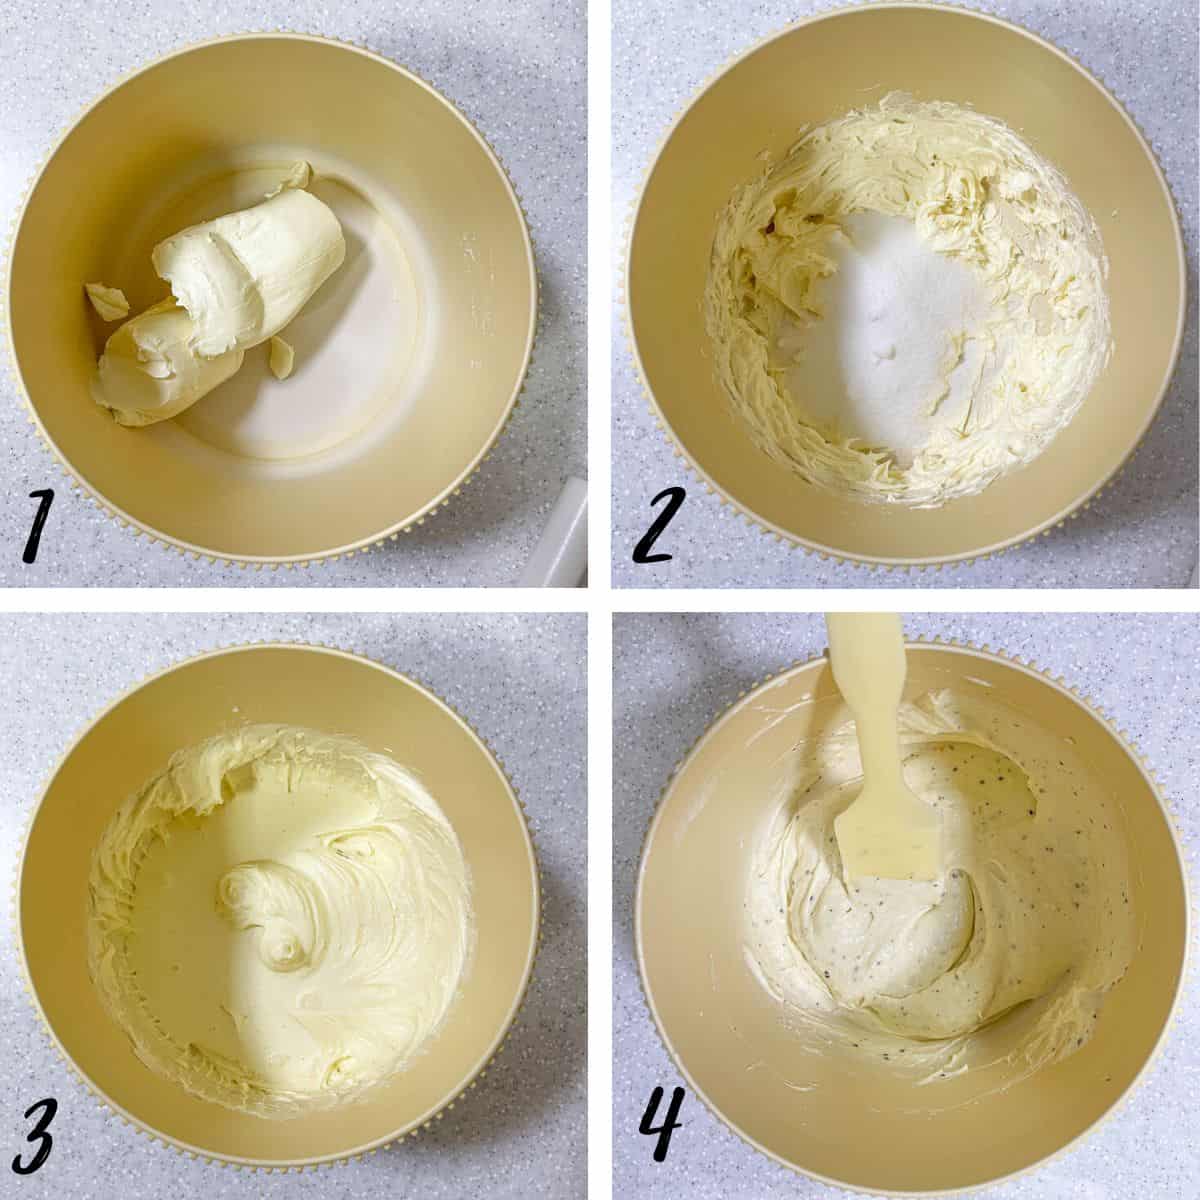
- To make the filling, measure the cream cheese into a medium bowl. Beat until it turns creamy. Scrape the sides of the bowl halfway through to make sure there is no cheese left unbeaten.
- Next, add the sugar. Beat again until the sugar is well incorporated.
- Measure in the heavy cream and cream it with the sugar and cream cheese mixture until well combined. Scrape the sides and bottom of the bowl halfway through.
- Finally, add the kiwi coulis (see the recipe card for the exact measurement as you will need to reserve some for the topping) and vanilla extract (if using). Mix until it is well combined in the batter. Fill the batter into a large piping bag for easy filling into the cheesecake cups.
Assembling the cheesecake cups
- Since each cup has 2 layers of cookie crumbs and 2 layers of cream cheese and kiwi mixture filling, you will need to make sure you divide the crumbs and the batter equally into all cups. An easy way to do this is to measure the prepared crumbs and divide it into 12 (2 layers @ 6 cups). This is easier to do it you have a digital kitchen scale. The same with the batter.
- The other option is to divide the prepared crumbs and cheesecake batter into two portions each. Distribute the first portion of the cookie crumbs into all the cups equally first before filling them with the first portion of the cheesecake batter. Similar to the cookie crumbs, distribute the cheesecake filling equally into all cups.
- For the second layer of the kiwi cheesecake cups, do the same thing as above. That way, you get to adjust the crumbs and filling in each cup to ensure the layers are equal in all cups.
Here is how I did it:
The first layers
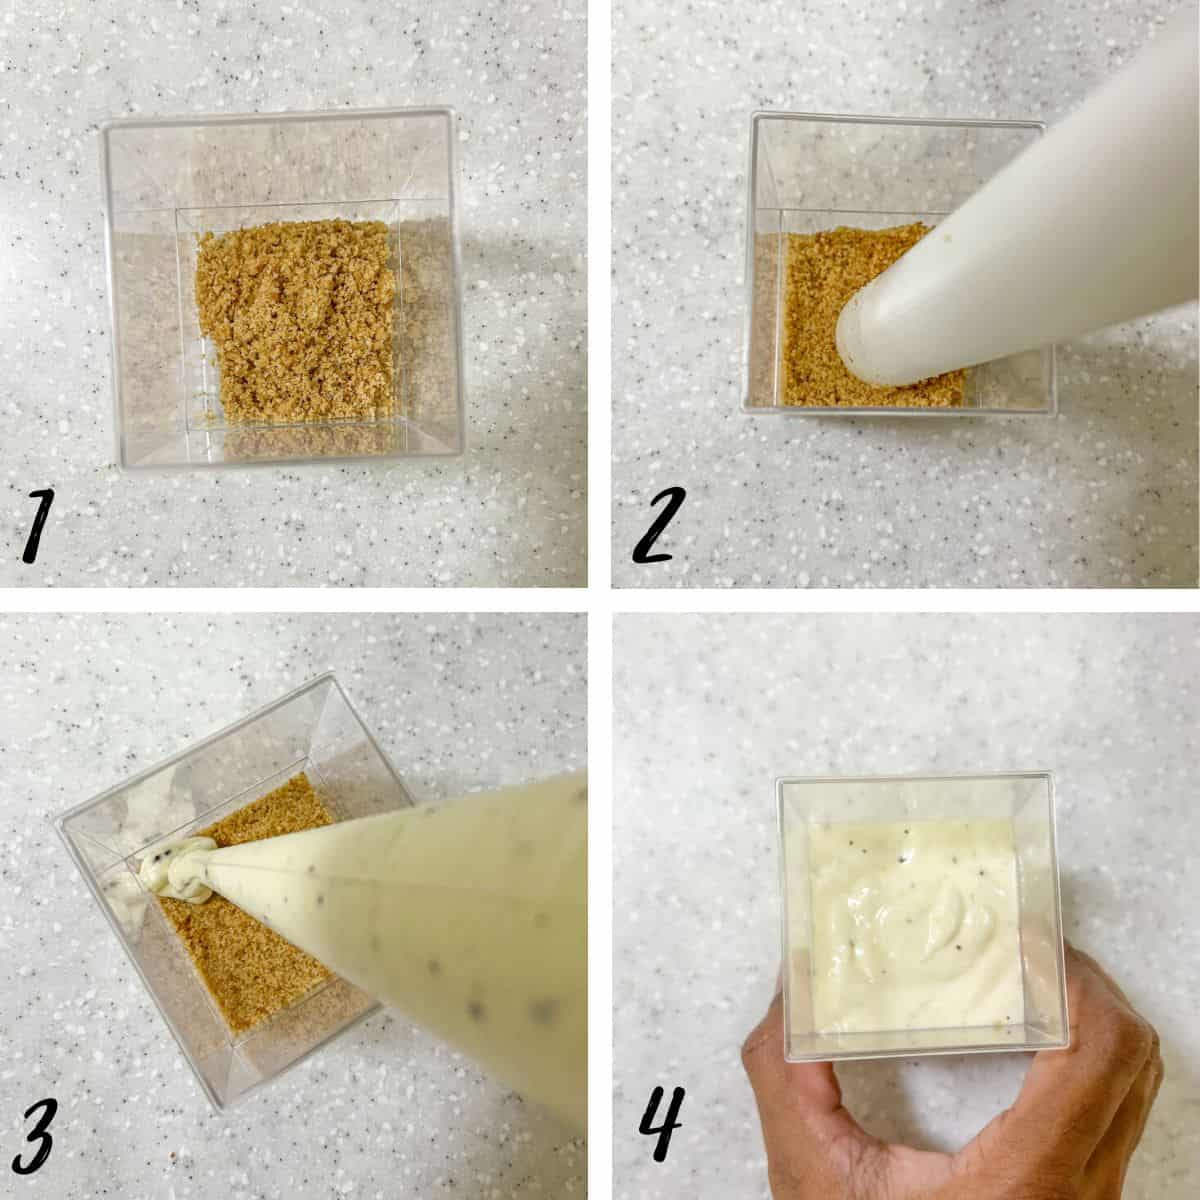
- To assemble the cheesecake cups, start with the cookie or biscuit base. Divide the first half of the cookie crumbs into all the 6 cups equally.
- Use the sides of a rolling pin or the back of a small spoon to press the crumbs down to form the biscuit base for the kiwi cheesecake cups. You need not press too hard, suffice if you level the crumbs.
- Next, divide the first portion of the kiwi cheesecake batter. Pipe the batter onto the cookie crust layer.
- To ensure the filling is level, tap the cups onto your kitchen countertop gently.
The second layers
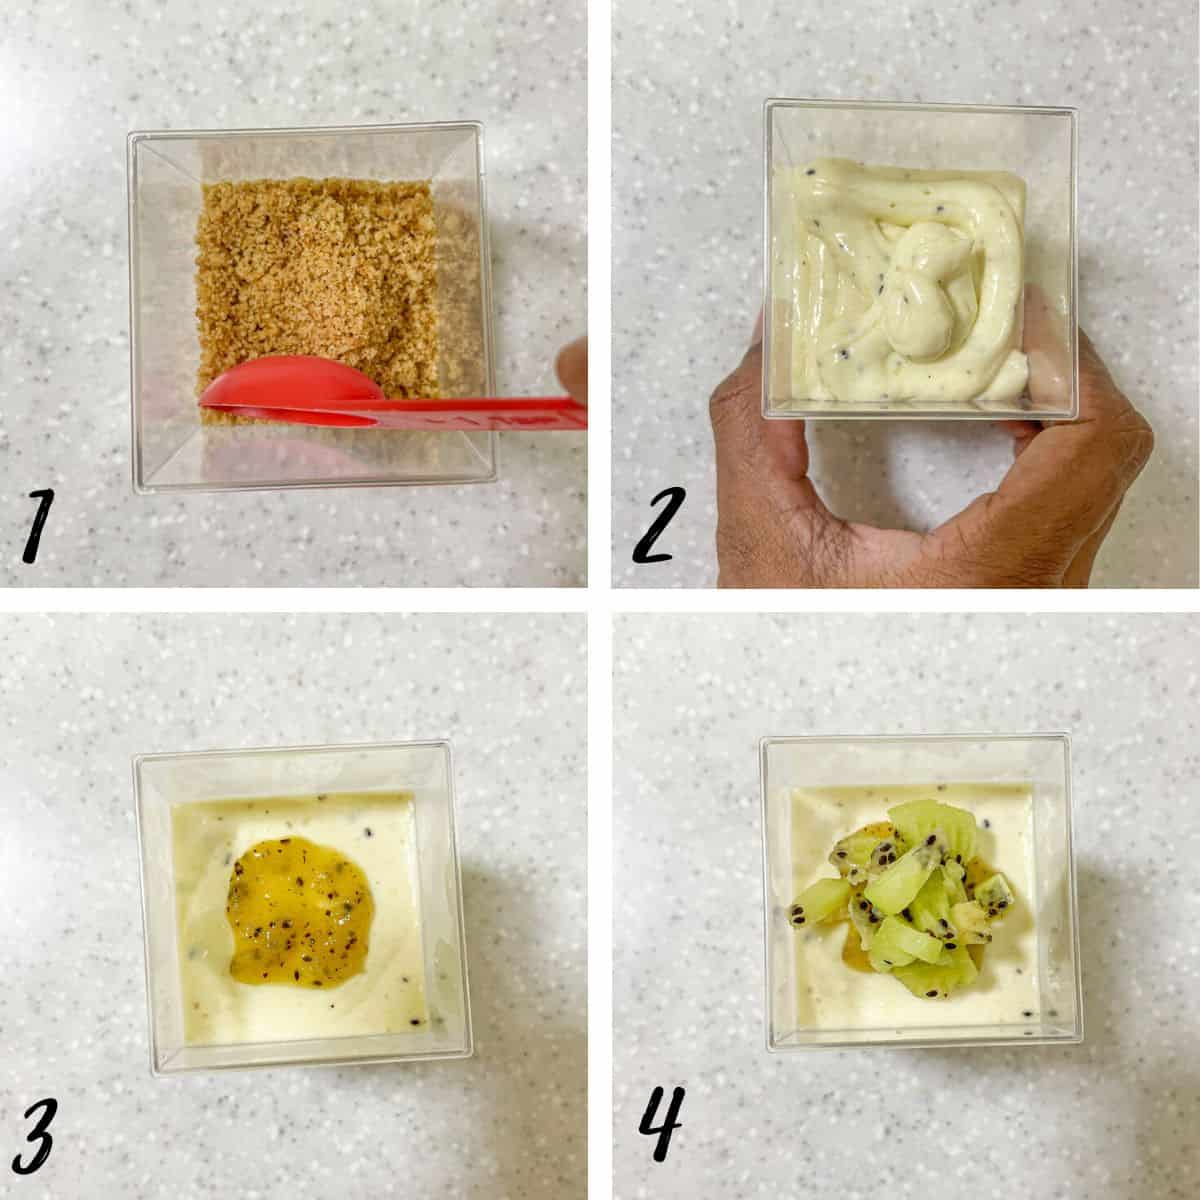
- Repeat the assembly process with the second layer of the cookie crumb mixture in each cup. Level them lightly with the back of a small spoon, but take note to not apply pressure into doing this to avoid the crumbs from sinking into the cheesecake mixture underneath.
- And finally, divide the remaining batter equally among the cups. Tap lightly to level the filing.
- For the topping, spoon between 1 to 1.5 teaspoons of the kiwi coulis onto the top on each kiwi cheesecake cup.
- Peel the kiwi fruit and chop it into small pieces. Top the sauce with chopped kiwi fruit.
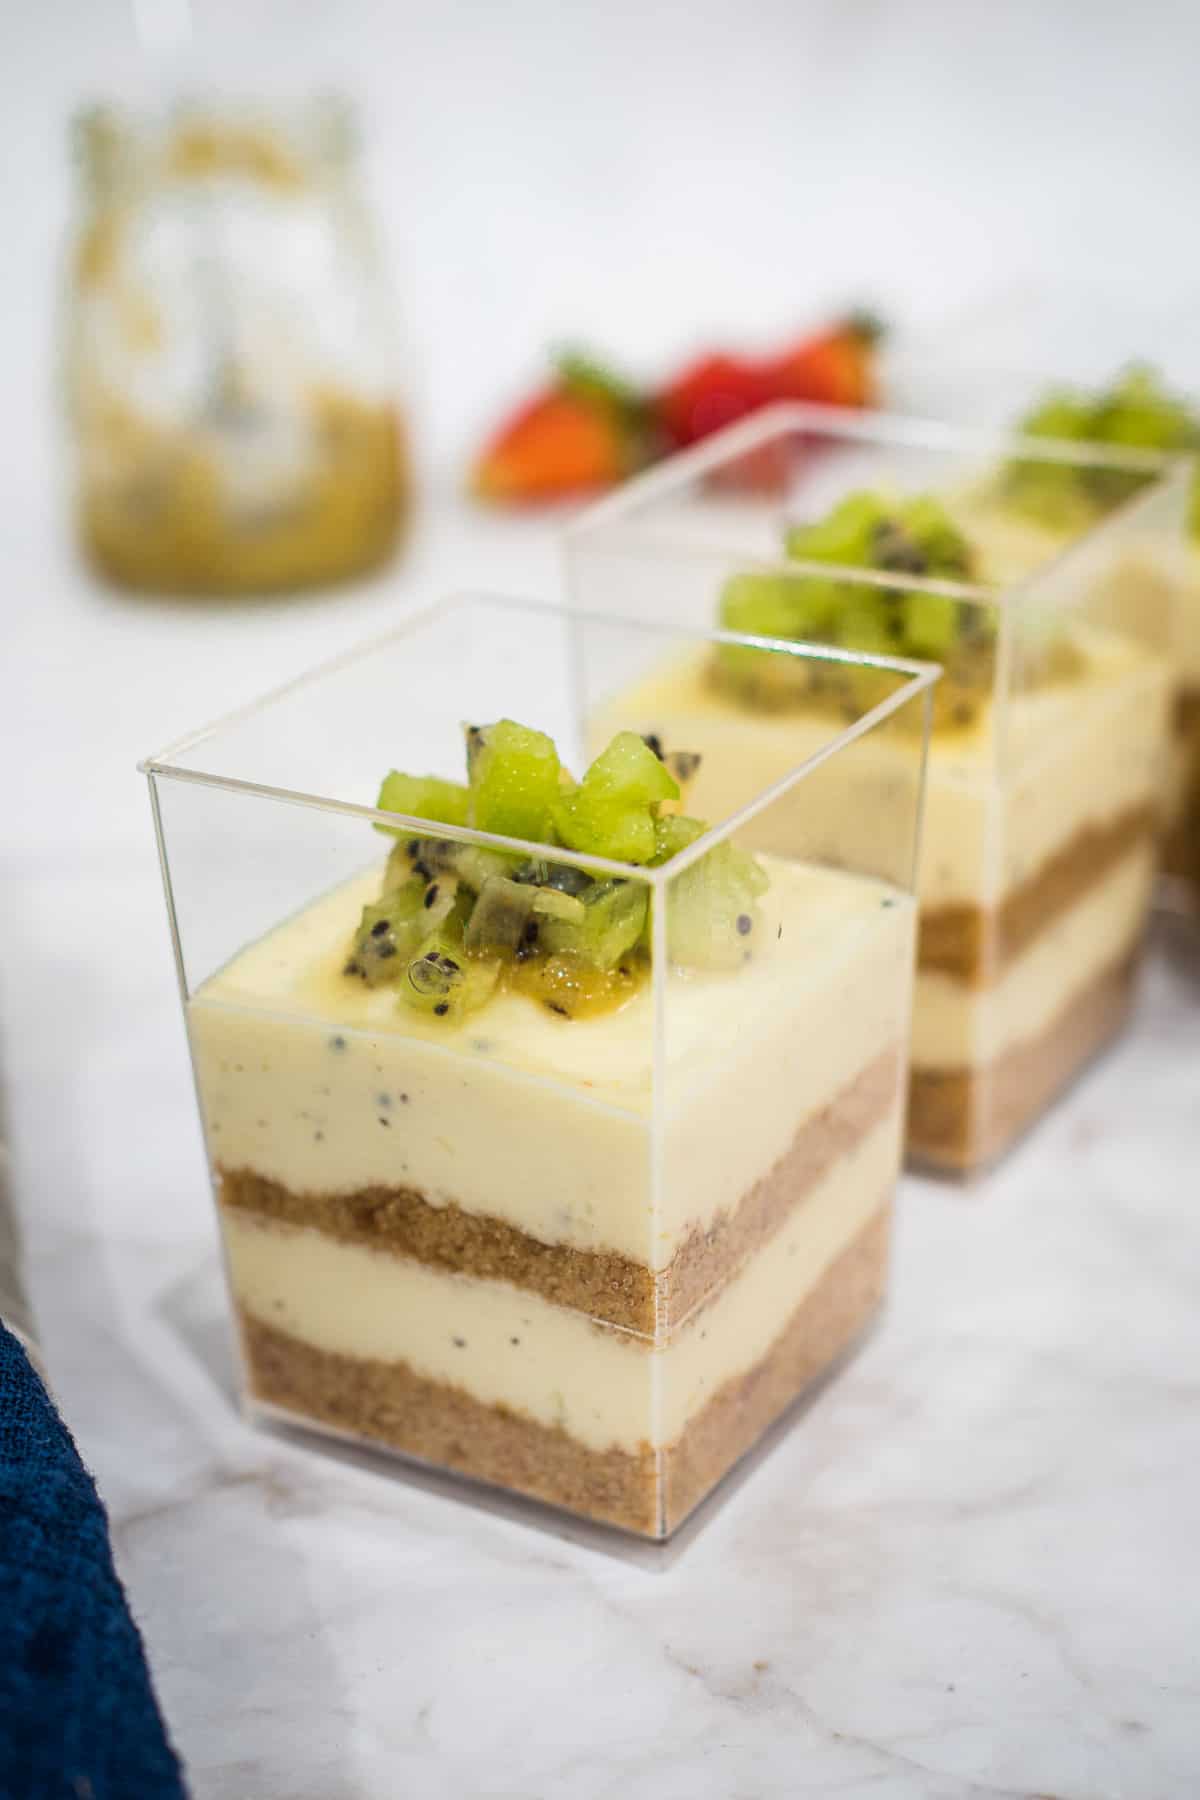
- Chill the cups for about 2 hours before serving. These kiwi cheesecake cups should be kept chilled and are best served chilled.
🍽️Serving & storage
- These kiwi cheesecake cups can last for a good 4 to 5 days provided they are kept refrigerated. To avoid the top of the cheesecakes from becoming dry, these cups are best stored in an airtight container.
💡Expert Tips
- The kiwi sauce (kiwi coulis) can be made in advance. Keep it refrigerated.
- Choose kiwis that are ripe, sweet, and packed with flavor. Ripe kiwis will provide the best taste and texture for your cheesecake cups.
- To achieve a smooth and creamy filling, make sure to whip the cream cheese until it is soft and smooth. This will help create a silky texture in your cheesecake cups.
- Using a piping bag to fill the cream cheese filling into the cups will ease the process as compared to using a spoon.
- After assembling the cheesecake cups, refrigerate them for a few hours allow the filling to set properly. This will ensure a lovely creamy and stable texture.
💭FAQs
This cheesecake can become dry if left uncovered in the refrigerator. It will be ok for the first day or two, but you will be able to see the fruit topping becoming dry as well as the surface of the cheesecake.
To prevent this, keep the cheesecake cups covered in an airtight container or wrap them in plastic wrap.
Yes you can. However, make sure it is kept covered. For best results, the fresh chopped kiwi topping is best added on the day it is served.
❤️More Recipes You Will Love
Do you like this recipe? Please leave a 5-star ⭐⭐⭐⭐⭐rating in the recipe card below and consider a review further down this page. I would love to hear from you. Thank you!
📖Recipe
Kiwi Cheesecake Cups (No Bake)
For best results, use the metrics measurements. US customary measurements have not been tested and are only meant for guide.
Ingredients
Cookie Layers
- 150 g Digestive biscuits
- 15 g butter
- 1 tablespoon granulated sugar
Cheesecake Layers
- 225 g cream cheese
- 75 g granulated sugar
- 50 g heavy cream
- 1 teaspoon vanilla extract (optional)
Kiwi Sauce (Coulis)
- 2 kiwi fruits
- 20 g white sugar
- ⅛ teaspoon lemon juice
Garnish /Decoration
- 1 kiwi fruit
Instructions
Preparing the cookie crust
- Break the cookies and place them in a food processor.
- Blend until they turn into fine crumbs. Transfer the crushed biscuits into a small bowl.
- Melt the butter over low heat. Let it cool slightly.
- In the meantime, add sugar to the cookie crumbs and mix well.
- Pour the cooled melted butter into the crumbs and mix until the crumbs are well moistened. Set the mixture aside until the cheesecake filling is ready.
Preparing the cheesecake filling
- To make the filling, measure the cream cheese into a medium bowl. Beat until it turns creamy. Scrape the sides of the bowl halfway through.
- Next, add the sugar. Beat until the sugar is well incorporated.
- Measure in the heavy cream and cream it with the cheese mixture until well combined. Scrape the sides and bottom of the bowl halfway through.
- Finally, add 75g of the kiwi coulis. Also add the vanilla extract (if using). Mix until it is well combined in the batter. Fill the filling into a large piping bag.
Assembling the cheesecake cups
- Start with the cookie or biscuit base. Divide the first half of the cookie crumbs into all the 6 cups equally.
- Use the sides of a rolling pin or the back of a small spoon to press the crumbs down lightly to form the biscuit base.
- Next, divide the first portion of the kiwi cheesecake batter equally into all the cups. Pipe the batter onto the cookie crust layer.
- To ensure the filling is level, tap the cups onto your kitchen countertop gently.
- Repeat the assembly process with the second layer of the cookie crumb mixture in each cup. Level them lightly with the back of a small spoon, but take note to not apply pressure into doing this to avoid the crumbs from sinking into the cheesecake mixture underneath.
- Divide the remaining cream cheese filling equally among the cups. Tap lightly to level the filing.
Topping
- For the topping, spoon between 1 to 1.5 teaspoons of the remaining kiwi coulis onto the top on each kiwi cheesecake cup. Top it with chopped fresh kiwi fruit.
- Chill the cheesecake cups for about 2 hours before serving. The cheesecake should be kept chilled and are best served chilled.
Notes
- The kiwi sauce (kiwi coulis) can be made in advance. Keep it refrigerated.
- Choose kiwis that are ripe, sweet, and packed with flavor. Ripe kiwis will provide the best taste and texture for your cheesecake cups.
- To achieve a smooth and creamy filling, make sure to whip the cream cheese until it is soft and smooth. This will help create a silky texture in your cheesecake cups.
- After assembling the cheesecake cups, refrigerate them for a few hours allow the filling to set properly. This will ensure a lovely creamy and stable texture.


Leave a Reply