

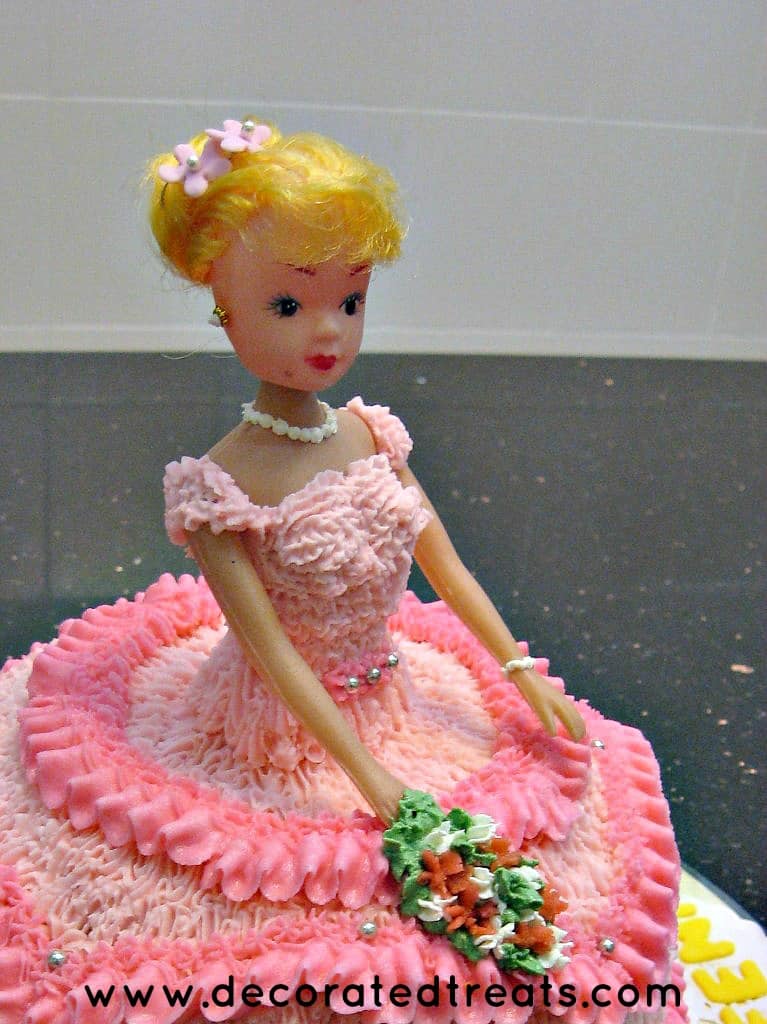
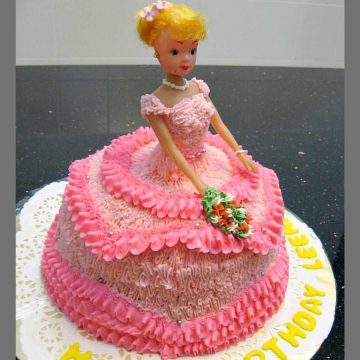
Looking for a doll cake design? Here is an easy one you can make. Baked in a bowl shaped mold and decorated with buttercream, this doll cake is not just pretty, it is very quick and easy to make too.

The cake was a very last minute request. I baked and decorated it in one night, after returning home from my day job! The doll cake i.e the skirt is entirely in buttercream and the only fondant on the cake is the birthday name (cut out in yellow fondant) and the 2 small pink fondant flowers on the dolls head.
If you like this cake, you should also check out this Belle cake which is a doll cake decorated to look like Belle from the Beauty and the Beast.
🧾Supplies Required
- Cake baked in a bowl-shaped cake pan. There are specialty cake pans which you can purchase from your local cake decorating supplies shops. Or if you want a more cost-effective option, you can always use an ovenproof bowl from your kitchen to bake the cake in. I used a stainless steel bowl I had at home. And used this technique to calculate the cake batter required (using my butter pound cake recipe) for this doll cake)
- Doll pick
- this is basically a doll with just half of the body from head to waist and a pick after that to secure the doll to cake. These doll picks come in many different hairstyles and hair colors, and also different face cut. You can also substitute this pick with a real doll - a Barbie doll perhaps. It works as a great gift idea too as the birthday girl will get to own a Barbie doll afterwards!)
- Buttercream in dark and light pink, white, green and red
- Fondant - A tiny amount of pink and yellow fondant
- Disposable piping bags
- Cake decorating brush
- Wilton alphabet cutters for the birthday message on the doll cake and flower cutters for the flowers in the hair.
- Star tip #16, petal tip #104, round tip #1 or #2 - the star tip and the petal tip are for the doll's dress and flower bouquet. The small round tip is for the necklace, earrings, and bracelet
- Silver sugar dragees for the deco on the dress

👩🍳How to Make
Step 1: Prepare the Cake Board
Once the cake was baked and completely cooled, I placed it on a cake board decorated with a doily. There is a layer of cellophane paper between the cake and the doily. I placed it there so that the paper doily does not soak up any grease from the cake. It also helps to protect the doily from buttercream that may drop onto the cake board while the cake is being decorated.
To completely protect the doily, when cutting the cellophane paper to cover your cake board, make sure to cut it slightly larger than the cake board itself. The excess will be trimmed off once the cake has been completed. Hence it is perfectly OK to cut the cellophane paper to a larger size.
Step 2: Prepare the Cake
Next, I crumb coated the whole cake with a thin layer of light pink buttercream. And inserted the doll pick right in the center of the cake.
Then, I marked the lines for the frills; the top layer, the middle layer and the bottom layers of the dress. Once that was done, using a small star tip ( I used Wilton tip #16) I piped curved zigzags that ran horizontally across the doll's skirt with light pink buttercream icing. I did this in sections, according to the lines that were marked for the frills earlier i.e. the top section and middle section. The bottom section was left entirely for frills.
Step 3: Pipe the Bodice and Sleeves
I also covered the doll's bodice and dress sleeves with tiny zigzags in the same light pink buttercream.
Step 4: Pipe the Dress
As for the frills on the dress, I used a medium petals nozzle (Wilton tip #104) and dark pink buttercream. The frills were piped along the lines I marked earlier. Hold the tip slanting slightly upwards when piping the frills. This is to avoid scraping off the earlier light pink zigzag icing underneath.
For the bottom part of the doll's dress where there are 3 layers of frills, start from the bottom in horizontally curved lines. Upon completion of the final layer, using star tip #16, I piped tiny stars along the border of the frills in dark pink icing.
Step 5: Add the Buttercream Hand Bouquet, Necklace and Ring
Next, I piped the hand bouquet with some green and red and white icing, using a small star nozzle. This is followed by a tiny string of necklace and a ring for the doll with some white icing.
For added decoration on the doll cake, I attached silver dragees at the doll's waist. I also added the dragees on the frills of the dress as well as 2 pink flowers cut out from fondant for the hair.
Step 6: Add the Name
Next, I trimmed off the excess cellophane paper on the cake board with a small knife, as close to the cake as possible.
I finished off the cake decoration with the letters for the birthday name. These were cut out from yellow fondant using Wilton Alphabet cutters and attached to the cake board with a light brush of water.
❤️More Cake Designs You Will Love


Do you like this tutorial? Please leave a 5-star ⭐⭐⭐⭐⭐rating in the recipe card below and consider a review further down this page. I would love to hear from you. Thank you!
📖Recipe
Doll Cake Design
Equipment
- Doll pick (or a full body doll)
- Wilton alphabet cutters
- Flower cutters for the flowers in the hair.
- Piping tips - Petal tip, star tip and round tip
- Disposable piping bags
- Cake decorating brush
For best results, use the metrics measurements. US customary measurements have not been tested and are only meant for guide.
Ingredients
Cake
- 420 g self-raising flour
- 420 g granulated sugar
- 420 g butter
- 7 eggs
- 105 ml milk
- 1 teaspoon baking powder
- ⅔ teaspoon salt
- 1 teaspoon vanilla extract
Frosting and Decoration
- Buttercream
- Fondant in pink and yellow
- Food coloring in pink white, red and green
- Silver sugar dragees for the deco on the dress
Instructions
Baking the cake
- Preheat oven to 170 °Celsius.
- Grease and flour a bowl shaped cake tin (doll cake mold). Set aside.
- In a medium sized bowl, beat butter and sugar till soft and creamy for about 2 minutes. Add eggs, one at a time, beating well after each addition.
- In a separate bowl, sift flour, baking powder, and salt. Fold in the sifted ingredients into the creamed mixture alternately with milk, starting and ending with flour.
- Finally, add in vanilla extract and combine well. Pour batter into the well greased and floured doll cake mold and bake for 55 to 60 minutes until the top of the cake springs back when lightly pressed. The cake is done when a skewer inserted in the center of the cake comes out without any wet batter.
- Remove the cake from oven and let it cool completely before icing and decorating.
Preparing the cake board for the buttercream doll cake
- Place a paper doily on a round cake board and glue it to the cake board. Make sure the cake board is at least 3 inches larger than the diameter of the doll cake. The paper doily should be the same diameter of the cake board and not larger.
- Next, place a layer of clear cellophane sheet on the doily. Cut the cellophane sheet to be slightly larger than the cake board. This sheet will help avoid the grease from the cake from seeping onto the paper doily (and leave unsightly grease marks) as well as protect the doily from any drops of buttercream as you are decorating the cake.
- The excess of the cellophane sheet will be trimmed off once the cake has been completed. Hence it is perfectly fine to cut the cellophane paper to a larger size.
Preparing the cake
- Crumb coat the whole cake with a thin layer of light pink buttercream. Insert the doll pick right in the center of the cake. If you are using a full sized doll or a Barbie doll, you will need to cut a hole in the center of the cake to be able to insert the doll into the cake. Cut the hole deep enough to insert the doll until slightly below its waist.
- Next, mark the lines for the frills; the top layer, the middle layer and the bottom layers of the dress. The top layer is just a straight line all around the skirt, just below the waist. The second and third layers are wavy lines all around the skirt. Once that is done, using a small star tip ( I used Wilton tip #16) pipe curved zigzags that run horizontally across the doll’s skirt with light pink buttercream icing. Do this in sections, following to the lines that were marked for the frills earlier i.e. the top section and middle section. The bottom section is to be filled entirely with frills, so leave that section blank for now.
The bodice and the sleeves of the doll cake topper
- Cover the doll’s bodice and dress sleeves with tiny zigzags in the same light pink buttercream.
The skirt of the doll's dress
- As for the frills on the dress, use a medium petal nozzle (Wilton tip #104) and a deeper shade of pink buttercream. Pipe the frills along the lines you marked earlier. Hold the tip slanting slightly upwards when piping the frills. This is to avoid scraping off the light pink zigzag icing underneath.
- For the bottom part of the dress, pipe 3 layers of frills, starting from the bottom in horizontally curved lines. Once the final layer is completed, using star tip #16, pipe tiny stars along the border of the frills in dark pink icing.
The buttercream hand bouquet, necklace and ring
- Next, pipe the hand bouquet with some green and red and white icing, using a small star nozzle. Start with the green base, and then randomly pipe and red and white stars on top. After that, using round tip #1 or #2, pipe a tiny string of necklace and a ring for the doll with some white icing.
- For added decoration, attach silver dragees on the doll's dress, at the waist, on the frills as well as on the 2 pink flowers cut out from fondant for the hair.
The birthday name
- Finish off the cake decoration with the birthday name. Roll some yellow fondant thin and cut the letters out with Wilton alphabet cutters.
- Before placing the birthday name on the cake board, trim off the excess cellophane paper on the cake board with a small knife, as close to the cake as possible so that it is not visible.
- Arrange the birthday name onto the cake board and to secure the letters on the cake board, brush the back of each letter with a damp brush before arranging them on the cake board.
Notes
- The amount of cake batter you need for your cake will depend on the size of your cake mold. The recipe measurement provided above is only as a guide based on the cake pan I used to make my doll cake.
Leave a Reply