

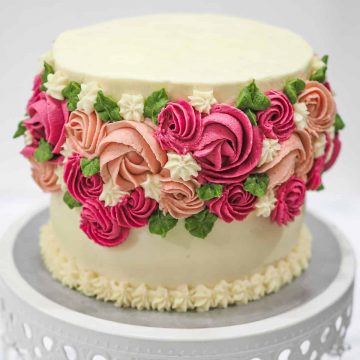
This rosette cake makes an elegant buttercream cake with pretty multicolor rosettes (roses) on its sides. This makes a perfect cake for birthdays. You can also make this rosettes cake into a 2 tier or 3 tier cake. It would be perfect for weddings too!
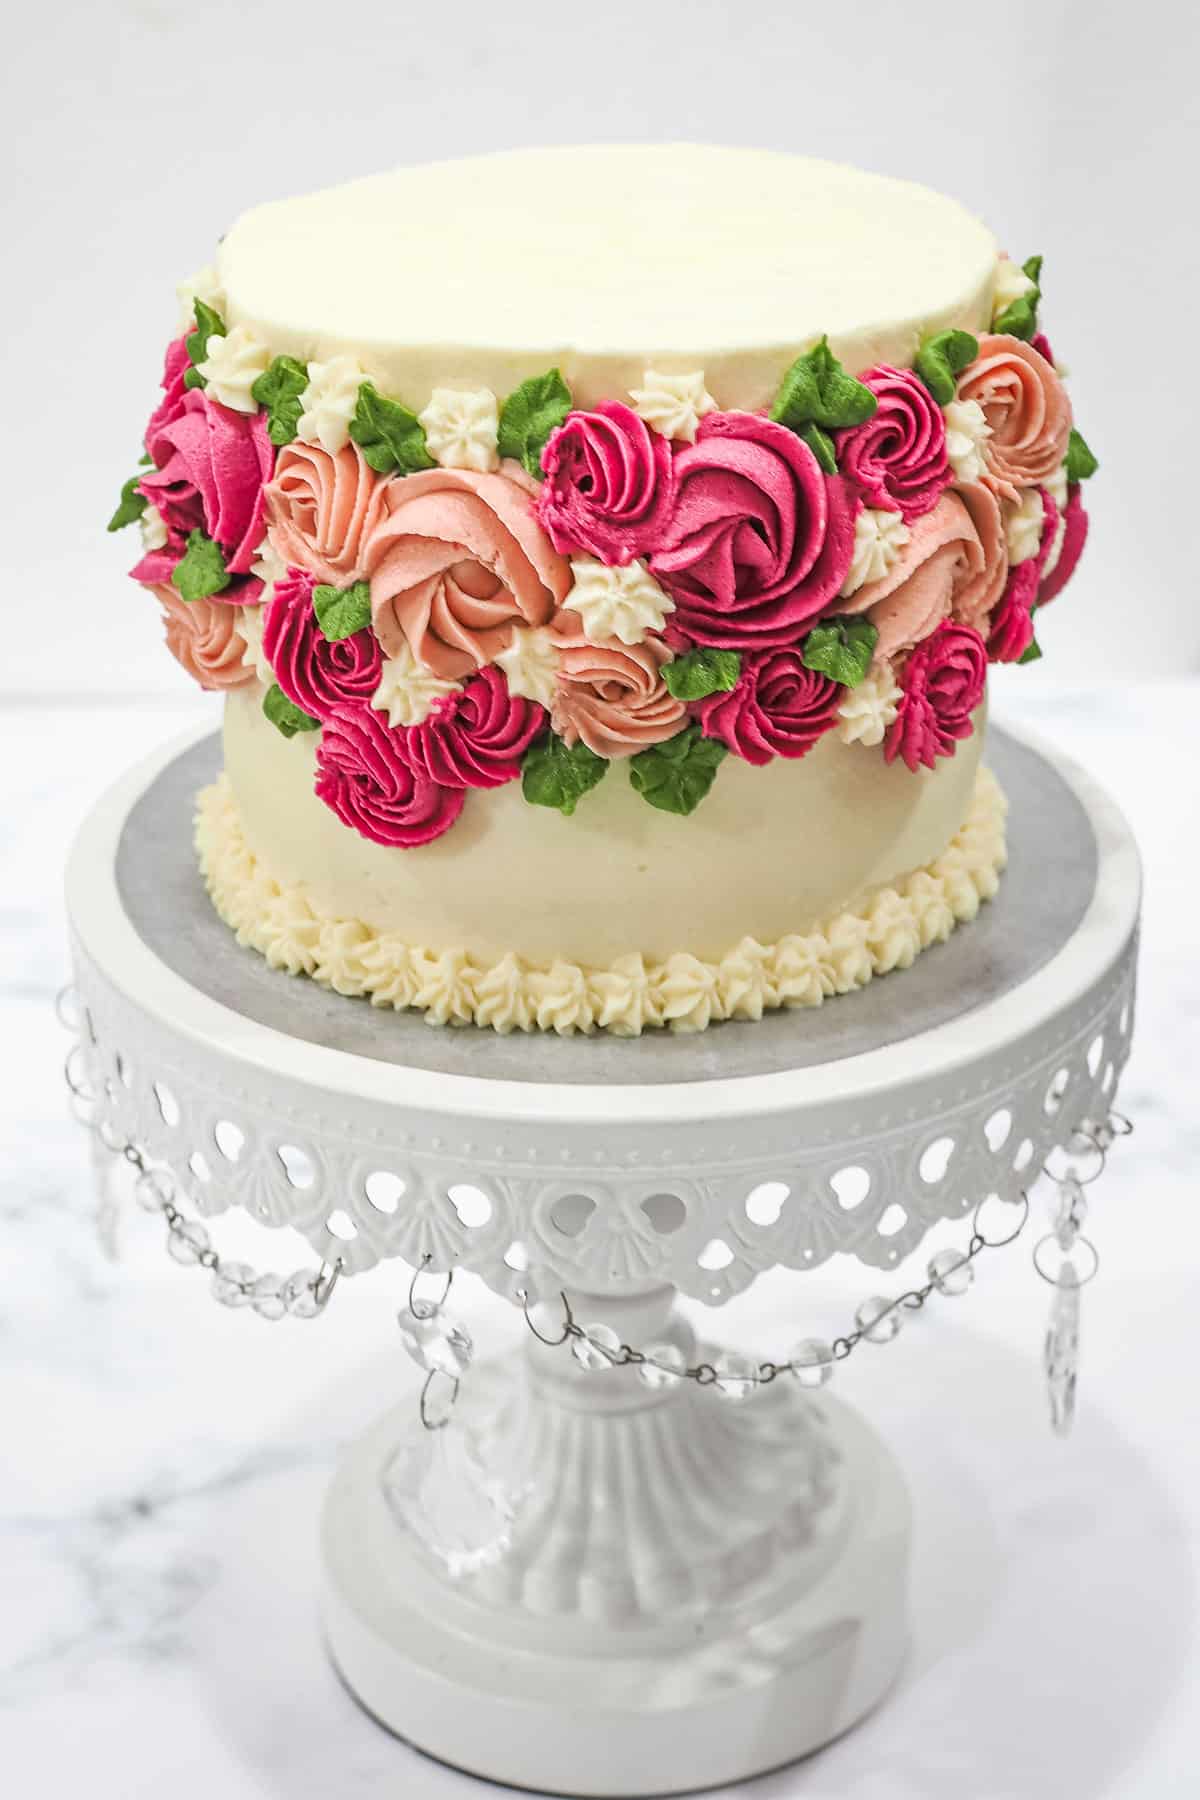
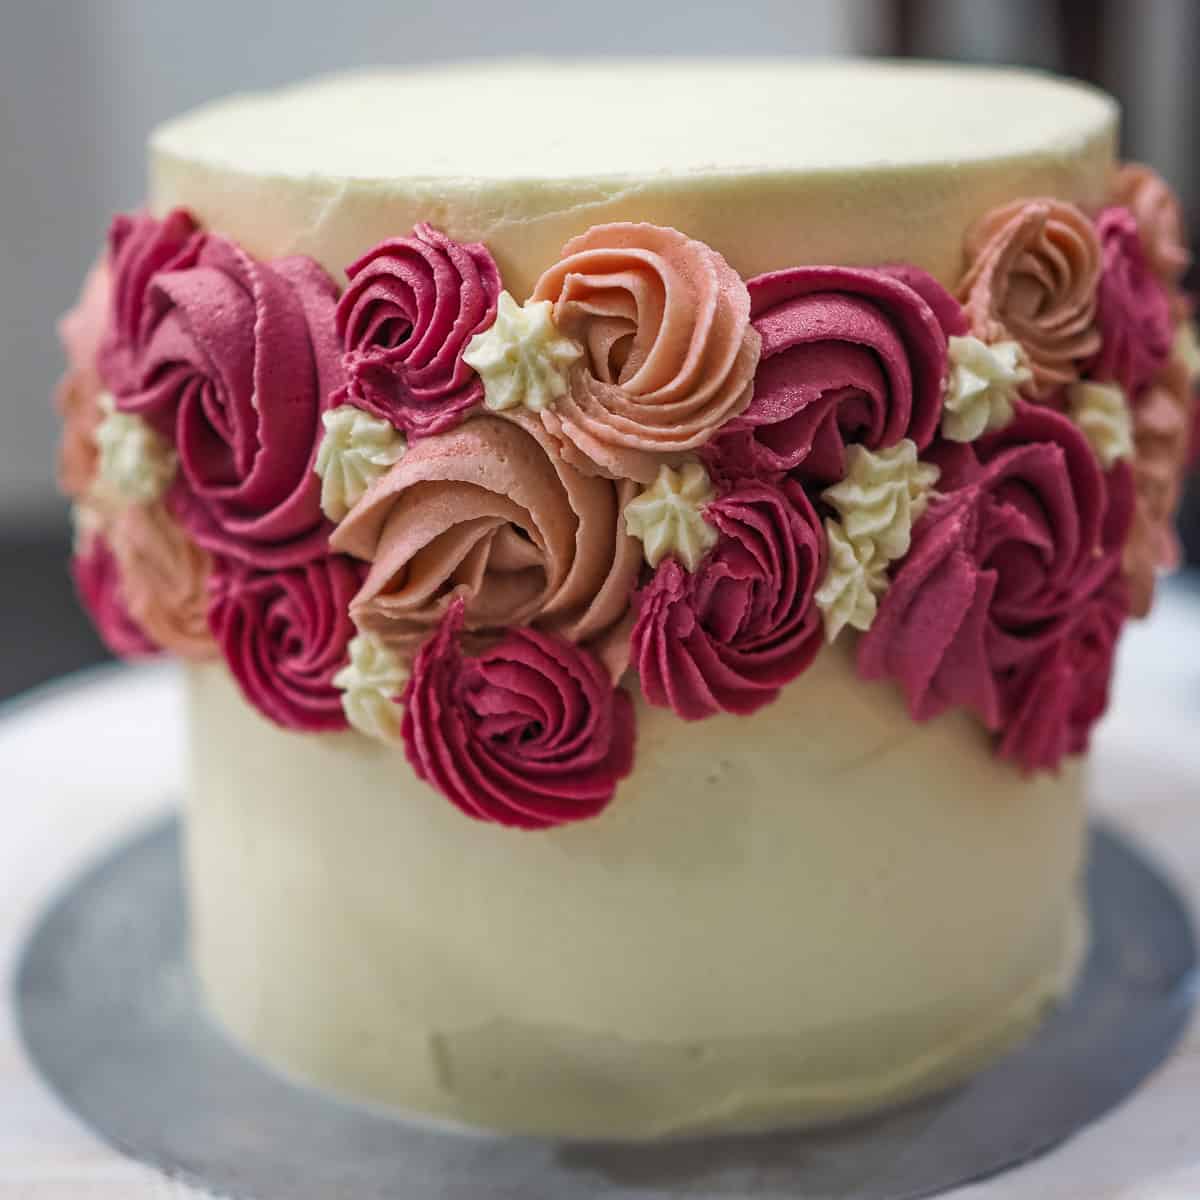
The rosette cake recipe on this page makes a small 5 inches round cake with a height of approximately 4 inches. The buttercream rosettes are in shades of burgundy and pink and are accented with white stars and green leaves for a really floral and elegant cake.
The rosettes or buttercream roses are all in random order, but I focused them on the upper half of the cake.
In piping the flowers, I alternated the colors. This is so that there is a balanced spread of them on the cake.
And to not move the focus away from the floral decoration on the sides of the cake, I made a simple border of white stars. I left the top of the cake blank with just a smooth coat of buttercream.
If you like this cake, you should also check out my sunflower cupcakes, daisy cupcakes, simple buttercream flowers cake, 70th birthday cake with flowers and flower pot cake.
🧾Supplies Required
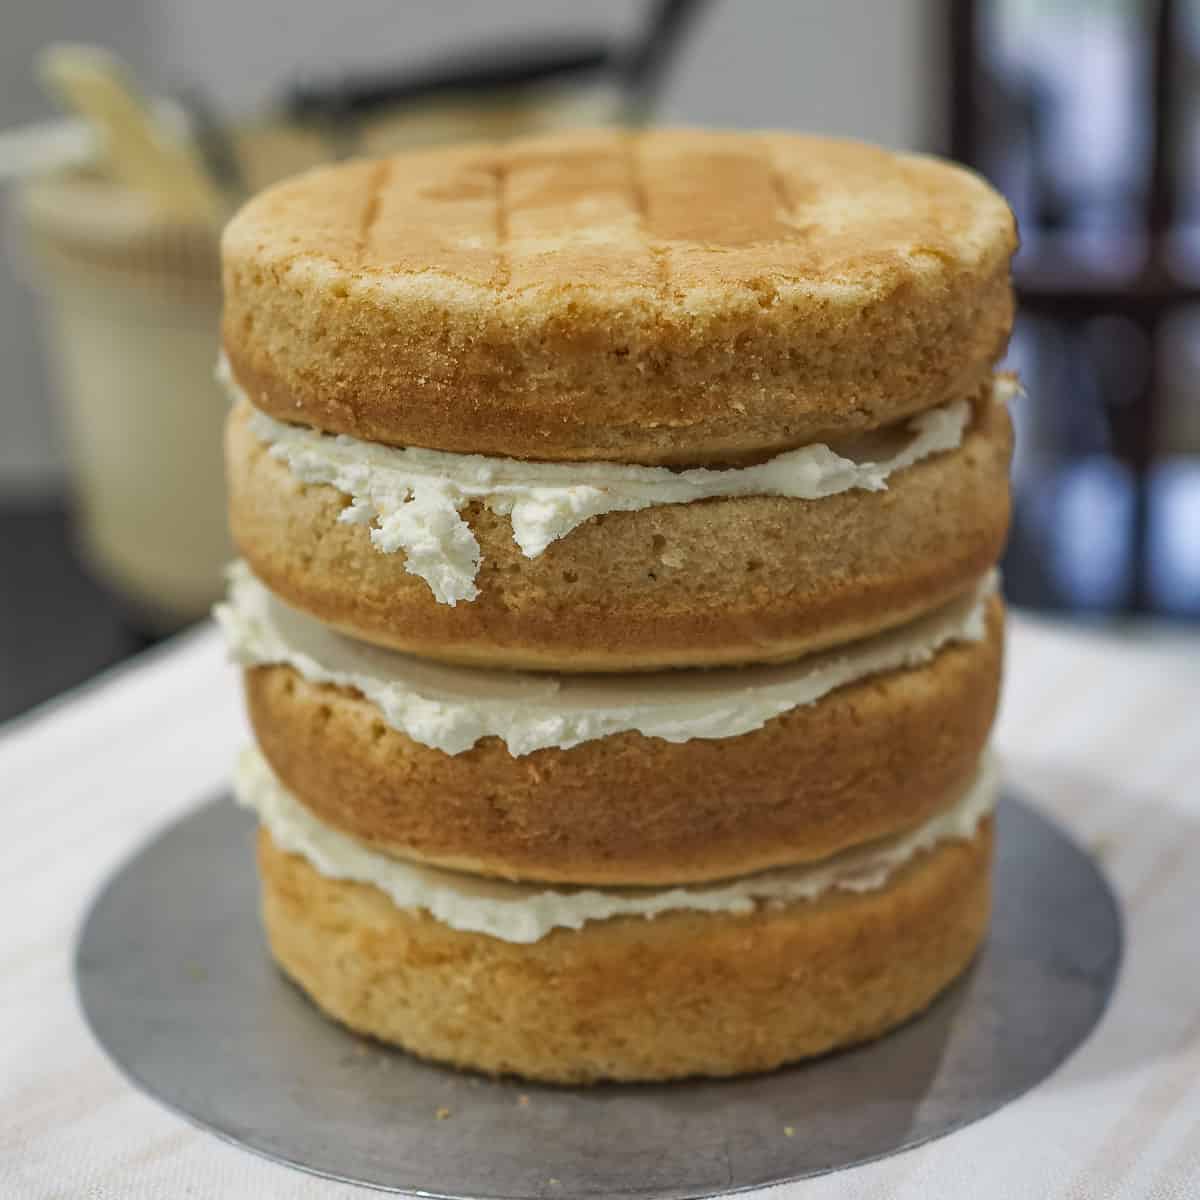
- Cake - this is a 5 inches round cake consisting of 4 layers of cakes. I baked the cake using my vanilla cake recipe.
- Buttercream - I made this frosting with 600g of icing sugar and 300g of butter. This amount was just nice for a cake of this size, with just a thin layer of buttercream in between the cake layers. If you wish to have thick buttercream filling for your cake, you would need to increase the amount of icing.
- Piping tips number 1M , 352 , 18 and 21. These are all star tips for the rosettes on the cake except for tip number 352 which is a leaf tip.
- Disposable piping bags
- Icing scraper
- Wilton food colors in Burgundy , Rose Petal and Juniper Green
- Palette knife
👩🍳How to Make
Step 1: Bake the Vanilla Cake
This is a small 5 inches round cake consisting of 4 layers of cakes. I baked the cakes one day in advance. I kept them in the refrigerator, wrapped in cling wrap until they were ready to be assembled.
The next day, I leveled the cakes and stacked them with vanilla buttercream between each layer.
Step 2: Cover the Cake with Buttercream
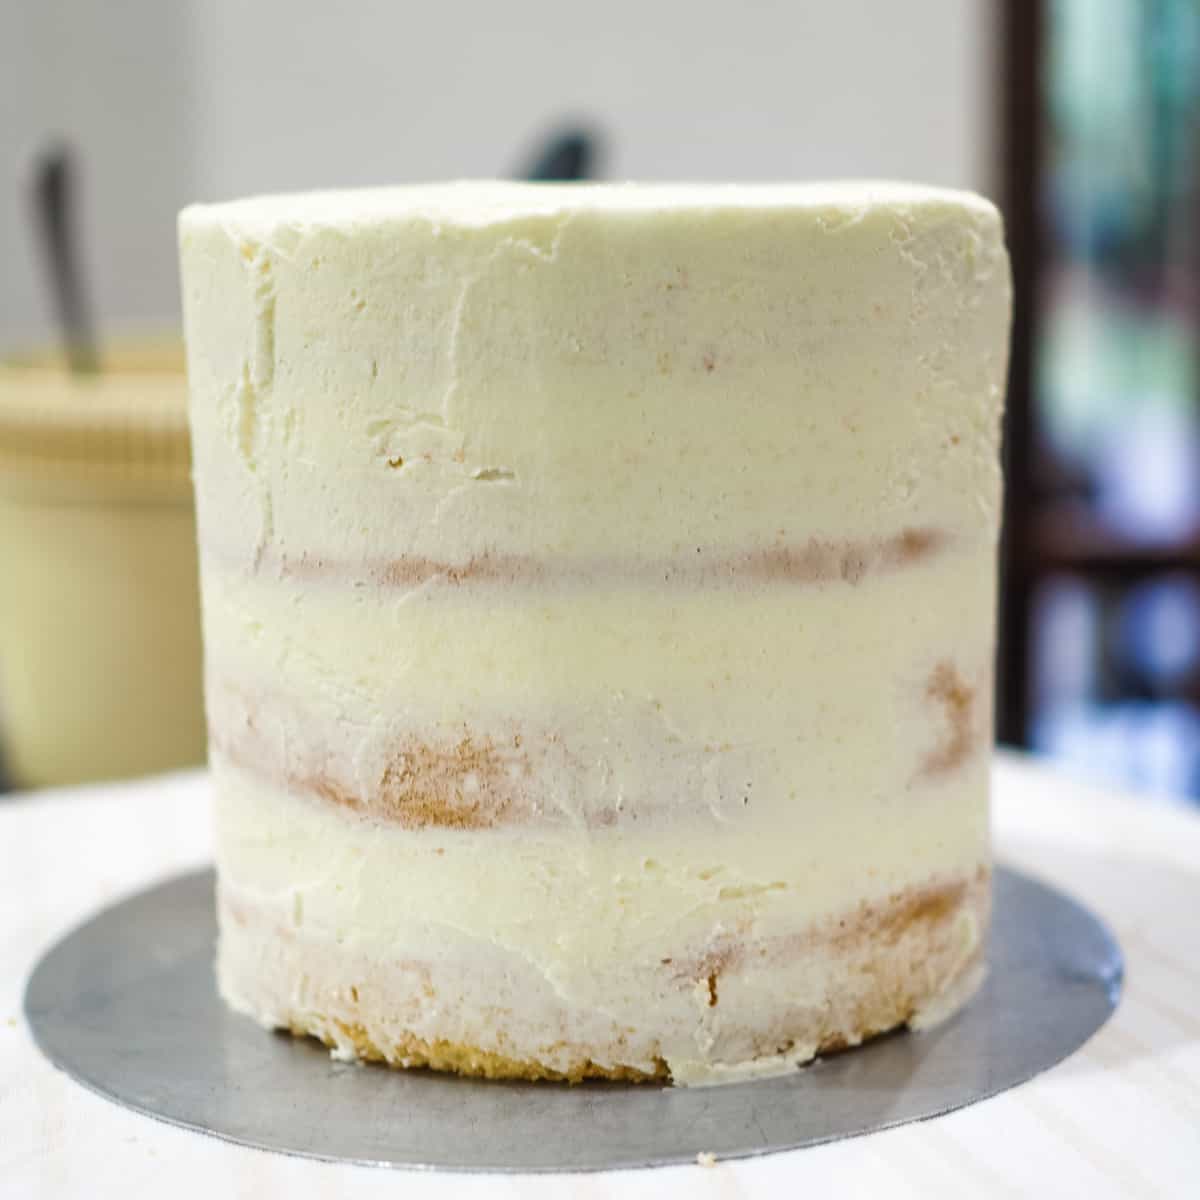
To lock the cake crumbs, I applied a thin coat of buttercream to the cake. I smoothed the top and sides and placed the cake in the refrigerator for about 15 minutes to allow the buttercream to set.
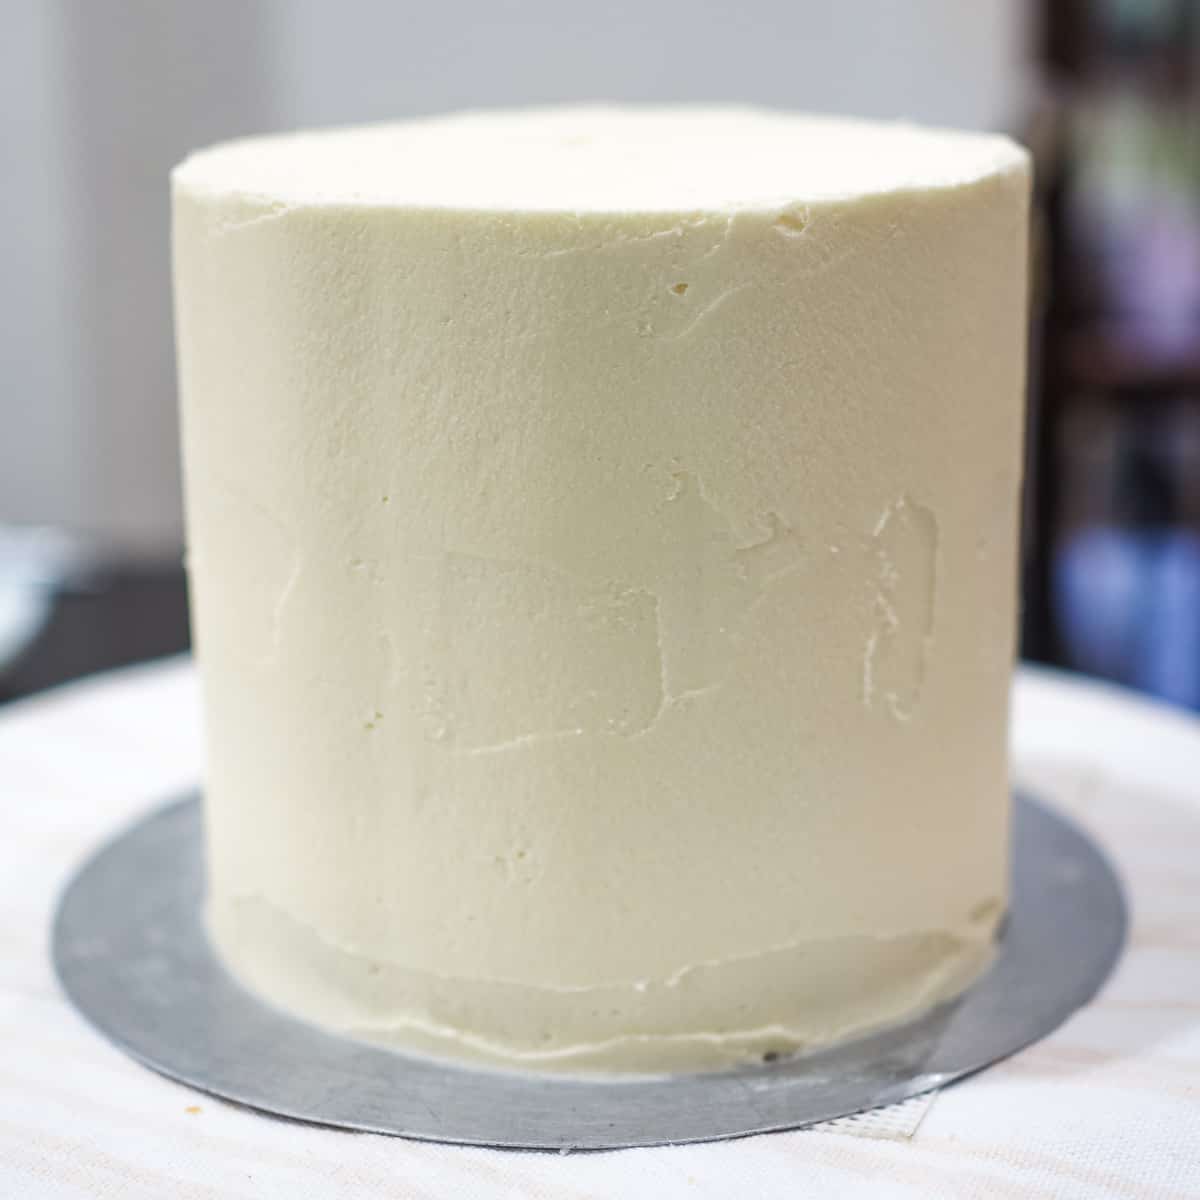
And then I took it out and applied the next layer of buttercream which is also the final layer. In covering the cake with buttercream, I made sure the top and sides were smooth and level.

Step 3: Mix Food Coloring into Buttercream for the Rosettes
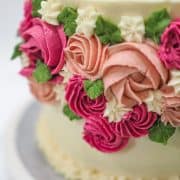
Next was the rosette flowers. For this design, I piped simple rosettes in 2 sizes and 2 different colors. To accent them, I made small white star flowers and green leaves in random intervals to complete the decoration.
I used three colors for the cake decoration, i.e. burgundy, rose petal pink and juniper green. And then I fitted all the 3 star piping tips and one leaf tip into 4 separate piping bags. And then I filled my burgundy buttercream and the rose petal buttercream into 2 separate piping bags. Here's the full picture:
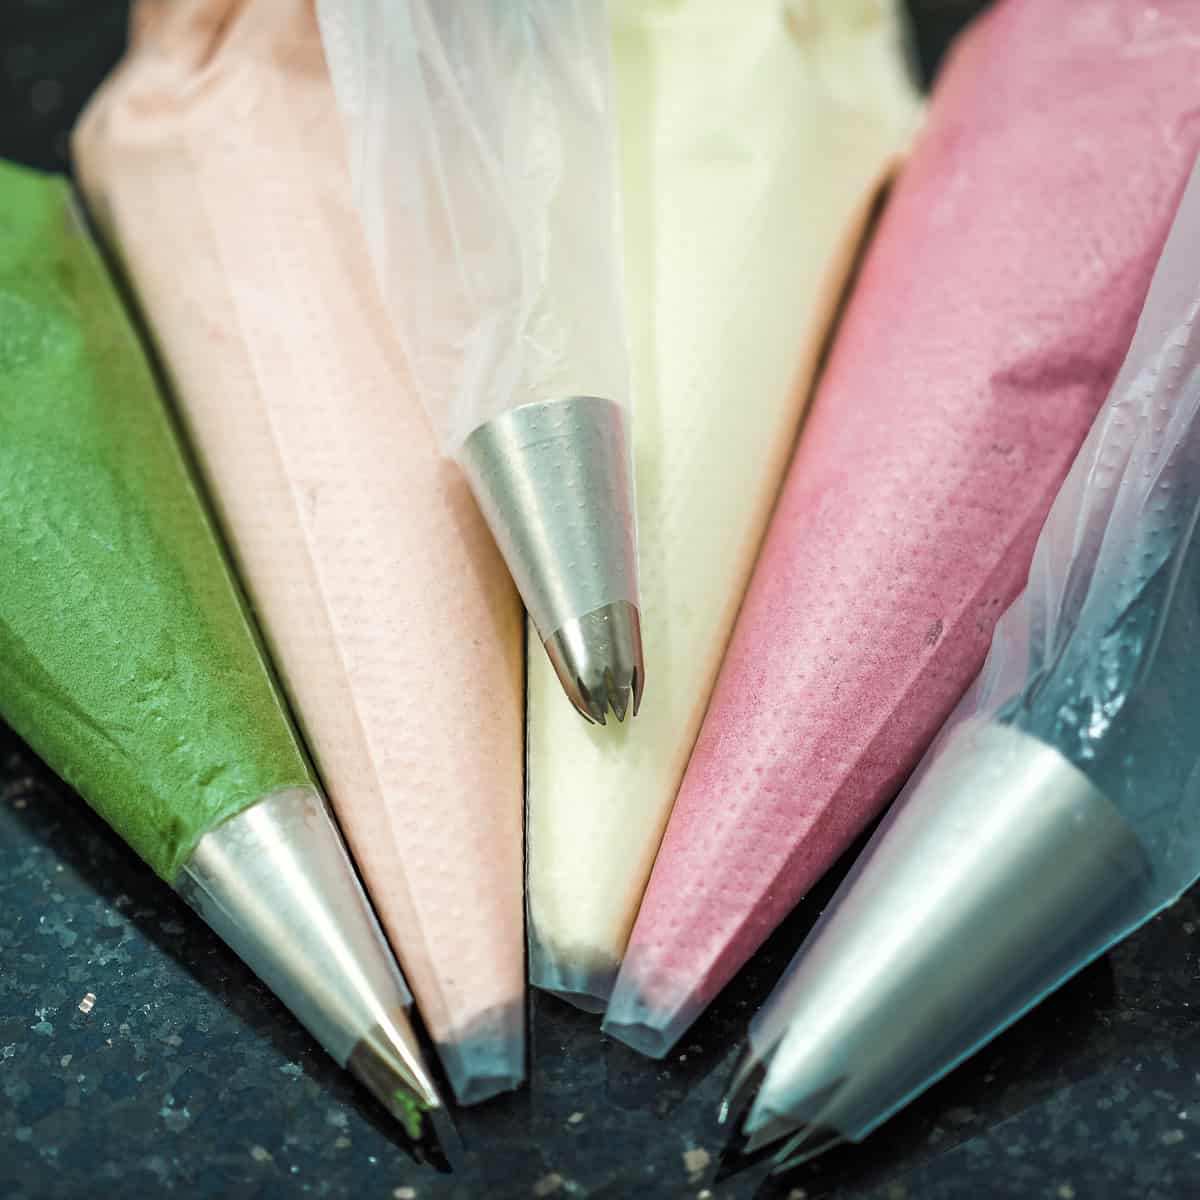
If you notice, only the green icings is filled up in a piping bag fitted with piping tips. The burgundy, white and pink do not have any piping tips fitted to their piping bags. This is because I had only one each of the 1M, 18 & 21 star tips and had to use the tips 1M & 21 for both the burgundy and rose petal pink buttercream.
The best way to manage this situation is to use the double piping bag method. For example, with the double piping bag method, I inserted the rose petal pink icing filled piping bag into an empty piping bag that is already fitted with tip 1M and piped the light pink flowers.
Once the light pink flowers were done, I removed the icing bag from the 1M fitted piping bag and replaced it with the piping bag containing the burgundy icing.
Step 4: Pipe the Rosettes on the Cake
To begin with, I inserted my pink icing filled piping bag into the piping bag fitted with tip 1M. I then made large rosettes all around the top half of the cake at almost consistent intervals.
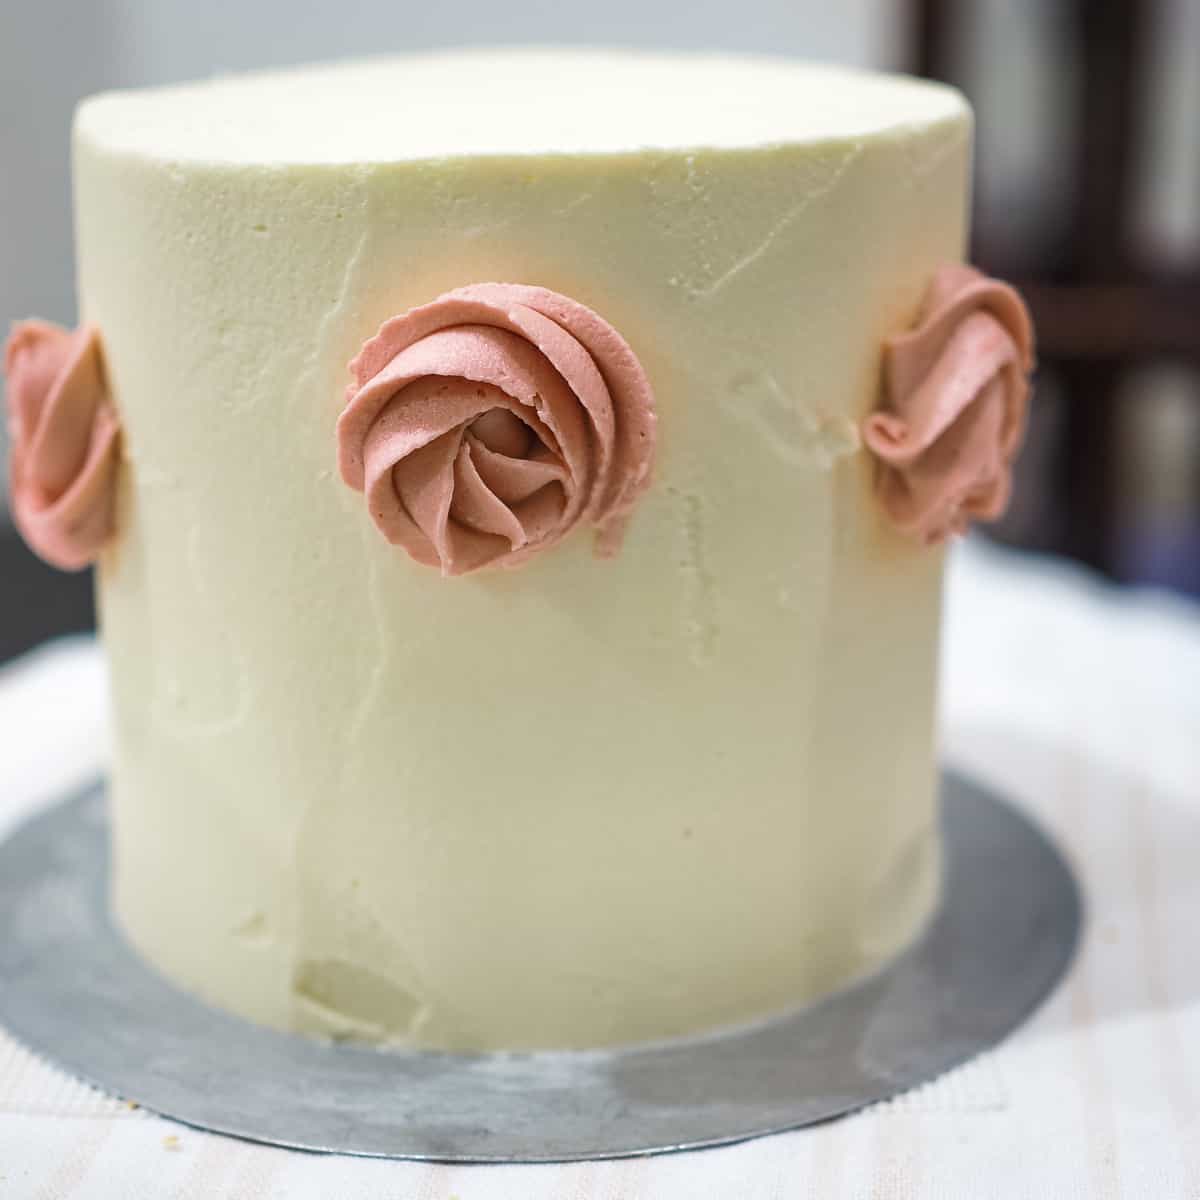
And then I removed the pink icing piping bag and replaced it with the burgundy icing bag. With the same, almost consistent intervals, I made large burgundy rosettes all around the top half of the cake as shown below.
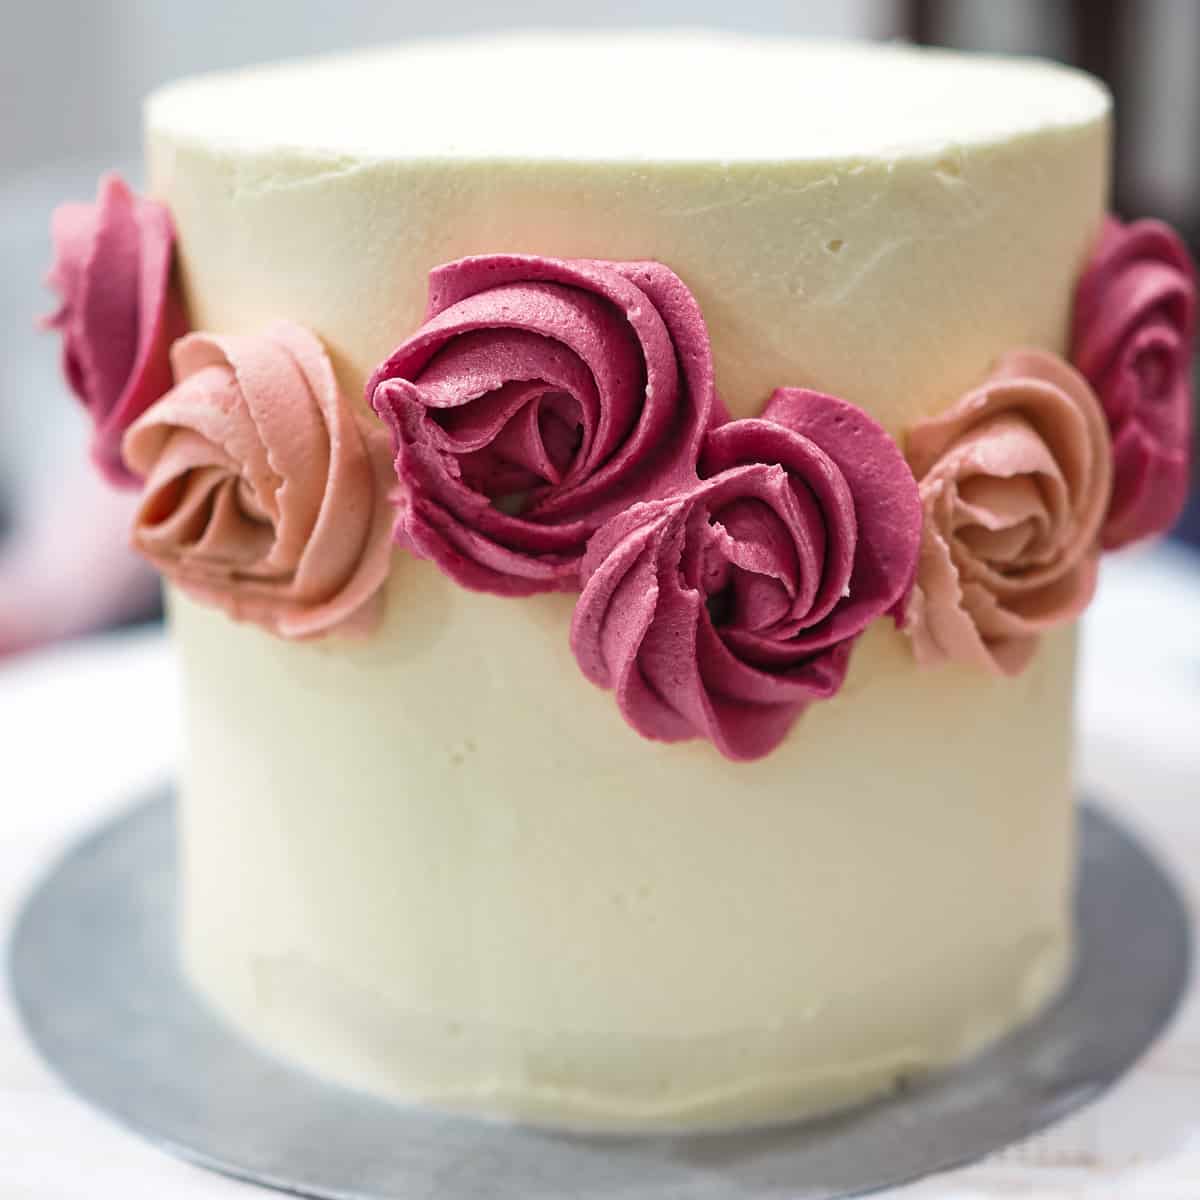
Step 5: Make the Small Rosettes
Once the large buttercream rosettes were done, I went on to add smaller buttercream rosettes on the sides of the cake. Similar to the large rosettes, I started with the pink icing.
I inserted the pink icing filled bag into the empty one fitted with tip number 21 and piped small rosettes in random order, close to the larger buttercream rosettes earlier.
And I repeated the same with the burgundy icing.
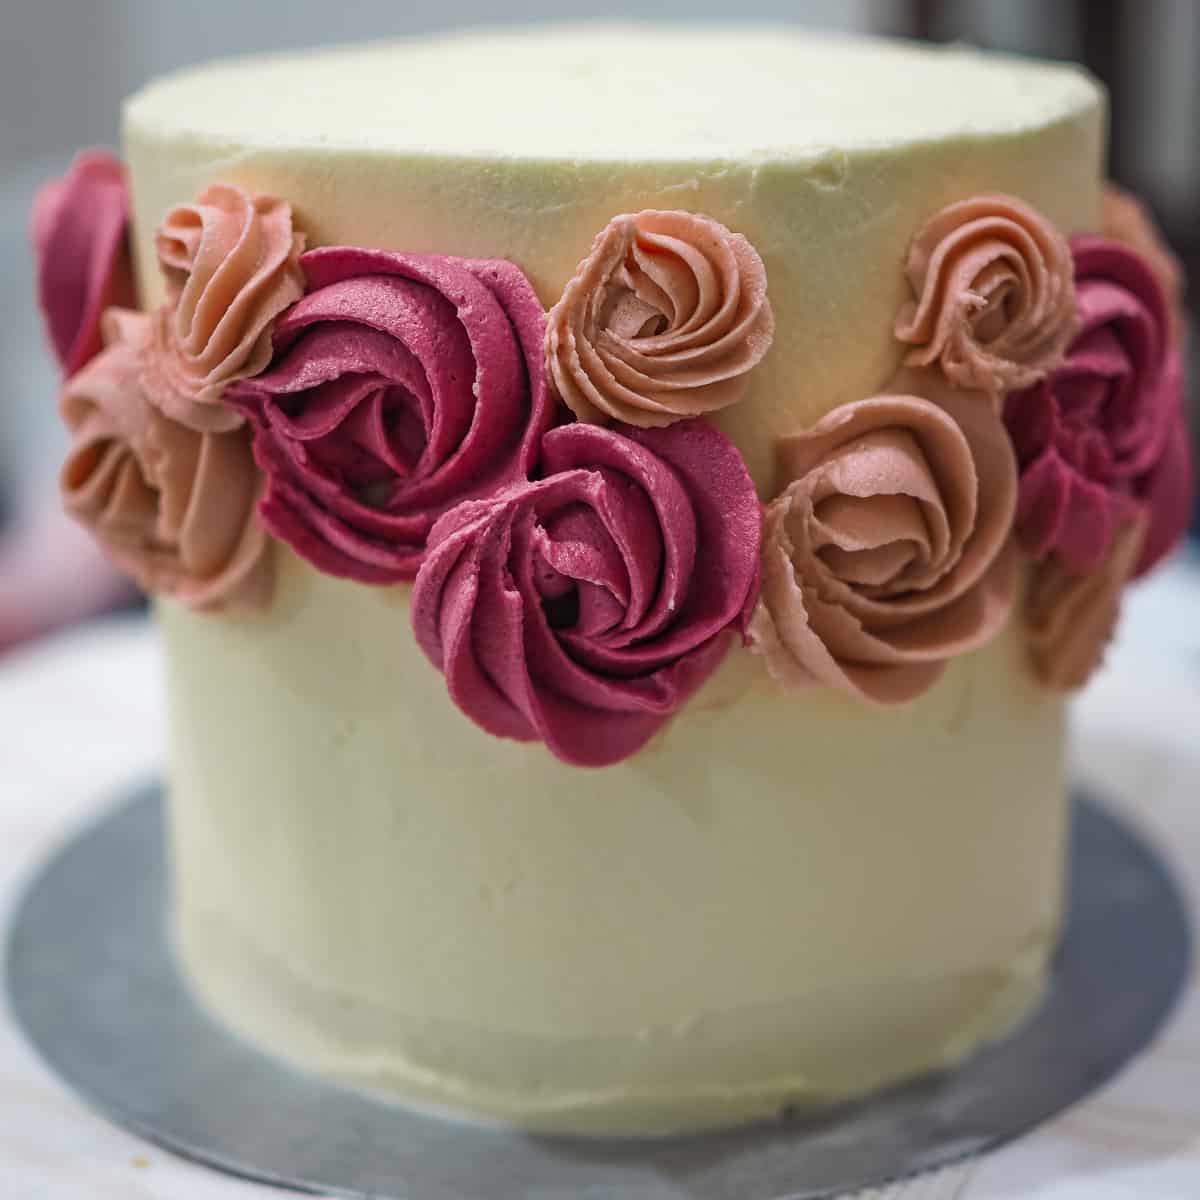
Step 6: Pipe the White Flowers
Next were the white star flowers on the rosette cake. I made them with star tip number 18, also in random order such they they filled up the gaps between the large and small buttercream rosettes.
Step 7: Add the Buttercream Leaves
After that, using leaf tip number 352 and buttercream tinted in Wilton Juniper Green color, I made tiny green leaves randomly near and in between the buttercream flowers. In piping the leaves, I made sure they were not overly concentrated in any one spot. Rather, they were well distributed all around the cake.
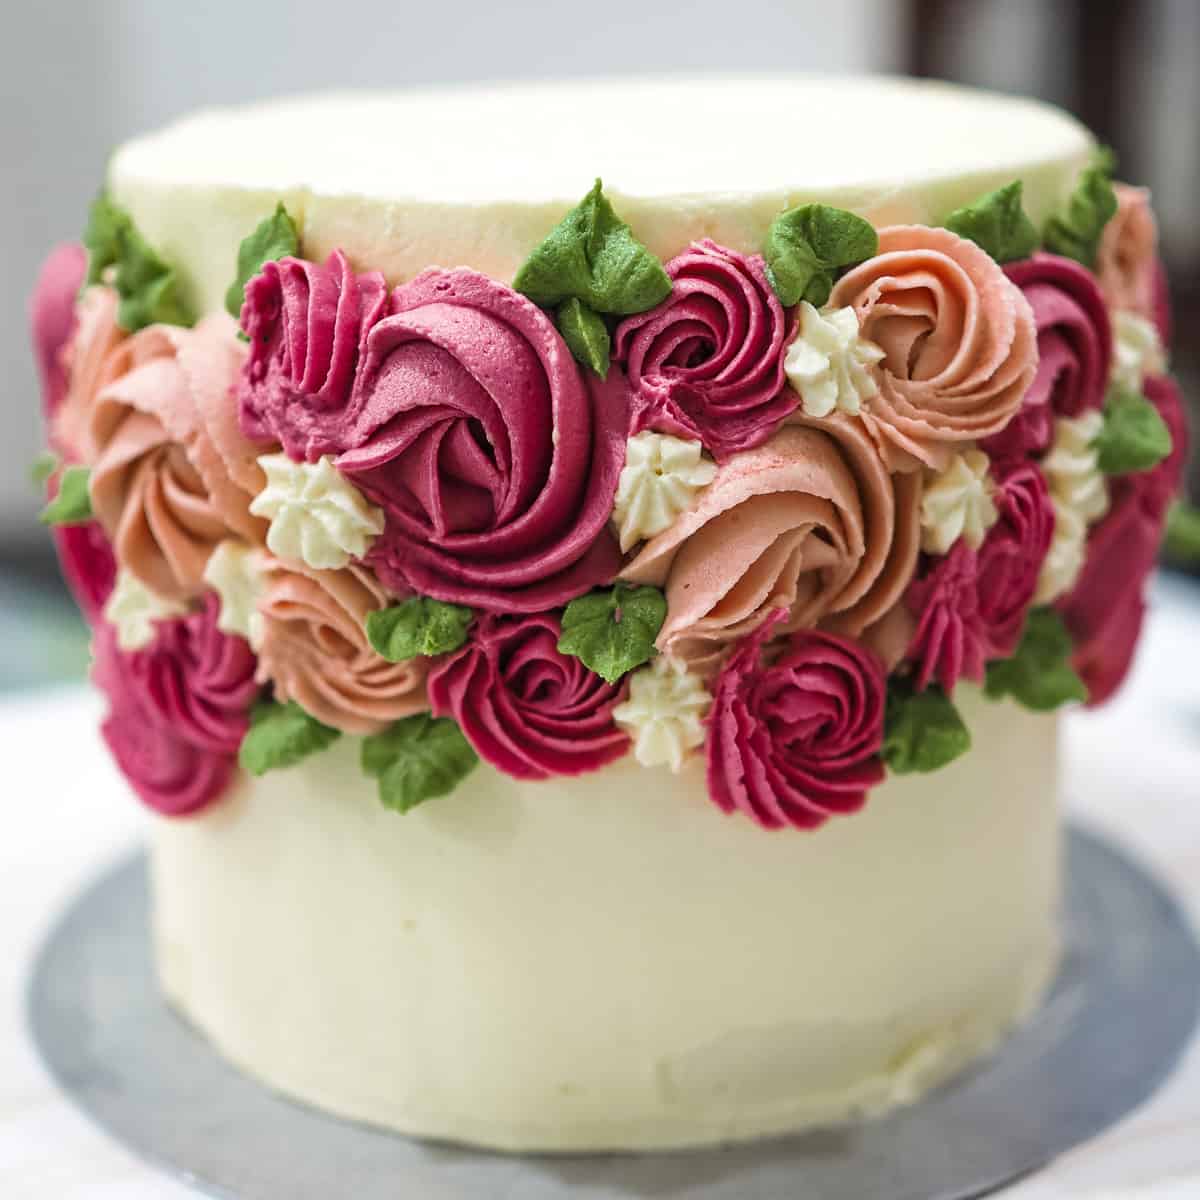
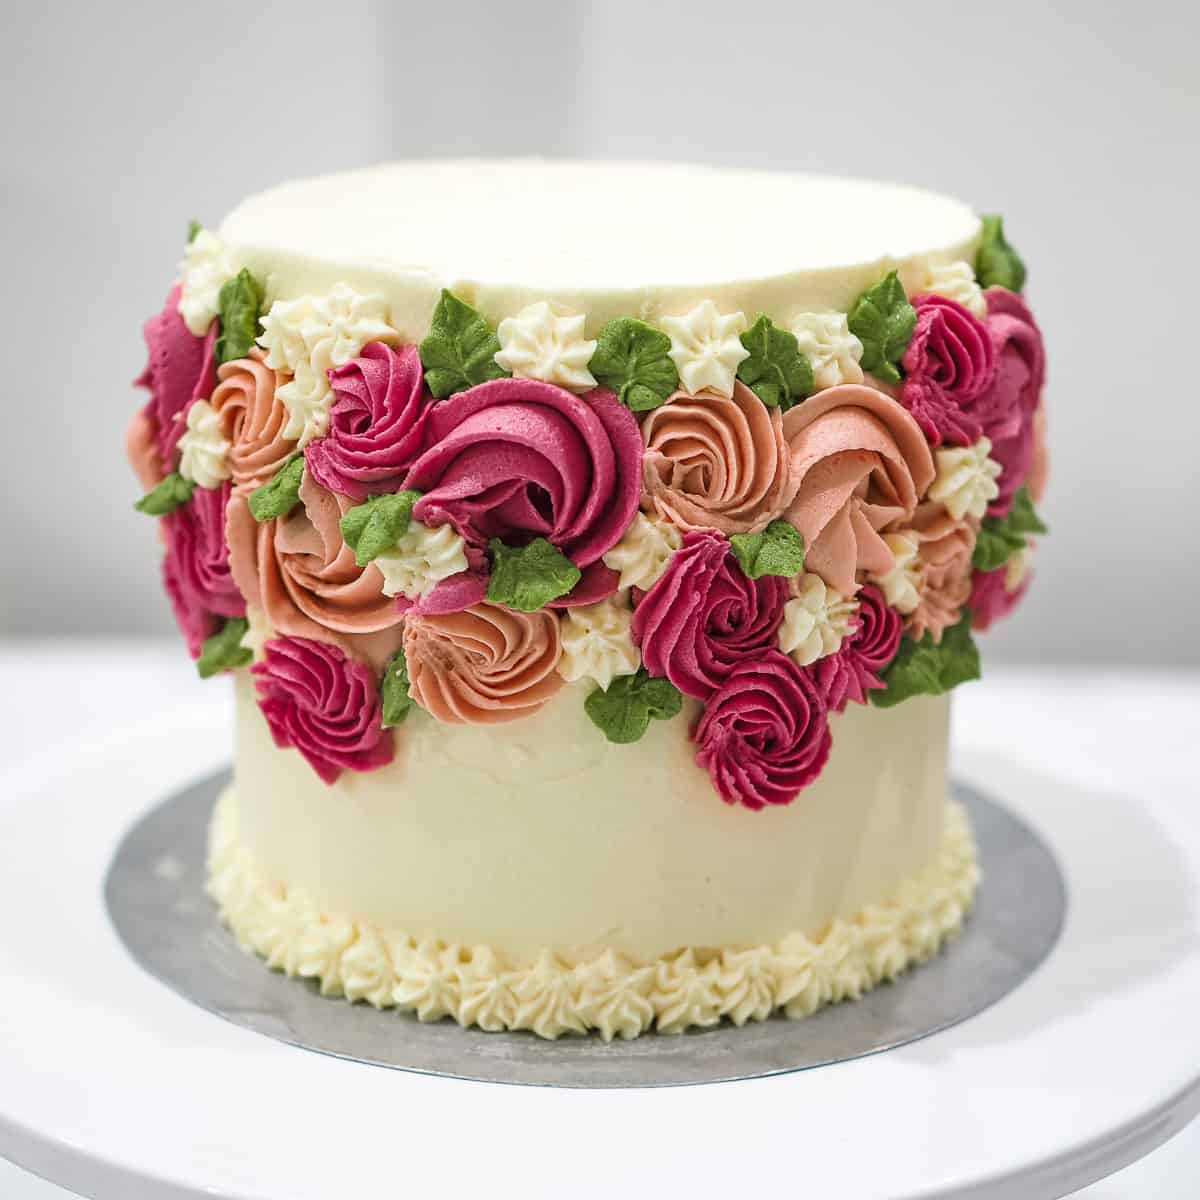
Once the leaves were done, I felt that more buttercream flowers were needed to complete the design, hence added more white flowers and rosettes to the sides of the rosette cake.
Finally, to complete the cake, I used the same icing and piping tip I used for the white star flowers to make the border for the cake.
❤️More Tutorials You Will Love


Do you like this tutorial? Please leave a 5-star ⭐⭐⭐⭐⭐rating in the recipe card below and consider a review further down this page. I would love to hear from you. Thank you!
📖Recipe
Rosette Cake
Equipment
- Piping tips number 1M , 352 , 18 and 21
- Disposable piping bags
- Icing scraper
- Wilton food colors in Burgundy , Rose Petal and Juniper Green
- Palette knife
For best results, use the metrics measurements. US customary measurements have not been tested and are only meant for guide.
Ingredients
Cake
- 220 g self-raising flour
- 180 g butter
- 140 g granulated sugar
- ½ teaspoon baking powder
- ⅛ teaspoon salt
- 2 eggs
- 120 ml milk
- 1 teaspoon vanilla extract
Buttercream
- 300 g powdered sugar
- 150 g butter
- ¼ teaspoon vanilla extract
- 1 tablespoon milk optional
Instructions
Baking the cake
- Preheat oven to 160 °Celsius. Prepare four 5-inches round baking trays (greased and floured). If you don't have 4 tins, bake the cakes in batches.
- Sieve flour, baking powder and salt and keep it aside.
- In a clean bowl, cream the butter, and sugar until light and fluffy. Add the eggs and continue beating until it is well incorporated and the mixture is all light and creamy.
- Fold in the flour alternately with milk, starting and end with flour.
- Finally, add the vanilla extract and mix well.
- Pour cake batter into prepared tins and bake for about 25 to 30 minutes until the center of the cakes spring back when pressed lightly. You can also use a toothpick to test if the cake is done. The toothpick should come out without any wet batter sticking to it when inserted in the center of the cake.
- Remove cakes from oven and let them rest in the tins for a few minutes before turning them over onto wire racks to cool completely.
- To assemble the cake, level each layer and sandwich them with buttercream. Cover the sides and top with buttercream.
Piping the rosettes
- Divide the remaining buttercream into 4. Tint them with green, burgundy and pink and leave one portion untinted. Fill the pink, burgundy and untinted buttercream into piping bags (without any tips fitted in) and snip the pointed ends. Fill the green icing into a piping bag fitted with tip 352.
- Fit the star tip 1M into an empty piping bag. Insert the pink icing filled piping bag into it and pipe out large rosettes all around the top half of the cake at almost consistent intervals.
- And then remove the pink icing piping bag and replace it with the burgundy icing bag. With the same, almost consistent intervals, make large burgundy rosettes all around the top half of the cake alternately to the pink ones.
- Once the large buttercream rosettes are done, add the smaller buttercream rosettes. Start with the rose petal pink icing. Insert the pink icing filled bag into an empty piping bag fitted with tip number 21. Pipe small rosettes in random order, close to the larger buttercream rosettes earlier. Repeat the same with small burgundy flowers.
- Next are the white star flowers on the rosette cake. Make them with star tip number 18, also in random order, making sure they fill up the gaps between the large and small buttercream rosettes.
Buttercream leaves and cake border
- For the leaves, using leaf tip number 352 and buttercream tinted in Wilton Juniper Green color, make tiny green leaves randomly near and in between the buttercream flowers. In piping the leaves, make sure they are not overly concentrated in any one spot for a more balanced and natural look.
- Use the same icing and piping tip used for the white star flowers, make the border for the cake to finish off the cake decoration.


Nike
I love your explanation, very clear.
Victory EME
I like your teaching skills... continue the good work!