

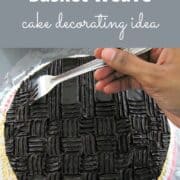
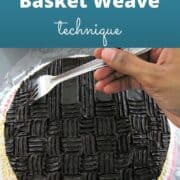
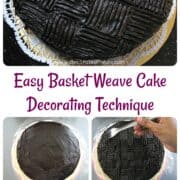
This is the easiest basket weave cake you can make. With just a fork, you can create the basket weave pattern on your frosted cakes within minutes. No piping required and is perfect for beginners!
Basketweave cake decorating pattern is typically created by piping buttercream or royal icing into basket weave patterns. This chocolate basket weave cake decorating technique does not require any piping. It can be done with just a fork.
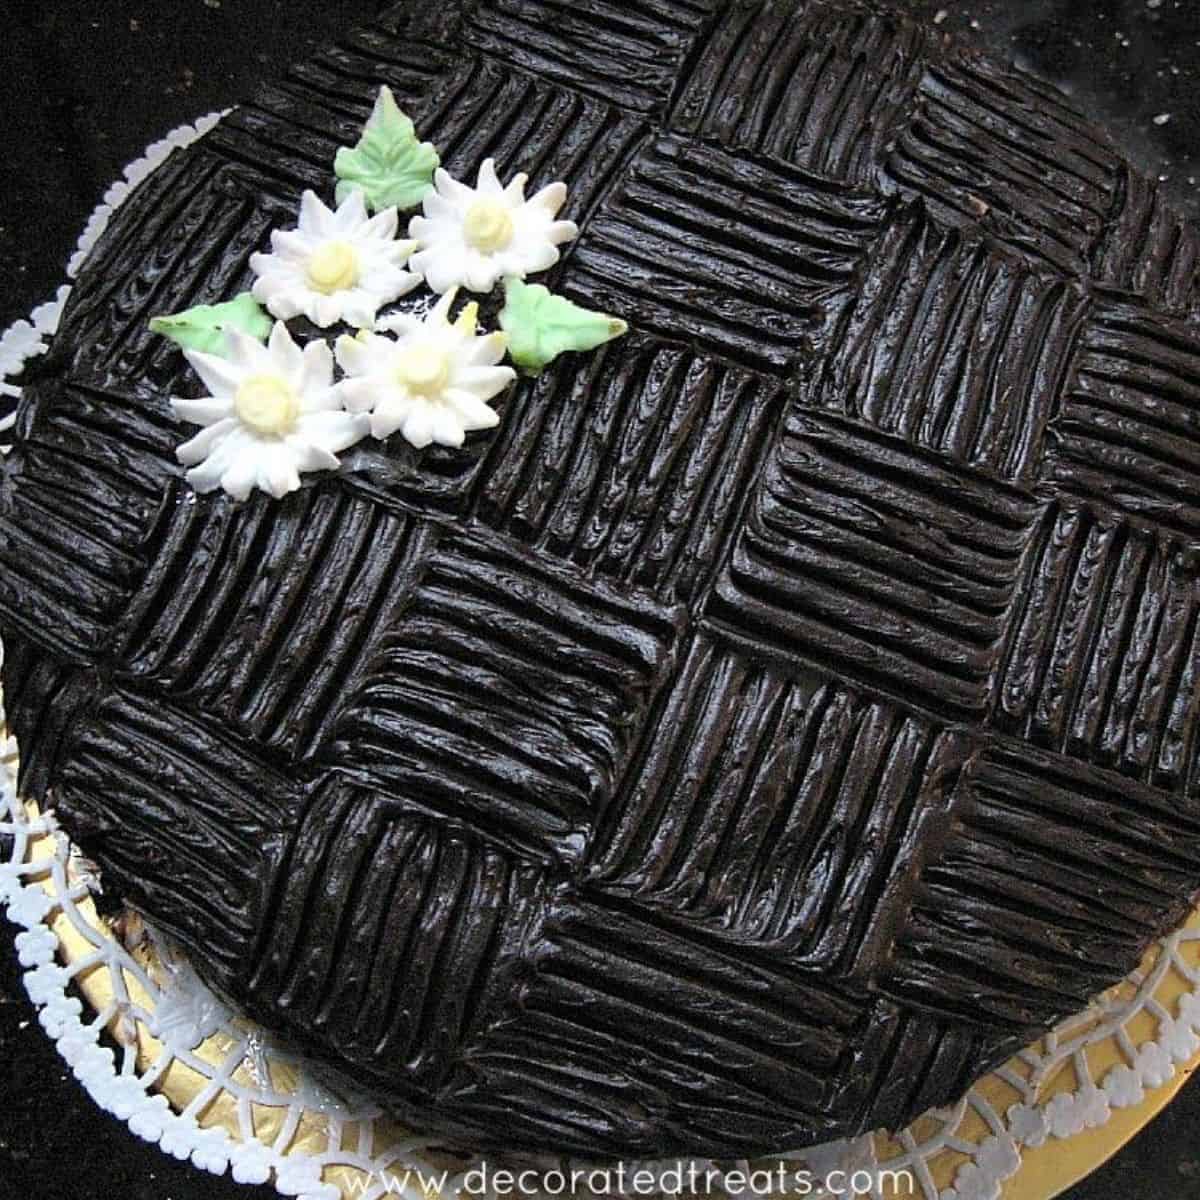
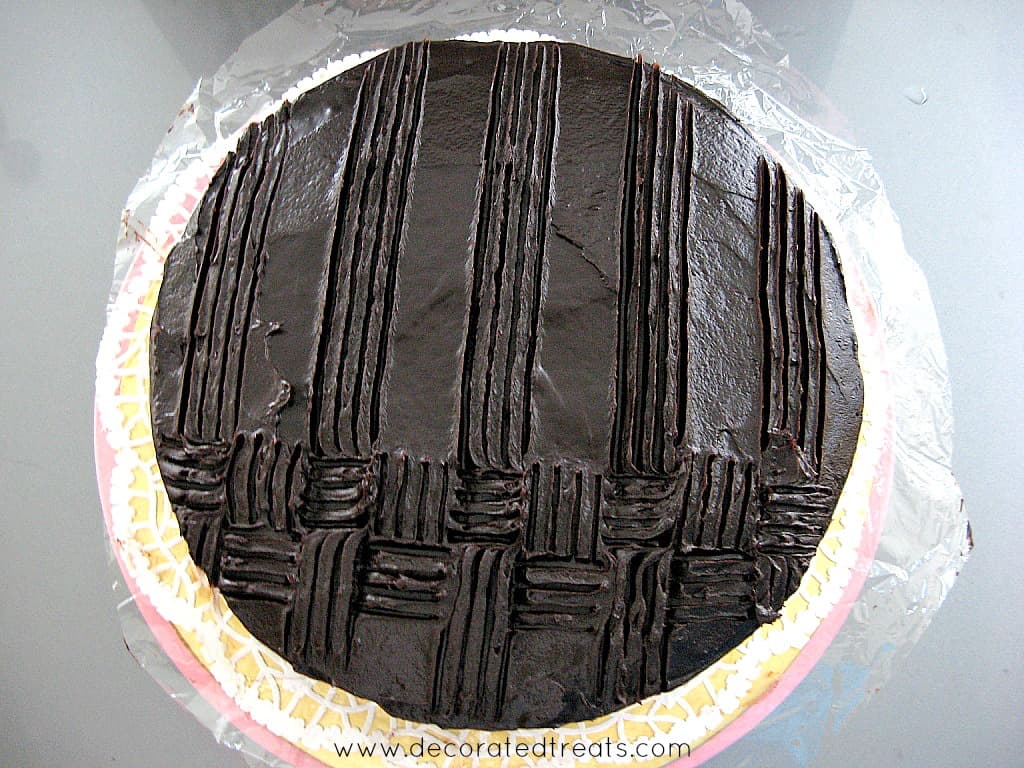
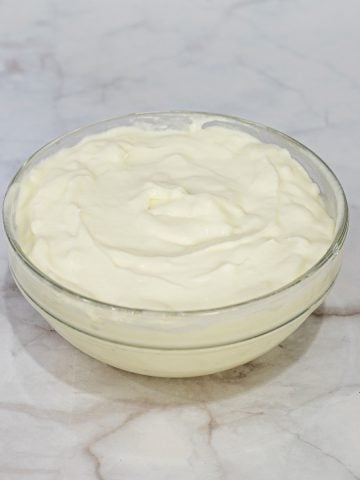
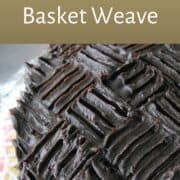
In the image above, I have used chocolate ganache to create the chocolate basket weave cake pattern, but other icings like buttercream and royal icing can also be used and will produce similar results as chocolate ganache.
Jump to:
❤️Why you will love this tutorial
- It is very easy to learn.
- You do not need to frost your cakes smoothly and there is no piping work involved.
- No piping tips or piping bags or any other tools required. You only need a fork.
If you like this tutorial, you will also like this easy letter cupcakes topper tutorial, fondant embossing technique for cake decorating, fondant crimping technique and easy fondant flowers for cakes.
🧾Supplies required
- Chocolate ganache - As I mentioned earlier, I used chocolate ganache in this tutorial, but really, any icing in soft consistency such as buttercream would work perfectly well for this technique.
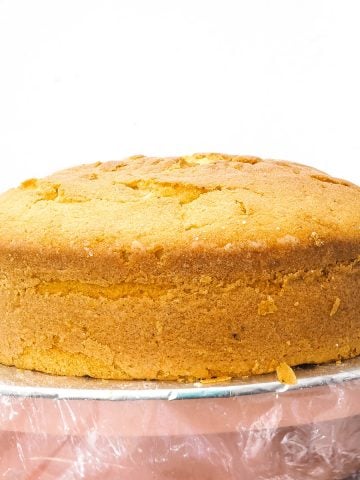
- Your favorite cake, all baked and cooled
- Palette Knife - to apply the frosting on the cake.
- A fork - to make the basket weave pattern.
👩🍳How to Make
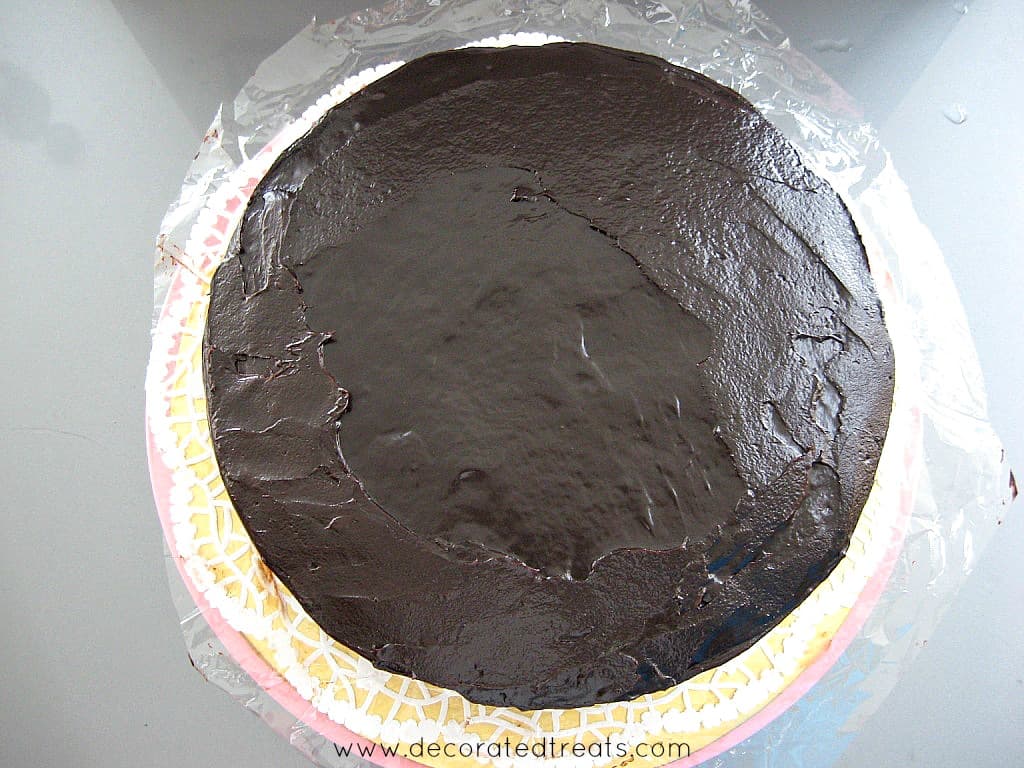
Step 1: Cover your cake with chocolate ganache
Prepare your cake. Level it and brush off any loose cake crumbs.
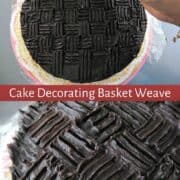
Take a generous amount of chocolate ganache and spread it onto your cake with a palette knife. Cover the whole cake with chocolate ganache evenly.
As you can see in the picture, the icing is not 'perfectly' smooth. For this design, it would suffice if the cake is evenly coated with ganache, there is no need to get it perfectly smooth.
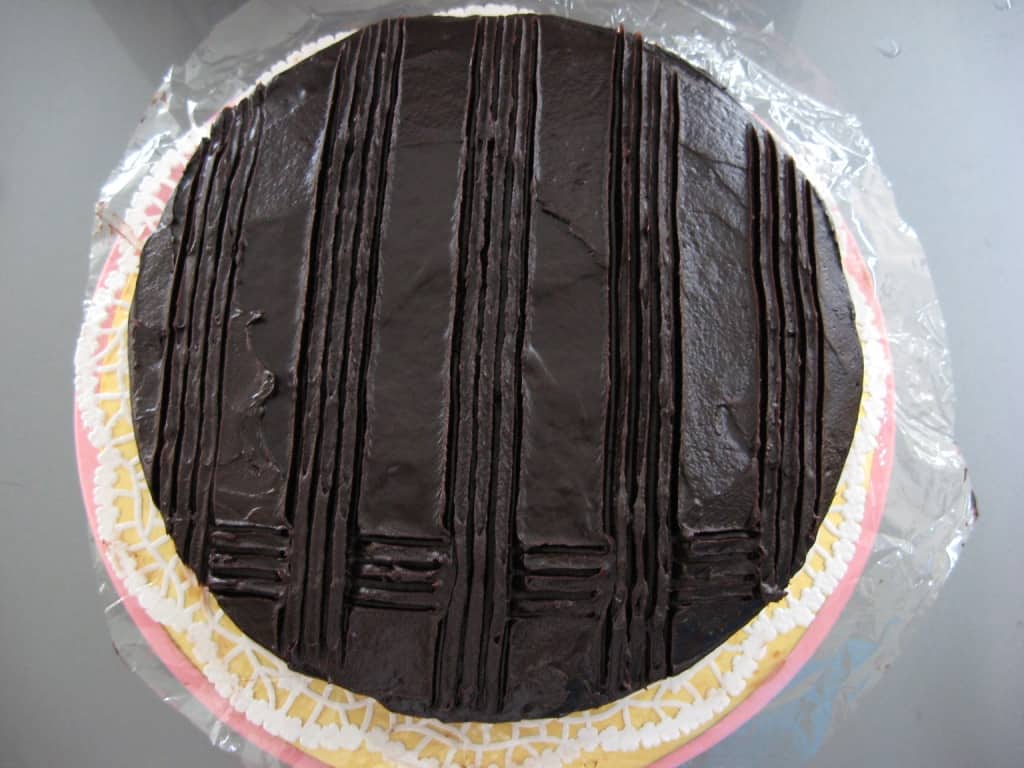
Step 2: Mark vertical lines on the ganache
Next, using a fork, mark long vertical lines of design as shown. Make sure the space in between each set of fork lines are of the same width as the fork.
I freehanded it here, but if you cannot get the lines straight, you can use a clean ruler as a guide.
When marking the lines, do it only on the ganache and do not scrape the cake underneath.

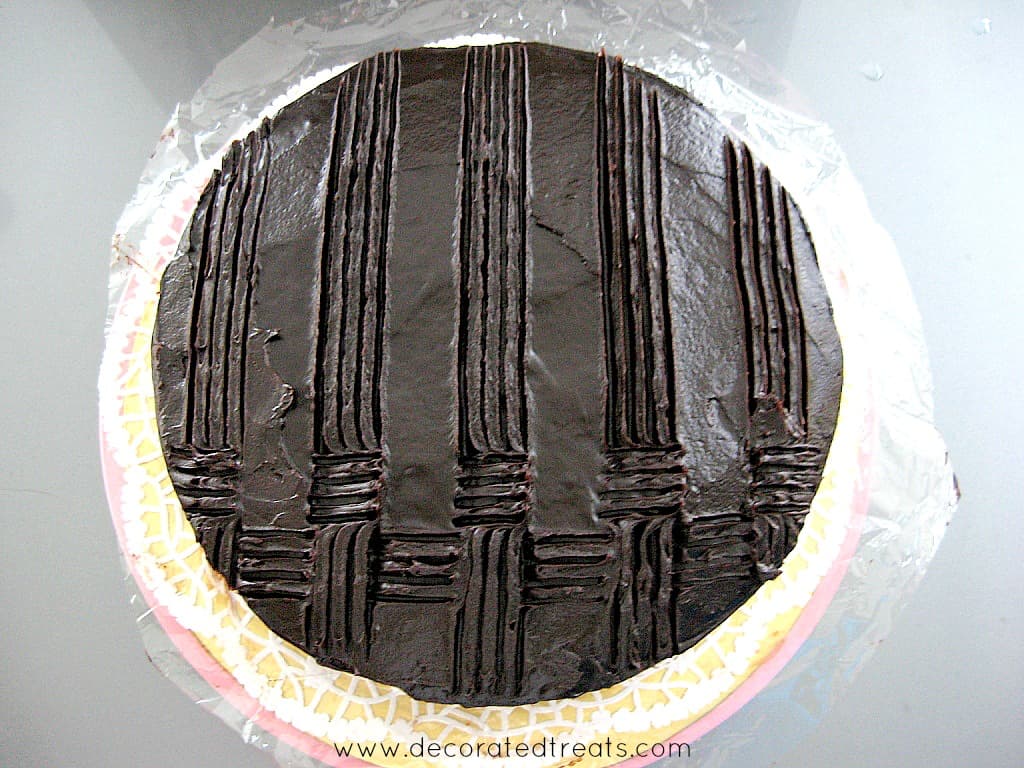
Step 3: Mark the horizontal lines
Once done with the vertical lines, its time to mark the horizontal ones. In this step, you will have to mark the lines in between the vertical ones.
Following that, make another set of short horizontal lines, this time one row above the earlier horizontal lines but right on the vertical lines made in step one above.
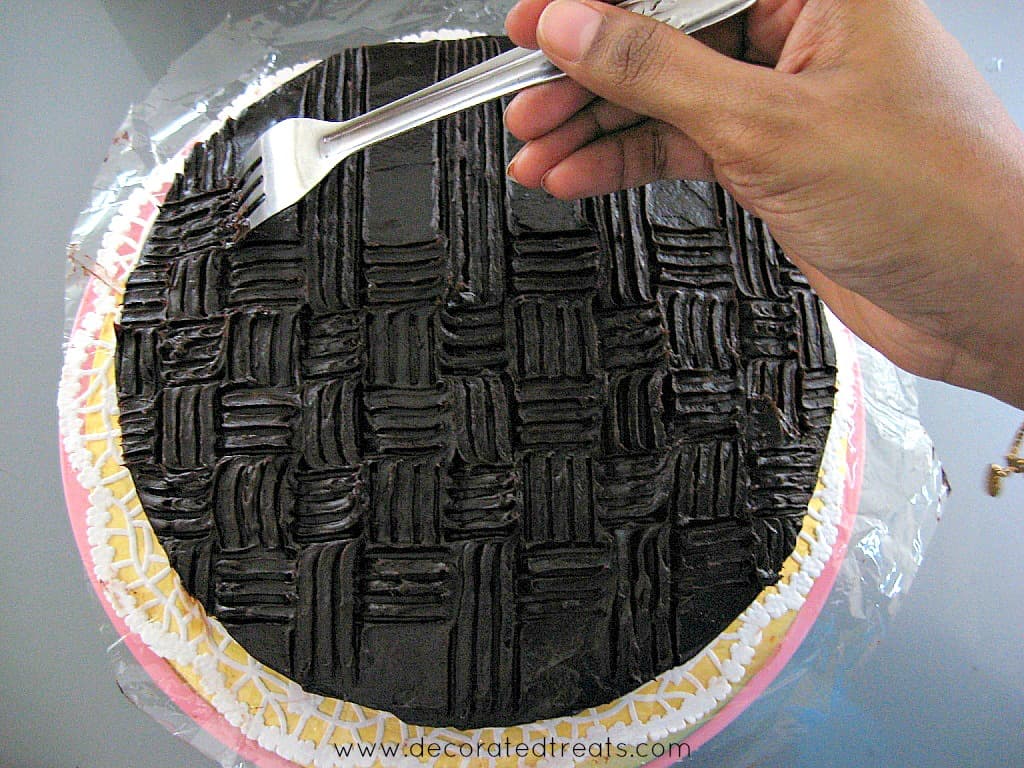
Step 4: Alternate the horizontal and vertical lines
Fill up the gaps between the newly marked horizontal lines with short vertical lines, as shown.
Moving on to the next row, repeat marking horizontal lines in between the existing vertical lines.
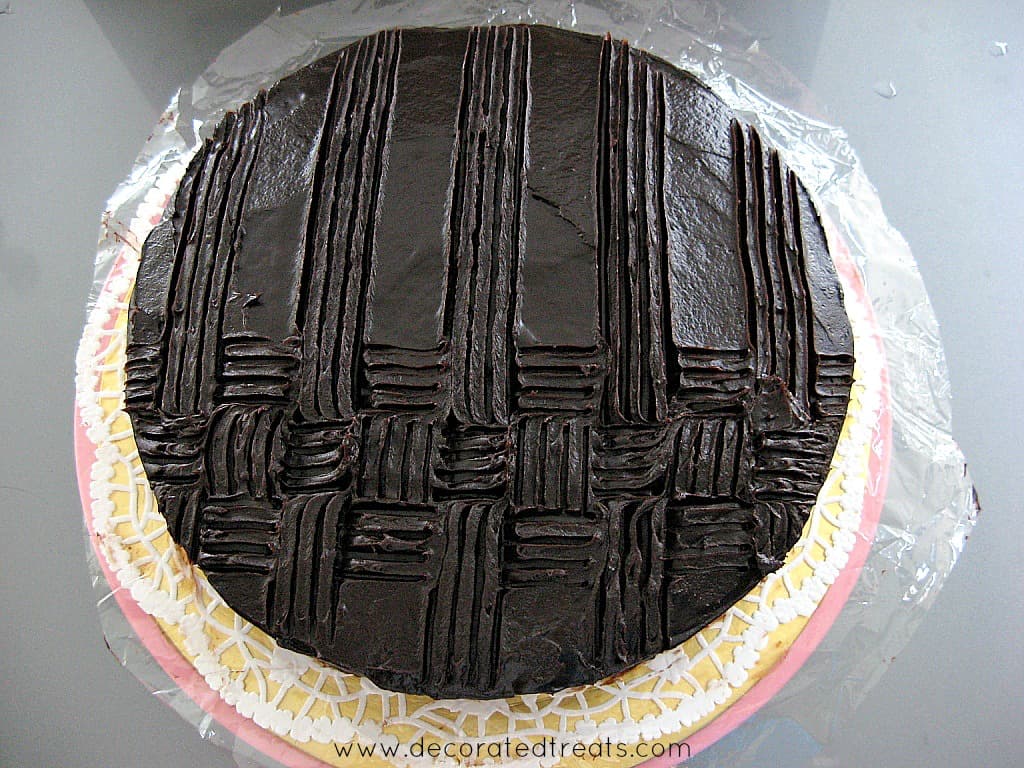
Again, make another set of short horizontal lines, this time one row above the earlier horizontal lines but right on the vertical lines made in step one above.
Fill up the gap between the newly marked horizontal lines with short vertical lines, as shown.
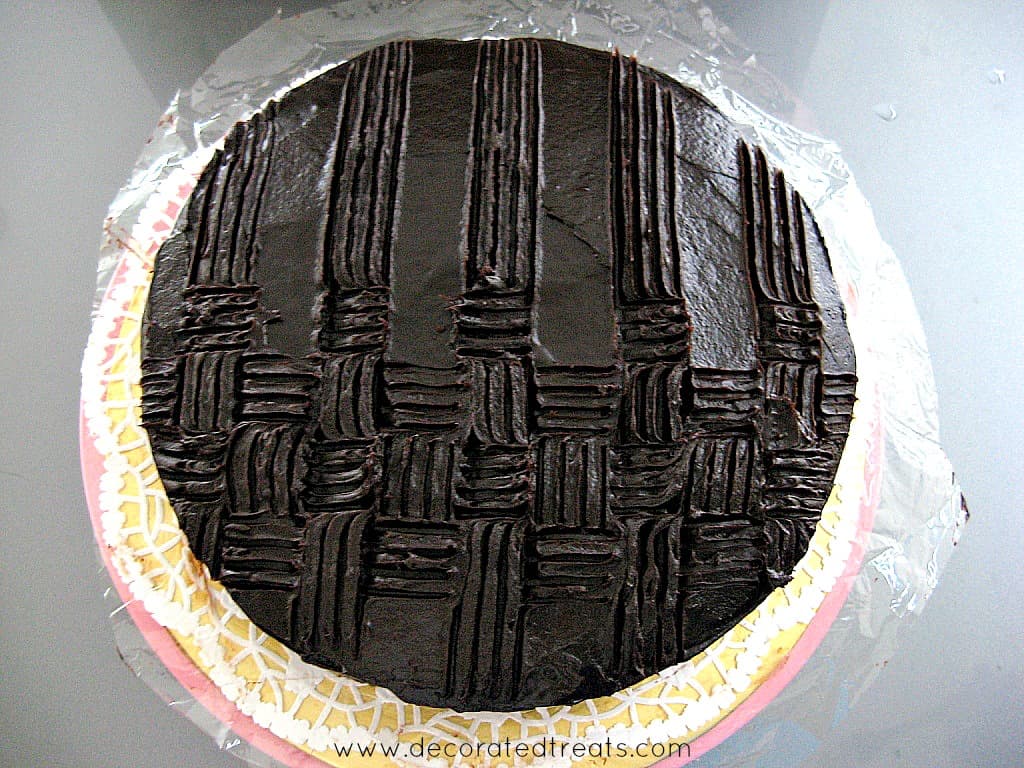
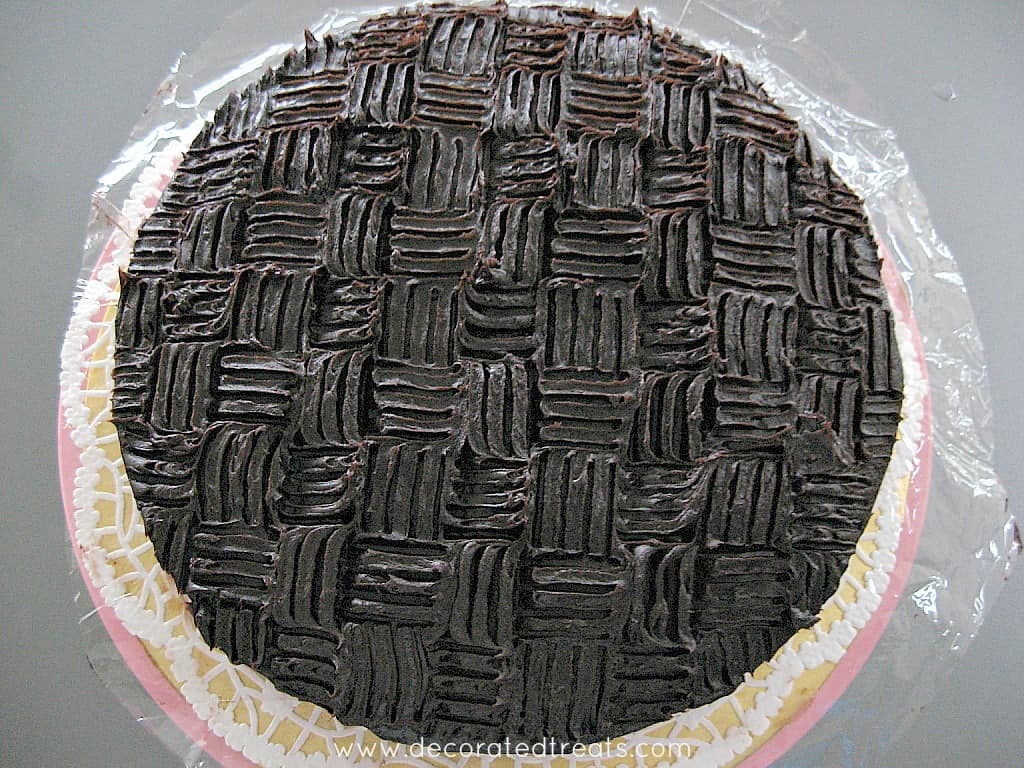
Repeat the above steps. Cover the entire cake with basket weave pattern. Do the same for the sides of the cake as well.
This is how a completed chocolate basket weave cake design will look like.
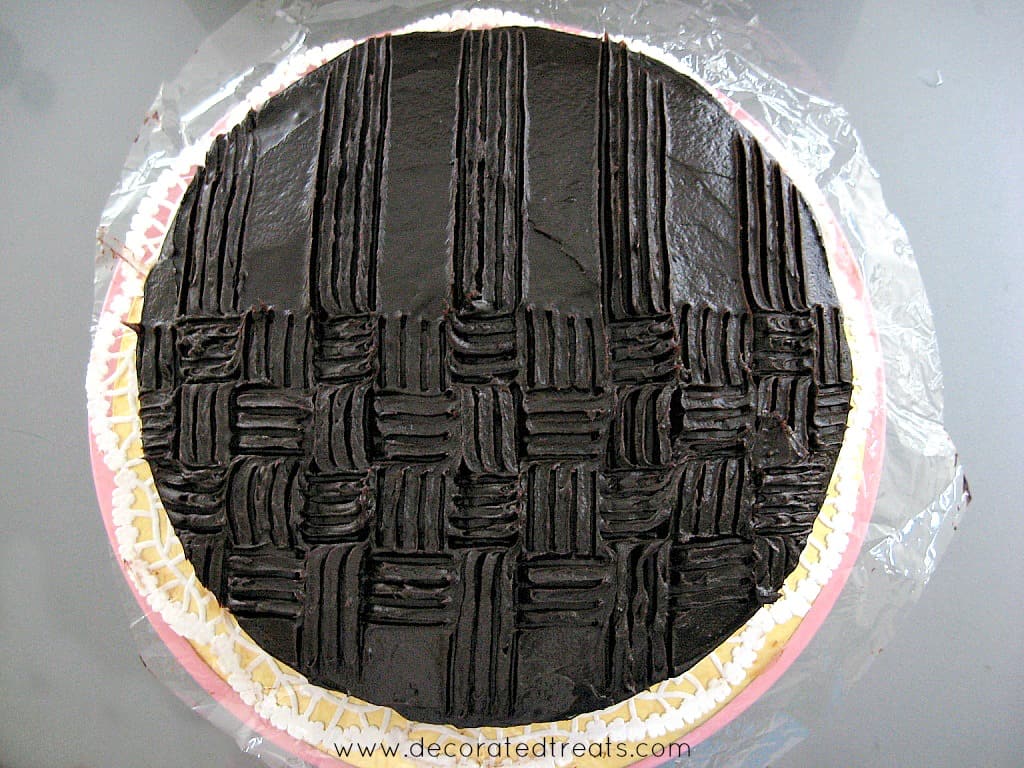
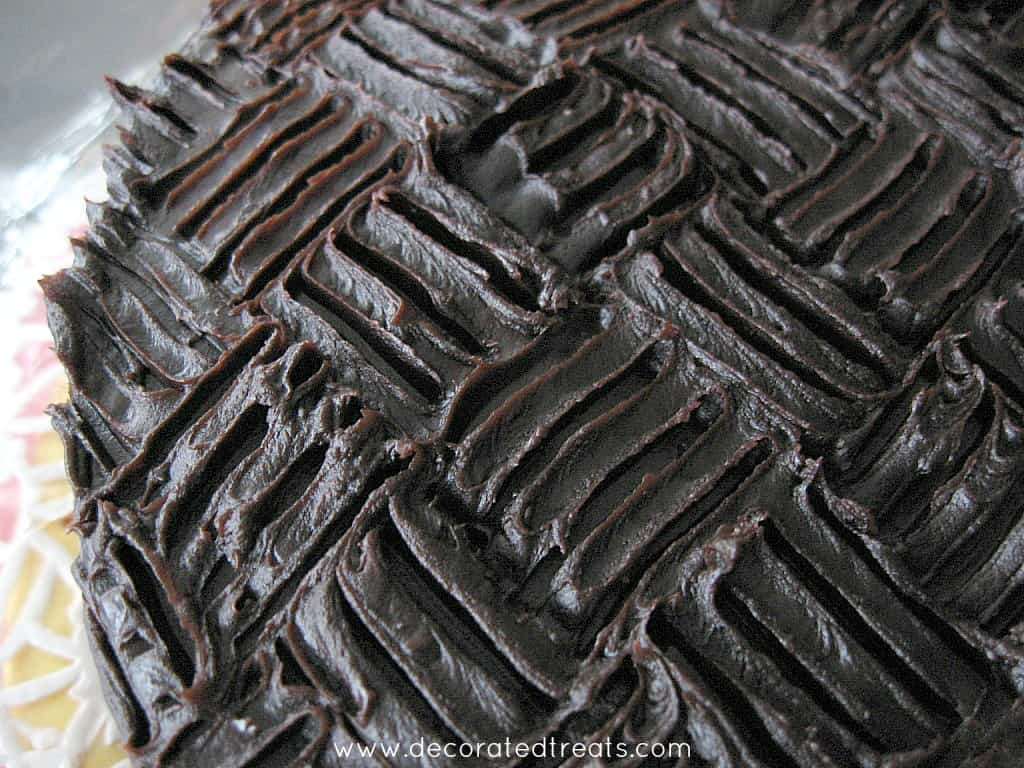
If you like, you can even make broader chocolate basket weave cake designs, like in the image here. All you need to do is to make two sets of fork lines instead of one set as shown in the instructions above.
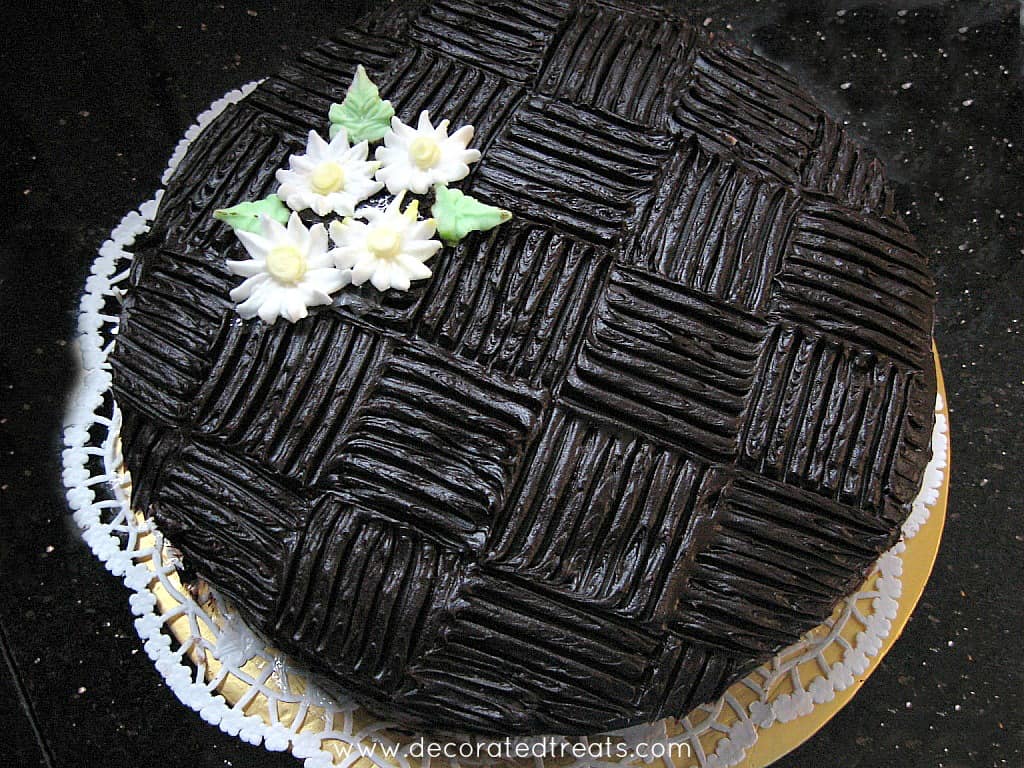
Hope you find this chocolate basket weave cake tutorial useful.


Adedayo Bushura
I really appreciate you, because I ' ve learnt so much here