

Learn how to make easy cupcake letter toppers with this step by step tutorial. These are very quick and easy to make and you can make them in any letter or color you like.
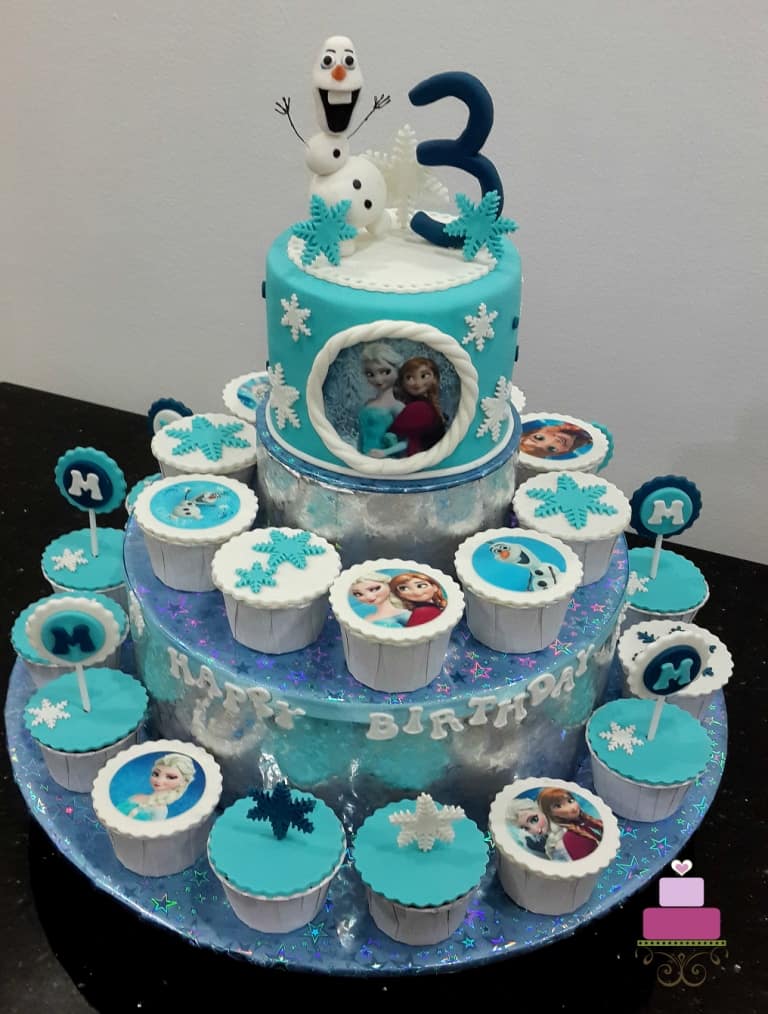
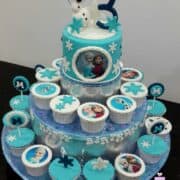
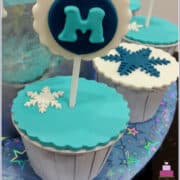
If you are looking for ideas to make really easy letter toppers for cupcakes that are made of fondant, here is one you can use. I made these for a set of Frozen themed cupcakes.
❤️Why you will love this tutorial
- The toppers are made entirely of fondant (and attached to lollipop sticks), making them completely edible.
- They are very quick and easy to make.
- You can make these in advance and have them ready when you need to use them.
- You can even get your children to help make these toppers as a fun craft project.
If you like this tutorial, do also check out my other tutorials on how to make a 3D Olaf cake topper, how to make a fondant unicorn horn, how to make a baby stroller cake topper, how to make fondant bow and how to make fondant surf board toppers.
🧾Supplies required
- Fondant – I used Satin Ice fondant in 3 colors – turquoise (white fondant mixed with Americolor Turquoise food color), dark blue (white fondant mixed with Americolor Navy Blue food color) and white. You can also make your own fondant with this homemade fondant recipe and marshmallow fondant recipe.
- Lollipop sticks - to hold the toppers.
- Round cutters – I used 2 different types of round cutters, one which was scalloped and the other plain circles.
- Alphabet cutters – I used Clikstix Groovy Alphabet cutters. Since the birthday girl’s name started with letter M, I only used the cutter for letter M.
- Fondant glue - to attach the fondant pieces on to make the toppers.
👩🍳How to Make
Step 1: Mix the fondant colors
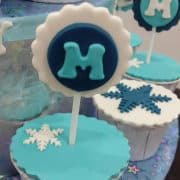
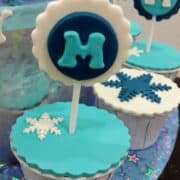
The color theme for this cupcake toppers was navy blue, turquoise and white. Divide fondant into 3 and tint the first 2 parts with turquoise and navy blue each. Leave the third portion white.
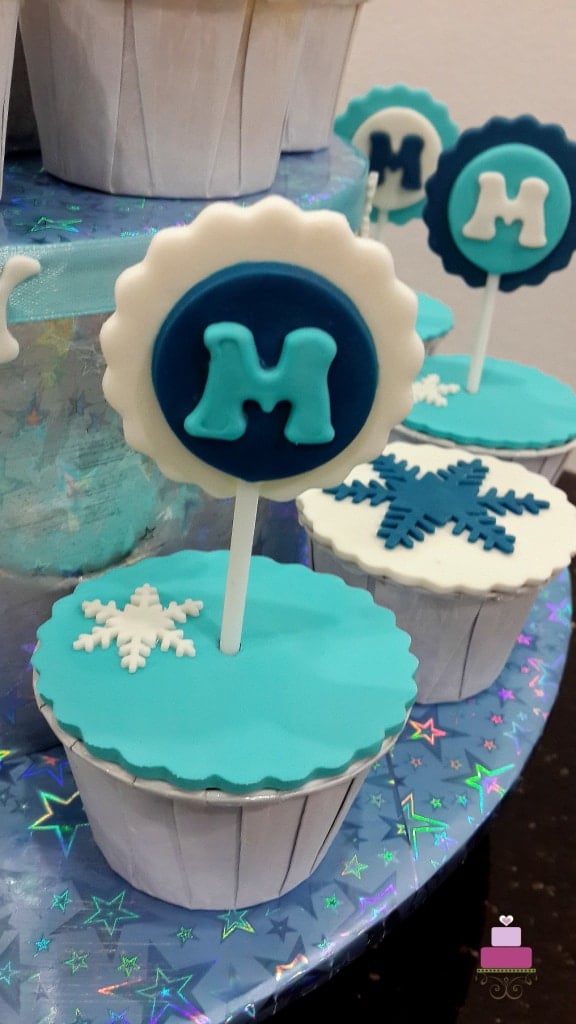
Each topper is made up of a large round scalloped cut out, a smaller plain round cut out and the letter M.
For each of these 3 elements, I made them 2 in each color. For example, I made 2 letter M in white, 2 in turquoise and 2 in navy blue. Similarly for the round and scalloped circle cut outs.
And then I mixed and matched these colors to produce 6 different color combined toppers. Here is the color combination I used for all the 6 cupcake toppers:
- White scalloped circle, navy blue plain circle, turquoise letter M
- White scalloped circle, turquoise plain circle, navy blue letter M
- Navy blue scalloped circle, white plain circle, turquoise letter M
- Navy blue scalloped circle, turquoise plain circle, white letter M
- Turquoise scalloped circle, navy blue plain circle, white letter M
- Turquoise scalloped circle, white plain circle, navy blue letter M
Step 2: Cut the fondant circles and letters
To begin with, roll white fondant, cut out 2 scalloped circles (these are the largest cut-outs). And then cut 2 smaller plain circles and finally 2 letter 'M's.
Repeat the same for the turquoise and blue fondant. Each color should have 2 large scalloped round cut outs, 2 plain round cut outs and 2 letter M.
Step 3: Assemble the cupcake toppers
Follow the color combination listed in step 1 above.
Start with the largest circle which is the scalloped one. Lay it flat on your work surface, apply some fondant glue in the middle, and then put a lollipop stick on it.
And then take a plain circle cut out, apply some glue to the back, and place it right in the center of the scalloped cut-out. At this point, the lollipop stick should be in between the 2 cut-outs.
Next, take one of the letter M and glue it (apply some glue to the back of the letter) right in the center of the plain circle cut out.
That completes the first cupcake topper. Let the topper dry and set in a horizontal position until the glue has really set and the fondant dry and firm.
Repeat the process for all the different color combinations.
To attach the toppers to cupcakes, simply poke the lollipop sticks into the cupcakes.
And that's that. My super easy letter toppers for cupcakes.

Leave a Reply