

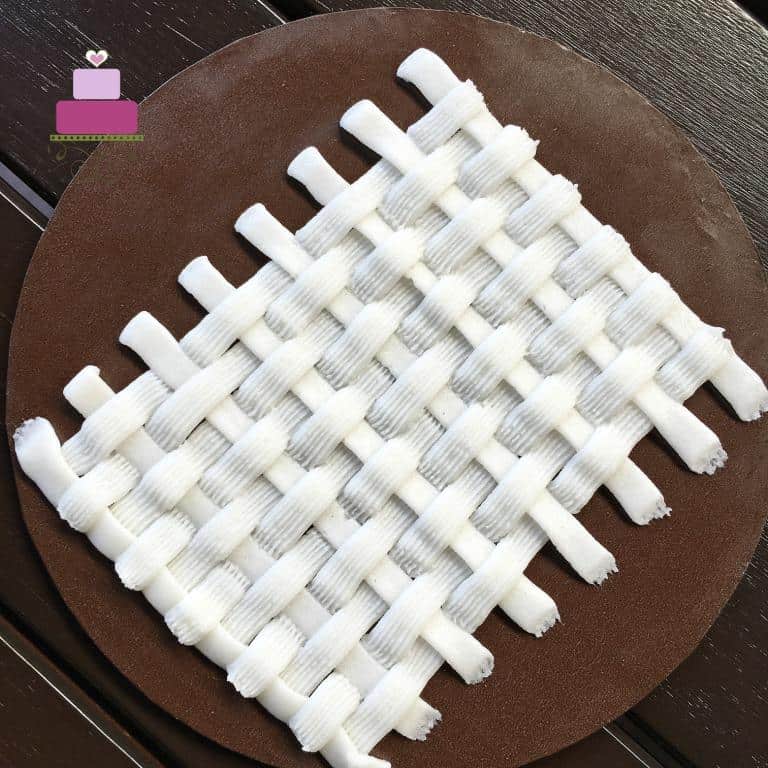
Buttercream basket weave piping technique is typically used to create basket weave pattern on cakes. It is very easy to pipe and can be mastered very quickly.
This is a very common cake decorating technique, but one that is capable of creating stunning results on cakes.
It is also one of the more traditional ways of decorating a cake. I have seen cakes decorated using this basket weave technique for many years now and it is one that I would say is evergreen.
Jump to:
❤️Why you will love this tutorial
- It makes very pretty cake decorating.
- It is also very easy to learn and master.
- You can use this technique not just with buttercream, but with any other pipeable frosting like royal icing, chocolate ganache, and cream cheese frosting.
- All you need is a flat piping tip and piping bag. Not other special tools required.
If you like this tutorial, you should also check out my other tutorials on how to make royal icing butterflies and how to make easy buttercream flowers.
🧾Supplies required
- Buttercream Icing - I used buttercream icing for this tutorial, but any icing in piping consistency such as royal icing or even chocolate ganache can be used for this technique.
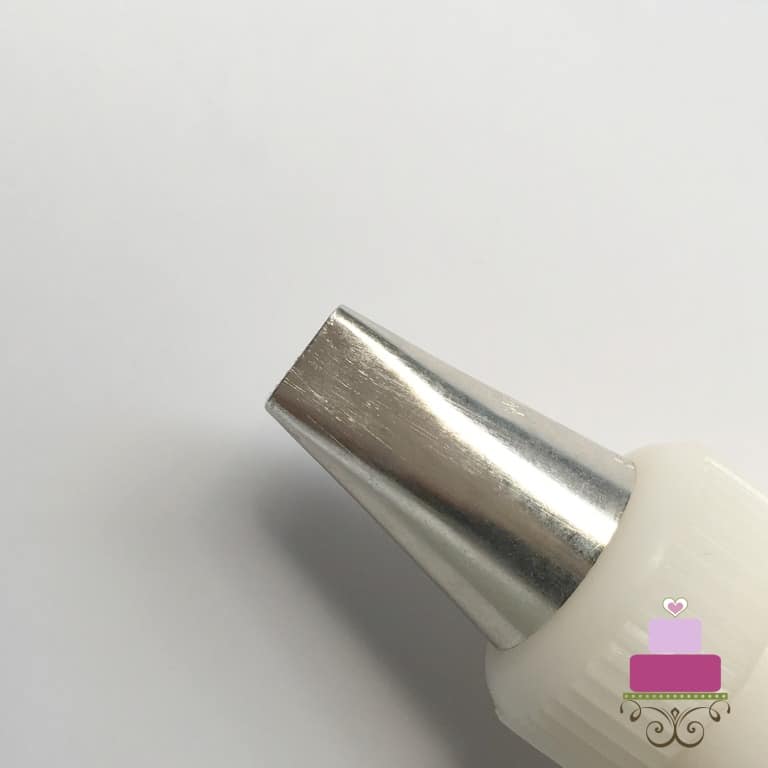
- Disposable piping bags and basket weave tip/nozzle - There are many different types of basket weave tips/nozzles in the market. Choose the tip that best meets the type of texture you want for cake design. There are also extra-large tips if you are working on big cakes. The tip I am using for this tutorial is tip number 47 that is flat on one side and serrated on the other side.


👩🍳How to Make
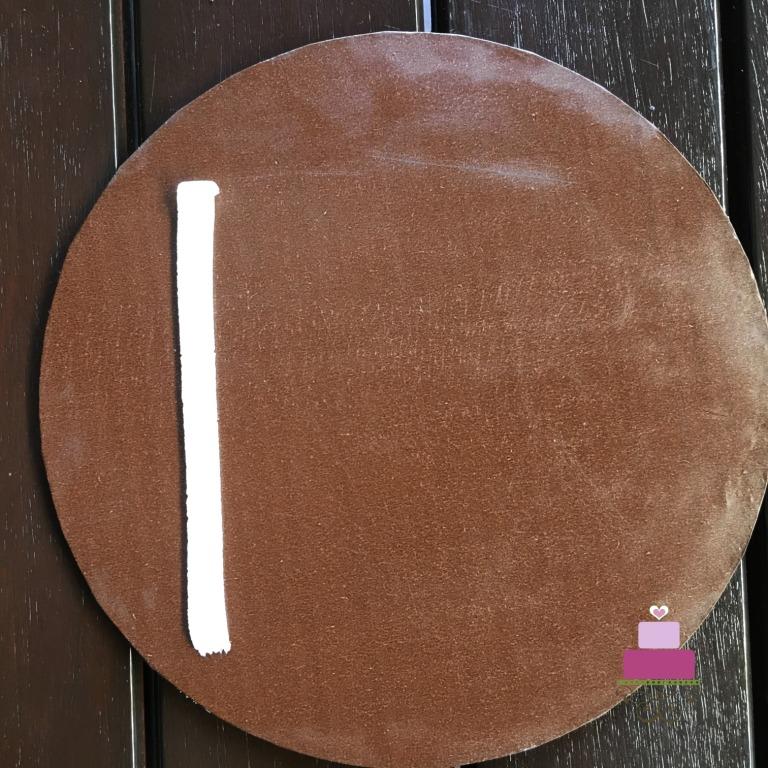
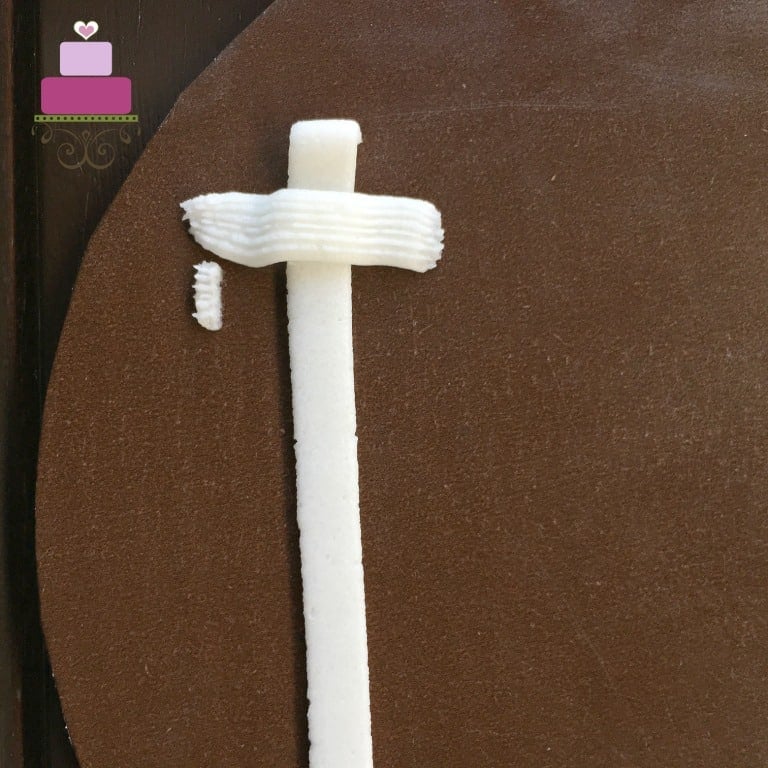
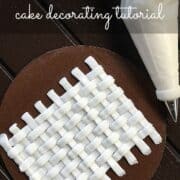
Step 1: Pipe the first vertical line of buttercream
Fit a basketweave tip/nozzle into your piping bag and fill the bag with icing. Start by piping a vertical line on your cake. If you intend to pipe this on the sides of your cake, the vertical line should ideally be from the top of your cake to the bottom.
And then, if you wish, you can mark the positions of the rest of the vertical lines with small dots of icing all around your cake to guide you for the vertical lines.
The space can equal the width of your piping tip but it is not an absolute must. In this tutorial, I am not doing any marking as I am going to just eyeball the lines.
Marking the guide for the vertical lines help ensure the lines are distributed all around the cake at equal intervals.
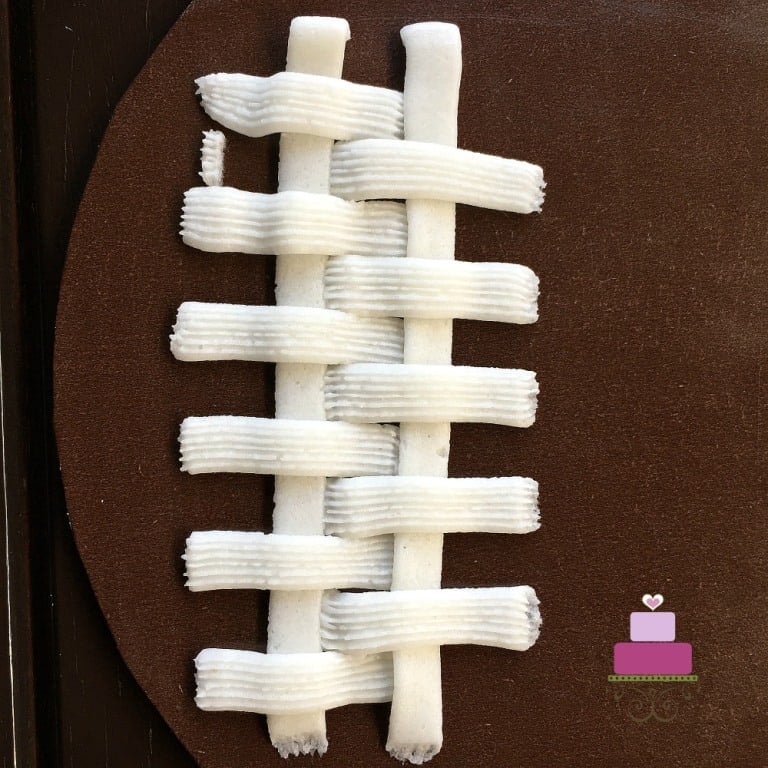
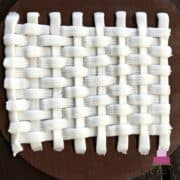
Step 2: Pipe the first set of horizontal lines
Next, pipe a short horizontal line across the first vertical in the above step. Mark a small dot of icing below the horizontal line as a guide for the next step.
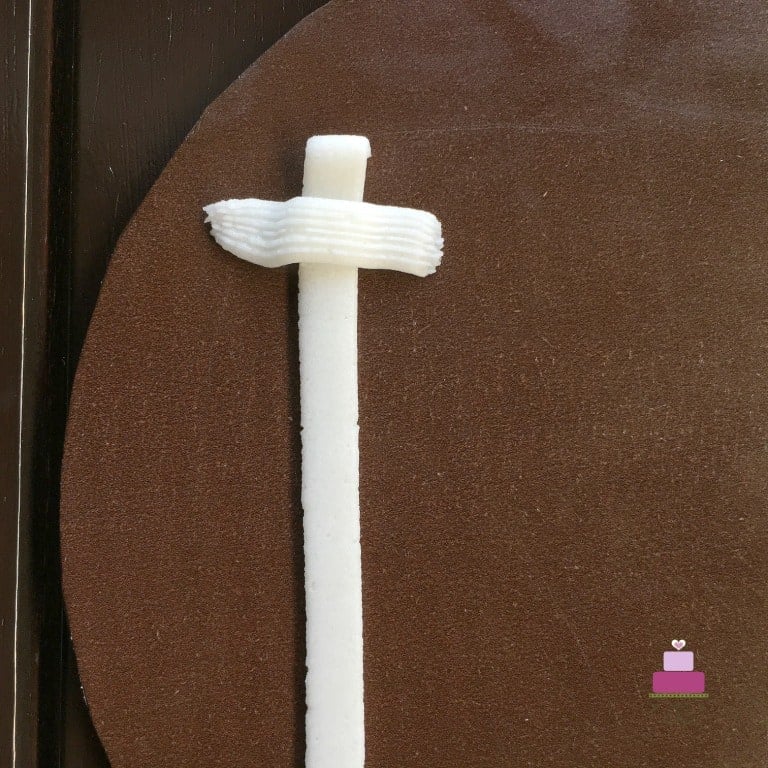
Pipe out another long horizontal line below the dot, across the vertical line. Mark another dot right below it if you need guide on the spacing between the vertical lines.
I chose not to add the marks as I was able to eyeball the space for the intervals. Repeat until the entire vertical line is covered with horizontal lines. Ideally, the gap between each horizontal line should be the size of the tip or nozzle used.
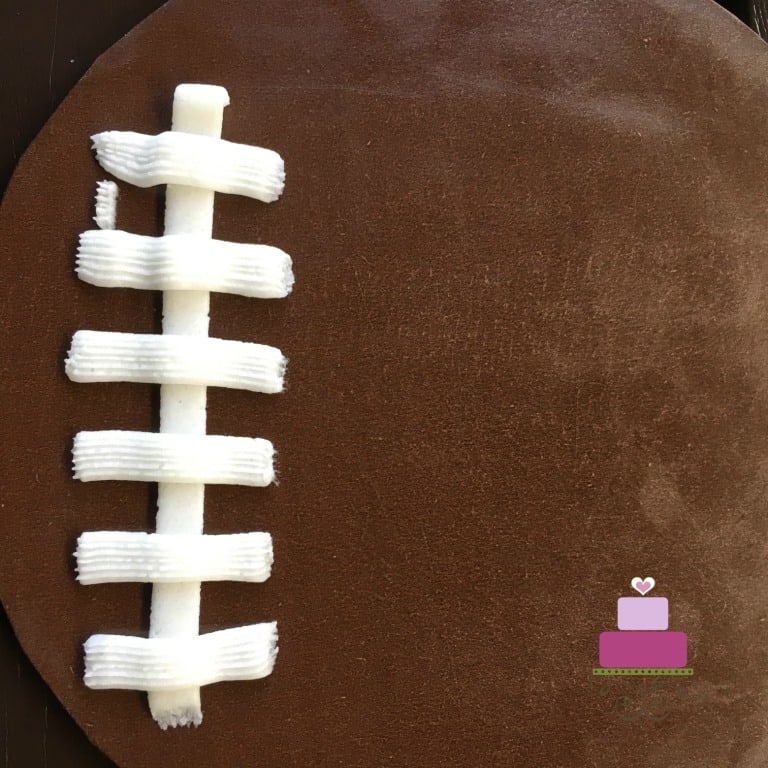
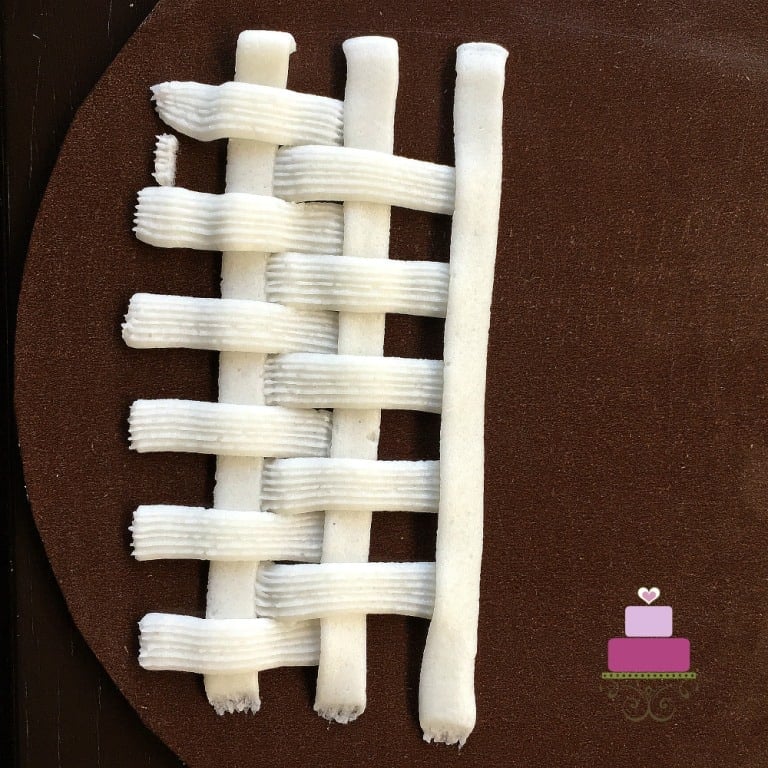
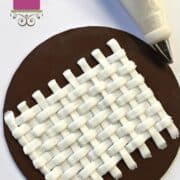
Step 3: Pipe the next vertical line
Once the first vertical line is covered, move to the second vertical line. Start by piping the vertical line first.
Make sure all the edges of the horizontal lines piped in the above step are hidden under this vertical line.
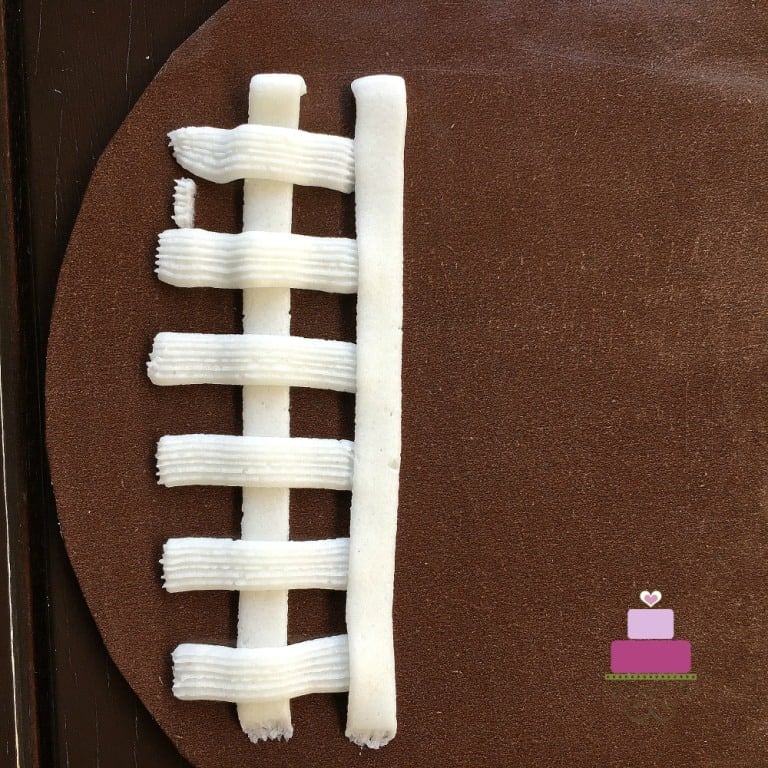
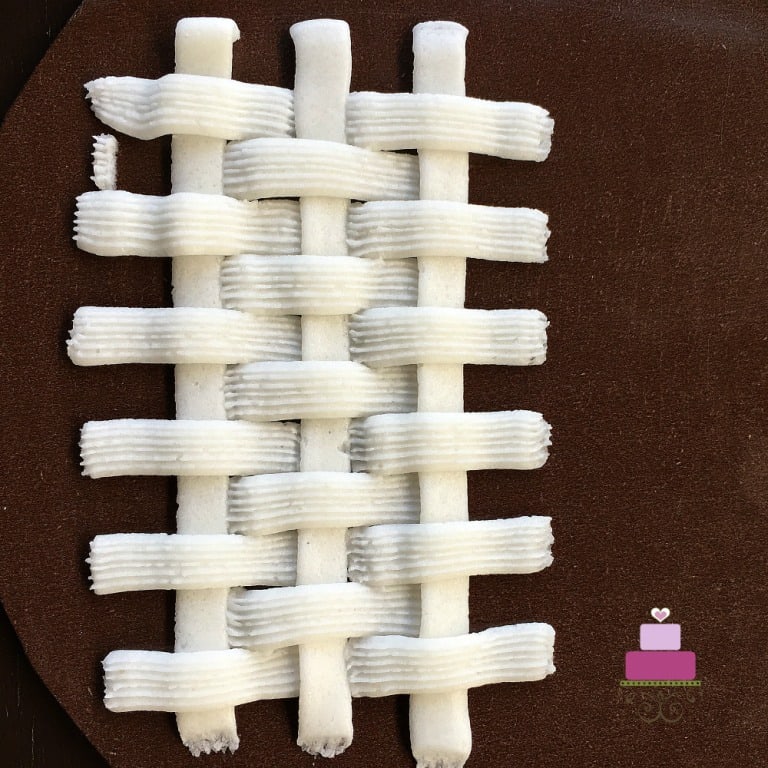
Step 4: Pipe the second set of horizontal lines
Following that, you will need to pipe another set of horizontal lines as shown. Start each line from underneath the first vertical line right across the second vertical line.
The length should be the same as the first set of horizontal lines piped in the steps above.
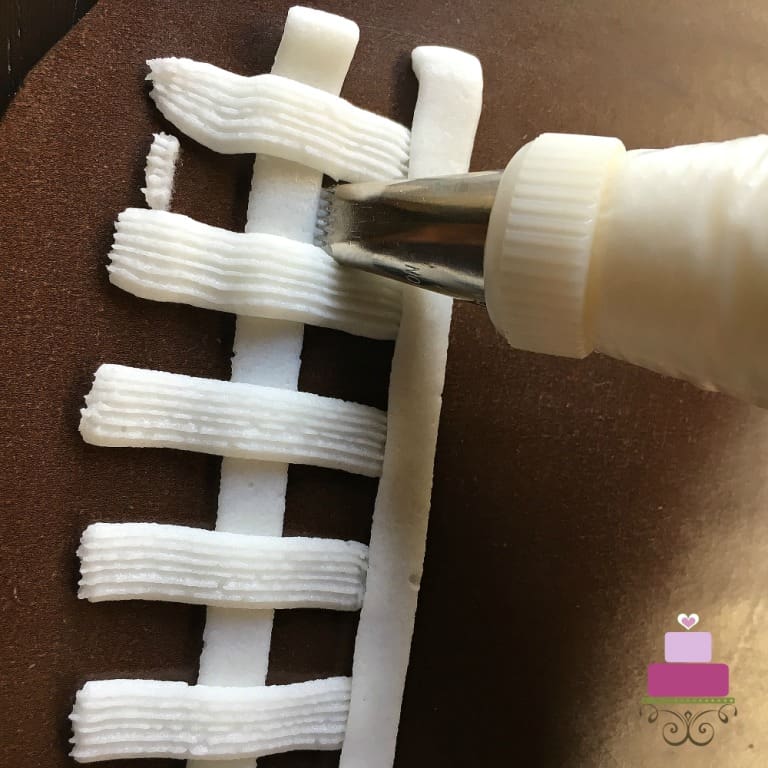
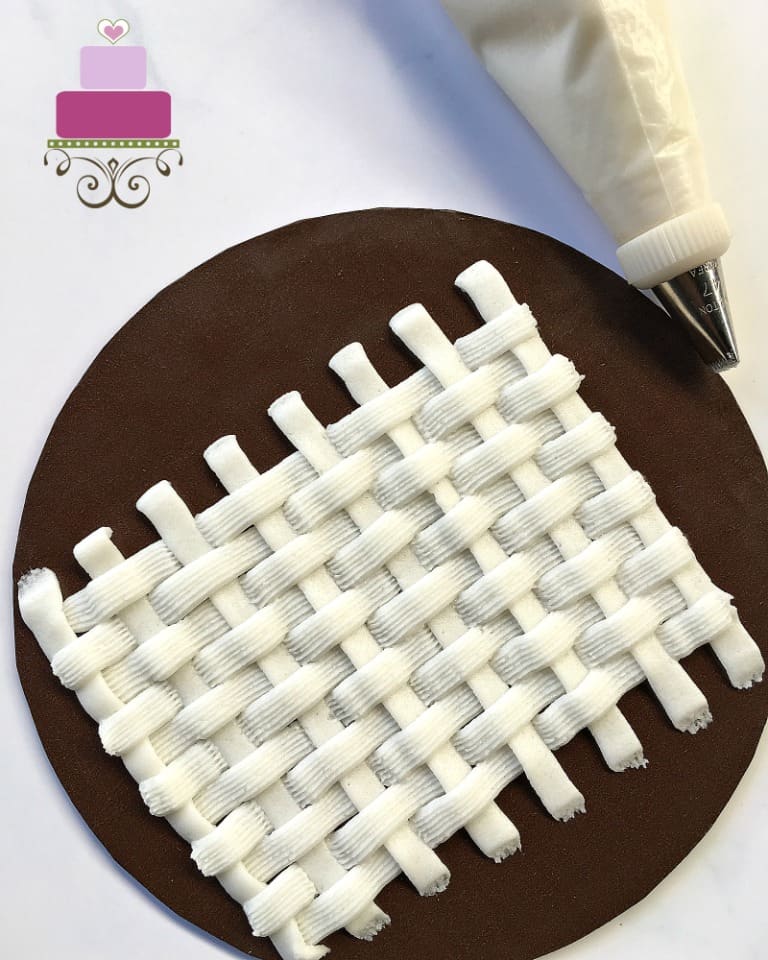
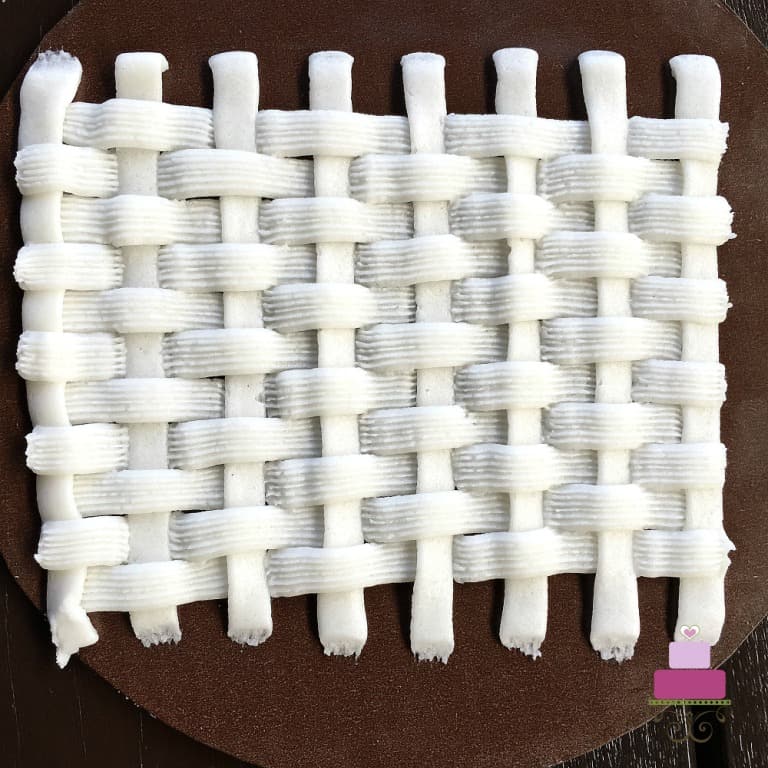
Step 5: Repeat with the vertical and horizontal lines until the end
Once the second vertical line is covered, move on to the third line. Pipe the third vertical line, again, making sure the horizontal lines piped in the step above are well covered underneath.
Repeat another set of horizontal lines across the newly piped vertical one, as shown.
Step 5: End the pattern piping
Repeat the process until the last vertical line. And with that, the basket weave piping around the cake should be complete.
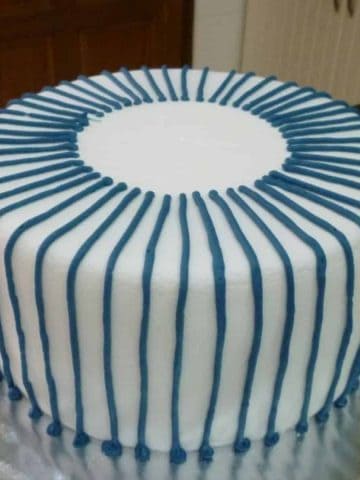
You can then move on to add a rope border around the base of the cake and if you like, another similar border on the top edges of your cake.
And that is pretty much the method for buttercream basket weave cake decorating.
Hope you enjoyed this tutorial and find it useful for your cake decorating.

Leave a Reply