This butterfly pea cake makes a decadently pretty blue colored cake. It has a very soft and moist texture and is naturally tinted with butterfly pea flowers (blue pea flowers).
Combined with the tangy lemon cream cheese frosting, this moist cake is definitely not to be missed!
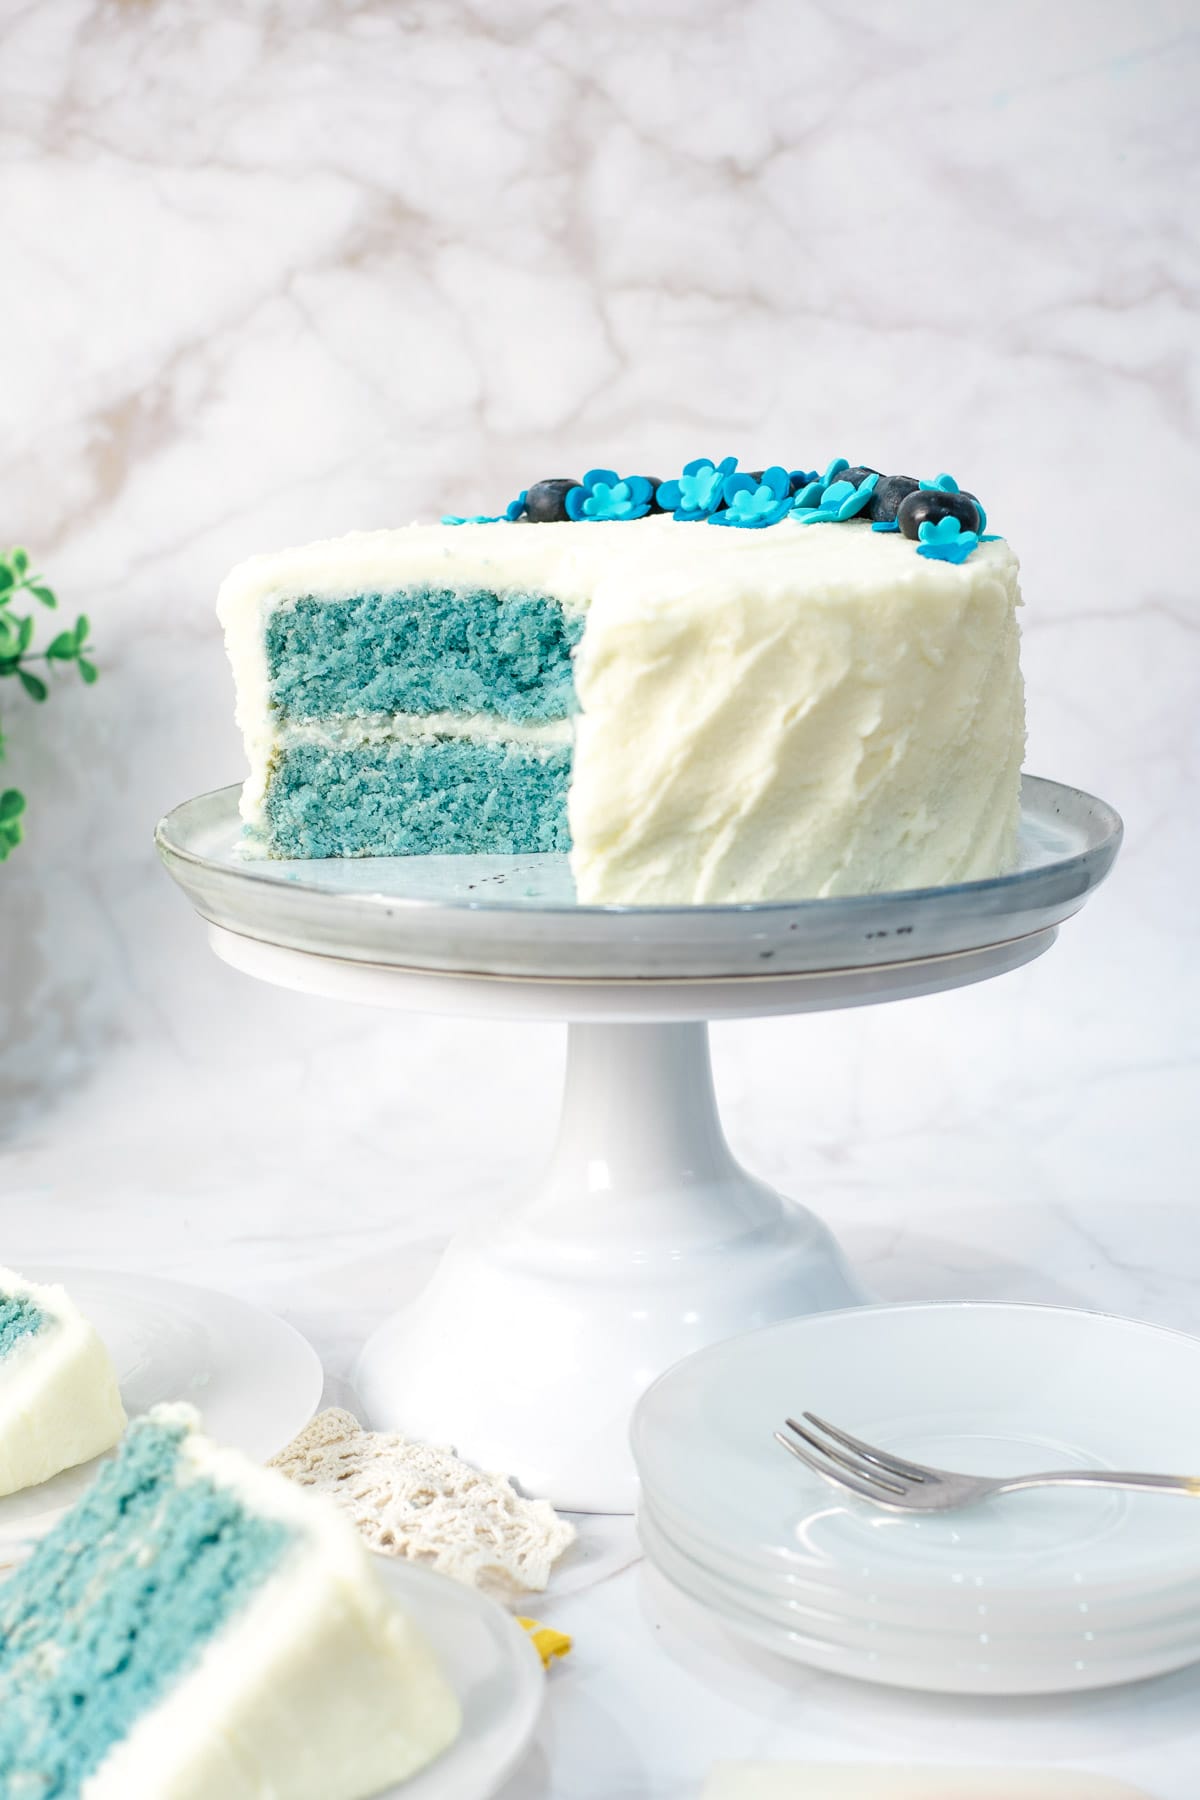
Blue is a very tricky color to achieve in cakes regardless of whether you tint it with naturally derived blue powders (like the butterfly pea flowers) or store bought blue coloring.
Any slightest tinge of yellow in any of the cake ingredients (like butter or egg yolks which are typically used in most cakes including vanilla cake and pound cake) will turn the blue cake batter into green or teal.
To preserve the pure blue color of the butterfly pea flowers, this blue cake batter is made without any egg yolks or butter. Egg yolks are totally eliminated while butter is replaced with shortening.
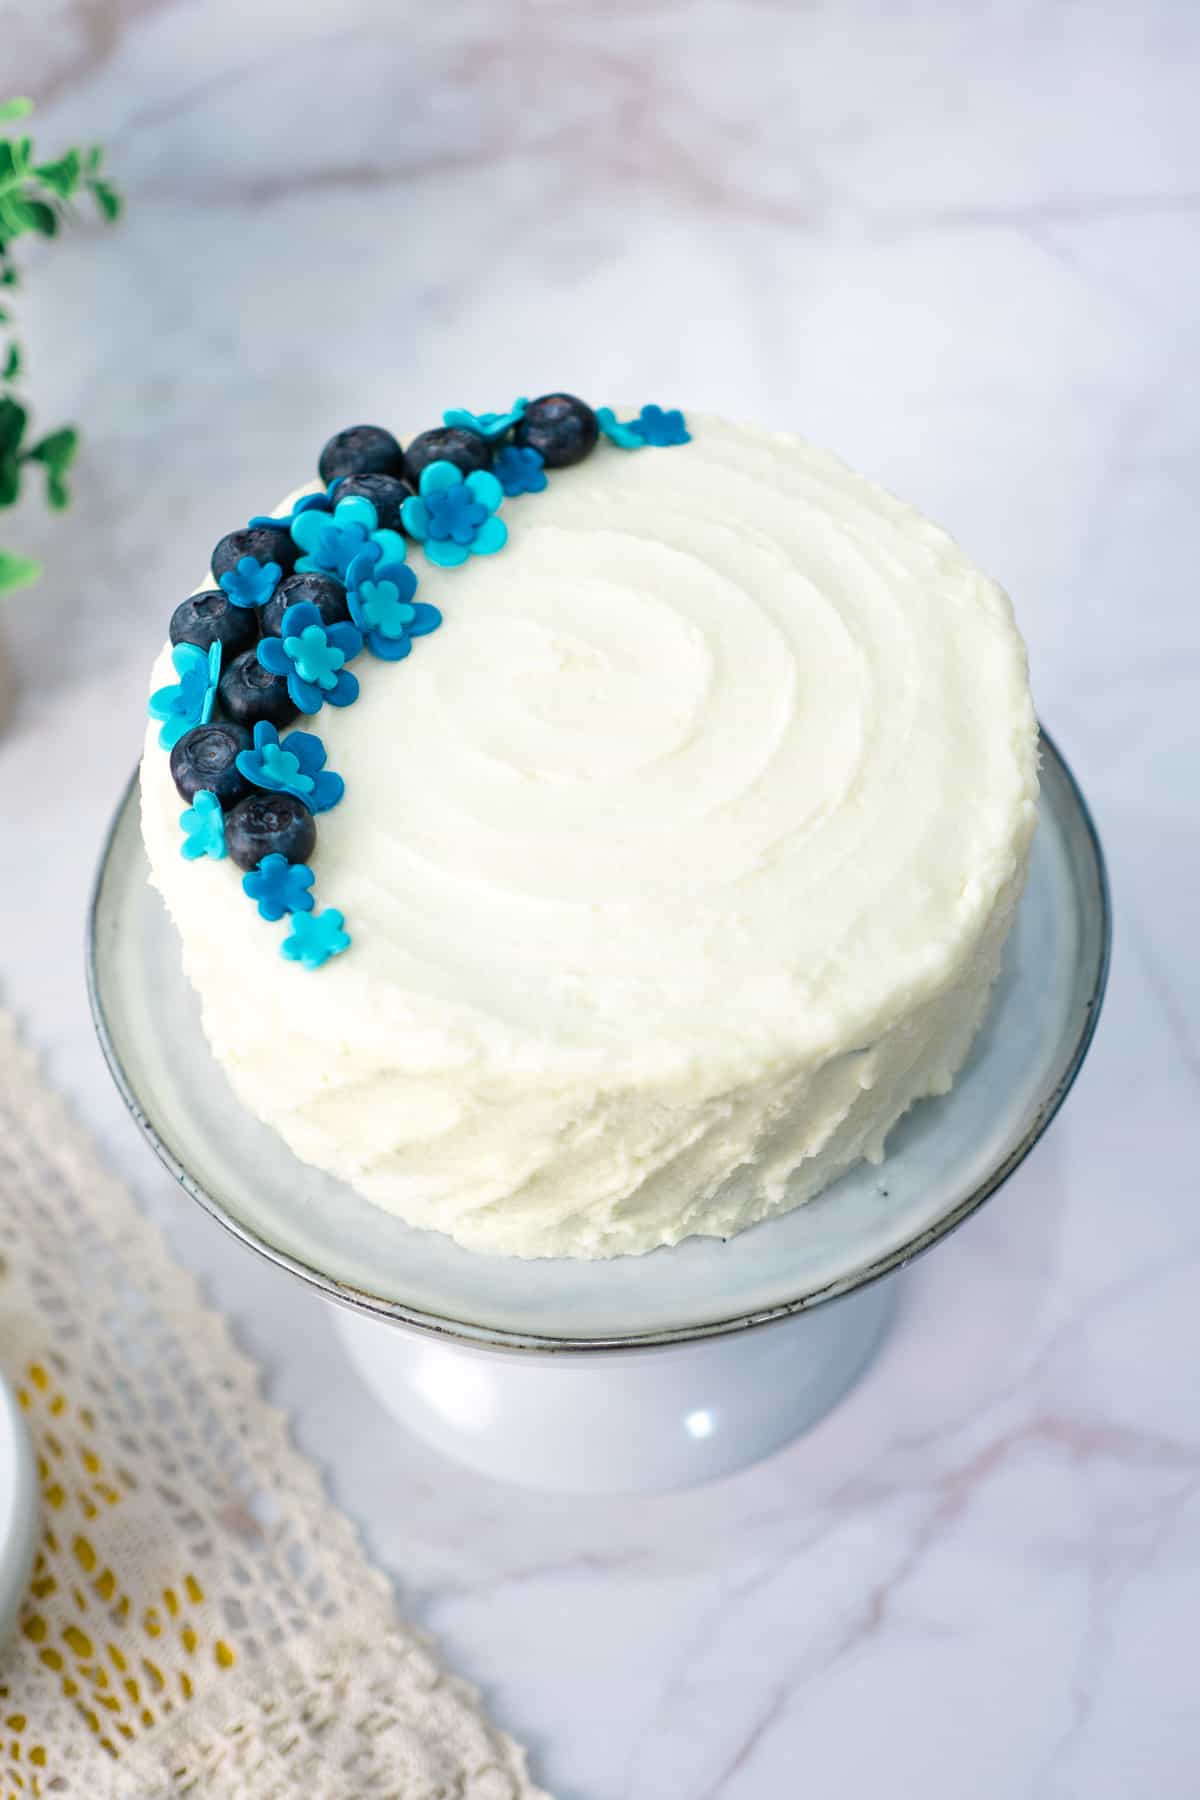
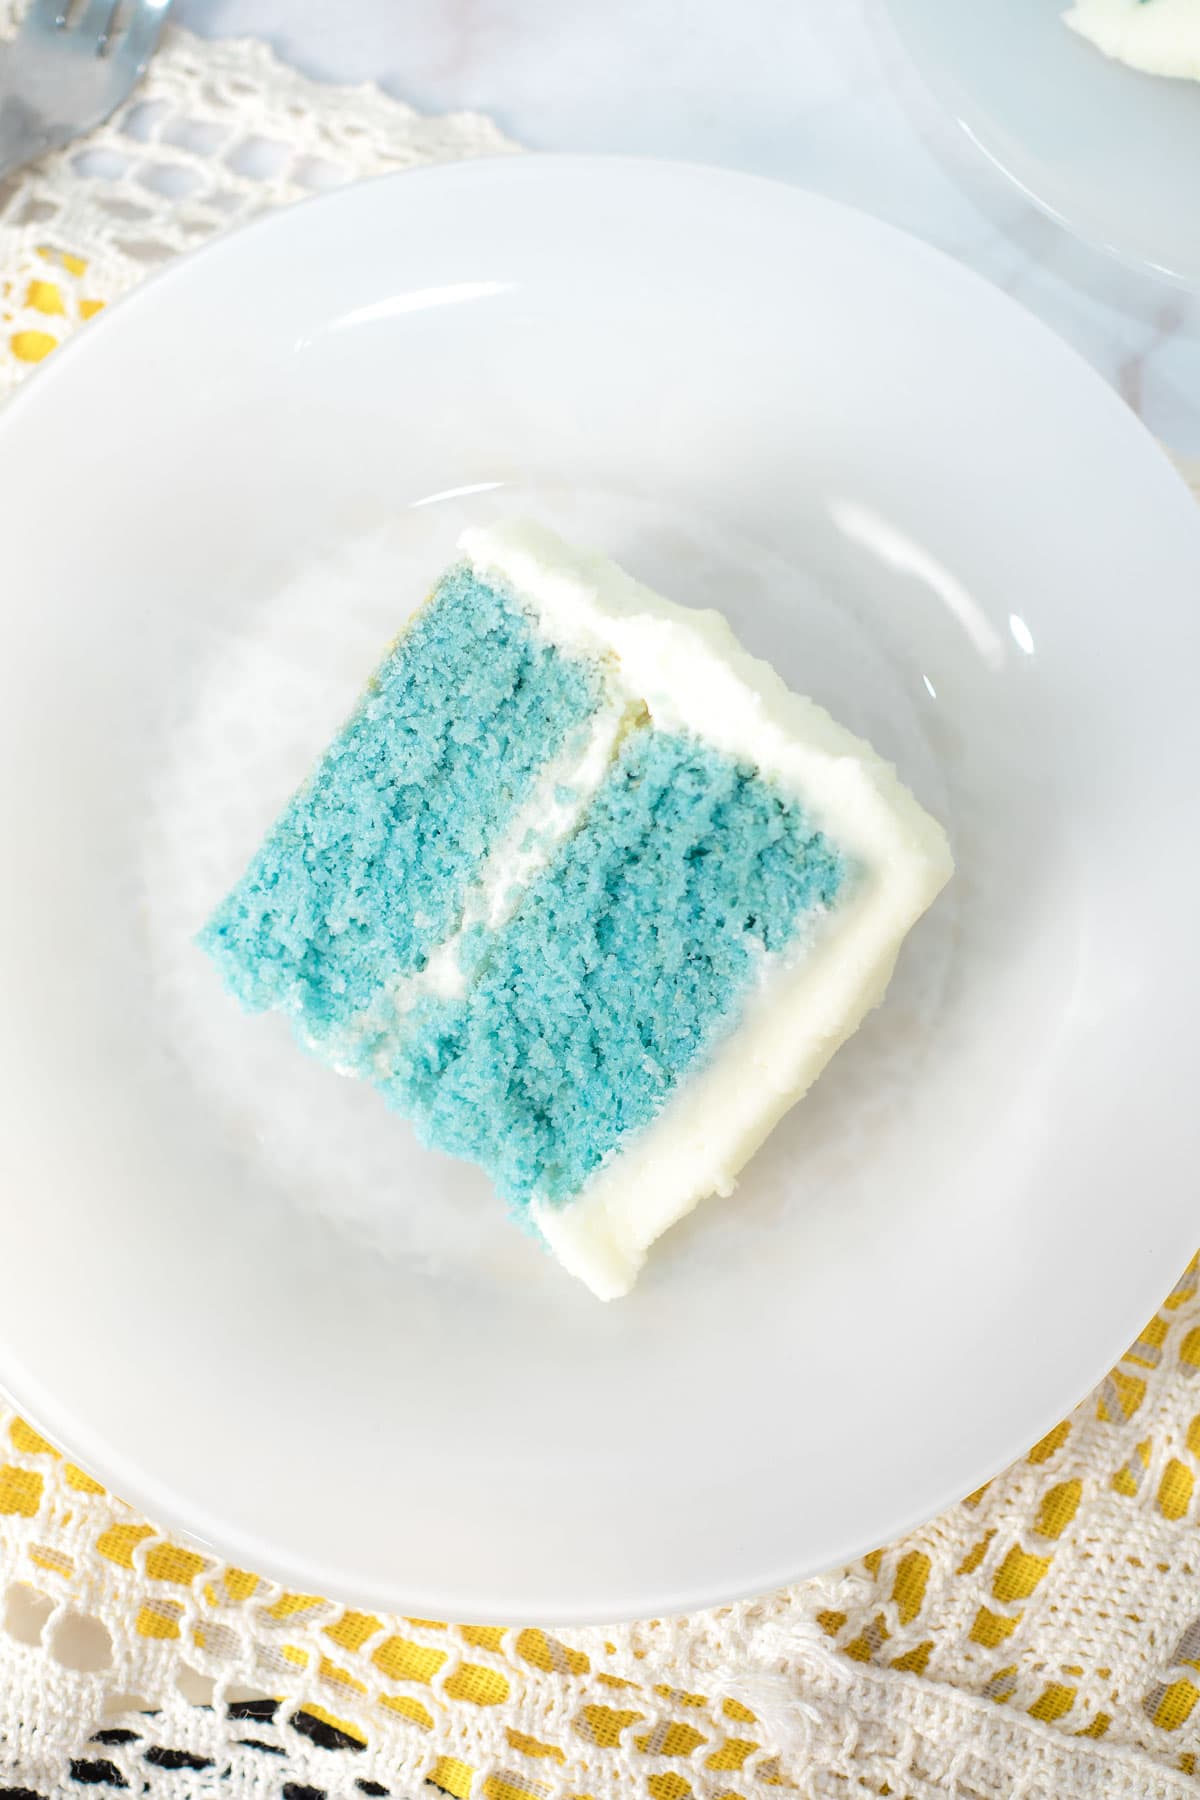
The resulting cake has a lovely pastel blue interior and makes an even prettier cake with a white cream cheese frosting.
Jump to:
❤️Why you will love this recipe
- This is an easy cake to make.
- It has a lovely soft and fluffy texture.
- The sweet taste of the cake complements perfectly with the tangy lemon cream cheese frosting.
- The cake has the prettiest blue color for a cake.
- It makes a perfect choice for blue themed parties, baby showers and other special occasions.
❓What is butterfly pea flower?
- Butterfly pea plant is native to the Southeast Asia region. It produces blue edible flowers that are widely used in the Southeast Asian cuisine, both for its beautiful color as well as its medicinal properties.
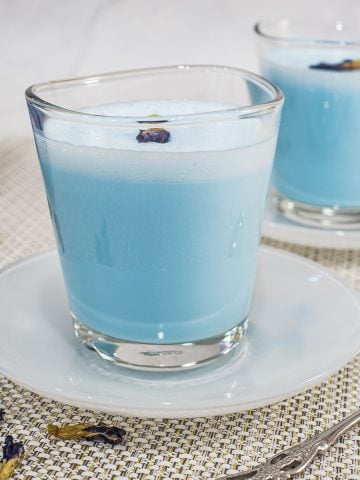
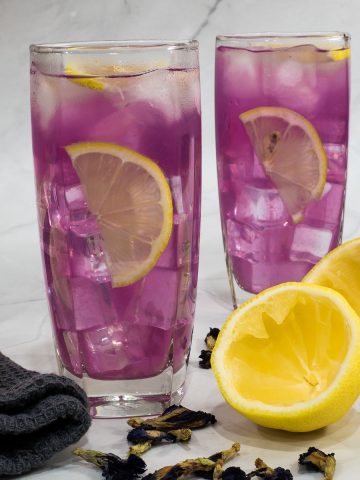
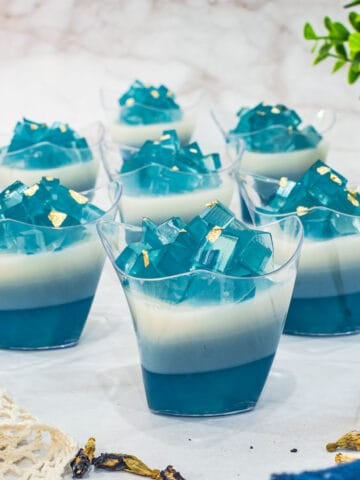
- Also known as Asian Pigeonwings or blue pea flowers, the butterfly pea flowers are blue in color. The rich color is often extracted (by steeping the flowers in hot water) and used as a natural dye in food (like the butterfly pea cookies and butterfly pea jelly) and drinks (like this butterfly pea drink, butterfly pea latte, butterfly pea lemonade and butterfly pea milk tea).
- The flowers can be used in fresh form, or in dried or powder form. While it may be difficult to readily obtain the fresh flowers, you can find the dried butterfly pea flowers in online stores or grocery stores selling South East Asia food items.
- The powder form of the blue butterfly pea powder is also known as blue matcha powder.
📋Ingredients
For the cake:
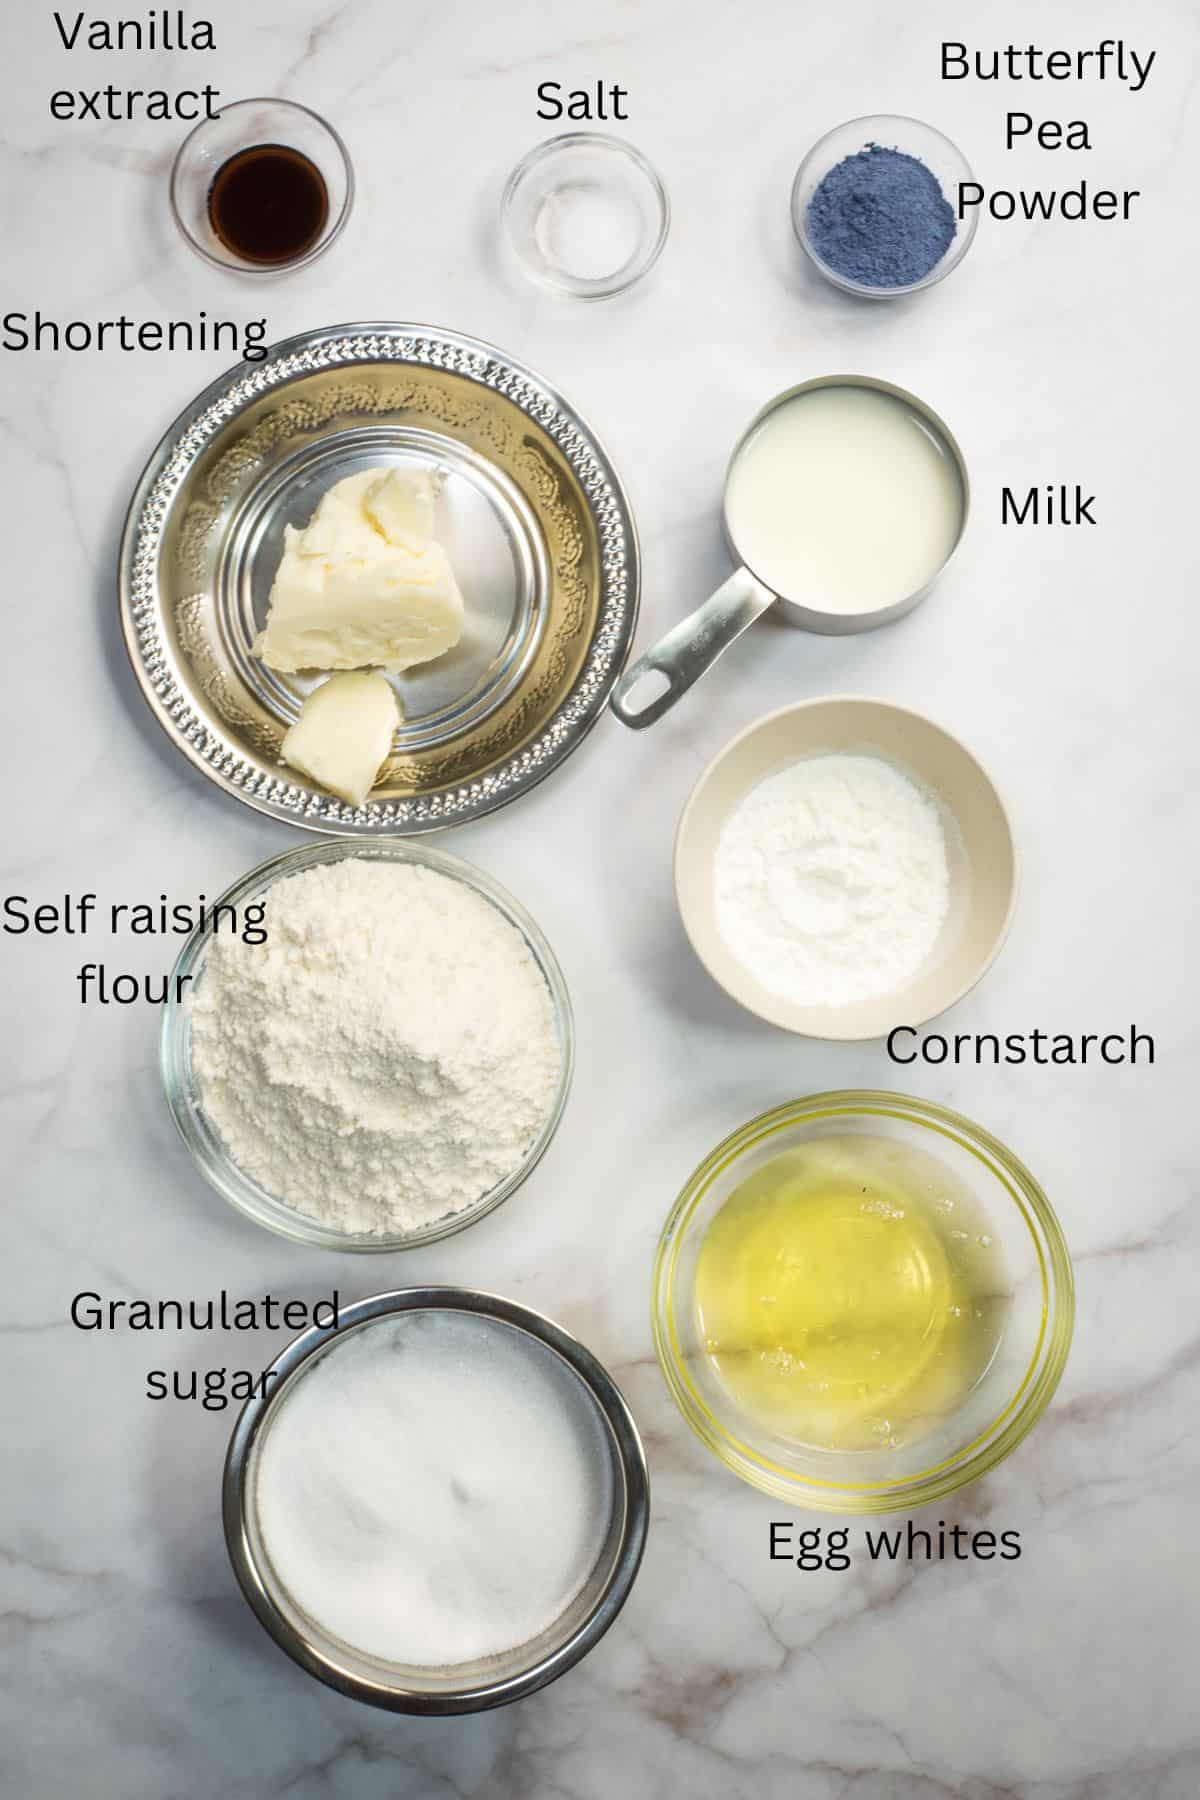
- Egg whites - use fresh eggs and make sure they are at room temperature.
- Granulated sugar (caster sugar) - use white sugar to preserve the white base for the cake.
- Shortening - helps keep the batter completely white to preserve the blue color of the butterfly pea. Butter will cause the cake to become a teal colored instead of blue.
- Self raising flour + cornstarch + salt - Cornstarch helps with the soft and delicate texture of the cake. Make sure to sift both flours (with salt) before using to break any lumps and to aerate the flour.
- Vanilla extract - flavoring is important for this cake as shortening is quite tasteless.
- Blue butterfly pea flower powder (Blue matcha powder) - contributes to the natural blue color of the cake. It is best to purchase the flowers in powder form than making at home with dried flowers as the powder has to be fine like flour.
For the lemon cream cheese frosting:
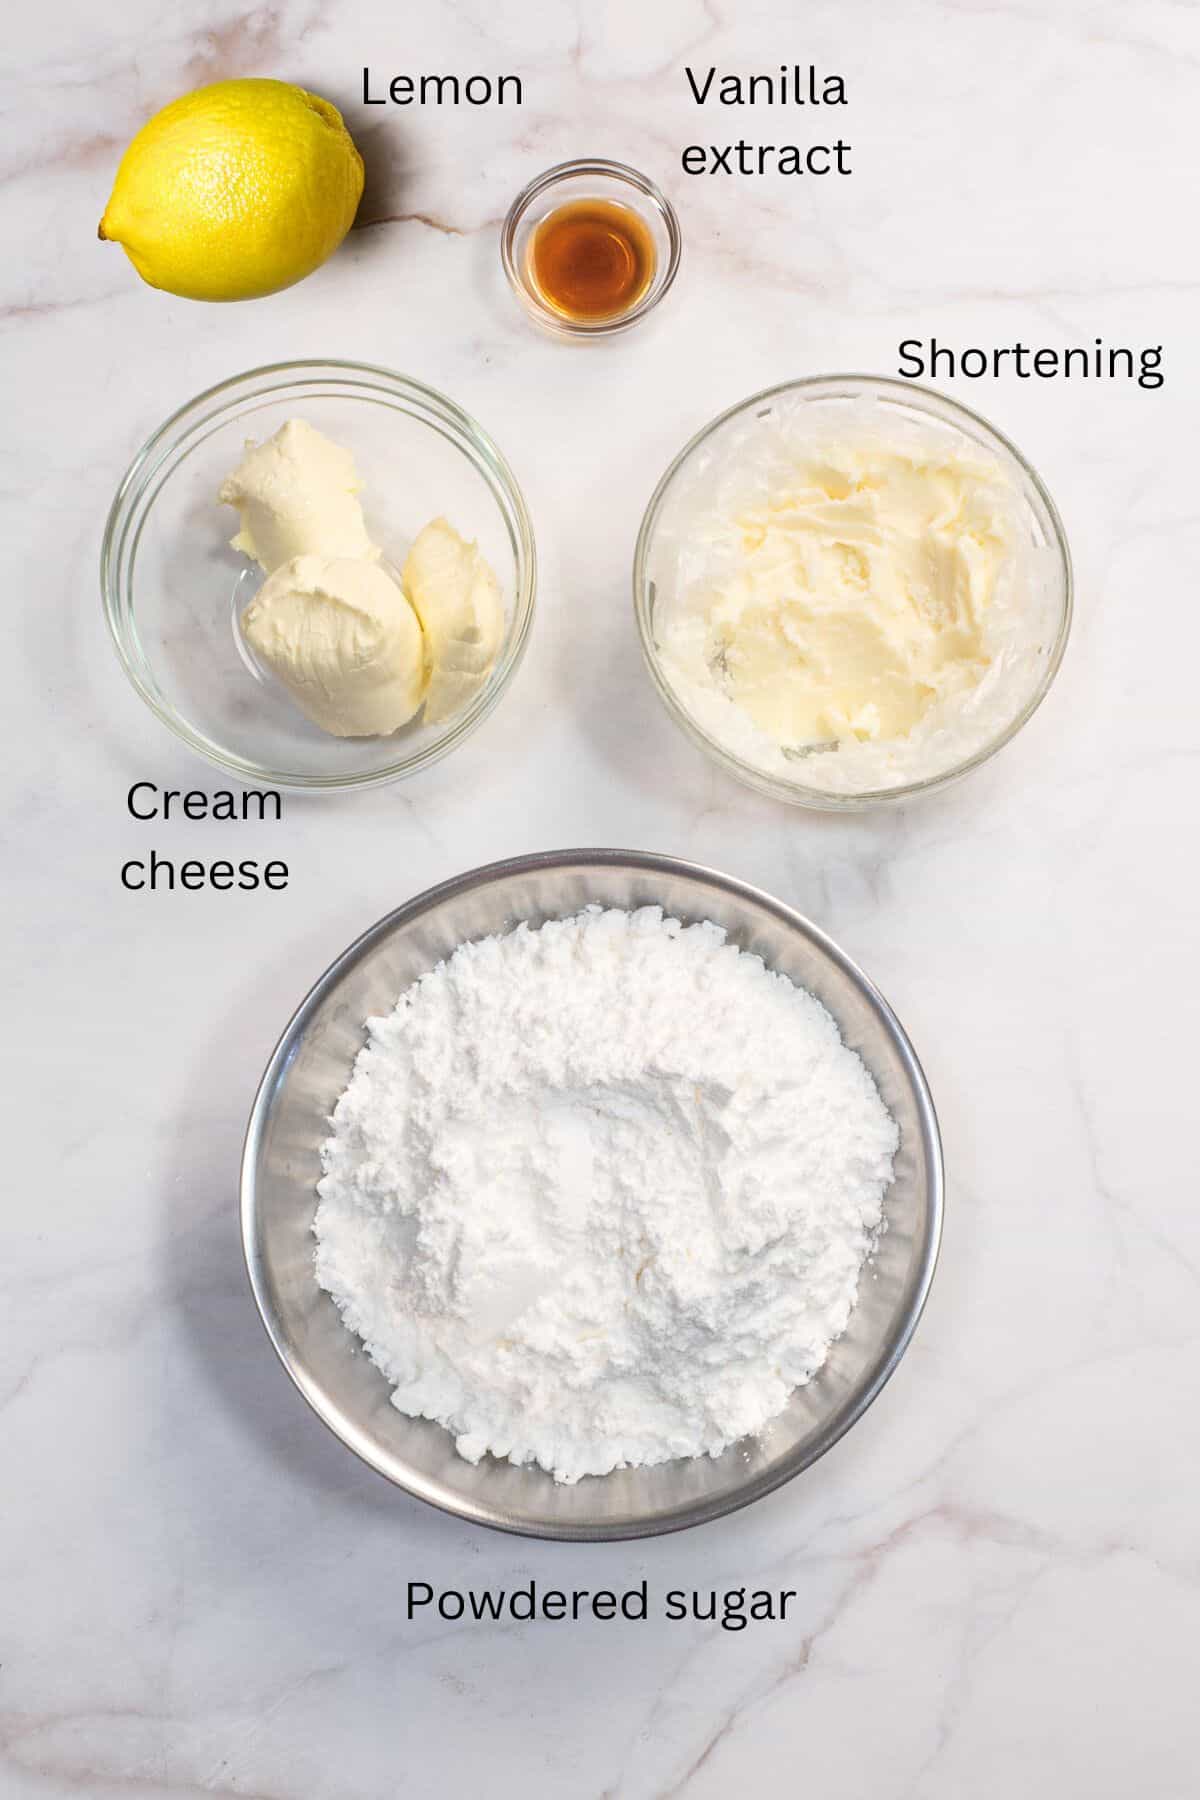
- Cream cheese - use full fat cream cheese that is sold in blocks. Spreadable cream cheese will not work for this recipe as it will be too soft.
- Powdered sugar (icing sugar) - sift first to break any lumps as powdered sugar tends to be lumpy.
- Shortening - Helps to stabilize the cream cheese especially in warm climates. It also helps maintain the white color of the frosting.
- Lemon zest & juice - adds a lovely flavor to the cream cheese frosting.
Decoration (Optional)
- Fondant flowers - These are cut using fondant flower cutters in 2 different sizes and 2 different shades of blue. You can make your own fondant with my marshmallow fondant or homemade fondant recipe or store bought fondant.
- Fresh berries (blueberries) - I used blueberries to match the color of the cake.
*Refer to the recipe card below for full list of ingredients and exact quantities. For best results, use a digital kitchen scale where applicable*
🧾Substitution and Variations
- Shortening can be replaced with butter or oil, however, the color of your cake will be teal instead of a pastel blue.
- Vanilla extract can be replaced with almond extract or rose extract.
- In addition to the lemon cream cheese frosting, you can also use lemon curd as the cake filling.
- Lemon cream cheese frosting can be substituted with mascarpone whipped cream or lightly sweetened plain whipped cream.
This recipe has not been tested with other substitutions or variations. If you do try, please let me know in the comments section below!
👩🍳How to Make
Baking the cake
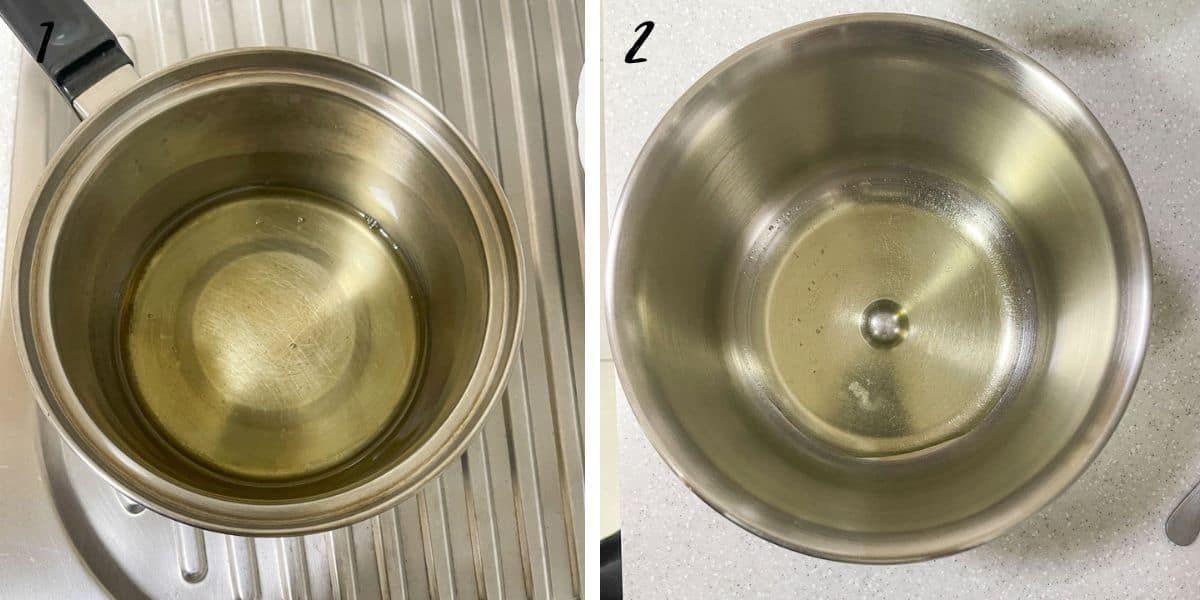
Step 1: Melt the shortening. Use low heat and turn the heat off as soon as the shortening is almost all melted. The rest will continue to melt in the heat. Set it aside to cool (image 1).
Step 2: Separate the egg whites and egg yolks. The egg yolks as they are not required in this recipe. Add the egg whites into an absolutely grease-free bowl (image 2).
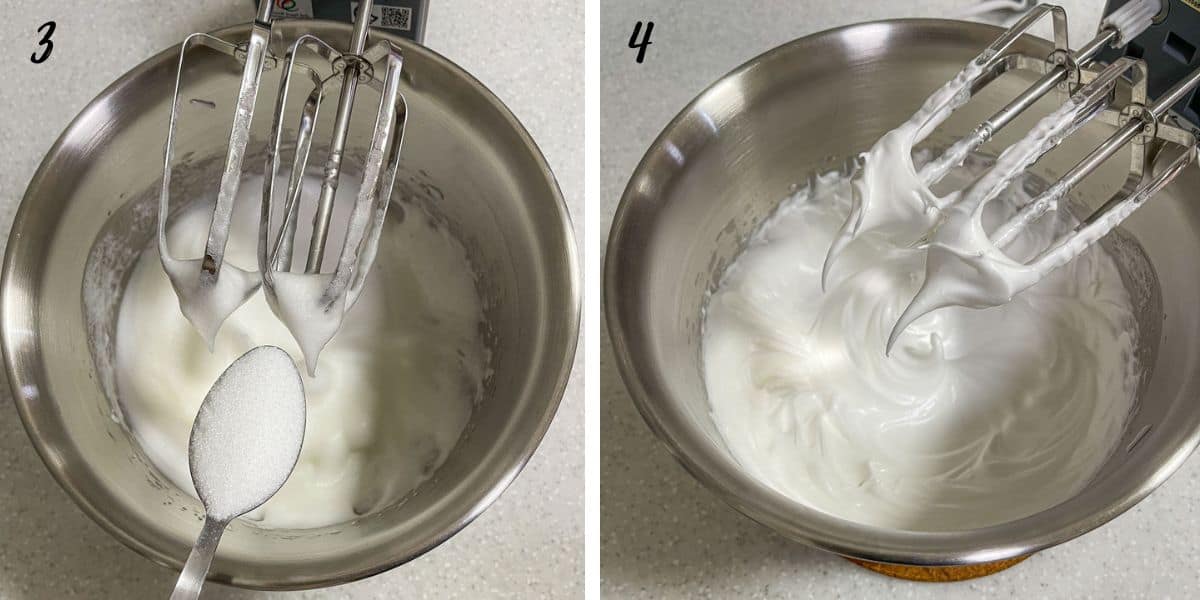
Step 3: Whisk the egg whites and add half of the sugar. Start by whisking just the egg whites. Use medium speed. Whisk until they turn frothy and increase in volume.
Test by turning off the mixer and lifting the beaters. If you see stiff peaks formed on the beaters (like in image 3), you can start adding half of the granulated sugar.
Note: Sprinkle the sugar gradually while whisking instead of dumping it all at once to avoid the eggs from deflating.
Step 4: Continue to whisk on medium speed until the egg whites turn glossy and stiff peaks form again (image 4). Set aside.
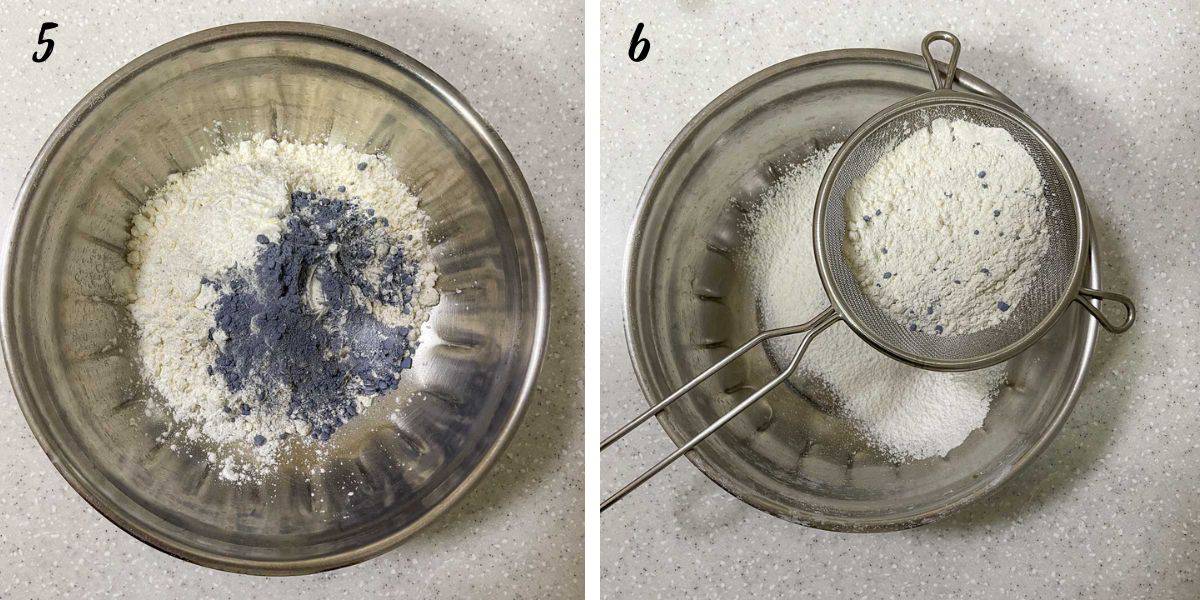
Step 5: Measure the dry ingredients. Add self raising flour, cornstarch, salt and the butterfly pea powder into a bowl (image 5). Sift twice to combine the ingredients and aerate the flour (image 6).
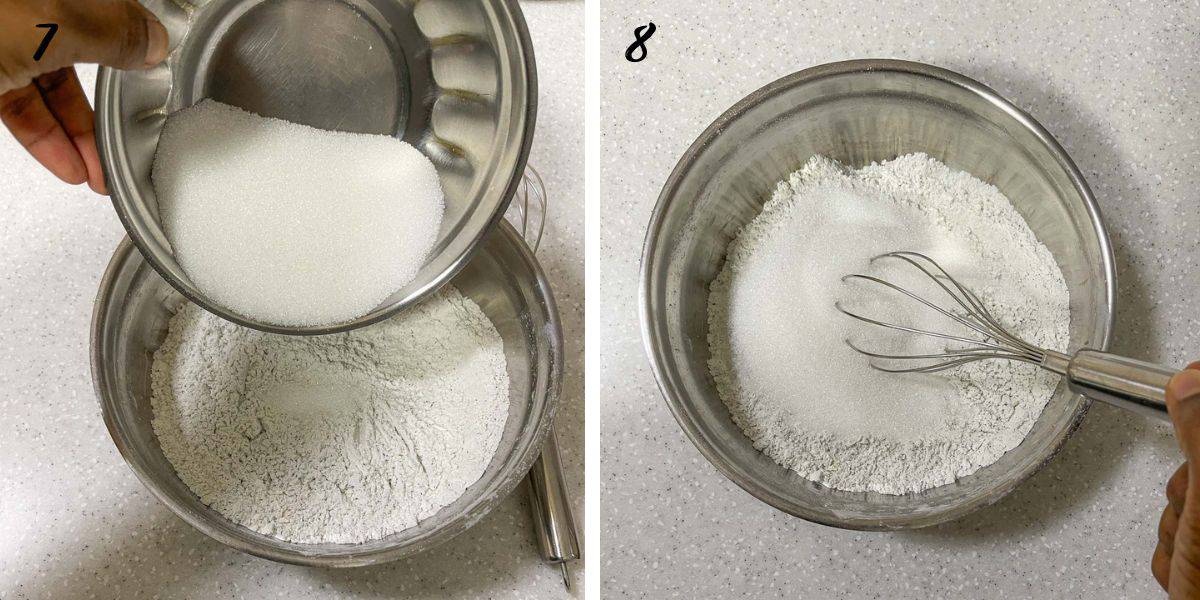
Step 6: Mix in the remaining half of the granulated sugar. Stir with a hand whisk until well combined (images 7 & 8).
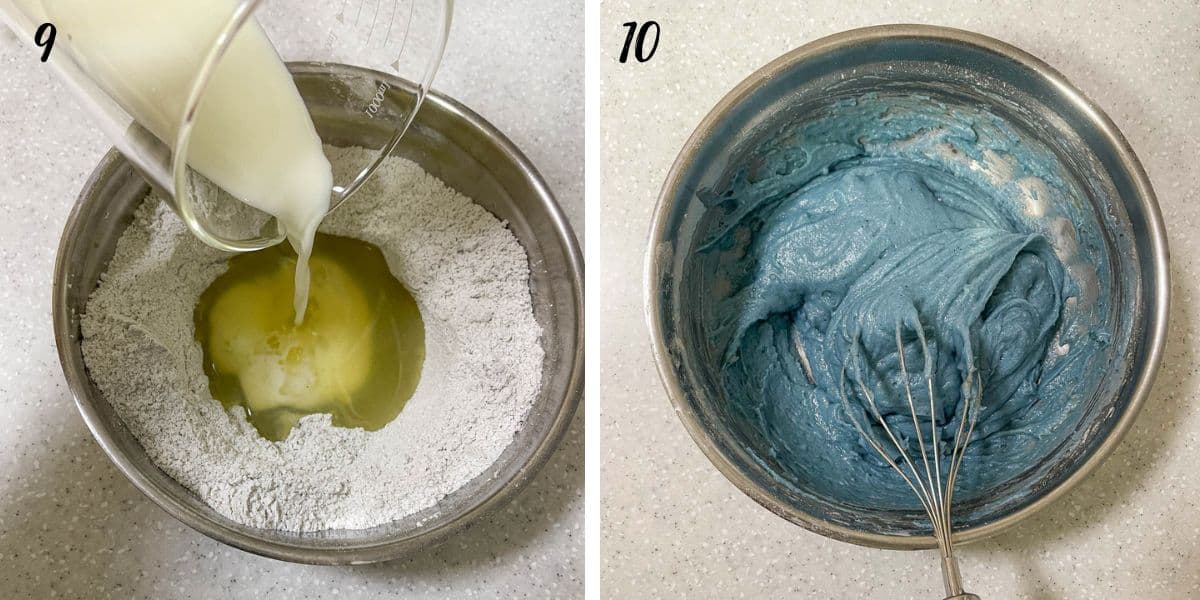
Step 7: Combine wet ingredients into the dry ingredients. Make a well in the center of the sifted dry ingredients.
Note: The best way to mix the liquids into the flour mixture (to avoid the flour from lumping) is to make a well in the center and pour the liquids in.
Pour in the melted shortening, followed by the milk and the vanilla extract (image 9).
Mix with a hand whisk until the mixture turns smooth and there are no lumps (image 10).
Note: Start mixing in the center in circular motion and pull in the flour mixture into the center with the whisk as you mix.
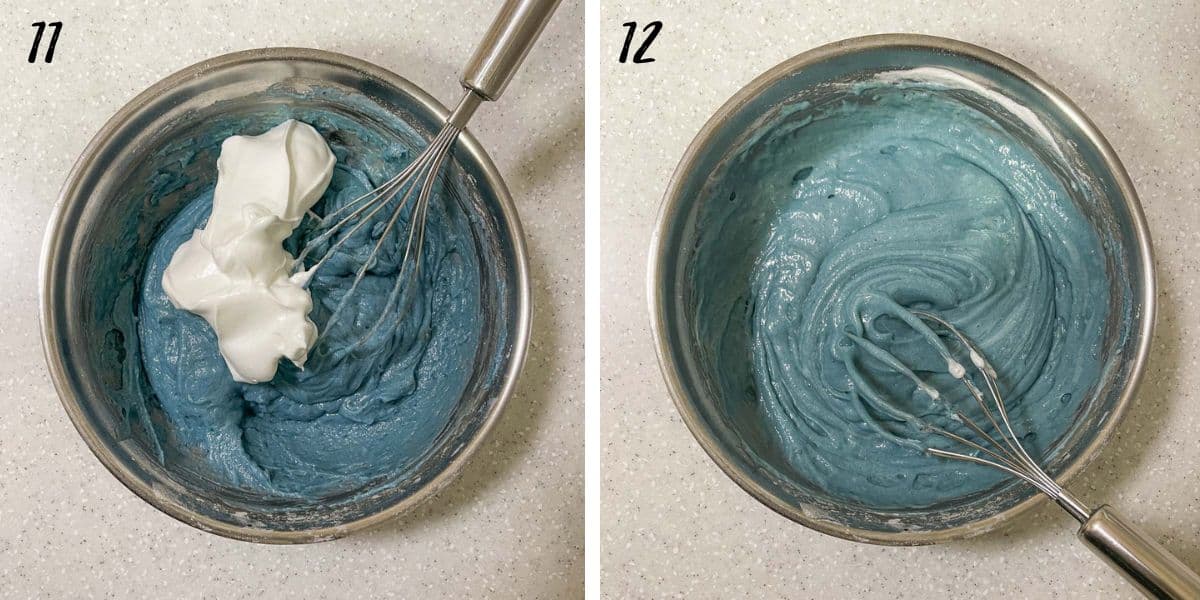
Step 8: Fold in the egg whites. Scoop one third of the whipped egg whites into the flour mixture and fold it in gently.
Scrape the sides and bottom of the bowl as you fold. Continue with another one third of the whipped egg whites. Fold well (images 11 & 12).
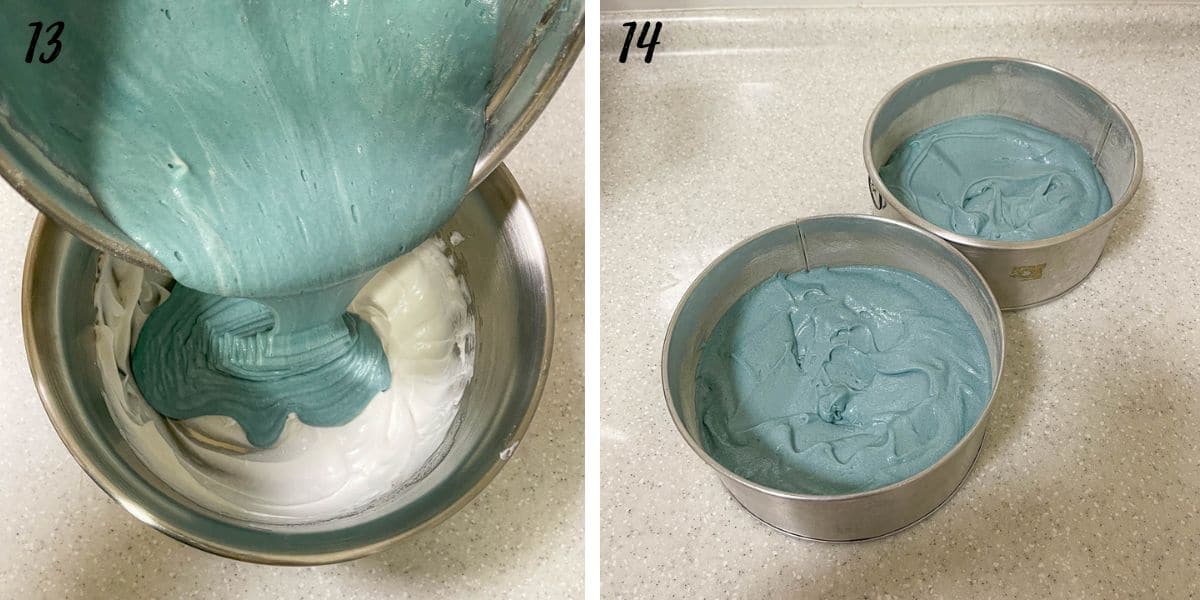
Finally, pour the blue batter into the remaining whipped egg whites. Fold gently and well, until there are no streaks of the whipped egg whites left (image 13).
Note: Transferring the batter into the egg whites bowl will ensure there is no flour mixture left unmixed at the bottom of the bowl. But do not overmix the batter to avoid the egg whites from deflating.
Step 9: Pour the batter into cake tins. Divide between two well greased 7 inches round cake tins.
Make sure to line the bottom of the tins with parchment paper. This is crucial as the cake tends to stick to the bottom of the pan even after greasing (image 14).
Note: To ensure the batter is equally divided between the tins, you may want to weigh the cake tins with the batter in it. This will help ensure the cakes bake evenly and with same height.
Step 10: Bake the cakes for 45 minutes in the preheated oven at 175℃ until the top is soft but firm to the touch.
Make sure the cakes are well baked or they risk collapsing once you remove from the oven. Remove the cakes from the oven and let them cool in the tins for about 3 to 4 minutes.
Use a butter knife or palette knife to loosen the sides of the cake from the tin.
Turn the cakes over onto wire racks and peel off the parchment paper lining. Turn the cakes over again so that they face upwards. Let them cool down completely before frosting.
Note: Keep the cakes covered with a kitchen towel as they are cooling down to prevent them from becoming dry. It also helps to wrap them in plastic wrap while they are still warm and refrigerating until they cool down completely to lock the moisture.
Making the lemon cream cheese frosting
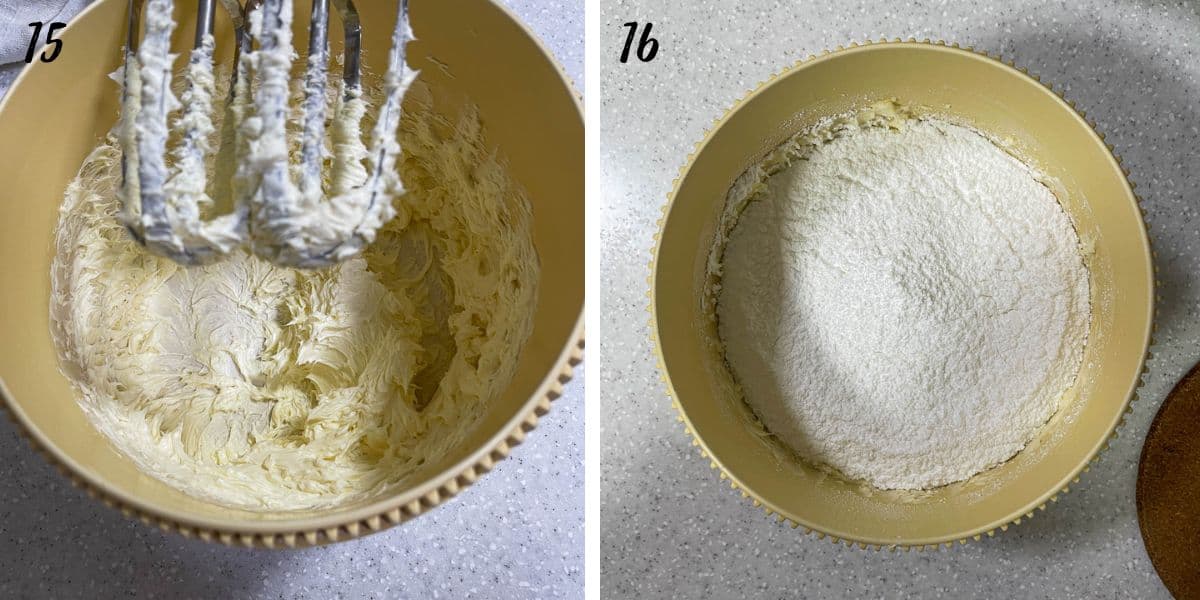
Step 11: Make the cream cheese frosting. Measure cream cheese into a medium bowl. Add the shortening. Cream both until smooth and creamy (image 15).
Next, sift in the powdered sugar. You can either sift it directly into the creamed mixture or sift it separately and then add it into the bowl (image 16).
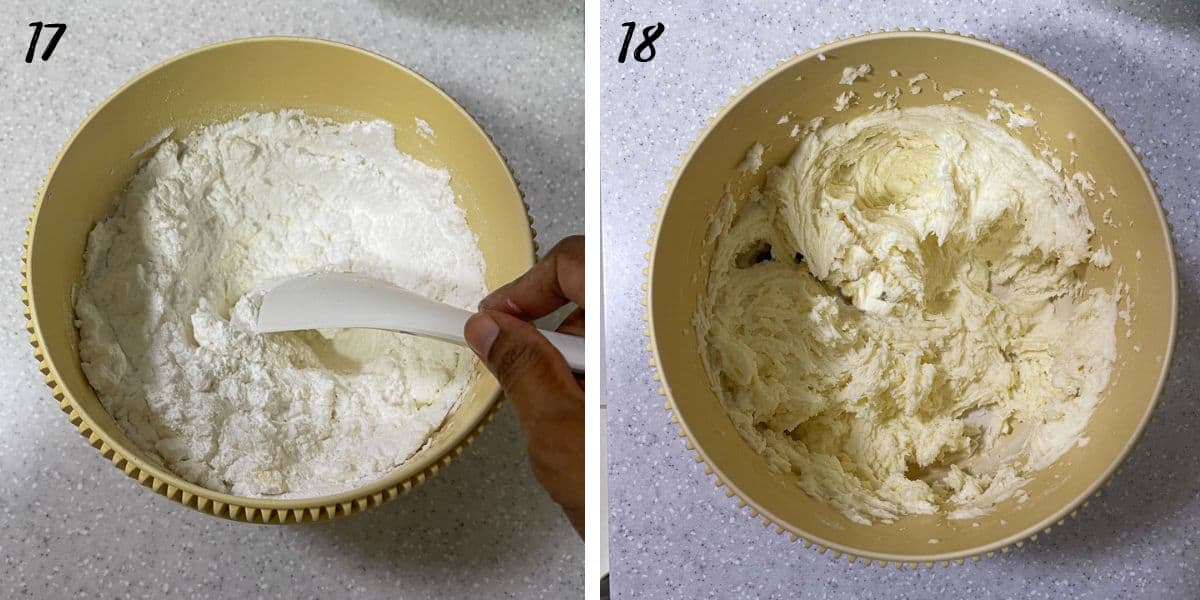
Mix the sugar into the creamed cheese with a spatula first to avoid the sugar from flying all over as you turn on your mixer (image 17).
Once the sugar is lightly moistened, whip the frosting until it turns smooth (image 18). Add the lemon zest and lemon juice and beat again until well combined.
Decorating the cake
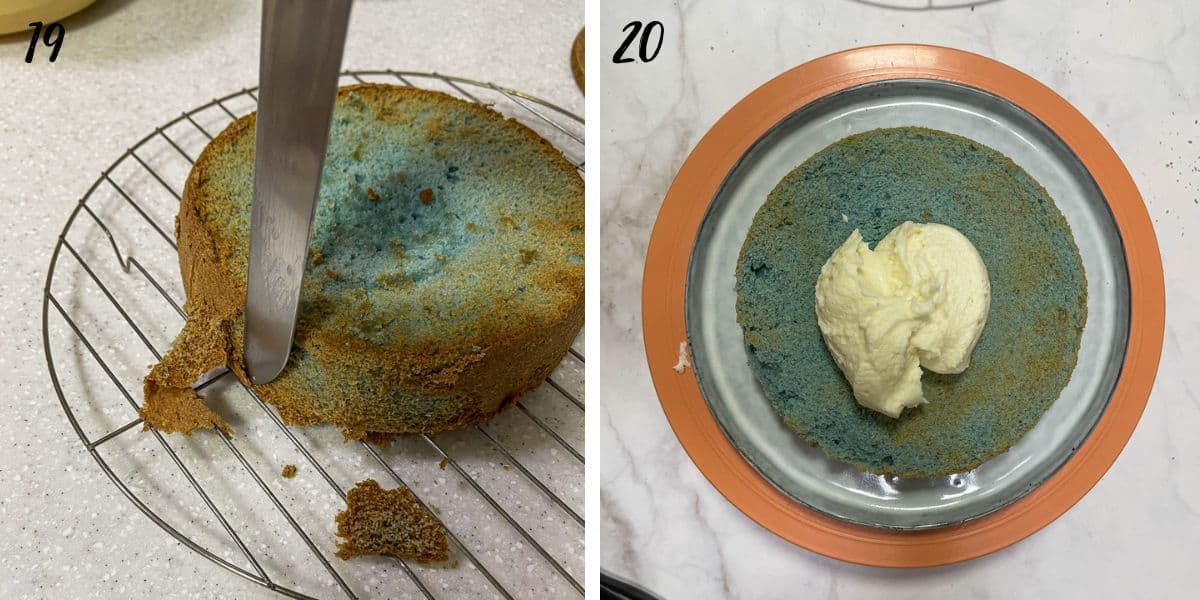
Step 12: Fill and cover the cake with the frosting. To prevent the brown crust around the cake layers from showing, use a sharp knife or a serrated knife to slice it off from the top, bottom and sides of each cake layer (image 19).
Place the first cake layer on a cake plate. Spoon some cream cheese frosting onto the cake layer and spread it with a palette knife (image 20).
Note: Use a turntable for easy frosting of the cake.
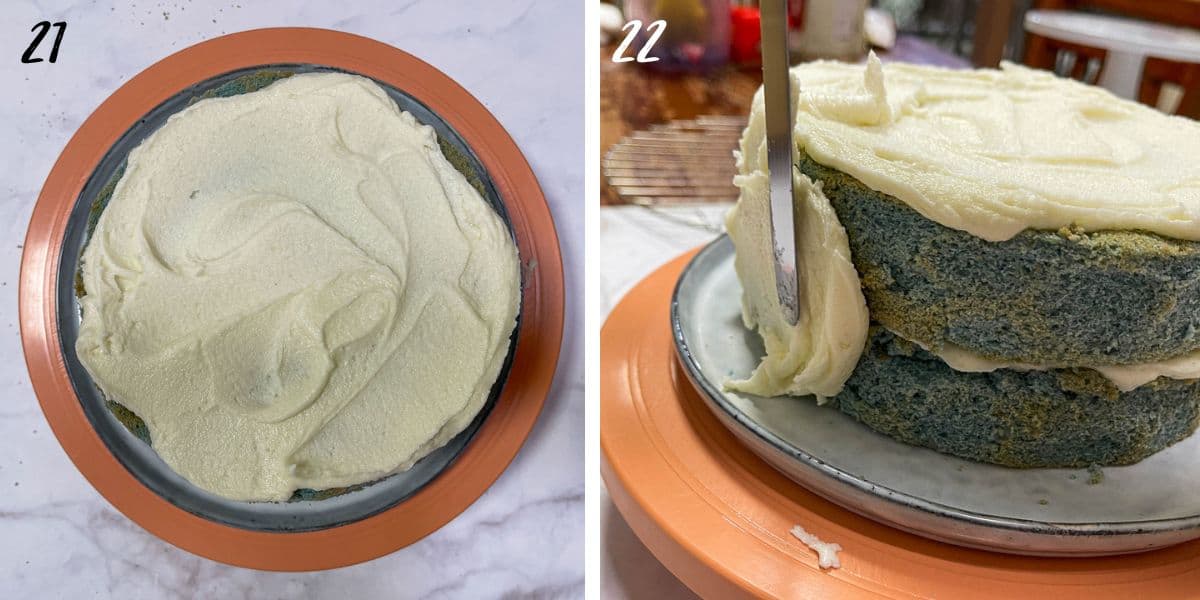
Top with the second cake layer. Start by covering the top with frosting before doing the sides (images 21 & 22). Level the frosting (but it need not be super smooth as you will be doing designs on it with the palette knife (see the steps below).
Note: To avoid the cake crumbs from getting mixed into the frosting, you can give the cake a thin layer of crumb coat like in this Earl Grey lavender cake. Refrigerate for a few minutes to allow the frosting to firm up and then apply the final layer of frosting.
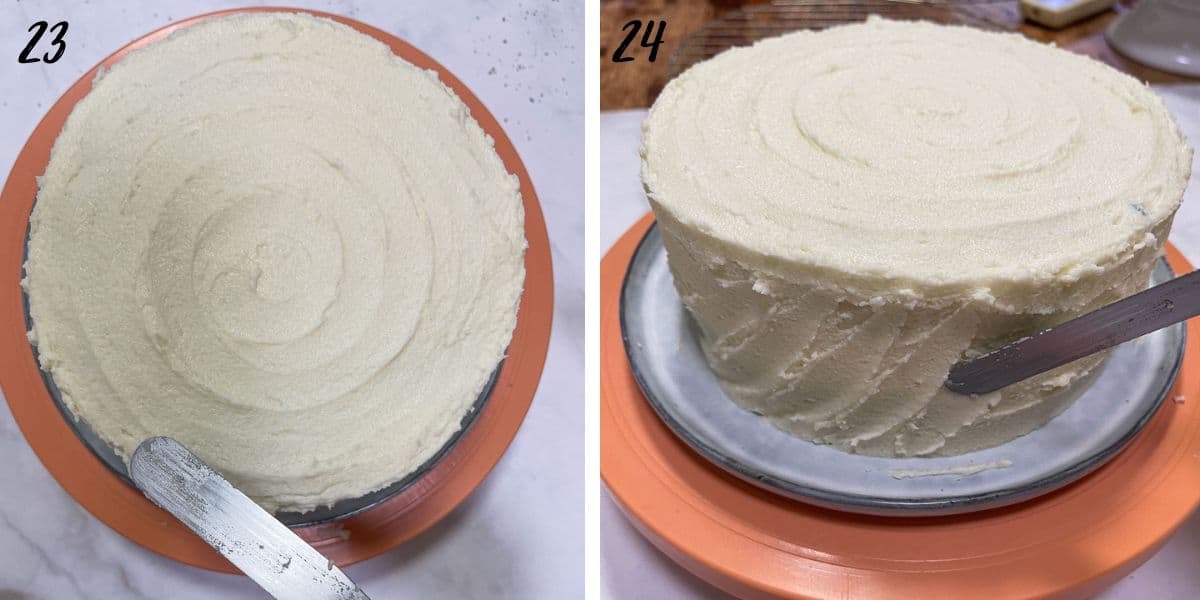
Step 13: Decorate the cake. Hold the palette knife at about 45 degrees angle on top of the cake, in the center.
Apply very light pressure on the frosting and move the knife outwards as you turn the turntable with the other hand. This will create a pretty circular pattern on the cake (image 23).
For the sides, use the same palette knife (wipe off any excess icing that is stuck to it), and move the knife from bottom to top, creating slanting lines on the side (image 24).
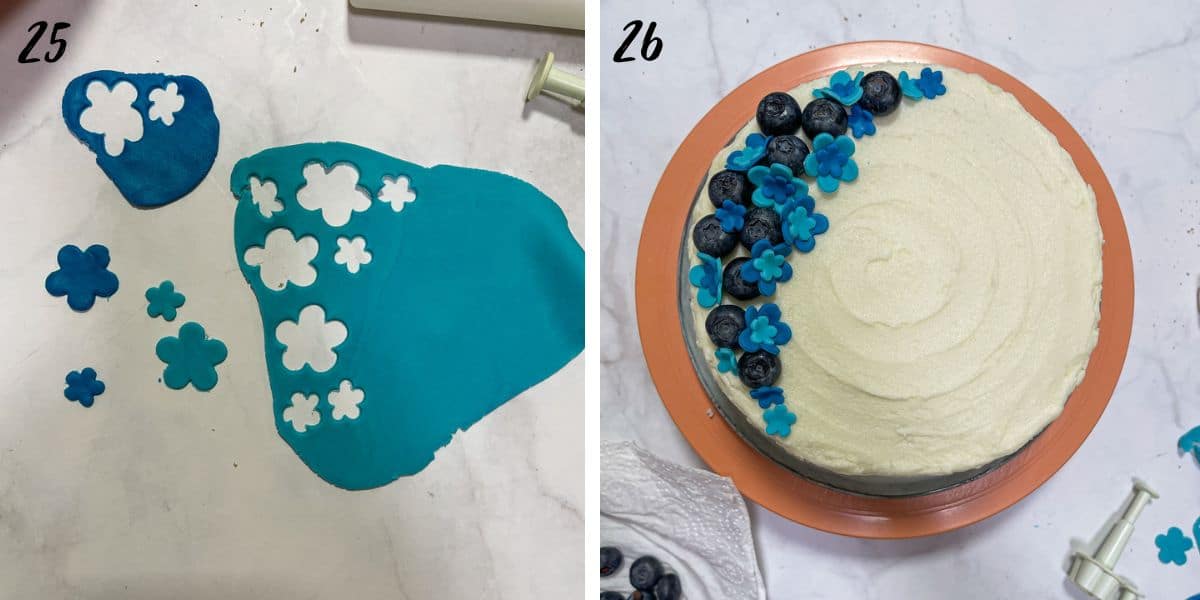
To complete the decoration, roll some fondant thin and cut out the flowers using small flower cutters (image 25).
Arrange the flowers on the cake, combined with fresh blueberries to create a pretty pattern on it (image 26).
💡Expert tips
- Well whipped egg whites - Ensure no grease in the bowl or beaters when whipping egg whites; rinse with hot water and dry with a kitchen towel. Use room temperature egg whites.
- Flavoring - Include vanilla, almond, or rose extract for better cake flavor (shortening lacks flavor, unlike butter, so you definitely need the extracts).
- Baking time - Follow the recommended baking time; underbaking can lead to the cakes collapsing. When fully baked, the cakes should be soft but firm when touched.
- Moist texture - Cover the cakes with a kitchen towel when cooling to prevent drying. And after cooling slightly, wrap them in plastic wrap and refrigerate until they cool down completely. This will help the cakes retain the moisture and give them a moist texture.
💭FAQs
Yes you can. To use fresh or dried flowers, heat up the milk and then let the flowers steep in the hot milk until it turns blue. Strain the milk, remove the flowers and let it cool down completely before using in the cake batter.
Do note, however, that you will require a lot of flowers to achieve the required level of depth of color. Powder is much more concentrated and easier to use.
The butterfly pea flowers do not contribute to any distinct taste in the cake. They are used primarily for the blue color.
The cake is sweet has a lovely fluffy texture. It makes a perfect combination with tangy filling and frosting like lemon curd and cream cheese frosting. It also makes a good combination with less sweet frostings like lightly sweetened whipped cream or whipped mascarpone frosting.
The cake (without frosting) can last at room temperature for a good 4 to 5 days. Keep it covered in an airtight container to prevent it from becoming dry.
With the cream cheese frosting, the cake should not be left at room temperature for more than 2 to 3 hours. Keep it refrigerated and bring it back to room temperature before serving.
Once cut, the cake should be kept in an airtight container to prevent it from becoming dry.
Also, fondant tends to 'sweat' if refrigerated and brought to room temperature, hence it is best to place the decoration on the cake before serving the cake.
❤️More Recipes You Will Love
Do you like this recipe? Please leave a 5-star ⭐⭐⭐⭐⭐rating in the recipe card below and consider a review further down this page. I would love to hear from you. Thank you!
📖Recipe
Butterfly Pea Cake with Lemon Cream Cheese Frosting
For best results, use the metrics measurements. US customary measurements have not been tested and are only meant for guide.
Ingredients
Cake
- 4 egg whites (at room temperature)
- 320 g granulated sugar
- 160 g shortening
- 320 g self raising flour
- 200 ml milk
- 1 teaspoon vanilla extract
- 2½ tablespoon butterfly pea flower powder (blue matcha powder)
- ⅓ teaspoon salt
Lemon Cream Cheese Frosting
- 450 g powdered sugar
- 135 g cream cheese
- 45 g shortening
- 1½ teaspoon vanilla extract
- 1 tablespoon grated lemon zest (lemon rind)
- 1½ tablespoon lemon juice (strained)
Decoration
- Fondant (in 2 shades of blue)
- Blueberries
Instructions
Baking the cake
- Preheat oven to 175℃.
- Melt the shortening over low heat in a small saucepan. Turn off the heat as soon as it is almost melted and let it to melt completely in the heat. Set aside to cool.
- Separate the egg whites and egg yolks. Set aside the egg yolks as they are not required in this recipe.
- Add the egg whites into a grease-free bowl and whisk the egg whites on medium speed until they turn frothy and stiff peaks form. Make sure the beaters are also free from grease.
- Gradually sprinkle half of the sugar into the egg whites and continue to whip the egg whites until they turn glossy and stiff peak form again. Set aside.
- In a separate bowl, measure the self raising flour, cornstarch, salt and the butterfly pea powder. Sift twice.
- Add the remaining half of the granulated sugar into the flour mixture and mix with a hand whisk until well combined.
- Make a well in the center and add the melted shortening, followed by the milk and the vanilla extract.
- Mix with a hand whisk until the mixture turns smooth.
- Scoop one third of the whipped egg white into the flour mixture and fold it in gently. Scrape the sides and bottom of the bowl as you fold.
- Continue with another one third of the egg white. Fold well but do not overmix to avoid deflating the egg whites.
- Finally, pour the flour mixture into the remaining egg whites and fold well, until there are no streaks of the white egg whites left.
- Divide the cake batter between two well greased 7 inches round cake tins. Make sure to line the bottom of the tins with parchment paper and grease the parchment lining as well. This is crucial as the cake tends to stick to the bottom of the pan even after greasing.
- To ensure the batter is equally divided between the tins, weigh the cake tins with the batter in it. This will help ensure the cakes bake evenly and with same height.
- Bake the cakes for 45 minutes in the preheated oven at 175℃ until the top is soft but firm to the touch.Make sure the cakes are well baked or they risk collapsing once you remove from the oven. The cakes should be soft but firm to the touch. Remove the cakes from the oven and let them cool in the tins for about 3 to 4 minutes.
- Use a butter knife or palette knife to loosen the sides of the cake from the tin.
- Turn the tins over onto wire racks and peel off the parchment paper lining. Turn the cakes over again so that they face upwards. Let them cool down completely. Keep them covered with a kitchen towel to prevent them from becoming dry. It also helps to wrap them in plastic wrap while they are still warm and refrigerating them to lock the moisture.
Making the lemon cream cheese frosting
- Measure cream cheese into a medium bowl.
- Add the shortening.
- Cream both until smooth and creamy.
- Next, sift in the powdered sugar. You can either sift it directly into the creamed mixture or sift it separately and then add it into the bowl.
- Mix the sugar into the creamed cheese and shortening with a spatula to moisten it. This step is not necessary, but it will help avoid the sugar from flying all over as you turn on your mixer.
- Once the sugar is lightly moistened, beat the frosting until it turns smooth with an electric mixer. Add the lemon zest and lemon juice and beat again until well combined.
Decorating the cake
- To prevent the brown crust around the cake layers from showing after assembling the cake, use a sharp knife or a serrated knife to slice it off from the top, bottom and sides of each cake layer.
- Place the first cake layer on a cake plate.
- Place the plate on a turntable for easy frosting. Spoon some cream cheese frosting onto the cake layer and spread it with a palette knife.
- Top with the second cake layer.
- Cover the cake with the remaining frosting. To avoid the cake crumbs from getting mixed with the frosting, it is advisable to cover the cake with a thin layer of crumb coat like in this Earl Grey lavender cake. Refrigerate for a few minutes to allow the frosting to firm up.
- Remove the cake from the fridge and apply the next layer of frosting. This time, apply it thicker.
- Start from the top and then cover the sides. Level the frosting reasonably well with a palette knife. You need not achieve a perfectly smooth coating as you will be doing designs on it with the palette knife.
- Hold the palette knife at about 45 degrees angle, on top of the cake, at the center. Apply very light pressure and turn the turntable with the other hand. As you turn the turntable, move the palette knife outwards, towards the top edges of the cake, creating a circular pattern as you move it.
- For the sides, use the same palette knife (wipe off any excess icing that is stuck to it), and move the knife from bottom to top, creating slanting lines on the side.
- To complete the decoration, roll the fondant thin and cut out the flowers using small flower cutters.
- Arrange the flowers on the cake, combined with fresh blueberries to create a pretty pattern on it.
Notes
- Well whipped egg whites - Ensure no grease in the bowl or beaters when whipping egg whites; rinse with hot water and dry with a kitchen towel. Use room temperature egg whites.
- Flavoring - Include vanilla, almond, or rose extract for better cake flavor (shortening lacks flavor, unlike butter, so you definitely need the extracts).
- Baking time - Follow the recommended baking time; underbaking can lead to the cakes collapsing. When fully baked, the cakes should be soft but firm when touched.
- Moist texture - Cover the cakes with a kitchen towel when cooling to prevent drying. And after cooling slightly, wrap them in plastic wrap and refrigerate until they cool down completely. This will help the cakes retain the moisture and give them a moist texture.


Leave a Reply