

Have you ever wanted to make your own churned ice cream with a texture so smooth and creamy as the ones you purchase at premium ice cream stores?

Well, me too! And because I love ice cream so much, I have taken great interest in learning how to make ice creams such that I don't have to buy from stores anymore! Plus I get to create as many custom flavors I want and adjust the taste to suit my liking too.
And in this post, I am sharing with you my perfected homemade ice cream recipe that only requires 4 main ingredients (i.e.milk, cream, sugar, and a tiny bit of salt) for the creamiest, most delicious ice cream.
This churned ice cream recipe can be made with both an ice cream maker and without an ice cream maker. Without an ice cream maker, all you need is a blender or food processor which most households readily have, and you can achieve perfectly smooth, churned consistency ice cream.
This churned ice cream recipe makes an excellent ice cream base, one that you can use to make ice creams in as many of your favorite flavors as you wish.
Table of contents
- Making Churned Ice Cream With and Without An Ice Cream Maker
- How to Make
- Notes
- Is it necessary to use full-fat milk and can it be substituted for low-fat milk?
- Can granulated sugar be replaced with regular white sugar?
- Why must the ice cream solution be chilled instead of being churned immediately?
- Can the ratio of cream and milk be adjusted?
- Can the ice cream be frozen in ice cube trays for easy blending?
- What is the best temperature to freeze this ice cream and what if it is too hard to scoop after freezing?
- Recipe (Printable)
Making Churned Ice Cream With and Without An Ice Cream Maker
This is both an ice cream maker and a non-ice cream maker recipe. In other words, you can use this recipe and make the smoothest, creamiest churned ice cream in an ice cream maker. Or, you can simply freeze the ice cream and churn it in a blender afterward to a smoothie-like consistency for an equally smooth and creamy textured ice cream. The only difference in churning with a blender is that the churning is not a slow one like in an ice cream machine, but rather an express one.
Nevertheless, I call both the ice creams made with an ice cream machine and a blender as churned ice cream because of the churned consistency of the ice creams - smooth and creamy ice cream, better than the store-bought churned ice creams.
I also have another homemade ice cream recipe which is pretty much an ice cream base like this one. I call it my no-churn ice cream recipe. That recipe does not require any churning or blending. What is more, the ingredients are limited to just 2 (i.e. heavy cream and condensed milk) and it stills makes absolutely creamy and delicious homemade ice cream. You should check it out too!
How to Make
Ingredients:
- Full fat milk
- Heavy whipping cream (with at least 35% fat)
- Granulated sugar
- Fine salt
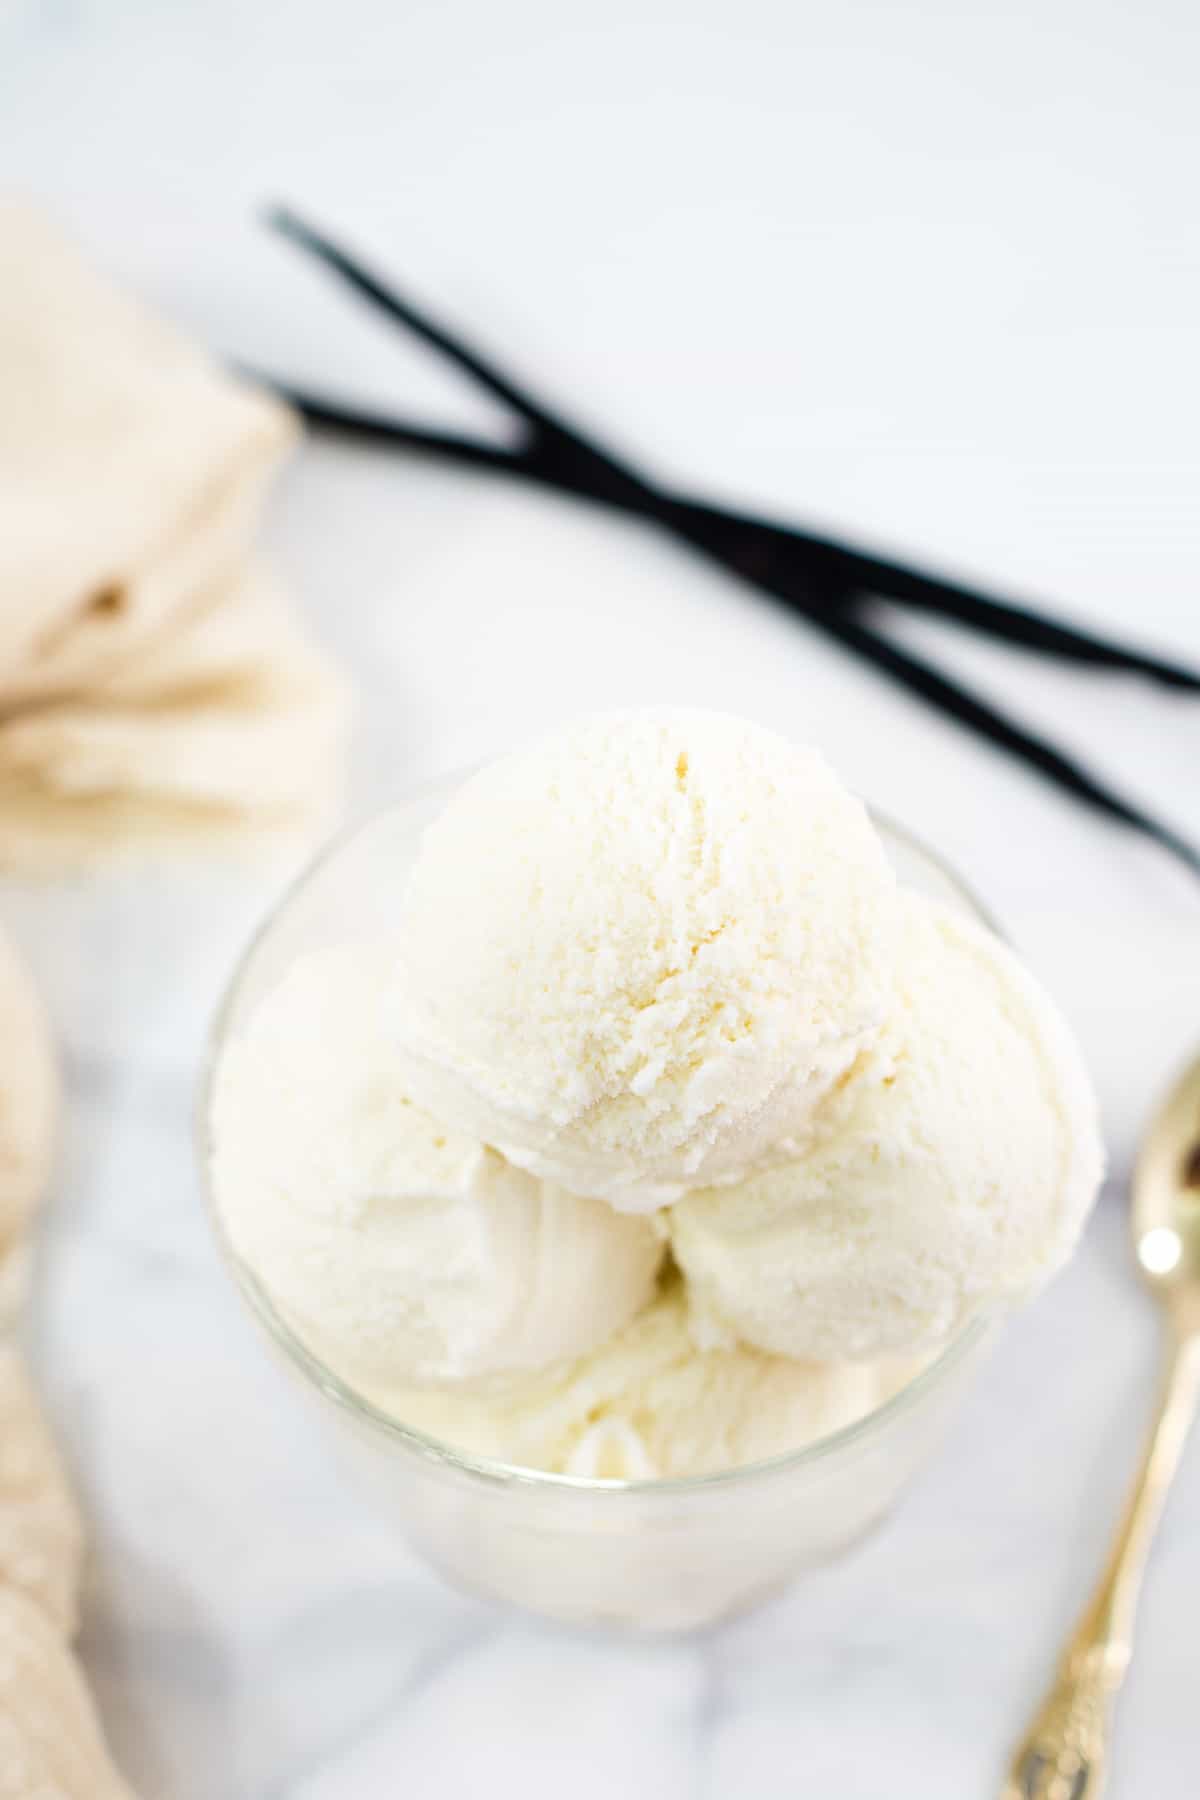
- Vanilla Essence
Mixing the homemade ice cream base
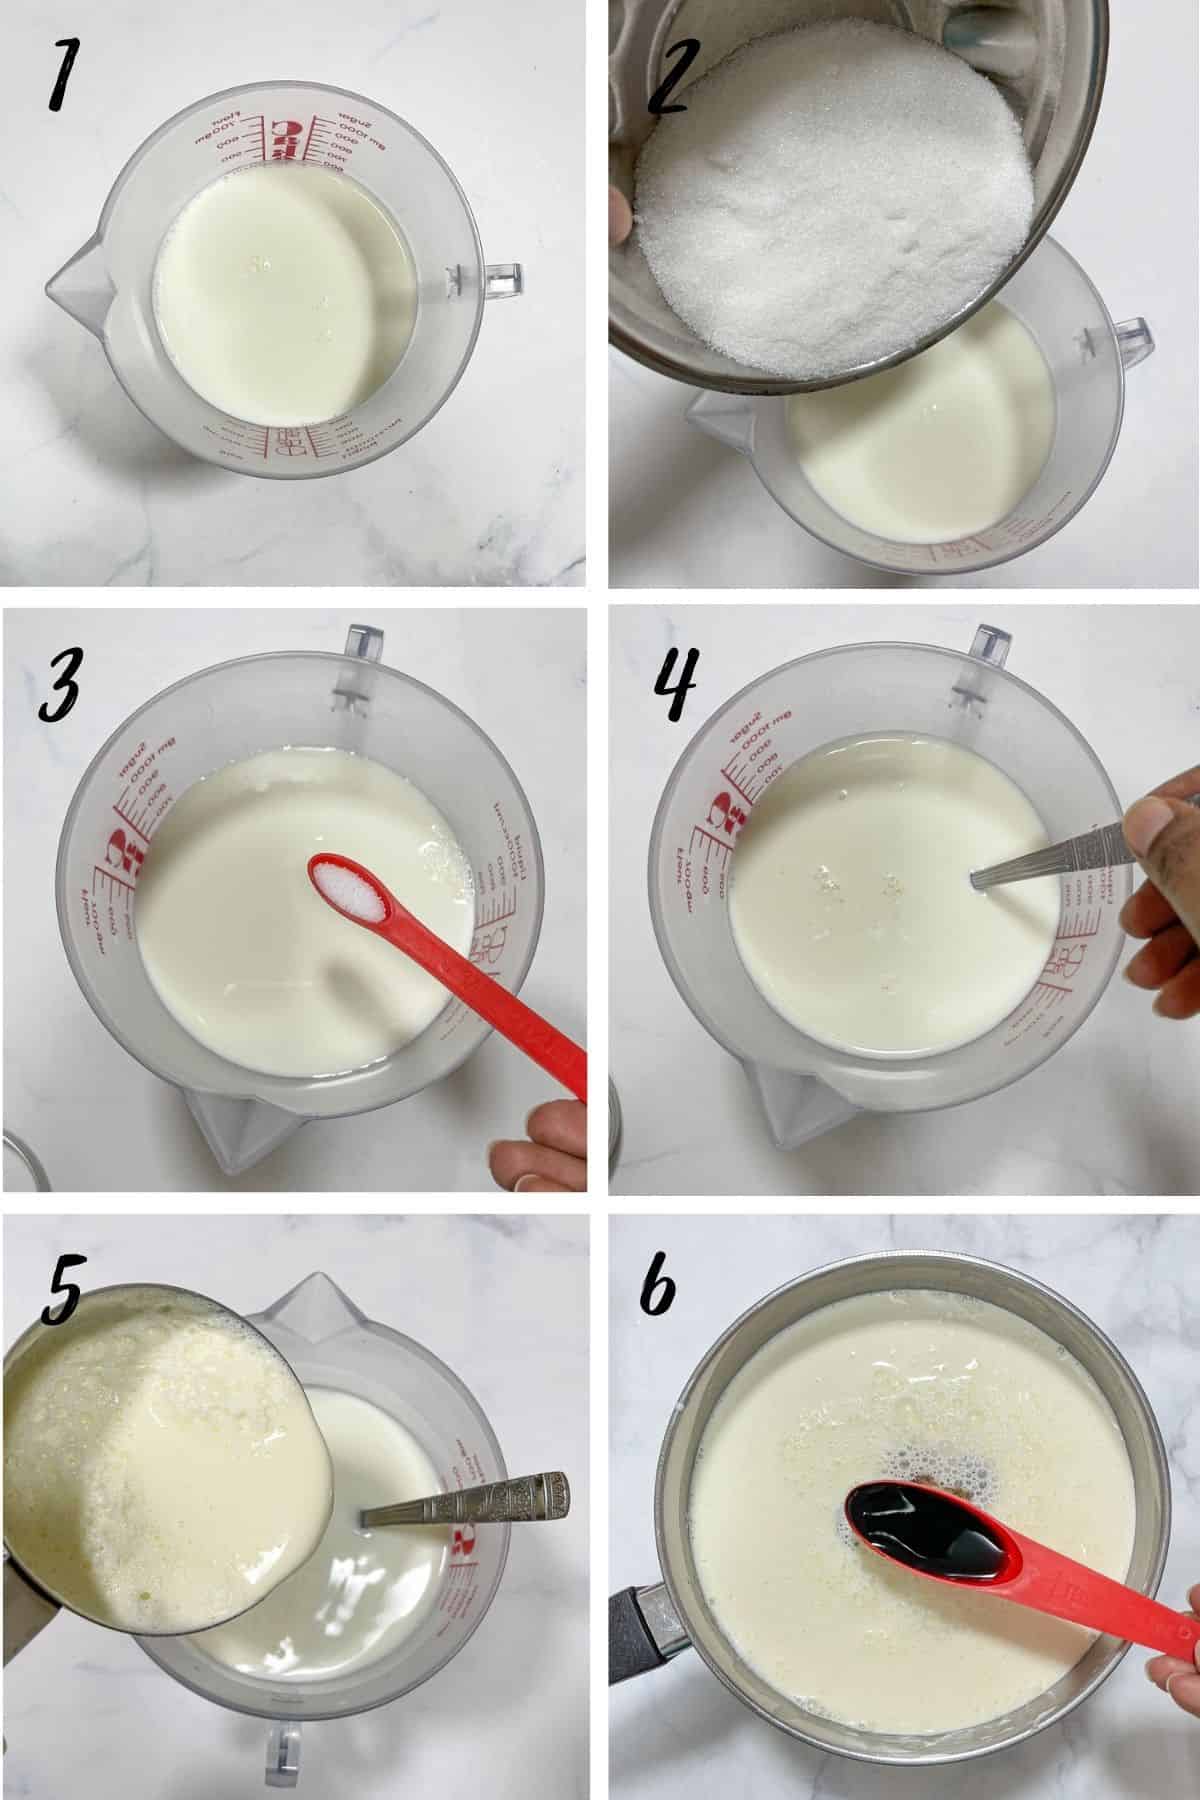
- Start by measuring the milk into a measuring jug or pot.
- Add sugar
- And then add the salt.
- Stir the milk with a spoon or whisk until the sugar and salt are all dissolved. Since granulated sugar is quite fine, this process should not take more than a minute or two. As you stir the milk, you will feel the sugar and salt grains at the bottom of the bowl or pot. As soon as you don't feel them anymore, that means the sugar and salt are dissolved.
- Next, measure the cream and mix it into the milk.
- Finally, add the vanilla essence and stir well (I transferred the solution into a pot with a lid for chilling).
The sections below are separated for ice cream maker and blender/food processor methods. Follow the instructions depending on the method you wish to take.
Method 1: With ice cream maker
Read your ice cream maker manual and do the necessary preparation if required (for example, freezing the ice cream bowl before hand).
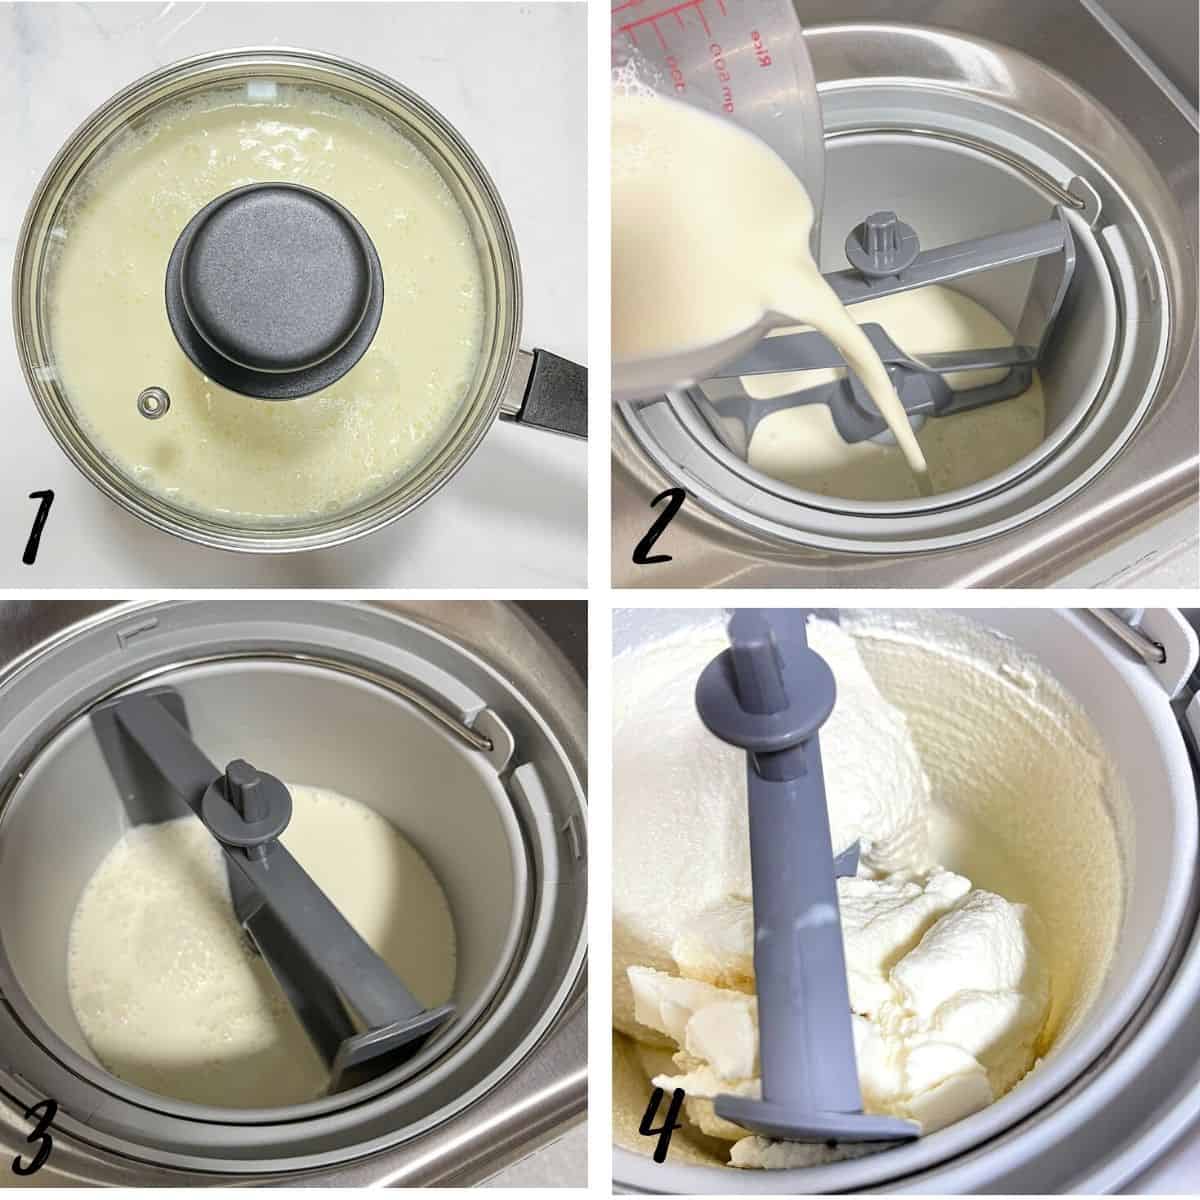
- Chill the homemade ice cream base prepared above in the fridge (not the freezer) for at least 2 hours, until the mixture is completely chilled. You can also leave this in the fridge overnight.
- Pour the chilled base into your ice cream maker bowl. Follow the instructions as stated in your ice cream maker manual on how to operate your machine. Each machine works differently. Also, make sure you have the correct churning pedal attached (in case your machine comes with more than one type of pedal) and that the quantity of the liquid is not exceeding the capacity of your machine. The homemade base can be used for ice cream makers with a capacity of one and a half quarts. Also do note that as the ice cream is being churned, it will increase in volume. So make sure you do not fill your ice cream maker tub anymore than the capacity it is intended for.
- Turn on the machine and let it churn the ice cream. I churn mine for 1 hour, but be sure to check the maximum time for your machines.
- At the end of 60 minutes, the ice cream should be perfectly churned. But it may still be a little soft (like a soft-serve ice cream consistency). You can serve it in that consistency if you wish. Otherwise, you can transfer the churned ice cream into a container and let it freeze further for a few more hours until completely set.
Method 2: Churned ice cream with blender
For this method, you can use a blender or a food processor.
Start by mixing the homemade ice cream base as outlined in the earlier section above.
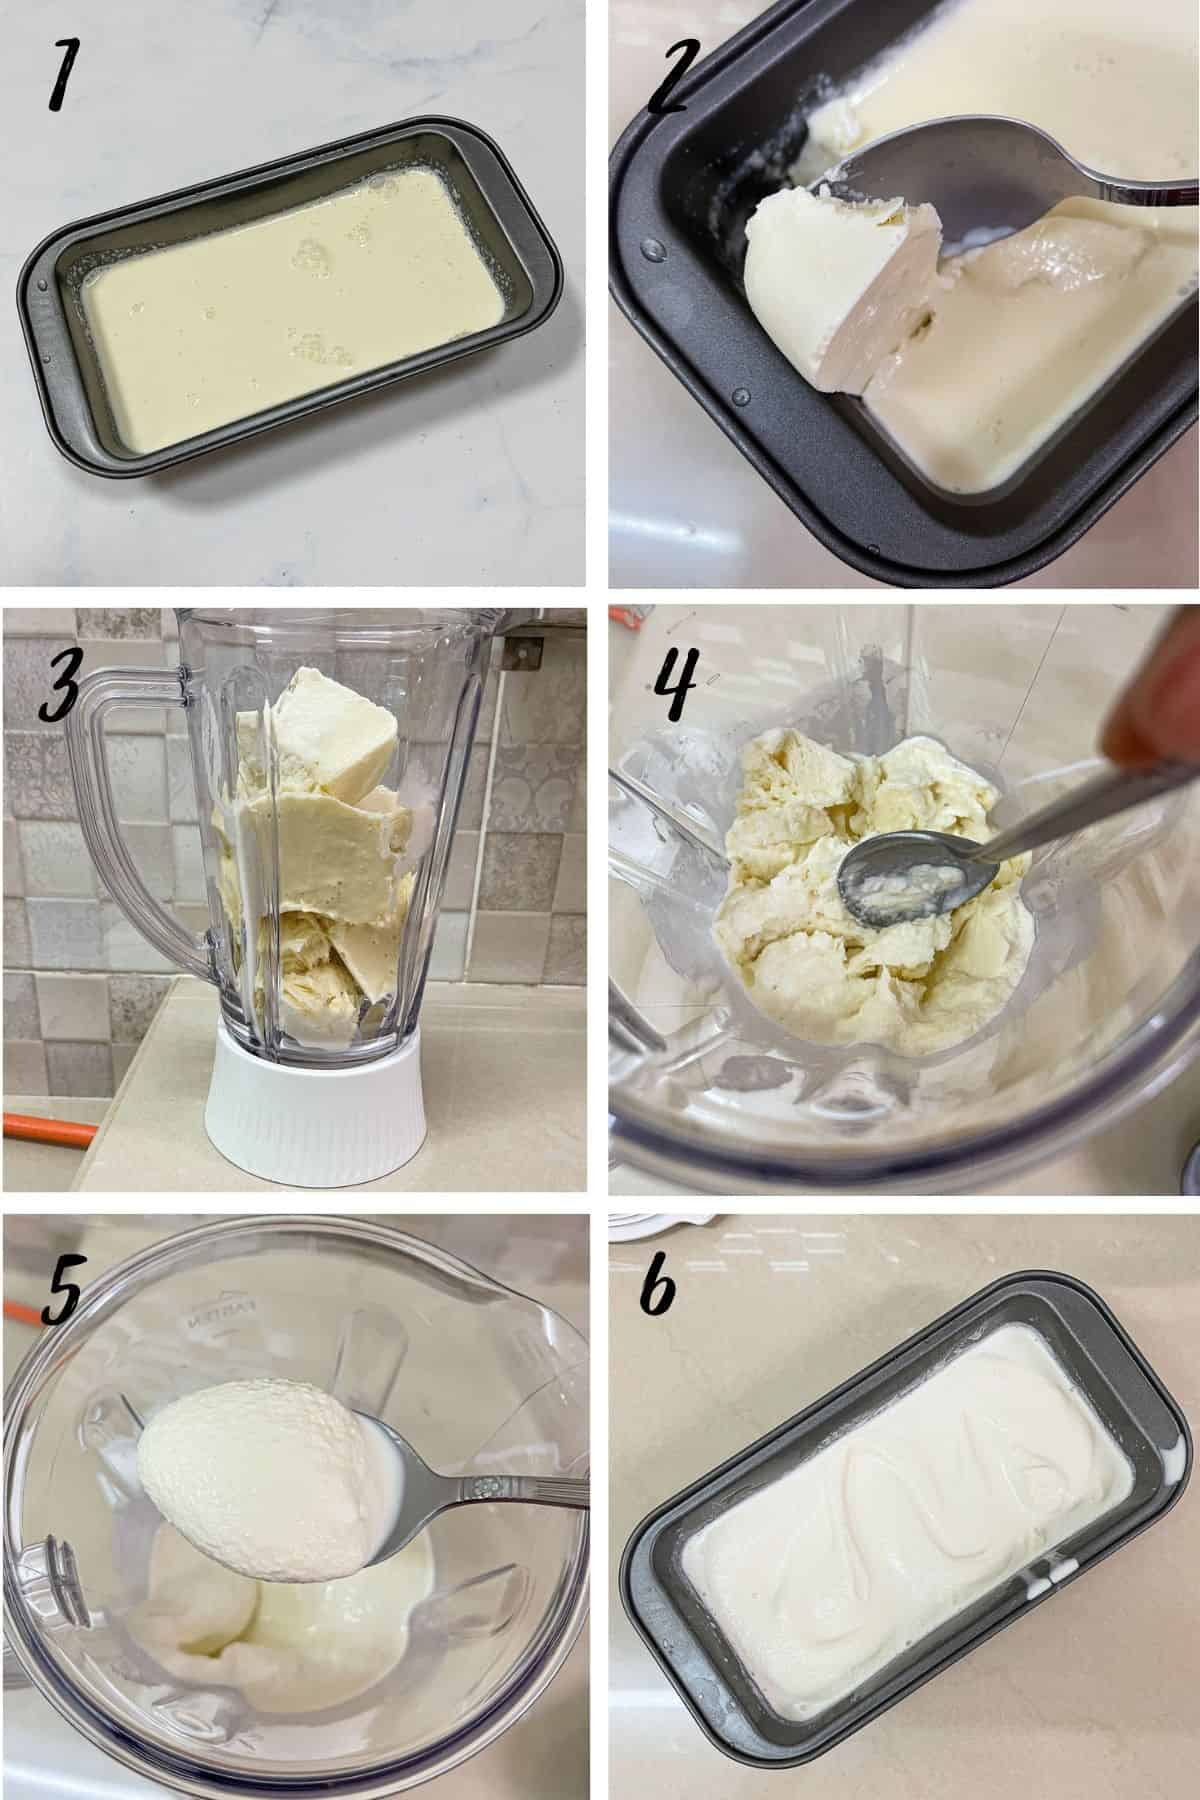
- Once your ice cream base is ready, pour it into a container. Freeze it for at least 4 to 5 hours. Ideally, the ice cream should harden completely.
- Next, remove the ice cream from the freezer. Use a spoon to break it into small chunks.
- Fill it into a blender. Once all the ice cream chunks are in, turn on the blender and let it blend and break the ice crystals in the ice cream to a smooth consistency.
- If the blender blades are stuck, use a spoon to break the ice cream chunks further.
- Blend the ice cream until it is all smooth.
- Quickly transfer the blended ice cream back into its container. You would need to work quickly to avoid the ice cream from melting too much. If you wish to add any extra ingredients (which are solid like nuts, cookies, marshmallows, dried fruits, chocolate chips etc) to the ice cream, add them in at this stage and not during the blending stage. Mix well. Level the top and return the blender churned ice cream into the freezer to firm up. It is best to leave it for at least 2 to 3 hours (at -13 degrees Celsius) to allow the churned ice cream to set completely.
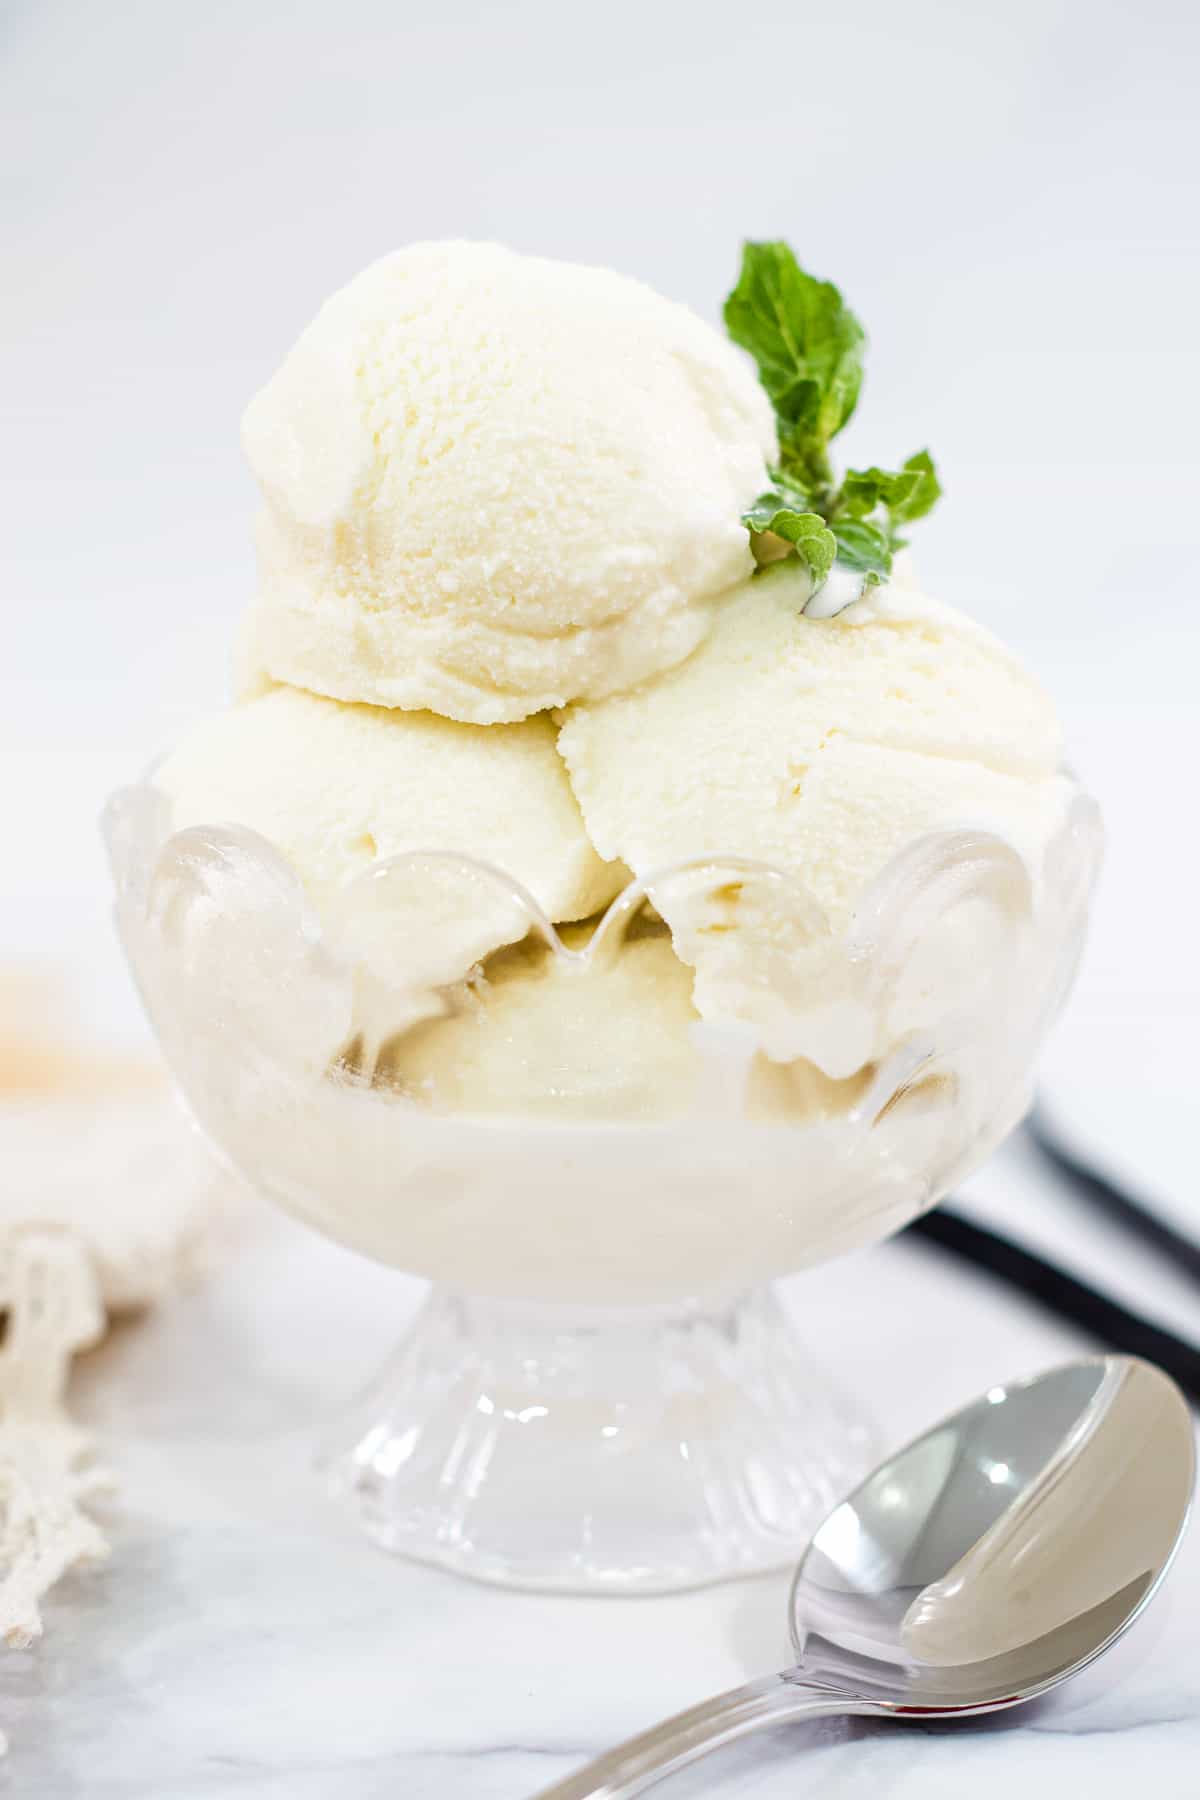
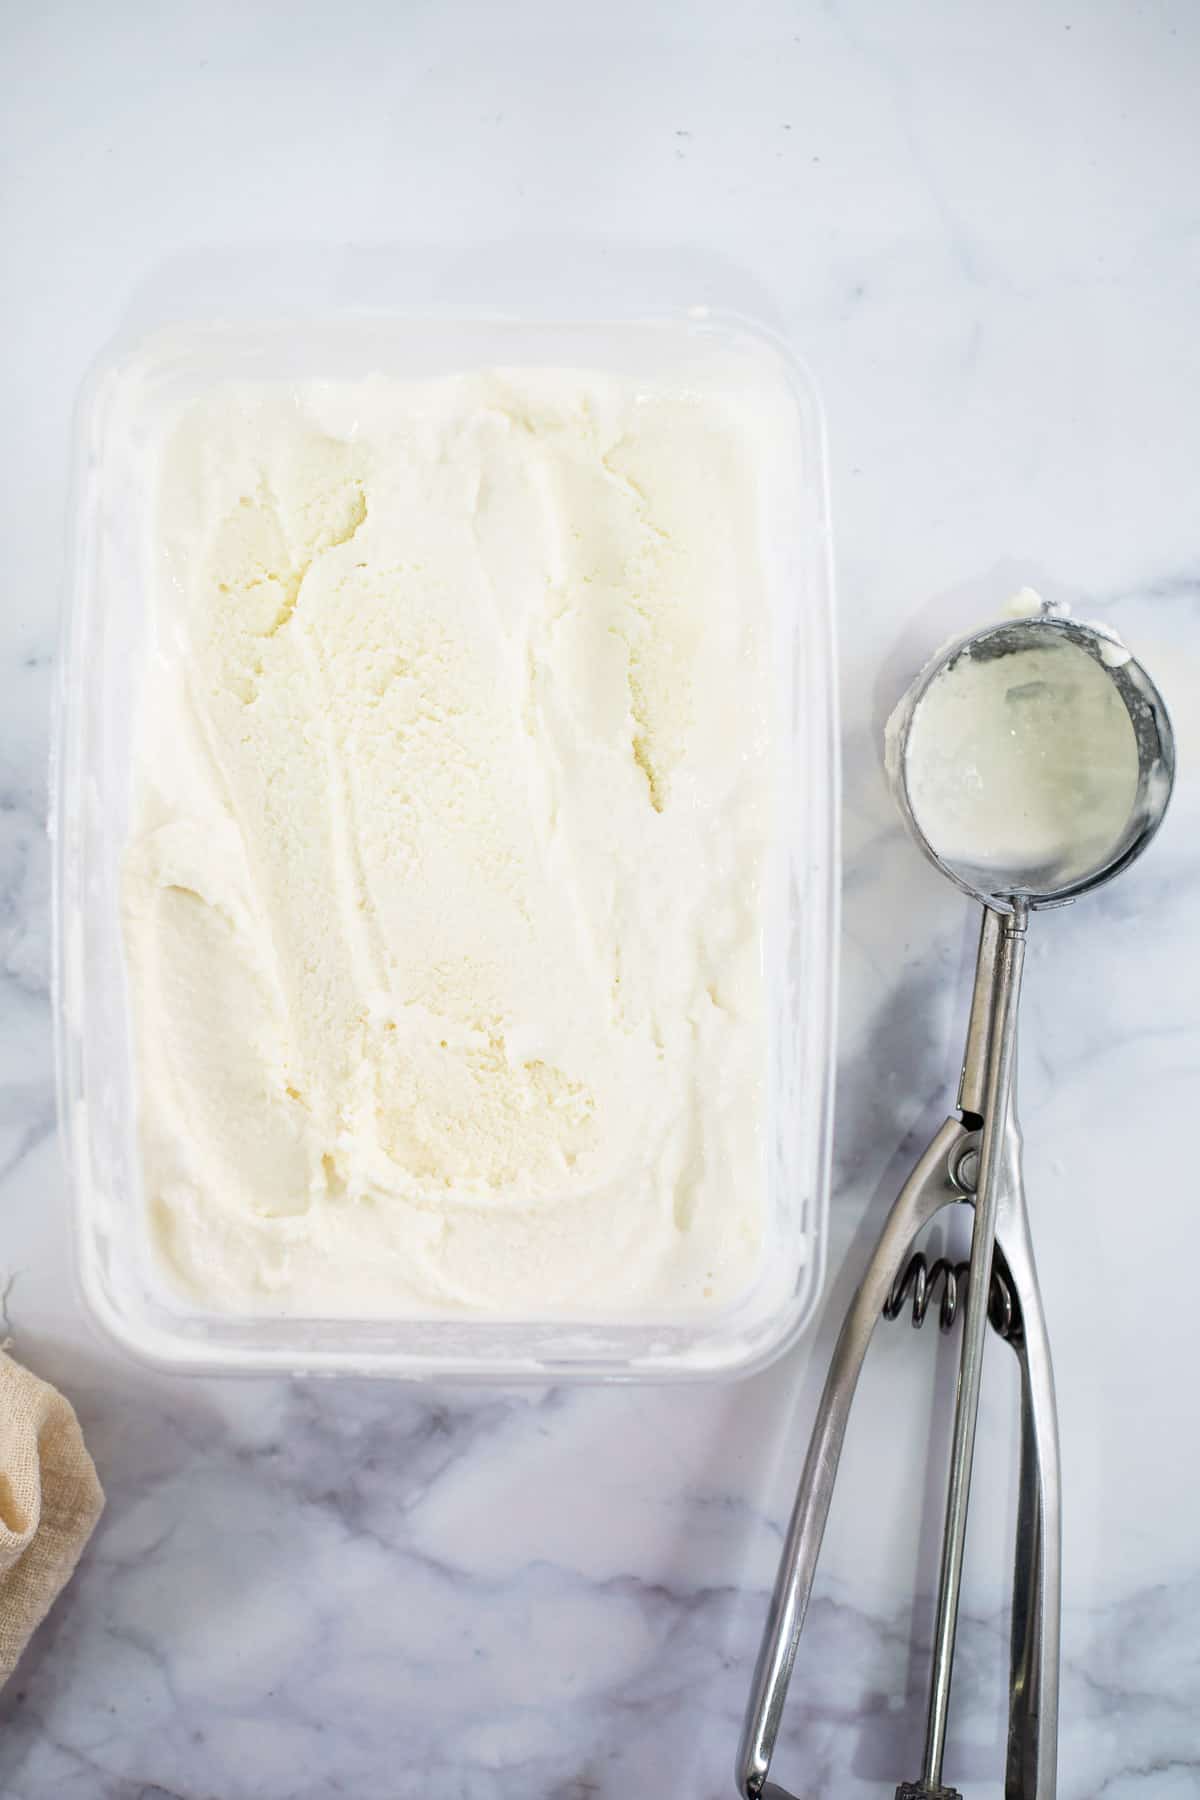
Serving the ice cream
- To serve, use an ice cream scoop to scoop it into a serving cup. The ice cream should not be too hard to scoop if you use the exact same quantity of ingredients mentioned in my recipe card below and the ice cream is frozen at -13 degrees Celsius.
- But if it is hard for some reason, do not worry. Leave the ice cream container out for a few minutes. It should be a lot easier to scoop your ice cream then.
Notes
Is it necessary to use full-fat milk and can it be substituted for low-fat milk?
- I would not recommend using low-fat milk. The fat content in the milk helps with the creamy texture of the ice cream. Using low-fat milk will result in your ice cream having a more water-based ice cream texture.
Can granulated sugar be replaced with regular white sugar?
- Yes, you can, but that means it will take you a longer time to stir the milk and sugar as regular sugar granules are larger and would take longer to dissolve.
Why must the ice cream solution be chilled instead of being churned immediately?
- The colder the solution, the easier and faster it would take for the ice cream maker to freeze your ice cream. It also helps avoid the ice cream maker from having to process the ice cream for a long period of time.
- Since milk and cream need to be kept refrigerated, the ice cream solution (after mixing) would generally be cold. However, in the process of mixing in the sugar and flavoring, they would lose some of the coldness. Hence, it is advisable to return the solution to the fridge after mixing to chill it completely.
Can the ratio of cream and milk be adjusted?
- Yes, you can. In fact, I have tried experimenting with different ratios of milk and cream to make my homemade ice cream.
- Generally, the ice cream tastes better with a slightly higher ratio of cream compared to milk. Nevertheless, this is a matter of personal preference and can be adjusted accordingly, provided you keep the final quantity of your homemade ice cream solution as per your ice cream maker specifications.
- Sugar can also be adjusted accordingly.
Can the ice cream be frozen in ice cube trays for easy blending?
- For the blender method, instead of freezing the ice cream solution in an ice cream container, you can also pour it into ice cube trays to freeze. Once frozen, put the ice cream cubes into your blender and blend until they reach a churned consistency..
What is the best temperature to freeze this ice cream and what if it is too hard to scoop after freezing?
- This churned ice cream requires a negative thirteen (-13) degrees Celsius temperature to freeze well.
- If you find it hard to scoop the ice cream after long hours of freezing, simply leave it out at room temperature for a minute or two (or slightly longer if your room temperature is not so warm) and try scooping it after that.
Like this easy ice cream recipe? Here are my other posts you might want to check out
- Homemade No-Churn Ice Cream
- No Churn Chocolate Ice Cream
- Homemade Chocolate Ice Cream - Ice Cream Maker and Blender Method
- Lemonade Sorbet
- Lime Popsicles
- Chocolate Chocolate Chip Ice Cream - A Simple Homemade Recipe
- Mint Oreo Ice Cream - An Easy Homemade Recipe
- Matcha Ice Cream (Green Tea Ice Cream)
Recipe (Printable)
Here is the full printable version of my homemade churned ice cream recipe. Instructions are included for both the ice cream maker method as well as the blender method.
📖Recipe
Churned Ice Cream (With and Without Ice Cream Maker)
For best results, use the metrics measurements. US customary measurements have not been tested and are only meant for guide.
Ingredients
Ice Cream Base
- 375 ml full fat milk
- 625 ml heavy whipping cream (at least 35% fat)
- 150 g castor sugar
- ⅛ teaspoon salt
- 2 teaspoon vanilla essence
Instructions
Making the ice cream base
- Measure the milk into a pot or mixing bowl.
- Add the sugar and salt. Stir until both are dissolved.
- Add the cream into the milk and stir well.
- Finally, mix in the vanilla essence.
Method 1: Ice Cream Maker
- Prepare the ice cream base as above. Chill the solution for at least 2 hours or more until it is completely chilled. Churn the ice cream according to your ice cream maker's instructions.
- If you wish to add extra flavors or ingredients to your ice cream, do it in the last 3 or 4 minutes of the churning time. Alternatively, these can be added after the ice cream is transfered to a container for freezing.
- Transfer the churned ice cream into a container and freeze until it sets further.
Method 2: Blender/Food Processor
- Prepare the ice cream base as above. Pour it into an ice cream container and chill for at least 4 to 5 hours or until completely frozen.
- Once frozen, remove the ice cream from the freezer and use a spoon to break it into chunks.
- Add the ice cream chunks into a blender and blend until smooth, for approximately 1 to 2 minutes. Do not blend too long to avoid the ice cream from melting too much.
- Pour the blended ice cream back into its container If you wish to add extra flavors or ingredients to your ice cream, do it at this stage. Freeze the ice cream again for at least 2 to 3 hours before serving.
Chilling and serving the ice cream
- To serve, scoop the ice cream into serving bowls or ice cream cones.
- If the ice cream is too hard to scoop, leave it out at room temperature for a minute or two. It will be much easier to scoop.
- This recipe makes 1.5 quartz ice cream.
Notes
- When using the blender method, if the frozen ice cream (before blending) is too hard to break with a spoon, leave it out for a minute or two to soften it slightly before trying again.
Nutrition
And that's pretty much my churned ice cream recipe for you.
Enjoy!
Emma
This is the best mouth-watering home-made ice cream recipe and instructions I've ever read. Can't wait to make it. Especially important is that you gave both with and without ice cream maker solutions. Very thoughtful and very much appreciated. Sooooo many different ways to make it. Thanks for everything.