

This no-churn chocolate ice cream is the second of my series of no-churn ice cream recipes. The first was my no-churn ice cream which is the basic ice cream recipe. It works very much like a base that can be used to make ice creams in any flavors you like simply by adding extra ingredients and flavors to it.
This no-churn chocolate ice cream is adapted from that recipe and customized to make chocolate-flavored no-churn ice cream.
In order for ice creams to have a smooth texture, they often require slow churning in an ice cream machine. The slow churning process in a machine helps avoid large ice crystals from forming in the ice cream as it freezes, making it delectably smooth. You can check out how to make churned chocolate ice cream in my other post here.
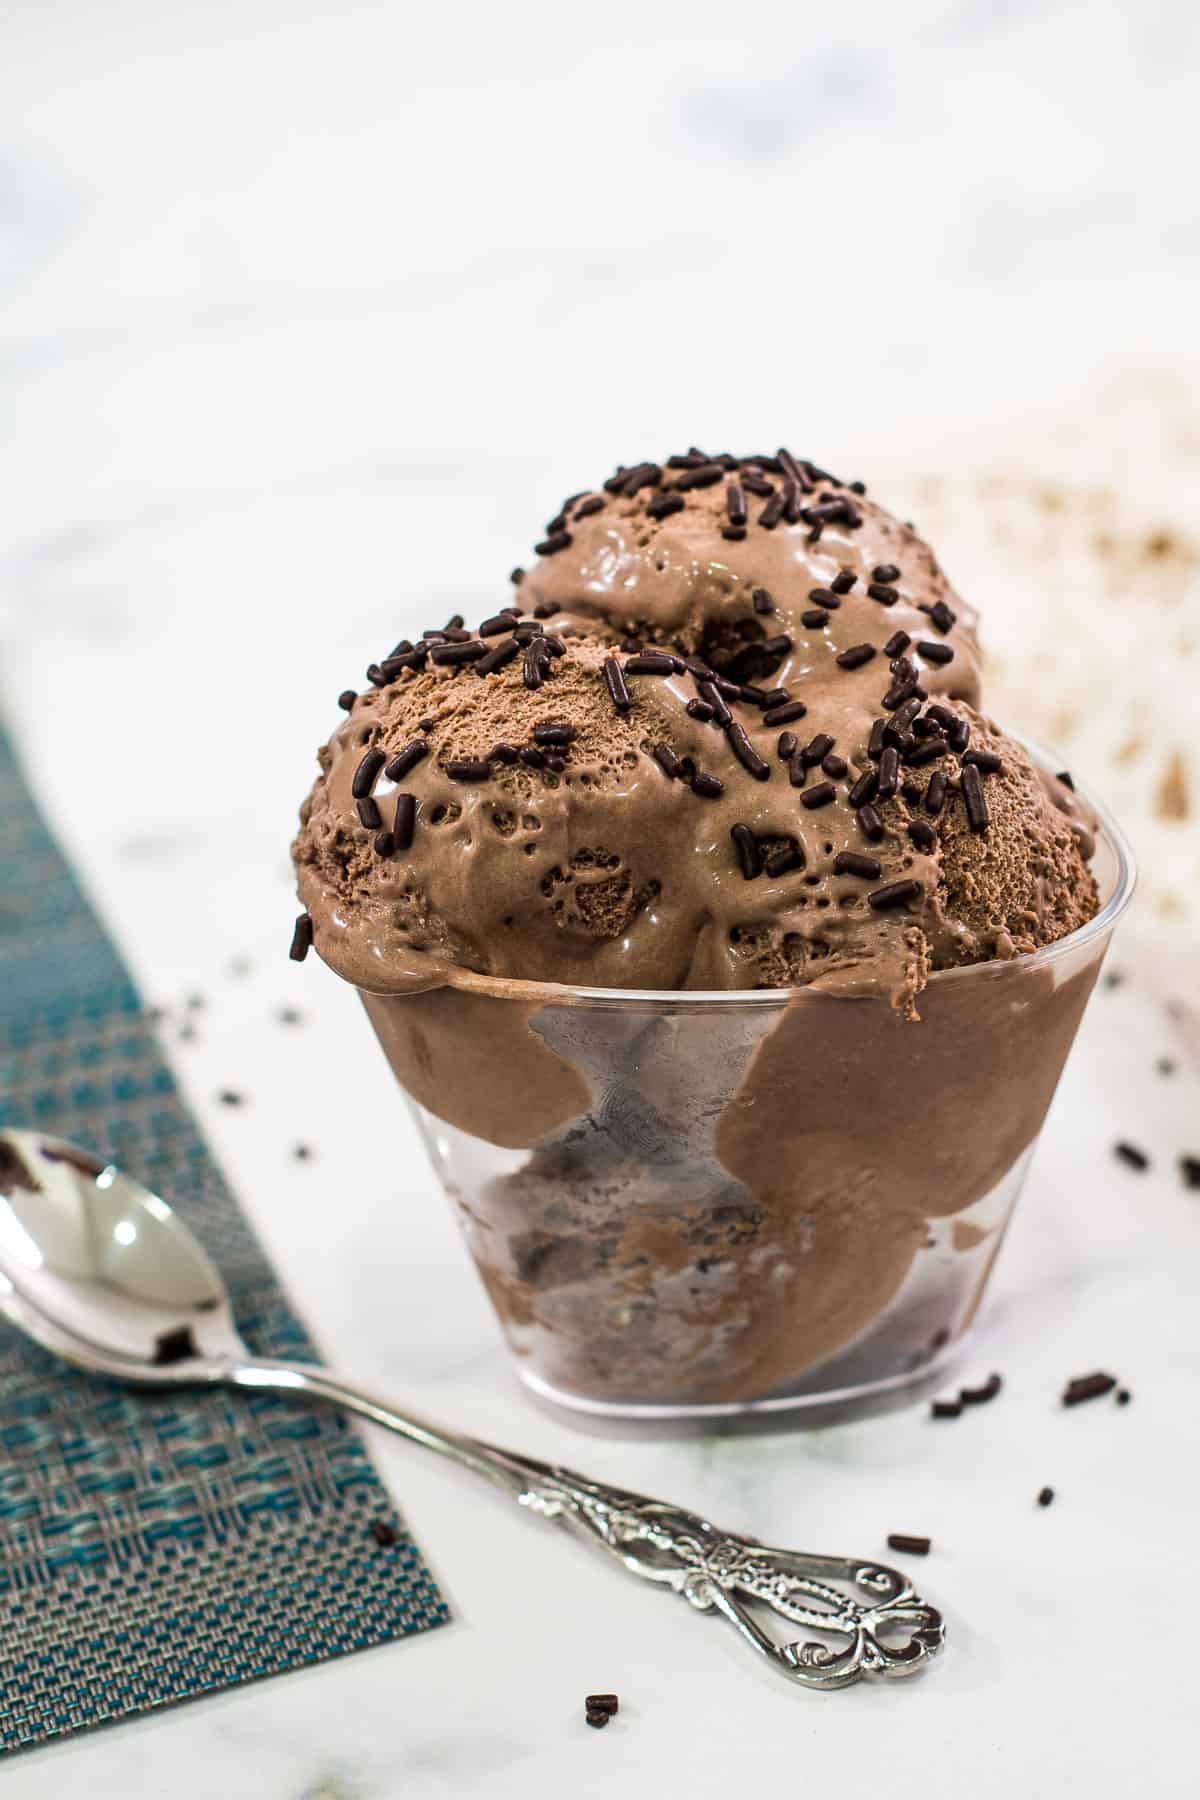
Table of contents
- Churn or No-Churn Ice Cream?
- How to Make
- Notes
- Whipping Cream
- Sweetened condensed milk Vs evaporated milk
- The ratio of cream to condensed milk
- Can the chocolate be melted on its own and added to the ice cream base rather than melting with condensed milk?
- Substituting chocolate with cocoa powder
- Can milk chocolate be used instead of dark chocolate?
- Can you increase the amount of dark chocolate in the ice cream?
- Like this no churn ice cream recipe? Here are my other posts you might want to check out:
- Recipe (Printable)
Churn or No-Churn Ice Cream?
This no-churn chocolate ice cream recipe is slightly different from the churned chocolate ice cream recipe. Firstly, the ingredients for this no-churn ice cream are limited to 4, i.e. heavy whipping cream, condensed milk, chocolate, and vanilla. The churned ice cream on the other hand requires 6 ingredients i.e, heavy whipping cream, milk, sugar, salt, chocolate, and vanilla.
Secondly, this no-churn ice cream does not require an ice cream machine. This means it does not require to be churned. This no-churn feature is the highlight of this recipe. Hence I have included the term 'no-churn' in the title of this post. And neither does it require any additional steps after mixing the ice cream solution other than freezing it before serving. You do, however, require a cake mixer with a whisk attachment to whisk the heavy cream to stiff peaks consistency. You can also do this with a hand whisk, but it will take a longer time and much more of your energy.
The churned ice cream, on the other hand, requires an ice cream machine. And if you don't have one, you would need a home blender or food processor to express churn the ice cream to a smooth consistency.
Despite both the churn and no-churn chocolate ice cream recipes being different (ingredients and method), they both produce deliciously creamy and smooth ice creams. It is a matter of personal choice as to which recipe to follow depending mainly on the requirements for special machines and the taste of the ice cream.
And despite this no-churn chocolate ice cream being the easiest of both, some people do not like the after-taste of condensed milk in the ice cream. For these people, the churned ice cream would be the best. For some others, the ease of making this ice cream and its perfectly smooth and creamy texture take precedence.
As for me, I am more inclined to the churned version of ice creams, but my children absolutely love the no-churn ice cream with condensed milk. Hence, I make both types of ice creams interchangeably at home.
How to Make
Ingredients
- Heavy whipping cream
- Sweetened condensed milk
- Dark chocolate
- Vanilla essence
Mixing the chocolate ice cream solution
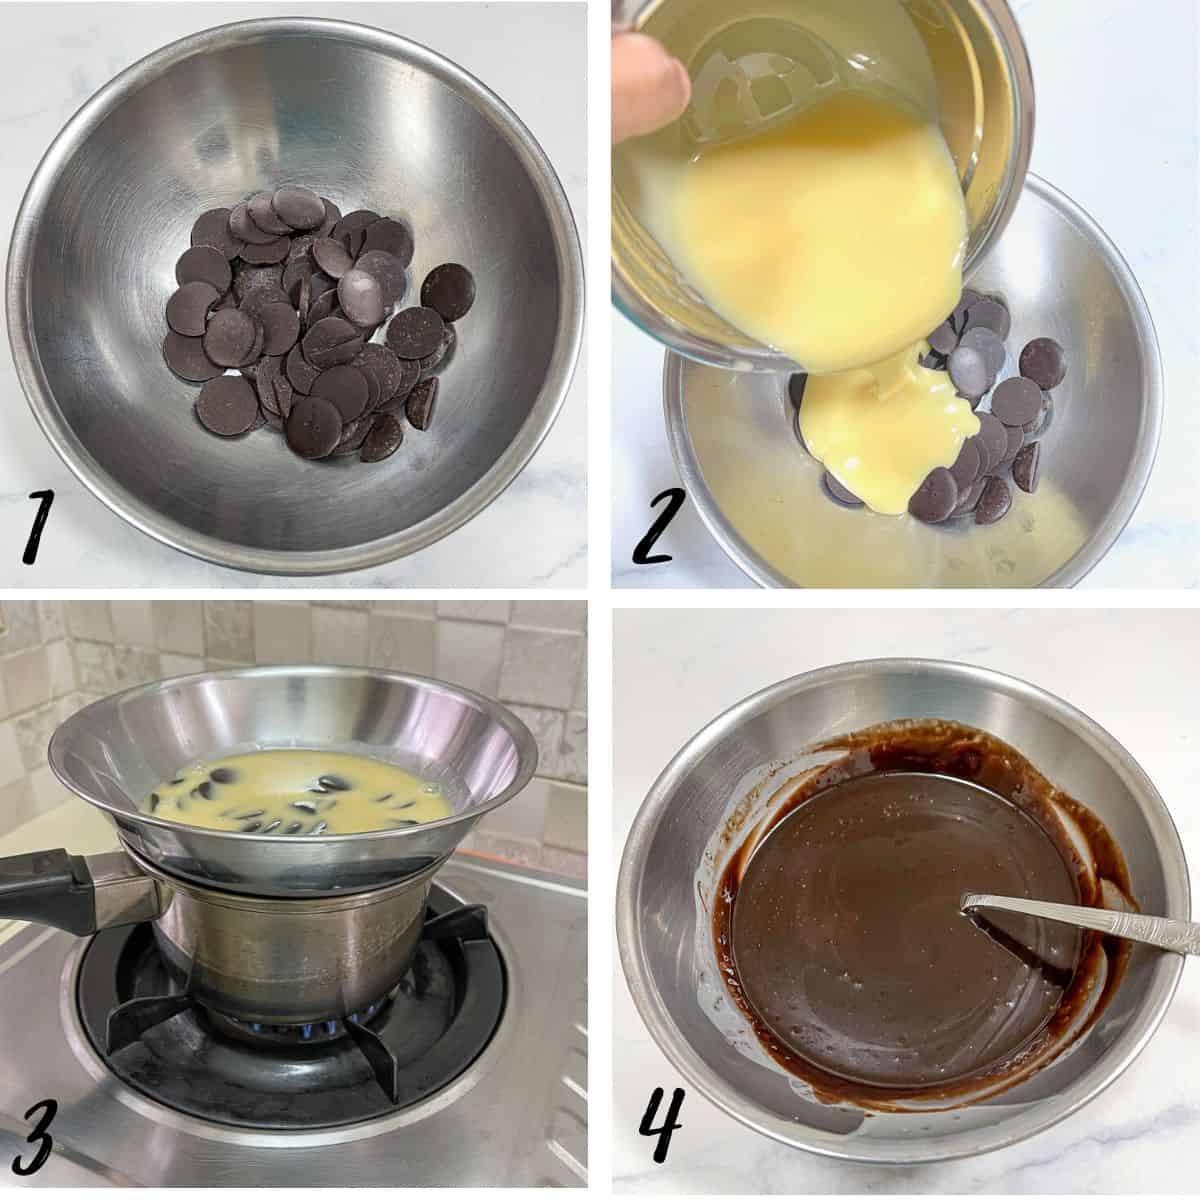
- If you are using a block of chocolate, chop it up into smaller pieces for easy melting. No need to chop if you are using chocolate chips or chocolate buttons.
- Add condensed milk into the chocolate.
- Double boil both until the chocolate is completely melted.
- Stir occasionally to help the chocolate melt faster. Once the chocolate is all melted, remove it from heat and let it cool down. You can also place it in the fridge to chill completely before using it. You will notice after refrigeration that there is very light skin formed on the chocolate-condensed milk mix. This is fine, just use a spoon to stir it well.

- Next, measure heavy cream into a medium-sized bowl.
- Whip until it becomes stiff and stiff peaks form.
- Add the chocolate-condensed milk into the bowl of whipped cream.
- Add the vanilla essence.
- Gently fold it into the whipped cream until it is all well combined and the chocolate is well distributed throughout the ice cream base mix. If you wish to add any other ingredients into this no-churn ice cream (for example chocolate chips, nuts, dried fruits, or even marshmallows), do it now. Mix well.
- Transfer the ice cream base into a freezer-safe container. Freeze it for at least 6 hours or longer until it is all set and firm.
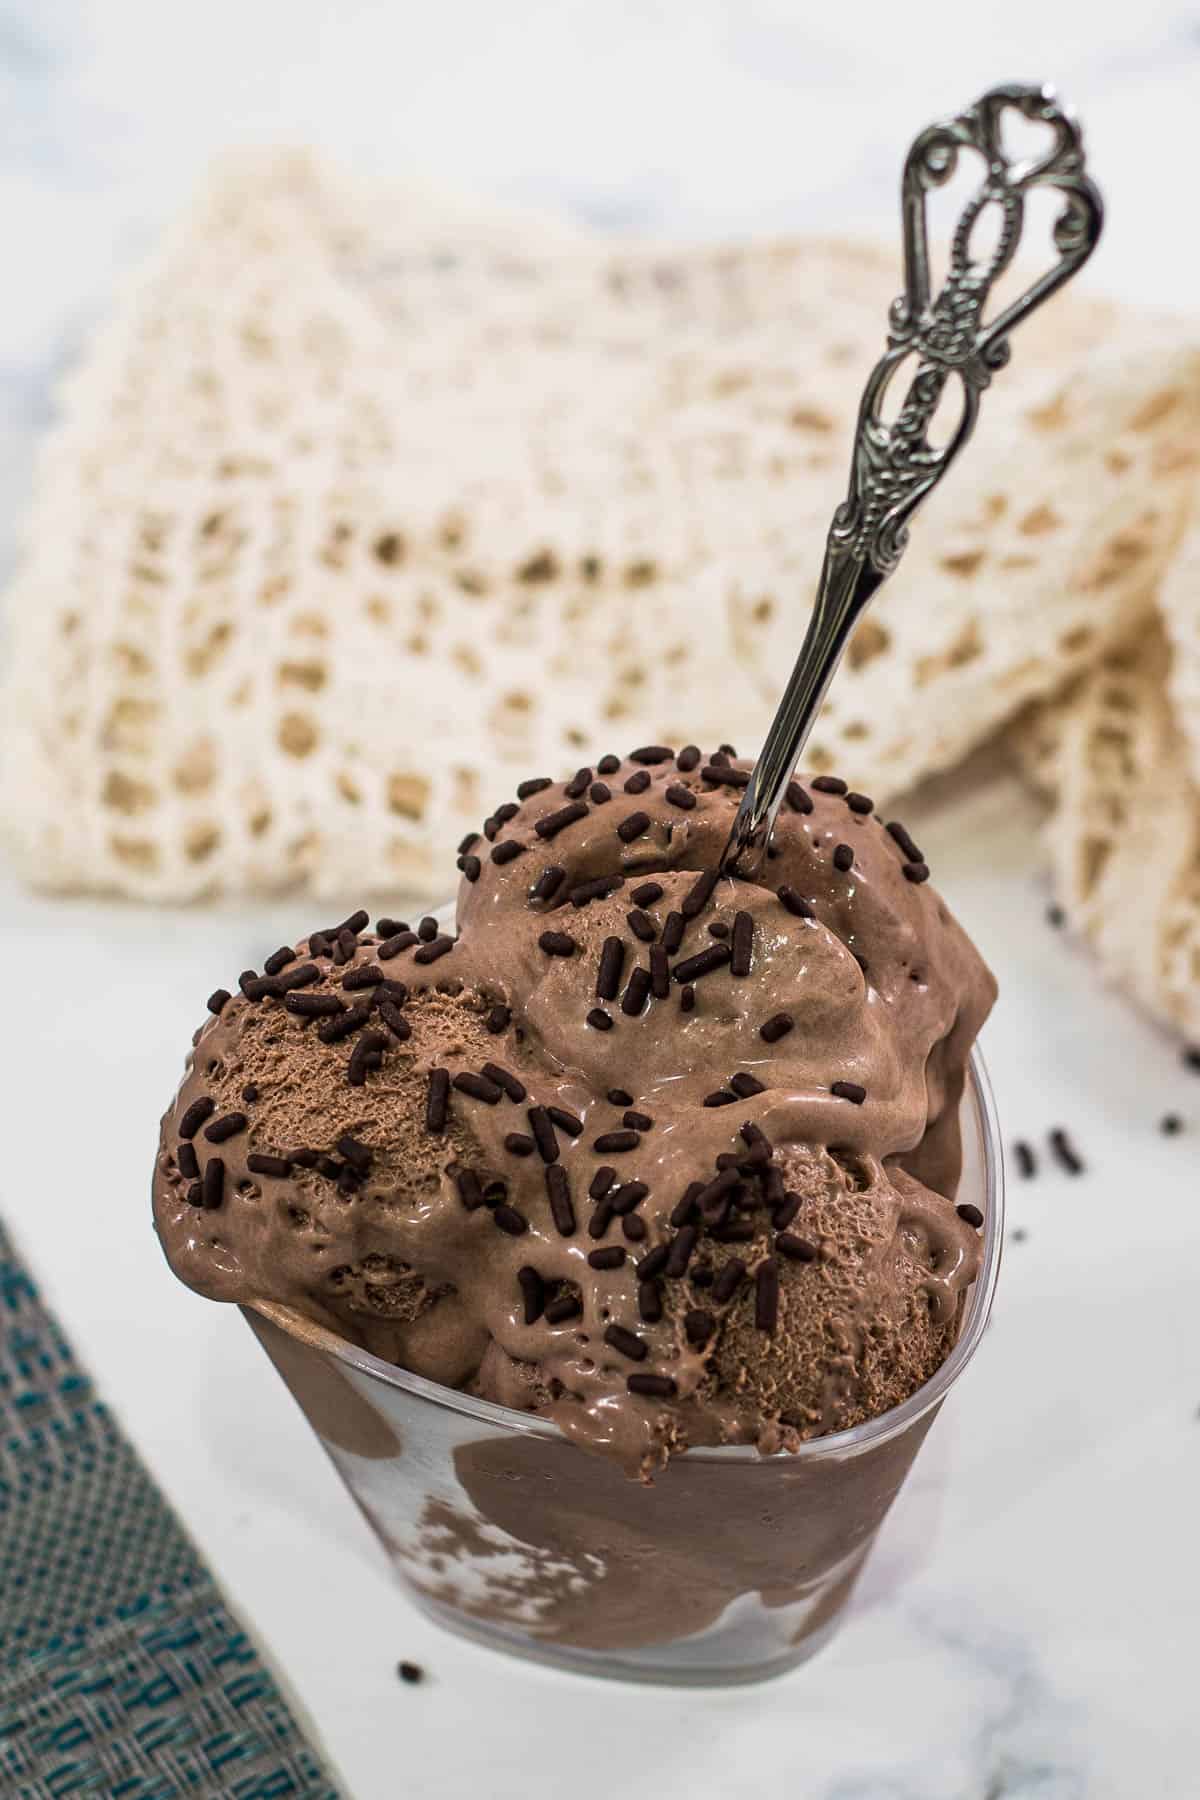
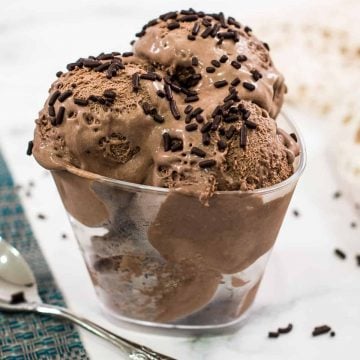
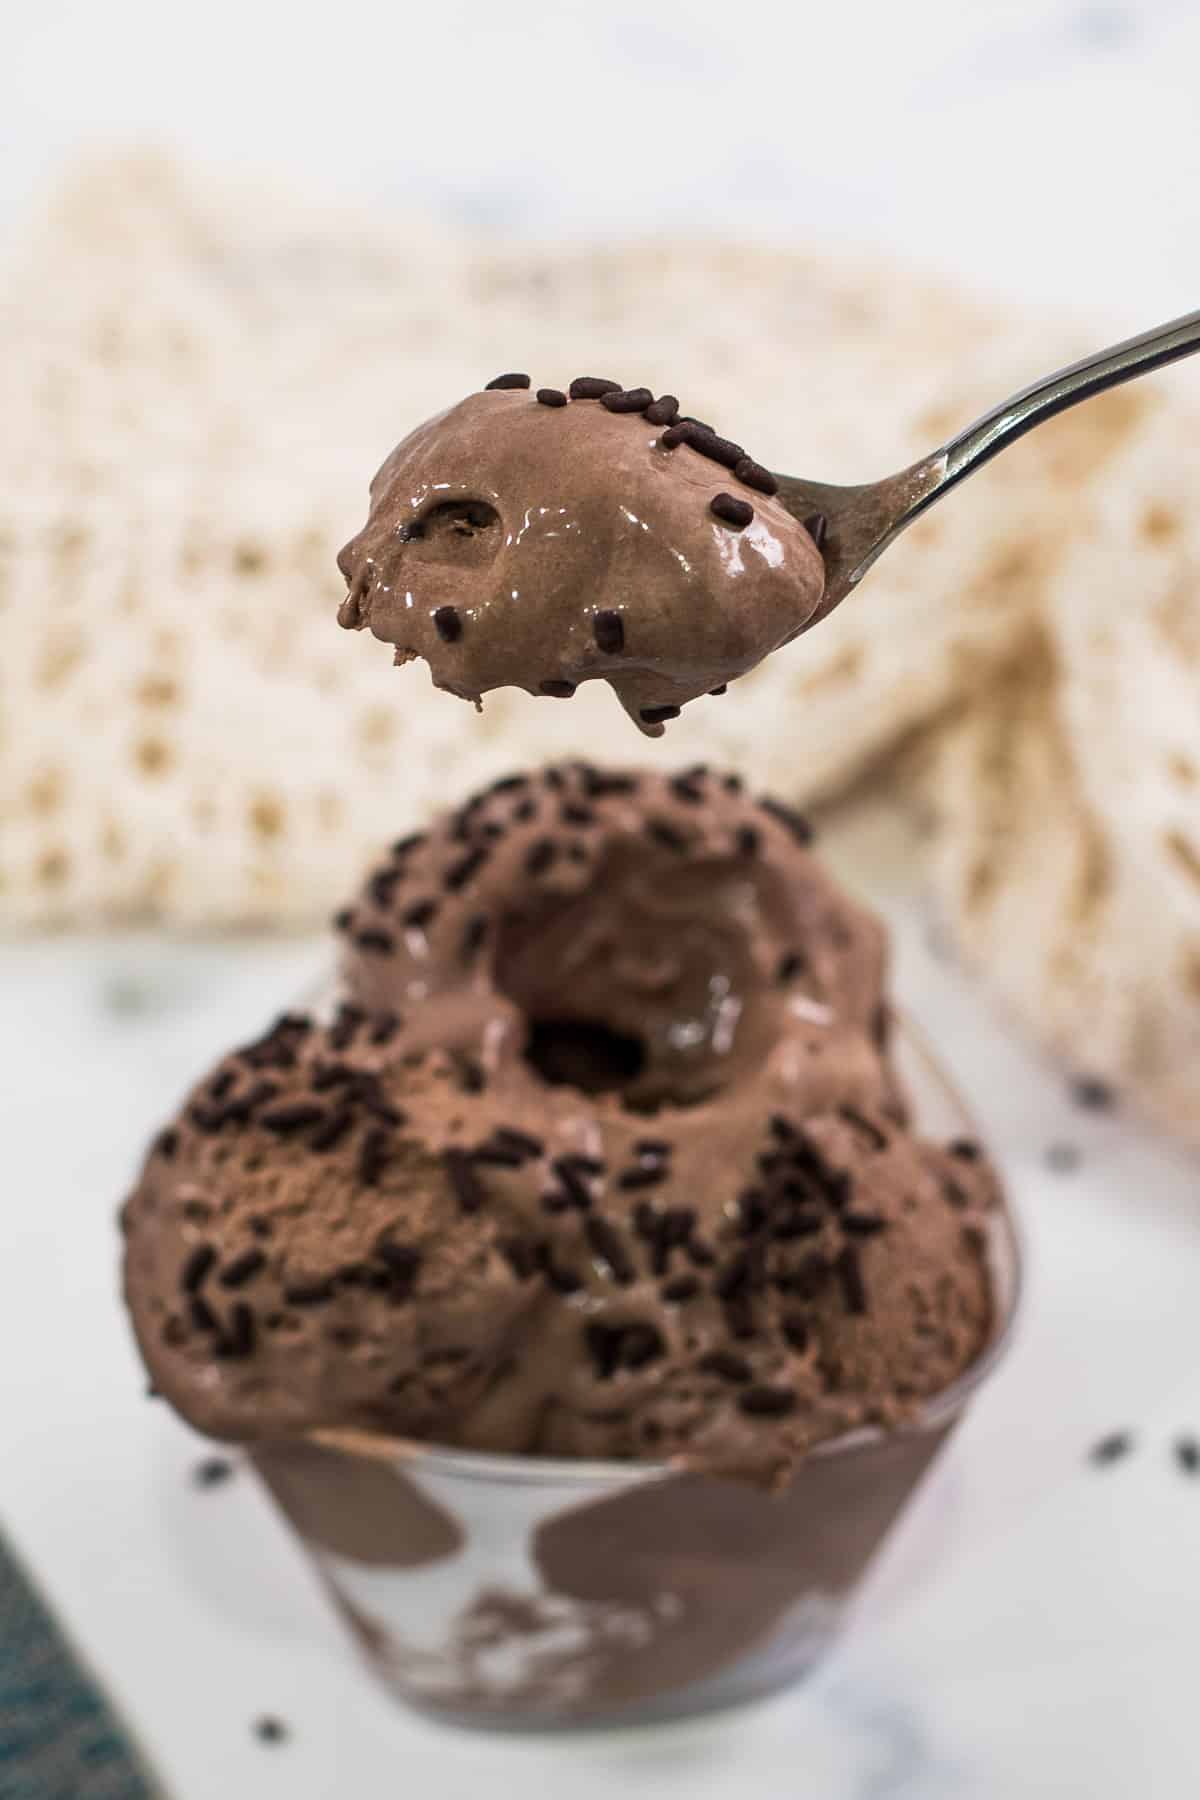
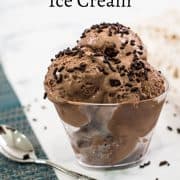
To serve the ice cream, scoop it into dessert bowls. Add any toppings you like. If the ice cream is too hard to scoop (which is unlikely to happen), leave it out at room temperate for about 1 to 2 minutes before trying again.

Notes
Whipping Cream
- To ensure your ice cream is absolutely smooth and creamy, choose dairy whipping cream with at least 35% fat content (you will be able to see this written on the cream carton).
- Also, take note that the cream must be completely chilled for it to be able to be whipped properly. Whipping cream would typically need to be refrigerated all the time, so this is not really a problem. But just in case you decide to use it immediately after purchasing it, make sure you chill it properly first.
- The other point about the cream is that if you whip for too long, it will end up turning into butter. That is not good for the ice cream. Keep watching the cream as you whip it. When you see that is it beginning to stiffen and is able to hold stiff peaks when you lift the whisk up, the cream is ready and you can stop whipping.
Sweetened condensed milk Vs evaporated milk
- People sometimes get confused between condensed and evaporated milk. Both are very different and when used in making the no-churn ice cream, will yield very different results.
- Condensed milk is sweet and much thicker, which means the water content is very low. When used in making this no-churn chocolate ice cream, it gives your ice cream the required sweetness and smooth consistency without any water crystals in it. Evaporated milk, on the other hand, is not sweet, and has a more liquid-like consistency. When used in making this no-churn chocolate ice cream, will give you ice cream that is bland (not sweet at all as there is no added sugar in the recipe) and with lots of obviously water crystals in it (i.e. the texture will not be smooth).
- Take note that for best results, the condensed milk is should be chilled too. This will help avoid the whipped cream from deflating when mixing.
The ratio of cream to condensed milk
- The ratio of cream to condensed milk in this recipe is just nice to give the ice cream the right level of creaminess and sweetness. For simplicity, the recipe is written for a full 14 ounces can. And for each can, you use 2 cups of cream.
- You can change the ratio of these ingredients if you like, however, that might change the consistency and taste of your ice cream. Reducing the condensed milk to reduce the sweetness of the ice cream could result in your ice cream being a little too creamy tasting. If you are ok with that, then it is ok to adjust the ratio.
Can the chocolate be melted on its own and added to the ice cream base rather than melting with condensed milk?
- You can melt the chocolate on its own. However, when added to the cold condensed milk or cream, it will start to solidify, leaving tiny specks of chocolate pieces in your ice cream. For a completely smooth chocolate ice cream, it is better to melt the chocolate with condensed milk.
Substituting chocolate with cocoa powder
- Yes, you can.
- For the recipe below, you can substitute the chocolate with 45g of cocoa powder. Simply prepare the no-churn ice cream base by whipping the cream and mixing it with condensed milk. After that, sift the cocoa powder into the ice cream base and mix it thoroughly before pouring everything into a freezer-safe container to freeze the ice cream.
- You can also use a combination of dark chocolate and cocoa powder to make your ice cream.
Can milk chocolate be used instead of dark chocolate?
- Yes, you can. Milk chocolate tends to be sweeter than dark chocolate, so do take note that it might make your ice cream sweeter.
Can you increase the amount of dark chocolate in the ice cream?
- Yes, you certainly can. But if you wish to make a really dark chocolate no-churn ice cream, the best way would be to add some cocoa powder to your ice cream. That way, your ice cream will not become overly sweet with the addition of extra dark chocolate.
Like this no churn ice cream recipe? Here are my other posts you might want to check out:
- Churned Ice Cream (Ice Cream Maker/ Blender Method)
- Homemade No-Churn Ice Cream - The Easiest!
- Homemade Chocolate Ice Cream (Ice Cream Maker / Blender Method)
- Chocolate Chocolate Chip Ice Cream - A Simple Homemade Recipe
- Mint Oreo Ice Cream - An Easy Homemade Recipe
Recipe (Printable)
Here is the full printable version of my homemade no-churn chocolate ice cream recipe.
📖Recipe
No-Churn Chocolate Ice Cream
For best results, use the metrics measurements. US customary measurements have not been tested and are only meant for guide.
Ingredients
- 397 g condensed milk (one 14 ounce-can)
- 500 ml heavy whipping cream (at least 35% fat content)
- 200 g dark chocolate
- 2 teaspoon vanilla essence
Instructions
- Chop the chocolate into small pieces. Place it in a heat-proof bowl.
- Add condensed milk to the chocolate and double boil until the chocolate is melted. Remove from heat and let the chocolate-condensed milk chill in the fridge.
- Measure the whipping cream into a large bowl. Whip until stiff peaks form.
- Fold in the chocolate-condensed milk into the cream. Add the vanilla essence and fold until the chocolate is thoroughly combined.
- If you wish to customize the ice cream by adding nuts, chocolate chips or even sauces, add them at this stage.
- Transfer the prepared ice cream into a freezer-safe container and freeze for at least 6 hours (or more as necessary) at negative 13 degrees Celsius until the ice cream is fully frozen.
- To serve, use an ice cream scoop to scoop the ice cream into serving bowls. Garnish as preferred.
- This recipe makes 1.5 quarts ice cream.
Notes
- The chocolate and condensed milk can also be melted in a microwave. Do it in short intervals until the chocolate is fully melted.
- Dark chocolate can be replaced with cocoa powder. Use 45g of cocoa powder for every 200g of chocolate. Sift the cocoa powder first.
- For best results, the whipping cream and condensed milk should be completely chilled before mixing.
Nutrition
And that's pretty much my no-churn chocolate ice cream recipe for you.
Enjoy!
Emma
Who would think you could produce an even easier way to make ice cream? O, you, clever you. Thinks for the way to make with chocolate. I really appreciate the many tips and explanations. So much better when one understands the "why" of doing things. I am also thankful for easy to print recipes. I am so very happy I found your posts and ideas. Tomorrow will be a happy and a fun-filled eating festival. day for me. Thanks, Thanks!!