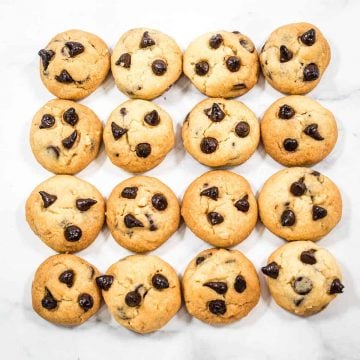
These mini chocolate chip cookies are so easy to make and taste so delicious, it’s difficult to stop with just one or two cookie at a time.
These irresistible bite-sized wonders are perfect for satisfying your cookie cravings in a single mouthful. With their crisp and crumbly, buttery texture and bursts of rich chocolate morsels, these mini delights are a guaranteed hit at parties, potlucks, or simply as a delightful snack.
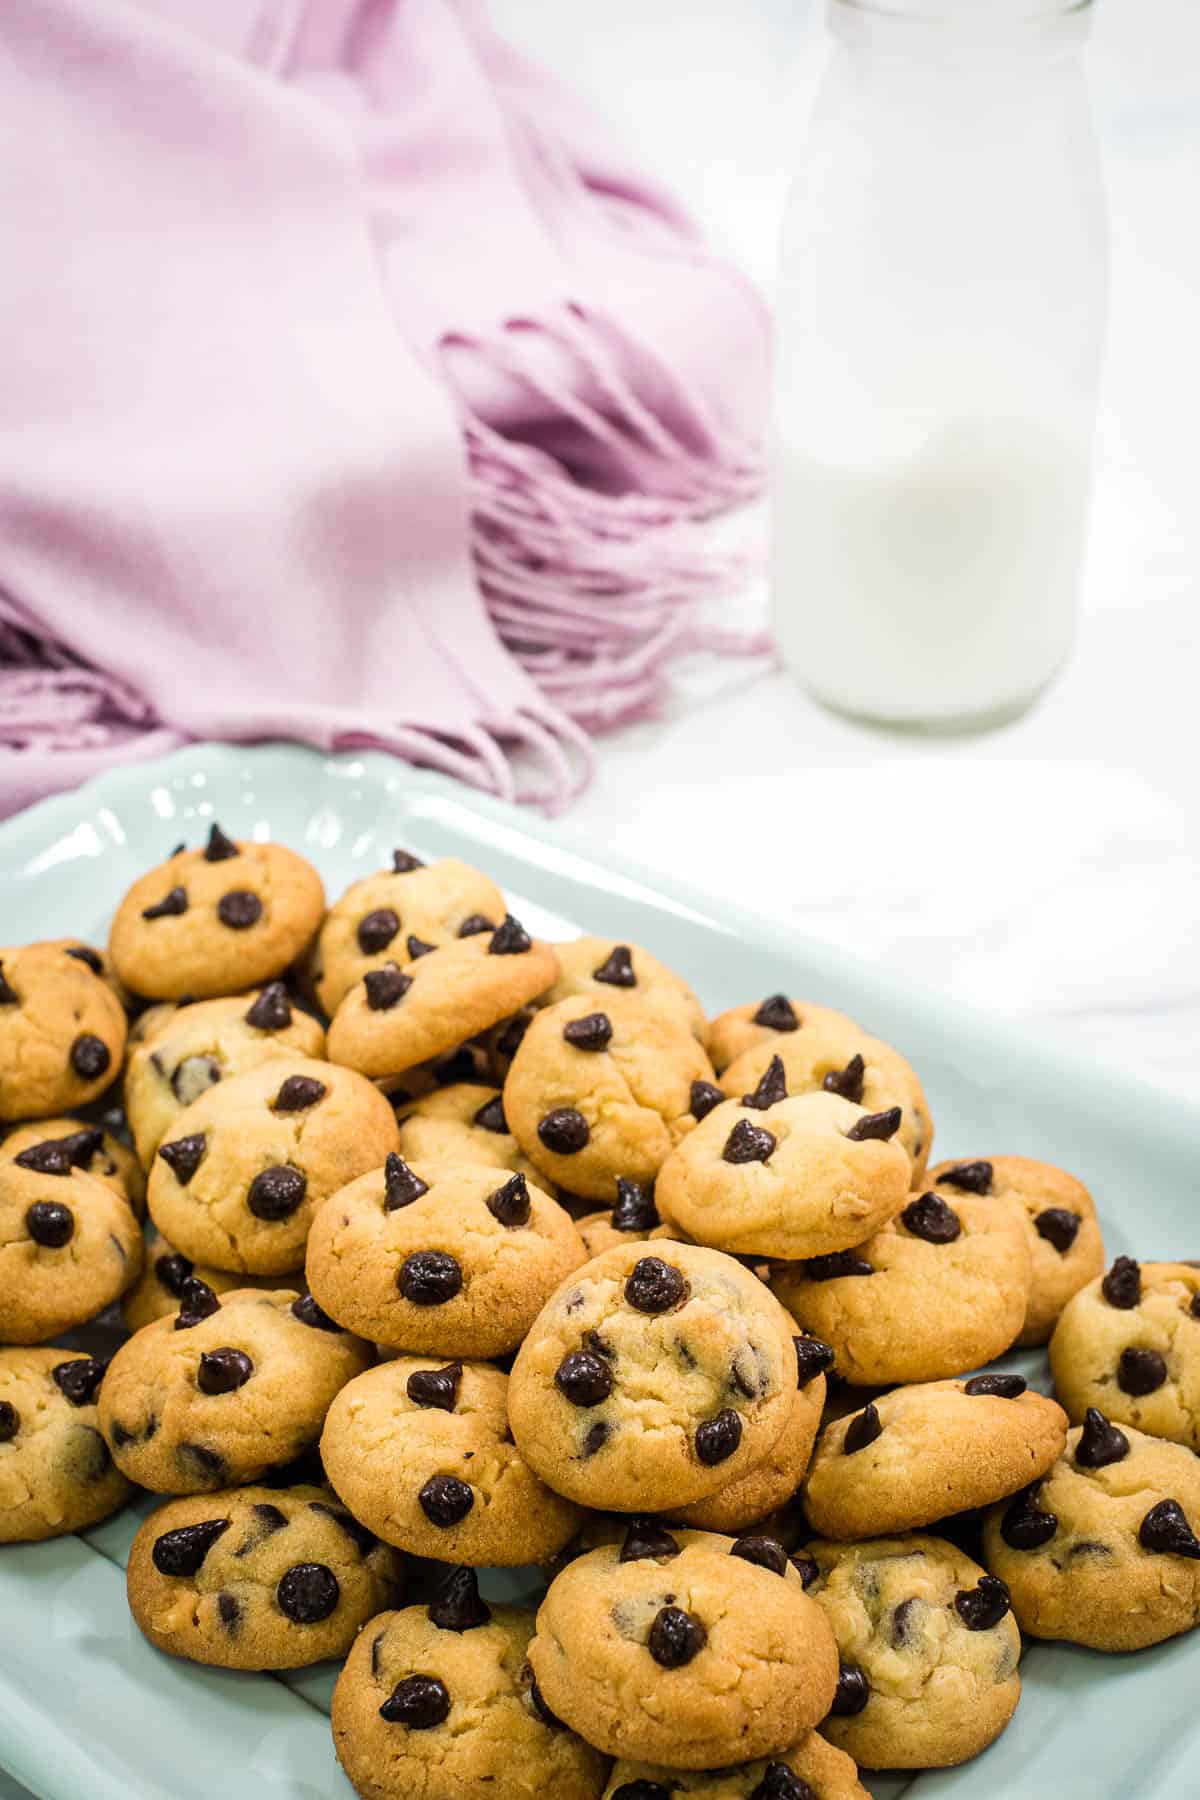
These are thick, bite-sized, mini chocolate chip cookies which means they are much smaller in size compared to regular chocolate chip cookies, and have a light and crisp texture (more like shortbread) instead of being soft and chewy cookie like the regular cookies.
The bite sizes of these tiny chocolate chip cookies makes them a great holiday cookie option. In a season where you have an abundance of cookies and sweet treats to try, having bite sized cookies simply means being able to try out as many different types of cookies and treats available.
Jump to:
❤️Why you will love this recipe
- This mini chocolate chip cookie recipe makes perfect chocolate chip cookies for those who like crunchy cookies.
- The mini cookies size is cute and visually appealing, making them enjoyable to eat and share.
- The cookies are a great choice for any special occasion. They can be served at parties, birthdays, baby showers, or other gatherings as bite-sized treats that guests can enjoy without feeling overly indulgent.
- They are also are very easy to make. No need for any cookie cutters too.
- The smaller size of these cookies makes them perfect for portion control. They provide a guilt-free way to satisfy your sweet tooth without consuming a large cookie.
- These are really delicious cookies. They deliver all the deliciousness of a regular-sized cookie, with a concentrated burst of chocolate and crunchy nuts and the perfect balance of sweetness.
- Some people prefer crumbly cookies and these mini chocolate chip cookies are great for that.
Like this easy cookie recipe? Here are my other favorite recipes you might want to check out:
📋Ingredients
- Self raising flour - sift to break any lumps before use.
- Butter - I use salted butter. If you use unsalted butter, add ⅛ teaspoon of salt when creaming the butter and sugar.
- Dark brown sugar - gives a cookies a delicious molasses flavor.
- Granulated sugar (caster sugar) - contributes to the crisp and crunchy texture of the cookies. Best to use fine sugar instead of coarse sugar.
- Egg yolk - helps to bring the dough together.
- Mini chocolate chips - these are perfect given the small size of the cookies, but can be substituted with regular chocolate chips.
- Almond nibs (roasted) - remember to roast the nuts first before adding them to the cookie dough to ensure you get crunchy nuts in the cookies after baking.
- Vanilla extract - gives the cookies a lovely aroma.
*Refer to the recipe card below for full list of ingredients and exact quantities. For best results, use a digital kitchen scale where applicable*
🧾Substitution and Variations
- I use self-raising flour in this mini cookie recipe and because of this, I did not add any leavening agents further to help the cookies increase in size during baking. You can use all purpose flour too, but remember to add ¼ teaspoon baking powder to the flour and sift it together.
- Dark brown sugar can be replaced with light brown sugar.
- Dark chocolate chips can be replaced with milk chocolate chips or even white chocolate chips if preferred.
- Nuts can be omitted from the recipe. You can also replace them with other nuts if you like. Depending on the nuts you use, roasting them slightly before adding to the cookie dough gives will give your crunchy cookies an extra lovely crunch and that complements the crispy texture of the cookies perfectly.
- To make chewy mini chocolate chip cookies, reduce the baking time to 4 to 5 minutes.
This recipe has not been tested with other substitutions or variations. If you do try, please let me know in the comments section below!
👩🍳How to Make
Roasting the almond nibs
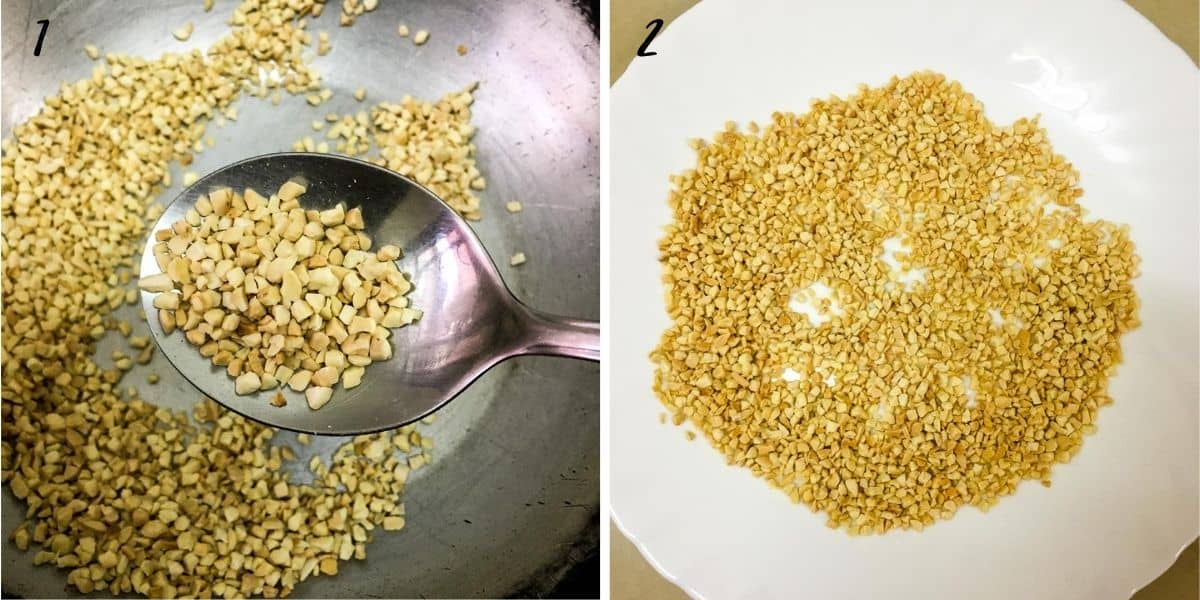
- Start by dry roasting the almond nibs over low heat until they turn golden brown. You can do this by putting them into a shallow pan (without any oil) over low heat and stir until they turn golden brown in color.
- Once they are lightly roasted, transfer them onto a plate and leave aside to cool. The reason you need to transfer them to a plate is to avoid the nuts from being roasted further in the hot pan (even without the heat).
Mixing the cookie dough
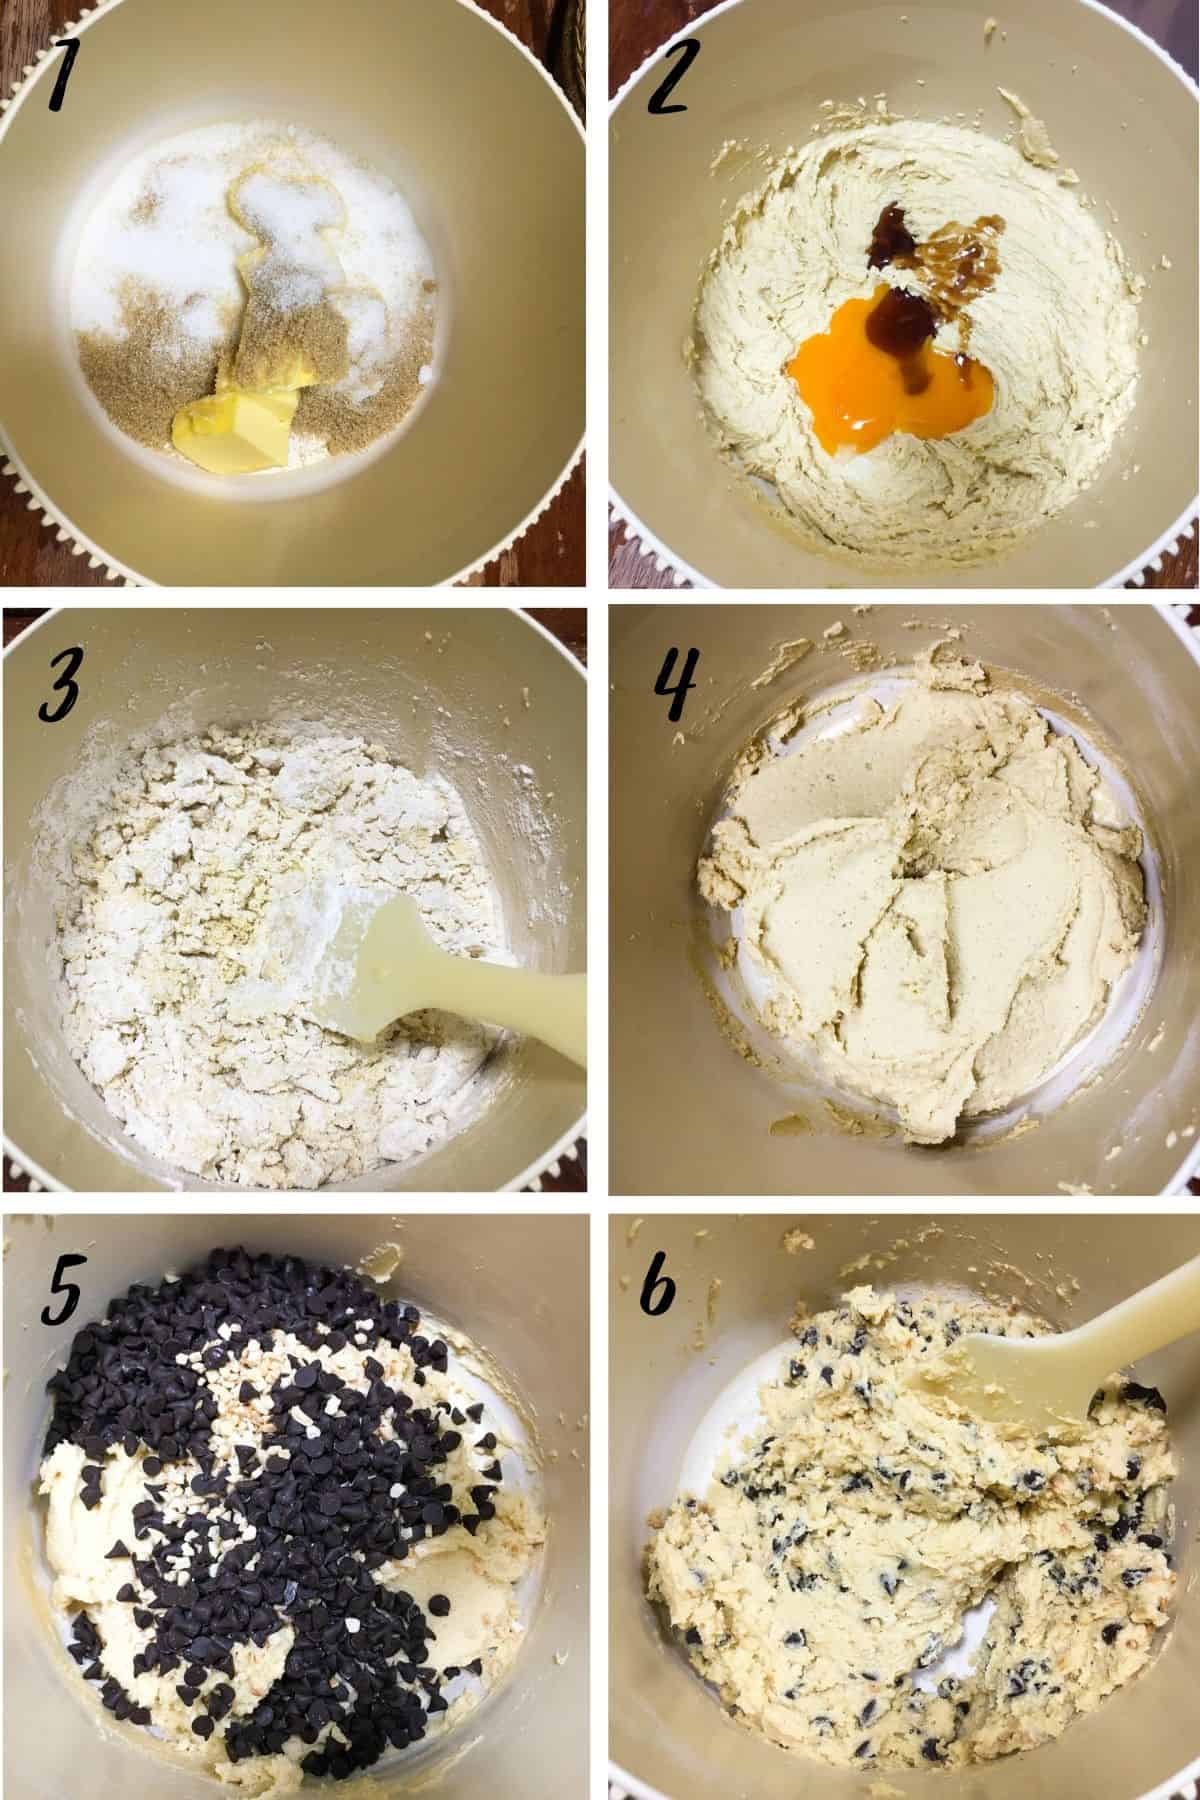
- In a large bowl, cream the butter and both the brown and granulated sugars until creamy with an electric mixer (hand mixer or stand mixer. If stand mixer, use the paddle attachment). Do not overbeat the mixture as this can lead to your cookies spreading too much during baking.
- Next, add in the egg yolk and vanilla extract. Beat until all traces of the egg are no longer visible. Scrap the sides of the bowl.
- Next is the dry ingredients. Add in the flour. Mix it in lightly with a spatula before using the mixer to mix the flour in, otherwise, you will end up with flour flying out. You can also use a spatula to mix the flour.
- Mix until the flour is well combined.
- The final step is to add in the almond nibs and the chocolate chips.
- Add all the nuts, but for the chocolate chips, add only two thirds. Mix by hand with a wooden spoon or a spatula. Reserve the remaining one third for topping later.
Shaping and baking the mini cookies
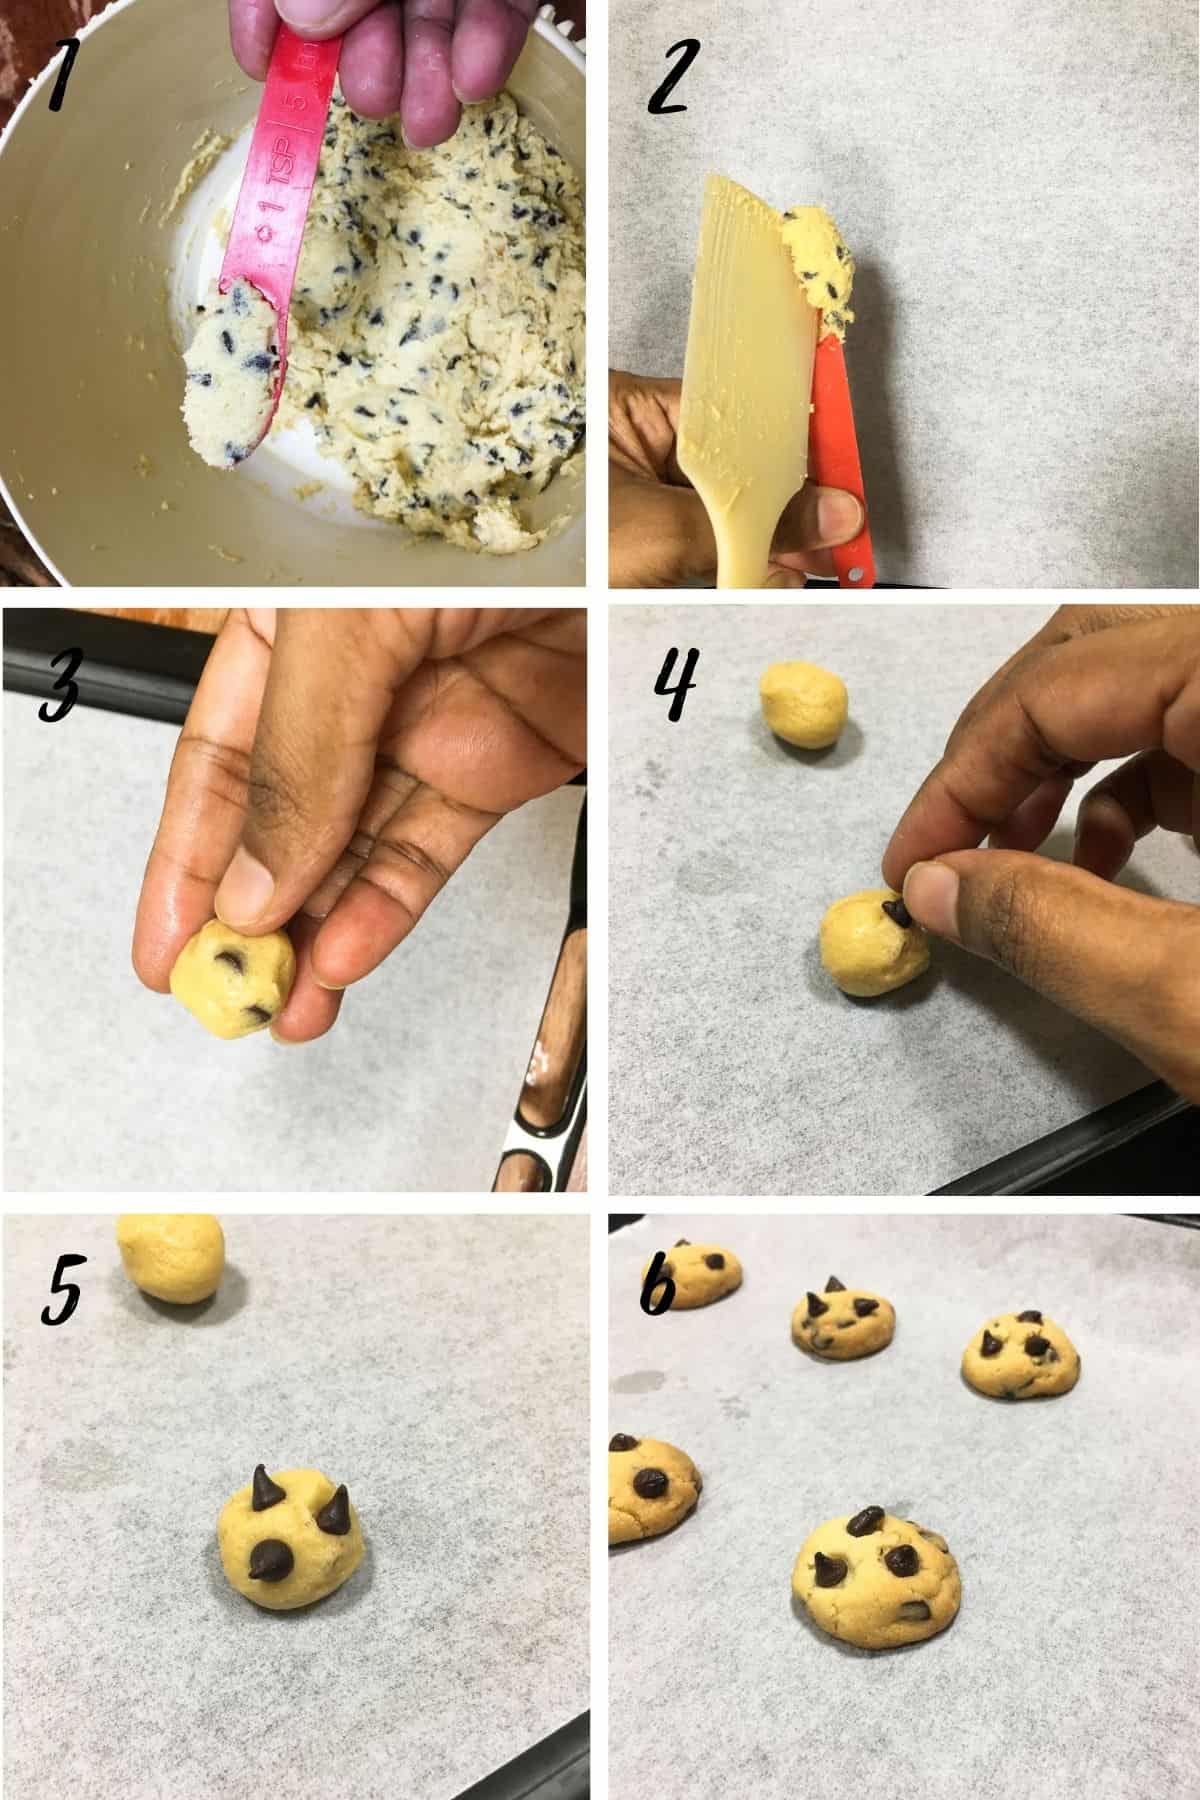
- Scoop the cookie dough into 1 teaspoon of cookie dough each. I literally used my measuring spoon to scoop my cookie dough so that my cookies are consistently sized. You can also use a cookie scoop but make sure it is of 1 teaspoon capacity.
- Drop the mini cookie dough onto a parchment paper or baking sheet or cookie sheet lined baking tray.
- Shape the cookie dough drops into tiny balls with hand. Space them on the baking tray as the dough balls will spread a little during baking.
- Add the reserved mini chips onto the cookies by randomly pressing them into the cookie balls.
- Bake the cookies for a baking time of 8 minutes in a preheated oven until they turn golden brown on the sides.
- Remove the mini cookies from the oven and let them rest in the tray for a few minutes before removing them onto wire rack (cooling rack) to cool completely to room temperature. As soon as the cookies have cooled down, transfer them into an airtight container to retaining their crispiness.
🍽️Serving & storage
- These mini chocolate chip cookies will last for a good 2 weeks in an airtight container.
💡Expert Tips
- Ensure enough space between the cookie dough balls on the baking sheet as the cookies tend to expand during baking.
- To achieve crunchy texture, the cookies must be thoroughly baked. Follow the baking time indicated in the recipe. Keep an eye on them and check for a golden brown color around the edges.
💭FAQs
This recipe uses a combination of both brown sugar and white sugar for 2 reasons.
The brown sugar gives these delicious cookies a deep molasses-like flavor and the white sugar helps with the crunchy texture of the mini bite-sized cookies.
Yes, you certainly can.
The only reason I add the chocolate chips to the top of the cookies before baking is to make the mini cookies look more delicious. With the chocolate chips clearly showing on the cookies after baking, the cookies are just more inviting!
❤️More Recipes You Will Love
Do you like this recipe? Please leave a 5-star ⭐⭐⭐⭐⭐rating in the recipe card below and consider a review further down this page. I would love to hear from you. Thank you!
📖Recipe
Mini Chocolate Chip Cookies (Bite-Sized & Crunchy)
For best results, use the metrics measurements. US customary measurements have not been tested and are only meant for guide.
Ingredients
- 190 g self raising flour
- 150 g salted butter
- 50 g soft brown sugar
- 75 g granulated sugar
- 1 egg yolk
- 150 g mini dark chocolate chips
- 50 g almond nibs roasted
- 1 teaspoon vanilla extract
Instructions
- Preheat the oven to 175°Celsius and line baking trays with parchment paper.
- Dry roast the almond nibs on a pan over small heat or in the oven. Leave aside to cool.
- In a clean bowl, add both the granulated sugar and brown sugar and butter. Cream these until the mixture turns light and creamy. Do not over beat as this could result in the cookies spreading too much during baking.
- Add the egg yolk and vanilla. Beat until just combined.
- Next, add the flour. Mix until well combined.
- And finally, add almond nibs and two-thirds of the dark chocolate chips to the dough. Mix with a spatula.
- Drop teaspoonfuls of cookie dough onto the baking tray, making sure they are spaced out to allow for spreading during baking.
- Tidy the cookies by shaping them into ball using your hands. And finally, press in the remaining chocolate chips onto the top of each cookie.
- Bake the cookies for 8 minutes until they are lightly browned at the sides.
- Remove the cookies from the oven, lift the parchment paper off the baking tray and place them onto wire racks for the cookies to cool down.
- Once cooled, remove them from the paper, and let them cool completely on wire racks before storing in an airtight container. These cookies can last up to 2 weeks in an airtight container.
Notes
- Ensure enough space between the cookie dough balls on the baking sheet as the cookies tend to expand during baking.
- To achieve crunchy texture, the cookies must be thoroughly baked. Follow the baking time indicated in the recipe. Keep an eye on them and check for a golden brown color around the edges.




Leave a Reply