

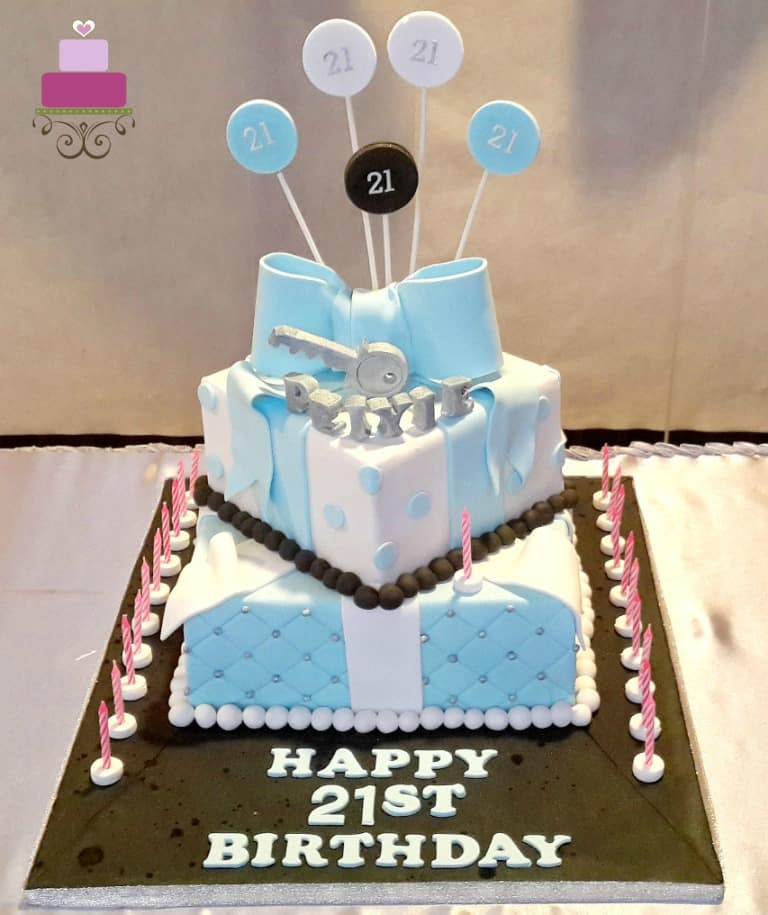
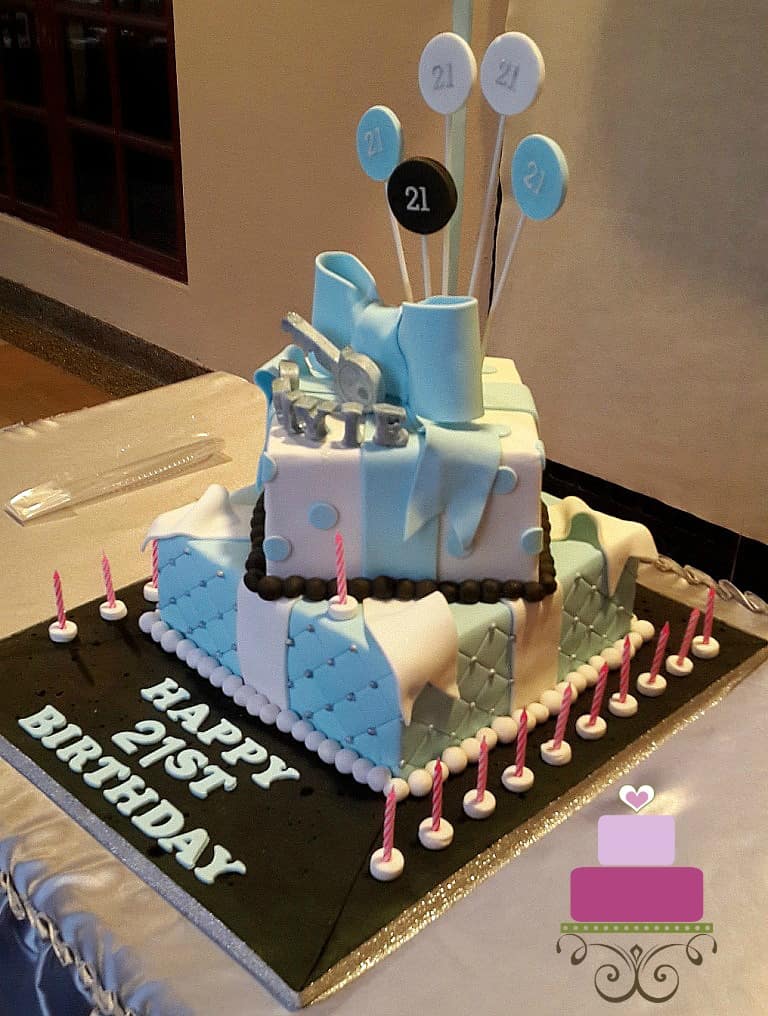
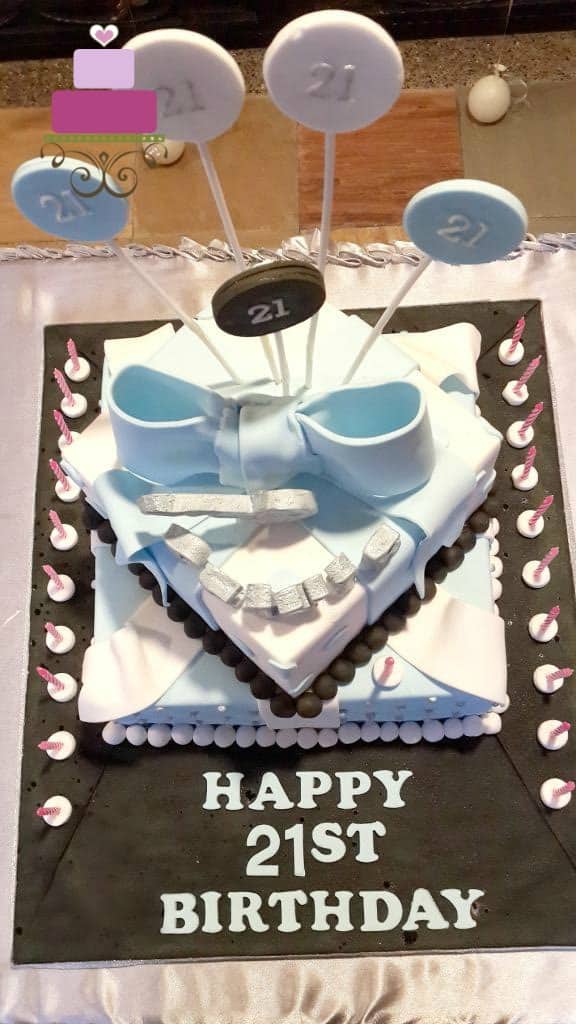
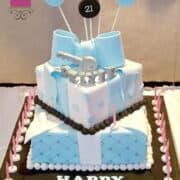
I made this baby blue girl 21st birthday cake for a 21st birthday. It was a 2 tier square cake decorated with handmade fondant bow and 3D key topper. See the decorating guide below to make this sweet 21st birthday cake.
Original Design & Credit
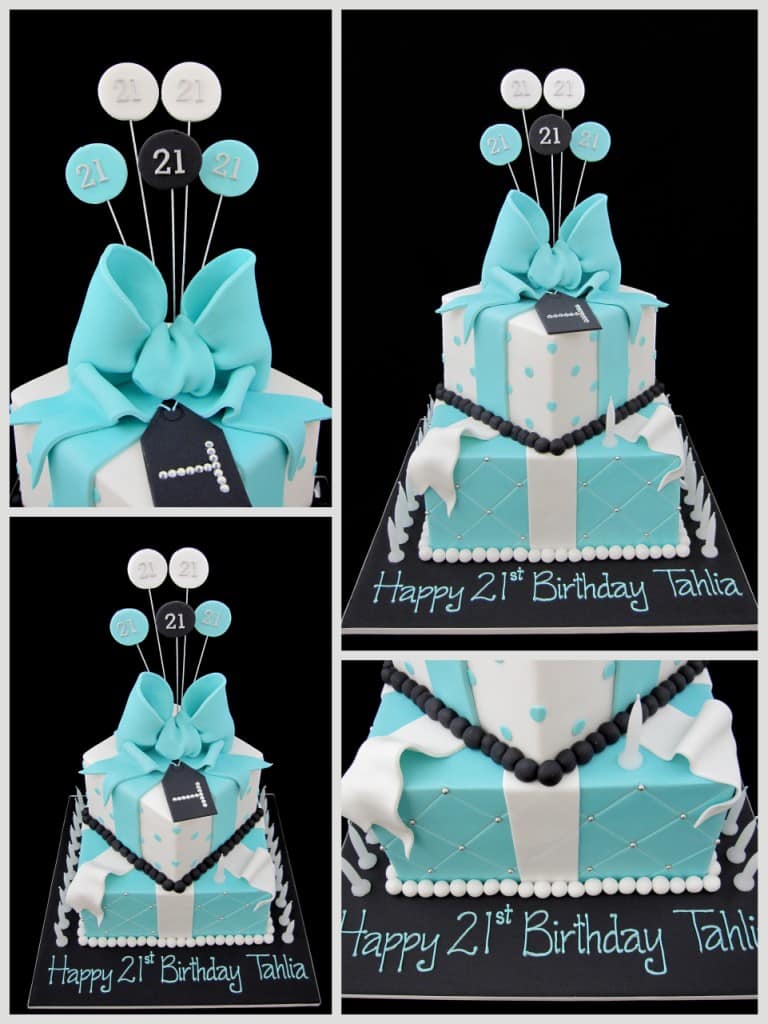
This cake is not my original design. It is a remake of a cake by Michelle from Inspired by Michelle (www.inspiredbymichelle.wordpress.com). Michelle’s original color of the cake was tiffany blue and did not have the 3D key nor the lettering.
She, however, had a tag with an alphabet “T” on it. Based on my customer’s request, I omitted the tag but added a 3D key to the cake and the birthday girl’s name in 3D letters. Here is Michelle’s original girl 21st birthday cake as shared by my customer:
🧾Supplies Required
- Cake – this was a 2 tier square cake with the tiers measuring 8 inches and 10 inches each. The height of each tier was 4 inches. I used my chocolate cake recipe for the cake.
- Buttercream – I used chocolate buttercream to fill the cake as well as to crumb coat it.
- Fondant – The entire cake was covered in fondant. I used Satin Ice white , baby blue and black. You can also make your own fondant with this homemade fondant recipe or marshmallow fondant recipe.
- Gum paste – I used very little gum paste in this project. And that was only for the numbers ‘21’ on the round disc toppers on the cake. And I used Satin Ice gum paste for this purpose.
- CMC powder – I added this to my fondant when making the circle discs, the 3D key and the bow. CMC helps fondant to set hard and firm, enabling it to hold shape in 3D form.
- Silver dragees – these were store-bought. I used them on the bottom tier, at the edges of each diamond lattice.
- Fondant glue & shortening – these were the ‘glues’ I used to stick my fondant deco on the cake. They were used interchangeably throughout this baby blue 21st birthday cake project.
- Lollipop sticks – these were used as picks for the circle disc toppers on the cake. I also used them for the numbers ‘21’ on them.
- Key template – this was a hand-drawn template on a piece of paper. I used this as a guide to make the 3D key.
- Round cutter set – I used a medium-sized one from this set for the circle disc toppers on the cake.
- Round plunger cutter set – I used the largest size for the pastel blue polka dots on the top tier of the cake.
- Alphabet cutters - I used 2 different types for this cake. The first one was FMM Tappit block letters and numbers cutter set. I used this for the numbers ‘21’ on the cake. The other set I used were also block letters . But these were larger than the FMM font. I used these to make the 3D lettering on the cake as well as the birthday message on the cake board.
- Pizza cutting wheel – this was a general cutting tool throughout the project. It was particularly useful for making the strips of the bow.
- Airbrush & silver metallic sheen paint – I used an airbrush to paint the 3D key and the 3D letters on the cake. The silver sheen airbrush paint was from Americolor.
- Toothpicks and wooden skewers – I used toothpicks for the 3D letters and a 3D key, to help hold them in place on the cake. Similarly, I used a wooden skewer to hold the 3D bow in place on the cake.
👩🍳How to Make
I started by preparing some of the deco on the cake in advance. These were the bow and the circle toppers on lollipop sticks with the numbers ‘21’ on them. Both these deco were made with fondant that has been added CMC into. CMC helps the bow and the cutouts to hold shape when put on the cake.
Step 1: Make the Bow
I did not capture the step by step images of making the bow. I do, however, have a tutorial on how to make a similar bow which I made for a baby shower cake.
The bow on this cake was made following the same steps except that this bow is wider. Click here to see the fondant bow tutorial.
Step 2: Make the Circle Cake Toppers
As for the circle toppers, these were cut using my round cutter set. Each circle was about 0.5 cm thick. I made them thick so that I could insert the lollipop sticks into them without any tearing to them.
And the numbers 21 on each of these discs were cut out using FMM block letters alphabet cutters. I used gum paste for the letters and air brushed them in silver. I attached them to the discs with shortening only after the air brush paint was set completely.
Step 3: Make the 3D Key Topper
I also made the 3D key topper and the upright standing 3D letters in advance. These were also made using fondant that has been added CMC. For the key, I drew the key on a piece of paper. I used it as a template to cut it out in fondant.
And while the fondant was still soft, I attached a toothpick to its base so that will be easier to hold the key in place once it's placed on the cake.
The letters, on the other hand, were made using alphabet cutters and these were also attached with toothpicks. Both these deco were made in white and I airbrushed them in silver using Americolor silver sheen airbrush color.
Step 4: Prepare the Cake
Closer to the event date, I baked the cake. Once it has completely cooled, I leveled the tiers, filled and crumb coated them with buttercream, and then covered them with fondant. The bottom tier was covered in baby blue while the top tier was covered in white.
For the bottom tier, I used my diamond lattice imprinting tool to imprint the diamond lattice design all around the sides. And then I attached a silver dragees at the corner of each lattice. To attach these, I used the back of my paintbrush to make a slight dent on the fondant.
And then I dabbed a little glue into each hole and pushed one silver dragee into each hole. This way, the dragees will remain in place and not fall off while transporting the cake.
Step 5: Add the White Stripes
And before stacking the top tier on the bottom tier cake, I added 4 wide white strips on all 4 sides of the cake. I also added 2 additional strips that were hanging on the sides. All these were attached to the cake with shortening.
For the top tier, I added similar wide strips, but this time, it was in baby blue. And again, I added 2 additional strips in the same baby blue color hanging on the front sides of the cake.
To make them appear naturally curved, I rolled some kitchen papers and put them underneath the strips. I removed them once the fondant has set, leaving the strips looking slightly curved.
Step 6: Add the Polka Dots
Next, before adding the bow, I attached the baby blue polka dots to the cake. I cut these with my round plunger set and used shortening to stick them in place.
Step 7: Attach the Bow and the Key Topper
The first decoration to go on the cake was the bow. I attached a wooden pick to the bow. And then I applied some glue to the base before putting it onto the cake.
The pick is an additional measure to hold the bow in place. And I used fondant glue instead of shortening so that the bow is securely attached to the cake.
Next to go on the cake was the 3D key followed by the birthday girl’s name. And then the circle disc toppers went on.
Step 8: Attach the Cake Border
After that, I added the cake borders. I formed the balls by hand and attached them to the cake with glue. I would normally use shortening for cake borders.
However, since the corners of the first tier cake were at the edges of the second tier, there is not much support for the balls in these sections. So I used a stronger ‘glue’ to secure them in place.
Step 9: Make the Cake Lettering and Candle Holders
Next was the birthday lettering on the cake. These were cut using the same cutters I used for the 3D letters that formed the name of the birthday girl on the cake. And I attached these to the cake board with shortening.
And finally, for the finishing touch on this girl birthday cake, since my customer wanted a total of 21 candles on the cake, and since there was not much space on the cake itself to put the candles, I decided to place 20 of them on the cake board in an organized pattern.
The remaining candle went on the front of the bottom layer of this sweet girl birthday cake. To hold the candles on the cake board, I cut out round pieces of fondant with a thickness of about 30mm. And then I poked a candle each into the centers. I attached these ‘candle holders’ to the board using glue.
And with that, the girl 21st birthday cake was complete.


Leave a Reply