This chocolate pound cake is simply the best. With its rich buttery chocolate flavor, this cake is a delightful combination of the moist and fluffy texture of a classic pound cake and the deep cocoa flavor of a chocolate cake.
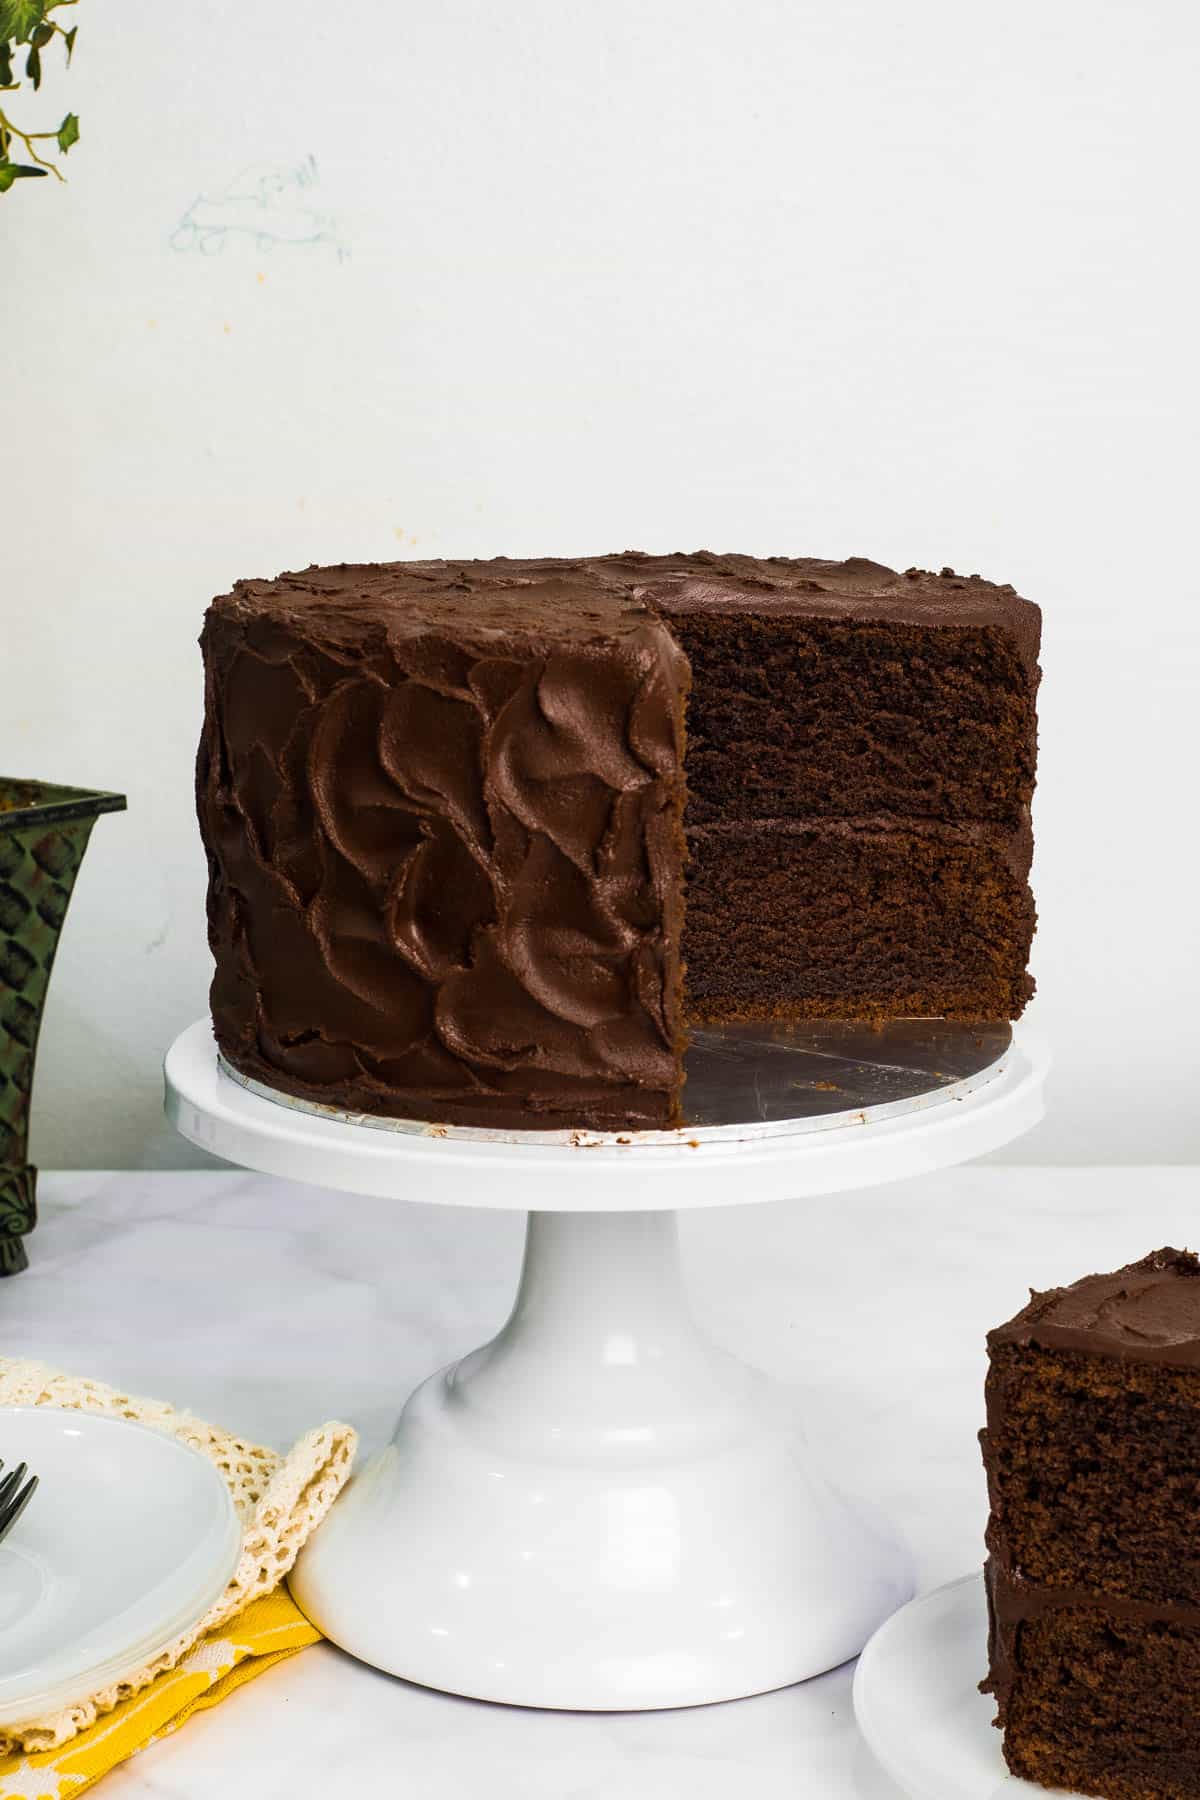
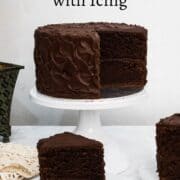
Baked into a round cake and frosted with a simple chocolate icing, this chocolate pound cake not only makes a great snack, it is perfect for birthdays and parties too.
This simple chocolate cake recipe has received rave reviews and so much positive feedback from fans who found my recipe online as well as my customers to whom I have made this cake before.
Just like my butter pound cake recipe, this is the only chocolate cake recipe I used in all my cake orders for chocolate cakes. I have baked this very same cake in many different tin sizes too. So I am able to share with you the recipe measurement for the different round and square pan sizes. Read more on this in the notes section of the recipe card below.
Jump to:
❤️Why you will love this recipe
- This rich chocolate pound cake recipe makes a great flavor variation to the classic pound cake.
- With its moist texture and rich chocolate flavor, this delicious cake is a perfect treat for chocolate lovers.
- The cake is very easy to make and very versatile. It can be baked into a simple loaf cake, a pretty bundt cake as well as into round or square cakes.
- Whether served on its own with a light dusting of powdered sugar, a scoop of vanilla ice cream or some fresh berries with whipped cream, this chocolate pound cake makes a timeless and satisfying dessert.
- You can also frost the cake with any frosting of your choice for a birthday party or any other special occasion.
- The cake stays soft and moist for a good 4 to 5 days at room temperature. It is awesome when eaten plain and works equally well when frosted either with chocolate buttercream frosting, chocolate ganache, or even my chocolate icing as I have pictured on this page.
Like this easy and moist cake recipe? Check out my other recipes you will love like this orange layer cake with orange buttercream and candied peels, moist chocolate cupcakes from scratch, chocolate brioche bread loaf, brownies with perfect crinkle tops, chocolate peanut butter stuffed cookies and dark chocolate banana cake with buttermilk.
📋Ingredients
For the cake:
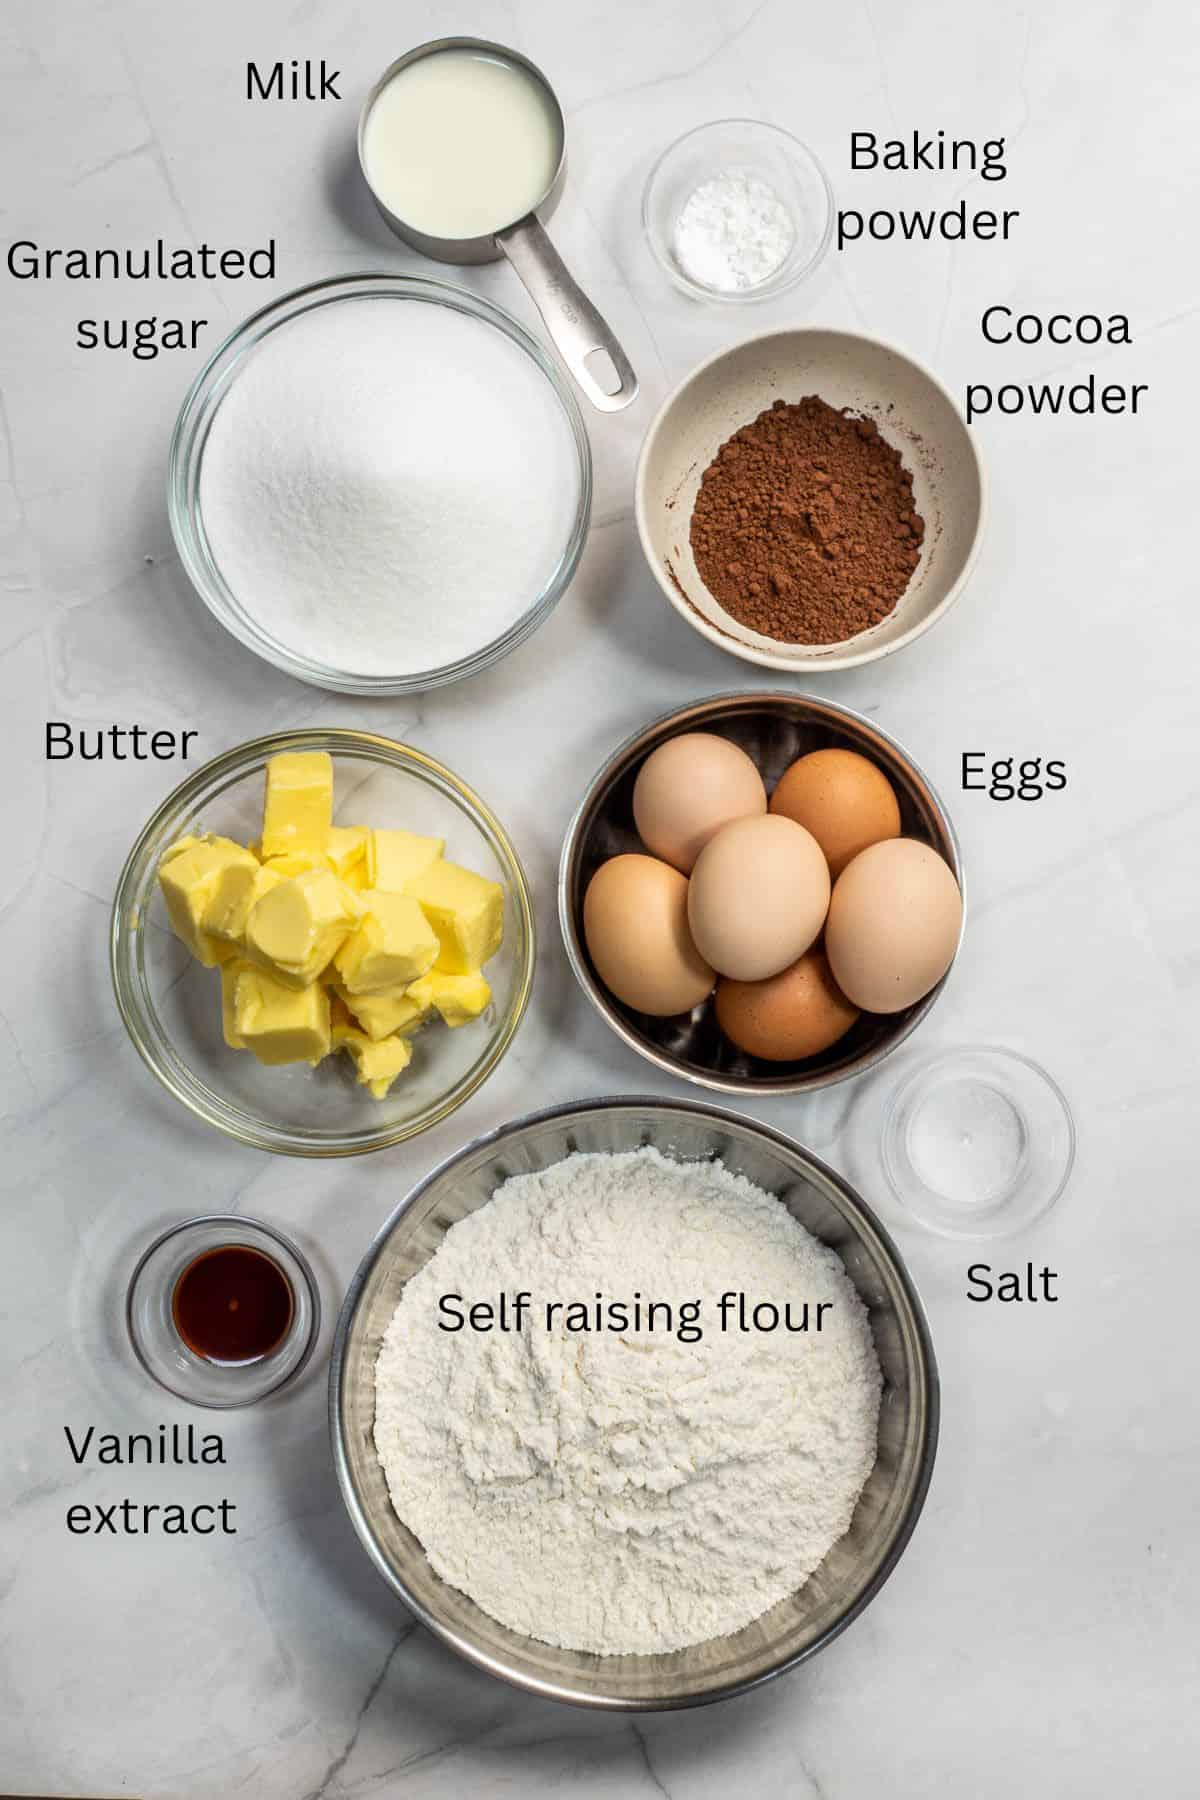
- Self raising flour + baking powder + salt - sift these together to mix them well and to break any lumps in the flour. Use fine salt.
- Unsweetened cocoa powder - make sure to sift the cocoa powder before using as it tends to be lumpy and can remain lumpy in your cake batter.
- Granulated sugar (caster sugar) - fine sugar works best for this cake. Coarse white sugar will leave unsightly specks of sugar on the surface of the cake after baking.
- Butter - I use salted butter. If you are using unsalted butter, increase the amount of salt in the recipe by one eighth of a teaspoon.
- Eggs - use large eggs.
- Whole milk - Contributes to the moist texture of the cake. Use room temperature milk.
- Vanilla extract - adds a lovely aroma and flavor to the chocolate pound cake.
For the chocolate icing:
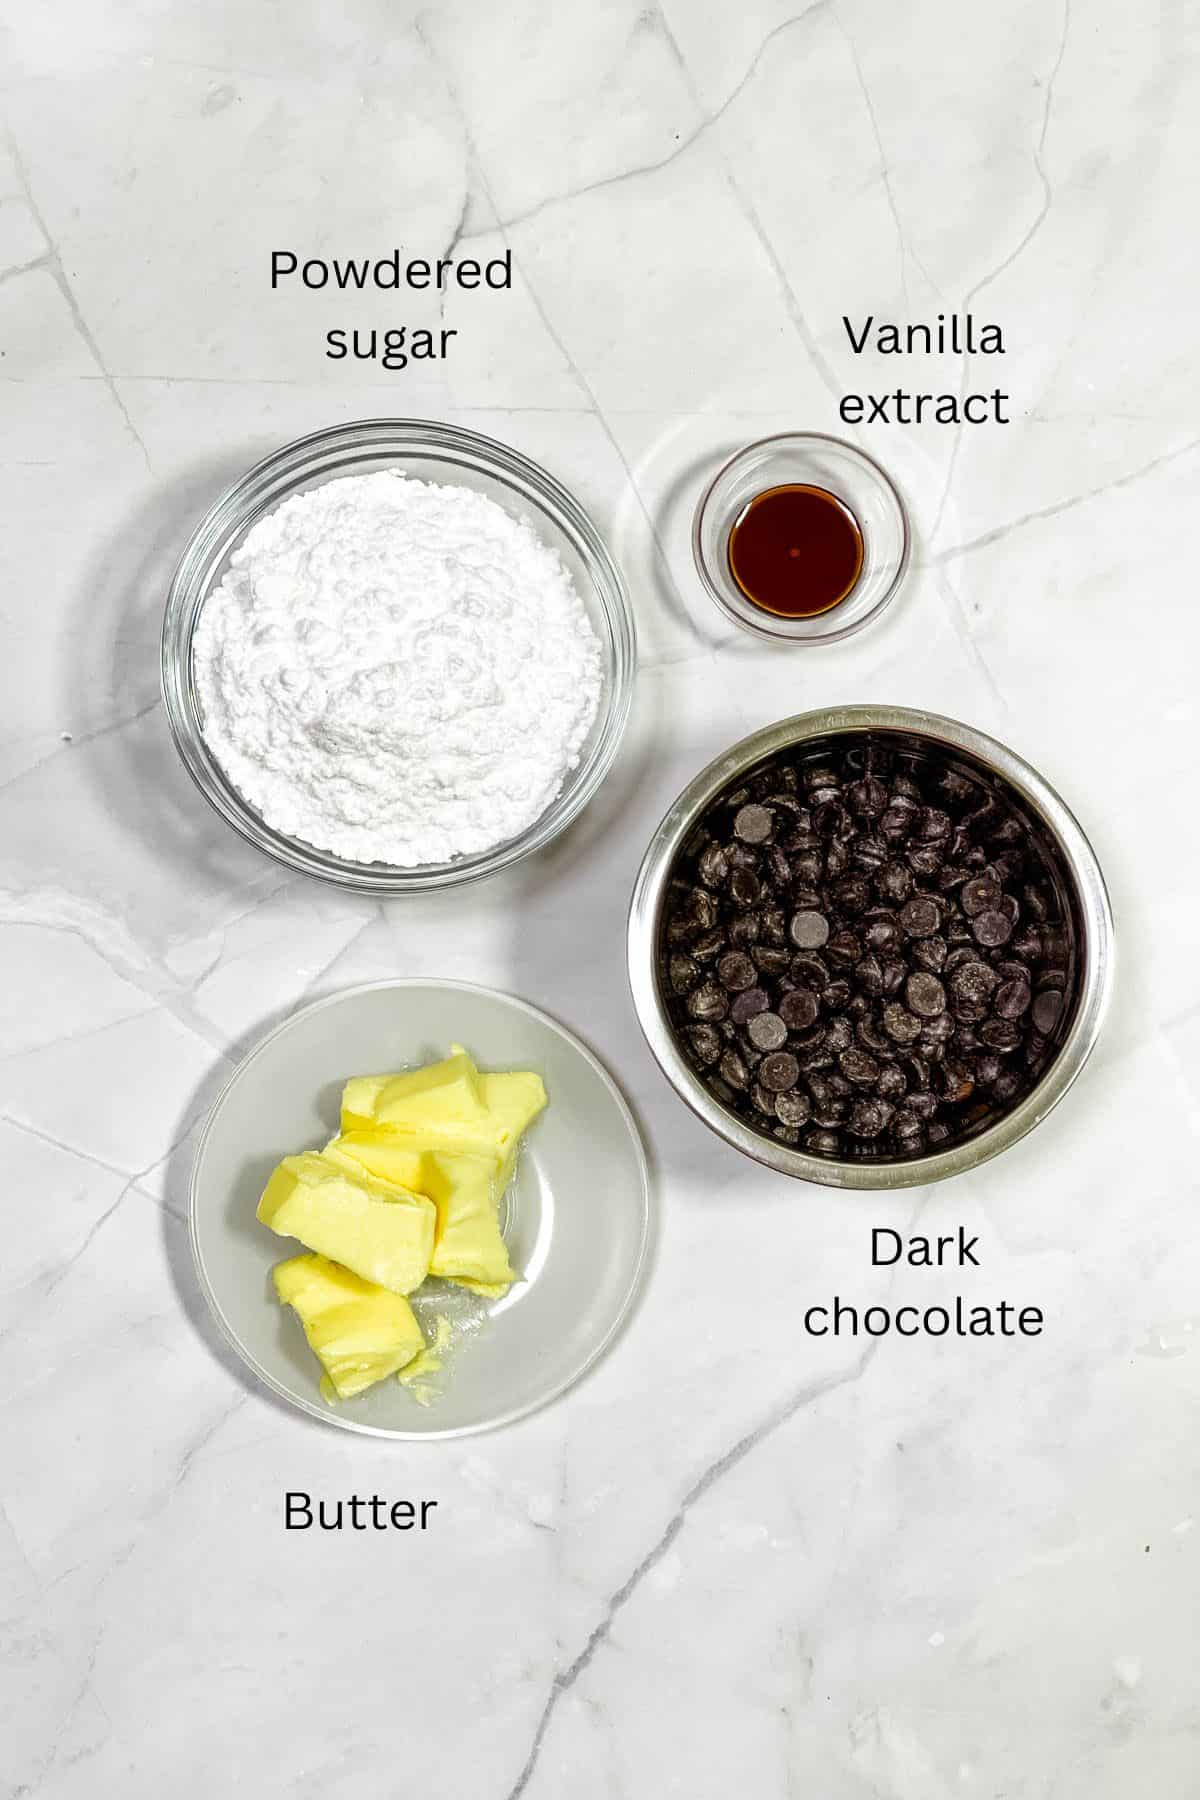
- Dark chocolate - for best results, use bittersweet or semisweet chocolate. Generally, the higher the content of cocoa butter, the more bitter the chocolate will be. Bitter chocolate helps to balance the sweetness from the powdered sugar in this chocolate icing. Milk chocolate and white chocolate are not recommended as they will make the icing too sweet. Use cooking chocolate (or chocolate melts) instead of eating chocolate or chocolate chips and these do not melt well.
- Powdered sugar - sift first before using to break any lumps.
- Butter - I use salted butter. If using unsalted butter, add a tiny pinch of salt along with the butter when mixing the icing.
- Vanilla extract - adds a lovely aroma to the chocolate icing.
- Heavy cream (optional) - you only need to use this if the icing is too stiff.
*Refer to the recipe card below for full list of ingredients and exact quantities. For best results, use a digital kitchen scale where applicable*
🧾Substitution and variations
- Self raising flour can be substituted with all purpose flour. For every 225g of all purpose flour, add one and a half teaspoons of baking powder. Mix well and sift at least 3 times before using. To make 360g of self raising flour (for the measurement in the recipe card below), add two and a half teaspoons of baking powder (in addition to the amount of baking powder indicated in the recipe) to 360g of all purpose flour.
- To make the chocolate pound cake in a loaf pan, half the recipe and bake the cake in an 8 inches by 4 inches loaf tin.
- To make a chocolate bundt cake, half the recipe and bake the cake in a 6 cups capacity bundt pan at 160 degrees Celsius for 30 minutes. Make sure to not fill the cake tin full. Leave about one third of the tin height to allow sufficient space for the cake to rise without overflowing.
- Chocolate icing can be replaced with other chocolate based frostings like chocolate buttercream or chocolate ganache.
- Heavy cream for the frosting can be replaced with milk.
This recipe has not been tested with other substitutions or variations. If you do try, please let me know in the comments section below!
👩🍳How to Make
Baking the cakes
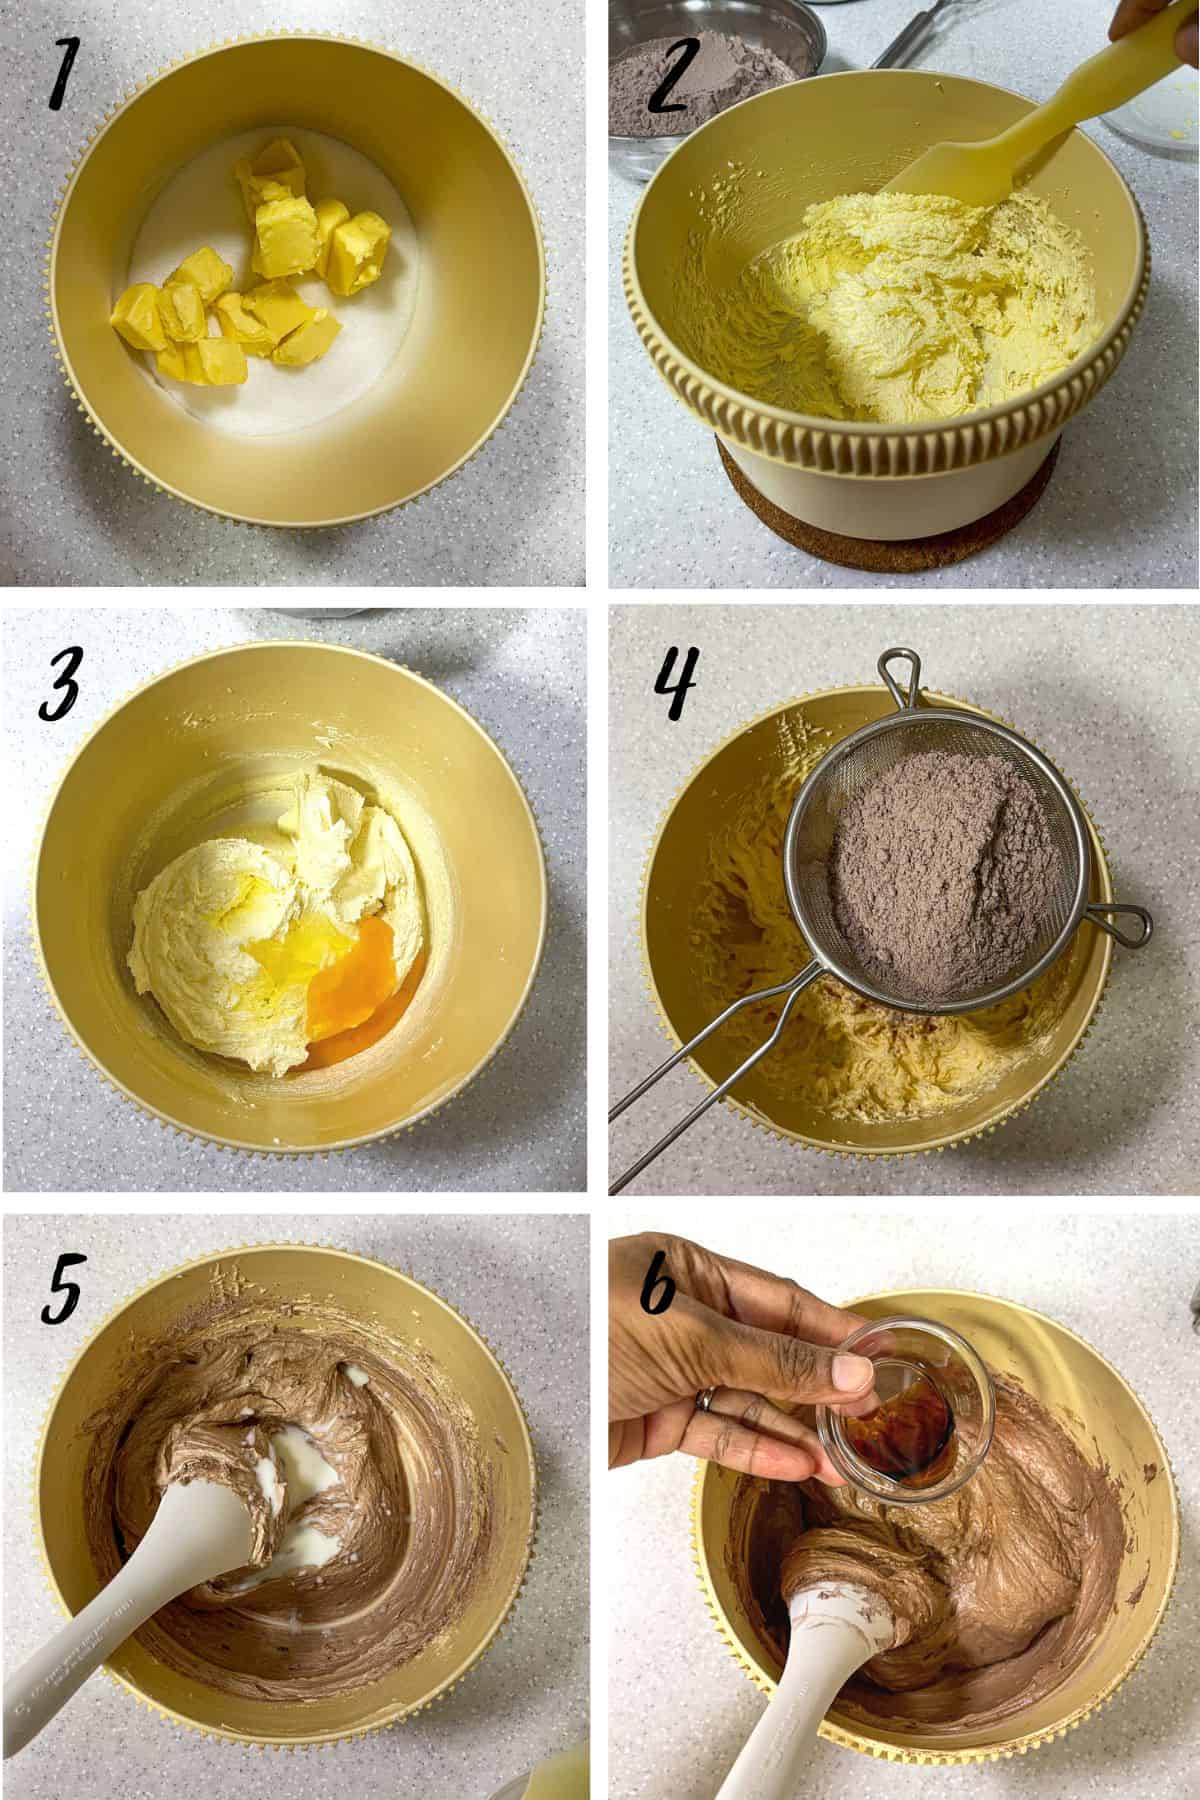
- Measure sugar into a large bowl of an electric mixer. Add butter to it and beat until the butter and sugar are creamy, light and fluffy on medium speed (with a paddle attachment). This should take about 2 minutes.
- Scrape the bottom and sides of the bowl at one minute interval.
- Next, add the eggs, two at a time, in the sugar and butter mixture. Each time, beat until the traces of the eggs are no longer visible.
- In another separate bowl, mix the flour, cocoa powder, baking powder and salt. Sift this flour mixture (dry ingredients) into the creamed wet ingredients in 3 batches.
- Alternate each batch with milk. Start and end with flour.
- Finally add vanilla extract and combine well.
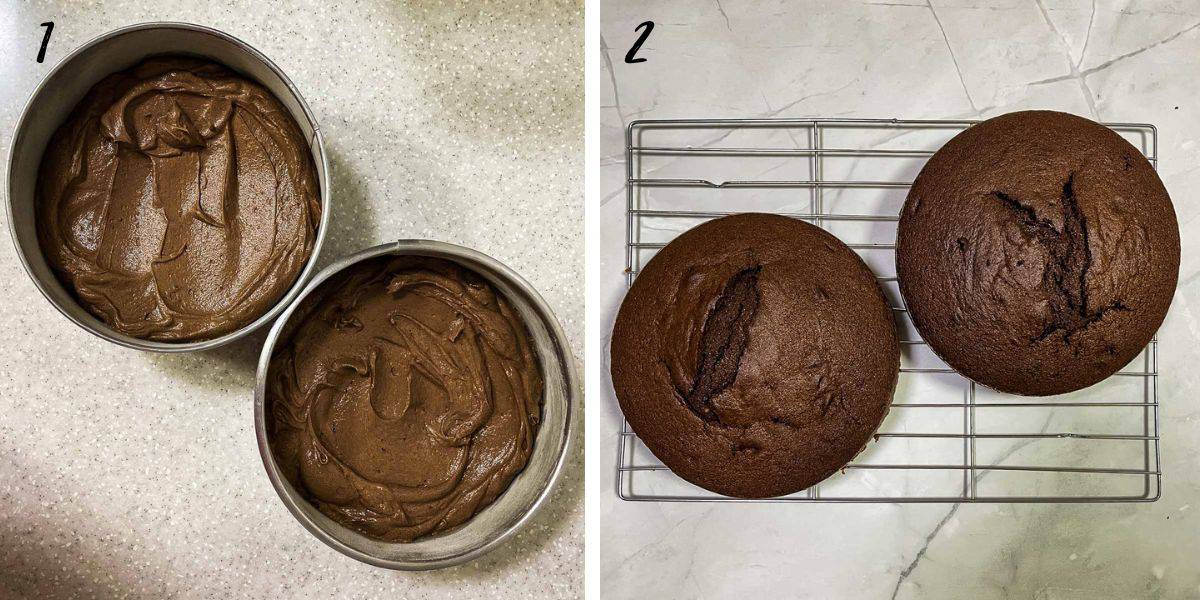
- Pour batter into the prepared pan (two well greased and floured cake tins of equal size). Level the top. Bake the cakes in a 170 degrees Celsius preheated oven for 40 to 45 minutes or until a skewer or cake tester inserted in the center of the cakes come out clean.
- Remove cakes from oven and let them cool on wire rack (cooling rack) before decorating. Baking time may vary slightly for larger cakes.
Making the icing
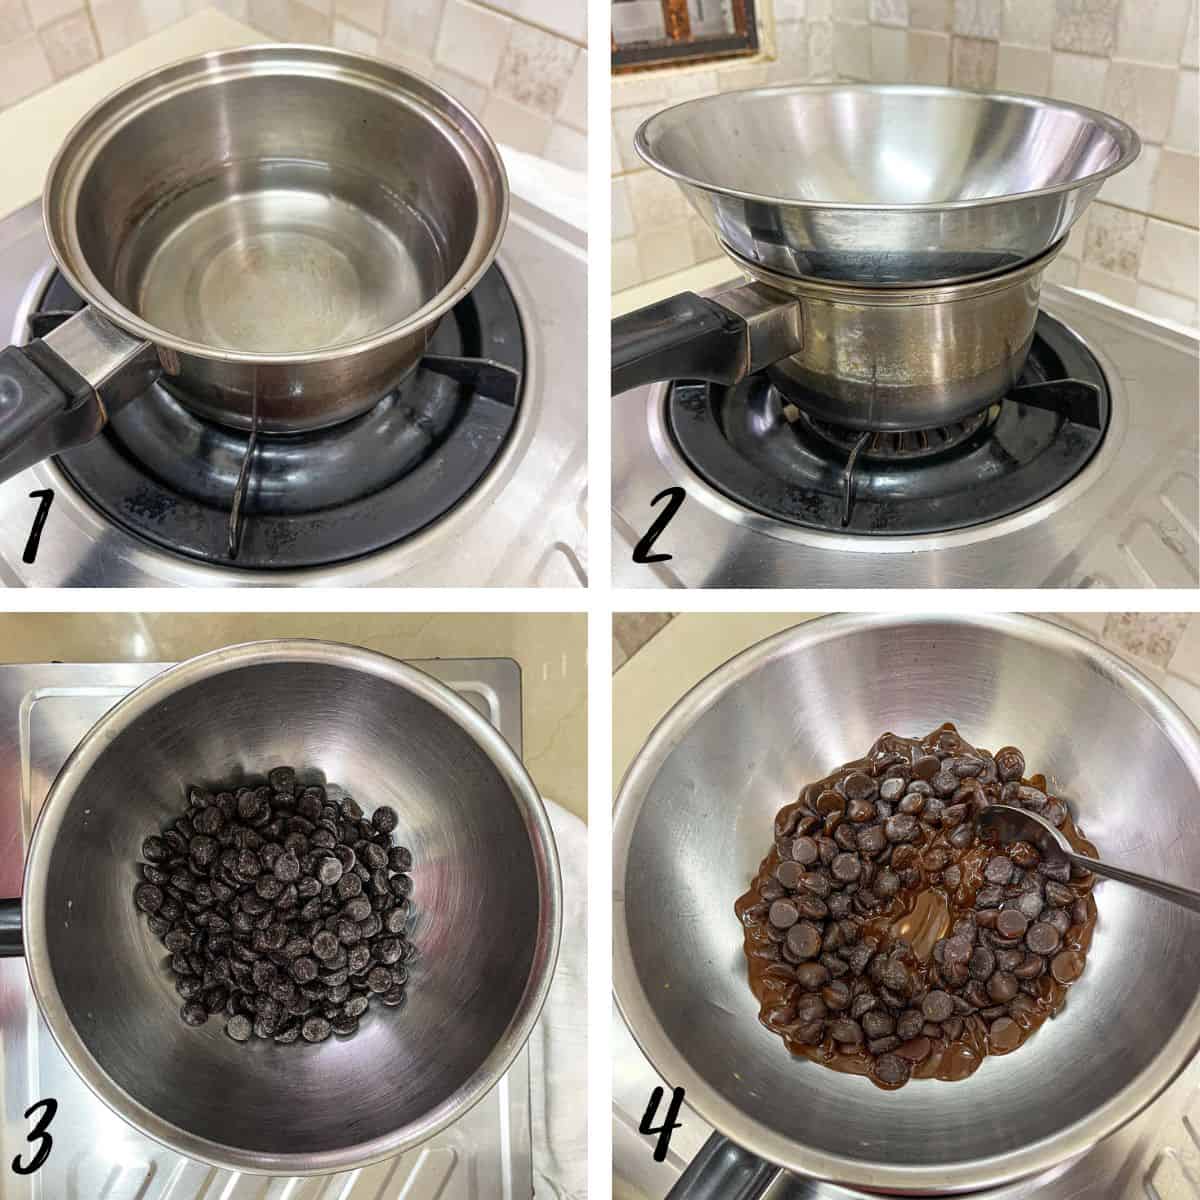
- Prepare a double boiler. If you don't have one, you can use a small saucepan and a heatproof bowl. Fill water into the saucepan (about a quarter high).
- Place the heat proof bowl on the saucepan. Make sure the bowl is larger than the saucepan so that it sits on the pan and not inside. The bowl should not be touching the water underneath.
- Add chocolate into the bowl. If using a chocolate bar, chop the chocolate into small, uniform pieces for easy melting. If using chocolate buttons or melts, no need to chop them.
- Turn on the heat to a medium flame and let the stim from the water heat up the bowl and the chocolate. Stir to expedite the melting.
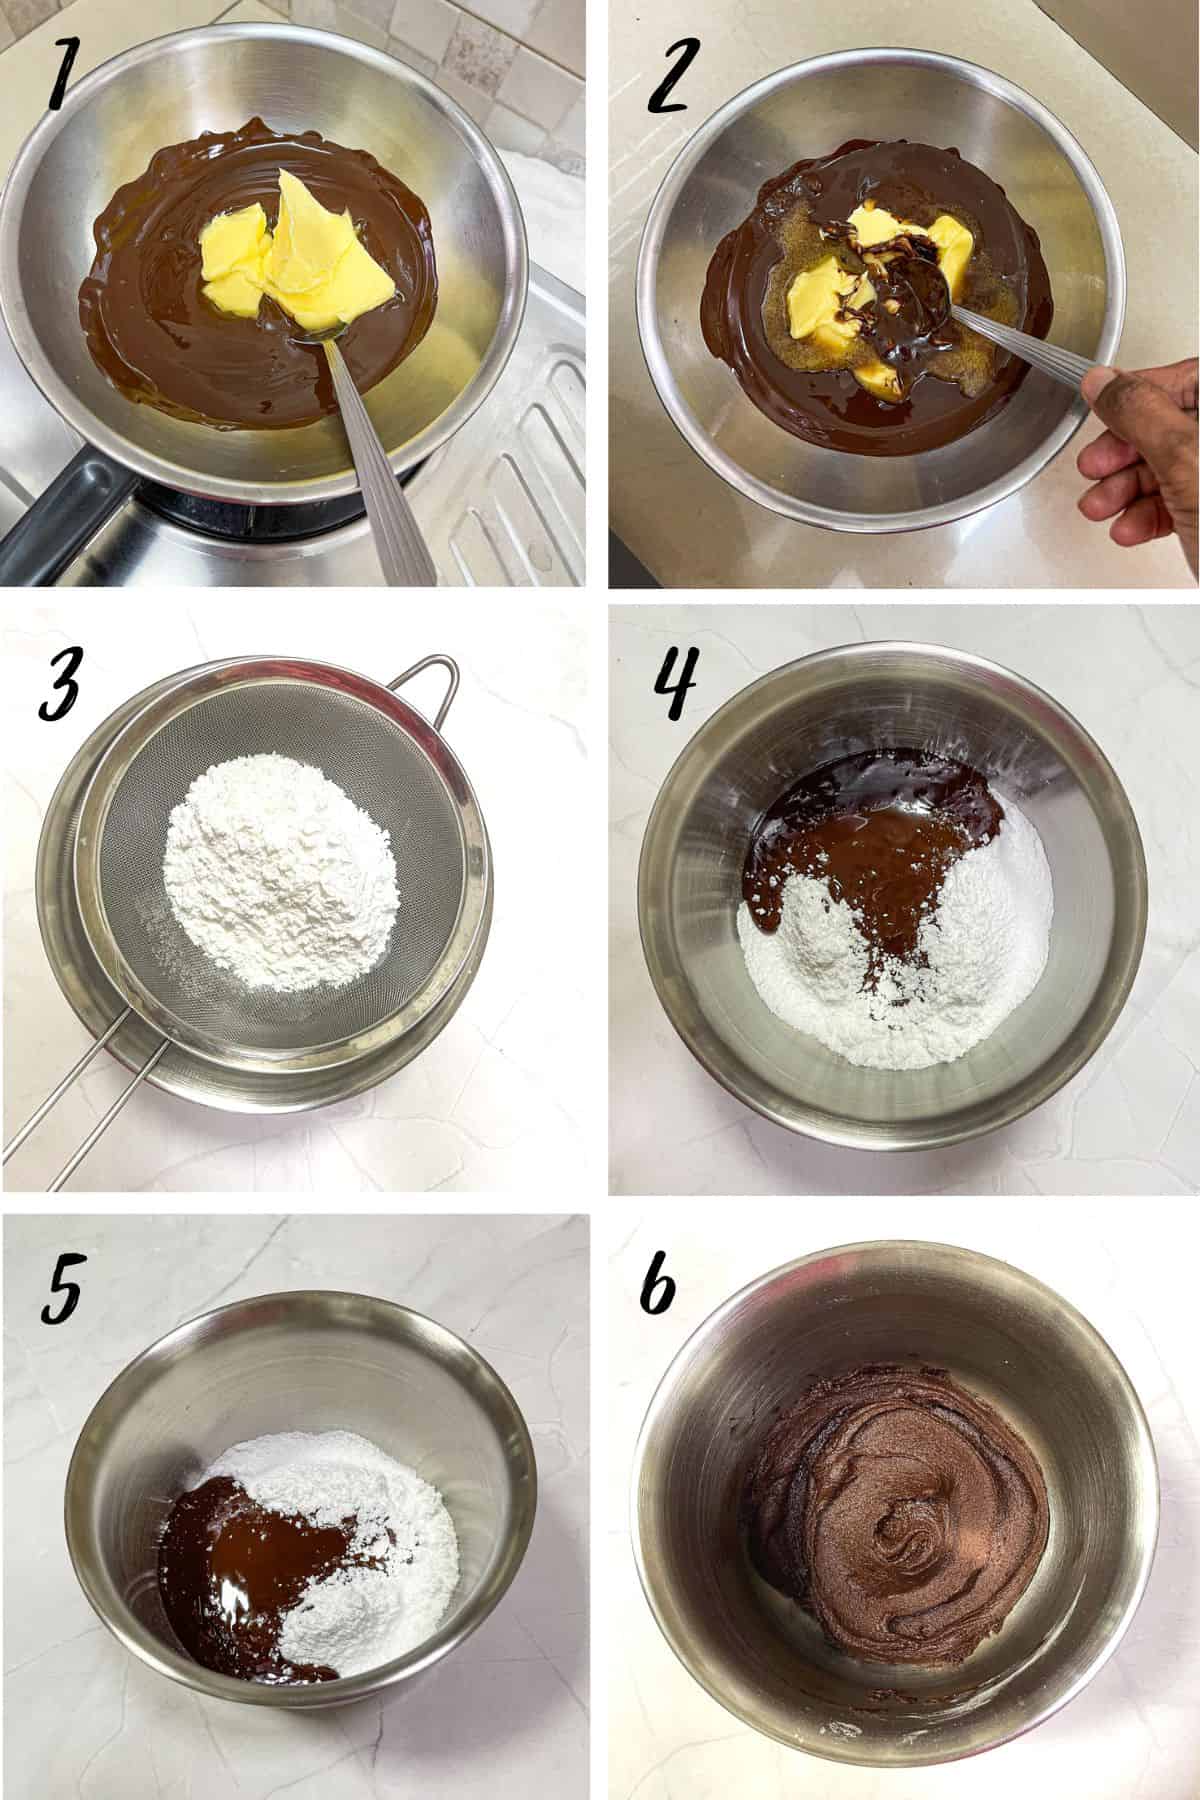
- As soon as the chocolate is almost completely melted, add the butter. Again, for quicky melting, cut the butter into small cubes.
- Remove the chocolate butter mixture from the heat immediately after adding the butter and let the butter melt in the heat of the chocolate. Stir to mix. Let the chocolate mixture cool down to room temperature.
- Meanwhile, measure and sift the powdered sugar into a medium sized bowl.
- Pour the chocolate mixture into the powdered sugar.
- Add the vanilla extract.
- Mix until the sugar is well combined and the chocolate icing comes together.
If the icing is too stiff, you can add some cream to it and beat it until smooth. Add the cream in small increments of one tablespoon at a time to avoid the icing from becoming too thin.
The icing can be used immediately.
Frosting the cake
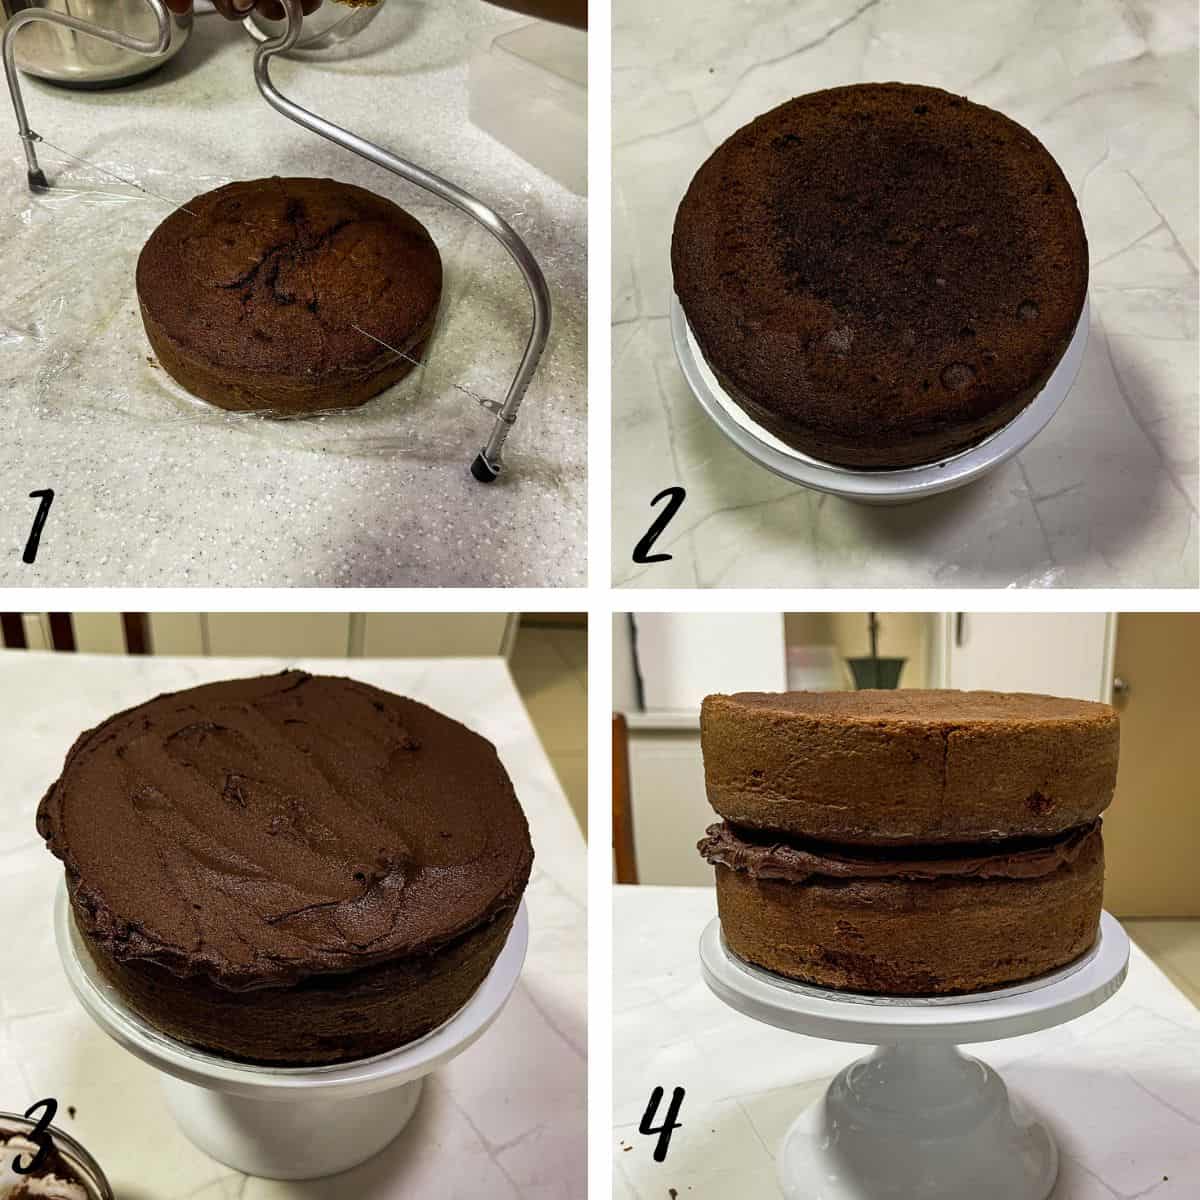
- Make sure the cakes are at room temperature when frosting them. If the cakes are refrigerated, bring them out and let them warm up to room temperature before unwrapping the plastic wrap. Start by leveling the top of the cakes (if the cakes are domed). Refer to my post here on how to level cakes for all the various methods of levelling a cake.
- Place the first layer on a cake stand with the top facing up.
- Spread some chocolate icing on the top and level it.
- Top the icing with the second cake layer, this time, facing the cake down.
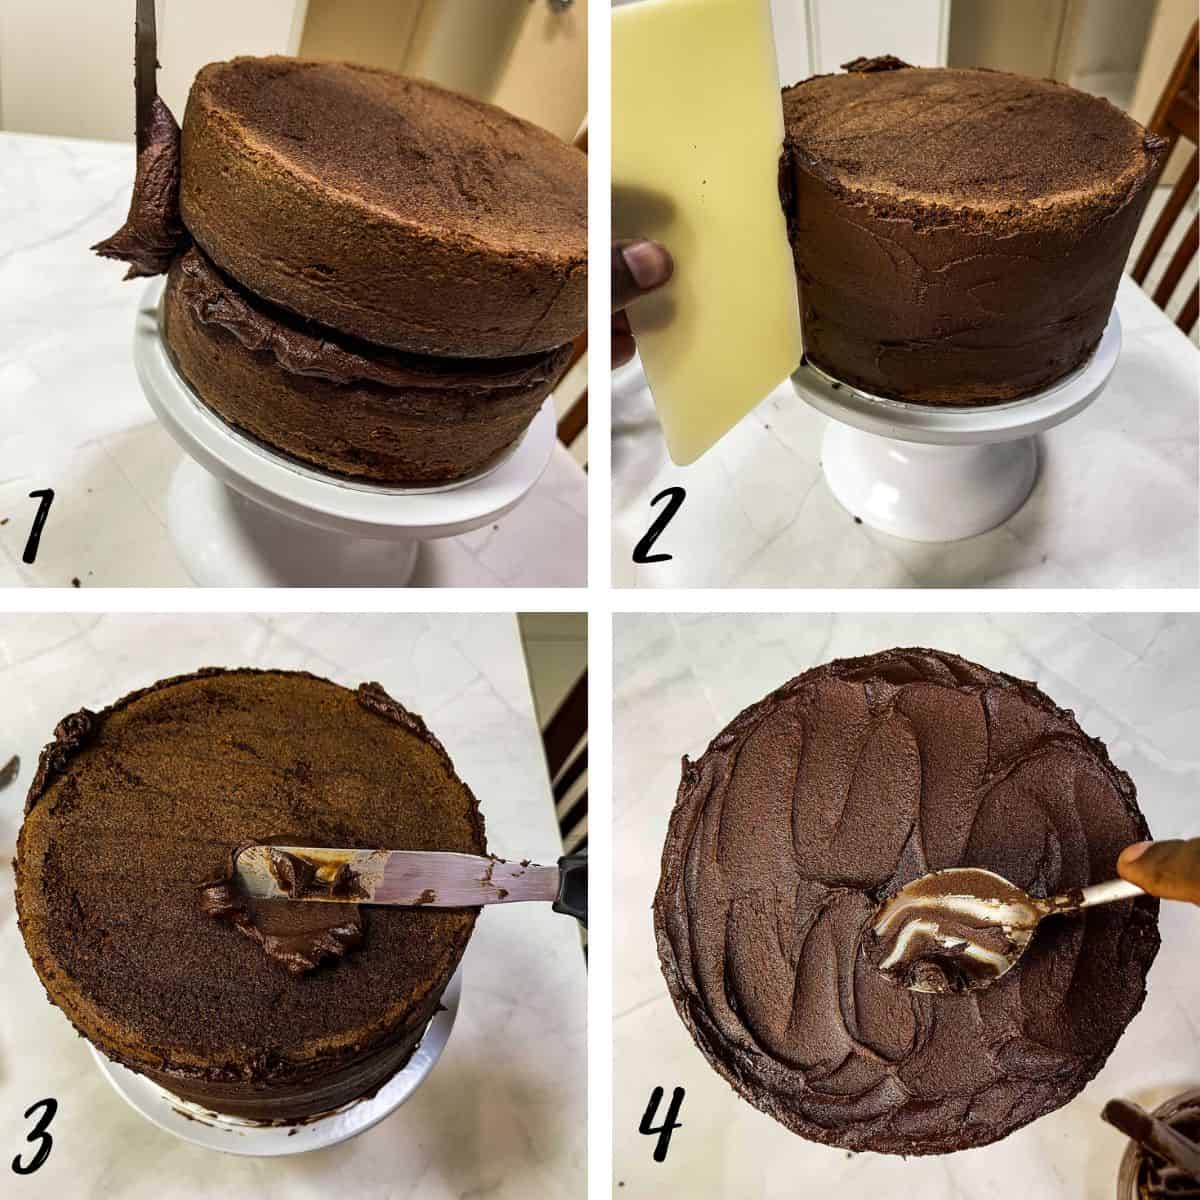
- Next step is to crumb coat the cake so that the crumbs are locked in place and do not get mixed with the icing as you frost the cake. Use a palette knife to smooth the icing on the sides of the cake, in between the cake layers before covering the rest of the side area.
- Use an icing scraper to smooth the icing to a thin coat.
- Repeat the crumb coat for the top of the cake as well.
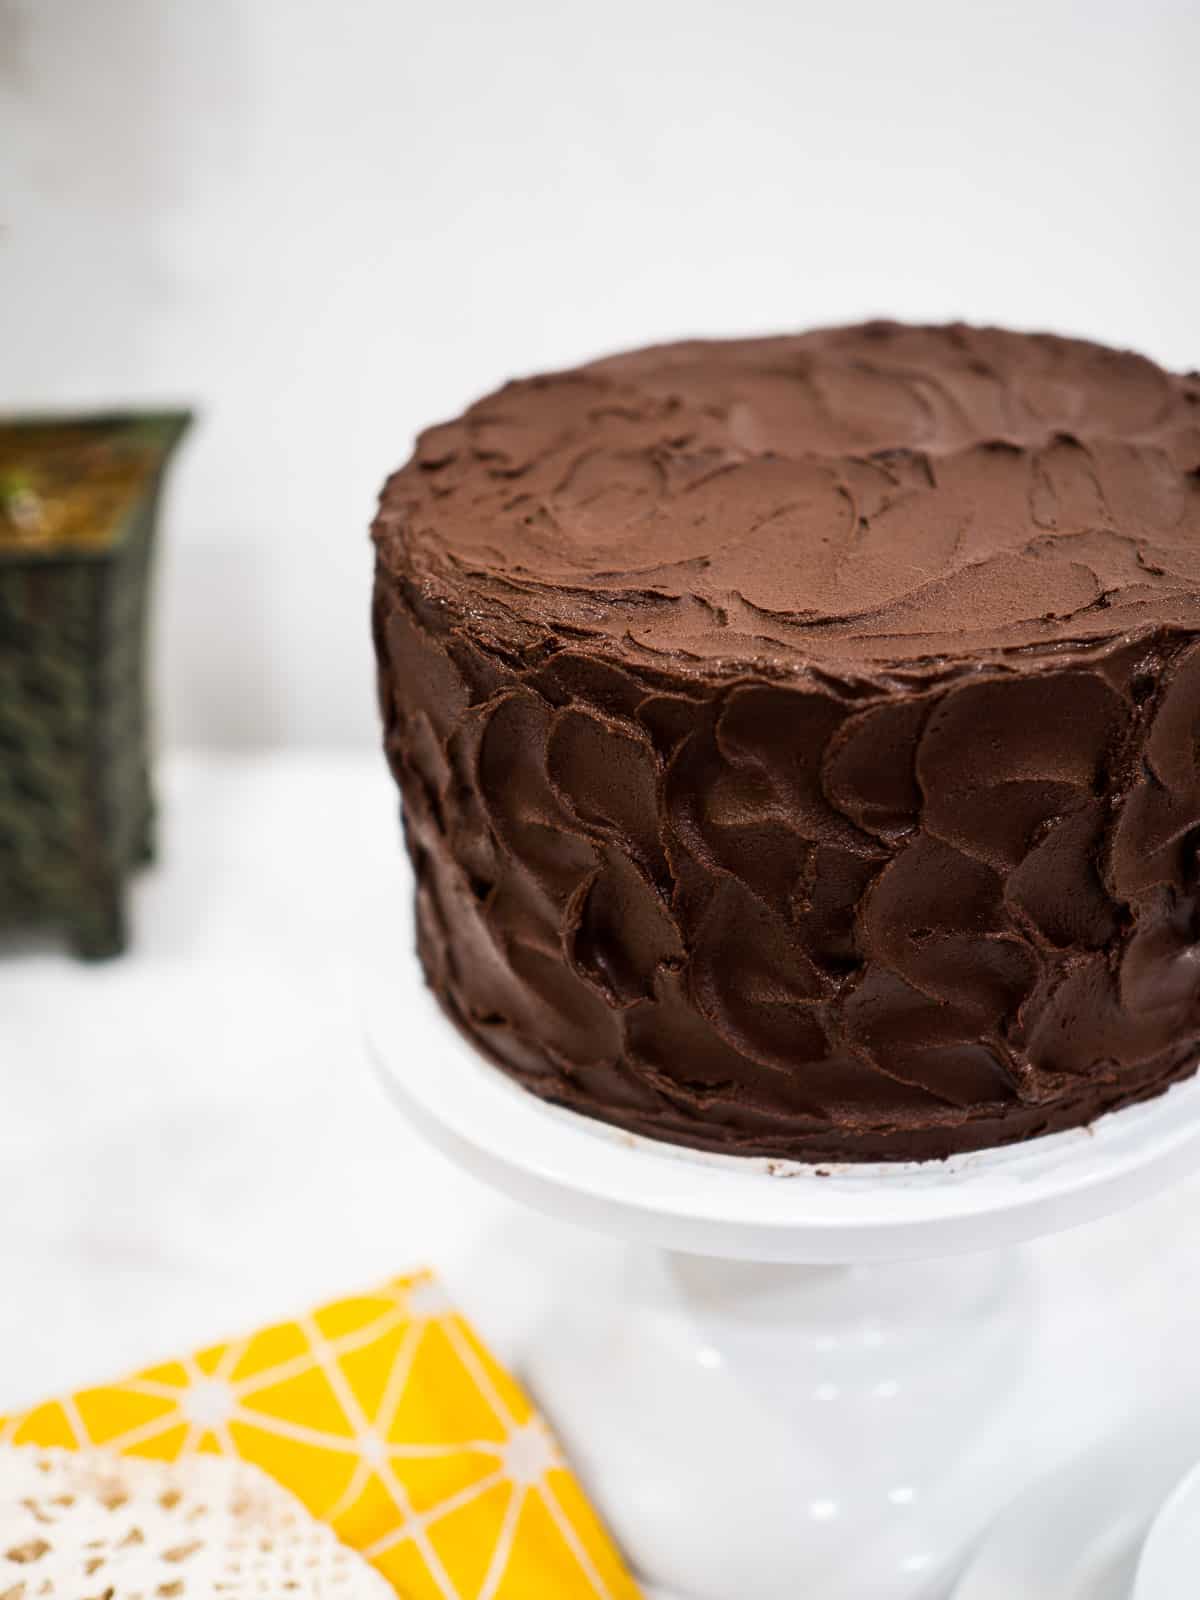
- Next, apply the icing generously on the sides of the cake. Use the spatula to make waves on the icing as you cover the sides of the cake. Once the sides are done, cover the top. Use the back of a spoon to create the waves on the icing to complete the cake.
🍽️Serving & storage
- This cake can be served on the same day it is baked, even while it is still warm. It is also equally good if baked in advance and stored in the fridge until it is ready for use, within one week. To store the cake in the fridge, once it is baked and has cooled down slightly, wrap it tightly with cling wrap (plastic wrap) and refrigerate.
- Wrapping the cake while it is still warm locks and distributes the moisture in the cake making it soft and moist after refrigeration. When you need to use it, remove the cake from the fridge, and with the cling wrap still intact, let it warm up to room temperature. Remove the wrapping only after the cake has reached room temperature to prevent condensation on the cake which can reduce its shelf life.
- Leftovers of this chocolate cake can be stored at room temperature for a good 4 to 5 days provided it is handled without any moisture. Always ensure the knife used to cut the cake is all dry and the container you intend to store the cake has no traces of water in it. The leftovers can last up to one week if refrigerated.
- If you wish to use this cake for carving, the cake is best left to rest for at least one day after baking for the texture to stabilize for easy carving with fewer crumbs.
💡Expert Tips
- Just like any other cake recipes, the baking time plays a very important role in the taste and texture of this cake. Baking the cake for too long can result in a dry cake. Under baking can cause the cake to sink.
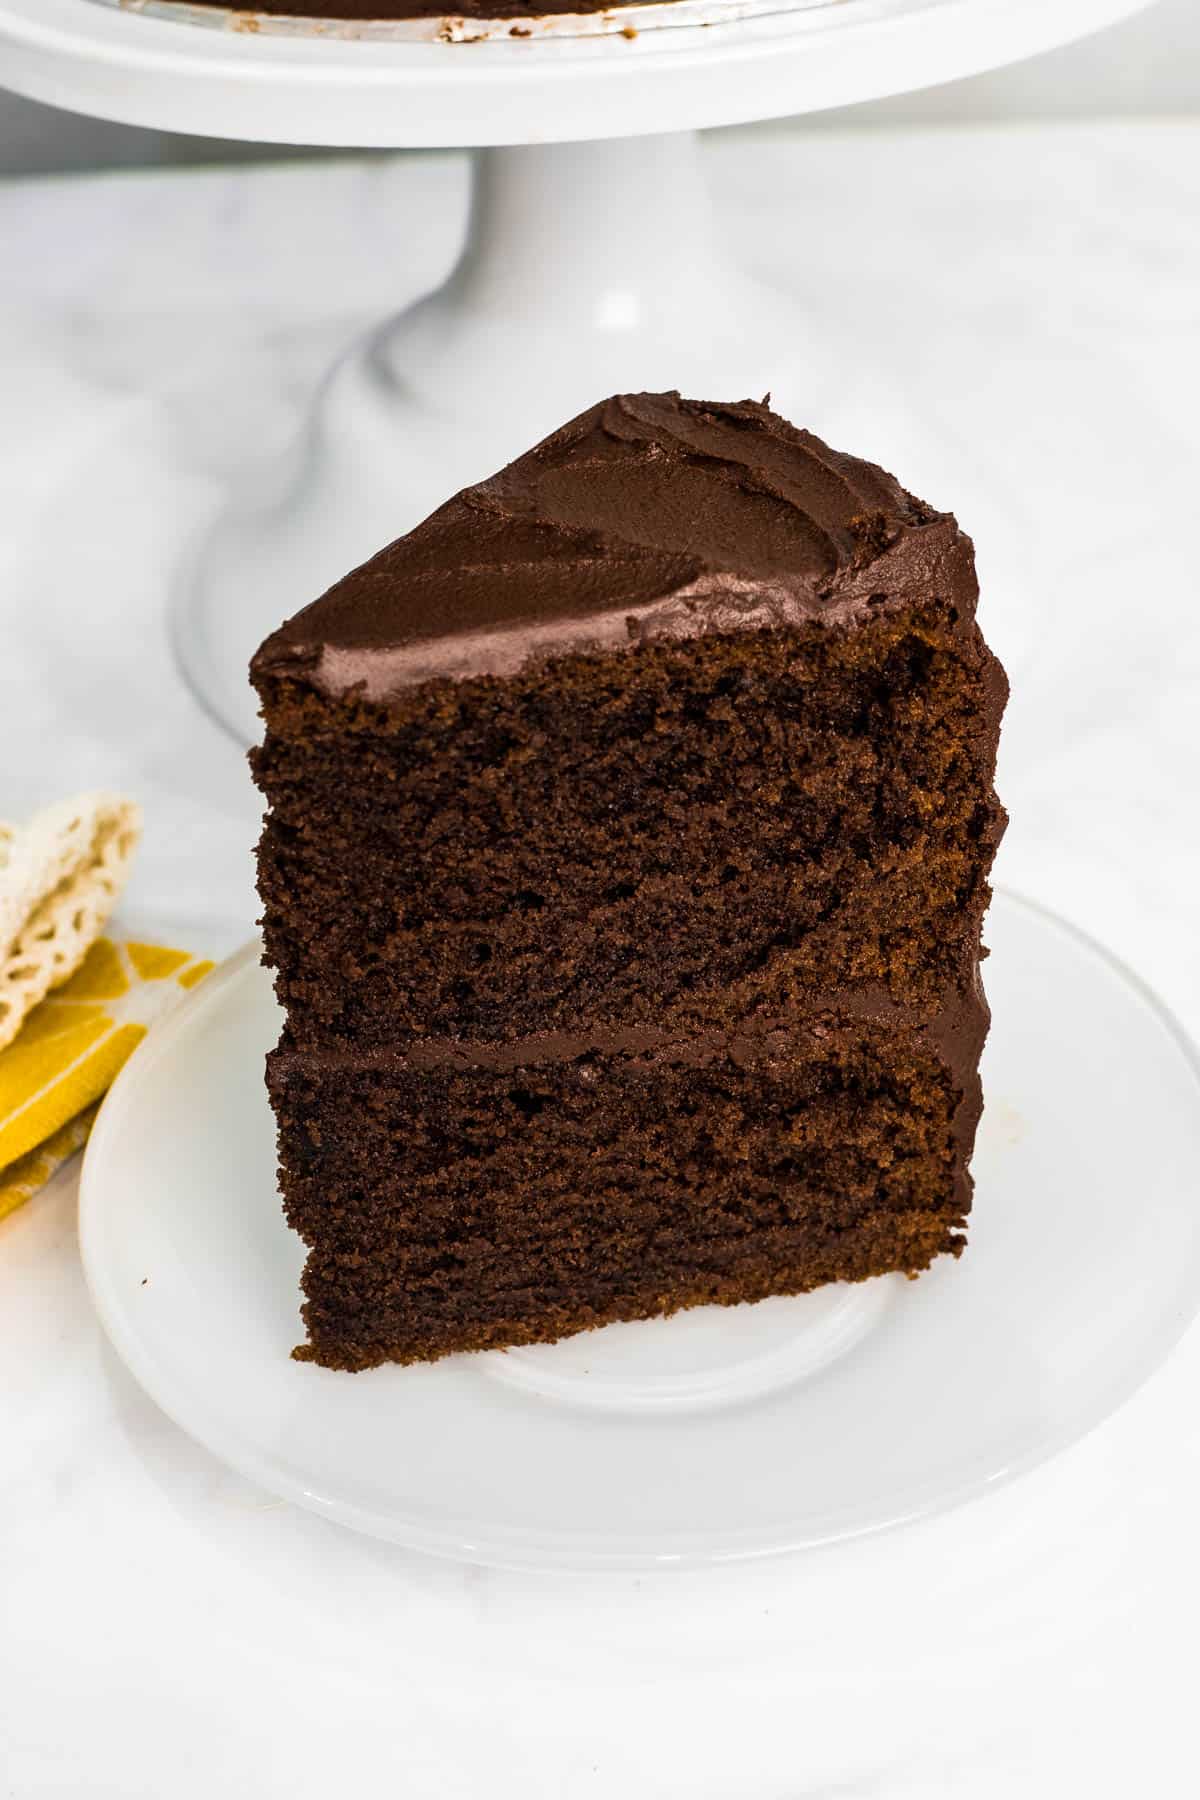
- Check if the cake is done at least 5 to 10 minutes before the baking time is up. Insert a long skewer in the center of the cake. If the skewer comes out without any wet batter sticking to it, the cake is done. Also, the top of the cake will spring back when lightly pressed with your finger.
- Ideally, there should be soft cake crumbs sticking to your skewer. If the skewer comes out totally clean, the cake could have been overcooked. Also, when the cake is done, the sides will pull away from the tin.
💭FAQs
There are a few tips to keep your pound cake from becoming dry.
Firstly, make sure you measure your ingredients accurately. The balance between wet and dry ingredients can affect the moistness of the cake. For best results, use a kitchen scale.
Secondly, do not overbake the cake. Check for doneness at least 5 to 10 minutes before the baking time is up by inserting a skewer in the center of the cake. If it comes out without any wet batter sticking to it, the cake is ready and can be removed. You need not wait until the baking time is up.
Thirdly, keep the cake covered in a kitchen towel when cooling it down. And as soon as it cools down to a warm temperature, wrap the cake in plastic wrap and refrigerate it to cool down completely. Covering the cake this way helps retain the moisture in the cake and will keep it nice and moist.
Pound cake is said to have gotten its name from the measurement of ingredients used in making the cake. Originally, only 4 ingredients are used to make pound cake i.e. flour, butter, sugar and eggs and each of these ingredients are added in equal weight of one pound, hence the name pound cake.
Yes you can.
If you wish to double or triple this chocolate cake recipe, make sure you use the cake tin sizes I have indicated in the recipe. My recipe has been calculated to produce cake layers that are approximately 2 inches high.
Too much cake batter in a small cake tin would require a longer baking time. And your cake could end up being a little too dry on the sides. Hence if you want taller cakes, it is best to bake them into separate layers (in separate tins) and sandwich the layers together.
If you wish to bake cakes larger than 10 inches in diameter, it is advisable to use cake strips or a heating core. Cake strips and heating cores help the cakes to bake evenly. They also prevent the sides of the cake from drying out due to the longer baking time for larger cakes. See my post here on how to achieve leveled cakes to learn more about using cake strips and heating cores.
Sometimes, you find your cake batter curdling after adding the eggs. The main reason for this is the temperature of the butter and eggs. If either the eggs or butter is cold, your cake batter will tend to curdle.
But if both are of the same temperature, it is fine, however, since it is hard to cream butter when it is cold, it would typically require to be softened by leaving it at room temperature for a while. If cold eggs are added to the room temperature butter and sugar mixture, the mixture will curdle.
To prevent this, it is best to have both the eggs and the butter at room temperature. If at all your batter still curdles, do not worry. Add some flour and mix until it is no longer curdled before adding any milk.
The chocolate icing recipe for this pound cake is made using dark chocolate with a high percentage of cocoa butter, which means it is bitter. The bitterness of the chocolate is balanced by the sweetness of the sugar.
To ensure the chocolate icing is not too sweet, use dark chocolate with 70% or more cocoa butter.
And if you still find that too sweet, you can replace 1 tablespoon of powdered sugar with cocoa powder. Cocoa powder will stiffen the icing, and to make it into smooth spreadable consistency, you will also need to add some cream or milk to the icing. Start with one tablespoon and increase gradually to achieve the desired consistency for your icing.
❤️More Recipes You Will Love
Do you like this recipe? Please leave a 5-star ⭐⭐⭐⭐⭐rating in the recipe card below and consider a review further down this page. I would love to hear from you. Thank you!
📖Recipe
Chocolate Pound Cake with Icing
For best results, use the metrics measurements. US customary measurements have not been tested and are only meant for guide.
Ingredients
Chocolate Pound Cake
- 330 g self raising flour
- 30 g cocoa powder
- 360 g granulated sugar
- 360 g butter at room temperature
- 6 eggs at room temperature
- 90 ml milk
- ¼ teaspoon salt
- ¾ teaspoon baking powder
- 1 teaspoon vanilla extract
Chocolate Icing
- 400 g dark chocolate (cooking chocolate with at least 70% cocoa butter)
- 200 g butter
- 400 g powdered sugar
- 1 teaspoon vanilla extract
Instructions
Baking the cakes
- Measure the granulated sugar into a medium sized mixing bowl. Add butter and beat until the mixture turns creamy, light and fluffy on medium to high speed. This should take about 2 minutes.
- Scrape the bottom and sides of the bowl at one minute interval.
- Next, add the eggs, two at a time. Each time, beat until the traces of the eggs are no longer visible before adding more.
- In another separate bowl, mix the flour, cocoa powder, baking powder and salt with a whisk or spoon until well combined. Sift these dry ingredients into the creamed mixture in 3 batches.
- Alternate each batch with the milk (in 2 batches). Start and end with the flour mixture.
- Finally fold in the vanilla extract.
- Divide the batter into 2 well greased and floured 7-inches round cake tins (with a height of at least 3 inches). Level the tops and bake in a 170 degrees Celsius preheated oven for 40 to 45 minutes or until a skewer or cake tester inserted in the center of the cakes come out clean.
- Remove the cakes from oven and let them cool in the tins for about 2 minutes before loosening the sides with a jam knife and turning them out onto wire rack. Position the cakes upright when cooling.
- Baking time may vary slightly for larger cakes.
- Cool the cakes completely before frosting.
Making the icing
- Prepare a double boiler. If you don't have one, you can use a small saucepan and a heatproof bowl. Fill water into the saucepan (about a quarter of the saucepan high).
- Place the heat proof bowl on the saucepan. Make sure the bowl is larger than the saucepan so that it sits on the pan and not inside. The bowl should not be touching the water underneath.
- Add chocolate into the bowl. If using a chocolate bar, chop the chocolate into small, uniform pieces for easy melting. If using chocolate buttons or melts, no need to chop them.
- Turn on the heat to a medium flame and let the stim from the water heat up the bowl and the chocolate. Stir to expedite the melting.
- As soon as the chocolate is almost completely melted, add the butter. Again, for quicky melting, cut the butter into small cubes.
- Remove the chocolate mixture from the heat immediately after adding the butter and let the butter melt in the heat of the chocolate. Stir to mix. Let the chocolate mixture cool down to room temperature.
- In a separate bowl, measure and sift the powdered sugar.
- Pour the cooled chocolate mixture into the powdered sugar.
- Add the vanilla extract.
- Mix until the sugar is well combined and the chocolate icing comes together.
- If the icing is too stiff, add some cream to it and beat it until smooth. Add the cream in small increments of one tablespoon at a time to avoid the icing from becoming too thin.
- The icing can be used immediately.
Frosting the cake
- Make sure the cakes are at room temperature when frosting them. If the cakes are refrigerated, bring them out and let them warm up to room temperature before unwrapping the plastic wraps.
- Start by leveling the top of the cakes (if the cakes are domed). Use a cake leveler or a serrated knife.
- Place the first layer (with the top facing up) on a cake stand .
- Spread some chocolate icing on the top and level it.
- Top the icing with the second cake layer, this time, place the cake facing down.
- Next step is to crumb coat the cake so that the crumbs are locked in place and do not get mixed with the icing as you frost the cake. Use a palette knife to smooth the icing on the sides of the cake, in between the cake layers before covering the rest of the side area.
- Use an icing scraper to smooth the icing to a thin coat.
- Repeat the crumb coat for the top of the cake as well.
- Next, apply the remaining icing generously on the sides of the cake. Use the spatula to make waves on the icing as you cover the sides of the cake. Once the sides are done, cover the top. Use the back of a spoon to create the wavy pattern on the icing to complete the cake.
- The frosting is sufficient to generously fill and coat the cake.
Notes
- Self raising flour can be substituted with all purpose flour. To make 360g of self raising flour (for the measurement in the recipe card above), add two and a half teaspoons of baking powder (in addition to the amount of baking powder indicated in the recipe) to make 360g of all purpose flour. Mix well and sift at least 3 times before using.
- To make the chocolate pound cake in a loaf pan, half the recipe and bake the cake in an 8 inches by 4 inches loaf tin.
- To make a chocolate bundt cake, half the recipe and bake the cake in a 6 cups capacity bundt pan at 160 degrees Celsius for 30 minutes. Make sure to not fill the cake tin full. Leave about one third of the tin height to allow sufficient space for the cake to rise without overflowing.
- Chocolate icing can be replaced with other chocolate based frostings like chocolate buttercream or chocolate ganache.
- Heavy cream for the frosting can be replaced with milk.
- Larger cakes may take a longer time to bake.
- Use cake tins that are at least 3 inches high.
Calculated Tin Sizes
6 inches round/ 5 inches square (makes 2 layers of approximately 2 inch high cakes)- 240 g butter
- 240 g granulated sugar
- 220 g self-raising flour
- 20 g cocoa powder
- 4 eggs
- 60 ml milk
- ⅛ teaspoon salt
- ½ teaspoon baking powder
- ¾ teaspoon vanilla extract
- 480 g butter
- 480 g granulated sugar
- 440 g self-raising flour
- 40 g cocoa powder
- 8 eggs
- 120 ml milk
- ⅓ teaspoon salt
- 1 teaspoon baking powder
- 1 ¼ teaspoon vanilla extract
- 600 g butter
- 600 g granulated sugar
- 550 g self-raising flour
- 50 g cocoa powder
- 10 eggs
- 150 ml milk
- ⅓ teaspoon salt
- 1 ¼ teaspoon baking powder
- 1 ½ teaspoon vanilla extract
- 720 g butter
- 720 g granulated sugar
- 660 g self-raising flour
- 60 g cocoa powder
- 12 eggs
- 180 ml milk
- ½ teaspoon salt
- 1 ½ teaspoon baking powder
- 2 tsp vanilla extract
- 840 g butter
- 840 g granulated sugar
- 770 g self-raising flour
- 70 g cocoa powder
- 14 eggs
- 210 ml milk
- ½ teaspoon salt
- 1 ¾ teaspoon baking powder
- 2 ¼ teaspoon vanilla extract
- 960 g butter
- 960 g granulated sugar
- 880 g self-raising flour
- 80 g cocoa powder
- 16 eggs
- 240 ml milk
- ⅔ tsp salt
- 2 teaspoon baking powder
- 2 ¾ teaspoon vanilla extract


Anna Coward
I've used this recipe to make a yummy chocolate cake. It turned out really well. Question, could I use the mix to make cupcakes?
Priya Maha
Hi Anna, yes you can.
Sara
Hi I want to make this cake. I have a 10inch round tin. A couple of questions please - how long should I bake the cake for (I have found the measurements for 10") as I will bake it all in one and will carve the layers. I know low and slow. How much buttercream would suggest? I always make far too much (and end up eating it!!) big thanks x
Priya Maha
Hi Sara,
I wouldn't recommend baking the cake all in one layer. You will have to bake the cake for a longer time to get the center to cook and that will leave you with dry sides. As for the buttercream, I am sorry, I have not measured the amount required for a 10 inch cake.
Nart
This chocolate cake is so good. I made it for my nephew's birthday and he absolutely loved it!
Amy
Three tall layers of deliciousness! This was such a rich, moist chocolate cake! I served it with raspberries and everybody raved about it!
Marie
Everyone needs a go-to chocolate cake recipe and this one is great! Really appreciated the storage tips, too.
Lauren
Chocolate cake is such a classic recipe to keep on hand. This one sounds perfect and your photos are drool worthy!
Kayla
This chocolate cake was so perfect! I love how rich and fluffy it was!
H.L.McCallum
I always get SUPER nervous when I see (The Best Ever) on a recipe because way too many of them have been the worst ever, even when you follow the directions.
However, this time your cake looked delicious, so I thought, what the heck! It turned out very good, and I will make it again. The hubby even enjoyed it. Thanks for the tips and tricks.
I look forward to browsing through your blog for other recipes. Have a great day!!!
Uma
Who doesn't love chocolate cake! This looks perfect for celebrating any special day. I love these with a cup of tea 🙂
Veronika
You can never go wrong with a chocolate cake, it has always been my favorite flavor! Can't wait to give this one a try!