

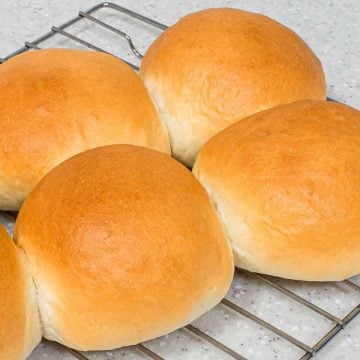
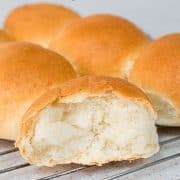
These easy yeast rolls for beginners are the best rolls ever. They turn out soft and fluffy every single time and are super easy to make. Serve them plain as dinner rolls or use them as a base to customize into any shape or flavor you wish!

Jump to:
❤️Why you will love this recipe
- This is an easy recipe for delicious homemade rolls with very simple and basic ingredients.
- The making method is fairly easy too and is perfect for beginners wanting to try their hands at making their own bread rolls.
- These rolls are made using the easy direct dough method, where all the ingredients are added in and mixed together, unlike other methods such as sourdough and Tangzhong where starters and pre-cooked dough is required.
- This is a basic homemade rolls recipe and is perfect for customization to many different types of buns and rolls for daily consumption or for special occasions. You can use this exact recipe to make strawberry cinnamon rolls, coffee rolls, ube rolls and coconut rolls.
- The best part is these yeast rolls can be made using all purpose flour or bread flour which makes it super convenient too.
- This is a small batch homemade dinner rolls recipe and is perfect if you are looking to make a small batch of delicious rolls.
- The dough also freezes well, so that is another plus point with these easy yeast rolls. You can make them in advance, and bake them fresh just when you want.
Like this recipe? Here are my other recipes you might want to check out:
- Old Fashioned Homemade Yeast Doughnuts
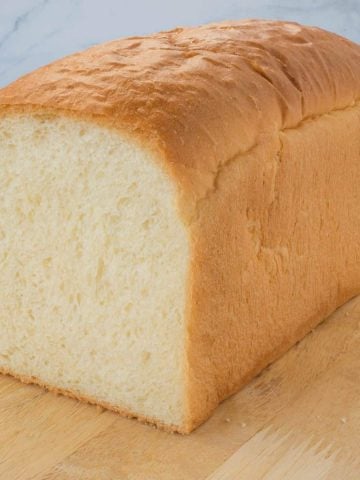
- Homemade White Bread Loaf
- Homemade Fried Dough Recipe (Dough Bites in Simple Syrup)
- Brioche Donuts (Perfectly Soft and Fluffy)
- Chocolate Brioche (Easy Brioche Loaf)
- Pandan Bread (Homemade Milk Loaf with Raisins)
- Ube Rolls (Soft and Fluffy Twisted Bread Rolls)
- Cinnamon Raisin Rolls
- Coffee Rolls with Coffee Cream Cheese Glaze
- Coconut Rolls with Coconut Glaze
- Strawberry Rolls with Cinnamon Cream Cheese Glaze
📋Ingredients
- All purpose flour + salt - salt cannot be added directly to yeast as it can 'kill' yeast. Hence, it is mixed with flour and added as such or added into the yeast mixture after adding the flour. Use fine salt.
- Dry instant yeast - Instant yeast can be used without the need to activate it in any warm water or milk, unlike dry active yeast. All you need to do is mix it in room temperature liquid and then proceed to add other ingredients without having to wait for it to activate or froth.
- Whole milk - can use room temperature milk if using instant yeast. For active yeast, use warm milk.
- White sugar - sweetens the rolls.
- Eggs - use large eggs.
- Butter - both salted or unsalted butter will work fine for this recipe.
*Refer to the recipe card below for full list of ingredients and exact quantities. For best results, use a digital kitchen scale where applicable*
🧾Substitution and Variations
- All purpose flour can be substituted with bread flour. Use exact same quantity.
- Instant dry yeast can be replaced with active dry yeast. However, you will need to mix it with the milk and sugar and set is aside for about 10 to 15 minutes to allow it to froth and activate before mixing in other ingredients. The milk has to be warm.
- White sugar can be replaced with brown sugar.
- You can give the top of the rolls a light egg wash before baking for a shiny top, if you like. To do it, lightly beat an egg and gently brush it onto the proofed rolls before putting them into the oven.
This recipe has not been tested with other substitutions or variations. If you do try, please let me know in the comments section below!
👩🍳How to Make
Mixing the dough
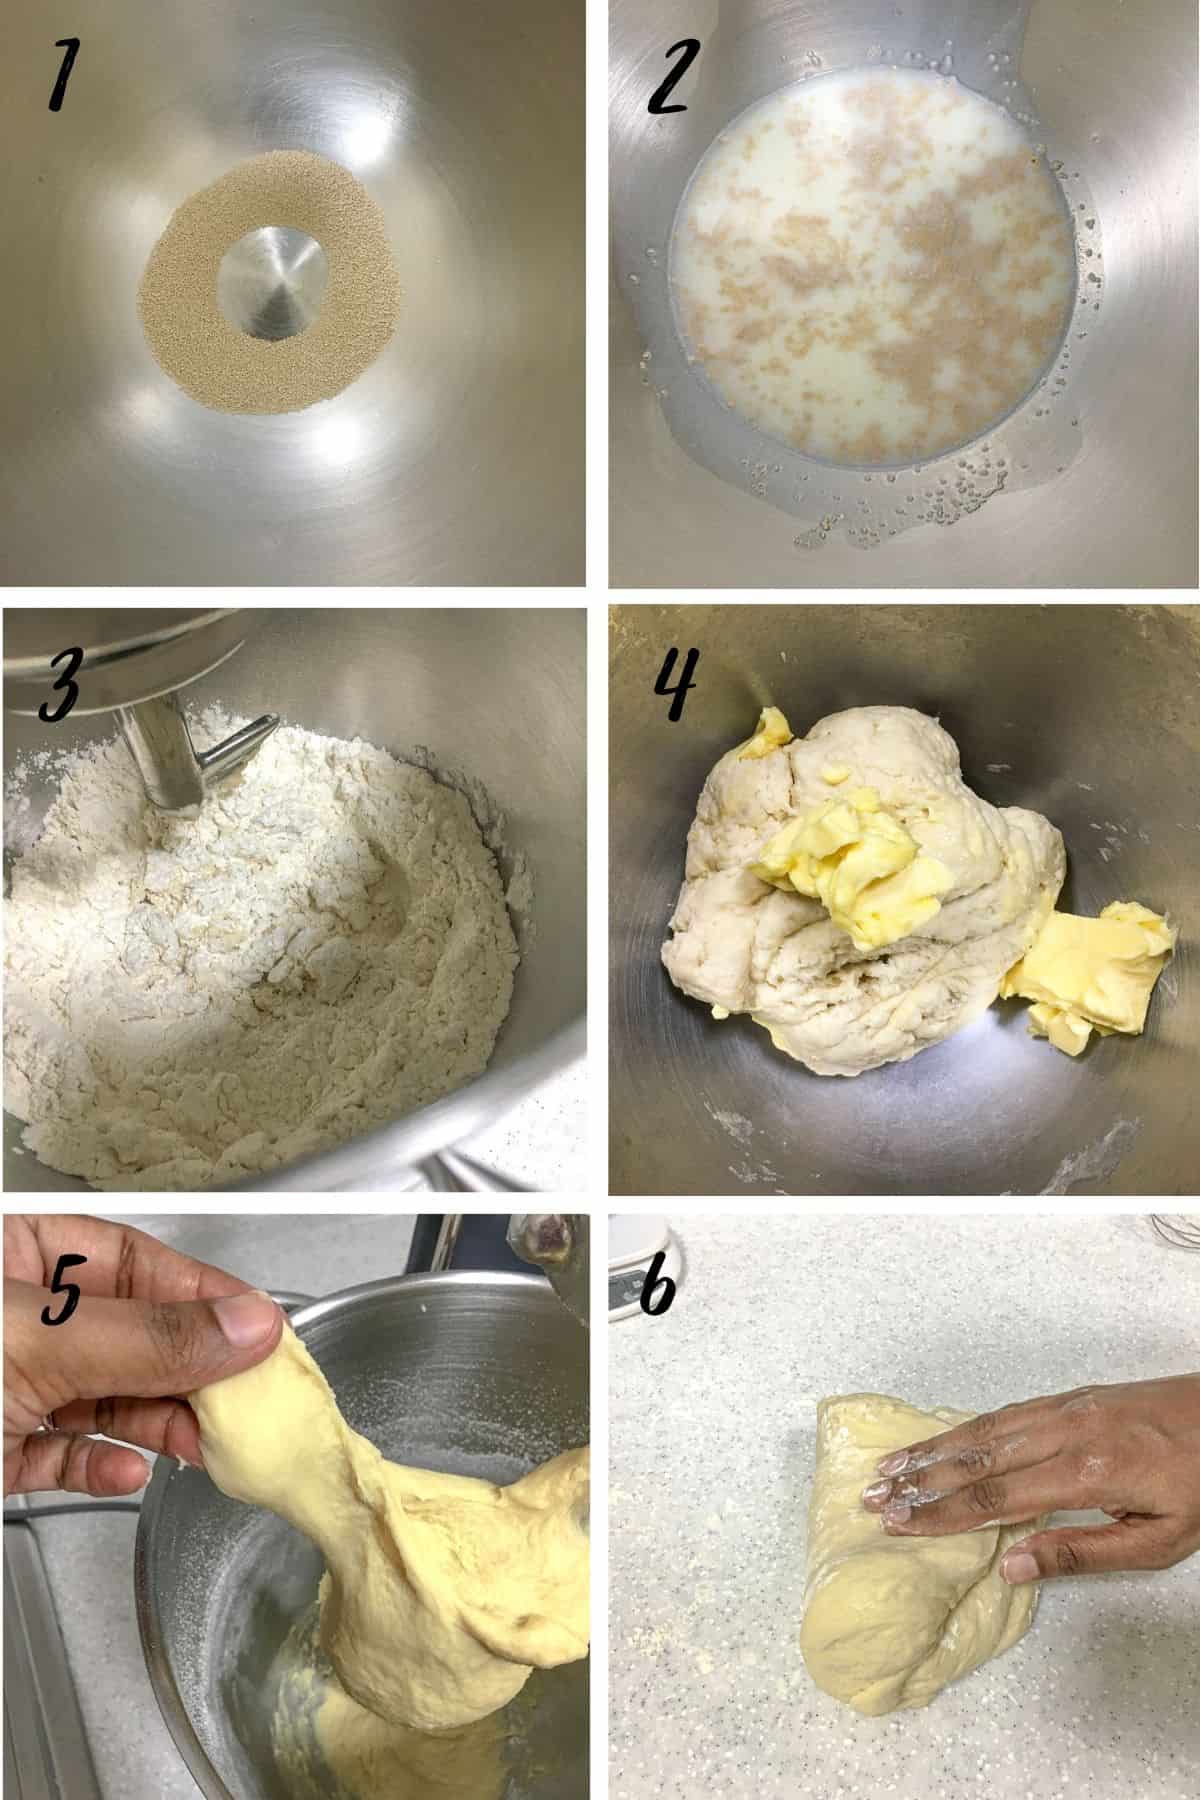
- Start by measuring yeast into a large bowl.
- Add the milk to it. The milk can be at room temperature but take note that it should not be any hotter than just lukewarm. Stir until the yeast is dissolved.
- Next, add the sugar, egg, flour and salt into the yeast mixture and turn on your stand mixer (with a dough hook attachment) to a low-medium speed.
- Mix the dry ingredients and the egg into the dough until the dough comes together, for approximately 2 minutes. Add the softened butter and continue kneading for another 7 to 8 minutes at the same speed.
- At the end of it, the butter should have been all incorporated, and the dough should be stretchy. If you were to knead the rolls by hand, you would need to knead the dough for approximately 15 minutes.
- Turn it onto a lightly floured surface, knead lightly and form it into a ball. It will be sticky and that is how it is meant to be. Dust your workspace with flour but try not to add too much flour into it as you knead it.
First rise (first proof)
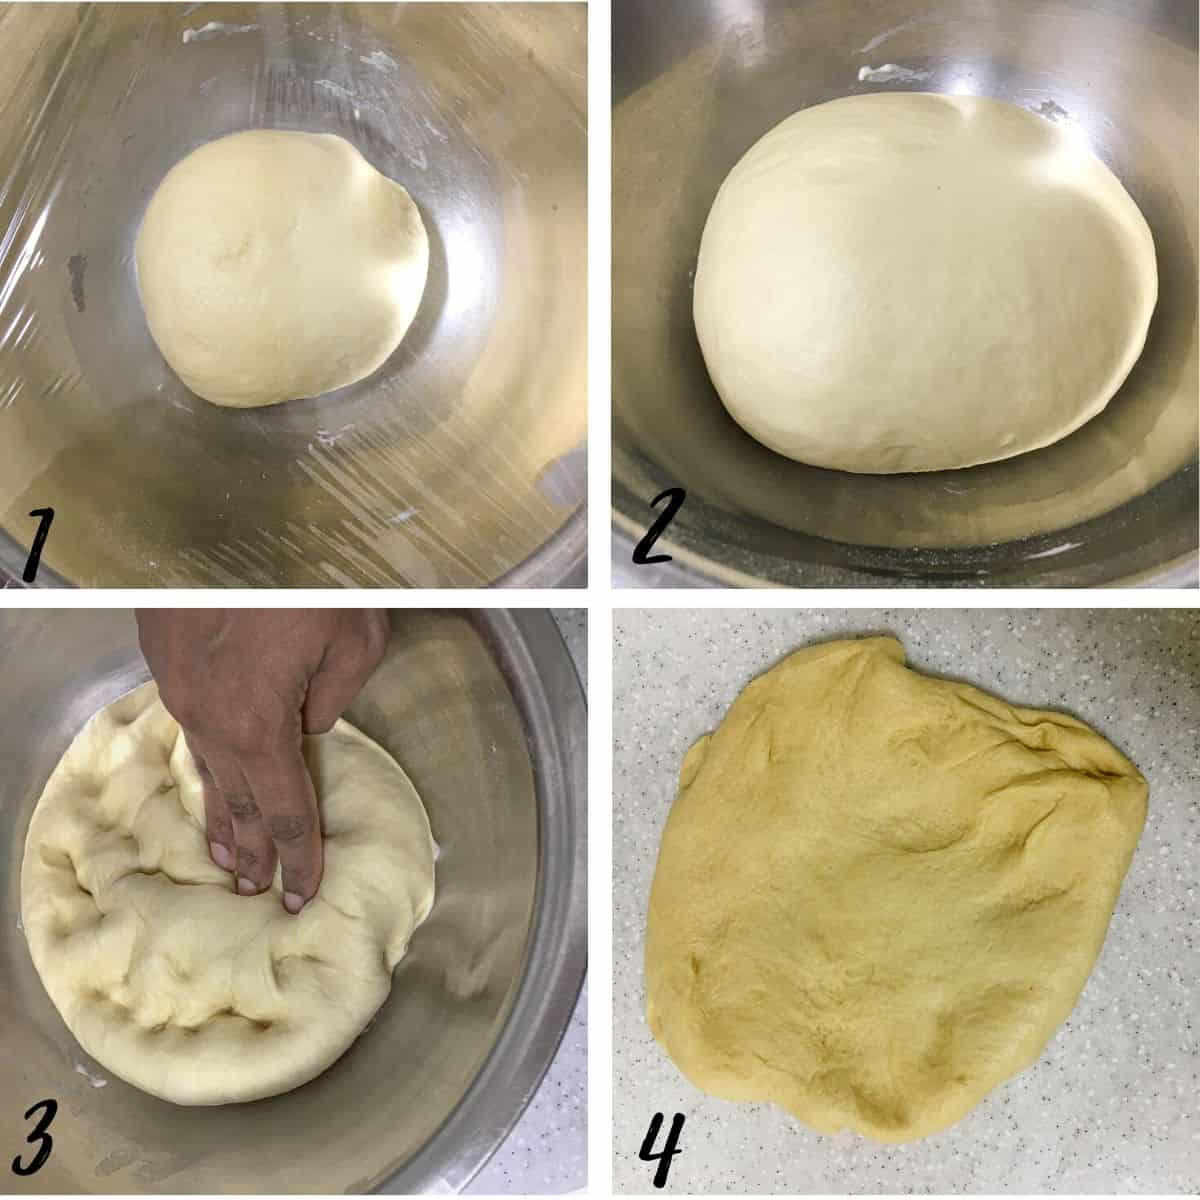
- Lightly oil the sides of the bowl and place the dough ball back into it. Cover it with a towel or plastic wrap (cling wrap) and let the dough rise in a warm place.
- It should double in size and this can take any time between 30 minutes to 1 hour (or sometimes longer if it's cold where you live).
- Once doubled in size, remove the wrap and press the dough to remove air bubbles.
- Turn it out onto your workspace.
Forming the yeast rolls

- Divide the dough into 6 sections.
- Form each section into round balls. To form the balls, use your fingers to bring and pinch the edges to the center.
- Rotate the rolls as you repeat the pinching. What you are effectively doing is forming a tight ball, by pulling the edges of the dough ball to the center and pinching it together to make a smooth ball.
- Place the unbaked rolls (with the pinched side facing down) on a well-greased baking pan or tray.
Second rise (second proof)

- Cover with a piece of light kitchen towel and let the rolls proof until they are double in size. These easy yeast rolls will continue to rise as they bake so it is sufficient to let them proof until double in size.
- Bake in a preheated oven at 165 degrees Celsius for 25 minutes until they turn golden brown. Place the rolls on the lowest rack in your oven.
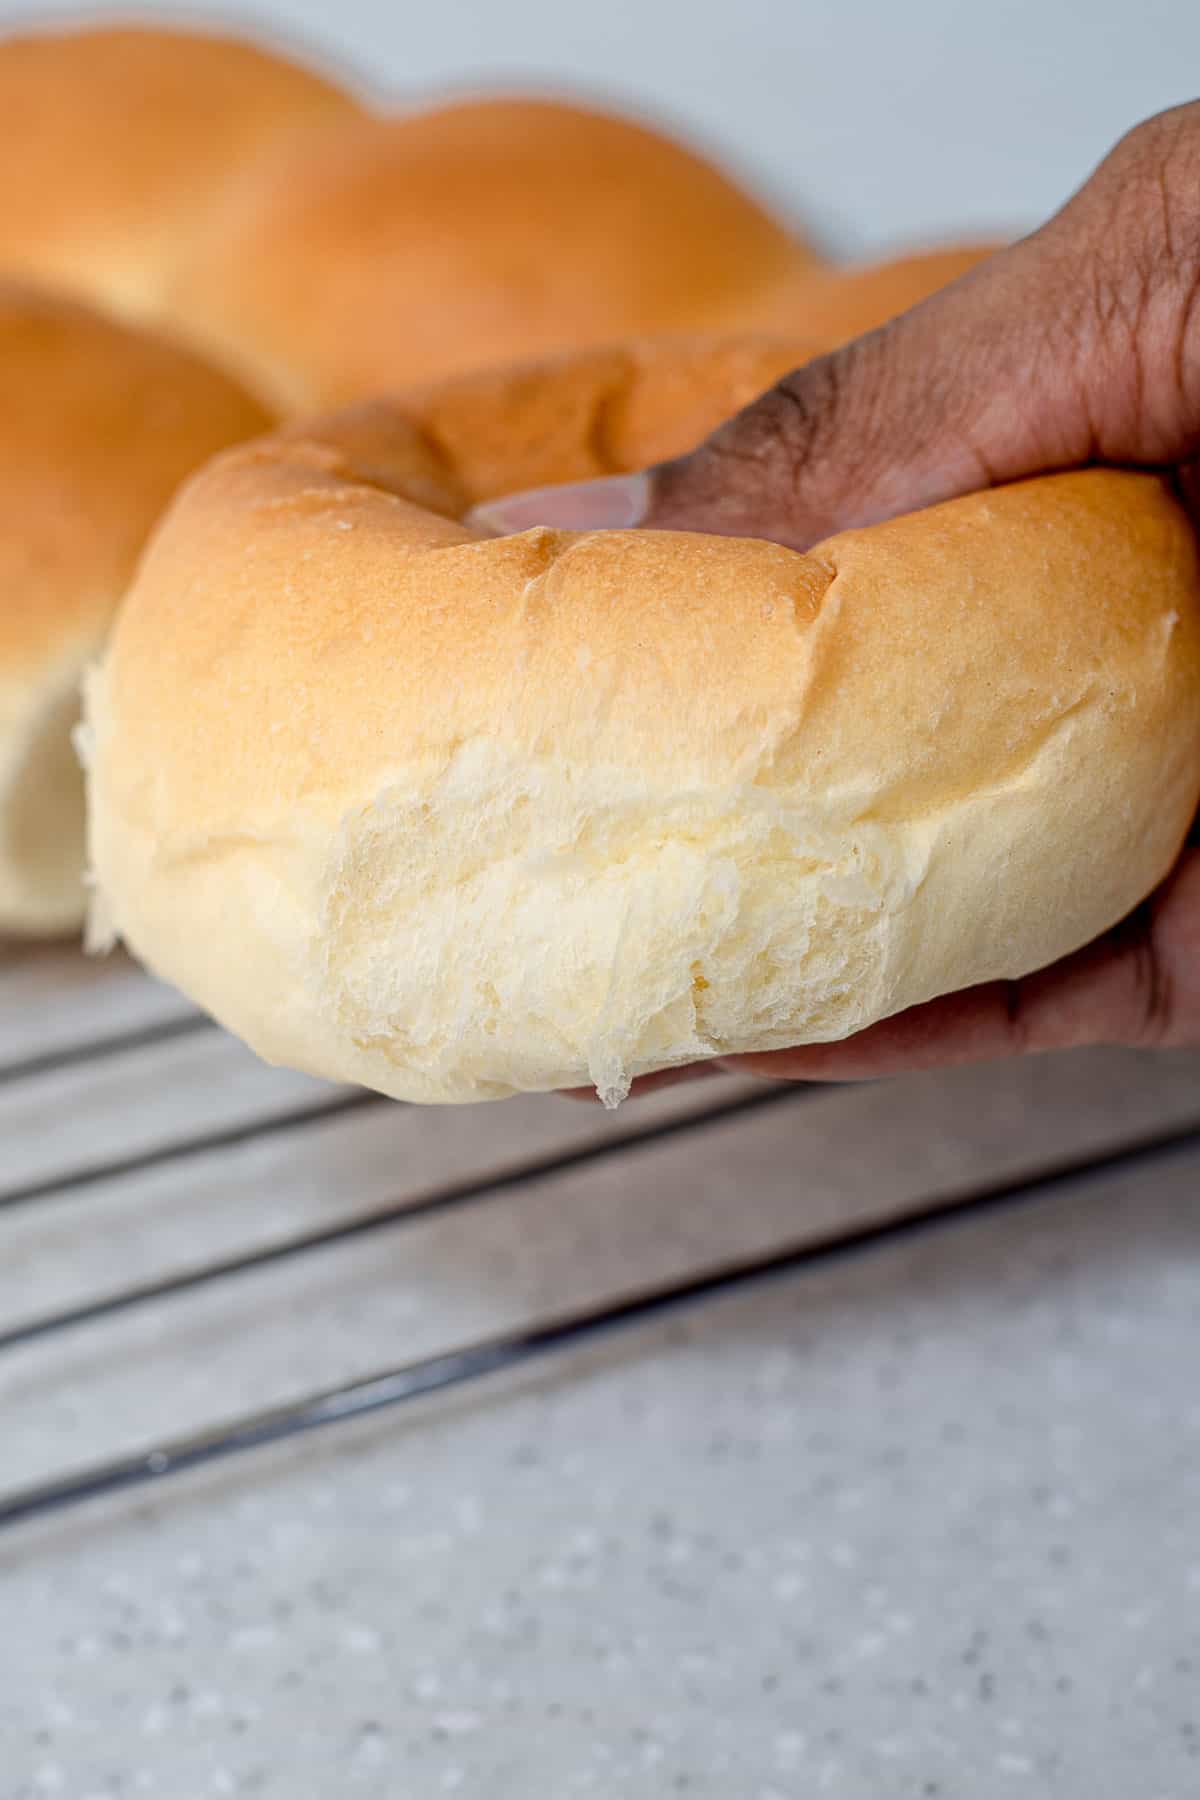
- Once baked, remove the yeast rolls from the oven and brush the top with melted butter.
- Turn the homemade bread rolls onto a wire rack and let them cool further.
Chilling and freezing the dough
- These easy yeast rolls can be chilled overnight for next day baking or even frozen for up to 1 week to be baked on a different day. To chill the dough as soon as it is mixed, place it in a deep bowl and cover with cling wrap. Refrigerate it. The dough will continue to proof in the fridge and the next day, all you need to do is unwrap the bowl, punch the dough, form the rolls, proof, and then bake them.
- If you wish to freeze the dough, you can do it in 2 stages. The first stage is at the point of the first proofing. As soon as the dough is mixed, form into a ball and wrap it tightly with cling wrap. Place it in the freezer. Before baking, let it thaw at room temperature, before unwrapping and placing it in a warm place for the first proofing. Follow the rest of the steps as above.
- The second stage of freezing is at the point of second proofing. Once the first proofing is done, shape the rolls and arrange them in a baking tray. Wrap the tray with cling wrap and place it in the freezer. When they are ready to be baked, thaw them to room temperature, remove the cling wrap and cover with a kitchen towel for second proofing before proceeding to bake them as usual.
🍽️Serving & storage
- These easy yeast rolls are super soft and fluffy on the day they are made. They turn slightly dry the next day but a light toast just before eating makes them all fluffy again.
💡Expert Tips
- Kneading is crucial for developing gluten in the dough, which gives the rolls structure and a light texture. When kneading with a machine, keep to the time indicated in the recipe. If kneading by hand, you will need a longer time depending on how well the kneading goes.
- To check if the dough is well kneaded, you can do the windowpane test. Take some dough and try to gently stretch it as much as possible to a thin film without breaking. If it breaks or tears, the dough needs further kneading.
- Allow sufficient time for the dough to rise in a warm spot until it at least doubles in size. This usually takes about 1-2 hours, depending on the temperature and the yeast you're using. Patience is key here, as a proper rise contributes to fluffy rolls.
- Preheat your oven to the recommended temperature (usually around 375°F or 190°C) and bake the rolls until they are golden brown on top. The exact baking time can vary depending on the size of the rolls, so keep a close eye on them.
- As soon as the rolls come out of the oven, brush them with melted butter. This adds a beautiful shine and enhances the flavor.
💭FAQs
I used instant yeast in the recipe, which is slightly different from active yeast in that it does not require any activation of the yeast.
Activation refers to the process of mixing the yeast and warm liquid and letting it turn frothy over a period of about 10 to 15 minutes before mixing in the rest of the ingredients. This step is normally required for active yeast but not for instant yeast.
Hence, with instant yeast, there is not need to wait for the yeast to be activated. There is also no need for the liquid to be warm, suffice if it is at room temperature. You simply mix the instant yeast with milk (the liquid used in this recipe), followed by all the other ingredients, and knead the dough.
A mixer with a hook will make the kneading super easy and all done in about 10 minutes. But if you prefer to knead by hand, the process should take approximately 15 to 20 minutes.
The dough consistency is sticky so try not to add too much flour for dusting if you choose to knead this easy yeast rolls by hand.
To test if the dough is well kneaded, use the windowpane test. Take a small piece of dough into your hands and stretch it gently with your fingers. A well kneaded dough should be able to stretch to a thin film without tearing. If it tears, knead further until it passes the test.
❤️More Recipes You Will Love
Do you like this recipe? Please leave a 5-star ⭐⭐⭐⭐⭐rating in the recipe card below and consider a review further down this page. I would love to hear from you. Thank you!
📖Recipe
Easy Yeast Rolls for Beginners (Small Batch)
For best results, use the metrics measurements. US customary measurements have not been tested and are only meant for guide.
Ingredients
- 280 g all-purpose flour (or bread flour)
- 4.5 g instant dry yeast
- 20 g granulated sugar (or brown sugar)
- 1 egg
- 40 g butter (softened)
- 125 ml milk
- ¼ teaspoon salt
Instructions
- Prepare a rectangle baking tray. Grease it well and set aside.
- Add yeast to a large mixing bowl. Add the milk and mix with a spoon until the yeast is dissolved.
- Add the egg, sugar, flour and salt. Knead on medium speed for 2 minutes (with a hook attachment). The dough should come together into a ball.
- Cut the butter and add to the dough. Continue to knead until the butter gets fully incorporated and the dough turns stretchy. This should take approximately 7 to 8 minutes at medium-high speed.
- Turn the dough onto a working space. The dough will be sligthly sticky at this stage. For easier handling, dust your workspace with some flour. Form the dough into a ball and place it in a large bowl.
- Cover the bowl with a kitchen towel or cling wrap and place it is a warm place to proof. This should take approximately 1 hour depending on the surrounding temperature. The dough should almost triple in size.
- Press the proofed dough to release air bubbles.
- Turn it onto a lightly floured surface. Divide it into 6 equal sections.
- Shape each piece into a round ball. Place the rolls on the prepared baking tray. Place them well apart to allow space for rising.
- Cover the shaped rolls with a kitchen towel and let them proof until slightly more than double in size.
- Bake the yeast rolls at 165°Celcius for 20 minutes until the top of the buns have turned brown.
- Once baked, remove the rolls from the oven and brush the top of each roll with melted butter.
Notes
- Kneading is crucial for developing gluten in the dough, which gives the rolls structure and a light texture. When kneading with a machine, keep to the time indicated in the recipe. If kneading by hand, you will need a longer time depending on how well the kneading goes.
- To check if the dough is well kneaded, you can do the windowpane test. Take some dough and try to gently stretch it as much as possible to a thin film without breaking. If it breaks or tears, the dough needs further kneading.
- Allow sufficient time for the dough to rise in a warm spot until it at least doubles in size. This usually takes about 1-2 hours, depending on the temperature and the yeast you're using. Patience is key here, as a proper rise contributes to fluffy rolls.
- Preheat your oven to the recommended temperature (usually around 375°F or 190°C) and bake the rolls until they are golden brown on top. The exact baking time can vary depending on the size of the rolls, so keep a close eye on them.
- As soon as the rolls come out of the oven, brush them with melted butter. This adds a beautiful shine and enhances the flavor.
Chante
Doesn't state the amount of sugar ,milk etc.
Priya Maha
Hi Chante, the amount is provided in the recipe card.
Deanna
The recipe is really hard to follow as it says in the ingredients to use an egg but no where in the recipe does it call for an egg and it says ‘use half the milk’ then says ‘use the remaining water’ but the ingredients don’t say water at all
Priya Maha
Hi Deanna,
Thank you for pointing out. I have updated the recipe. The water was supposed to be milk and the egg should go it with the sugar, salt and flour.
Tinker
This recipe makes ONLY 6 rools?
Priya Maha
Yes, 6 rolls.