

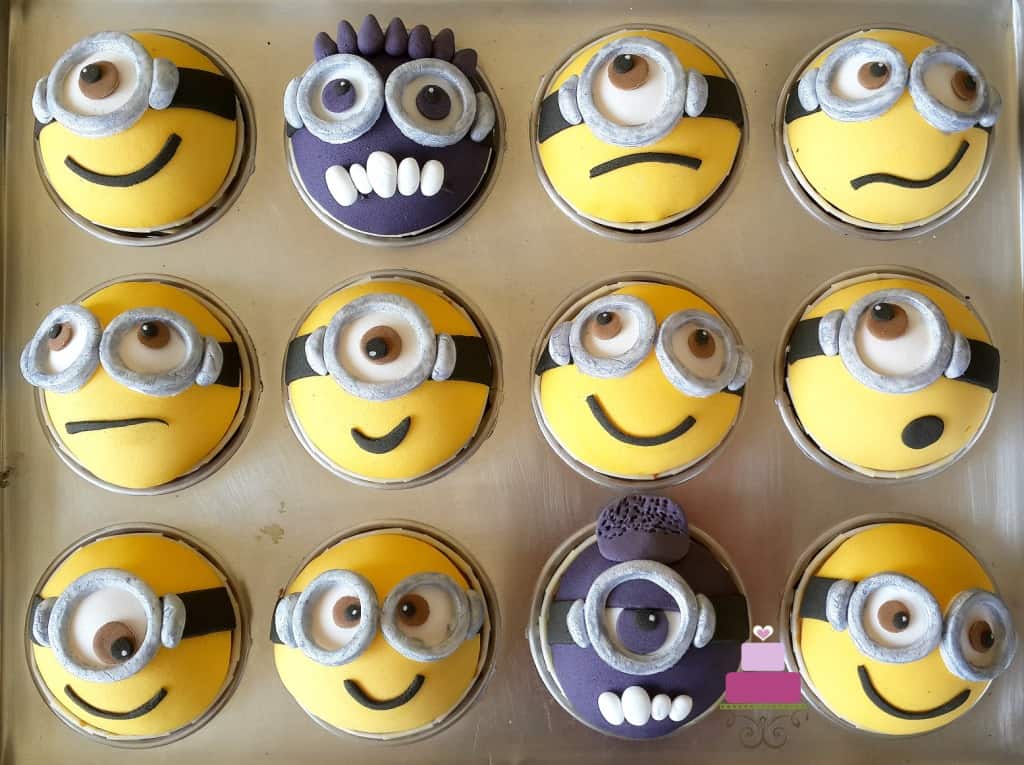
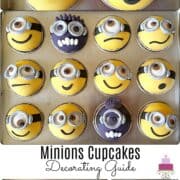
If you are a Minions fan, you will definitely love these Minion cupcakes.
These adorable treats are not only delicious but also fun to make. They make perfect treats for birthday parties and are sure to brighten up any occasion with their playful designs and delicious flavor.
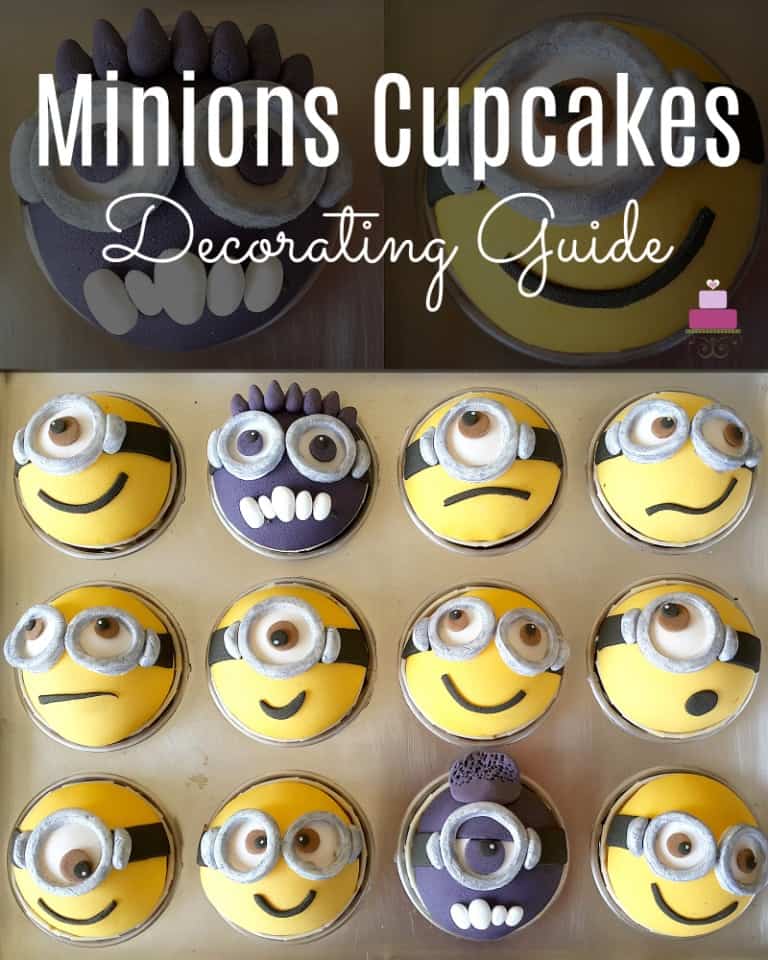
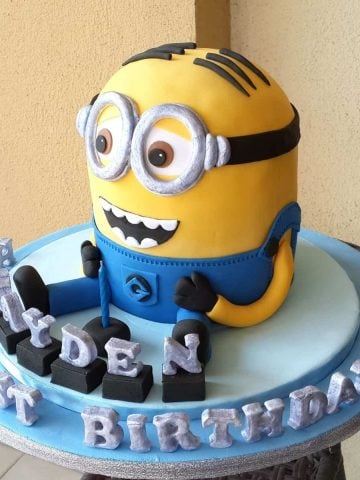
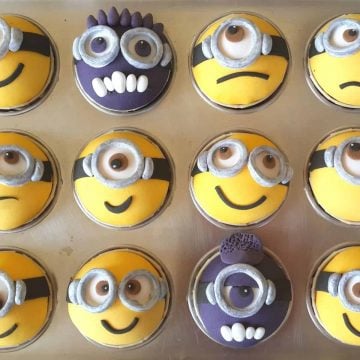
I made these minion cupcakes for a 1st year birthday party. The cupcakes were ordered together with a 3D Minion Dave cake and both were made based on images shared by my customer. The original design is by Cupcake Creations.
Note: This is an intermediate cake decorating tutorial and some basic knowledge about frosting a cake with buttercream and fondant is required.
Jump to:
❤️Why You Will Love This Tutorial
- Allows you to express your creativity and imagination. You can also customize the design of the cupcakes and experiment with different colors, flavors, and decorations.
- Can be a great bonding activity with family and friends. It's a fun way to spend time together and create something delicious.
- Can be a cost-effective alternative to buying custom made ones from a bakery.
- Gives a great feeling of satisfaction and confidence in cake decorating.
- The cupcakes are cute, playful, and perfect for any occasion.
📋Supplies Required
- 12 Vanilla cupcakes - (Please refer the recipe card below for list of ingredients and exact measurements)
- Buttercream – to fill the gap between the cupcakes top and the fondant coverings.(Please refer the recipe card below for list of ingredients and exact measurements)
- Fondant - to decorate the cupcakes
- Round cutter set– to cut out the yellow and purple covering for the cupcakes.
- Round plunger cutter set – to cut out the Minions’ eyes.
- Edible silver paint - for the Minions' goggles
- Fine tipped cake decorating brush – to paint the Minions’ goggles and to dot the Minions’ eyes
- Pizza cutting wheel
- Sugarcraft knife
- Small bowls with a same diameter as the cupcakes – If you don't have these, you can also use the plastic covers used to cover individual cupcake holders. These covers are normally dome shaped and can be used to mold the yellow and purple fondant.
- AmeriColor white food color - for the dots in the Minions' eyes
- Fondant glue
👩🍳How to Make
Step 1: Bake The Cupcakes
Measure the butter and sugar into a medium sized bowl. Cream both for approximately 2 minutes, until the mixture turns light and fluffy. Scrape the bottom and sides of the bowl half way through.
Next, add the eggs. Add one at a time, and each time, beat until all the traces of the egg is no longer visible.
Separately, sift the flour, baking powder, and salt. Add these dry ingredients into the creamed mixture in 3 batches. Alternate each batch with milk. Fold these ingredients until well incorporated, but do not overmix.
Finally, add in the vanilla essence and give the batter a quick mix until it's all smooth. Scoop the batter into the prepared cupcake liners. Fill each liner approximately two thirds full.
Bake the cupcakes until well risen and golden brown in color. Remove from the oven and let them cool in the tin for about 5 minutes before removing them onto a wire rack to cool completely before decorating.
Step 2: Make The Buttercream
Add the butter into a medium sized bowl. Beat it for about one minutes, until it turns creamy. Sift in the powdered sugar and stir with a spoon to combine with the butter. Sifting helps to remove any lumps in the sugar. Stirring the sugar into the butter with a spoon helps avoid it from flying when creaming with a cake mixer.
Once the sugar is fairly incorporated into the butter, cream the mixture on medium high speed until it turns fluffy. Add the vanilla extract and continue to mix until well combined.
If the icing appears too stiff, add some milk. Start with half a teaspoon and work your way up until the buttercream is of a spreadable consistency.
Step 3: Make The Fondant Covering
Start with the yellow fondant. Roll it to about ⅛ thick and cut out 10 medium circles. And then roll the purple fondant and cut out 2 similar sized circles.
In cutting the circles, make sure they are slightly larger than the diameter of the cupcakes. This is because the cutouts are to be shaped into domes and in doing that, the diameter of the domes will become slightly smaller compared to the diameter of the cutouts as flat pieces.
To mold the fondant cut outs into rounded shapes, place each piece into the insides of small bowls. Dust the bowls lightly with powdered sugar to avoid the pieces from sticking to the bowl. You can also use the plastic cupcake covers which can be purchased from cake decorating supply stores (these are not expensive) if you dont have the required size bowls.
Leave the cut out in the bowls until they set in that shape.
Step 4: Make The Frames For The Goggles
To make the goggles, roll some white fondant to about half a centimeter thick. Cut them out using round cutters. Use appropriate sized cutters for each of the Minion face design.
And then paint the goggles in silver edible paint and set them aside for the paint to dry completely. The goggles were cut out in white and painted in silver before being attached to the faces.
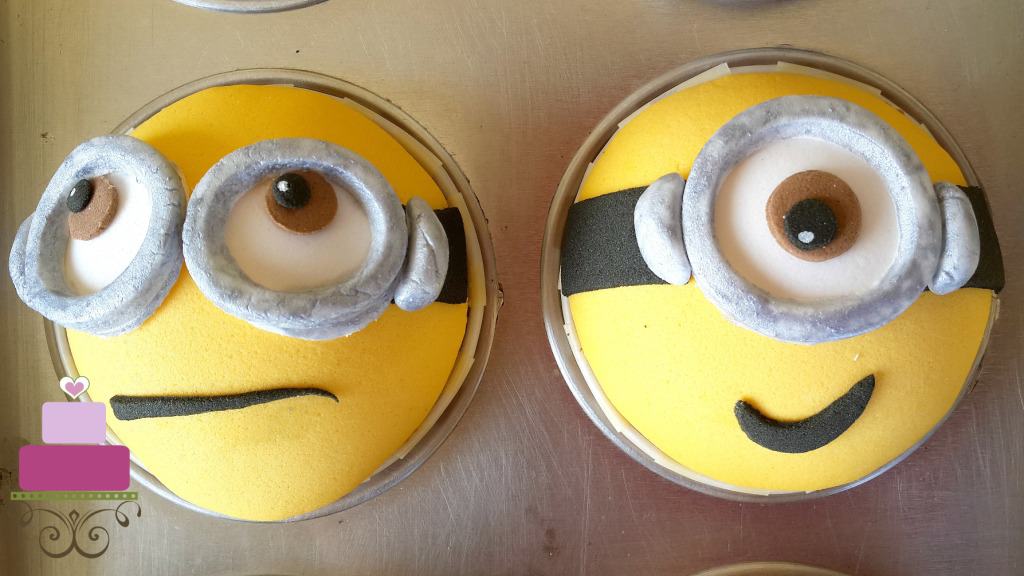
Step 5: Make The Eyes
Next were the eyes. The yellow Minions have brown and black eyes while the purple ones have purple and black eyes. Use the same sized round cutter used to cut the insides of the goggles to cut the white eyes.
Attach the painted goggles onto these white circles. Arrange these eyes and goggles onto the cupcakes. Attach them with fondant glue.
Next, use the round cutters to cut out the brown, purple and black circles for the insides of the eyes. Attach them to the cupcakes, also with some fondant glue. For the white dots, use a fine tipped brush and white food coloring and simply dot the paint on the eyes. Do not dilute the paint or the white dots will not be visible.
Step 6: Make the Goggles Strips
Next, roll some black fondant thin. Cut it to strips to make the strips for the goggles. Again refer to the image at the top of this page for the different designs for each of the Minions.
Attach these strips to the sides for the goggles on each cupcake with fondant glue. Once the black strips are all on, add the tiny silver sausage-like pieces to the sides of each goggle. Similar to the goggles, shape these in white fondant (by hand) and paint them in silver before before attaching to the Minions’ faces.
Step 7: Add The Fondant Mouths
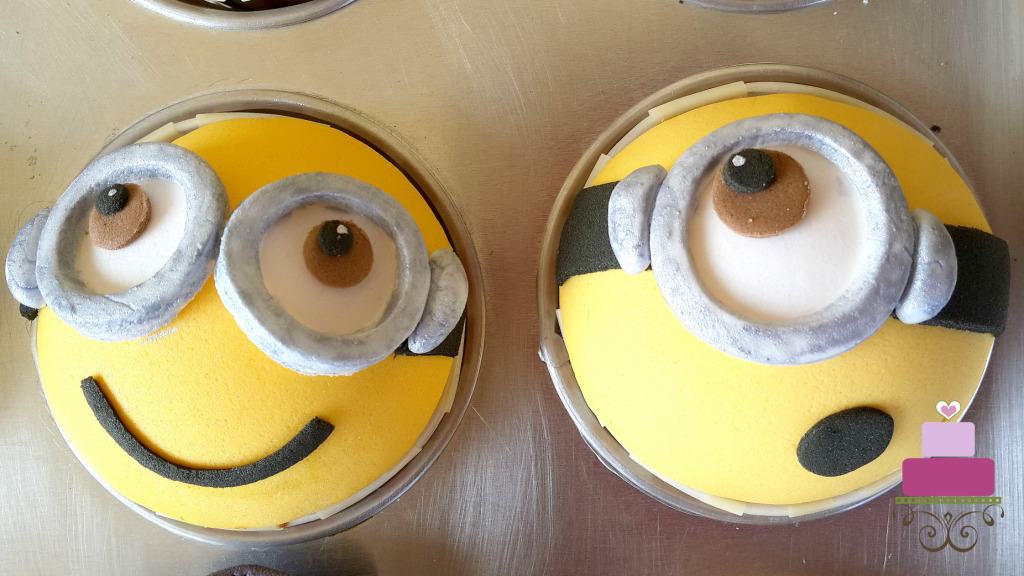
Once the eyes were done, do the mouths with black fondant. Roll the fondant and cut it free hand with the sugar craft knife for each of the 12 Minion faces. Attached them on using glue.
Step 8: Add The Teeth and The Head
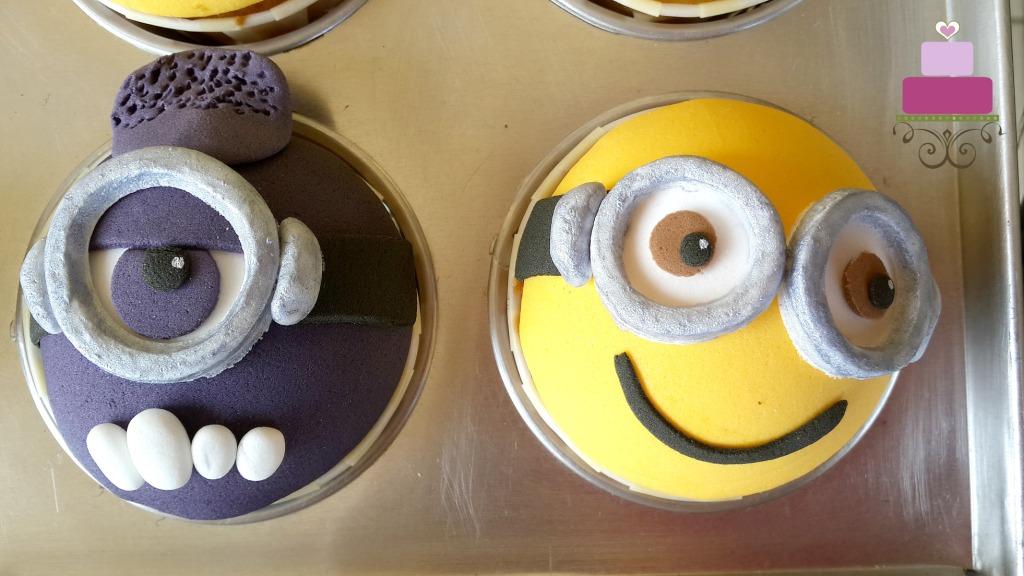

For the 2 purple Minions, both have sets of white teeth showing and extra parts on the head. For the teeth, pinch small pieces of white fondant and form them into tiny sausages by hand. Attach these to the Minions’ faces using glue.
For the headpieces, one minion has spikes on the head while the other has a purple blob on. To make the spikes, form them by hand and attach to the Minion's head with fondant glue.
For the blob, form a round ball, flatten one side, and use a toothpick to mark it with tiny holes. Attach the blob to the Minion’s head (with the side with holes pointing upwards). And that completes the decoration. Allow these decoration to set before adding them to the cupcakes.
Step 9: Assemble The Cupcakes
Once the cupcakes have cooled down completely, fill the buttercream into a piping bag. Pipe out swirls onto each cupcake.
Carefully lift the domed Minion toppers and place them onto the cupcakes, one topper for each cupcake. And that completes the Minion cupcakes.
💡Expert Tips
- The cupcakes can be decorated into flat designs instead of domed tops. Simply cut the circles in the same diameter as the cupcakes and skip the process of shaping the domes in the small bowls.
- For the silver goggles, you can use edible spray paint in metallic silver instead of painting it with a brush. If you are using the spray, do it in well ventilated area and make sure you place some cardboards around so that paint does not spill onto surrounding items.
- Humid environment will cause the fondant to turn soggy and sticky. If you are staying in a humid country, it is best that you work on these cupcakes in an airconditioned room.
- It is advisable to make extra cupcakes and extra toppers to give allowance for breakages and other issues.
❤️More Tutorials You Will Love

Do you like this tutorial? Please leave a 5-star ⭐⭐⭐⭐⭐rating in the recipe card below and consider a review further down this page. I would love to hear from you. Thank you!
📖Recipe
Minions Cupcakes
Equipment
- Round cutter set
- Round plunger cutter set
- fine tipped cake decorating brush
- Pizza cutting wheel
- Sugarcraft knife
- Individual cupcake covers (in plastic) or small bowls with a same diameter as the cupcakes
For best results, use the metrics measurements. US customary measurements have not been tested and are only meant for guide.
Ingredients
Cupcakes
- 190 g self raising flour
- 100 g butter
- 175 g granulated sugar
- 2 eggs
- 140 ml milk
- 1 teaspoon vanilla extract
- ¼ teaspoon salt
- ½ teaspoon baking powder
Buttercream
- 150 g butter (salted)
- 300 g powdered sugar (sifted)
- ½ teaspoon vanilla extract
- 1 tablespoon milk (optional)
Decoration
- Fondant
- Food coloring
- Fondant glue
- Edible silver paint
Instructions
Bake the cupcakes
- Measure the butter and sugar into a medium sized bowl. Cream both for approximately 2 minutes, until the mixture turns light and fluffy. Scrape the bottom and sides of the bowl half way through.
- Next, add the eggs. Add one at a time, and each time, beat until all the traces of the egg is no longer visible.
- Separately, sift the flour, baking powder, and salt. Add these dry ingredients into the creamed mixture in 3 batches. Alternate each batch with milk. Fold these ingredients until well incorporated, but do not overmix.
- Finally, add in the vanilla essence and give the batter a quick mix until it's all smooth.
- Scoop the batter into the prepared cupcake liners. Fill each liner approximately two thirds full.
- Bake the cupcakes until well risen and golden brown in color. Remove from the oven and let them cool in the tin for about 5 minutes before removing them onto a wire rack to cool completely before decorating.
Make the buttercream
- Add the butter into a medium sized bowl. Beat it for about one minutes, until it turns creamy.
- Sift in the powdered sugar and stir with a spoon to combine with the butter. Sifting helps to remove any lumps in the sugar. Stirring the sugar into the butter with a spoon helps avoid it from flying when creaming with a cake mixer.
- Once the sugar is fairly incorporated into the butter, cream the mixture on medium high speed until it turns fluffy.
- Add the vanilla extract and continue to mix until well combined.
- If the icing appears too stiff, add some milk. Start with half a teaspoon and work your way up until the buttercream is of a spreadable consistency.
Make the fondant covering
- Start with the yellow fondant. Roll it to about ⅛ thick and cut out 10 medium circles. And then roll the purple fondant and cut out 2 similar sized circles.
- In cutting the circles, make sure they are slightly larger than the diameter of the cupcakes. This is because the cutouts are to be shaped into domes and in doing that, the diameter of the domes will become slightly smaller compared to the diameter of the cutouts as flat pieces.
- To mold the fondant cut outs into rounded shapes, place each piece into the insides of small bowls. Dust the bowls lightly with powdered sugar to avoid the pieces from sticking to the bowl. You can also use the plastic cupcake covers which can be purchased from cake decorating supply stores (these are not expensive) if you dont have the required size bowls.
- Leave the cut out in the bowls until they set in that shape.
Make the goggles frame
- To make the goggles, roll some white fondant to about half a centimeter thick.
- Cut them out using round cutters. Use appropriate sized cutters for each of the Minion face design.
- And then paint the goggles in silver edible paint and set them aside for the paint to dry completely.
- The goggles were cut out in white and painted in silver before being attached to the faces.
Add the eyes
- Next were the eyes. The yellow Minions have brown and black eyes while the purple ones have purple and black eyes.
- Use the same sized round cutter used to cut the insides of the goggles to cut the white eyes.
- Attach the painted goggles onto these white circles.
- Arrange these eyes and goggles onto the cupcakes. Attach them with fondant glue.
- Next, use the round cutters to cut out the brown, purple and black circles for the insides of the eyes.
- Attach them to the cupcakes, also with some fondant glue. For the white dots, use a fine tipped brush and white food coloring and simply dot the paint on the eyes. Do not dilute the paint or the white dots will not be visible.
Make the goggles strip
- Next, roll some black fondant thin. Cut it to strips to make the strips for the goggles. Again refer to the image at the top of this page for the different designs for each of the Minions.
- Attach these strips to the sides for the goggles on each cupcake with fondant glue.
- Once the black strips are all on, add the tiny silver sausage-like pieces to the sides of each goggle. Similar to the goggles, shape these in white fondant (by hand) and paint them in silver before before attaching to the Minions’ faces.
Add the mouths
- Once the eyes were done, do the mouths with black fondant.
- Roll the fondant and cut it free hand with the sugar craft knife for each of the 12 Minion faces. Attach them on using glue.
Add the teeth and head
- For the 2 purple Minions, both have sets of white teeth showing and extra parts on the head. For the teeth, pinch small pieces of white fondant and form them into tiny sausages by hand. Attach these to the Minions’ faces using glue.
- For the headpieces, one minion has spikes on the head while the other has a purple blob on. To make the spikes, form them by hand and attach to the Minion's head with fondant glue.
- For the blob, form a round ball, flatten one side, and use a toothpick to mark it with tiny holes. Attach the blob to the Minion’s head (with the side with holes pointing upwards).
- And that completes the decoration. Allow these decoration to set before adding them to the cupcakes.
Assemble the cupcakes
- Once the cupcakes have cooled down completely, fill the buttercream into a piping bag.
- Pipe out swirls onto each cupcake.
- Carefully lift the domed Minion toppers and place them onto the cupcakes, one topper for each cupcake. And that completes the Minion cupcakes.
Notes
- The total number of cupcakes for the recipe above will depend on your cupcake liner size. It is advisable to make a few extra cupcakes and toppers to give allowance for breakages.
- The cupcakes can be decorated into flat designs instead of domed tops. Simply cut the circles in the same diameter as the cupcakes and skip the process of shaping the domes in the small bowls.
- For the silver goggles, you can use edible spray paint in metallic silver instead of painting it with a brush. If you are using the spray, do it in well ventilated area and make sure you place some cardboards around so that paint does not spill onto surrounding items.
- Humid environment will cause the fondant to turn soggy and sticky. If you are staying in a humid country, it is best that you work on these cupcakes in an airconditioned room.
Leave a Reply