

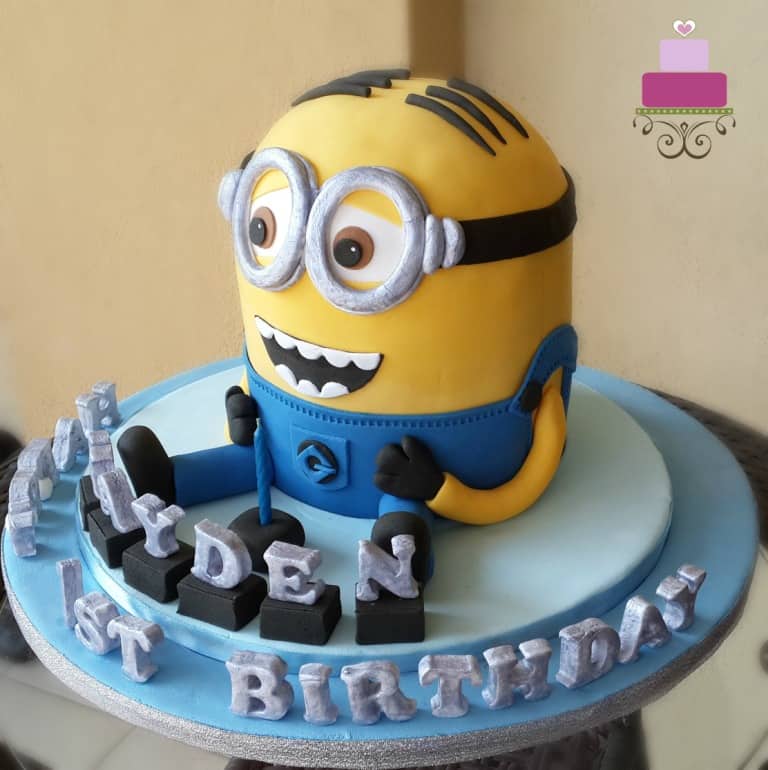
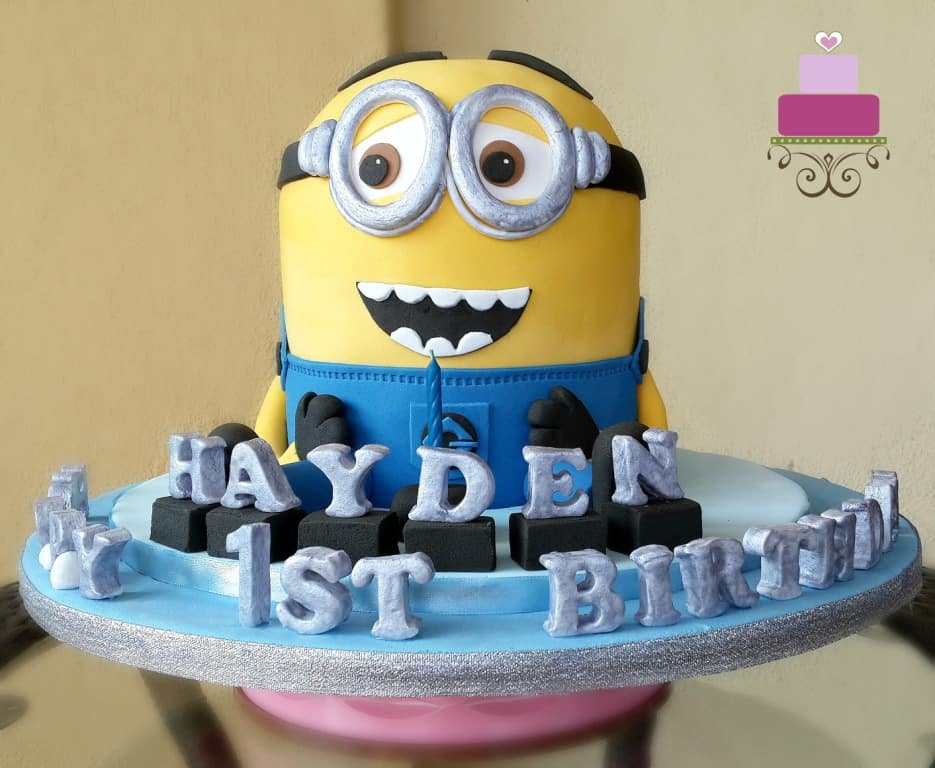
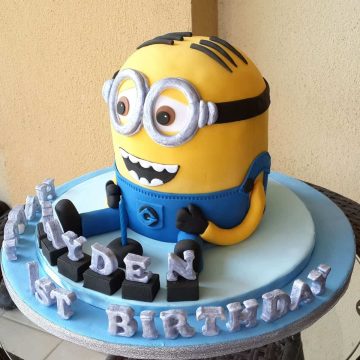
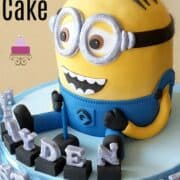
This Minion cake will make a great cake for Minion fans. With it's 3D shape body and cute decoration, this cake is easy to make and is a fun decorating project.
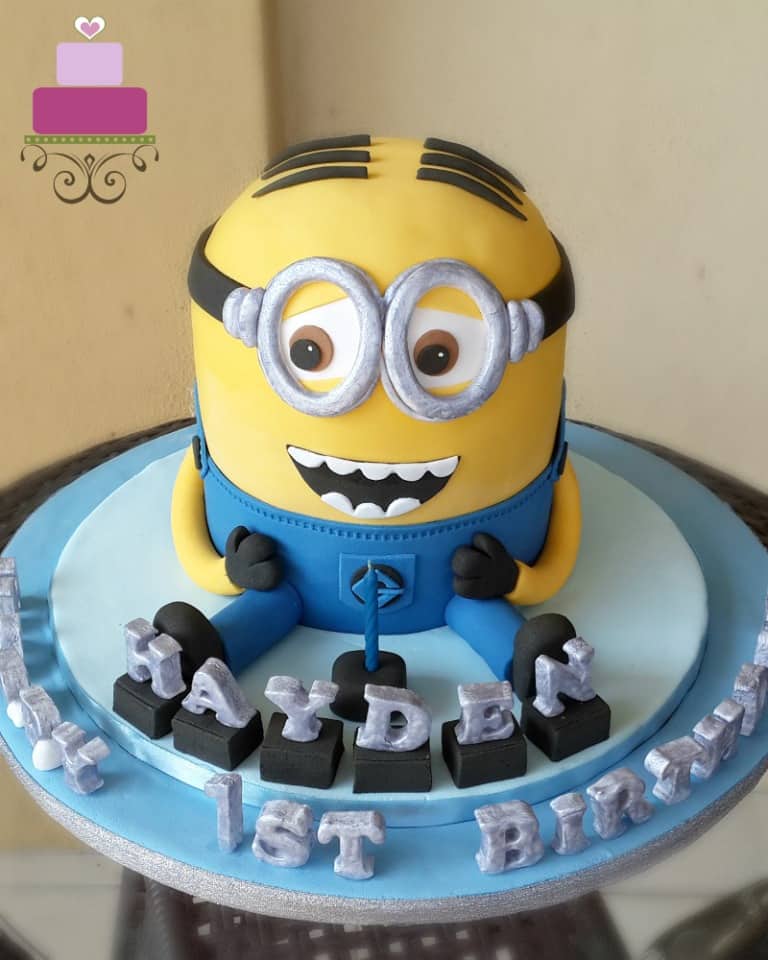
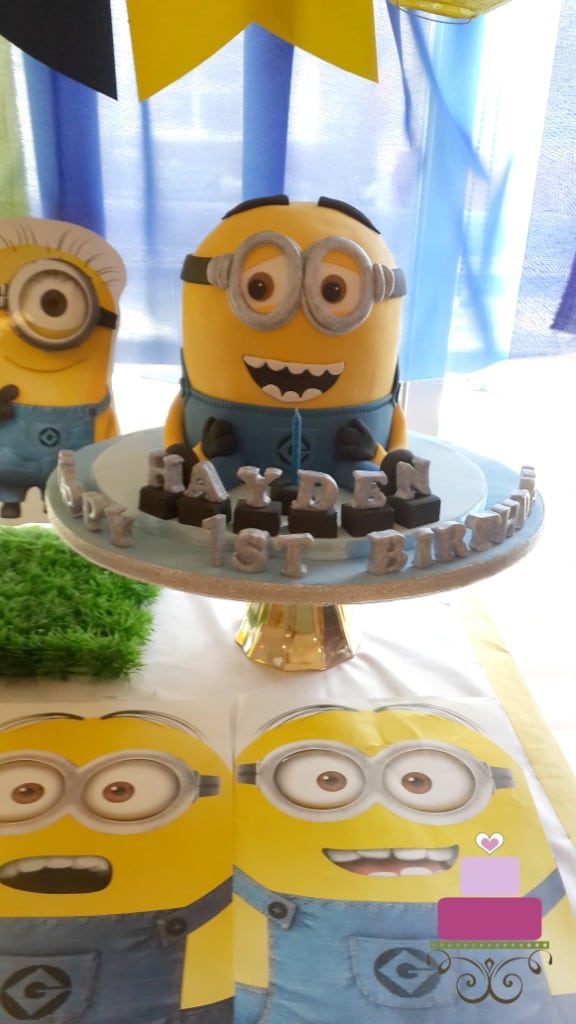
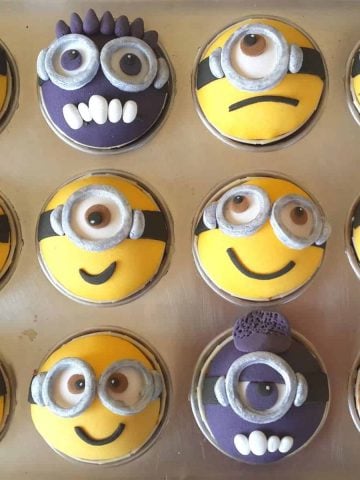
This Minion Cake request came for a 1st year birthday party along with a set of 12 cute Minions cupcakes. The cake is approximately 8 inches in height and 6 inches in diameter. The entire cake is decorated in fondant and is completely edible.
Note: This is an intermediate cake decorating tutorial and some basic knowledge about frosting a cake with buttercream and fondant is required.
Jump to:
❤️Why You Will Love This Tutorial
- Easy to follow with list of supplies and ingredients required.
- You get to customize the size and design to your liking. Make a purple minion cake if you like instead of yellow.
- A 3D cake is much more fun than a flat Minion cake
- It is a lot cheaper to make and decorate your own designer cake than to order similar custom cakes.
- It is a great way to hone your cake decorating skills and showcase it to family and friends.
📋Supplies Required
- Butter pound cake - 3 layers of 6 inches round cakes and 1 bowl shaped cake (with a diameter of 6 inches). You can use your favorite cake recipe.
- Buttercream – To fill the cake layers as well as to crumb coat the cake.
- Fondant – The entire cake is covered in fondant. You can make your own marshmallow fondant or purchase ready made if you like.
- Food coloring - Yellow, blue and white.
- Circle cutter set – To cut out the goggles.
- Round plunger cutters set – For the Minion’s eyes
- Fondant stitching tool – To make the stitch marks on the jumper.
- Sugar craft knife – General cutting tool to cut out the logo on Dave’s jumper.
- Alphabet cutters – For the birthday boy’s name as well as the birthday message.
- Fondant glue.
- Edible silver paint.
👩🍳How to Make
Step 1: Bake the Cakes
Bake the cakes and let them cool down completely to room temperature. Level the tops and stack them with buttercream in between. The bowl-shaped cake should be placed right on top.
Crumb coat the whole cake with buttercream frosting.
Step 2: Cover the Cake with Fondant
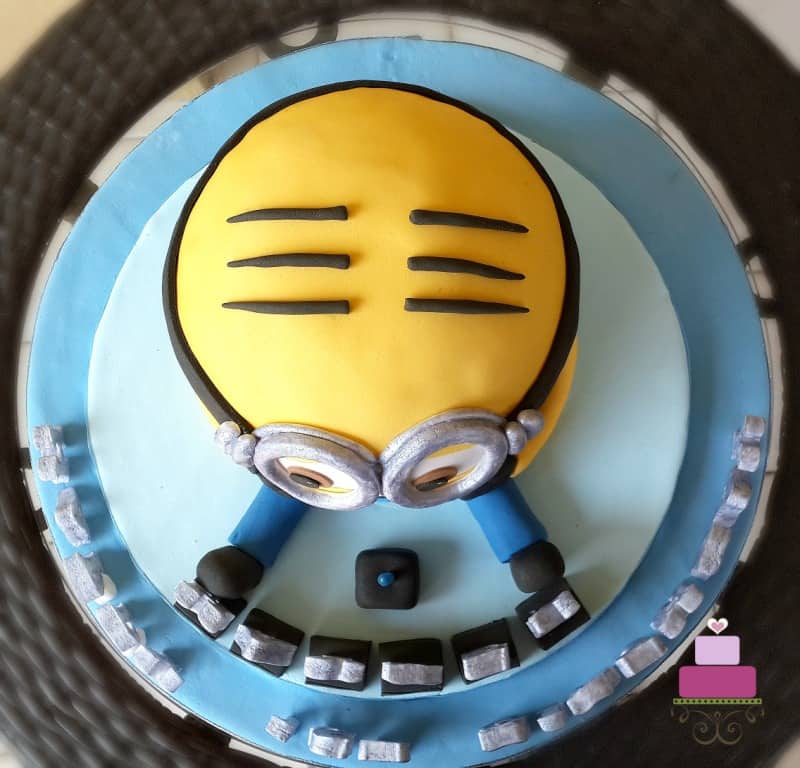
Since the cake is quite tall, cover it in 2 pieces of fondant. The first piece should cover the sides of the cake, and the second piece should cover the top. Make sure these pieces join at the same level as the goggles. That way, the goggles will cover the seams and it will look perfect.
For the joint at the side of the cake, smooth them as much as possible. And turn the joint side towards the side of Dave so that it can be partly covered by his jumper and arm.
Step 3: Make Dave's Eyes and Goggles
Next, are the eye pieces and the goggles. Draw out the goggles on a piece of paper and use it as a guide. In drawing the template, make sure it is proportionate to the size of the cake.
Using the template as a guide, cut out the lenses. Each side of the lens should consist of 2 layers of fondant, with the bottom layer thinner than the top. Paint both in silver. While waiting for the paint to set, use the same lenses template and cut out 2 white ovals pieces in white fondant. On these oval pieces, attach Dave’s yellow top and bottom eyelids (cut the eyelids separately and attach on the white ovals.)
And then add the eyeballs. Cut these with the round plunger cutter with the larger cutter used for the 2 brown circles and a slightly smaller one for the black circles. After that, attach the bottom layer lenses on the ovals and together, attach everything onto the cake with some fondant glue. Next, add the top layers of the lenses for both eyes.
After that, roll and cut some black fondant into a long strip to make the goggles strap. Attach it around the head, from one end of the goggle lenses to the other end of the goggles. And finally, to hide the joints between the black strip and the lens, add 2 tiny sausage-shaped fondant pieces on each side. Paint these in silver.
Step 4: Make the Minion's Jumper (Overalls)
Next on the Minion cake is the Minion's overalls (jumper). Measure the height you want the jumper to be and use this measurement to cut out a long rectangle piece of blue fondant. The blue strip should be of the same width as measured earlier. Attach it all around Dave, with the joints ending at one of the sides where the arm is to be placed.
And then, using the smallest cutter in the round plunger cutter set, I cut off two semi-circles on both sides of the jumper (where the arms are to be attached). Using the stitch tool, imprint the stitch mark at the edges of the jumpsuit.
Next, roll some blue fondant and cut out the logo for the front of jumper with the sugar craft knife. It would be helpful to have a template for the logo as a guidance (you can try to download one from the internet). Attach it to the cake with some glue.
Next are the Minion's feet and arms. Shape them in fondant and attach to the cake with glue. Once the arms are in place, cut out 2 “c” shaped yellow fondant pieces, put on the stitch marks on them and attach them above each arm. Also add the black buttons.
Step 5: Add the Mouth and the Hair
To make the mouth, use the round cutter to cut out a black fondant circle, and then cut the piece into half to make a semi circle.
Next, cut out 2 pieces of scalloped white strips and attach these to the black semi-circle piece as the teeth. And finally, add the hair. Shape these by hand and attach to the head with fondant glue. You can replace this with black string licorice or pipe them in black buttercream if you like.
Step 6: Add the Wordings on the Cake
For the wordings on the cake, cut them using the alphabet cutters in white fondant. If you are using store bought fondant, add some CMC or tylose powder to the fondant to help the fondant set firm.
Let the letters set before painting them in silver and attaching to the cake board. I used 2 levels of cake board for this cake simply so that the entire birthday message could be seen from the front of the cake.
It was for this purpose also that I have added black cubes of fondant on the cake board where I have placed the birthday boy’s name. The black cubes are cut out with a knife from thick rolled black fondant. And that completes the Minion cake.
💡Expert Tips
- The lettering for the cake can be made a few days in advance so that they are ready to be put on the cake on the day you assemble it.
- Fondant has tendency to become saggy and sticky in a humid environment. If you are living in a humid country, it is best to work in an air conditioned room.
- Always dust your work surface with some powdered sugar before rolling the fondant to avoid it from sticking.
- The cake flavor can be changes to any other that you like. You can use your favorite vanilla cakes or yellow cake layers. However, choose a cake that is sturdy so that it can withstand the weight on the fondant on it. Sponge and chiffon cakes are not suitable. Pound cakes are highly recommended. Other cake flavors you can choose include chocolate pound cake, orange cake, marble pound cake and coffee cake.
❤️More Tutorials You Will Love
Do you like this tutorial? Please leave a 5-star ⭐⭐⭐⭐⭐rating in the recipe card below and consider a review further down this page. I would love to hear from you. Thank you!
📖Recipe
Minion Cake
Equipment
- Round cutter set
- Round plunger cutters set
- Fondant stitching tool
- Sugar craft knife
- Alphabet cutters
For best results, use the metrics measurements. US customary measurements have not been tested and are only meant for guide.
Ingredients
- 3 six-inch round cakes approximately 2 inches high each
- 1 bowl shaped cake 6 inches in diameter
- Buttercream
- Fondant
- Food coloring Yellow, blue and white
- Fondant glue
- Edible silver paint
Instructions
Baking the cakes
- Bake the cakes and let them cool down completely to room temperature. Level the tops and stack them with buttercream in between. The bowl-shaped cake should be placed right on top.
- Crumb coat the whole cake with buttercream.
Covering the cake with fondant
- Since the cake is quite tall, cover it in 2 pieces of fondant. The first piece should cover the sides, and the second piece should cover the top. Make sure these pieces join at the same level as the goggles. That way, the goggles will cover the seams and it would look perfect.
- For the side joints, smooth them as much as possible. And turn the joint side towards the side of Dave so that it can be partly covered by his jumper and arm.
Dave's eyes and goggles
- Next, is the eyes and the goggles. Draw out the goggles on a piece of paper and use it as a guide. In drawing the template, make sure it is proportionate to the cake.
- Using the template as a guide, cut out the lenses. Each side of the lenses should consist of 2 layers of fondant, with the bottom layer thinner than the top. Paint both in silver.
- While waiting for the paint to set, use the same lenses template and cut out 2 white ovals pieces in white fondant. On these oval pieces, attach Dave’s yellow top and bottom eyelids (cut the eyelids separately and attach on the white ovals.)
- And then add the eyeballs. Cut these with the round plunger cutter with the larger cutter used for the 2 brown circles and a slightly smaller one for the black circles.
- After that, attach the bottom layer lenses on the ovals and together, attach everything onto the cake with some fondant glue. Next, add the top layers of the lenses for both eyes.
- After that, roll and cut some black fondant into a long strip to make the goggles strap. Attach it around the head, from one end of the goggle lenses to the other end of the goggles.
- And finally, to hide the joints between the black strip and the lens, add 2 tiny sausage-shaped fondant pieces on each side. Paint these in silver.
The Minion's jumper
- Next on the Minion cake is the jumper. Measure the height you want the jumper to be and use this measurement to cut out a long rectangle piece of blue fondant. The blue strip should be of the same width as measured earlier. Attach it all around Dave, with the joints ending at one of the sides where the arm is to be placed. And then, using the smallest cutter in the round plunger cutter set, I cut off two semi-circles on both sides of the jumper (where the arms are to be attached). Using the stitch tool, imprint the stitch mark at the edges of the jumpsuit.
- Next, roll some blue fondant and cut out the logo for the front of jumper with the sugar craft knife. It would be helpful to have a template for the logo as a guidance (you can try to download one from the internet). Attach it to the cake with some glue.
- Next are the legs and arms. Shape them in fondant and attach to the cake with glue. Once the arms are in place, cut out 2 “c” shaped yellow fondant pieces, put on the stitch marks on them and attach them above each arm. Also add the black buttons.
The mouth and the hair
- To make the mouth, use the round cutter to cut out a black fondant circle, and then cut the piece into half to make a semi circle.
- Next, cut out 2 pieces of scalloped white strips and attach these to the black semi-circle piece as the teeth. And finally, add the hair. Shape these by hand and attach to the head with fondant glue.
- A Minion shaped birthday cake with silver alphabets on a blue cake board
Wordings on the cake
- For the wordings on the cake, cut them using the alphabet cutters in white fondant. If you are using store bought fondant, add some CMC or tylose powder to the fondant to help the fondant set firm.
- Let the letters set before painting them in silver and attaching to the cake board. I used 2 levels of cake board for this cake simply so that the entire birthday message could be seen from the front of the cake.
- It was for this purpose also that I have added black cubes of fondant on the cake board where I have placed the birthday boy’s name. The black cubes are cut out with a knife from thick rolled black fondant. And that completes the Minion cake.
Notes
- The lettering for the cake can be made a few days in advance so that they are ready to be put on the cake on the day you assemble it.
- Fondant has tendency to become saggy and sticky in a humid environment. If you are living in a humid country, it is best to work in an air conditioned room.
- Choose a cake that is sturdy so that it can withstand the weight on the fondant on it. Sponge and chiffon cakes are not suitable. Pound cakes are recommended.
Leave a Reply