• Skip to primary navigation
  • Skip to main content
  • Skip to primary sidebar

Decorated Treats

  • Home
  • Recipes
    • Cake Recipes
    • Cookies Recipes
    • Brownies & Bars
    • Bread & Pastry Recipes
    • Sweets & Candies Recipes
    • Jellies, Mousses and Puddings
    • Frosting and Icing Recipes
  • Designs & Tutorials
  • Tips & Techniques
    • Preparing Cakes for Decoration
    • Fondant Decorating
    • Piping Techniques for Cake Decorating
    • Gum Paste Flowers - How to Make
    • Decorating with Chocolate
    • Other Techniques
menu icon
go to homepage
  • Recipes
  • Tutorials
  • Techniques
  • About Me
    • Facebook
    • Instagram
    • Pinterest
    • YouTube
  • search icon
    Homepage link
    • Recipes
    • Tutorials
    • Techniques
    • About Me
    • Facebook
    • Instagram
    • Pinterest
    • YouTube
  • ×
    Decorated Treats » Designs & Tutorials

    Olaf Cake and Cupcakes

    Published: Oct 3, 2020 · Modified: Mar 9, 2024 by Priya Maha

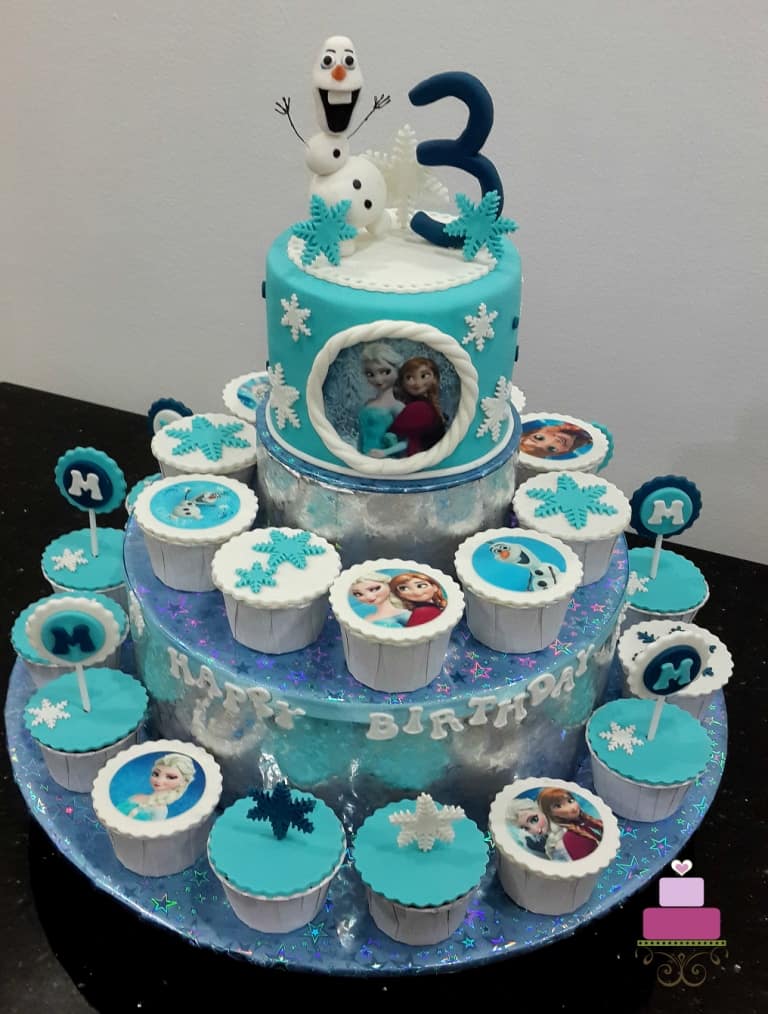
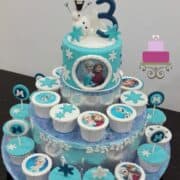
    I made this Frozen Olaf cake and cupcakes for a 3-year-old girl. It is made up of a 5 inches round cake and a set of Frozen themed cupcakes. Decorated with a handmade fondant Olaf cake topper, a number 3 cake topper and 3D snowflakes and set on a DIY cupcake holder, this Frozen cake set is perfect for little girls' birthday cakes.

    A blue round cake with 3d Olaf topper on a cupcake stand, with cupcakes on the stand.
    Jump to:
    • 🧾Supplies Required
    • 👩‍🍳How to Make
    • ❤️More Tutorials You Will Love

    🧾Supplies Required

    • Cake and cupcakes – the cake was a 5 inches round cake baked using my chocolate cake recipe. And the cupcakes were baked using my chocolate cupcakes recipe.
    • Buttercream – I used chocolate buttercream for this cake and used it to fill the cake as well as to crumb coat both the cake and the cupcakes.
    • Fondant – I used Satin Ice for the cake. The colors used were white, turquoise and dark blue. For the turquoise and dark blue colors, I tinted my white fondant with Americolor Turquoise and Americolor Navy Blue respectively.
    • Fondant extruder tool – I used this tool to make the white frame around Anna and Elsa’s image on the side of the cake as well as the cake border. I used 2 different discs for this project, one which is a round circle disc (for the cake border) and the other a 3 holes combined disc (not sure how to describe the pattern but the image of the disc I as as shown below).
    • Edible Image – I used edible images for this project. The images were provided by my customer and I merely resized them and sent them for printing from a local edible image printing vendor.
    • Muffin casings – there were medium-sized ones.
    • Snowflakes plunger cutter – This is a set of snowflakes cutters of the same pattern but in different sizes. I used these to make the 2D and 3D snowflakes on the cake.
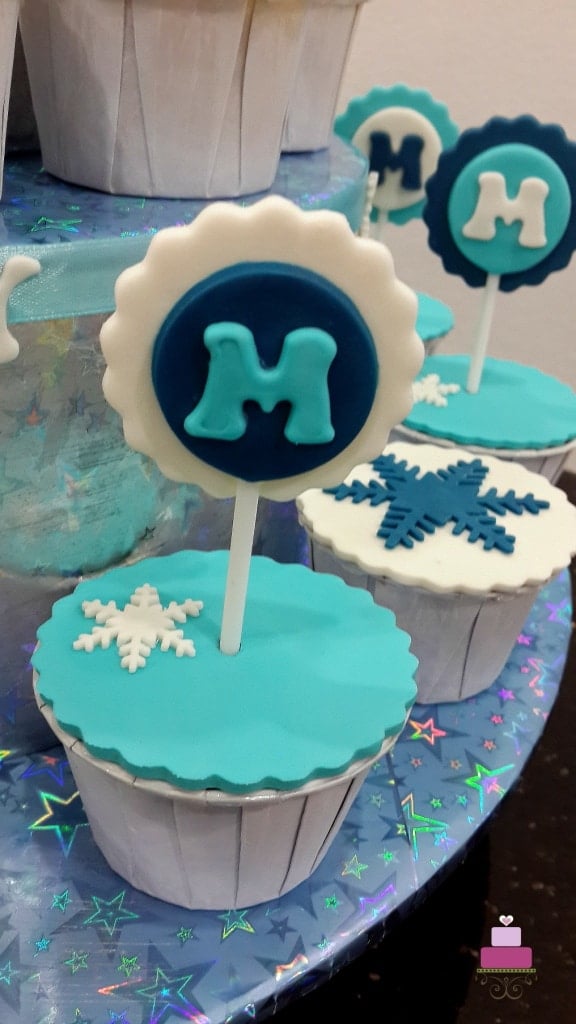
    • Lollipop Sticks – I used lollipop sticks for the initial “M” toppers
    • Round scalloped cutters 
    • 3D Olaf cake topper – This was handmade and I have a separate tutorial and video for this. 
    • Number 3 topper – This was also made of fondant and wire. 
    • Shortening and fondant glue - these were my glues for this project.

    👩‍🍳How to Make

    Step 1: Make the cake and cupcake toppers. Follow these tutorials to make Olaf cake topper, 3D fondant snowflakes, the letter cupcake toppers and the number 3 topper.

    Step 2: Attach the edible images and toppers to the cupcakes. Once baked and cooled, level the cupcake tops (for those that were domed). And then apply a thin layer of buttercream coating.

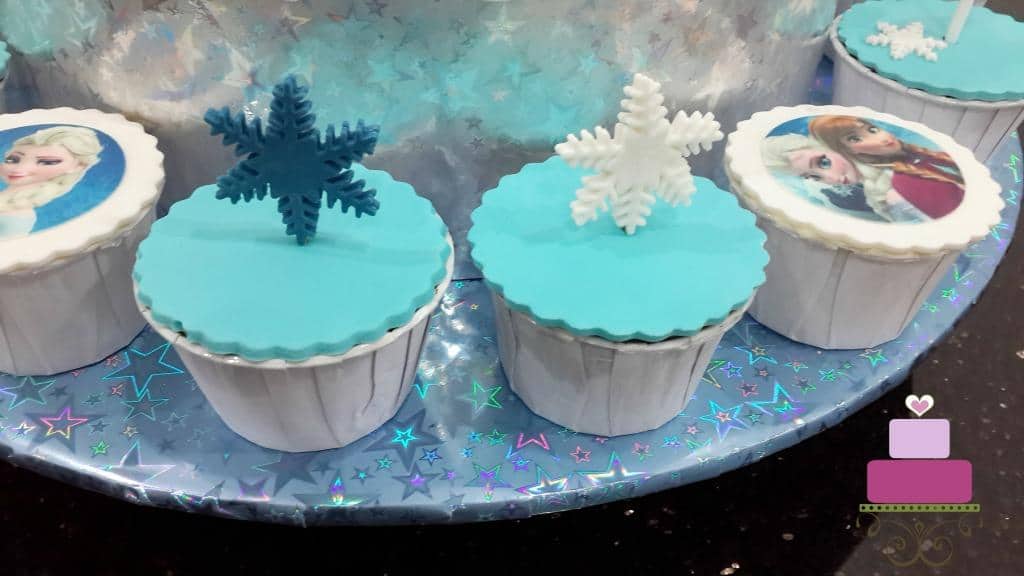
    Use the scalloped round cutters and cut out round fondant pieces in white and turquoise and place them on the buttercream covered cupcakes. And then attach edible images on some and 3D standing snowflakes on some. For the other, cut out snowflakes in rolled fondant and stick them to the cupcakes.

    Blue cupcakes with star toppers.
    Cupcake with initial M topper.

    Step 3: Decorate the cake. As for the cake, once baked and cooled, level, fill and crumb coat it with buttercream. And then covered it in turquoise fondant.

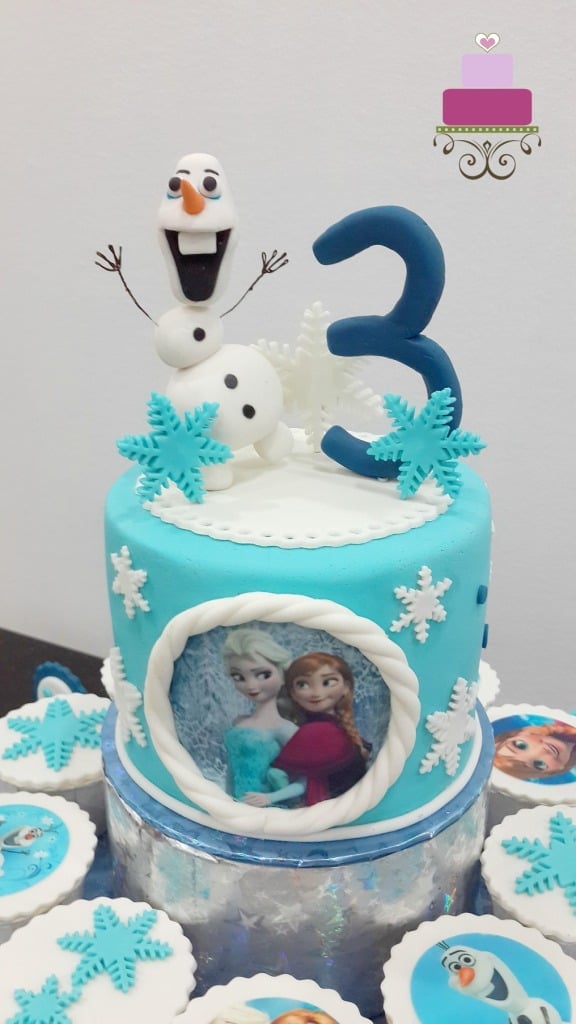
    Attach the Anna and Elsa's edible image on the front side of the cake. To frame the image, use the extruder tool fitted with a three combined holes disc to pipe out a long strip of fondant.

    Twist the strip gently to form the rope like finishing. Attach it to the cake using fondant glue.

    As for the top of the Frozen Olaf cake, roll some white fondant strips and cut out a large circle using the scalloped cutter. And then, use a piping tip (with medium sized round opening) and cut out tiny holes in each scallop for a lace-like effect. Attach it to the cake with shortening.

    Next, attach Olaf and the number ‘3’ topper on the cake. And finally, complete the decoration on the cake with the edible snowflakes.

    A round blue cake with 3d Olaf cake topper, a number three topper and snowflakes. On the front side is an image of Anna and Elsa in edible sugar sheet.

    Step 4: Assemble the cake and cupcakes on the cake and cupcake holder. To present the Frozen Olaf cake set, place them on the cupcake holder. The cake is on the top most tier. The cupcakes with 2D deco go the second tier. All those with 3D picks and edible images should be placed the lowest tier.

    Since the Frozen Olaf cake was rather small, I added the ‘Happy Birthday’ message on the cupcake holder. I cut the letters with the same cutters I used for the initial “M” cupcake picks.

    ❤️More Tutorials You Will Love

    • Chocolate cupcakes in black cupcake liners, decorated with black frosting, white fondant cut out and black buttercream spiders.
      Creepy Halloween Spider Cupcakes (How to Make)
    • 5 cupcakes decorated with red star toppers and Christmas themed sprinkles.
      Easy Christmas Cupcakes
    • A set of 5 cupcakes in white cupcake casings decorated with buttercream, sugar sprinkles and a pretty 5 petal fondant flower.
      Vanilla Cupcakes from Scratch (Perfectly Moist!)
    • 4 cupcakes with 2d christmas tree deco.
      Christmas Tree Cupcakes

    Reader Interactions

    Leave a Reply Cancel reply

    Your email address will not be published. Required fields are marked *

    Recipe Rating


    This site uses Akismet to reduce spam. Learn how your comment data is processed.

    Primary Sidebar

    Hi there!

    I'm Priya, and I'm so excited that you dropped by 🙂 Welcome to DECORATED TREATS, a place where I share all my cake decorating ideas & true and tried recipes for all things sweet.

    More about me →


    Currently Trending:

    • Light fruit cake cut into slices on a green plate.
      Moist Light Fruit Cake (the Best Ever)!
    • 3 dessert bowls of pink jelly with gold flake decoration.
      Agar Agar Jelly Recipe (How to Make)
    • Pink bars of coconut candy stacked on a plate.
      Coconut Candy Recipe (How to Make)
    • A stack of 4 green tea bars.
      Matcha Blondies (Perfectly Fudgy Green Tea Blondies)
    • A round cake on a cake board.
      Why is My Cake Wet In the Middle (and How to Avoid It)
    • A glass of milk on a brown tray with cookies on the side
      How to Make Milk with Milk Powder

    Footer

    ^ back to top

    SUBSCRIBE TO DECORATED TREATS

    Sign up for latest recipes and tutorials!


    Thank you for joining!

    Keep watch for my latest updates in your email.

    .

    About

    • Privacy Policy & Disclaimer

    Resources

    • Conversion Chart
    • Testimonials
    • Contact Me

    Decorated Treats is a participant in the Amazon Services LLC Associates Program, an affiliate advertising program designed to provide a means for sites to earn advertising fees by advertising and linking to Amazon.com. Decorated Treats also contains other affiliate links, which if you purchase from may earn me a small commission. The full disclosure policy can be found here.

    Copyright © 2024 Decorated Treats

    A blue round cake with 3d Olaf topper on a cupcake stand, with cupcakes on the stand.