

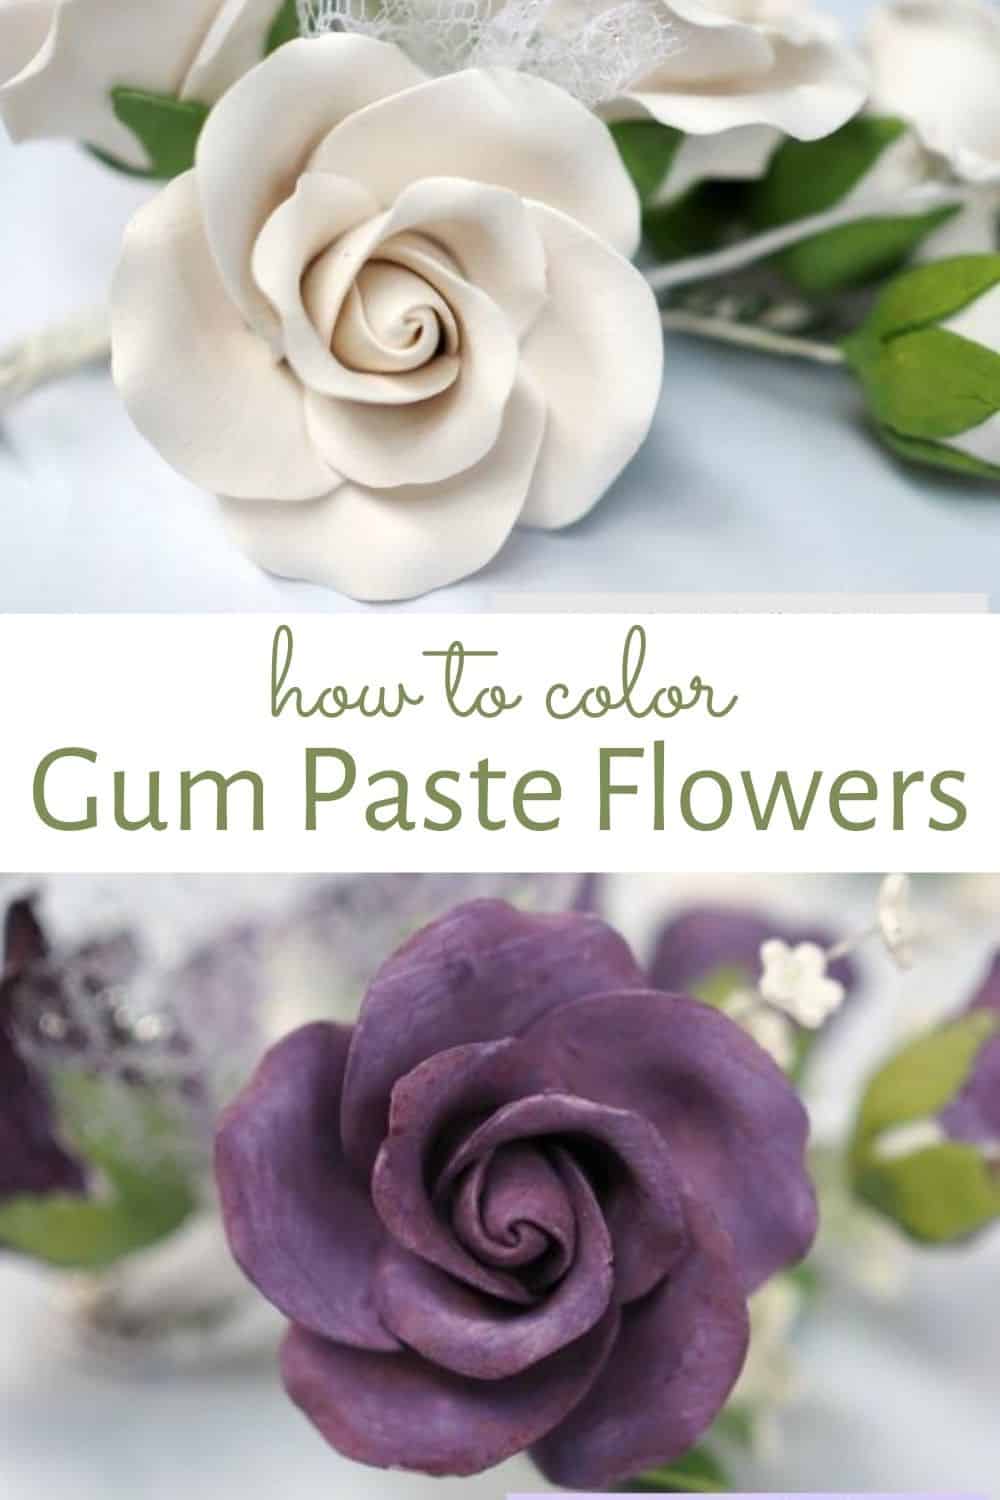
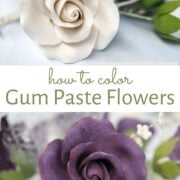
Learn how to color gum paste flowers with this quick and easy technique. It is a great way to make custom colored flowers for cakes and cupcakes and when you need them quickly, on a short notice.
In my experience of running a cake decorating business, I have had instances of customers requesting for cakes at the very last minute, sometimes in less than 2 days. This happens mostly for birthday cakes. I have also had similar requests for wedding cakes, sometimes with less than 2 weeks' notice.
It is still acceptable if the cake design is simple. By simple, I mean little deco and no sugar flowers. But in most cases, as simple as it can get, brides often request flowers as part of their wedding cakes deco.
So I figured out a way to cater to this kind of cake orders. I make the sugar flowers in advance. So when a rush order comes along, I have ready-made flowers to be used. It's not practical to have these ready-made flowers in every imaginable color. So what I do is make all the flowers in white. When an order comes along which requires a specific colored flower, I simply color gum paste flowers by painting and dusting them.
I have also used this technique on store-bought flowers. It is not only time saving but sometimes is a cheaper option. And can be considered for customers who do not have a big budget for their cakes.
Jump to:
❤️Why you will love this technique
- This is a great technique to make custom colored flowers.
- The technique works well when you want to color gum paste flowers in deep or dark shades of a color. Instead of mixing lots and lots of color into the gum paste to achieve the desired depth of the color, painting and dusting the flowers is often a faster option.
- It is also a great way to safe time by making the flowers in advance and simply color them when needed, particularly for rush cake projects or when you are rushed for time.
I recently had an order for a wedding cake that required deep purple colored roses for the deco. And was kind of a rush order (the order was from a return customer, so I could not reject it). I didn’t have any ready-made white roses at that time.
Making the roses myself was not a good option as it was a rush order. So I decided to purchase ready-made sugar rose bouquets instead. Unfortunately, I could not find the roses in the shade of purple I wanted! So I bought white roses and colored them instead.
If you like gum paste flowers, check out my tutorial on how to make gum paste roses, gum paste hydrangea, gum paste hibiscus, gum paste plumeria and gum paste poppies. And learn how to attach gum paste flowers to cakes correctly with this guide.
🧾Supplies required
- Gum paste flowers in white - these can be any flowers you wish to color. I used roses in this tutorial.
- Food coloring - Both gel food coloring and liquid food coloring will work.
- Water - to dilute the food colors.
- Edible flower petal dust - these come in a variety of colors and are in powder form. They are brushed onto fondant and gum paste decorations to add light color or to add deeper shades of color on certain parts of the fondant and gum paste.
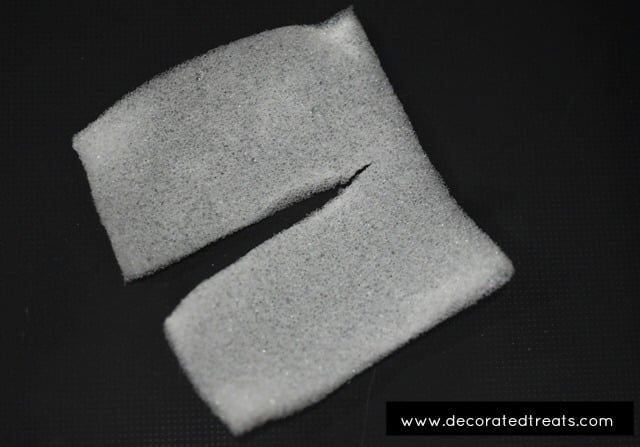
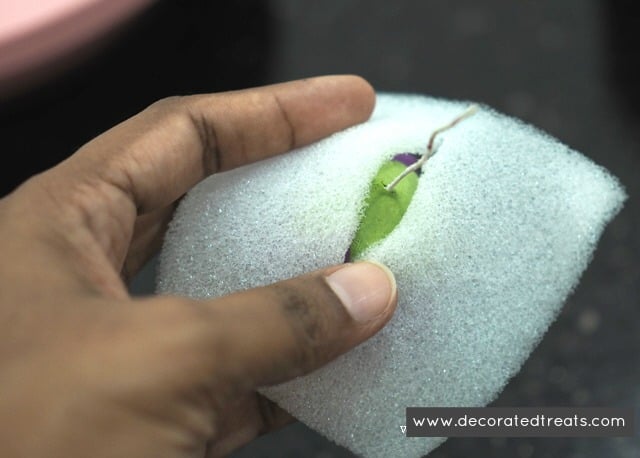
- Thin sponge (only required in you are coloring flowers in a bouquet). It will prevent the petal dust from staining other flowers in the bouquet. You can also use a folded kitchen paper towel.
- Cake decorating brushes - to paint and dust the flowers. Use thin brushes for small and intricate flowers.
✂️How to Make
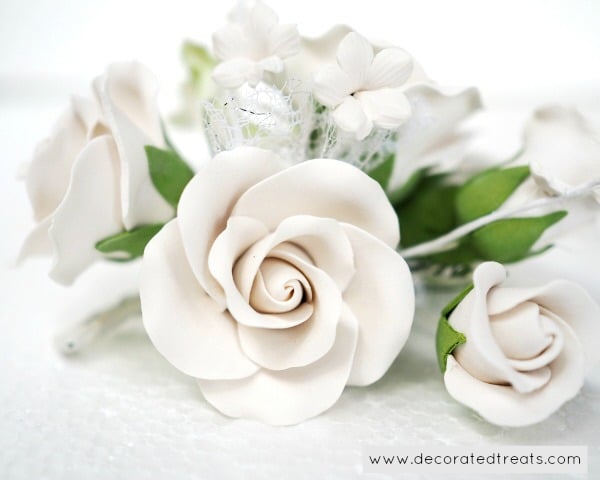
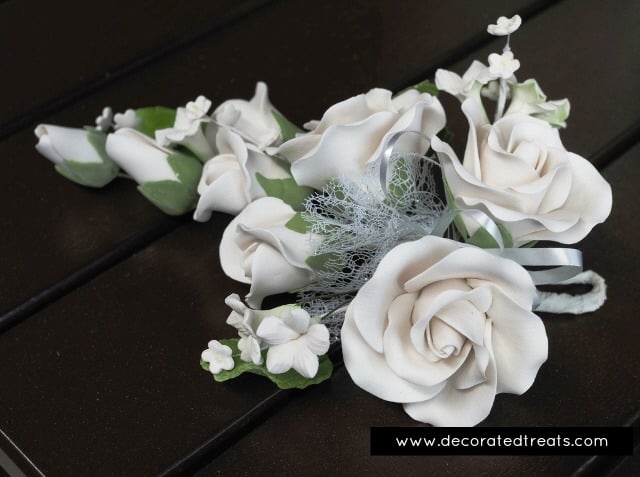
This is the rose bouquet I used, straight out of the packaging from a local cake decorating supply shop. I will be using this as an example.
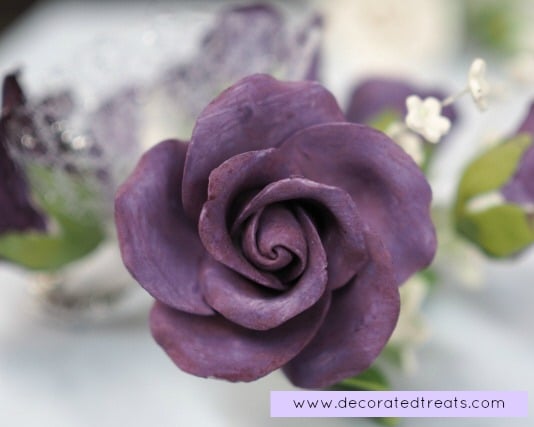
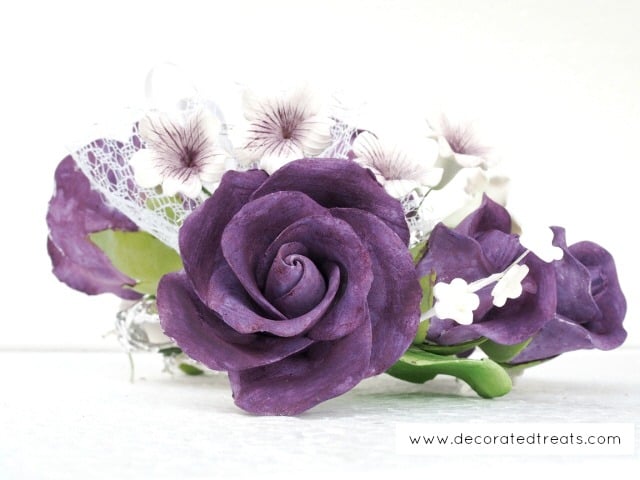
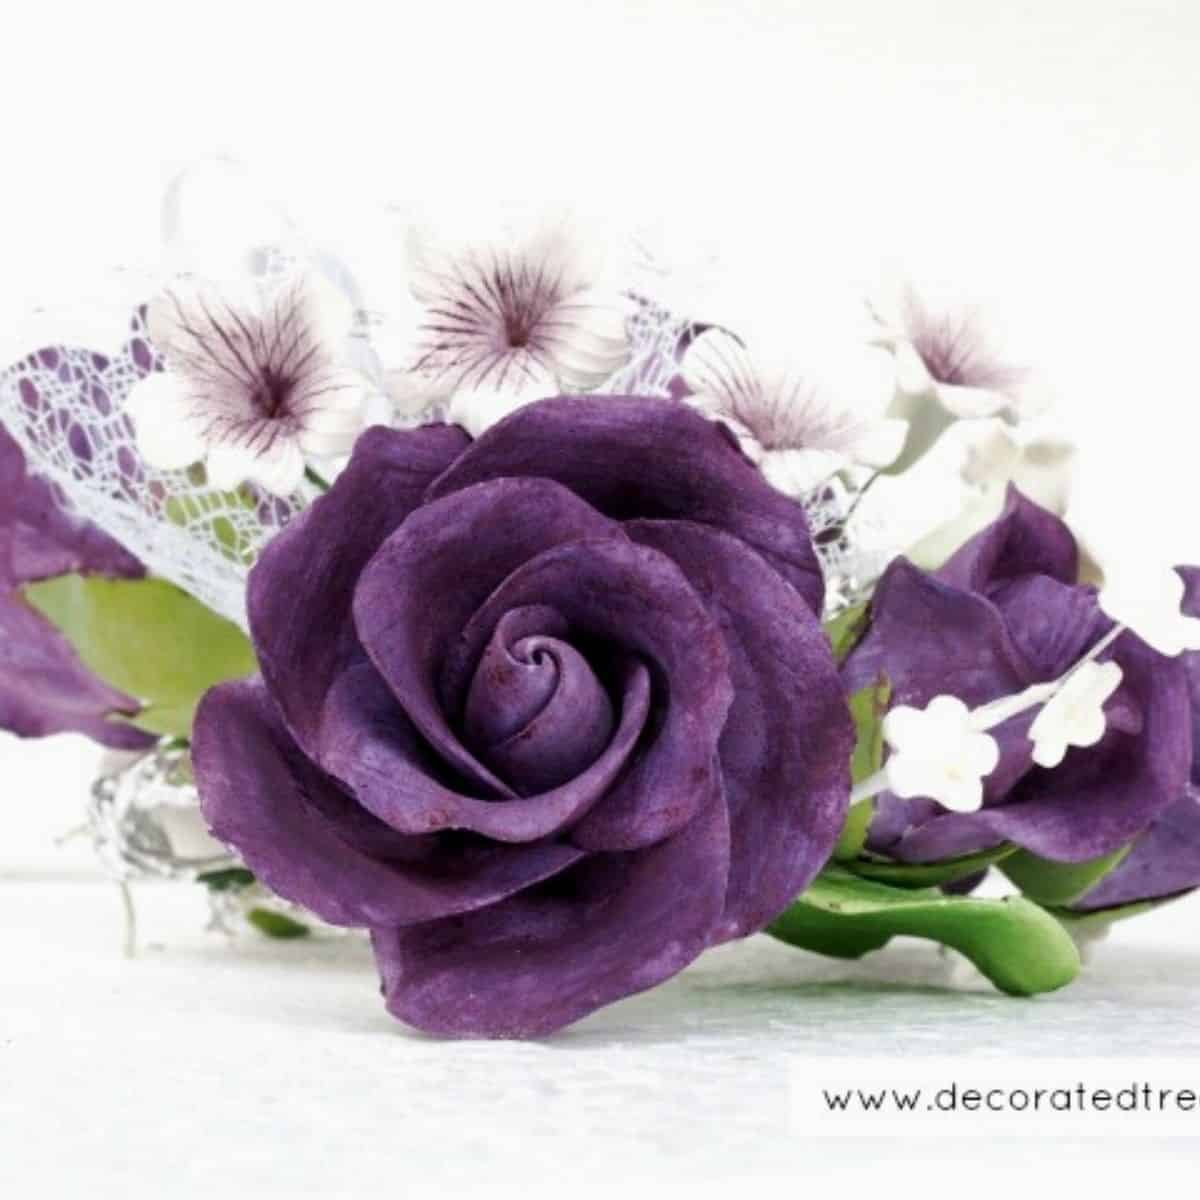
This is how the rose bouquet looked after I painted and dusted it with purple food coloring and petal dust.
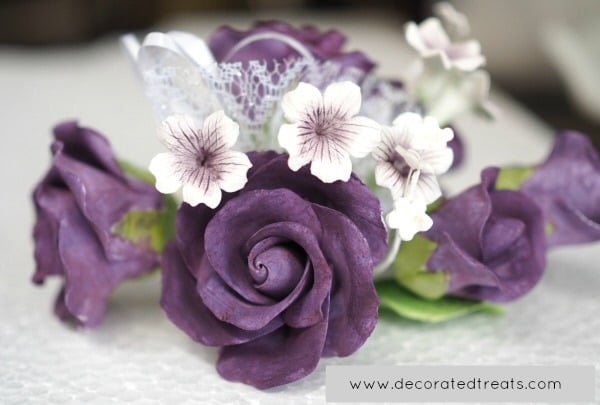
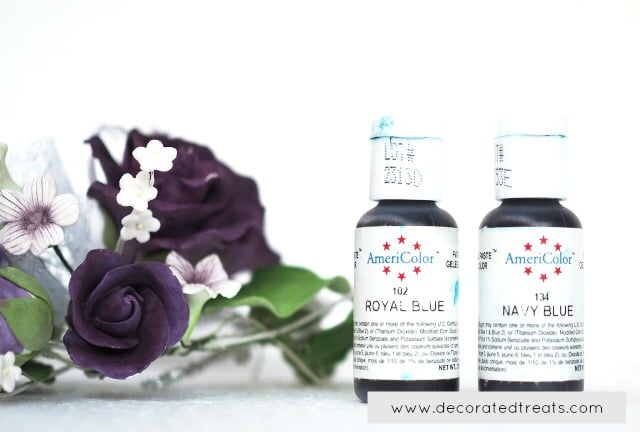
To achieve this deep purple shade, I used a mixture of royal blue, navy blue, fuchsia, burgundy and electric purple food colors.

Step 1: Get the correct color consistency
The paint mixture must be diluted in water before painting. To ensure color is in the shade you want, always test it on a test flower first.
Generally, if the paint solution is thick, the color on the rose will be too dark a shade of purple that it will look black instead of purple. Too much water would, on the other hand, appear as too light of a purple shade.
The trick is to add water in little amounts until the right shade is achieved.
Step 2: Paint the flowers
Once you have the right consistency, start by painting the center of the flower. And use a fine brush so that you can reach the insides and bottom of the petals without breaking them.
Also, make sure your brush does not contain too much paint. Otherwise it will take a long time to dry the paint.
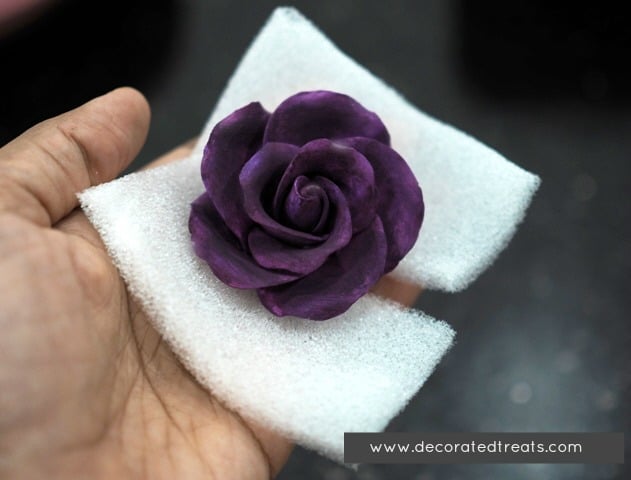
Here is how my rose looked after painting:
Note: If you flowers come in a bouquet and you do not wish to separate them, line the bottom of each of the flowers with a thin layer of sponge or kitchen towel. This will prevent the color from smearing to other flowers accidentally.
This piece of sponge came with the rose bouquet when I bought it, so I just recycled it. If you don’t have these, you can use a kitchen towel.
Once the flowers are painted, leave them to dry completely. I left mine to dry overnight.
Step 3: Dust the gum paste flowers
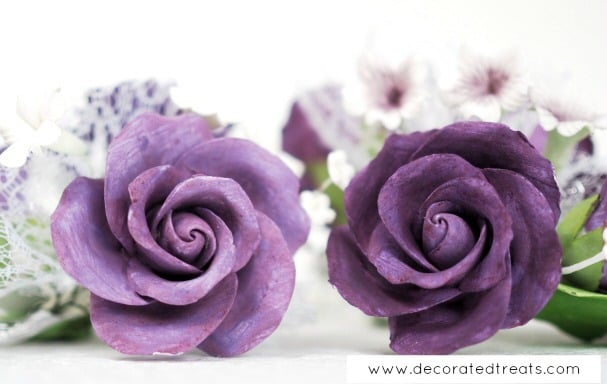
To enhance the color of the flower and hide any brush marks on the painted flowers, dust the painted flowers with petal dust. Dusting not only hides all the brush marks and uneven paint tones on the petals, it also helps to enhance the color. I used Violet dust from Squires Kitchen.
See the difference between these two roses. Both were painted, but the one of the right was dusted with the petal dust and the one on the left was not.
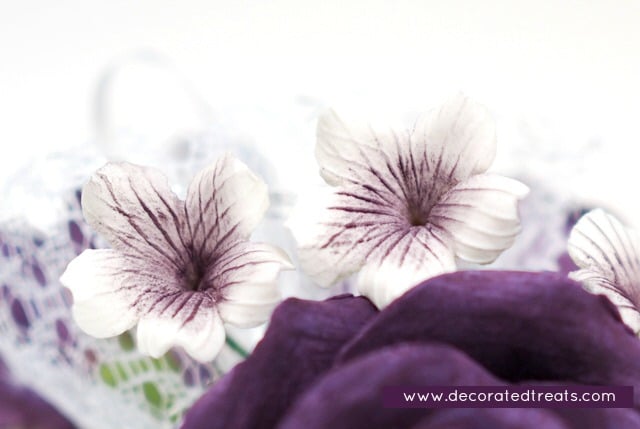
- As for the smaller filler flowers, instead of painting them, you can dust the centers with petal dust to match them with the main flowers..
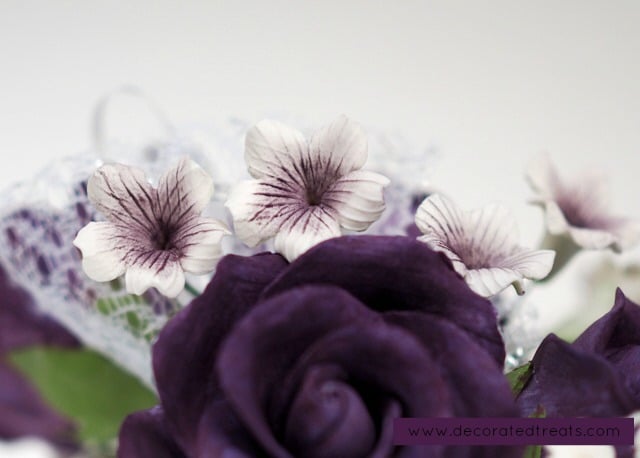
- Here is how my rose bouquet looked after painting and dusting:
I had to prepare 5 of these gum paste rose bouquets for the wedding cake, and this whole painting and dusting process took me approximately 4 hours, which is really worth it considering there were so many roses to paint and dust as compared to me making the rose bouquets myself which would have easily taken 2 days at a minimum.
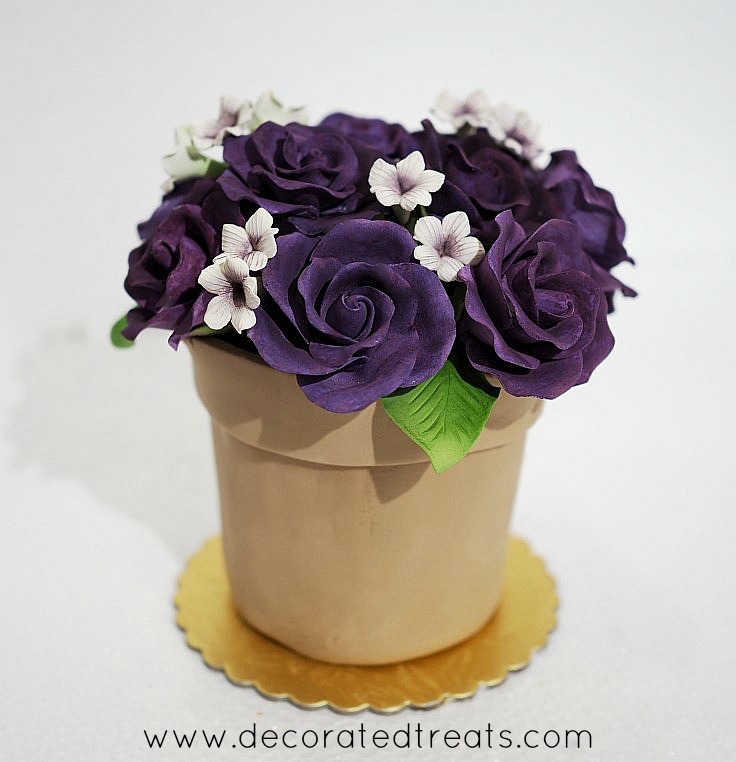
Here is another one of my cake projects in which I used the exact same colored roses. Click here to see step by step pictures on how I made this flower pot cake.

Leave a Reply