

Keen to learn how to make gum paste poppies for cake decoration? This page will teach you how to make these pretty flowers with step by step instructions and images.
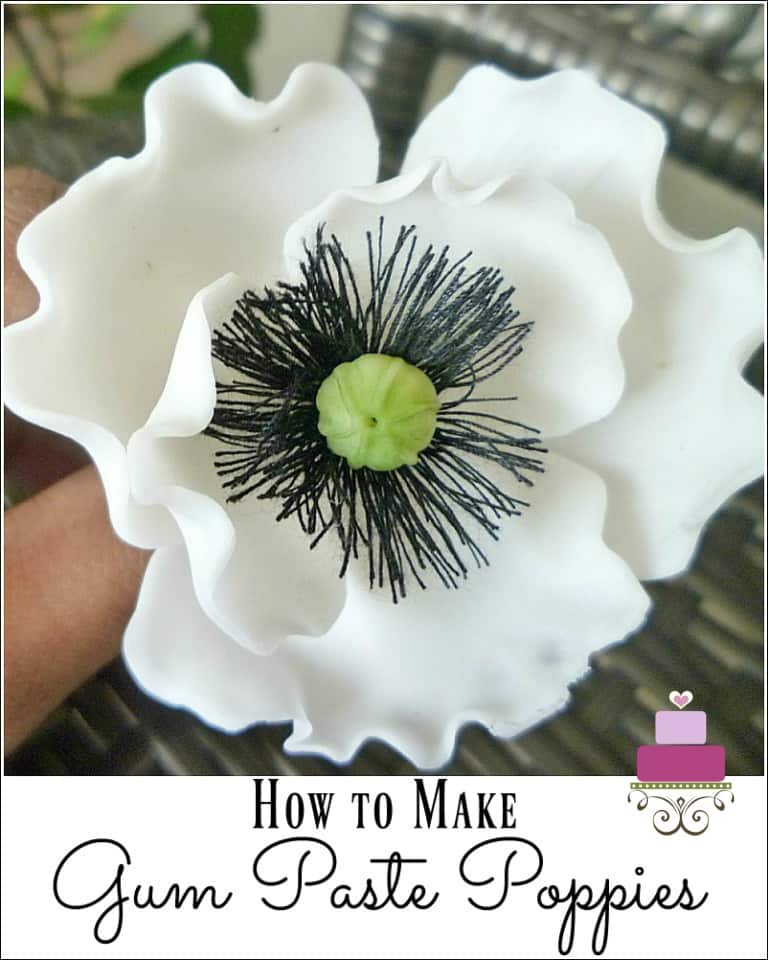
Each petal in this sugar paste flower is individually wired. That enables the petals to be adjusted to the right opening for the flowers.
If you like gum paste flowers, check out my other tutorials on how to make gum paste roses, gum paste hydrangeas, gum paste hibiscus, and gum paste plumeria (frangipani).
🧾Supplies Required
- Gum paste - I used store-bought Satin Ice gum paste. It can be rolled really thin and sets well.
- Floral wire - As I mentioned earlier, each petal in these gum paste poppies is wired. The size of the wire should not be too thin either too thick. I used 24 gauge wire.
- Black thread - I used normal black thread here. This is of course not edible, but since the flower itself is wired, the entire flower is not edible. So the use of thread as part of the flower is fine.
- Round cutters in 2 sizes, the small cutter for inner petals, and the larger cutter for outer petals.
- Green petal dust & dusting brush
- Flower forming cups
- Fondant glue
- Floral tape - to wrap the floral wire.
- Cake decorating tweezers - to help shape the center of the poppy flowers.
- Scissors
- Long nose pliers - to shape the floral wire.
✂️How to Make
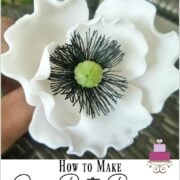
Step 1: Make the black flower centers

Start with the flower center. To make the centers, loop the black thread around 2 fingers about 40 to 50 times.
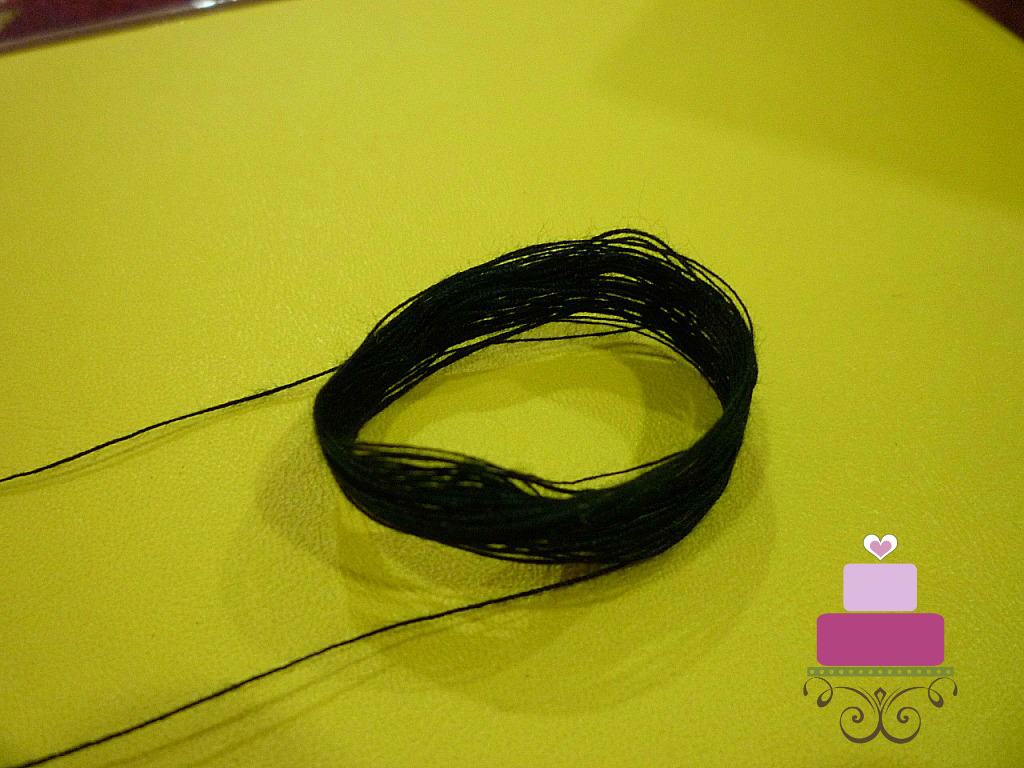
Remove the thread from your fingers without disrupting the loop.
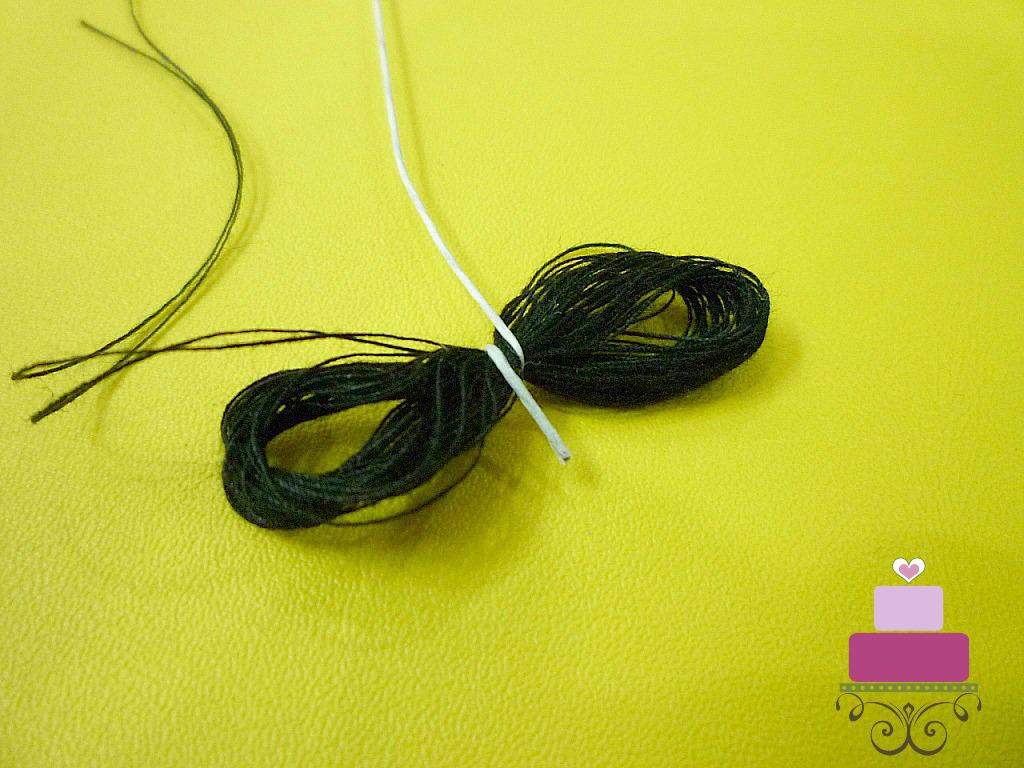
Twist a floral wire in the center. Leave the tip of the floral wire pointing upwards as shown.

And then cut both sides of the loop.
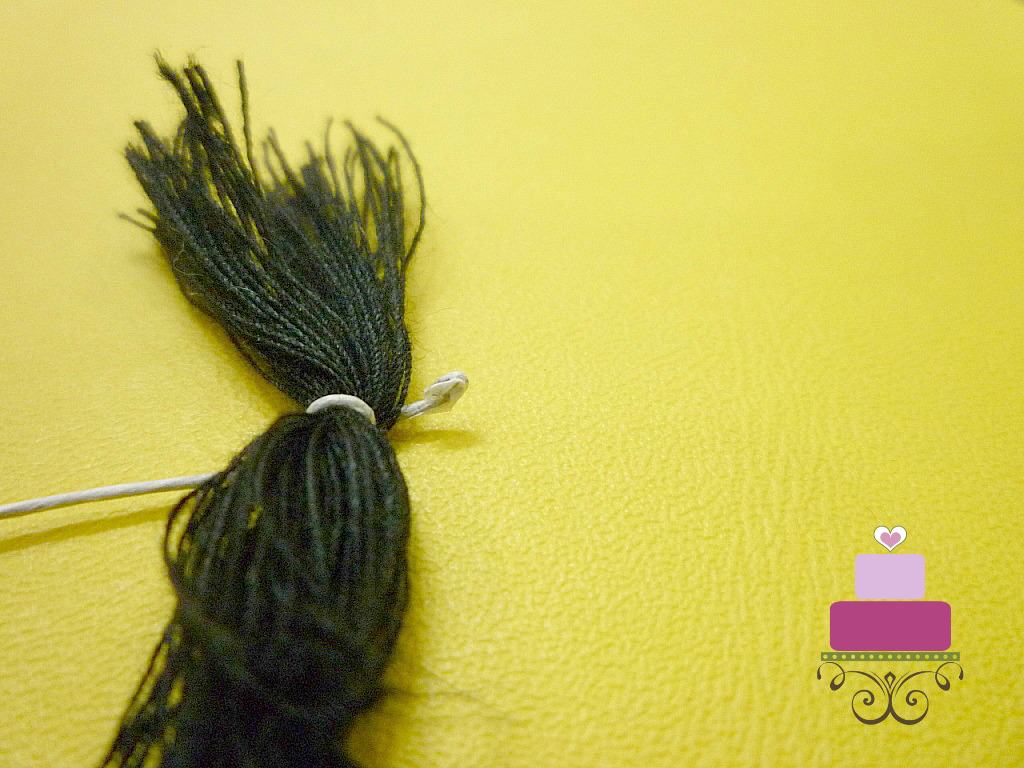
Use a pair of long nose pliers, to twist the shorter end of the earlier floral wire into a small loop. This loop is to secure the gum paste poppies flower center later.
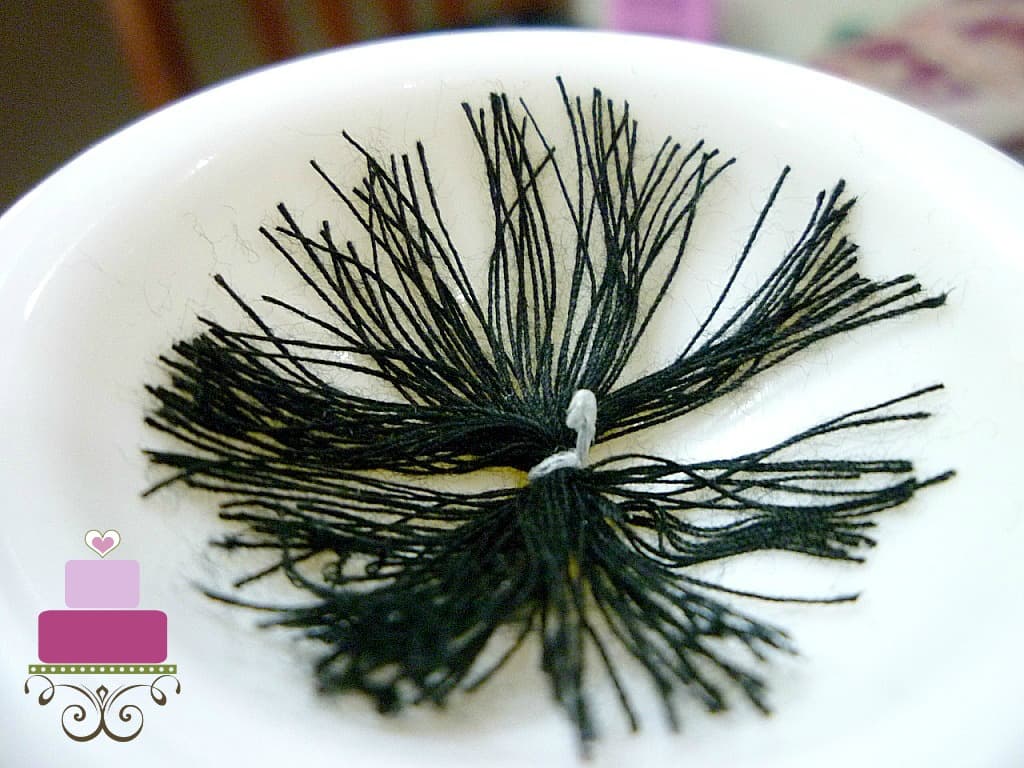
And then adjust the cut thread to make it evenly distributed, as shown. I am using a flower former here (which is why you don't see the floral wire at the bottom).
Step 2: Make the green flower center
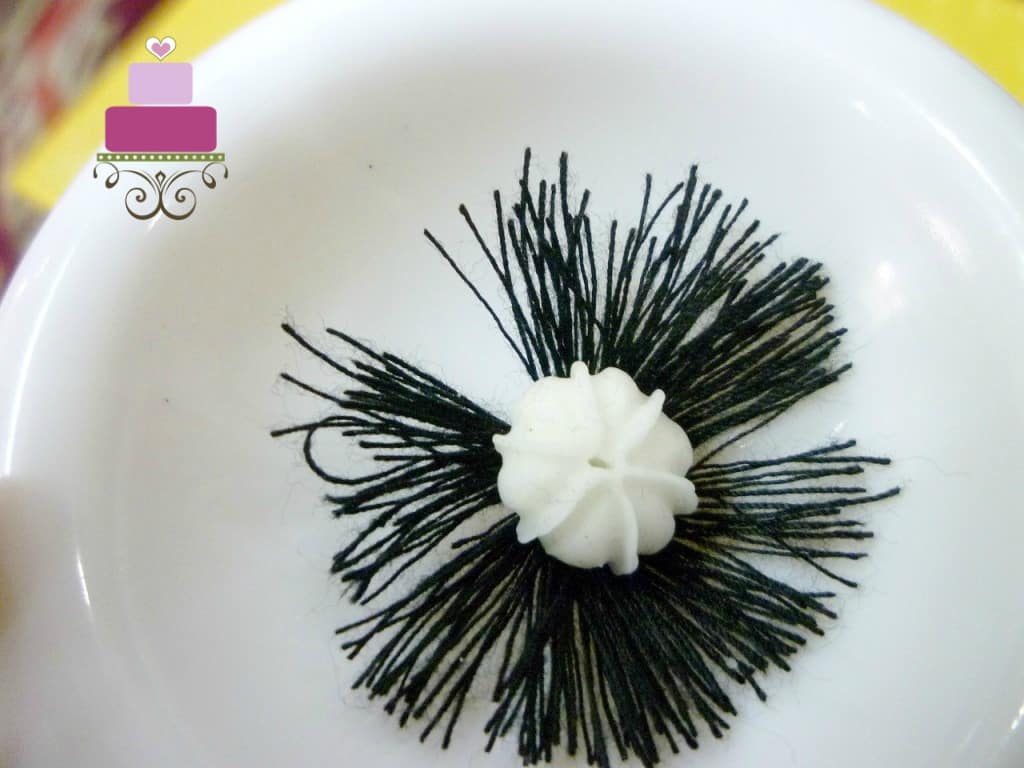
Take a small piece of white gum paste and shape it into a small marble-sized ball. Using a pair of tweezers, pinch 6 thin lines as shown.
And then brush a little edible glue on the looped end of the earlier floral wire and attach the flower center to it. Once done, set it aside to dry completely. That completes the flower center.
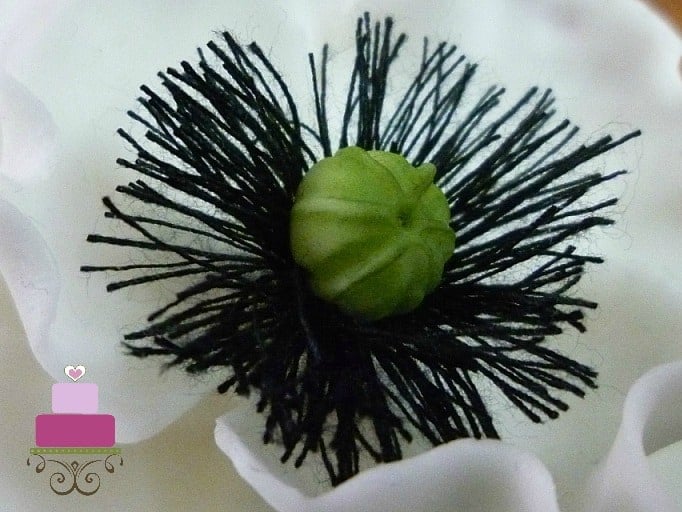
Once the gum paste has dried completely, dust it with green petal dust.
Note: Dusting after the gum paste has dried with avoid any brush marks on the gum paste (the brush bristles can leave marks if the gum paste is still soft). It will also avoid the gum paste from dislodging from the wire.
It is also important to finish the dust work before adding on any petals on the flower as this would ensure none of the green dust settles on the gum paste poppies petals.
Step 3: Form the flower petals

Once the center is done, move on to make the gum paste poppies petals. Each flower has 5 petals and therefore, you will need 5 pieces of floral wire for each flower.
Loop the ends of each of the wires with the long nose pliers. The loops help hold the wire in the gum paste more securely compared to when it's not.
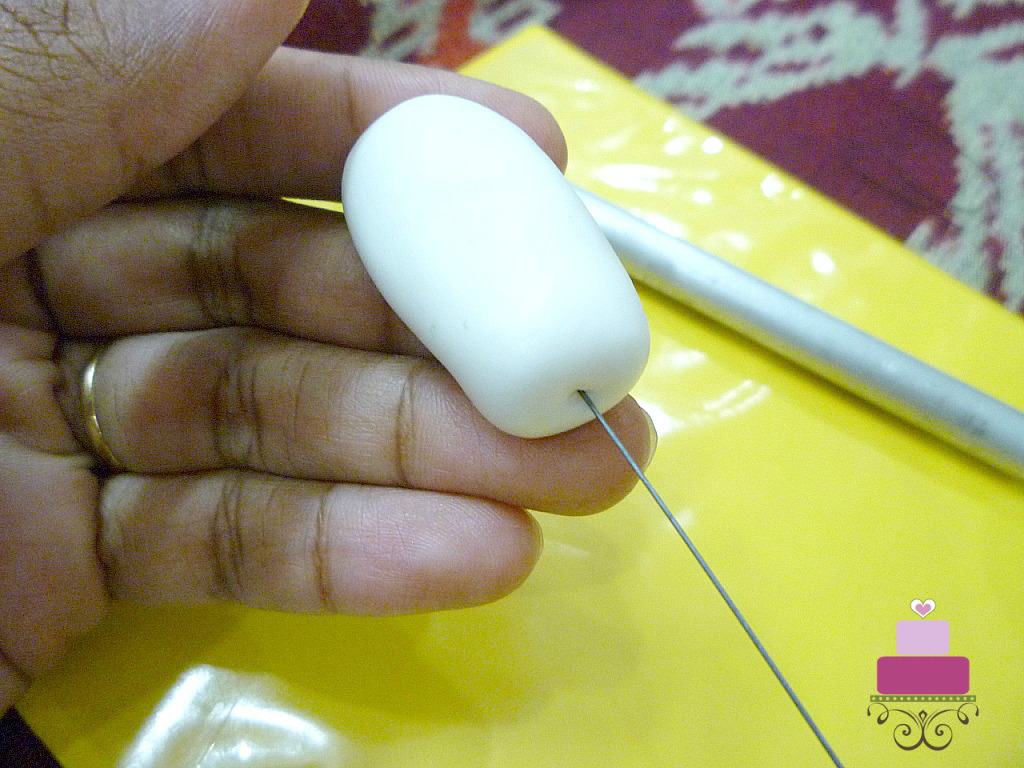
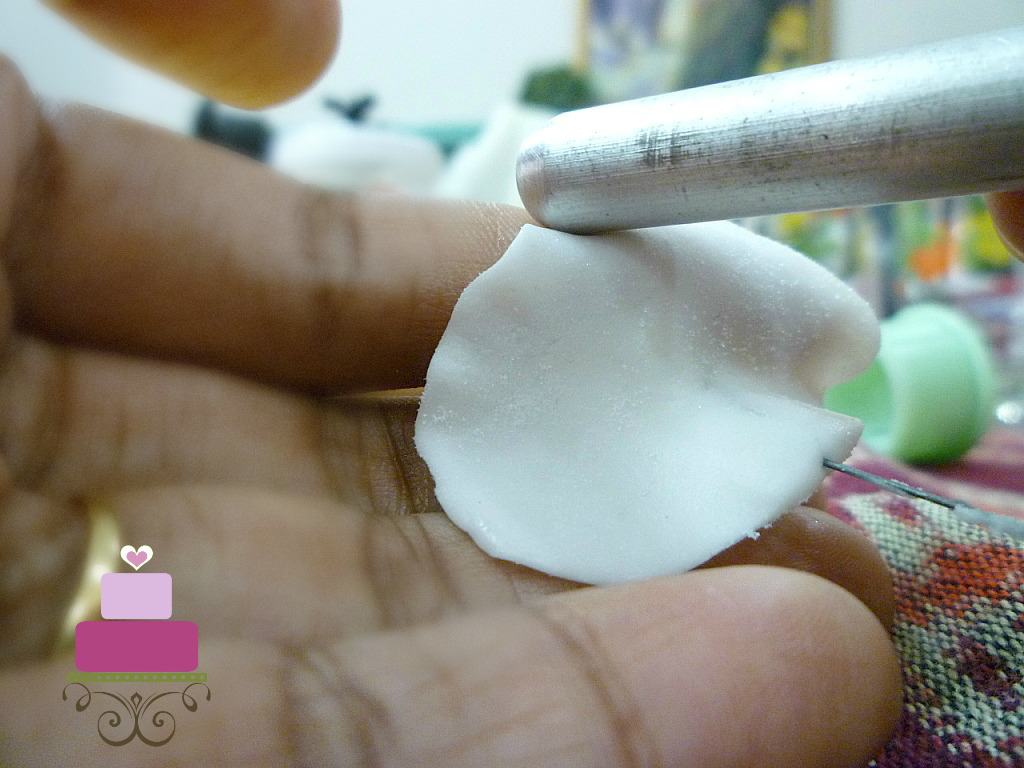
To start making the gum paste poppies petals, take a small piece of gum paste and shape it into a sausage.
Dip the looped-end of the floral wire into some edible glue and insert it into the gum paste, as shown.
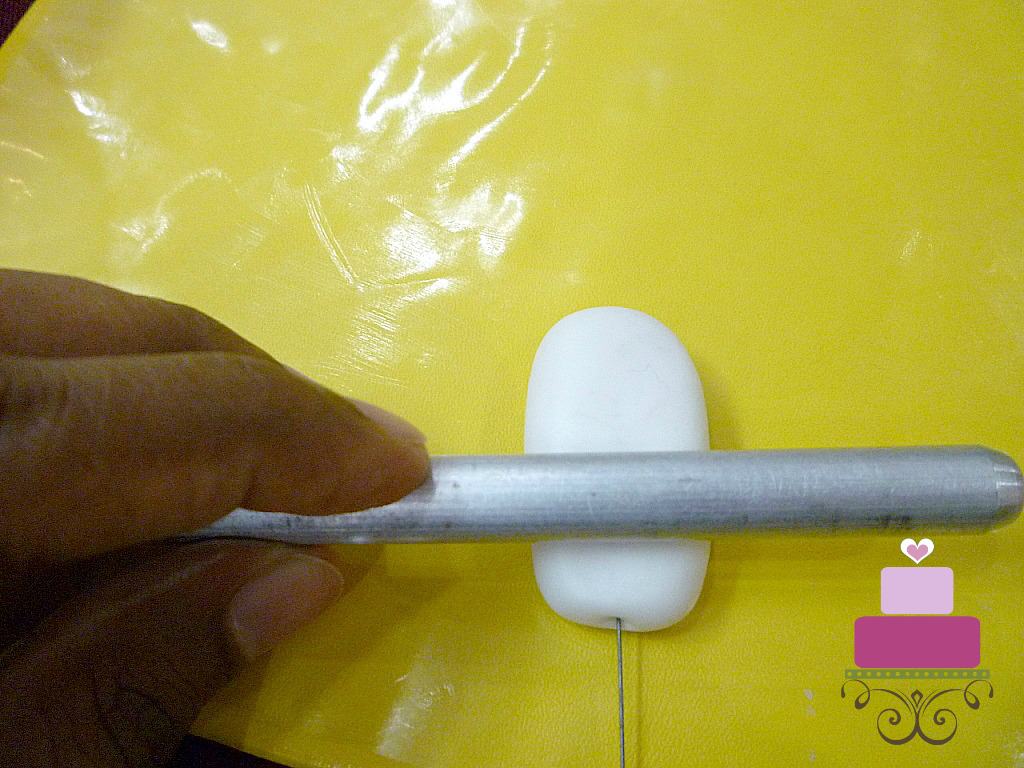
Place the gum paste onto a rolling mat and roll it thin (not too thin at this stage as too much rolling will result in the wire coming off. And there will be more rolling in the steps below, so at this stage, the gum paste need not be too thin).
Step 4: Cut the petals
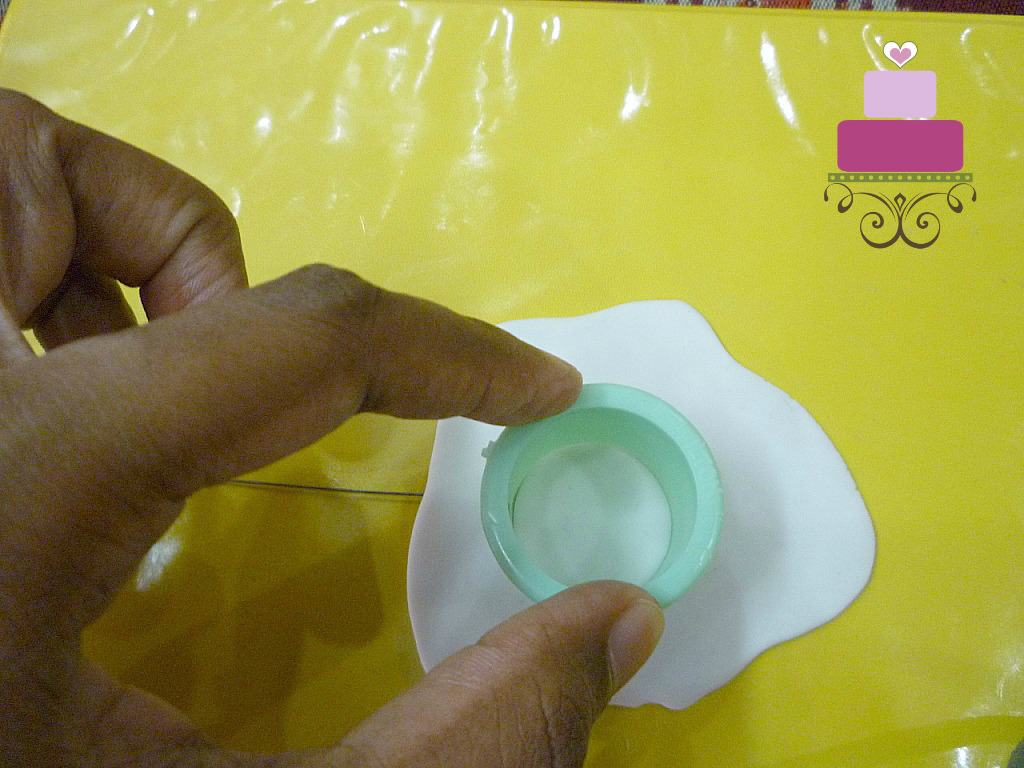
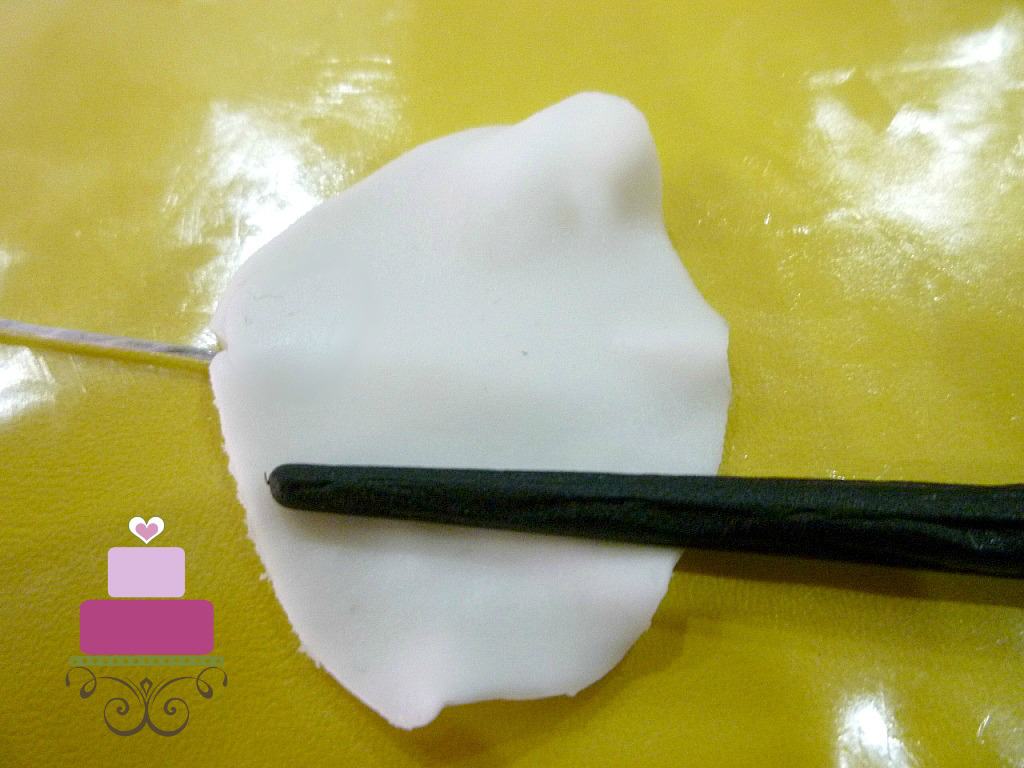
Next, place a round cutter on the rolled gum paste such that the floral wire ends somewhere in the center of the circle. And then cut the circle out.
At this stage, the wire will block the round cutter from cutting all the way through the gum paste. When removing the excess gum paste, gently and carefully pull the gum paste away at the wire.
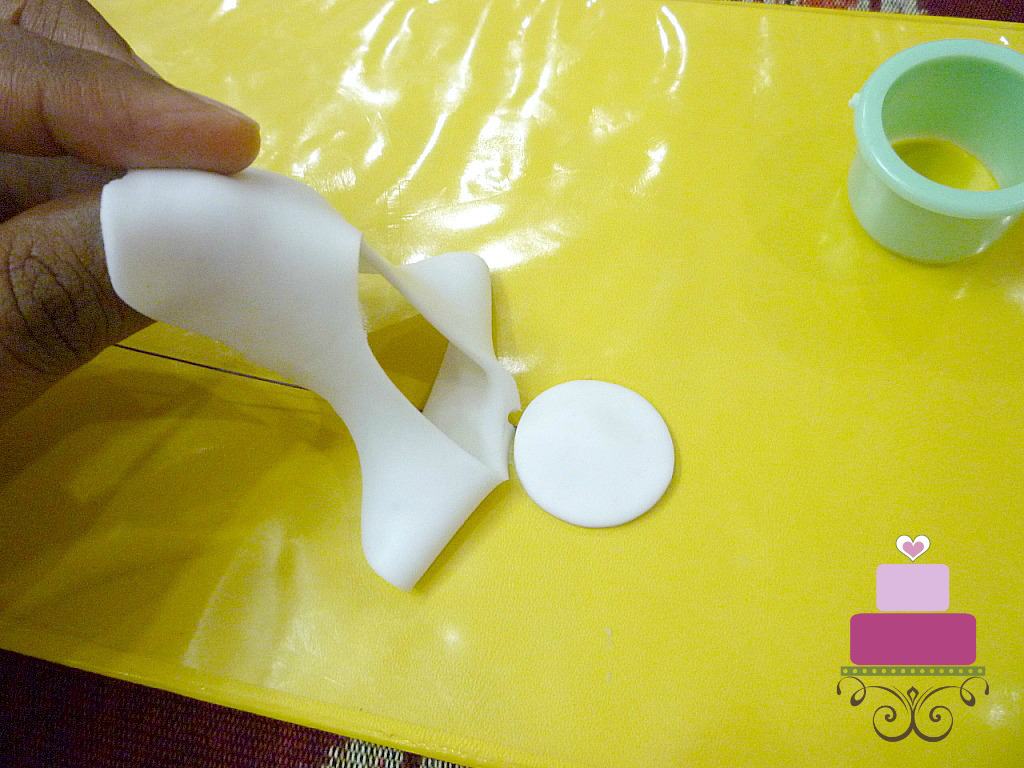
After that, roll the gum paste again. This time, roll it sideways as shown. In rolling the gum paste, make sure not to roll the center of the cutout gum paste where the floral wire has been inserted. This is to make sure the gum paste does not become too thin where the wire is or tear out through the gum paste.
Step 5: Shape the poppy petals
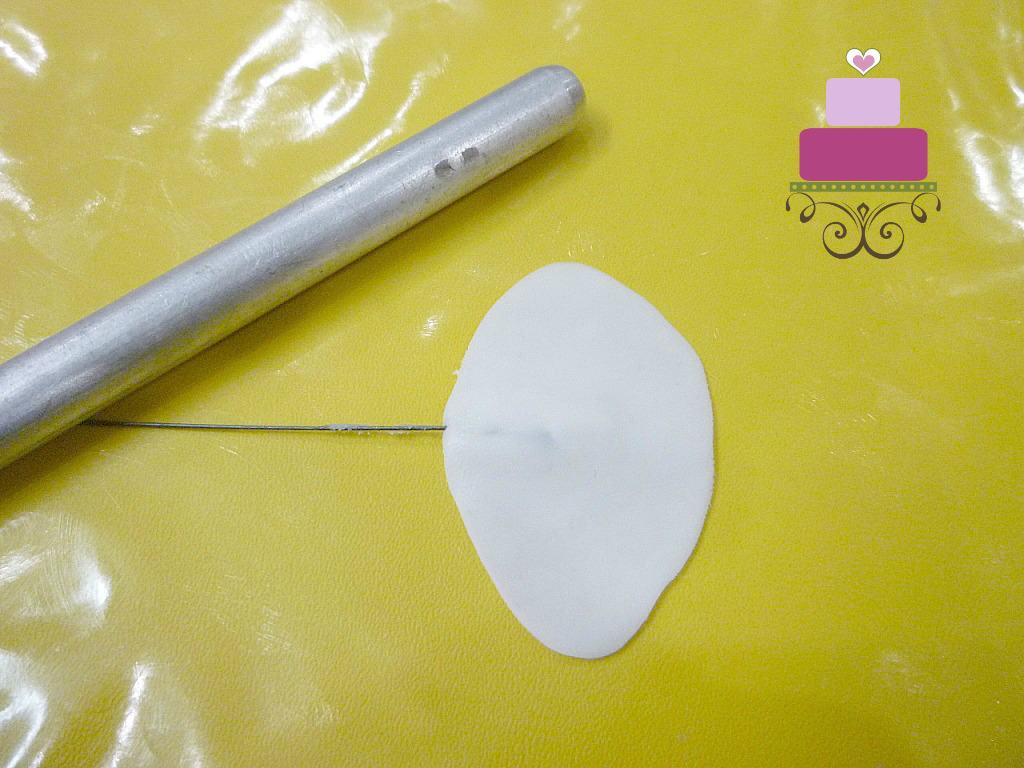
To make the petals more realistic, frill the sides of the petal with a small rolling pin against your fingers. You can also use a ball tool to thin the edges like I did for my gum paste roses here.
Next, use a veining tool and roll it lightly on the frilled petal to imprint veins onto the poppy petal.
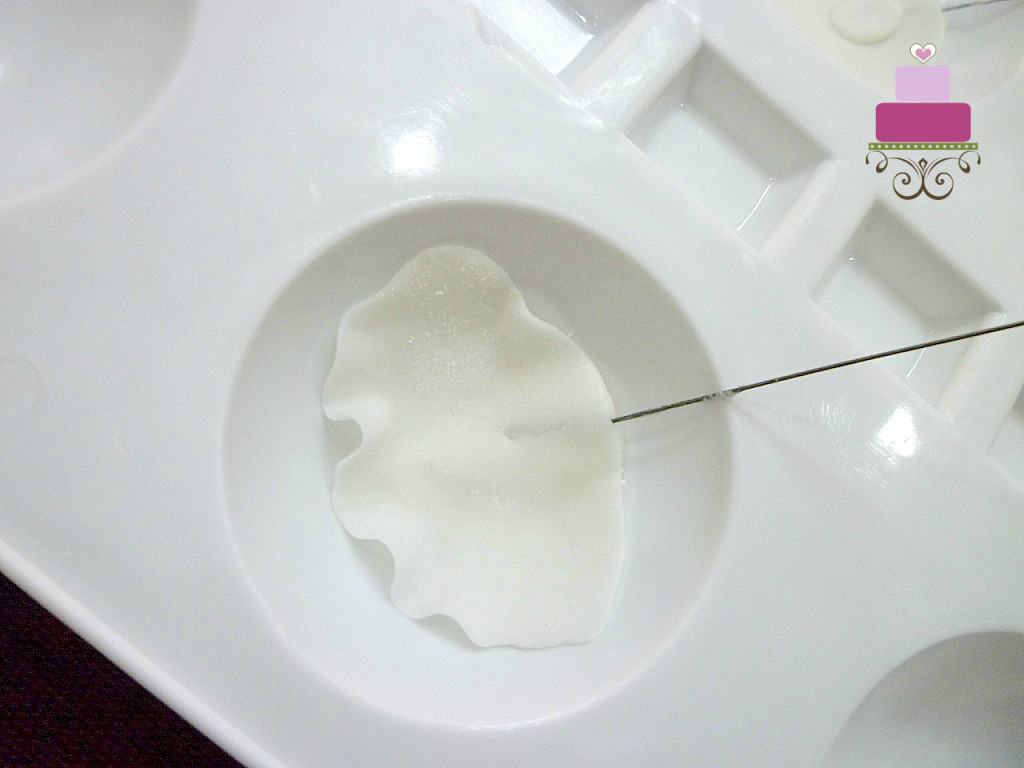
Repeat the same steps to create another small petal and 3 larger petals. And then leave all the petals to dry completely in a flower former.
Step 6: Assemble the flower
Once the petals are completely dried and set, you can assemble the poppy flower. To assemble the flower, use floral tape to secure the 2 small petals to the flower center.
And then tape the remaining 3 large petals underneath the smaller petals earlier, adjusting them as you tape to make sure they are well aligned. Since the gum paste poppies petals are individually wired, you can still do adjustments after the taping process has been completed.
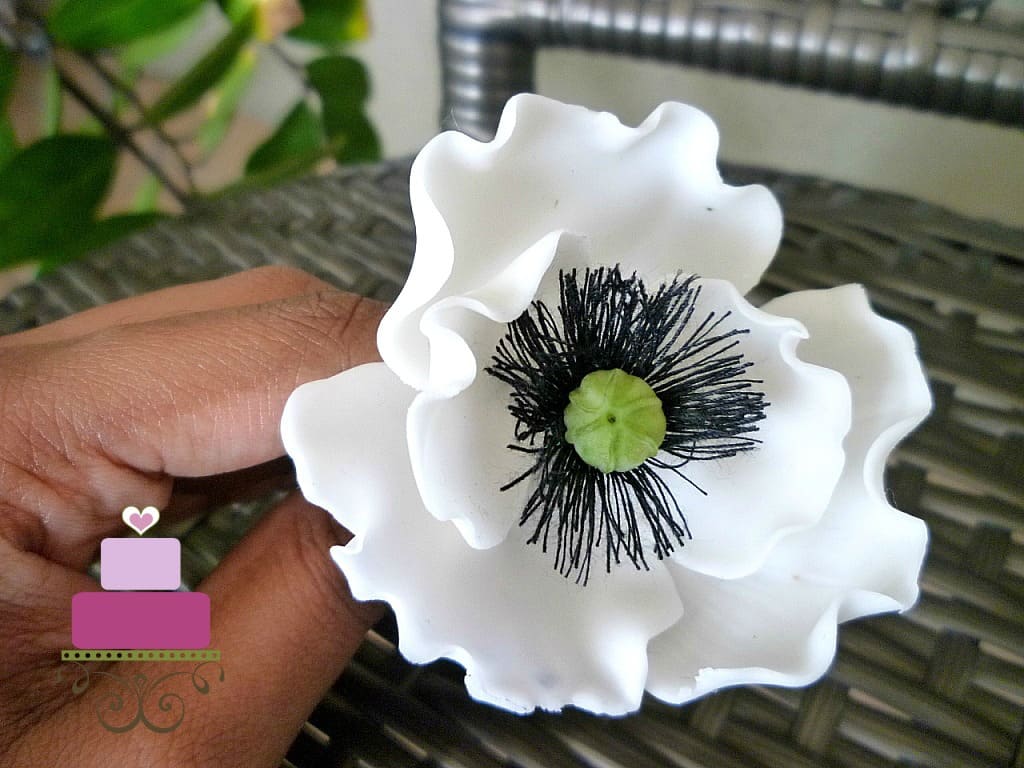
And that completes the gum paste poppies tutorial.
💡Expert tips
- Keep the gum paste scraps and any unused gum paste in a covered container to prevent it from drying.
- When rolling the gum paste, it helps to dust your work space with cornstarch. Here is a quick tutorial on how to make a DIY pouch for dusting.
- When using the flowers on cake, avoid poking the wires directly into your cake for food safety concerns. Always wrap them with plastic wrap or foil or insert into lolipop sticks. See my post here on how to attached flowers to cakes for a more comprehensive guide.

Kuka
Congratulations to your talent and skills. I really appreciate your easy way of explaining how to achieving a poppy without drama or pretentious attitude. We can see that you hv been spending time to get knowledge and passed to people. A very talented person.
Mn
Very good tutorial. The instructions are clear and simple to understand. I like the explanations given as to why this is done in that way. Easiest way to attach the wire which is very daunting to me.
Priya
Thank you 🙂 :). I am glad you find the tutorial useful.