

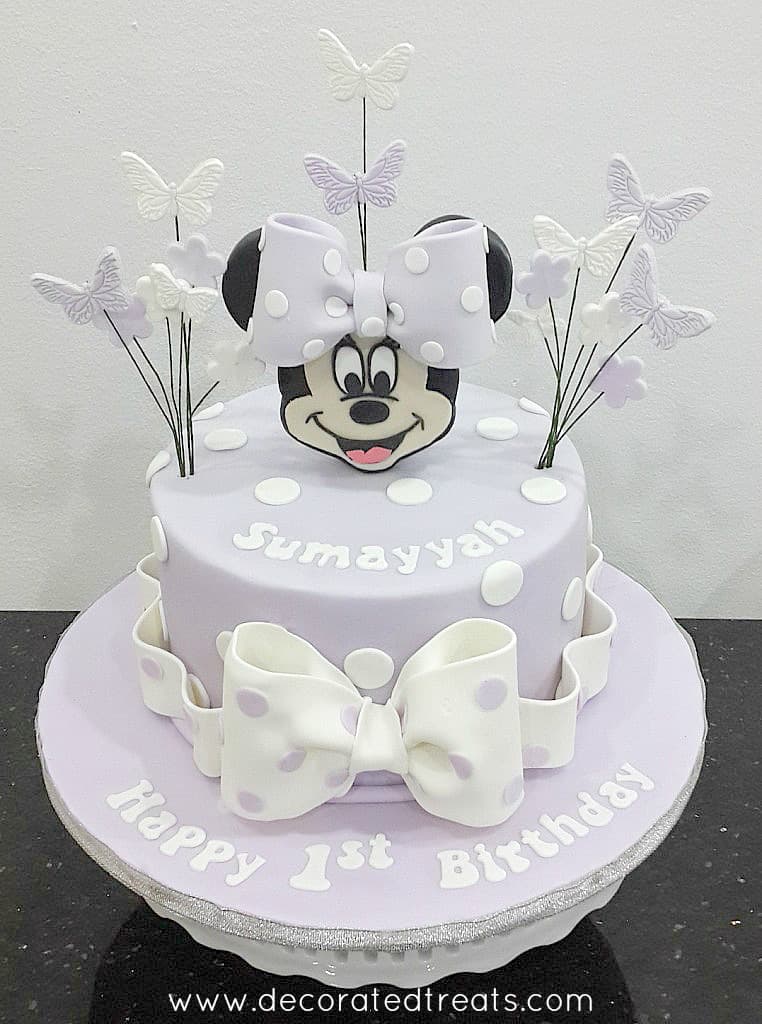
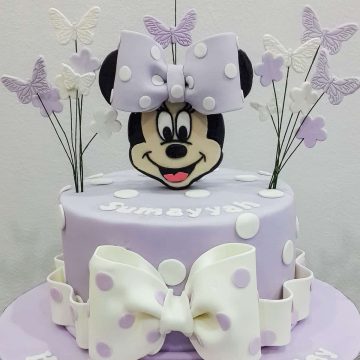
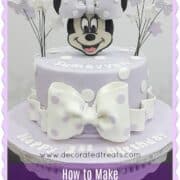
I made this cute Minnie Mouse cake for a first birthday. Its a single tier cake decorated with a Minnie head topper, lots of gum paste butterflies and 2 large polka dot bows. This makes a perfect cake for little girls!
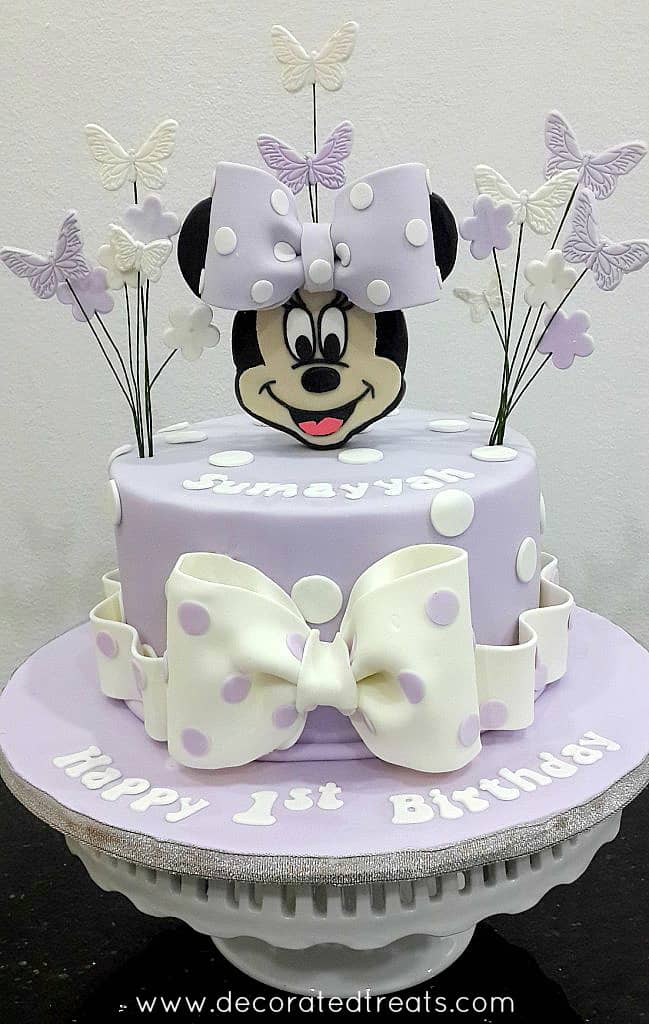
This cake is not my original design. It was a remake of an image shared with me. I made an attempt to trace the original designer of this Minnie Mouse themed cake, but when I did a search on the internet, I found not one, but MANY similar images of this cake made by many other bakers!
This polka dots purple Minnie Mouse cake design is so popular, there are so many versions of it on the internet and I totally could not trace the original designer.
So back to this purple Minnie Mouse cake that I made. It was a single layer cake. And Minnie's face topper was in styrofoam. The rest of the cake was decorated in fondant in pretty polka dots, large bows and cute butterflies.
🧾Supplies Required
- Minnie mouse face topper - The topper was handmade using styrofoam and covered in fondant. See below for details on how I made this topper.
- Cake - this is a single tier, 7 inches round cake made with my butter pound cake recipe.
- Buttercream - I used vanilla buttercream to fill the cake and crumb coat it.
- Fondant
- I used Satin Ice fondant for this project. The entire cake was in light purple fondant. I also used fondant to make the butterflies and flowers on the cake as well as in making the Minnie Mouse face topper.
- Gum paste
- Flower wire
- Butterfly cutters
- Alphabet Cutters - I used Clixstix alphabet cutters for the lettering on the cake.
- Shortening and fondant glue - I used both these mediums as the glue to attach the deco on the cake. I used fondant glue to attach both the bows. Shortening was for everything else.
👩🍳How to Make
Step 1: Make the Fondant Bow for Minnie Mouse Head
I made the Minnie Mouse cake topper and the bows in advance. These need time to set and therefore were made 2 days in advance. Once dry and set, I attached Minnie's bow to her head. I left it lying flat so that it could get attached securely to the topper.
The other bow had to wait until the rest of the cake deco was completed. Hence I simply left it aside after making, until ready for use.
Step 2: Make the Minnie Mouse Cake Topper
Like I mentioned earlier, the topper was made out of styrofoam. I got Minnie Mouse's face image from the internet. The image was downloaded and scaled to the size I wanted before being printed it out. Click here to learn how to resize images for cake decorating.
I then cut it along its outline and used the template to cut my styrofoam. I used a battery operated foam cutter. Next, I rolled black fondant into a thin sheet and used the paper template to make 2 cutouts. I attached both on each side of the styrofoam. For the sides, I cut out a long fondant strip. The strip width was the same as the thickness of the styrofoam topper. I attached it all around the sides and smoothed the edges.
For the face, I used Ivory fondant and used my paper template to cut out the face. And I repeated the same process for the rest of the facial features.
Finally, I attached the purple bow on her head. I left the topper lying flat to allow the bow to dry and secure in place.
As for the bows, to make the polka dot design, I cut out the gum paste for the bow. And then attached the purple polka dots with fondant glue before I shaped the bow. Follow the tutorial here to learn how to make the bow. Just increase the width of each loop when you cut your rolled gum paste to increase the size of your bow.
Step 3: Assemble the Cake
The next step for the purple Minnie Mouse cake was the flowers and butterflies. I had cutters for these and attached the fondant cutouts to floral wires. I made these in both purple and white.
To assemble this sweet purple themed cake, I did all the usual stuff. I layered, filled, and crumb coated the cake. And then I covered the cake with purple fondant. Next, I cut out the lettering and attached them to the cake and cake board with shortening.
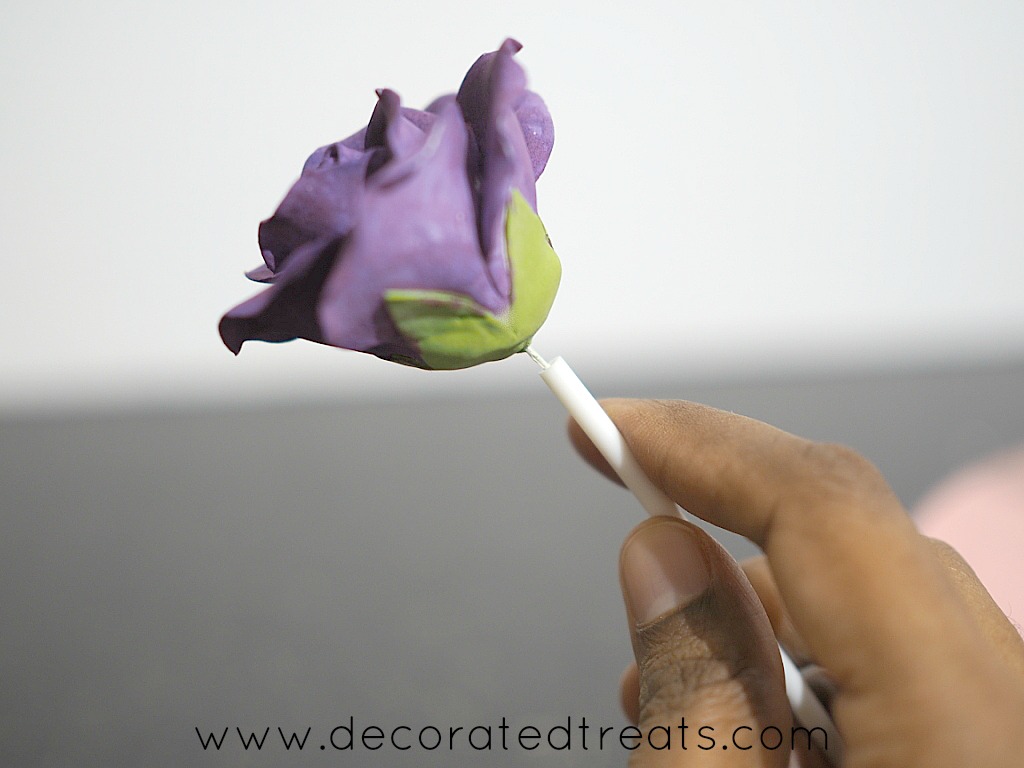
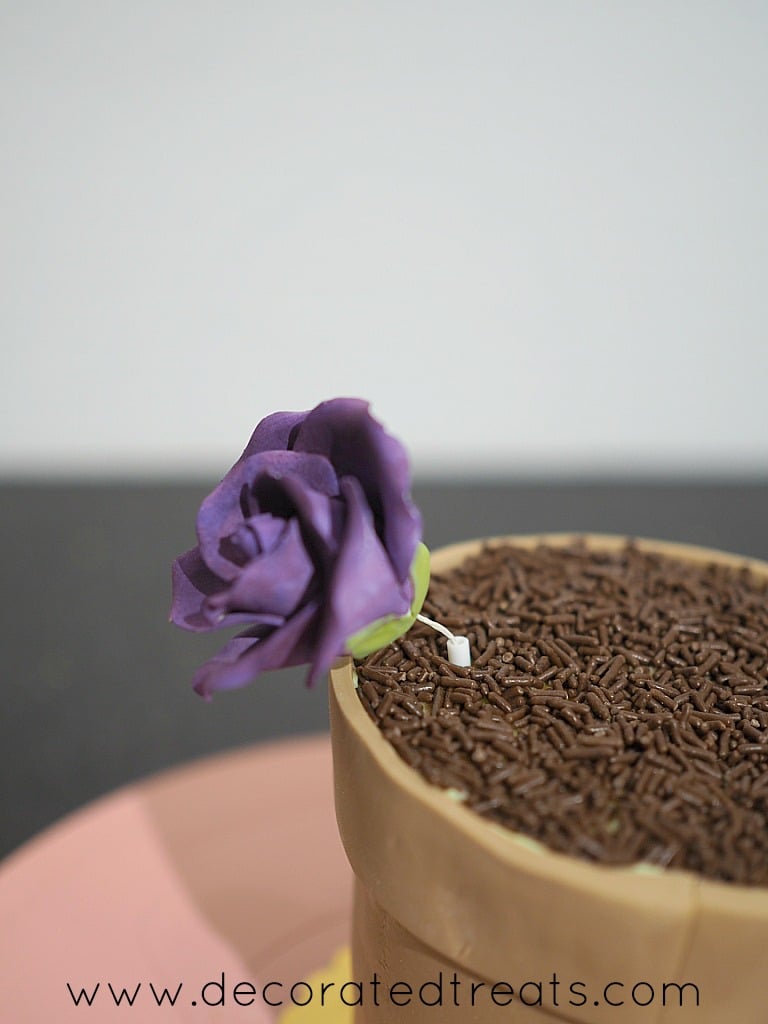
To attach the Minnie Mouse topper, I inserted 2 wires to the bottom of Minnie's face and then inserted the wires into 2 lollipop sticks. I then poked the topper with lollipop sticks into the cake. The lollipop sticks help prevent direct contact of the wire with the cake. See the image below from my mini flower pot cake tutorial on how I inserted the floral wire into a lollipop stick before poking it into my cake.
After Minnie Mouse's face, I attached the purple and white flowers and butterflies to the cake, also with lollipop sticks.
This was followed by the white polka dots all over the cake in random order.
Once the polka dots were done, I attached a thin rolled strip of purple border for the cake.
And then I attached the side ribbons before putting on the bow. I had to support it by gently tying a ribbon around the cake to hold it in place until the glue dried and the bow was secure in place.
❤️More Cake Designs You Will Love


Do you like this tutorial? Please leave a 5-star ⭐⭐⭐⭐⭐rating in the recipe card below and consider a review further down this page. I would love to hear from you. Thank you!
📖Recipe
Minnie Mouse Cake
Equipment
- Flower wire and lollipop sticks
- Butterfly cutters and flower cutters
- Clixstix Alphabet Cutters
- Shortening
For best results, use the metrics measurements. US customary measurements have not been tested and are only meant for guide.
Ingredients
Cake
- 360 g self-raising flour
- 360 g granulated sugar
- 360 g butter
- 6 eggs
- 90 ml milk
- ¾ teaspoon baking powder
- ¼ teaspoon salt
- 1 teaspoon vanilla extract
Frosting and Decoration
- Buttercream
- Fondant
- Gum Paste
Instructions
Making the fondant bow for Minnie Mouse head
- Make the Minnie Mouse cake topper and the bows in advance. These need time to set and therefore are best made 2 days in advance. Once dry and set, attach Minnie's bow to her head. Leave it lying flat so that it could get attached securely to the topper.
- The other bow needs to wait until the rest of the cake decoration is completed. Hence simply leave it aside after making, until ready for use.
Minnie Mouse head cake topper
- Draw Minnie Mouse face on a piece of paper. Alternative, download an image from the internet and resize it to fit the cake.
- Cut the paper template and place in on a piece of styrofoam block which is about 1cm thick. To hold the template in place, use a pin or tape.
- Cut the styrofoam (with a styrofoam cutter) following the outline of the paper template.
- Once cut, remove the paper template.
- Next, roll black fondant thin and used the paper template to make 2 Minnie Mouse head cutouts. Attach both on each side of the styrofoam. Use fondant glue to attach the pieces.
- For the sides of the styrofoam, cut out a long fondant strip. The width of the strip should be the same as the thickness of the styrofoam topper. Attach it all around the sides with glue and smooth the edges.
- For the face features, place the paper template on thinly rolled ivory fondant and cut it out. Repeat the same process for all the facial features.
- Finally, attach the purple bow on her head. Let the topper lie flat to allow the bow to dry and secure in place.
The polka dots on the bow
- To make the polka dots design on the bows, cut out the gum paste for the bow. And then attach the purple polka dots with fondant glue before shaping the bow. Follow the tutorial here to learn how to make the bow. Just increase the width of each loop when cutting the rolled gum paste to increase the size of the bow.
Assembling the purple Minnie Mouse themed cake
- The next step for the purple Minnie Mouse cake is the flowers and the butterflies. Use the butterfly and flower cutters to make these and attach them to floral wires. Make these in both purple and white.
Assembling the cake
- Once the cake layers are baked and have cooled down completely, level the tops. Fill the cake layers with buttercream, stack and crumb coat them with a thin layer of buttercream.
- Cover the cake with purple fondant.
- For the lettering, cut them out of gum paste with the alphabet cutters and attach to the cake board with shortening.
- To attach the Minnie Mouse topper to the cake, insert 2 wires to the bottom of Minnie's face and then insert the wires into 2 lollipop sticks. Poke the topper with lollipop sticks into the cake. The lollipop sticks help prevent direct contact of the wire with the cake.
- After Minnie Mouse's face topper, attach the purple and white flowers and butterflies to the cake, also with lollipop sticks.
- Next, cut out white polka dots and attach them all over the cake in random order.
- Once the polka dots are done, attach a thin rolled strip of purple border for the cake.
- And then attach the side gum paste bow ribbons before putting on the bow. You may need to support the bow by holding it in place while waiting for the glue to dry. You can do this by tying a ribbon gently around the cake and the bow.
Leave a Reply