

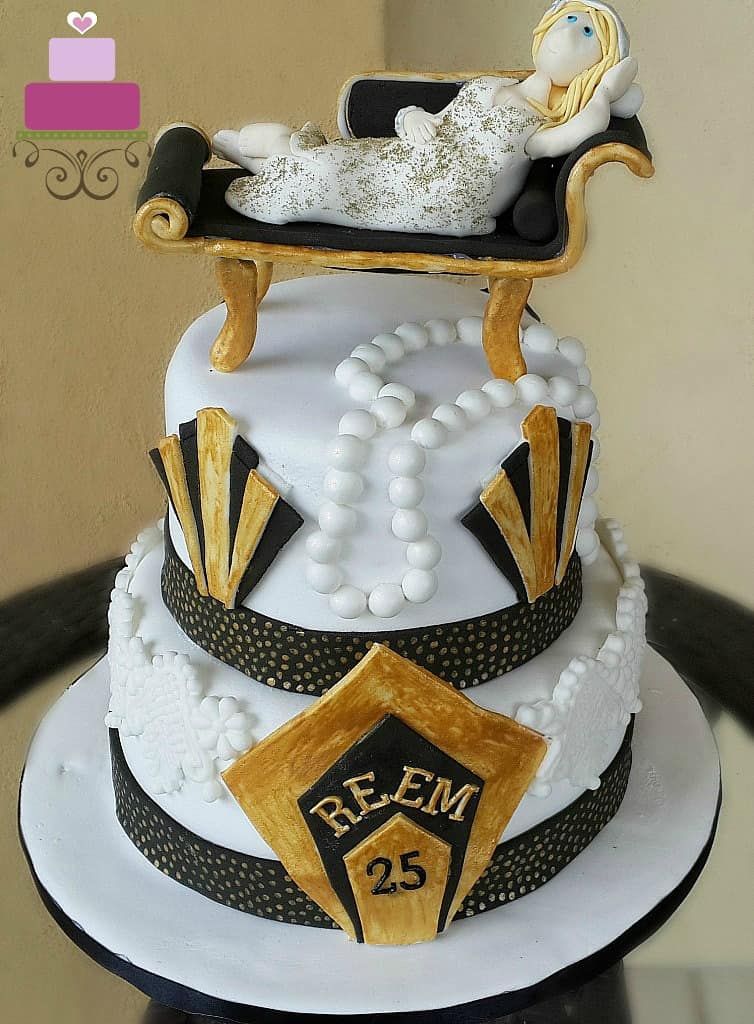
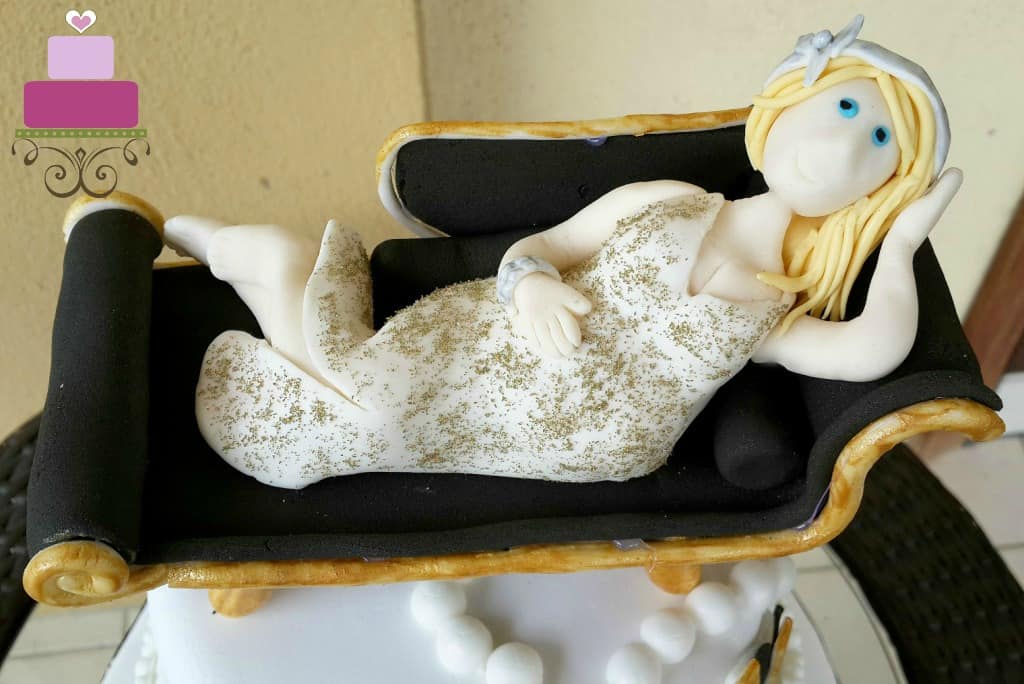
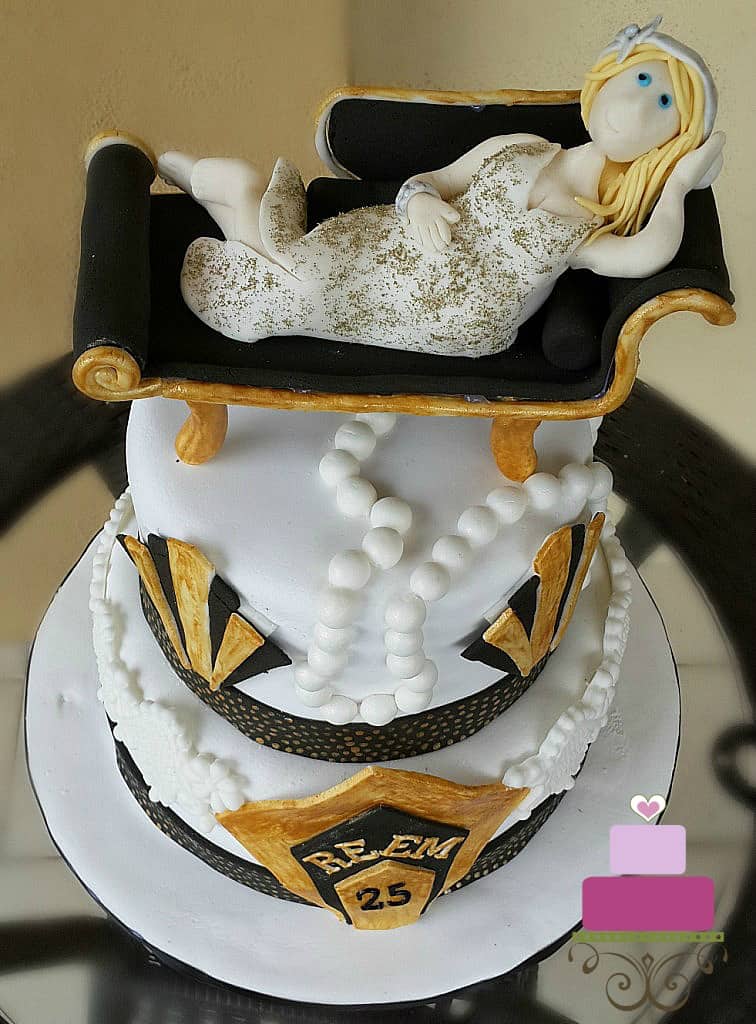
I made this the Great Gatsby birthday cake for a 25th birthday. The cake was ordered by her family. Besides wanting a cake along the theme of the Great Gatsby, they also wanted the birthday girl figurine on a bench as the cake topper. And since the birthday girl was pregnant at that time, they requested for the figurine on the cake to show the baby bump too.
This Great Gatsby birthday cake is pretty straightforward to make. This Craftsy class I took on how to make fondant figurines was absolutely helpful in making the topper on the cake. And it has also helped me greatly in making my human figurines for my other cakes too.
If you like this cake, check out this doll birthday cake, castle birthday cake, Hello Kitty birthday cake design and Smurfs birthday cake.
🧾Supplies Required
- Cake – this was a 2 tier cake, measuring 6 inches and 9 inches in diameter. Each tier was approximately 4 inches high. I used my butter pound cake recipe for the cakes.
- Buttercream – I used buttercream to fill the cake layers as well as to crumb coat the cake.
- Fondant – I used Satin Ice in white and black.
- Gum paste – I used gum paste to make the human topper as well as the lettering on the cake.
- Edible gold paint – I used a store-bought ready to use gold paint. Unfortunately, the paint was not very easy to use. It was almost impossible to get a smooth coating on fondant.
- Edible glitter – I used this dust on the human topper's dress. I attached this to the dress with a medium-sized cake decorating brush and fondant glue.
- Fondant glue - I used this to attach the glitter dust onto the birthday girl human topper's dress.
- Pearls silicone mold – I used this mold to make the pearl necklace on the top tier of the cake.
- Marvelous Molds Gloria lace mold – I used this mold to make the lace pattern on the second tier of the cake.
- Fondant extruder tool – This tool was used for the trimmings of the bench topper.
- FMM Block Letters cutter – Both the birthday girl’s name and age were cut using this alphabet cutter.
- Fondant modeling tools – these were used for shaping the human figure.
- Pizza cutting wheel – I used this tool as a general cutting tool. It was particularly used for cutting out the black and gold designs on the sides of the cake.
- Floral wire – I used floral wire gauge 16 for the legs of the bench topper. I wired them to make sure the topper would stay in place on the cake when transporting and moving the cake.
- Cake decorating brush – I used this brush to add glitter dust onto the human figure’s dress. There is no specific requirement on the size of the brush, so long as it could do the work without much mess and without taking too much time.
- Shortening – This was the ‘glue’ for this cake project.
- Lollipop sticks – Since the bench topper was wired, to make sure the wire does not get into direct contact with the cake, I inserted the wires into lollipop sticks before poking them into the cake.
👩🍳How to Make
Step 1: Make the Human Figurine Cake Topper
I started with the cake toppers first which were the bench and the human figurine. The figure was made using gum paste for the most parts except for the hair and head band which were made using fondant. As for the dress, I sprinkled it with glitter dust for a ‘party dress’ effect.
I made the figure in a lying down position with the head propped up against the arm of the bench. In making it, I used the techniques I learned in this Craftsy online class. Although the class did not cover lying down positions, the techniques of shaping a human figurine body were very useful.
Step 2: Make the Bench Topper
I made the bench topper in fondant. To make sure it dried hard and firm, I added CMC to it. I used white and black fondant. For the white, once it was set, I painted it gold. The legs of the bench were inserted with wires.
To make there was no direct contact of the wire with the cake, I inserted the wires into lollipop sticks before poking them into the cake.
Step 3: Prepare the Cake
Closer to the event date, I baked the cakes, leveled, and filled each tier with buttercream. I gave both tiers a smooth thin coat of buttercream before covering them in white fondant. And then I stacked them up.
Step 4: Add the Borders
Next, I did the borders for the Great Gatsby cake. I used my pizza cutting wheel and cut out 2 long black strips. I attached it around both cake tiers. Using a medium-sized paintbrush and my edible gold paint, I painted the tiny gold dots all around the border strips.
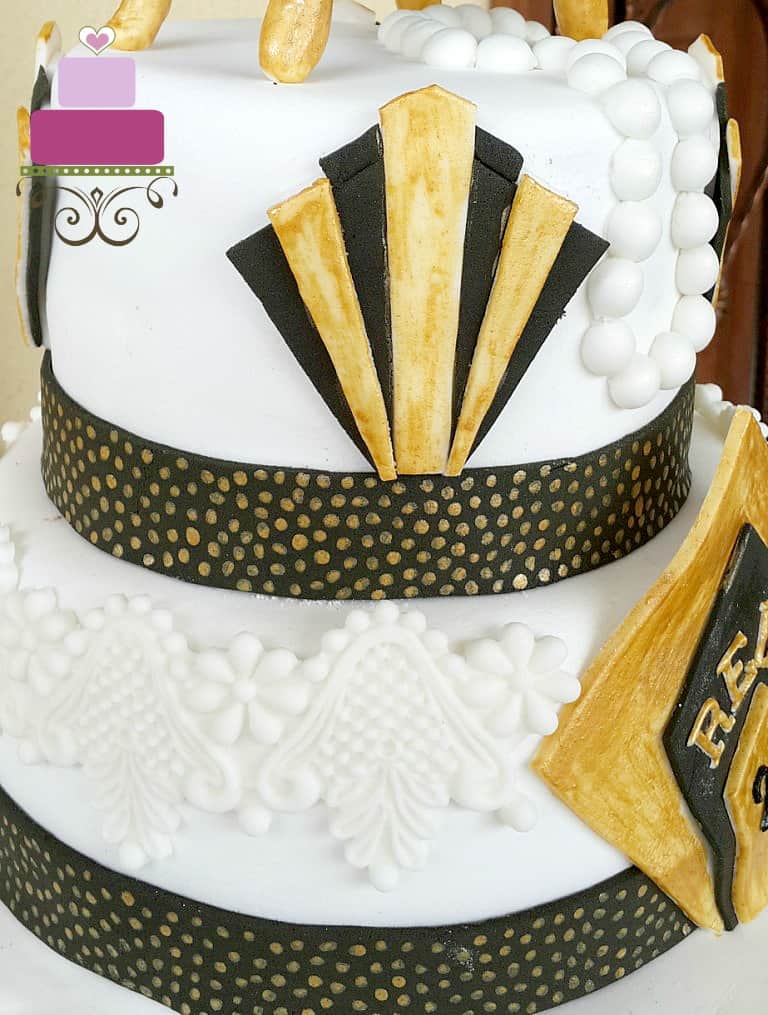
After that, I went on to complete the gold and black deco on the sides of the cake. For the top tier, to make sure the cutouts were all in the same size all around the tier, I drew a paper template first and used it as a guide to cut out the pieces. I used black and white fondant for these but later painted the white portions in gold.
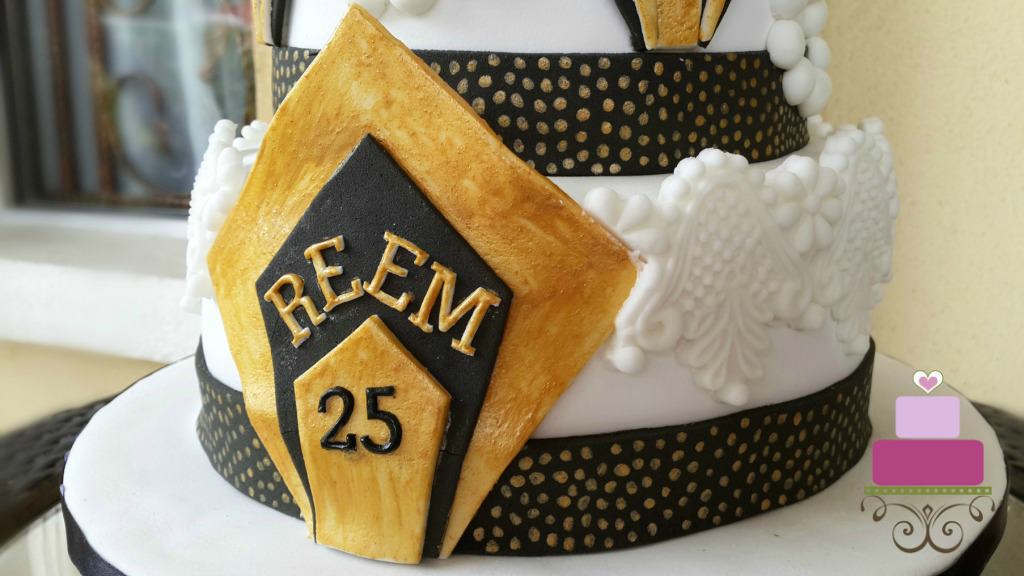
Step 5: Add the Black and Gold Plaque to the Great Gatsby Cake
Similarly, for the black and gold plaque that was placed on the bottom tier, I drew it on a paper as a template first before cutting it in black and white and subsequently painting the white portions gold.
I added the birthday girl’s name and age on this plaque. These letters and numbers were cut using the FMM block letters Tappit cutter. I used gum paste for these.
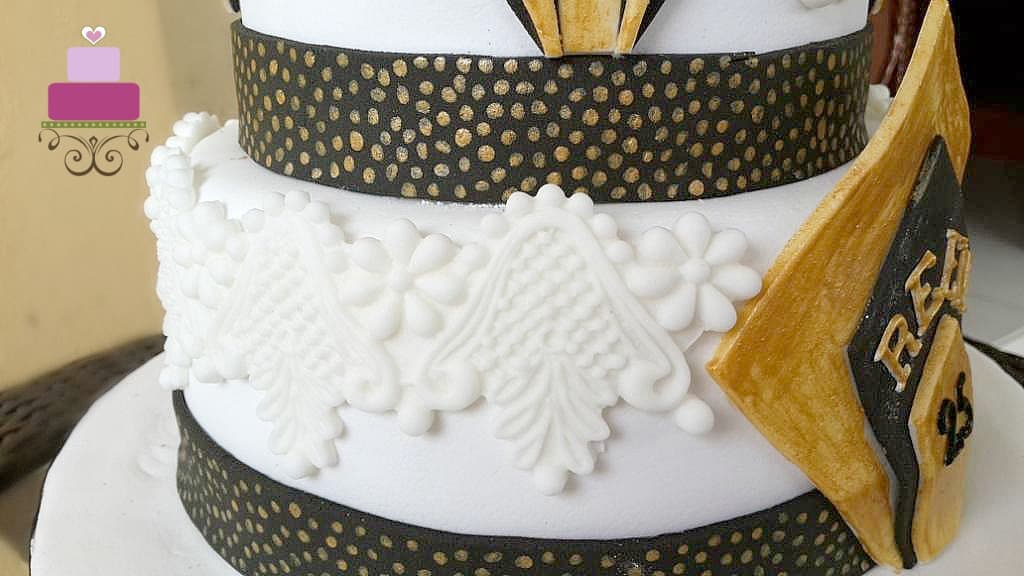
Next was the lace all around the top edges of the bottom tier. These were made using Marvelous Molds Gloria silicone mold. I used fondant to make these pretty lace patterns and they were attached to the cake with shortening.
Step 6: Make and Attach the Pearl Necklace
And finally, for the pearl necklace on the cake, I used the pearl silicon mold to shaped the beads necklace. And I attached it to the cake with some shortening. The last item to go on the cake was the cake topper.
And that's that. The Great Gatsby birthday cake.
Happy Decorating 🙂


Leave a Reply