

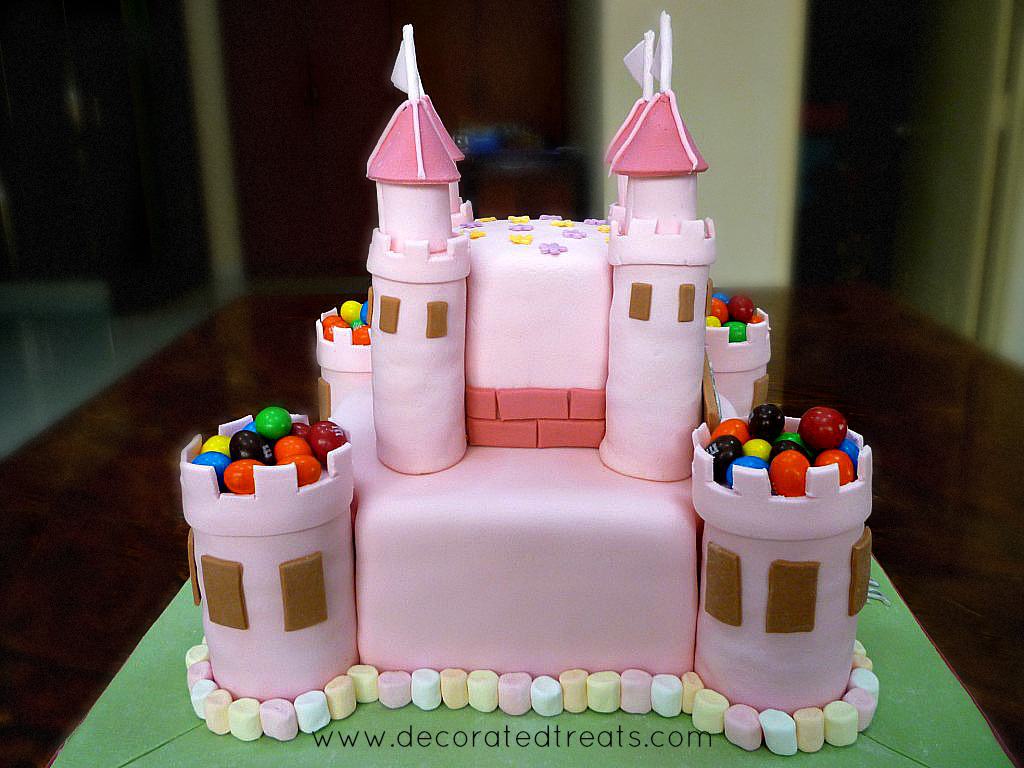
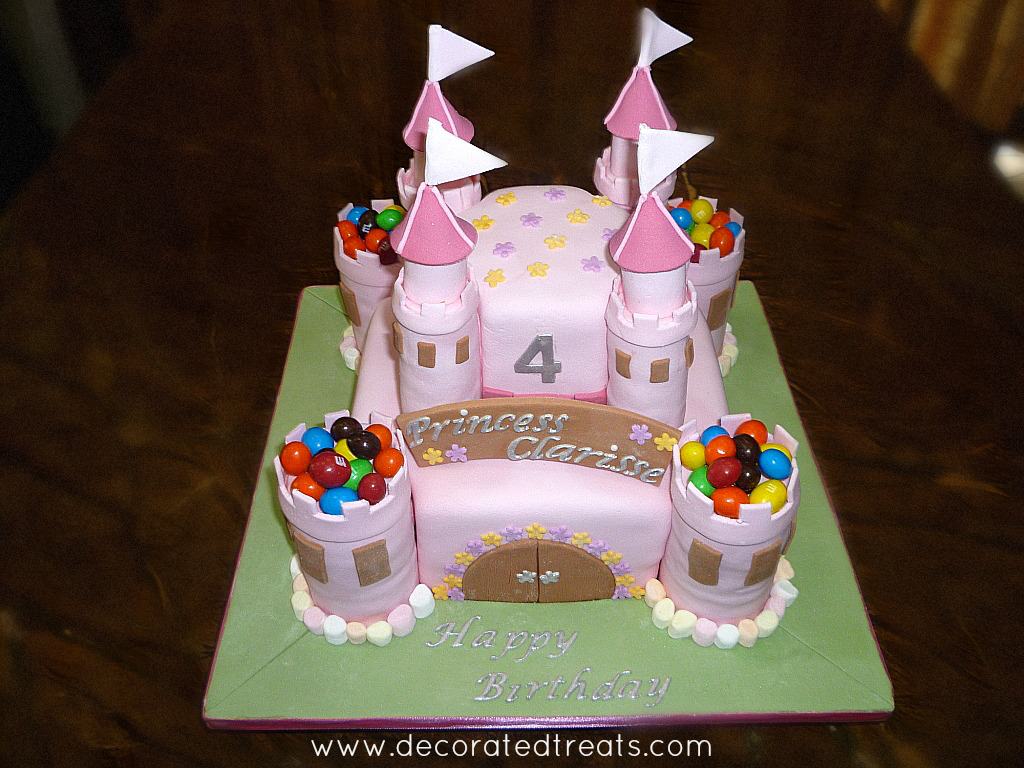
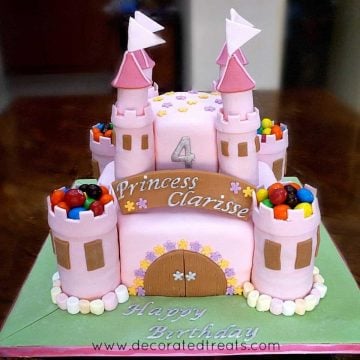
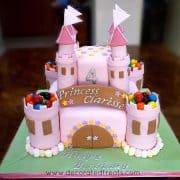
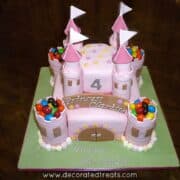
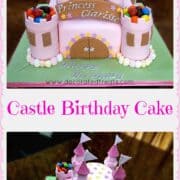
This 3D pink castle birthday cake is a dream come true for little girls! It is a 2-tier square cake carved and shaped into a castle. The cake is covered in fondant, decorated with marshmallows and has M&M filled turrets for a truly fun birthday cake.

And if you are a fan of castle cakes and all things princesses, do check this buttercream castle cake, twins princess castle cake and Belle cake design. I also have 2 designs for The Little Mermaid themed cakes - Ariel the Little Mermaid cake and Little Mermaid birthday cake.
Note: This is an intermediate cake decorating tutorial and some basic knowledge about working with fondant is required.
Jump to:
❤️Why You Will Love This Tutorial
- You get to learn how to make a 2 tier castle cake.
- The cake makes a great birthday cake design for little girls.
- You can save cost by making a 3D cake on your own.
- You get to customize the design to suit your liking.
📋Supplies Required
- Butter pound cake - 4 layers of 8 inch square cakes (each layer measuring approximately 2 inches high).
- Buttercream - To fill the cake layers as well as to crumb coat the top and sides before covering with fondant.
- Fondant - To cover the cake as well as to make the decorations. You can make the fondant on your own from scratch or use marshmallows to make marshmallow fondant. Alternatively, you can also use store bought fondant.
- CMC powder - added to fondant when making 3D decorations on the cake. It helps fondant to dry firm and hard, holding the decorations in shape.
- Mini marshmallows and M&M candies - for the decoration.
- Food coloring in pink, brown, green, purple, and yellow - to tint the fondant.
- Flower plunger cutters
- to cut the flowers around the door to the castle as well as on top of the top tier.
- Round cutters
- Fondant glue and shortening - these act as glue to attach fondant decorations.
- Hot glue - to attach the ribbon around the cake board.
- FMM letters and number cutters -
- Silver edible dust
- Pizza cutter and sugarcraft knife - to cut fondant.
- Cake decorating brush - should be food safe.
- Needle scriber tool - to mark the wood grain lines on the castle door.
- Toothpicks - to hold the fondant flags on the castle.
- Satin ribbon
👩🍳How to Make
Step 1: Bake the Cakes and Make the Buttercream
Bake 4 layers of 8 inch square cakes. You will be using 2 layers for the bottom tier and the remaining 2 layers for the top tier and the towers. Cool the cakes completely before decorating.
In the meantime, make the buttercream.
Step 2: Carve the Castle Cake
Level all the four cake layers. Stack two of the cake layers with buttercream frosting. Use a round cutter to cut off the corners of the cake to give space for the side towers. Use the same round cutter to cut the cake circles to make the towers for this tier.
Cut the 3rd cake layer into half (to make two rectangle pieces measuring 8 inches by 4 inches each). Cut the first rectangle into 2 (to make 2 pieces of 4 inches by 4 inches square layers) and stack both with some buttercream. This will make the second tier of the castle cake. Similar to the bottom tier, cut out the corners with round cutters to give space for the cake towers. Use smaller round cutters compared to the bottom tier earlier and use the same cutter to cut out the towers for this tier.
Use the remaining cake to cut out circles for the towers. Each tower is made up of 3 layers of cake. There are 4 large towers (for the bottom tier) and 4 small towers (for the top tier). Stack the layers with buttercream.
Step 3: Cover the Cake with Fondant
Crumb coat both the bottom and top cake tiers with buttercream and cover them with pink fondant. Do it separately for each tier.
Also crumb coat the towers and cover them with fondant.
Note: Refrigerating the stacked tower cakes will make it easier to cover them fondant as they will be firmer. Also, poking a long skewer in the center of each tower to hold the layers in place as you cover them with fondant also helps. Remove after covering.
Step 4: Attach and Decorate the Towers
Add some CMC into pink fondant. Knead well. Roll and cut long strips of pink fondant for the battlement. Attach to the towers with fondant glue.
Next, attach the towers to the cake, also with fondant glue.
For the top tier, before attaching the towers, cut and attach 2 rows of dark pink fondant bricks (with a sugar craft knife or pizza cutter) all around the base of the cake.
Top the bottom tier towers with M&M candies.
For the top tier towers, make another tier of short towers and cone-shaped roof with flags. These towers are made of fondant and hollow. To make them, add some CMC to pink fondant. Cut rectangle pieces of fondant and wrap them around a small rolling pin (or any other long item) to form the hollow towers. Attach the joints with fondant glue. Once the fondant is fairly set, slide them out of the rolling pin and attach to the cake with glue.
To make the cones, cut out round pieces of fondant and then cut each into half circles. Use one piece of the semi-circle to form one cone. Attach the ends with fondant glue. To hide the joints, roll thin strips of fondant and place four lines on each cone as a design, including one on the joining line to hide it. Attach to the towers with fondant glue.
Note: CMC helps the fondant to dry and set firm and is able to hold 3D shapes well.
Step 5: Make and Attach the Flags
Cut triangle pieces of fondant and wrap one side of the flags to a toothpick each. Let the flags set completely before inserting them into the cones.
Step 6: Cover the Cake Board
Brush the cake board with shortening and attach the green fondant to it. For easy covering, cut the fondant into 4 pieces for each side of the cake and attach it separately.
Step 7: Attach the Cake Wordings
Use FMM Sugarcraft cutters and very thinly rolled white gum paste.
Note: The thinner you roll the gum paste, the easier it is to cut with the cutters. See my tutorial on how to use the cutters.
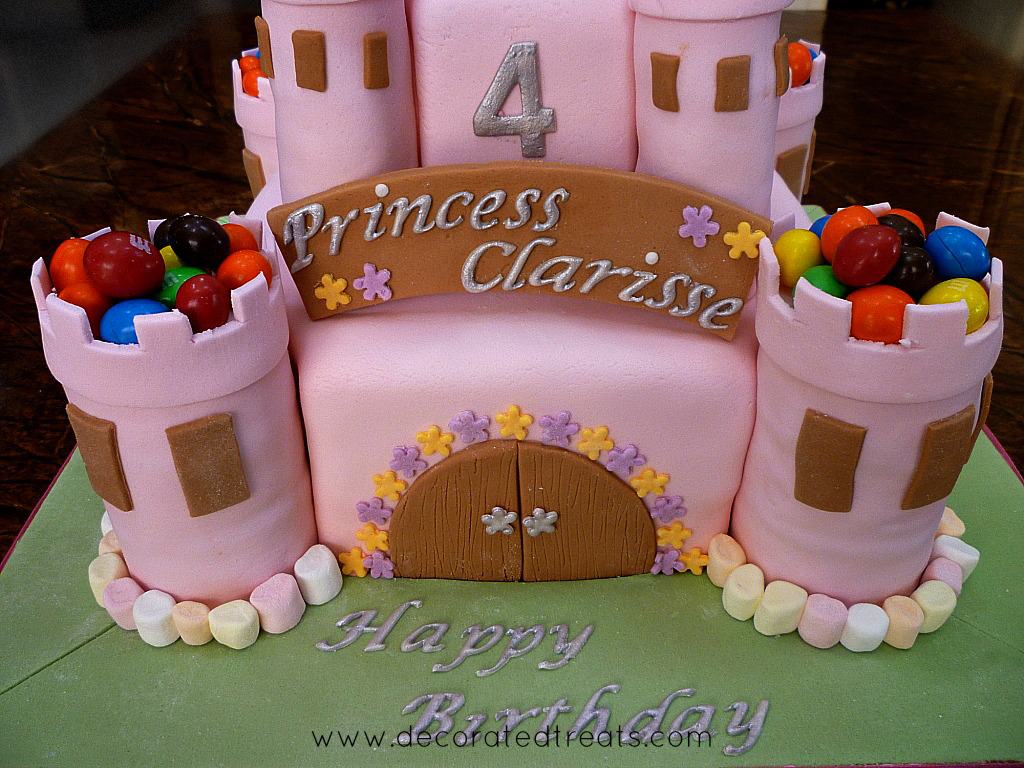
Let them set and then paint in silver (with the silver edible dust and lemon extract mixture) using a food safe cake decorating brush. Let the paint dry completely and attach to the cake with shortening. Place the words "Happy Birthday" on the cake board and the birthday girl's name on a CMC added brown fondant plaque (cut freehand with a pizza cutter). Let the plaque set before attaching it to the cake.
Step 8: Make the Doors and Windows
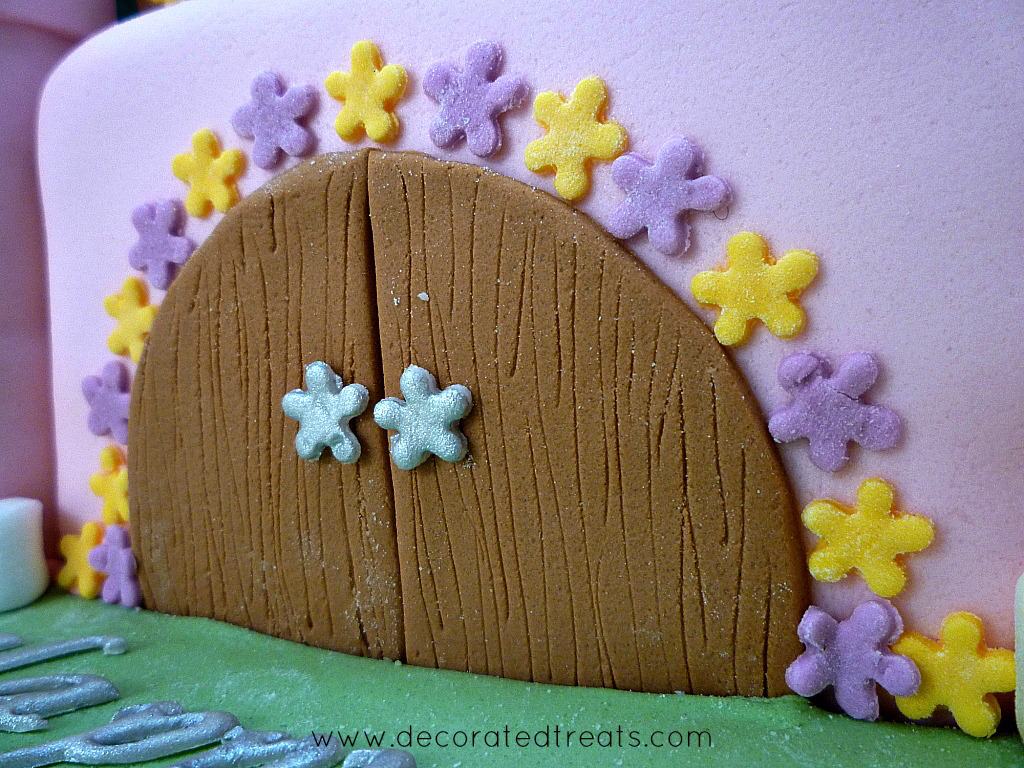
Use the same brown fondant to make the castle doors and windows. Cut these by hand, without any cutters.
Mark the wood grain pattern on the door with the needle tool or a toothpick. Attach to the cake with shortening.
Step 9: Add the Flowers and Attach the Marshmallows Border
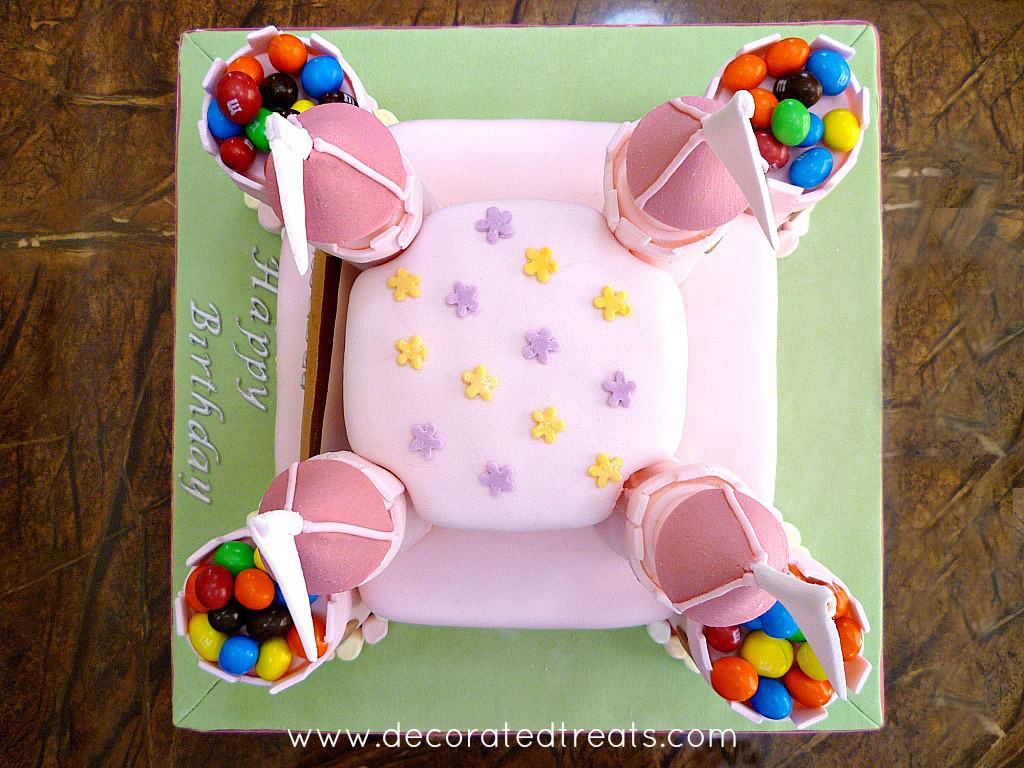
Cut the purple and yellow flowers with a flower plunger cutter. Randomly place them on top of the top tier as well as all-round the door.
Arrange a row of mini marshmallows all around the base of the castle birthday cake. Secure these in place with fondant glue.
Complete the cake decoration by attaching a matching ribbon in pink all around the cake board. Use hot glue to secure it in place.
❤️More Cakes You Will Love
Do you like this tutorial? Please leave a 5-star ⭐⭐⭐⭐⭐rating in the recipe card below and consider a review further down this page. I would love to hear from you. Thank you!
📖Recipe
Castle Birthday Cake
Equipment
- Flower plunger cutters
- Round cutters
- Hot glue
- FMM letters and number cutters.
- Pizza cutter and sugarcraft
- Needle scriber tool
- Cake decorating brush
- Toothpicks
- Satin ribbon
For best results, use the metrics measurements. US customary measurements have not been tested and are only meant for guide.
Ingredients
- 4 eight inch square cakes (made using butter pound cake recipe)
- Buttercream
- Fondant
- Gum paste
- Mini marshmallows
- M&M candies
- Food coloring in pink, brown, green, purple, and yellow
- Fondant glue
- Shortening
- Silver edible dust
- Lemon extract
- CMC powder
Instructions
- Bake 4 layers of 8 inch square cakes. 2 layers are for the bottom tier and the remaining 2 layers for the top tier and the towers. Cool the cakes completely before decorating.
- Make the buttercream.
- Level all the four cake layers. Stack 2 layers with buttercream frosting. Use round cutters to cut off the corners of the cake to place the towers.
- To make the top tier of the castle, cut third cake layer into half (to make two rectangle pieces measuring 8 inches by 4 inches each). Cut the first rectangle into 2 (to make 2 pieces of 4 inches by 4 inches square layers) and stack both with buttercream. Similar to the bottom tier, cut out the corners with round cutters to give space for the cake towers.
- Use the remaining cake to cut out circles for the towers. Each tower is made up of 3 layers of cake. There are 4 large towers (for the bottom tier) and 4 small towers (for the top tier). Stack the layers with buttercream. Use the same round cutters used to cut off the corners from the cake tiers.
- Crumb coat both the bottom and top cake tier with buttercream and cover them with pink fondant. Do it separately for each tier.
- Also crumb coat the towers and cover them with fondant.
- Add CMC to some pink fondant. Roll and cut long strips for the battlement on each tower. Attach to the towers with fondant glue.
- Attach the towers to the cake, also with fondant glue.
- For the top tier, before attaching the towers to cake, cut and attach 2 rows of dark pink fondant bricks (with a sugar craft knife or pizza cutter) all around the base of the cake.
- Top the bottom tier towers with M&M candies.
- For the top tier towers, make another tier of short towers and cone-shaped roof with flags. These towers are made of fondant and hollow. To make them, knead some CMC into fondant. Cut rectangle pieces of fondant and wrap them around a small rolling pin (or any other long item) to form the hollow towers. Attach the joints with fondant glue. Once the fondant is fairly set, slide them out of the rolling pin and attach to the cake with glue.
- To make the cones, cut out round pieces of fondant and then cut each into half circles. Use one piece of the semi-circle to form one cone. Attach the ends with fondant glue. To hide the joints, roll thin strips of fondant and place four lines on each cone as a design, including one on the joining line to hide it. Attach to the towers with fondant glue.
- Next, make the flags. Cut triangle pieces of fondant and wrap one side of the flags to a toothpick each. Let the flags set completely before inserting them into the cones.
- Cover the cake board with fondant. Brush it with shortening and attach the green fondant to it. For easy covering, cut the fondant into 4 pieces for each side of the cake and attach it separately.
- To make the wordings on the cake, use FMM Sugarcraft cutters and very thinly rolled white gum paste. Let the alphabets set and then paint in silver (with the silver edible dust and lemon extract mixture). Let the paint dry completely and attach to the cake with shortening. Place the words "Happy Birthday" on the cake board and the birthday girl's name on a CMC-added brown fondant plaque (cut freehand with a pizza cutter). Let the plaque set before attaching it to the cake.
- To make the castle door and window, use brown fondant and cut the shapes by hand with a pizza cutter or sugar craft knife. Mark the wood grain pattern on the door with the needle tool or a toothpick.
- Attach to the cake with shortening.
- Cut purple and yellow flowers with a flower plunger cutter. Randomly place them on top of the top tier as well as all-round the door.
- Arrange a row of mini marshmallows all around the base of the castle birthday cake. Secure these in place with fondant glue.
- Complete the cake decoration by attaching a matching ribbon in pink all around the cake board. Use hot glue to secure it in place.
Notes
- Make the cakes and buttercream in advance for a quicker decorating process.
- Refrigerating the tower cakes will make it easier to cover with fondant as they will be firmer. Also, poke a long skewer in the center of each tower to hold the layers in place as you cover them with fondant. Remove after covering.
- Adding CMC to fondant will make it dry firmer and harder and helps 3D fondant decorations to hold their shape.
- Some decorations on the cake such as the alphabets and name plaque and the hollow towers and cones can be made in advance to allow them time to set properly.
- Instead of making the towers in cake, you can also use cardboard, tissue rolls or Styrofoam blocks and cover them with fondant.
Debbie
Did you make a full 10 egg batch for each tier (so the bottom tier was two 8in cakes layered up, using 10eggs for that bit and the top tier was another 10egg batch then split between that tier and the towers) or did you use 10eggs in total to make all the cake needed? Or some other amount?
Priya Maha
Hi Debbie, it's a full 10 egg batch for the bottom tier and another full 10 egg batch for the top tier.