

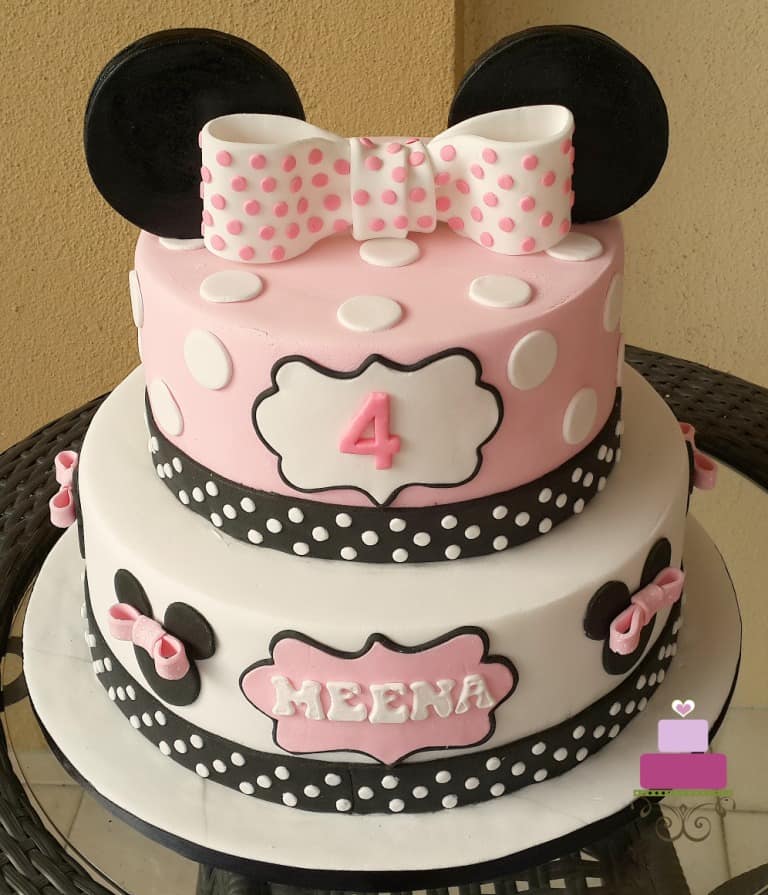
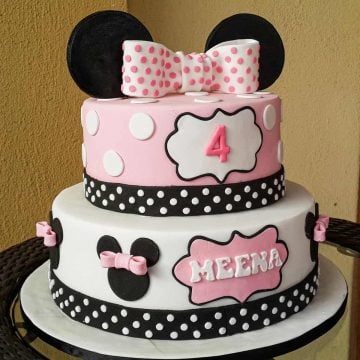
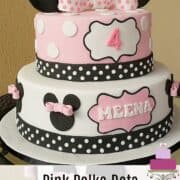
Here is a pink two tier Minnie Mouse birthday cake for 4-year-old girl. The cake is covered in fondant and decorated with handmade Minnie ears and cute polka dot bows.
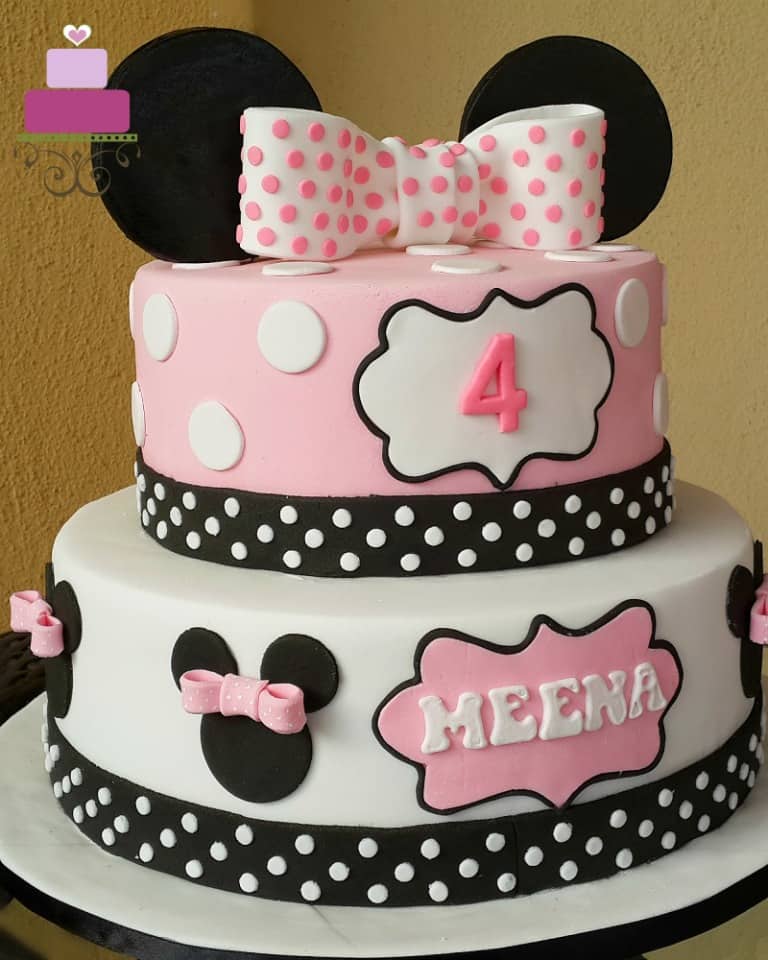
This cake is not my original design. The birthday girl's mom got me a picture of a Minnie cake and requested that I make one like that. I did an internet search for Minnie Mouse cakes in pink in my attempt to locate the original designer. However, much to my disappointment, I am unable to locate one.
If you like this cake, you should also check out this Minnie Mouse buttercream cake, purple Minnie Mouse cake, Minnie Mouse 1st birthday cake and this pink Minnie Mouse cake design.
🧾Supplies Required
- Cake – The was a 2 tier cake measuring 7 inches and 10 inches in diameter. I used my butter pound cake recipe for both tiers.
- Buttercream – I used buttercream to fill the cake layers as well as to crumb coat the cake before covering it with fondant.
- Fondant – the entire Minnie Mouse birthday cake and all the deco on it were in fondant. I used Satin Ice fondant in white , baby pink and black .
- CMC powder – I added this to the fondant when making the bows as well as Minnie Mouse’s large ears on the top tier. CMC helps fondant to set firm and hard. This in turn helps the fondant to hold shaped especially those in 3D shapes.
- Fondant glue and shortening – these were the glues for this project and I used them interchangeably.
- Round cutter set – I used this for Minnie’s large ears on the top tier as well as the smaller Minnie Mouse faces on the sides of the bottom tier and the white polka dots on the top tier.
- Round plunger cutter set – this is a set of smaller round cutters. I used these for the white polka dots on the cake border strips as well as the pink polka dots on the large white bow on the top tier.
- Plaque cutters – I used 2 different sizes – one slightly larger than the other. Both, however, were of the same shape.
- Clikstix Groovy alphabet cutter set – This was used for the birthday girl’s name on the Minnie Mouse birthday cake.
- Number cutter – I used this for number ‘4’ that was placed on the front side of the top tier.
- Fondant extruder tool – this was used to pipe the black borders for the 2 fondant plaques on the cake.
- Pizza cutting wheel – this was used for the long black border strips as well as the strips to make the bows.
- Cake decorating brush (Fine tipped brush) and Americolor white food coloring – these were used to mark the tiny white polka dots on the mini bows on the bottom tier of the Minnie Mouse birthday cake.
👩🍳How to Make
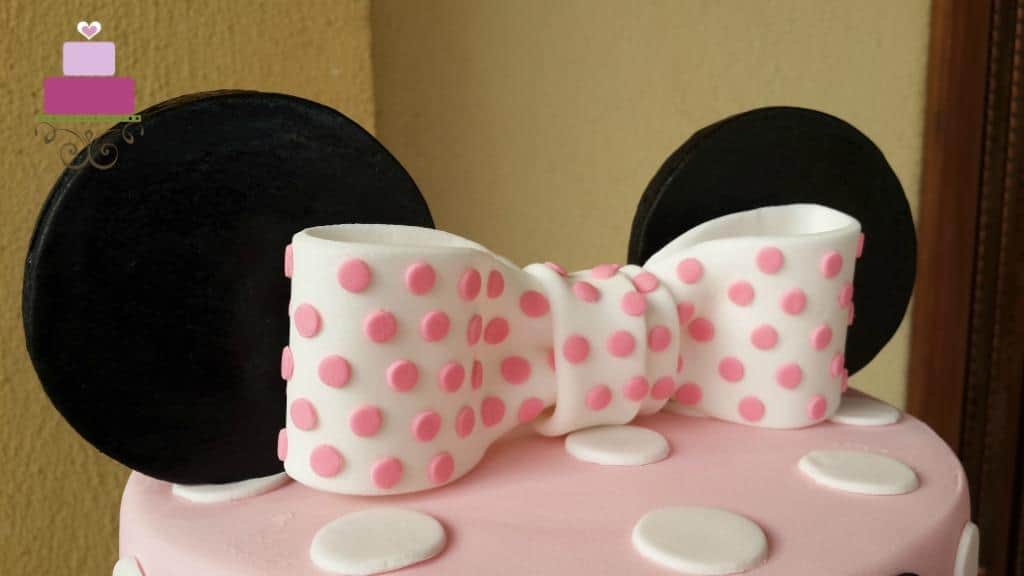
Step 1: Make Minnie's Bows
I made all the fondant bows (both the large one on the top tier as well as the smaller ones on the sides) and Minnie Mouse’s ears in advance. I have a separate tutorial on how to make the large bow but that tutorial is without the polka dots. For the polka dots, I used the smallest cutter in my round plunger cutter set and cut out tiny dots of pink fondant. I attached these to the bow once the bow was complete.
The smaller fondant bows were made in a similar manner to the large one, but the bow centers did not have any folds and for the polka dots, I used the fine tip of my cake decorating brush that has been dipped in Americolor white food color (undiluted) to mark random tiny white dots on the bows.
Step 2: Make Minnie Mouse's Ears
As for the ears, I cut them out in black fondant (that has been added CMC) using one of my large round cutters and attached a long wooden skewer to each. I let these set and harden completely before putting them up on the cake.
Step 3: Bake and Prepare the Cake
Once the cakes were baked and cooled down, I leveled them and then filled and crumb coated them with buttercream before covering each of the two tiers with fondant. The top tier was covered in pink fondant while the bottom tier was covered in white.
Once both cake tiers were covered in fondant, I stacked them and added the borders. To make the borders, I cut out a long thin strip of black fondant. And then I attached it to the cake and added the white polka dots which were cut using the smallest cutter of my round plunger set.
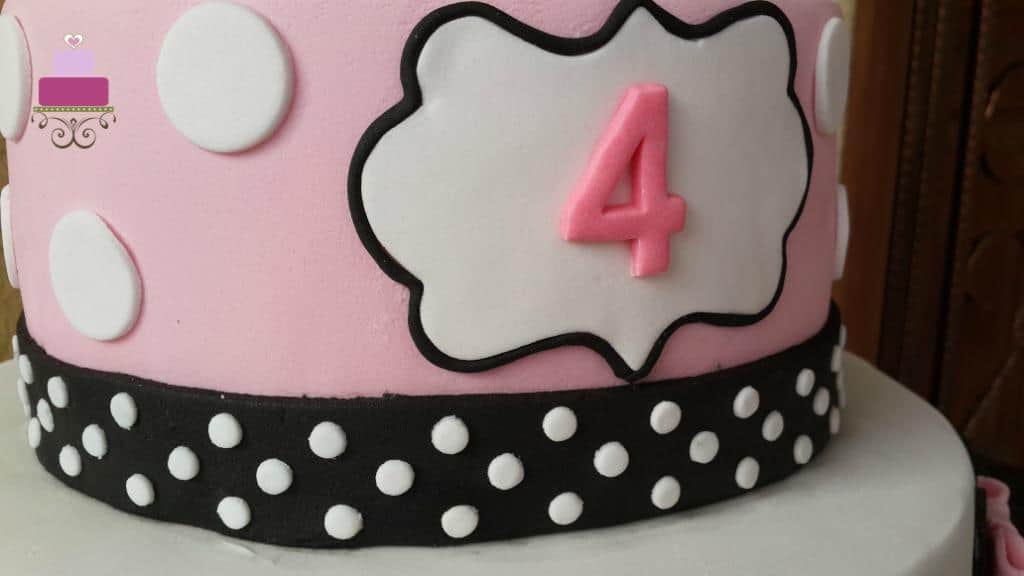
Step 4: Attach the Birthday Girl's Name and Age Number
Next to go on the Minnie Mouse birthday cake were the birthday girl's name and age number plaques. I used my plaque cutters for these and attached the letters and numbers to them before placing them on the cake.
For the name, I used Clikstix Groovy alphabet cutter. For the number, I used a different cutter which I purchased from a local cake decorating supplies shop. Once the plaques were on the cake, I added a thin black border for both. The border was piped using my extruder tool that was fitted with a small round disc.
Step 5: Make the 2D Minnie Mouse Fondant Decorations
Next were the tiny Minnie Mouse faces all around the second tier. These were cut using my round cutter set. I used a medium cutter for the face and a slightly smaller one for the ears. And then I added the mini bows to each face. I attached the bow with fondant glue so that they are held securely in place.
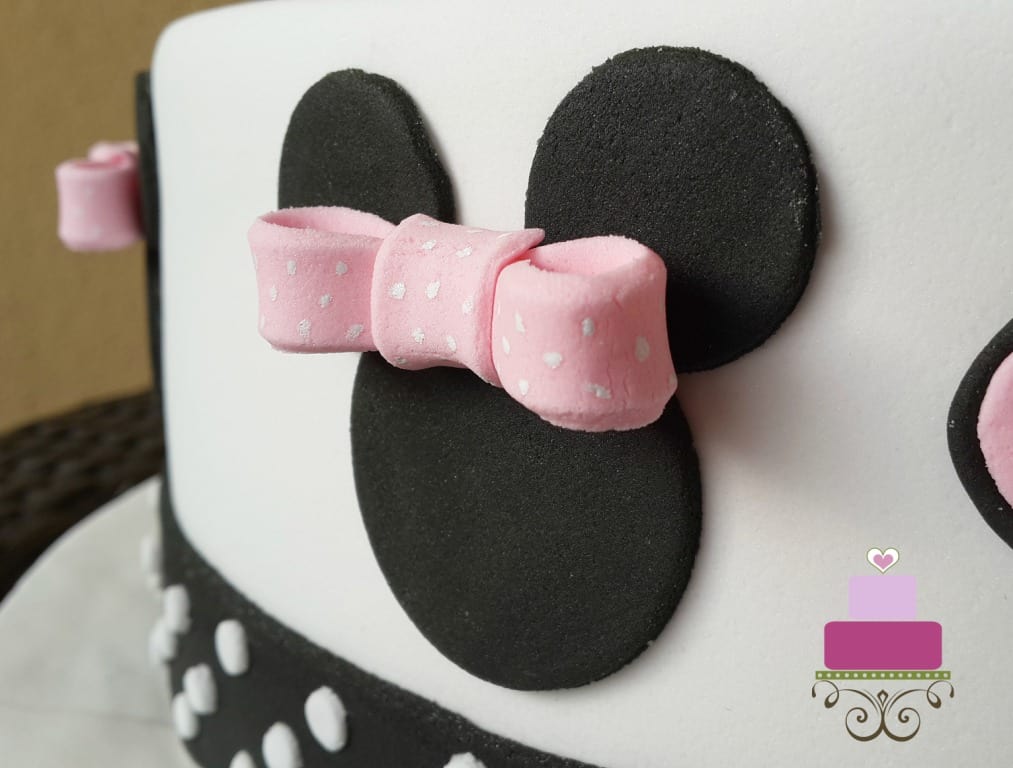
Step 6: Make the Polka Dots on the Cake
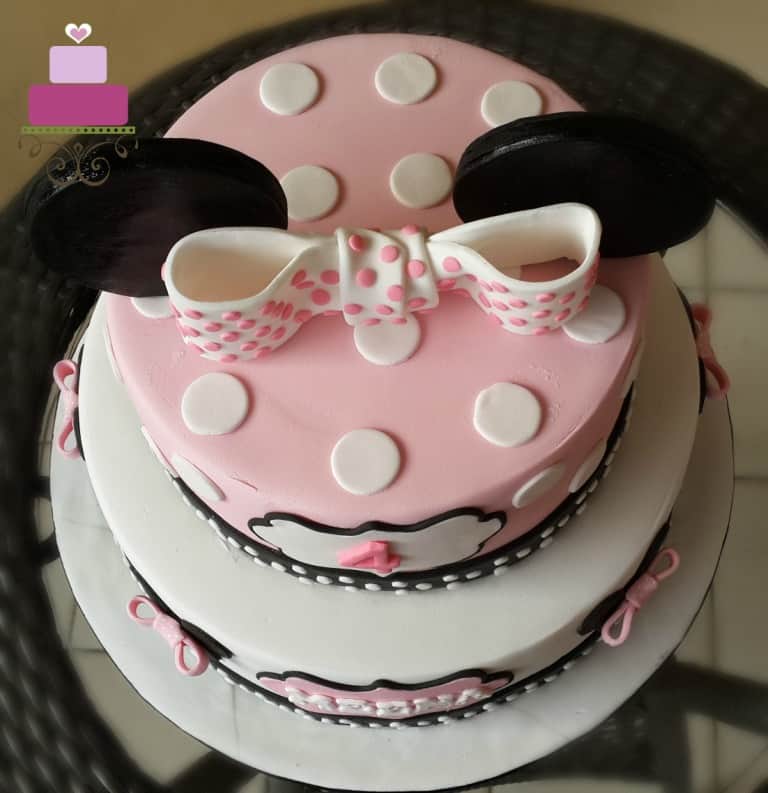
Once the bows were done, I added the white polka dots on the top tier. And then I completed the cake deco by poking Minnie’s large ears on the top tier.
This was followed by the large bow in front of them. I used fondant glue for the bow so that it would stay in place securely.
And that was how I decorated the pink, 2 tier Minnie Mouse birthday cake.

❤️More Cake Designs You Will Love


Do you like this tutorial? Please leave a 5-star ⭐⭐⭐⭐⭐rating in the recipe card below and consider a review further down this page. I would love to hear from you. Thank you!
📖Recipe
Two Tier Minnie Mouse Birthday Cake
Equipment
- Round cutter set
- Round plunger cutter set
- Plaque cutters
- Clikstix Groovy alphabet cutter set
- Number cutter
- Fondant extruder tool
- Pizza cutting wheel
- Cake decorating brush (Fine tipped brush)
- Americolor white food coloring
For best results, use the metrics measurements. US customary measurements have not been tested and are only meant for guide.
Ingredients
Cake
7 inch round cake
- 360 g self-raising flour
- 360 g granulated sugar
- 360 g butter at room temperature
- 6 eggs at room temperature
- 90 ml milk
- ¾ teaspoon baking powder
- ¼ teaspoon salt
- 1 teaspoon vanilla extract
10 inch round cake
- 720 g butter
- 720 g granulated sugar
- 720 g self-raising flour
- 12 eggs
- 180 ml milk
- ½ teaspoon salt
- 1 ½ teaspoon baking powder
- 1 ⅔ teaspoon vanilla extract
Frosting and decoration
- Buttercream
- Fondant
- CMC Powder
- Fondant glue
Instructions
Baking the cakes (The cakes are best baked in 2 batches (by tier). Follow the instructions below for each tier)
- Preheat oven to 170 °Celsius.
- Beat butter and sugar till soft and creamy for about 2 minutes. Add eggs, one at a time, beating well after each addition.
- In a separate bowl, sift flour, baking powder, and salt. Fold in the sifted ingredients into the creamed mixture alternately with milk, starting and ending with flour.
- Finally, add in vanilla extract and combine well. Pour batter into two greased and floured cake pans and bake for 45 to 50 minutes until the top of the cake springs back when lightly pressed. The cakes are done when a skewer inserted in the center of the cake comes out without any wet batter.
- Remove cakes from oven and let them cool completely before icing and decorating.
How to make the fondant bow
- Follow the tutorial here on how to the fondant bow. The tutorial is for making a large bow and is without the polka dots. For the polka dots, use the smallest cutter in the round plunger cutter set and cut out tiny dots of pink fondant. Attach these to the bow once the bow is complete.
- Make the smaller fondant bows in a similar manner as the large one, but you need not make any folds for the centers. For the polka dots, use the fine tipped cake decorating brush, dip the tip into white gel based food color (undiluted) to mark random tiny white dots on the bows.
How to make fondant Minnie Mouse ears
- Cut the ears out in black fondant (that has been added CMC) using a large round cutter and attach a long wooden skewer into each. Let these set and harden completely before putting them up on the cake.
Baking and preparing the cakes
- Once the cakes are baked and have cooled down, level the tops and fill each tier with buttercream. Crumb coat each tier and cover them separately with fondant. Cover the top tier with pink fondant and the bottom tier with white fondant.
- Next, stack them and add the borders. To make the borders, cut out a long thin strip of black fondant. And then attach it to the cake and add the white polka dots. Cut the polka dots in white fondant, with the smallest cutter of the round plunger cutter set.
The birthday girl's name and age
- Next to go on the Minnie Mouse birthday cake are the birthday girl's name and age number plaques.
- Use a plaque cutter for these and attach the letters and numbers to them before placing them on the cake. For the name, I used Clikstix Groovy alphabet cutter. For the number, I used a different cutter which I purchased from a local cake decorating supplies shop.
- Once the plaques are on the cake, add a thin black border for both. The border can be piped using the fondant extruder tool that is fitted with a small round disc.
Minnie Mouse fondant decorations on the cake
- Next decoration for the birthday cake is the tiny Minnie Mouse faces all around the second tier. You can cut these using round cutters.
- Use a medium cutter for the face and a slightly smaller one for the ears. And then add the mini bows to each face. Attach the bows with fondant glue so that they are held securely in place on the cake.
The polka dots
- Once the bows are done, add the white polka dots on the top tier. Complete the cake decoration by poking Minnie’s large ears on the top tier and add the large bow in front of them. Use fondant glue for the bow so that it would stay in place securely.
Leave a Reply