

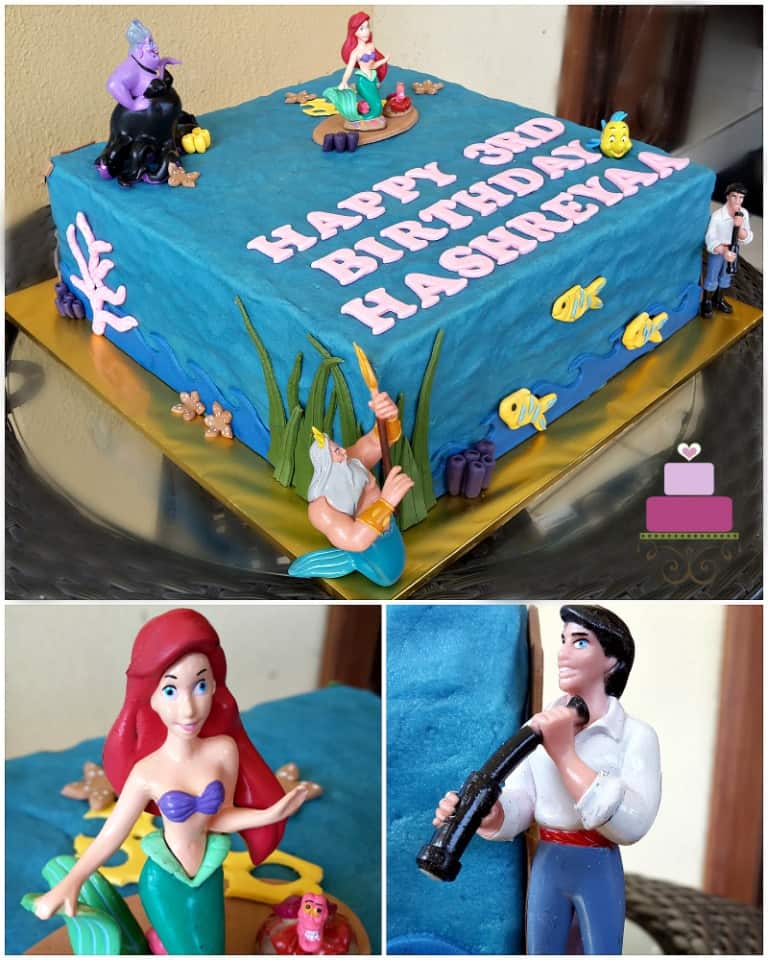
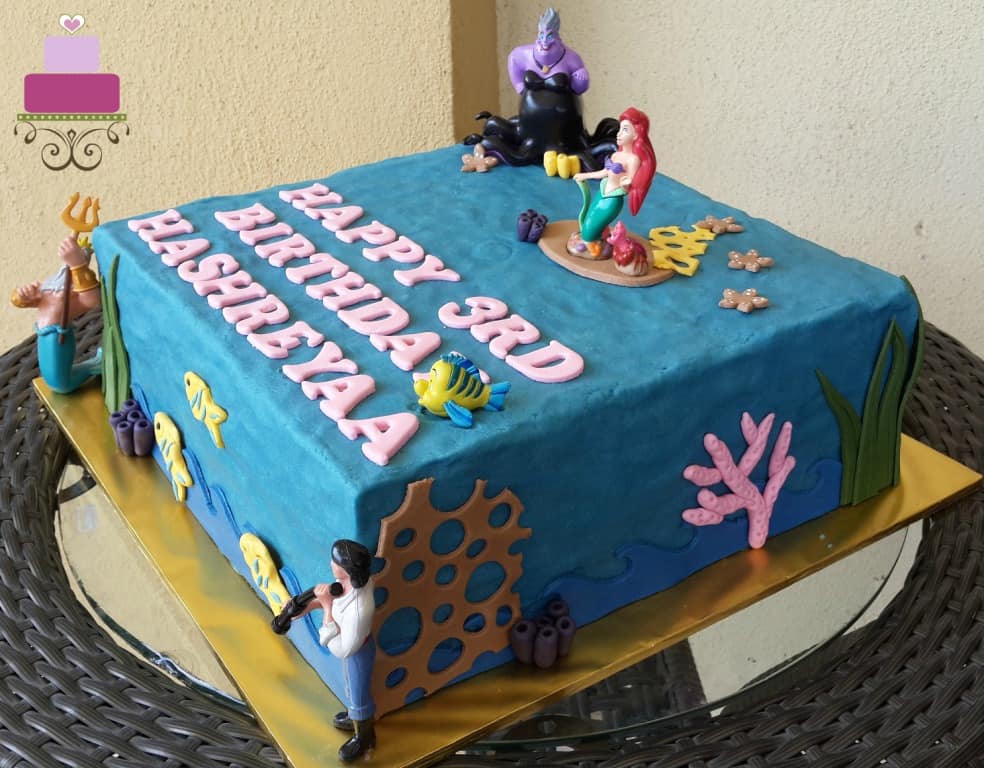
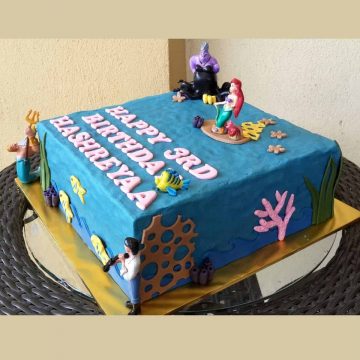
Learn how to make Ariel the Little Mermaid cake design with this easy decorating guide. Decorated in butter cream and fondant accents and topped with toy toppers, this cake is very easy to make and quick too.
If you like this cake, you should also check out this other Little Mermaid birthday cake. And for more princess themed cakes, check out this Belle cake, buttercream castle cake with princess toppers and Olaf cake and cupcakes.
🧾Supplies Required
- Cake – this was a 9 inches square cake baked using my pound cake recipe. I baked the cake in 2 layers and once stacked, the overall height was approximately 4 inches.
- Buttercream – I used this icing to fill and crumb coat the cake.
- Butter icing – this is the stiffer version of the buttercream.
- Fondant – I used Satin Ice for all the sea themed decorations on the cake (except for the figurines).
- Ariel the Little Mermaid themed toy toppers
- Pizza cutting wheel – I used this as a general cutting tool for the deco on the cake.
- Sea waves cutter – This was sea wave-shaped, and I purchased it from Not Just Cakes by Annie.
- Fondant shaping tools
- Round plunger cutter set– these were for the holes on the brown sea sponge on the cake.
- AmeriColor White gel food coloring & fine tipped cake decorating brush
- Wilton gel food colors in royal blue, pink, juniper green, violet, brown, yellow.
- Hot glue – I used hot glue to hold the figurines on the cake board securely in place.
- Block letters alphabet cutters
- Needle scribe tool – this was to mark the lines on the seagrass.
- Small daisy flower cutter – I used this for the brown starfishes on the cake.
👩🍳How to Make
Step 1: Prepare the Little Mermaid Cake Toppers
Purchase and have these ready at least a few days in advance so that you have them ready when you need to use, especially if you purchasing them online.
Step 2: Prepare the Birthday Cake
And so, closer to the cake delivery date, I baked the cake. This was a 2 layer cake sandwiched with buttercream.
Once the cake layers were baked and have cooled completely, I leveled the tops and filled filled buttercream. And then I crumb coated it with a thin layer of buttercream. The crumb coat was to make sure the top and sides of the cake were all level and flat.
Step 3: Cover the Cake with Icing
Next, I covered the cake with butter icing. I tinted it with Wilton Royal Blue food color. Since the icing has a natural yellow hue to it, adding blue to it turned it into a blue with a slight hint of green. That sea blue color was very fitting for this cake. It was meant to represent the seawater.
I applied the icing all over the cake and then, instead of smoothing it flat, I pressed it down with my fingers. The dents were meant to represent sea waves.
Once the entire cake was covered in butter icing sea waves, I made the border. I used blue fondant for the border and used my sea waves cutter to make a layer of waves and attached them all around the base of the cake.
The butter icing was able to hold the fondant strips in place without the need for any additional fondant glue.
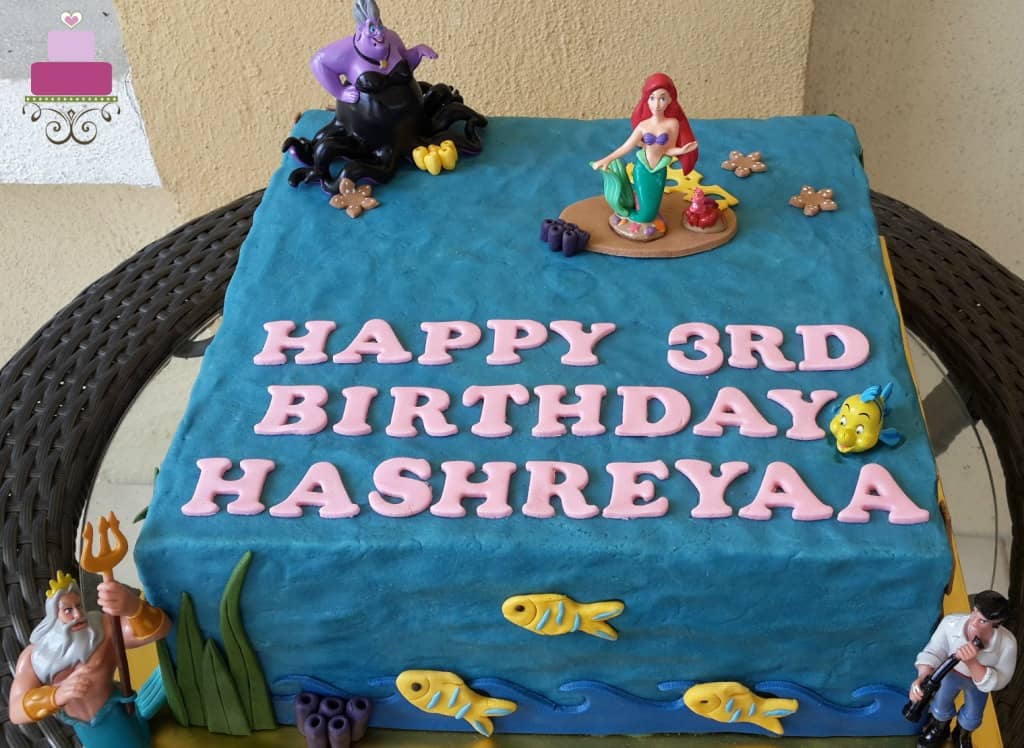
Step 4: Make the Lettering on the Cake
After that, I added the wordings on the cake. The letters were made using my block letter cutters. I purchased these from a local cake decorating supplies shop. I used pink tinted fondant for the letters.
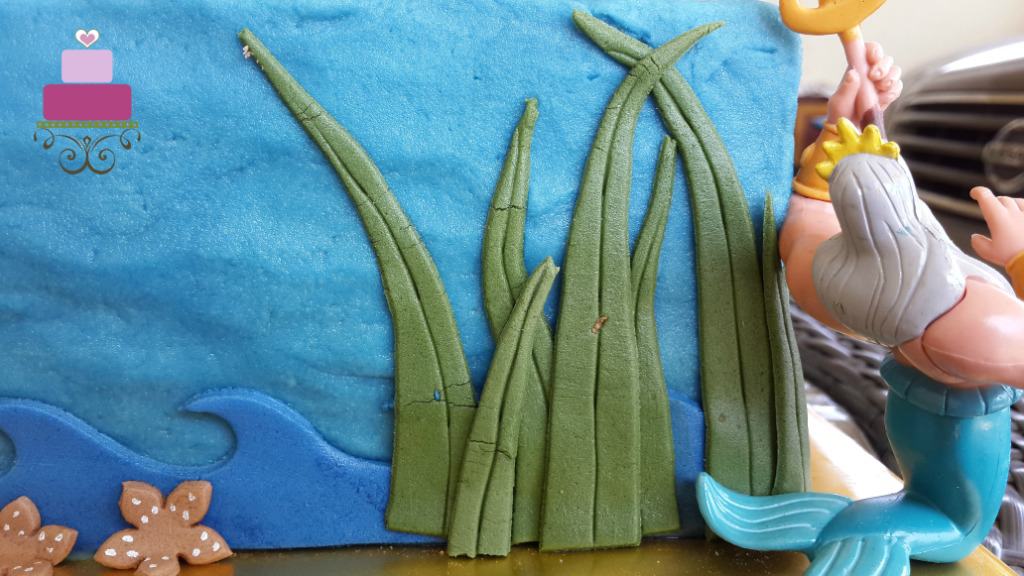
Once the letters were in place, I made the rest of the decoration for the Little Mermaid theme. I started by adding the long sea grass on the corners of the cake. The grass was cut using my pizza cutting wheel and the lines on the grass was made using my sugar craft needle scriber tool.
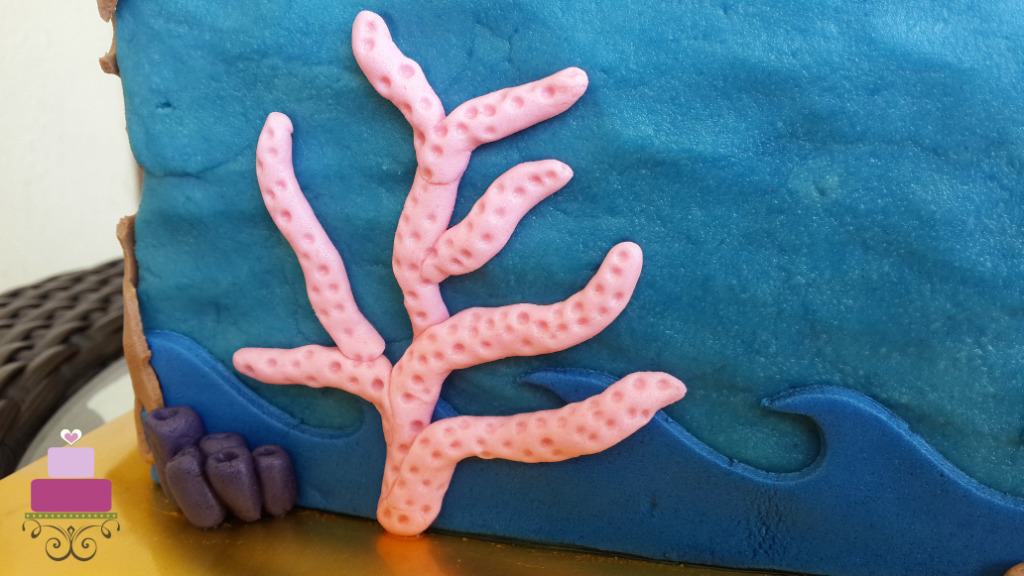
Step 5: Make the Pink Fondant Corals
Next were the pink fondant corals. These were shaped by hand and I used a thin wooden skewer to poke holes all over the coral.
And then I attached it to the sides of the cake. I did not need any special glue to stick the deco to the cake, the butter icing was able to hold the decoration well in place.
Step 6: Make the Edible Sea Creatures in Fondant
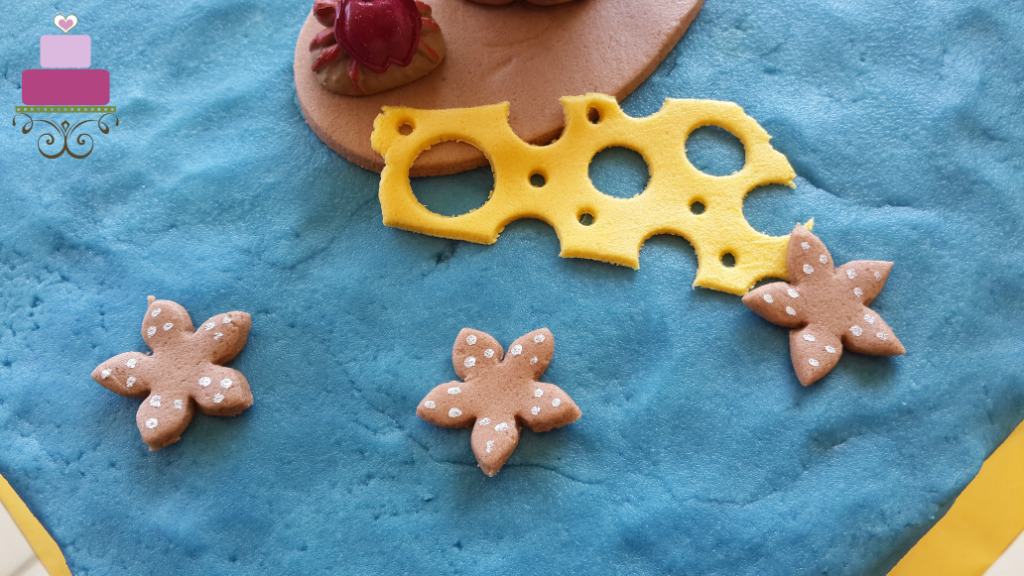
For the brown and yellow sponge, I rolled some brown and yellow fondant thin, and used my round plunger cutters to make random holes in random order all over the rolled pieces. And this went on the sides of the cake (brown sponge) as well as the top (yellow sponge) of the Little Mermaid cake.
Next was the cluster of purple cylinder-shaped sea plants. I made these individually by rolling some purple fondant into sausages. Using the pointed end of my shaping tool ( the one that is shaped like a pencil), I made holes on one end of the sausages. I then grouped a few of them together and attached them to the cake.
When grouping these together, I dampened them slightly with a damp brush so that they would stick to one another. And in attaching the clusters to the cake, again, the icing was sufficient to hold them in place. I made a few clusters of these and added them to the sides of the cake.
Step 7: Make the Fondant Fishes
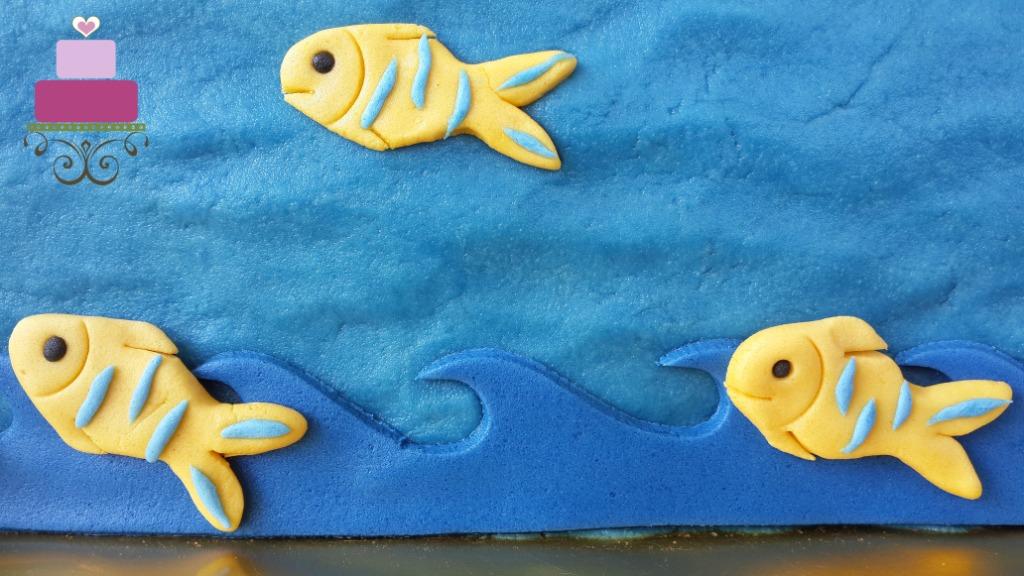
After all the edible sugar sea plants were done, I made the yellow fishes for the front side of the cake. These were formed by hand using yellow fondant and the shapes were then enhanced with the help of my shaping tools and sugar craft knife. I then added light blue strips and black eyes for the fishes.
Step 8: Make the Fondant Starfishes
The next decoration to go on the mermaid themed cake were the brown starfishes. I cut these with my small daisy flower cutter and added white polka dots using a fine-tipped cake decorating brush and white food color.
The white paint was undiluted white gel food coloring. These starfishes were randomly placed on the sides and top of the butter icing covered cake.
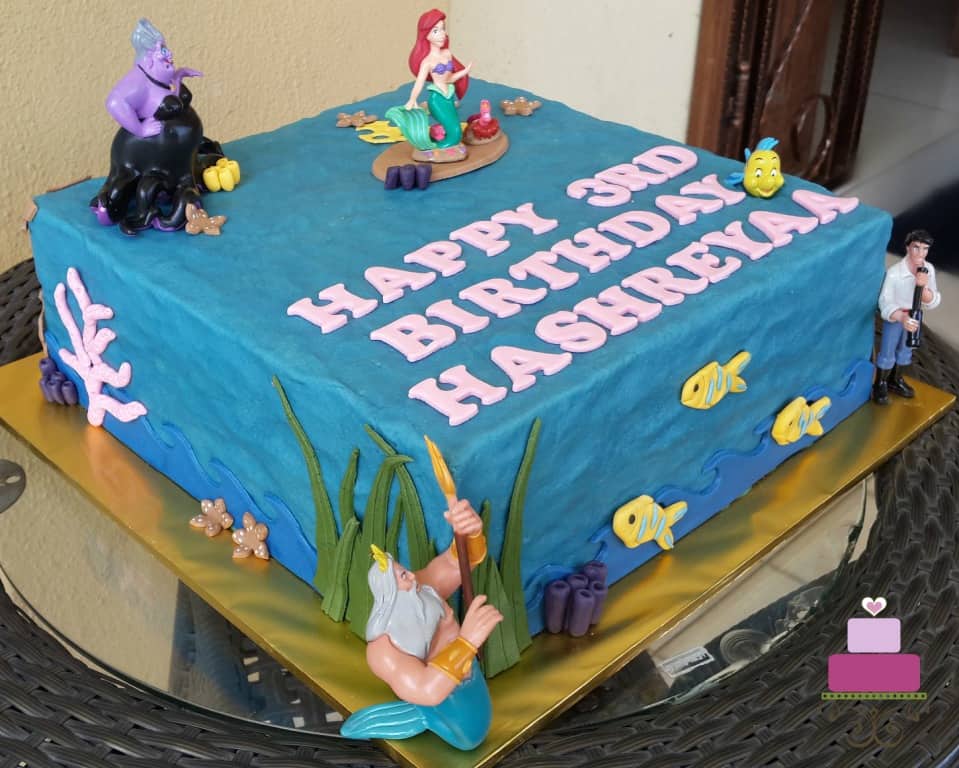
Once all the cake decoration was done, I arranged the Disney themed toy toppers on the cake. For the figurines on the cake board, I used hot glue to hold them in place. The ones of the cake were simply placed on the cake and since they had wide bottom bases, they were able to stand on the cake well.
I added more decoration on the sides of the Little Mermaid themed figurines on the cake just so that everything looked as naturally placed as possible.
And that’s that. My Ariel Little Mermaid cake design.
❤️More Cake Designs You Will Love


Do you like this tutorial? Please leave a 5-star ⭐⭐⭐⭐⭐rating in the recipe card below and consider a review further down this page. I would love to hear from you. Thank you!
📖Recipe
Ariel the Little Mermaid Cake
Equipment
- Ariel the Little Mermaid themed toy toppers
- Pizza cutting wheel
- Sea waves cutter
- Fondant shaping tools
- Round plunger cutter set
- fine tipped cake decorating brush
- Hot glue
- Block letters alphabet cutters
- Needle scribe tool
- Small daisy flower cutter
For best results, use the metrics measurements. US customary measurements have not been tested and are only meant for guide.
Ingredients
Cake
- 720 g butter
- 720 g granulated sugar
- 720 g self-raising flour
- 14 eggs
- 180 ml milk
- ⅔ teaspoon salt
- 1 ½ teaspoon baking powder
- 2 teaspoon vanilla extract
Frosting and Decoration
- Buttercream
- Butter Icing
- Fondant
- Wilton gel food colors in royal blue, pink, juniper green, violet, brown, yellow and white
Instructions
Baking the cake
- Preheat oven to 170 °Celsius.
- Beat butter and sugar till soft and creamy for about 2 minutes. Add eggs, one at a time, beating well after each addition.
- In a separate bowl, sift flour, baking powder, and salt. Fold in the sifted ingredients into the creamed mixture alternately with milk, starting and ending with flour.
- Finally, add in vanilla extract and combine well. Pour batter into 2 a well greased and floured 9 inches square cake pans and bake for 45 to 50 minutes until the top of the cakes spring back when lightly pressed. The cakes are done when a skewer inserted in the center of the cakes comes out without any wet batter.
- Remove the cakes from oven and let them cool completely before icing and decorating.
Preparing the cake
- Once the cake layers are baked and have cooled completely, level the tops and fill the layers with buttercream. And then crumb coat with a thin layer of buttercream. The crumb coat is to make sure the top and sides of the cake are all level and flat.
Buttercream sea effect on the cake
- Next, tint the butter icing in blue with Wilton Royal Blue food color. Since the icing has a natural yellow hue to it, adding blue to it will turn it into a blue with a slight hint of green. That sea blue color is perfect for this cake as the blue cake covering is meant to represent the seawater.
- Apply the icing all over the cake and then, instead of smoothing it flat, press it down with your fingers. The dents are meant to represent sea waves.
- Once the entire cake is covered in butter icing sea waves, make the border. Use blue fondant for the border and the waves cutter to make a layer of waves and attach them all around the base of the cake.
- The butter icing will be able to hold the fondant strips in place without the need for any additional fondant glue.
The lettering on the cake
- Roll some pink fondant thin and cut the letters out with alphabet cutters. Place them on the cake.
- Once the letters are in place, make the rest of the decoration to match the Little Mermaid theme.
- Start by adding the long sea grass on the corners of the cake. To make the grass, roll some dark green fondant and use a pizza cutting wheel to cut the grass blades. You can do this freehand. Mark the lines on the grass with a sugar craft needle scriber tool before attaching to the cake.
The pink corals
- Shape the pink corals by hand with pink fondant. Use a thin wooden skewer to poke holes all over the coral.
- And then attach them to the sides of the cake. You do not need any special glue to stick the corals to the cake, the butter icing will be able to hold the decoration well in place.
Edible sea creatures in fondant
- For the brown and yellow fondant sponges, roll some brown and yellow fondant thin, and use the round plunger cutters to make random holes in random order all over the rolled pieces. Place the sponges on the sides of the cake (brown sponge) as well as the top (yellow sponge) of the Little Mermaid cake.
- Next is the cluster of purple cylinder-shaped sea plants. Make these individually by rolling some purple fondant into sausages. Using the pointed end of the shaping tool ( the one that is shaped like a pencil), make holes on one end of the sausages. Group a few of them together and attach them to the cake.
- When grouping these together, dampen them slightly with a damp brush so that they would stick to one another. And in attaching the clusters to the cake, again, the icing is sufficient to hold them in place. Make a few clusters of these and add them to the sides of the cake.
DIY fondant fish
- Make the yellow fishes by hand. Simply form them with some yellow fondant and enhance the shape with fondant tools. Add the blue strips and black eyes to complete the fishes before attaching them to the cake.
The fondant starfishes
- Roll some brown fondant thin and cut out the starfishes using a 5 petal daisy flower cutter. To make the white dots, dip a fine tipped cake decorating brush into undiluted white gel based food color and mark the dots on the starfishes.
- Let the paint dry and place the completed starfishes randomly on the sides and top of the butter icing covered cake.
- Once all the cake decoration is done, arrange the Disney themed toy toppers on the cake. For the figurines on the cake board, you can use hot glue to hold them in place. The ones on the cake can be simply placed on the cake if they have wide bottom bases. They should be able to stand on the cake well.
- Add more decoration on the sides of the Little Mermaid themed figurines on the cake just so that everything looks as naturally placed as possible.

Leave a Reply