

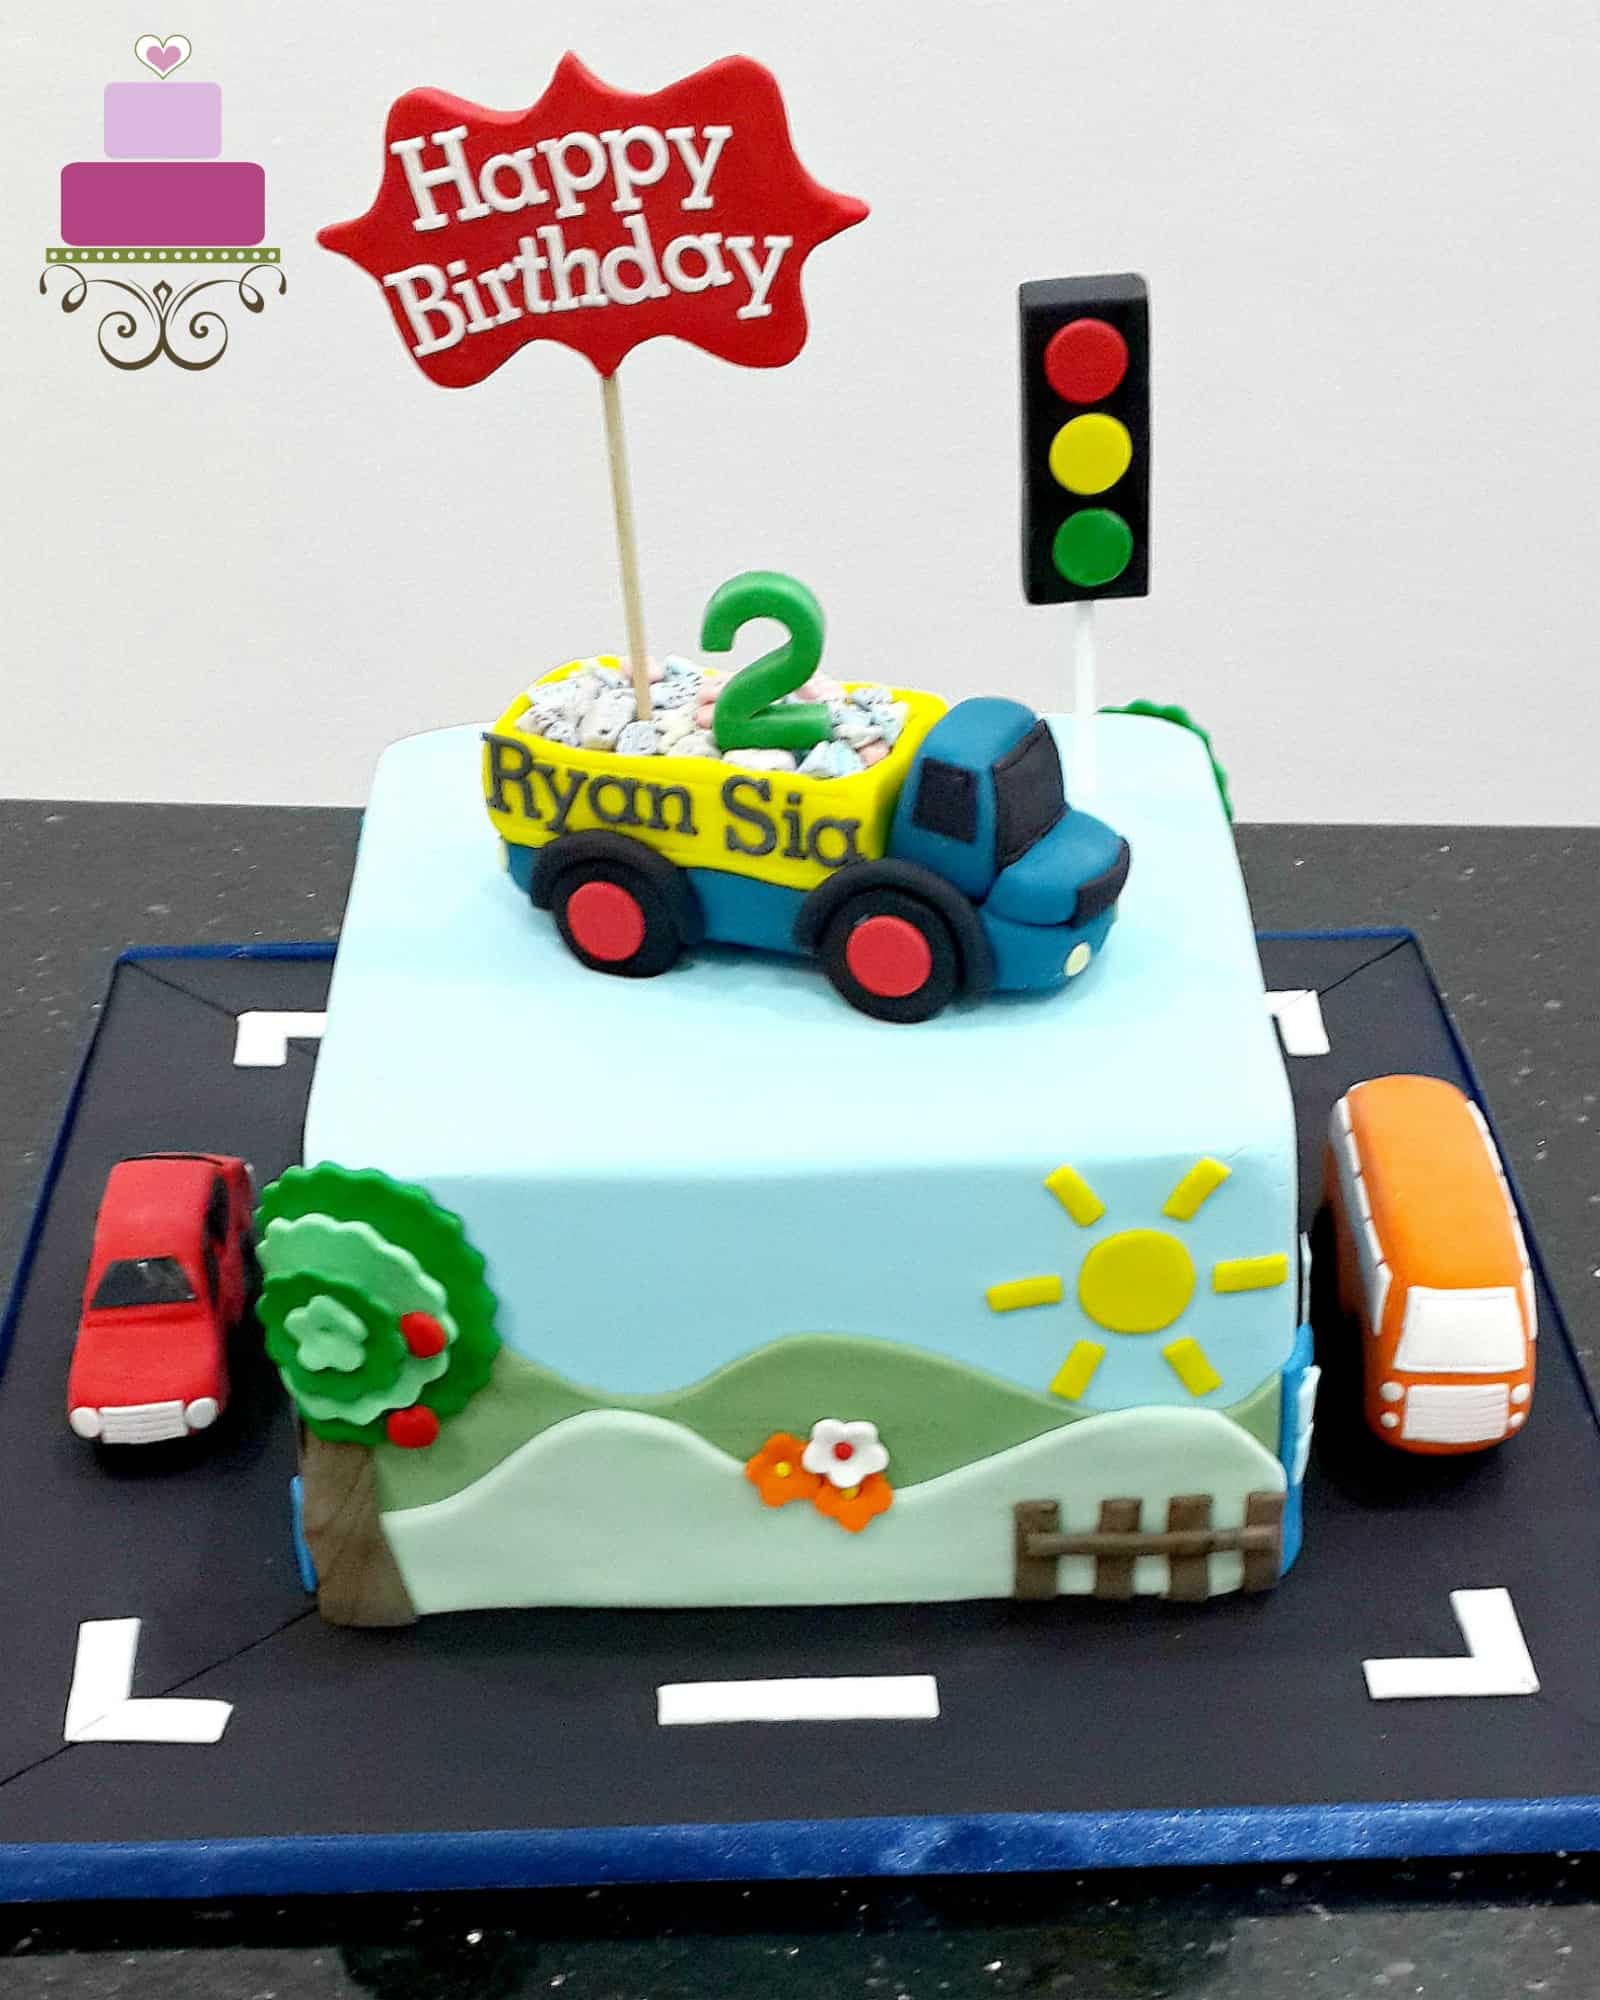
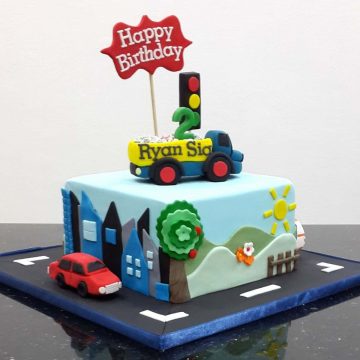
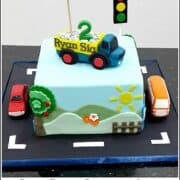
This dump truck cake is great for a transportation-themed birthday party or for anyone who loves trucks. It also makes a perfect birthday cake choice for little boys particularly with the cute edible 3D truck loaded with candy rocks as the cake topper, and the additional edible bus and car on the side!

This is a single tier cake measuring 8 inches square. The cake, including the 3D dump truck topper, the car and the bus are all made of fondant.
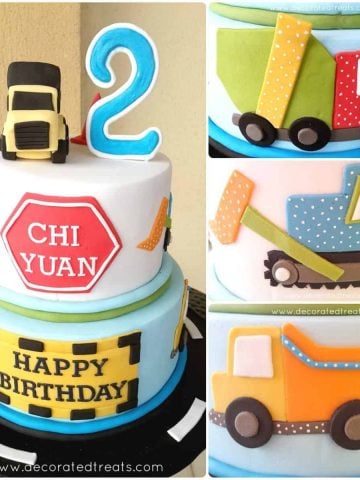
If you like this dump truck cake, you should also check out this other trucks cake decorating idea.
Note: This is an intermediate cake decorating tutorial and some basic knowledge about working with fondant is expected.
Jump to:
❤️Why You Will Love This Tutorial
- It provides the list of supplies required for the project and step by step decorating. guide making it easy to recreate the design.
- You get to tweak the design to your liking.
- You can make your own custom designed cake at a much lesser cost compared to a customed ordered cake from a bakery.
- This can be a fun activity to carry out with your child for his or her birthday.
- Provides you confident to showcase your cake decorating skills.
📋Supplies Required
- Chocolate cake – Two layers of 7 inches square cakes (each approximately 2 inches high).
- Chocolate Ganache – As the filling for this cake.
- Chocolate buttercream – To crumb coat the cake.
- Fondant – I used Satin Ice fondant in yellow, black, green, red, orange, blue, white and baby blue.
- CMC – Add to fondant for making the 3d toppers.
- Gum paste – For the lettering (both on the plaque as well as the dump truck).
- Chocolate pebbles candy
- Scalloped round cutter set – To make the tree on the side of the cake.
- Plunger cutters in squares, circles and 5-petal flower shapes.
- Pizza cutter and sugar craft knife
- Plaque cutter – To make the red “Happy Birthday” plaque.
- Alphabet cutters (large cutter) - to make the number '2'.
- Tappit block letters cutter - for the “Happy Birthday” and the birthday boy’s name.
- Wooden Skewer – To hold the plaque on the cake.
- Lollipop sticks – For the traffic light pole.
- Food color – Americolor Navy Blue , Wilton Juniper Green , Wilton Brown .
- Fondant shaping tools
- Fondant glue and shortening.
👩🍳How to Make
Step 1: Make the 3D Dump Truck Body
Starting by coloring the fondant. Use navy blue (white fondant mixed with Americolor Navy Blue color) for the main body of the lorry, Satin Ice yellow for the container and Satin Ice black and red for the wheels, windscreen and the wheel rims. Knead some CMC into all these colors.
To make the lorry, start with main part i.e. the base of the dump truck which is the long navy-blue piece of fondant that runs from the front to the end of the lorry.
To make the base, roll a thick piece of navy blue block and shaped it into a long rectangle. And then cut another smaller piece of rectangle in about the same thickness and attach it (with glue) to one end of the earlier base rectangle. This is the engine section of the lorry.
Next to it, cut a thicker piece of square, round the edges with your fingers and attach it in an upright standing position. This makes the driver seat section.
For the container, use yellow. Roll and cut out a long thick rectangle (length should not be longer than the remaining base of the dump truck after being taken up by the engine and seating sections of the truck).
And then use the fondant tools to scoop out some fondant from the top of the yellow rectangle piece and smooth the interior. Place this container on a cake board and leave it aside to set.
Step 2: Make the Fondant Wheels
Use the round cutter to cut out 4 wheels in thick black fondant and add red rims to each wheel. Leave them aside to set and harden completely, preferably overnight. Once set, use the glue to attach the container and the wheels to the truck.
For added support, underneath the base of the dump truck (where its hidden by the wheels, place additional pieces of navy blue fondant to support the base. And then add the chocolate pebbles into the container.
Finally, add the rest of the remaining smaller parts of the dump truck such as the lights, mudguard for the wheels, front grill, windscreen and windows to complete the 3D dump truck topper. All these can be cut free hand or with the available tools.
Step 3: Make the 3D Car Topper
Add some CMC into red fondant. Hand shape the car with the fondant. Use the fondant shaping tools to mark the lines for the doors and windscreen. And then use the round plunger cutter to cut out holes at the base of the car to insert its wheels.
Let the wheels dry and set completely overnight before attaching them to the car with glue. And then add the rest of the car parts such as the windows, windscreen, lights, front grills, etc. to complete the 3D car.
Step 4: Make the 3D Bus Topper
Make the bus in orange fondant. As with the car and the truck, add some CMC to it. Shape the body of the bus by hand.
Start by rolling the orange fondant into a fat sausage. From there, shape it into a bus, add the wheels, the windows, lights, front grill, etc. to complete it.
Step 5: Make the 3D Traffic Light
Cut out a thick piece of black rectangle block in black (add some CMC as well). Next, roll some red, yellow and green fondant and cut out 3 circles in each of the colors. Attach these circles onto the black block with some shortening.
Next, dip the end of a lollipop stick into fondant glue and insert it into the black block. Make sure the position of the lights is correct before you insert the stick. Let the light set and firm up in a horizontal position until it is ready to be put on the cake.
Step 6: Make the Fondant Plaque
This is the plaque that holds the ‘Happy Birthday’ lettering on the dump truck cake. Cut 2 pieces of this plaque out in red ( with CMC added). Glue both pieces together using fondant glue, with a wooden skewer in between.
For the lettering, use the Tappit alphabet cutters and cut out the letters for “Happy Birthday” in white gum paste. For best results, roll the paste thin. Attach the letters to the plaque with shortening. Leave it to dry and set in a horizontal position until it is ready to be put up on the cake.
Step 7: Prepare the Cake
Bake the cakes and let them cool completely to room temperature before decorating. Level the top of each cake layer and sandwich them with chocolate ganache. And then crumb coat the cake with chocolate buttercream.
Next roll the baby blue fondant to one eight inch of thickness and cover the whole cake with it. Lift and place cake on a cake board and cover the sides of the board in black. To make the cake board to look like road, add white divider lines on the cake board, all around the dump truck cake.
Step 8: Add the Scenery Decoration
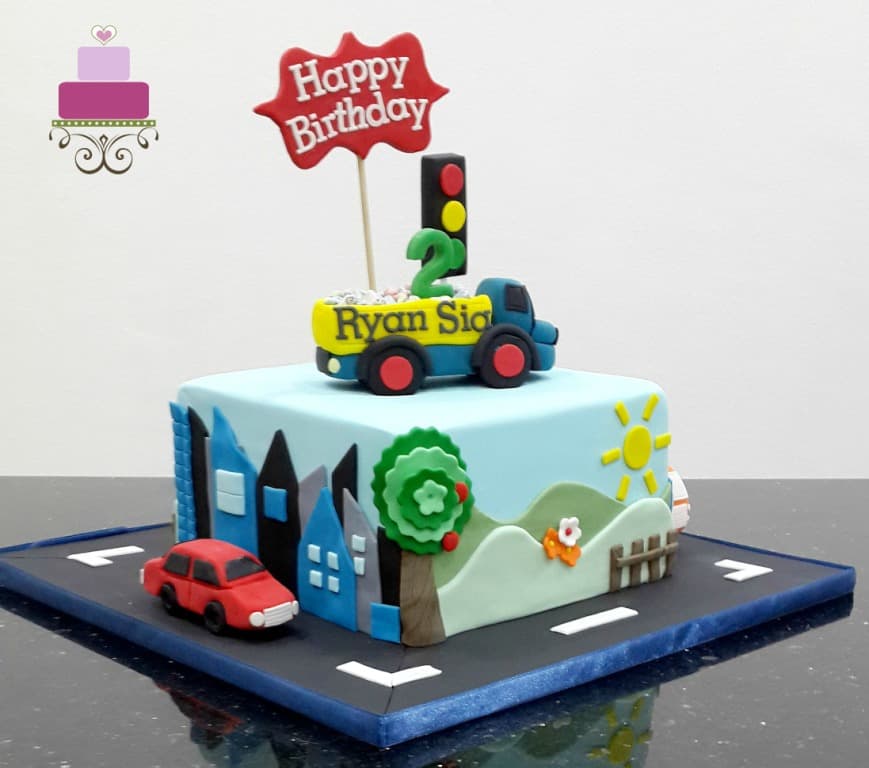
Before adding all the 3D decorations on the cake, complete the scenery decoration on the sides of the cake. Two sides of the dump truck cake are decorated with fondant building, while the other 2 sides are decorated with trees and hills.
For the city scenery, use grey, blue and black for the various blocks of buildings. Use the pizza cutter and a ruler to cut the building blocks. For the small square windows on the buildings, use the square plunger cutter.
For the hilly countryside scenery, use 4 different shades of green , 2 for the hills (Wilton Juniper green in dark and light shades), and 2 for the tree (Satin Ice green). The hills are to be cut free hand. And so is the tree trunk. Create a slightly marbled effect for the tree trunk by mixing brown and white fondant together.
As for the leaves on the tree, use the round scalloped cutter set for the multiple layers of leaves. Use the 5 petals flower plunger cutter for the last and smallest layer of leaves on the tree. And then add 2 small red balls on the tree as fruits.
For the sun, cut it using a round cutter and the rays using the pizza cutter. Similarly for the brown fence, cut it in brown fondant. For the tiny orange and white flowers with red and yellow centers, cut them the 5 petal flower plunger cutter and form the centers by pinching and forming red and yellow fondant into tiny balls. Attach these to the flowers with shortening. Also use shortening to attach the flowers to the cake.
Step 9: Add the 3D Vehicles
Once the sides of the cake are completed, add the 3D decorations. Place the dump truck topper on the cake, right in the center. And then poke the ‘Happy Birthday” message into the container. Also add the 3D number “2” in green and attach to a toothpick. And then I add the birthday boy’s name on the dump truck.
Finally, place the remaining two 3D vehicles onto the cake, both on the cake board. To secure them in place, apply a little glue to the wheels for all 3 vehicles.
And that completes the dump truck birthday cake decoration.
💡Expert Tips
- Adding CMC powder (tylose) to fondant helps the fondant to set harder and firm. This helps when making 3D decorations.
- Making the truck topper at least one day in advance will allow the wheels to dry and set firm, and this will enable the truck to stand stable on the cake.
- Tappit letter cutters are best used with gum paste because gum paste can be rolled paper thin without tearing, unlike fondant. Thinly rolled gum paste will produce neater alphabet cut outs.
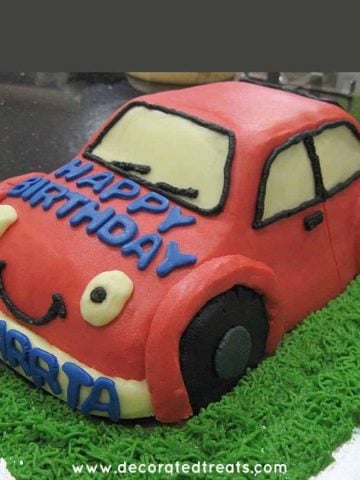
❤️More Tutorials You Will Love

Do you like this tutorial? Please leave a 5-star ⭐⭐⭐⭐⭐rating in the recipe card below and consider a review further down this page. I would love to hear from you. Thank you!
📖Recipe
Dump Truck Cake
Equipment
- Scalloped round cutter set
- Plunger cutters in squares, circles and 5-petal flower shapes
- Pizza cutting wheel
- Sugar craft knife
- Plaque cutter
- Alphabet cutters (large cutter)
- Tappit block letters cutter
- Wooden skewer
- Lollipop sticks
- Fondant shaping tools
For best results, use the metrics measurements. US customary measurements have not been tested and are only meant for guide.
Ingredients
- 2 seven inches square cakes (each approximately 2 inches high)
- Chocolate Ganache
- Chocolate buttercream
- Fondant Satin Ice fondant in yellow, black, green, red, orange, blue, white and baby blue.
- CMC powder
- Gum paste
- Chocolate pebbles candy
- Food color Americolor Navy Blue, Wilton Juniper Green, Wilton Brown
- Fondant glue
- Shortening
Instructions
Making the 3D dump truck topper body
- Starting by coloring the fondant. Use navy blue (white fondant mixed with Americolor Navy Blue color) for the main body of the lorry, Satin Ice yellow for the container and Satin Ice black and red for the wheels, windscreen and the wheel rims. Knead some CMC into all these colors.
- To make the lorry, start with main part i.e. the base of the dump truck which is the long navy-blue piece of fondant that runs from the front to the end of the lorry.
- To make the base, roll a thick piece of navy blue block and shaped it into a long rectangle. And then cut another smaller piece of rectangle in about the same thickness and attach it (with glue) to one end of the earlier base rectangle. This is the engine section of the lorry.
- Next to it, cut a thicker piece of square, round the edges with your fingers and attach it in an upright standing position. This makes the driver seat section.
- For the container, use yellow. Roll and cut out a long thick rectangle (length should not be longer than the remaining base of the dump truck after being taken up by the engine and seating sections of the truck).
- And then use the fondant tools to scoop out some fondant from the top of the yellow rectangle piece and smooth the interior. Place this container on a cake board and leave it aside to set.
Making the wheels
- Use the round cutter to cut out 4 wheels in thick black fondant and add red rims to each wheel. Leave them aside to set and harden completely, preferably overnight. Once set, use the glue to attach the container and the wheels to the truck.
- For added support, underneath the base of the dump truck (where its hidden by the wheels, place additional pieces of navy blue fondant to support the base. And then add the chocolate pebbles into the container.
- Finally, add the rest of the remaining smaller parts of the dump truck such as the lights, mudguard for the wheels, front grill, windscreen and windows to complete the 3D dump truck topper. All these can be cut free hand or with the available tools.
Making the 3D car topper
- Add some CMC into red fondant. Hand shape the car with the fondant. Use the fondant shaping tools to mark the lines for the doors and windscreen. And then use the round plunger cutter to cut out holes at the base of the car to insert its wheels.
- Let the wheels dry and set completely overnight before attaching them to the car with glue. And then add the rest of the car parts such as the windows, windscreen, lights, front grills, etc. to complete the 3D car.
Making the 3D bus topper
- Make the bus in orange fondant. As with the car and the truck, add some CMC to it. Shape the body of the bus by hand.
- Start by rolling the orange fondant into a fat sausage. From there, shape it into a bus, add the wheels, the windows, lights, front grill, etc. to complete it.
Making the 3D traffic light
- Cut out a thick piece of black rectangle block in black (add some CMC as well). Next, roll some red, yellow and green fondant and cut out 3 circles in each of the colors. Attach these circles onto the black block with some shortening.
- Next, dip the end of a lollipop stick into fondant glue and insert it into the black block. Make sure the position of the lights is correct before you insert the stick. Let the light set and firm up in a horizontal position until it is ready to be put on the cake.
Making the fondant plaque
- This is the plaque that holds the ‘Happy Birthday’ lettering on the cake. Cut 2 pieces of this plaque out in red ( with CMC added). Glue both pieces together using fondant glue, with a wooden skewer in between.
- For the lettering, use the Tappit alphabet cutters and cut out the letters for “Happy Birthday” in white gum paste. For best results, roll the paste thin. Attach the letters to the plaque with shortening. Leave it to dry and set in a horizontal position until it is ready to be put up on the cake.
Preparing the cake
- Bake the cakes and let them cool completely to room temperature before decorating. Level the top of each layer and sandwich them with chocolate ganache. And then crumb coat the cake with chocolate buttercream.
- Next roll the baby blue fondant to one eight inch of thickness and cover the whole cake with it. Lift and place cake on a cake board and cover the sides of the board in black. To make the cake board to look like road, add white divider lines on the cake board, all around the cake.
Adding the scenery decoration
- Before adding all the 3D decorations on the cake, complete the scenery decoration on the sides of the cake. Two sides of the cake is decorated with fondant building, while the other 2 sides are decorated with trees and hills.
- For the city scenery, use grey, blue and black for the various blocks of buildings. Use the pizza cutter and a ruler to cut the building blocks. For the small square windows on the buildings, use the square plunger cutter.
- For the hilly countryside scenery, use 4 different shades of green , 2 for the hills (Wilton Juniper green in dark and light shades), and 2 for the tree (Satin Ice green). The hills are to be cut free hand. And so is the tree trunk. Create a slightly marbled effect for the tree trunk by mixing brown and white fondant together.
- As for the leaves on the tree, use the round scalloped cutter set for the multiple layers of leaves. Use the 5 petals flower plunger cutter for the last and smallest layer of leaves on the tree. And then add 2 small red balls on the tree as fruits.
- For the sun, cut it using a round cutter and the rays using the pizza cutter. Similarly for the brown fence, cut it in brown fondant. For the tiny orange and white flowers with red and yellow centers, cut them the 5 petal flower plunger cutter and form the centers by pinching and forming red and yellow fondant into tiny balls. Attach these to the flowers with shortening. Also use shortening to attach the flowers to the cake.
Adding the 3D vehicles
- Once the sides of the cake are completed, add the 3D decorations. Place the dump truck topper on the cake, right in the center. And then poke the ‘Happy Birthday” message into the container. Also add the 3D number “2” in green and attach to a toothpick. And then I add the birthday boy’s name on the dump truck.
- Finally, place the remaining two 3D vehicles onto the cake, both on the cake board. To secure them in place, apply a little glue to the wheels for all 3 vehicles.
- And that completes the dump truck birthday cake decoration.
Notes
- Adding CMC powder (tylose) to fondant helps the fondant to set harder and firm. This helps when making 3D decorations.
- Making the truck topper at least one day in advance will allow the wheels to dry and set firm, and this will enable the truck to stand stable on the cake.
- Tappit letter cutters are best used with gum paste because gum paste can be rolled paper thin without tearing, unlike fondant. Thinly rolled gum paste will produce neater alphabet cut outs.
Leave a Reply