

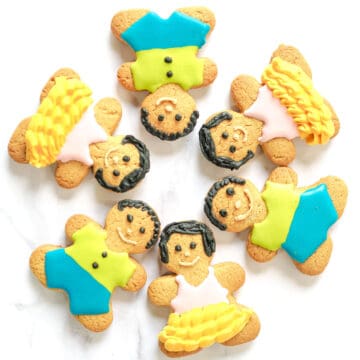
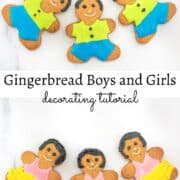
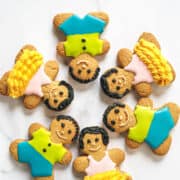
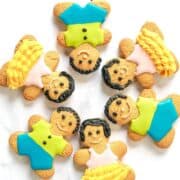
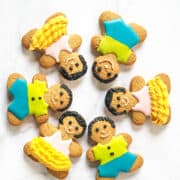
Make these gingerbread boys and girls cookies to elevate plain gingerbread cookies into cute treats. You can 'dress' these cookie treats in any color or fashion to suit your occasion or holiday with this easy tutorial and video!
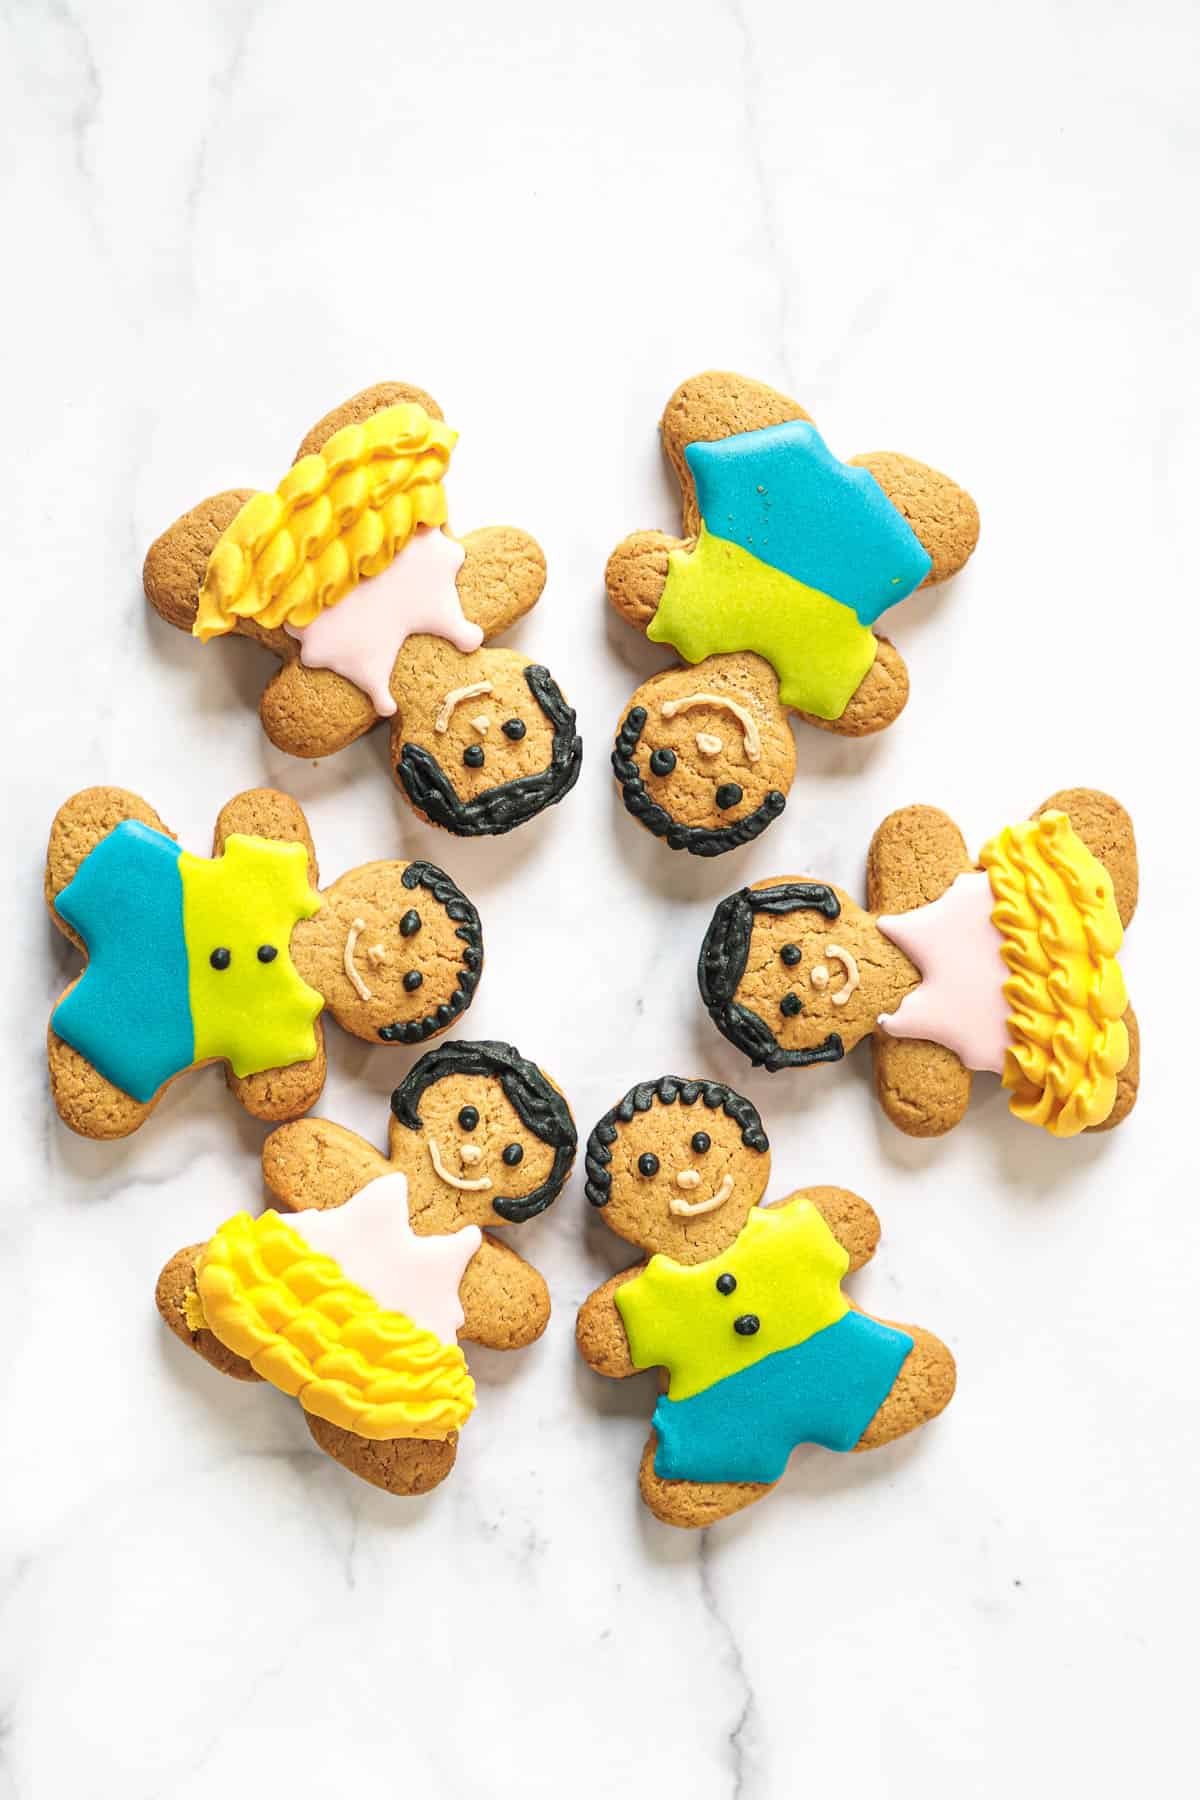
These gingerbread boys and girls cookies are adapted from my gingerbread cookies recipe. Instead of using the typical raisins, cherries, chocolate bits, or sugar dragees / sprinkles to decorate the gingerbread men, I used royal icing and simple piping techniques to decorate them.
If you like these decorated holiday gingerbread cookies, be sure to check out my other cookie decorating ideas like these Christmas wreath cookies, Easter egg sugar cookies, snowflake cookies, heart sugar cookies, daisy cookies and heart cookies for Valentine's Day.
Jump to:
❤️Why You Will Love This Recipe
- The cookies are soft and chewy and easy to make and decorate.
- You only need royal icing and very basic piping techniques to decorate these gingerbread boys and girls cookies.
- You get to customize the icing color to suit your occasion.
- You can use this same technique to make boys and girls cookies using simple sugar cookie recipe for occasions like baby showers.
- These make really cute Christmas gingerbread.
- They make great gifts too.
📋Ingredients
For the cookies:
- All purpose flour + baking soda + salt - mix and sift before using. Use fine salt. Baking soda helps the cookies puff slightly.
- Butter - This recipe uses salted butter. If using unsalted butter, add an extra pinch of salt to the recipe.
- Egg - help in binding all the ingredients.
- Soft dark brown sugar - use dark brown sugar for a deep molasses taste.
- Golden syrup - can be homemade or purchased. Can be substituted with molasses or honey.
- Ground ginger (ginger powder) + ground cloves (cloves powder) + ground cinnamon (cinnamon powder) -for flavor
For the decoration:
- Powdered sugar - always sift the sugar before using as powdered sugar tends to be lumpy and these lumps can clog your piping tips.
- Egg whites - use pasteurized egg whites. Can be substituted with meringue powder. Refer to my royal icing recipe for meringue powder options.
- Lemon juice - used as a flavoring. Strain before using. Lemon juice is optional and can be replaced with vanilla extract or rose extract.
- Food coloring – Wilton food colors in Pink and Golden Yellow for the girls' dresses and Americolor Electric Blue, Americolor Electric Green for the boys’ shirts and pants, Americolor Black for the hair and eyes, and Wilton Brown for the nose and mouth.
Tools and other supplies:
- Disposable piping bags
- Wilton petal tip number 101 for the frills on the girls’ dress.
*Refer to the recipe card below for full list of ingredients and exact quantities. For best results, use a digital kitchen scale where applicable*
👩🏻🍳How to Make
Bake the Cookies
Step 1: Preheat oven and prepare baking trays. Use 175 degrees Celsius. Line baking trays with parchment paper.
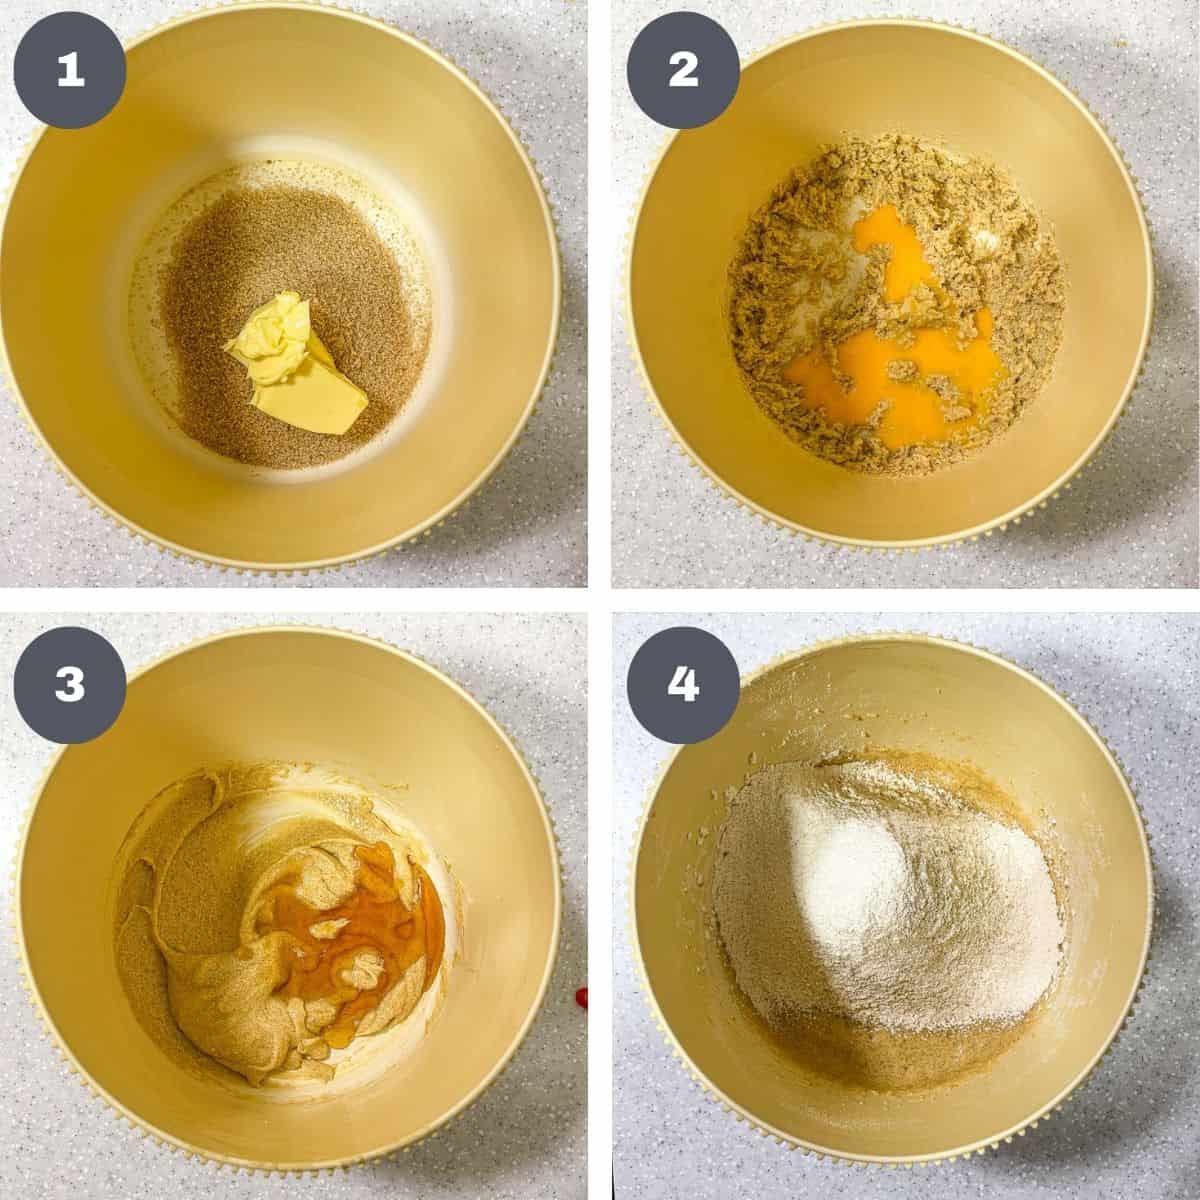
Step 2: Cream butter and sugar (image 1). Use an electric mixer on medium speed. Beat until the mixture turns creamy. Scrape the sides and bottom of the bowl half way through.
Step 3: Add the egg and golden syrup. Start with the egg and beat until all traces of the egg are no longer visible before beating in the golden syrup. Scrape the sides and bottom of the bowl (images 2 and 3).
Step 4: Add the dry ingredients. Sift the flour, ground ginger, ground cinnamon, ground cloves, baking soda, and salt. Mix into the creamed wet ingredients on low speed (image 4).
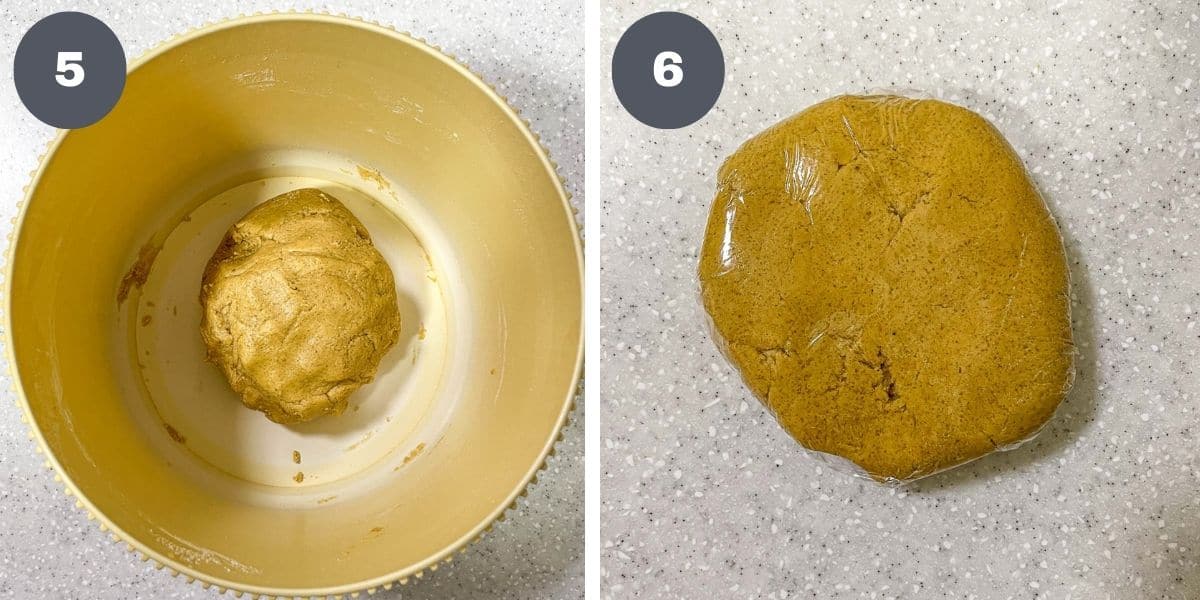
Mix to form a dough ball. The dough will be sticky at this stage. For easy handling, divide the dough into smaller sections, wrap with plastic wrap and refrigerate for 10 minutes (images 5 and 6).
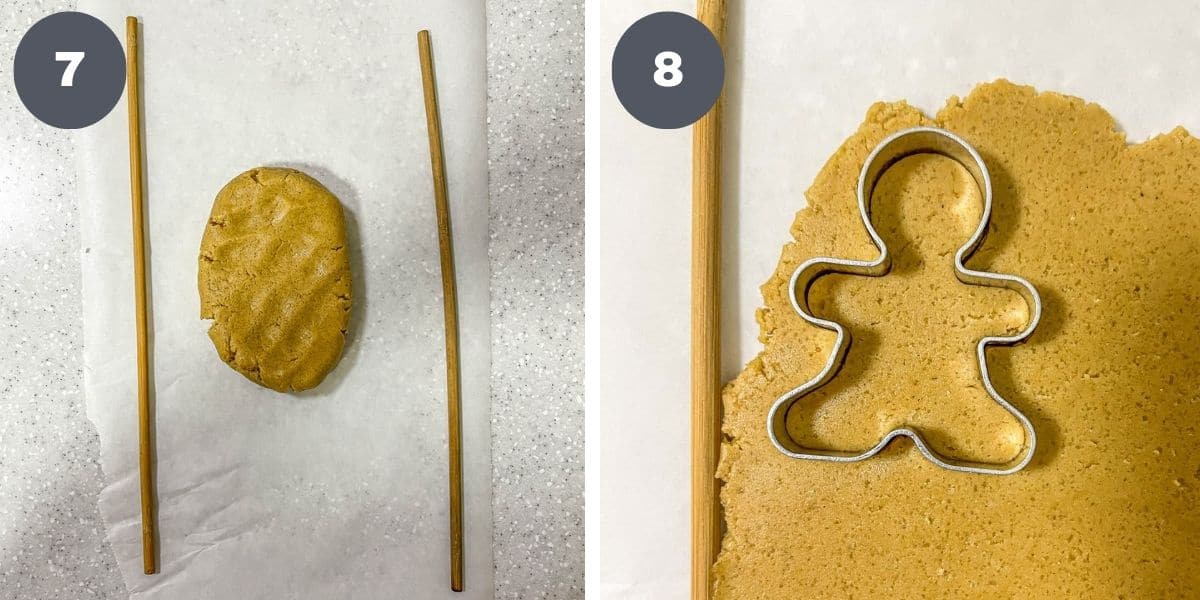
Step 5: Roll and cut the cookies. Place the chilled dough between 2 parchment sheets (or plastic sheets) and roll with 2 dowel rods on either side (image 7).
Note: The parchment sheets will prevent the dough from sticking to the rolling pin and counter space. Placing and rolling on the dowel rods on either side of the dough will ensure consistent thickness for your cookies.
Cut the dough with gingerbread man cookie cutter. Dip the cutter in flour to prevent sticking (image 8).
Step 6: Bake the cookies. Place the cookies in the prepared baking tins.
Note: It is easier to lift them onto the baking tray using a flat rubber spatula.
Bake at 175 degrees Celsius for 6 minutes for soft and chewy cookies. Increase the baking time to 8 minutes for crisp gingerbread cookies.
Remove the cookies from oven, let them rest in the tray for a few minutes and lift out onto cooling rack to cool completely to room temperature. Store the cookies in an airtight container until ready to be decorated.
Note: The cookies can be baked a few days in advance before decorating.
Decorate the cookies
Step 7: Make the royal icing. Mix the icing (please refer to the recipe card below), divide and tint it in all the colors that are needed - black, brown, electric blue, electric green, pink and yellow.
The royal icing is in stiff consistency. This consistency is required for the hair, facial features and the skirt. For the shirt, shorts and blouse, it has to be in a slightly runny consistency. To achieve runny consistency, add a few drops of water to the bowls of pink, electric blue and electric green icing. Mix well.
Note: The royal icing in runny consistency should not be too runny. Use the 10 seconds test to get right consistency as follows:
- Add a few drops of water into the icing. Mix well.
- Use a butter knife to cut through the icing. Count the number of seconds it takes for the line to disappear. Ideally, it should take 10 seconds, not more, not less.
- To make sure the icing does not accidentally become too runny, it is always advisable to start with a few drops of water at a time until the right consistency is achieved. If it becomes too runny, add some icing in stiff consistency and mix well. You may need to add more coloring too.
Fill the yellow icing into a piping bag fitted with tip 101. For the rest of the colors, fill them into separate piping bags without any tips.
Step 8: Decorate the gingerbread boys. Snip the tip of the black icing (a tiny hole) and pipe the hair in circular curly motion. Do it for the front edges of the head (top half) .
Next, pipe 2 dots for the eyes. Snip the tip of the brown icing bag and pipe the nose and mouth.
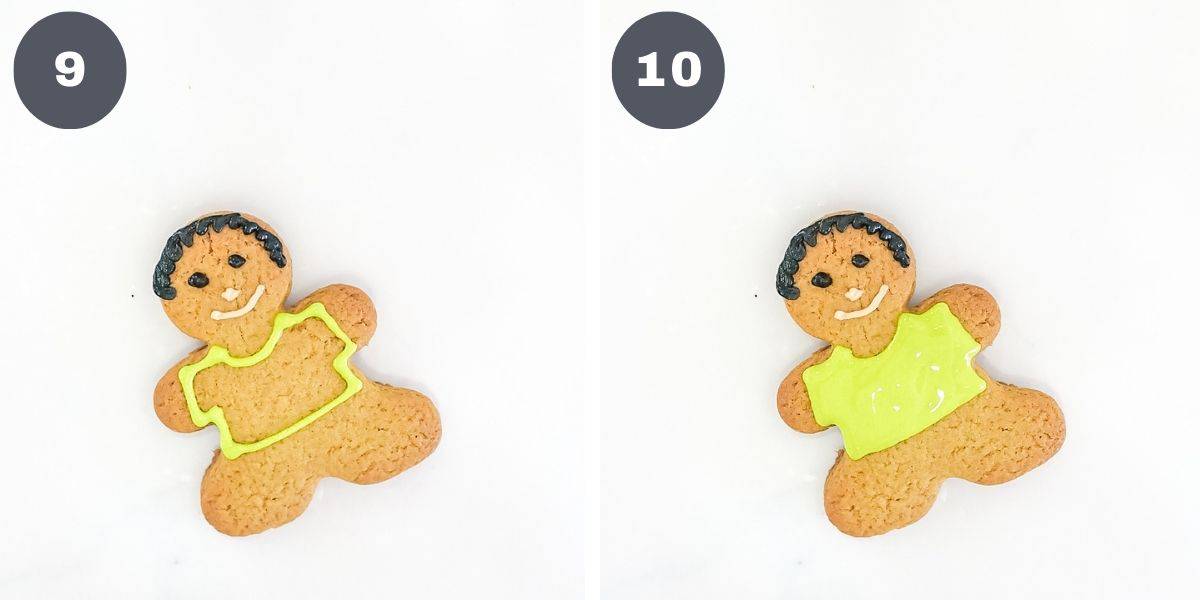
For the shirt, snip the tip of the green icing bag and pipe the outline. Fill the outline with the same icing color (images 9 and 10).
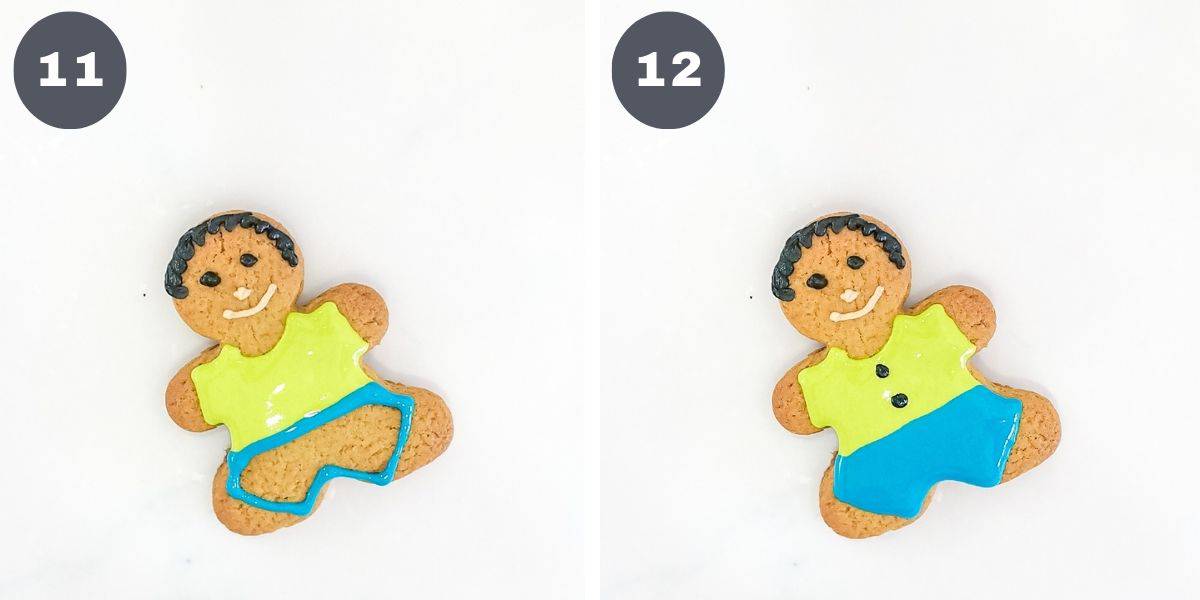
For the shorts, pipe the outline in blue and fill it with the same icing. For the final touch, add two dots of black icing for the buttons on the shirt (images 11 and 12).

And that completes the gingerbread boys cookies decoration.
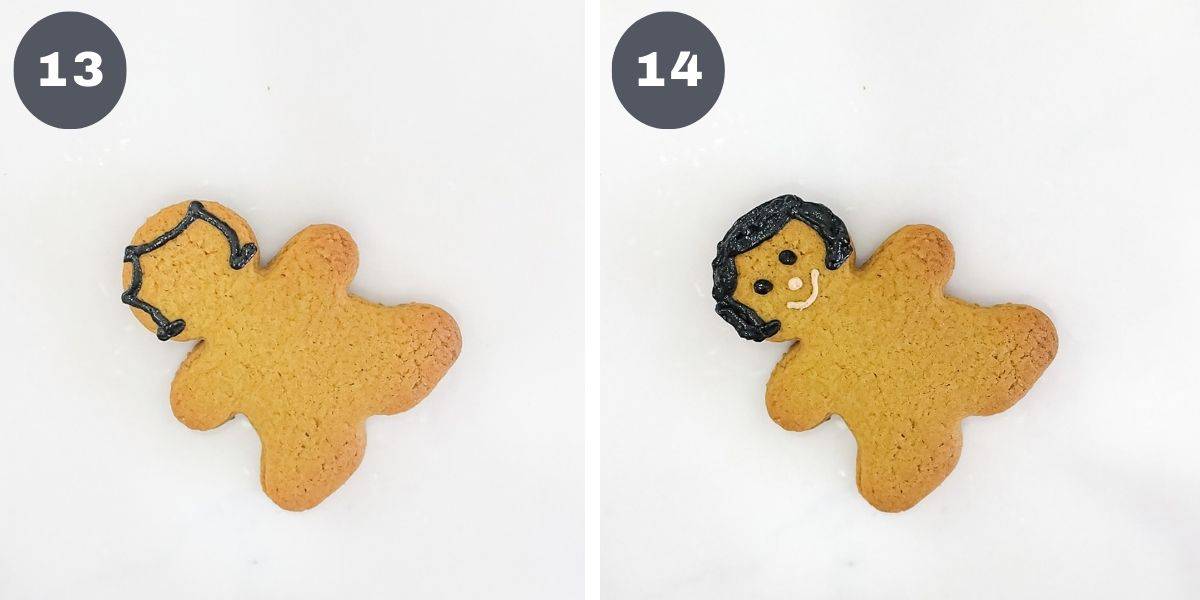
Step 9: Decorate the gingerbread girls. With black icing, pipe the outline for the hair (image 13). Fill the outline with piped lines to create hair strands.
Using the same black icing, pipe 2 dots for the eyes. For the nose and mouth, use the same brown as used for the gingerbread boys (image 14).
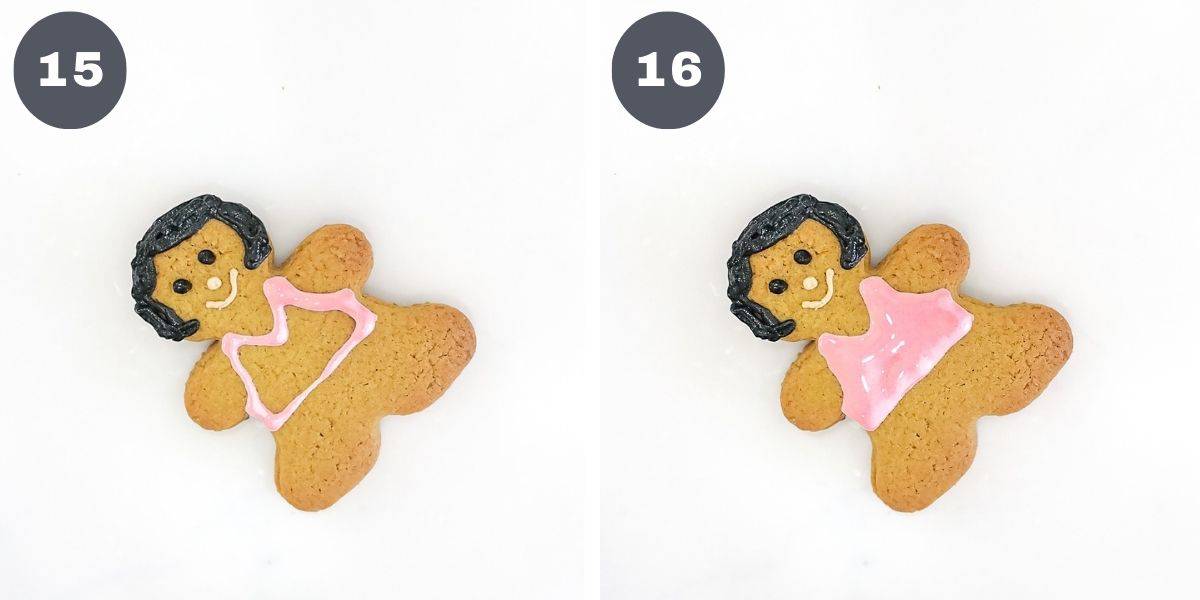
For the blouse, snip the tip of the pink icing bag and pipe the outline. Fill the outline with the same icing (images 15 and 16).
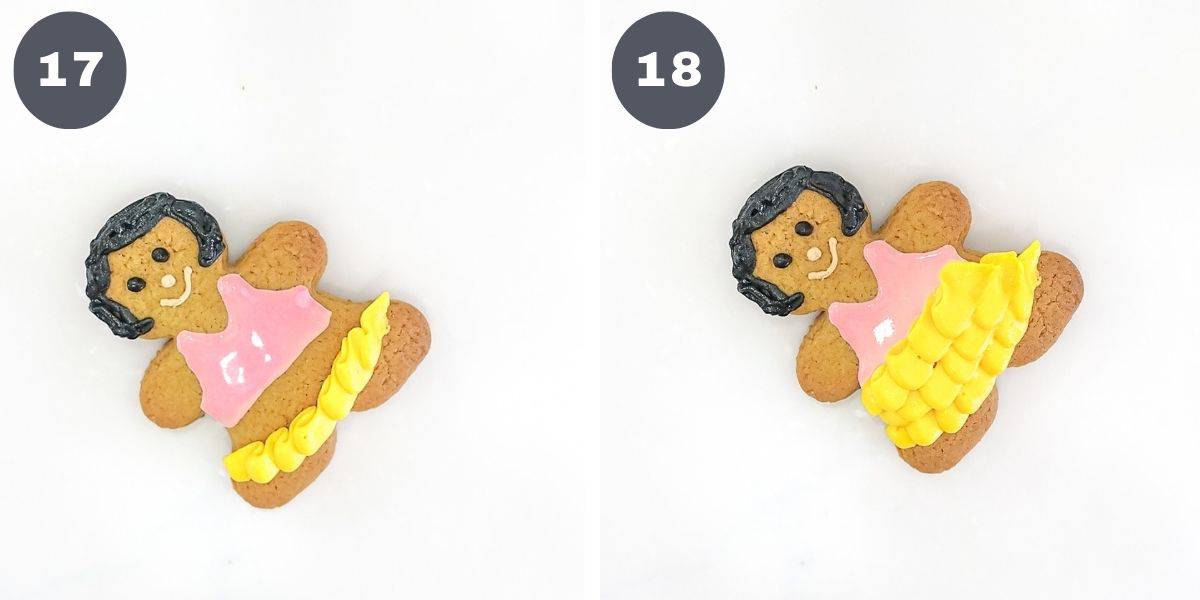
To make the frilly skirt, pipe 3 layers of frills starting from the bottom using yellow icing fitted with tip 101. The icing should be of stiff consistency to hold the shape of the frills (images 17 and 18).
Let the icing set completely before storing the cookies.

💡Expert Tips
- Decorate the cookies in batches - it is a lot quicker to decorate the cookies in batches. For example, pipe the hair for all the gingerbread boys, and then move to the girls. Similarly, for the facial features. Start with the boys, do it all at once and the move to the girls before adding on the clothes.
- Keep royal icing covered - this icing tends to crust very quickly. Fill it into piping bags after mixing and keep the snipped tips of the piping bags covered with a damp cloth when not using. This will prevent the icing from crusting and clogging the holes.
- Keep the cookies covered - this will ensure they they do not become soft (especially if you like crisp cookies).
- Well set icing - allow time for the royal icing to set completely before stacking the cookies in a cookie jar or container. Placing pieces of parchment paper in between the cookies will also help the icing from sticking to the other cookies.
💭FAQs
Sugar glaze (made with powdered sugar and water, but without the egg whites or meringue powder) is not suitable for these cookies as it is not stiff enough to pipe the hair and frills on the skirt.
Buttercream can hold its shape but not suitable to fill the cookies like royal icing, hence it is not very suitable to decorate these gingerbread boys and girls cookies.
The cookies are best kept at room temperature in an airtight container. They can last for a good 2 weeks at room temperature. The crisp version can last up to one month if stored well.
❤️More Recipes You Will Love
Do you like this recipe? Please leave a 5-star ⭐⭐⭐⭐⭐rating in the recipe card below and consider a review further down this page. I would love to hear from you. Thank you!
📖Recipe
Gingerbread Boys and Girls Cookies
Equipment
- Disposable piping bags
- Petal tip #101
For best results, use the metrics measurements. US customary measurements have not been tested and are only meant for guide.
Ingredients
Cookies
- 340 g all purpose flour
- 170 g soft brown sugar
- 100 g butter (salted)
- 60 ml golden syrup
- 1 egg
- 2 ½ tablespoon ground ginger ginger powder
- ½ teaspoon ground cinnamon cinnamon powder
- ½ teaspoon ground cloves cloves powder
- 1 teaspoon baking soda
- ½ teaspoon salt
Decoration
- 500 g powdered sugar (sifted)
- 2 egg whites (pasteurized)
- ¼ teaspoon lemon juice (optional)
- Food coloring (Wilton pink, golden yellow, brown and Americolor electric blue, electric green and black)
Instructions
- Preheat oven to 175°Celsius. Line baking trays with parchment paper.
- Measure butter and sugar into a large mixing bowl. Beat on medium speed until the mixture turns creamy. Scrape the sides of the bowl.
- Add the egg and beat again until all traces of the egg are no longer visible. Beat in the golden syrup.
- Sift the flour, ground ginger, ground cinnamon, ground cloves, baking soda, and salt. Add these dry ingredients into the creamed wet ingredients.
- Mix to form a dough ball. The dough will be sticky at this stage. For easy handling, divide the dough into smaller sections, wrap with plastic wrap and refrigerate for 10 minutes.
- Place the chilled dough between 2 parchment sheets (or plastic sheets) and roll with 2 dowel rods on either side (see Note 1).
- Cut with gingerbread man cookie cutter. Dip the cutter in flour to prevent sticking.
- Transfer the cookies onto prepared baking trays. Use a flat rubber spatula to lift the cookies to keep their shape.
- Bake for 6 minutes for soft and chewy cookies. Increase the baking time to 8 minutes for crispy gingerbread cookies (see Note 2).
- Remove cookies from oven and rest in the tray for a few minutes before transferring onto a wire rack to cool completely. Store in an airtight container until ready to be decorated (see Note 3).
- To make the royal icing, place the egg whites in a large, grease-free bowl. Whip on medium speed until they turn frothy and increase in volume. Gradually add the powdered sugar and continue beating until the icing turns smooth and gloss and stiff peaks form.
- Add the lemon juice and mix again.
- Divide the icing into 6 small bowls. Tint each bowl of icing in all the colors that are needed - black, brown, electric blue, electric green, pink and yellow.
- Add a few drops of warm water to the bowls of blue, green and pink icing to dilute to a runny consistency. Mix well (see Note 4).
- Fill the yellow icing into a piping bag fitted with tip 101. For the rest of the colors, fill them into piping bags without any tips.
- To decorate the gingerbread boys, snip the tip of the black icing bag and pipe the hair in curly motion. Using the same icing, pipe 2 dots on the face for the eyes.
- Snip the tip of the brown icing bag and pipe the nose and mouth.
- For the shirt, snip the tip of the green icing bag and pipe the outline. Fill the outline with the same icing color. For the shorts, pipe the outline in blue and fill it with the same icing.
- For the final touch, add two dots of black icing for the buttons on the shirt. Set the cookies aside to allow the royal icing to set completely before storing.
- To decorate the gingerbread girls, use the black icing to pipe the outline for the hair. Fill the outline with piped lines to create hair strands.
- Using the same black icing, pipe 2 dots for the eyes. For the nose and mouth, use the same brown as used for the gingerbread boys.
- For the blouse, snip the tip of the pink icing bag and pipe the outline. Fill the outline with the same icing.
- To make the frilly skirt, pipe 3 layers of frills starting from the bottom using yellow icing fitted with tip 101. The icing should be of stiff consistency to hold the shape of the frills.
- Let the icing set completely before storing the cookies.
Video
Notes
- The parchment sheets will prevent the dough from sticking to the rolling pin and counter space. Placing and rolling on the dowel rods on either side of the dough will ensure consistent thickness for your cookies.
- This baking time is for cookies measuring approximately 6.5cm long (from head to the toes) and 5cm wide (at the widest part, ie the feet). If you are making larger or smaller cookies, adjust the baking time accordingly.
- The cookies can be baked a few days in advance before decorating.
- The royal icing in runny consistency should not be too runny. Use the 10 seconds test to get right consistency: Start by adding just a few drops of water into the icing and mix well. Use a butter knife to cut through the icing and count the number of seconds it takes for the line to disappear. Ideally, it should take 10 seconds, not more, not less. To make sure the icing does not accidentally become too runny, it is always advisable to start with a little water at a time until the right consistency is achieved. If it becomes too runny, add some icing in stiff consistency and mix well. You may need to add more coloring too.
- To make royal icing with meringue powder, refer to the meringue powder royal icing recipe here.
- Royal icing tends to crust very quickly. Fill it into piping bags immediately after mixing and keep the snipped tips of the piping bags covered with a damp cloth when not using. This will prevent the icing from crusting and clogging the holes.

Leave a Reply