

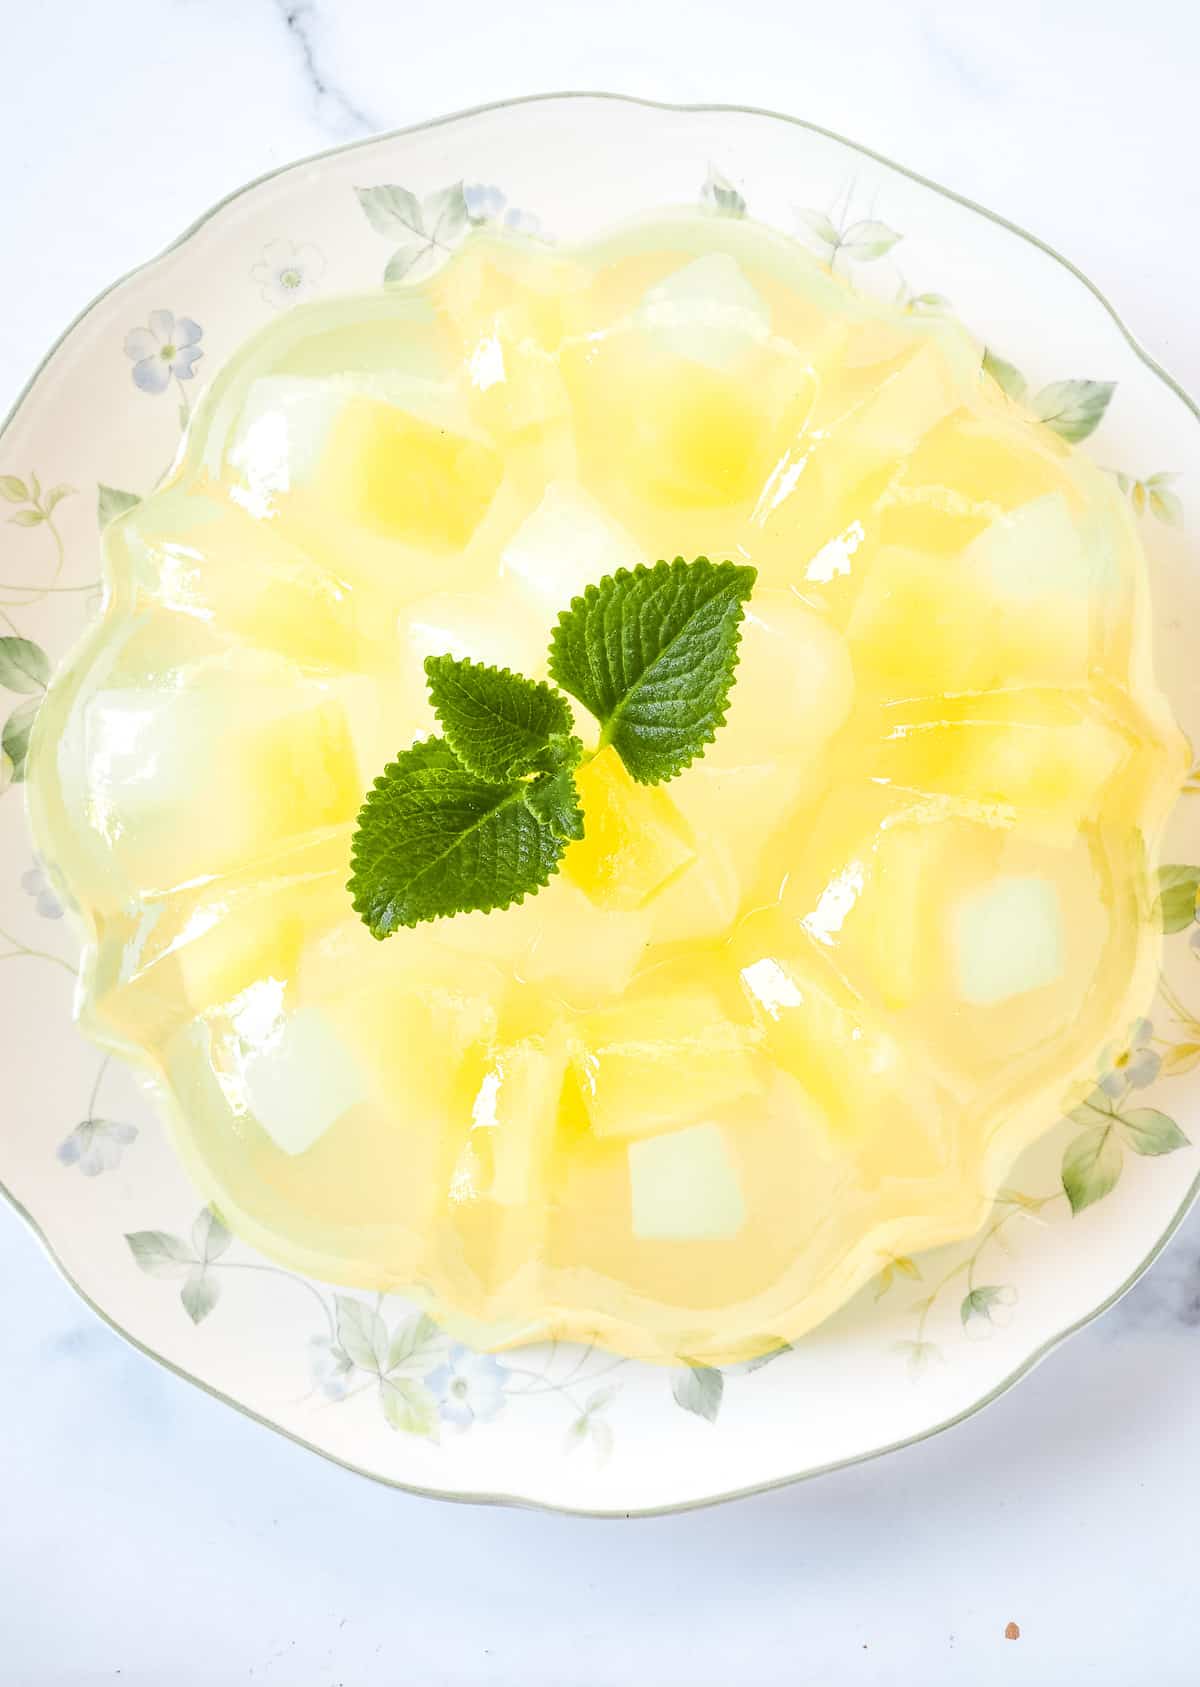
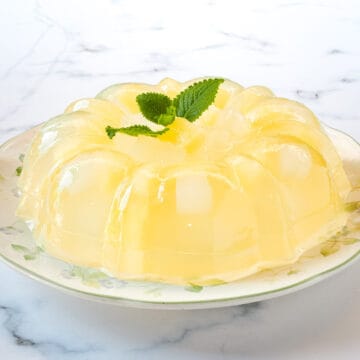
This nata de coco jelly makes a great dessert after a fulfilling meal, one that is light and refreshing with loads of chewy nata de coco and juicy tropical pineapple. With only 4 ingredients, this jelly dessert is very quick and easy to make.
I used Japanese jelly powder (konnyaku jelly) to make this jelly. It is slightly firmer and chewier compared to agar agar jelly and pairs very well with the nata de coco.
I made this pineapple flavored nata de coco jelly in a bundt cake tin but it can easily be made into individual serving containers or even a flat tray if you like.
The nata de coco jelly is best-served chill and is good at room temperature too. Once made, it can last in the refrigerator for a good 2 days.
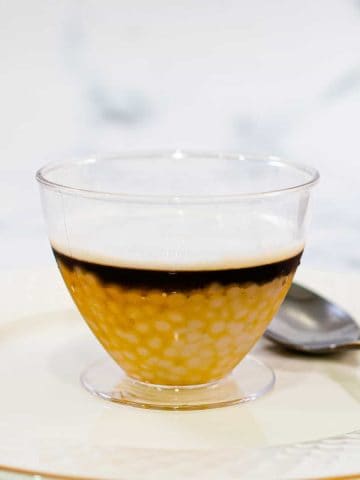
If you like jelly desserts, check out this lychee jelly which is also made in a similar bundt tin. And if you like agar agar jelly instead of konnyaku, these coconut jelly, fruit jelly cups and coffee jelly will be a perfect option.
Jump to:
❤️Why You Will Love This Recipe
- It is very easy and quick to make.
- It only requires 4 simple ingredients - jelly powder, canned nata de coco, canned pineapple, water and sugar.
- Served chilled, this jelly makes a perfect dessert on a hot summer day.
- Set in a bundt tin, the jelly is very pretty too.
📋Ingredients
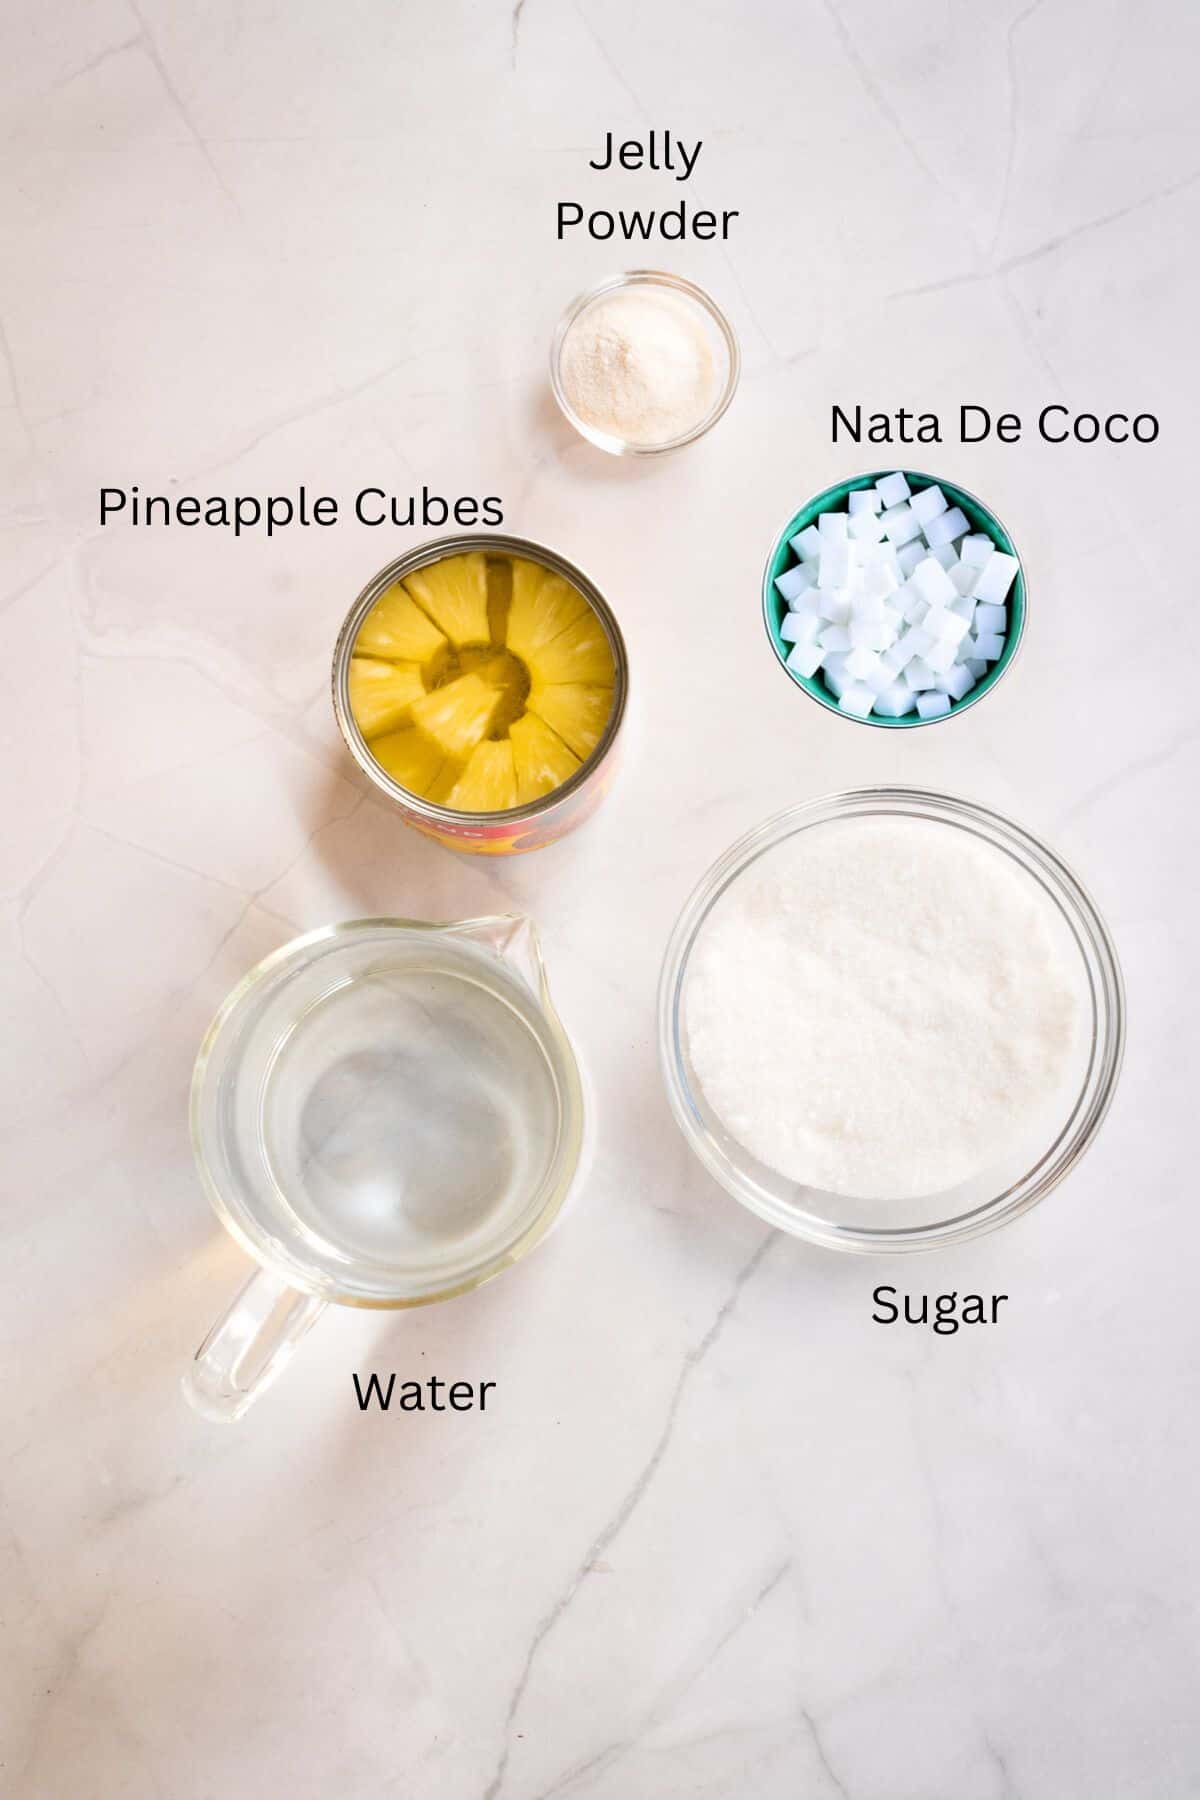
- Konnyaku jelly powder (Japanese jelly/agar) - this is sold in powder form. Purchase in small packets (sometimes sold as 10g or 20g) for ease of use as you can use the whole packet without having to measure.
- Nata de coco (canned) - comes in cube form and often sold in cans.
- Pineapple cubes (canned) + syrup - I prefer to use canned pineapple because it comes with pineapple infused syrup which adds a lovely flavor to the jelly.
- Sugar - use white sugar. Both coarse sugar and granulated sugar will work for this recipe.
- Water - use filtered water.
*Refer to the recipe card below for full list of ingredients and exact quantities. For best results, use a digital kitchen scale where applicable*
🧾Substitutions and Variations
- Konnyaku jelly powder can be substituted with agar agar jelly powder. Use exact same quantity and use the amount of liquid as indicated on the back of the jelly powder packet. If there is no amount given, use the amount provided in this recipe.
- The canned pineapple can be replaced with fresh pineapple if you like. Peel the fruit (here's how to peel a pineapple without waste) and cut it into small cubes. Add an extra 100g sugar to the jelly and replace the syrup with water.
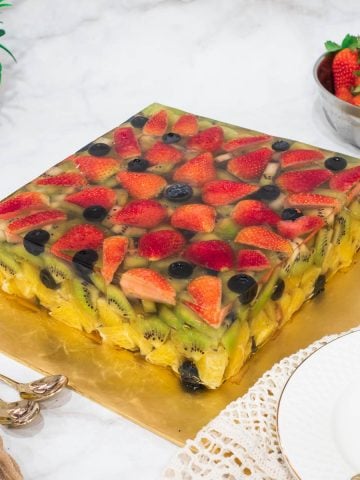
- You can also replace pineapple with any other fruits you like such as lychee, mangoes, strawberries, blueberries and even grapes.
This recipe has not been tested with other substitutions or variations. If you do try, please let me know in the comments section below!
👩🍳How to Make
Step 1: Prepare the mold. Wash and pat the mold dry. I used a Nordic Ware bundt cake tin to make my nata de coco jelly. Set it aside.
Note: The first step when making jellies is to prepare the containers or molds. This is because the jelly will start to set as it cools down, so it is important that the molds are prepared in advance.
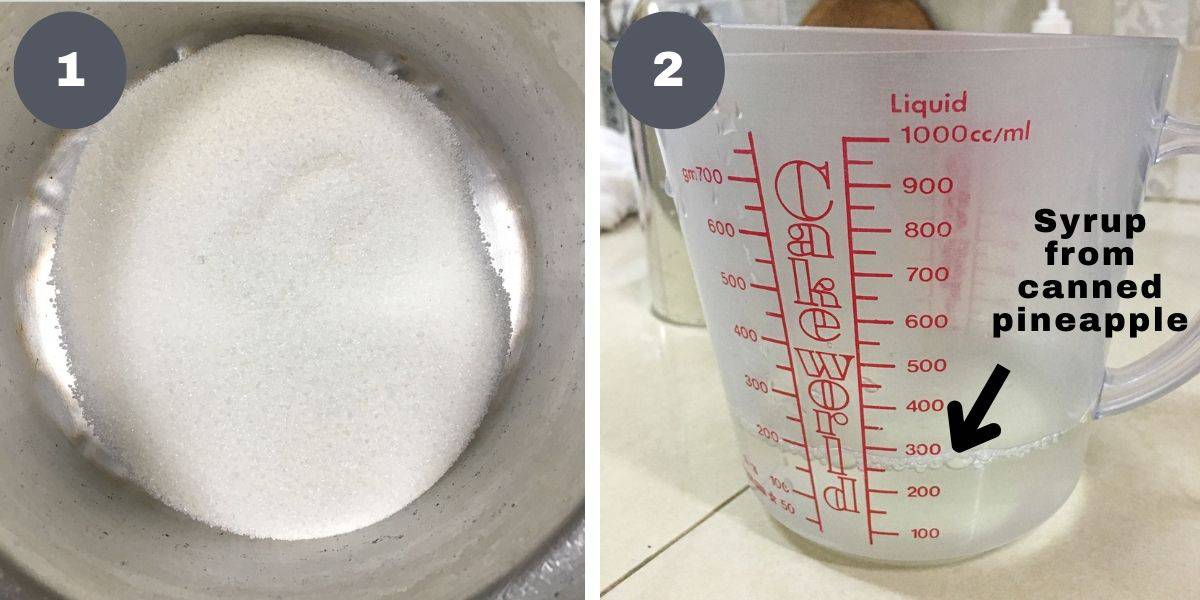
Step 2: Cook the jelly. Start by mixing the konnyaku jelly powder with sugar until both are well combined (image 1).
Note: Mixing the jelly powder with sugar will avoid the powder from clumping when added to liquid.
Separate the pineapple cubes from the syrup in the can. Pour the syrup into a measuring cup (image 2).
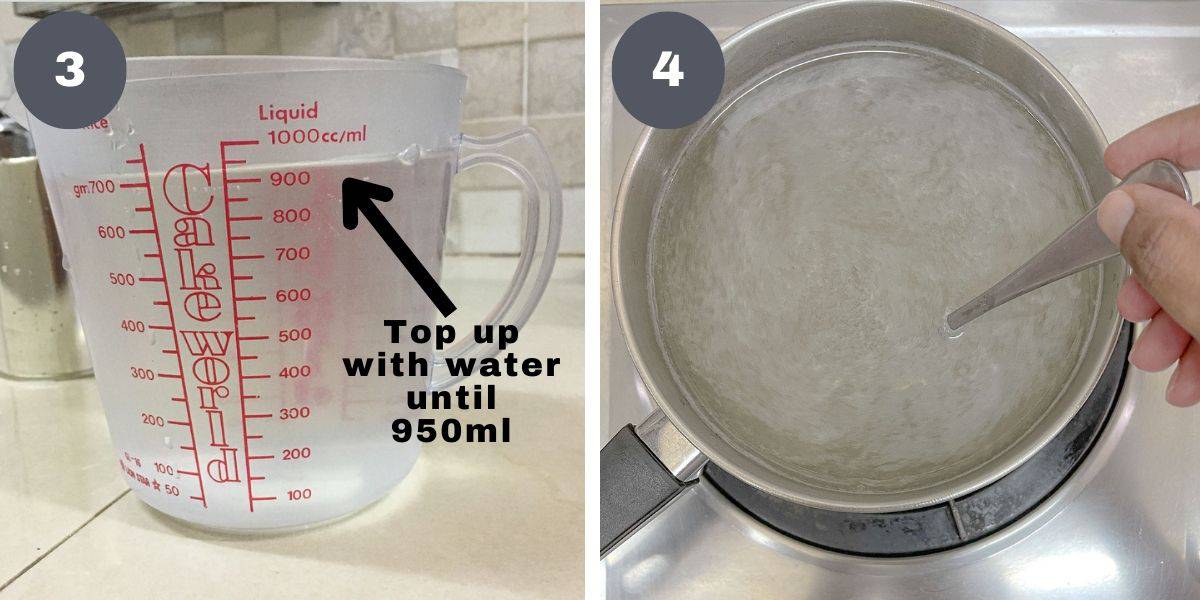
Add water to the syrup until it reaches 950ml (image 3). Pour the liquid into a pot and turn on the heat.
Slowly add the combined sugar and jelly powder into the pot. Stir to combine, until the sugar and jelly are completely dissolved. Cook the jelly until it reaches a rolling boil, stirring often (image 4).
Note: If the jelly powder is not fully dissolved, you jelly will not set properly. You can follow the cooking time indicated on the jelly package (if any).
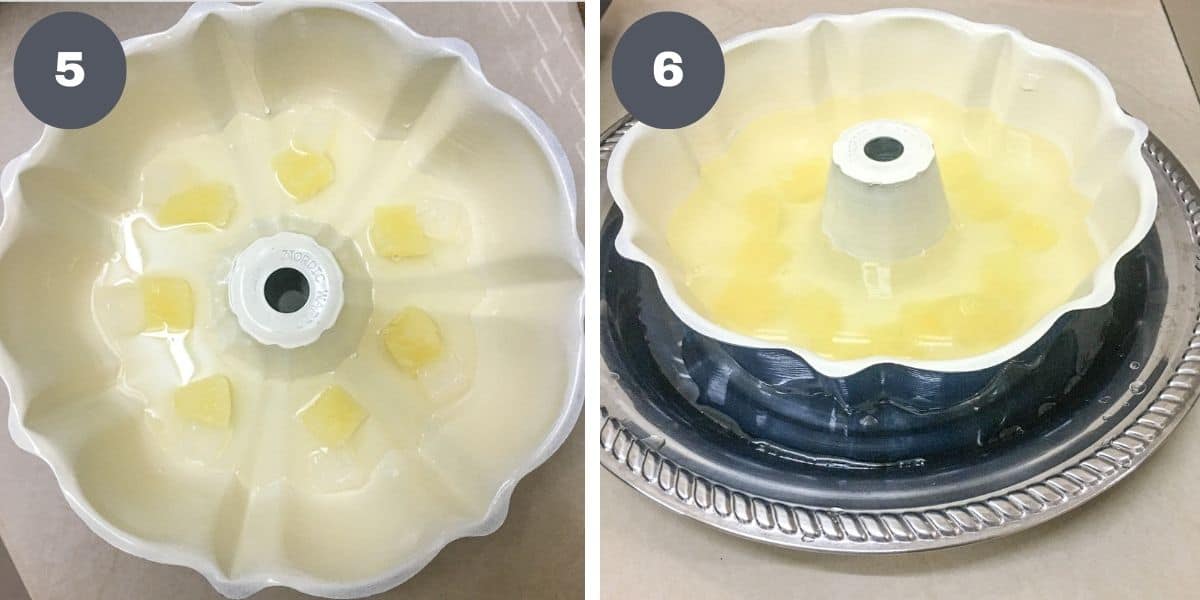
Step 3: Assemble the jelly. Arrange the pineapple and nata de coco at the bottom of the mold. Use a ladle to gently scoop the jelly solution onto the arranged fruit cubes. Add in sufficient jelly such that the fruits are about two-thirds submerged in jelly (image 5).
Note: The reason for not submerging the fruits completely is to make sure they are connected to the next layer of jelly. If there is nothing to connect the layers, they will separate as you remove the jelly from the mold and when you cut it.
Let the first jelly layer set. Once the surface is set (test by touching it lightly, if it is firm to the touch, it is ready), pour another layer of the jelly solution. Use a ladle to scoop the jelly into the mold rather than pouring it in. That way, you don't risk making a hole in the layer underneath as you pour in the next layer of jelly. Add enough jelly such that the fruit cubes below are fully covered (image 6).
Note: To speed the setting process, place the cake tin in a larger tray filled with iced water. That way, the jelly sets faster.

Let the jelly cool down a little (should still be liquid), and then arrange another row of fruits onto the jelly. The fruits should sink in slightly into the jelly solution underneath (image 7).
Let the jelly layer set. If the water in the tray below is no longer cold, you can replace it with a new batch of cold water to help the jelly set quicker. Once the second layer of the jelly is set, add the final layer of the jelly (image 8). Let the jelly chill completely (at least 4 hours).
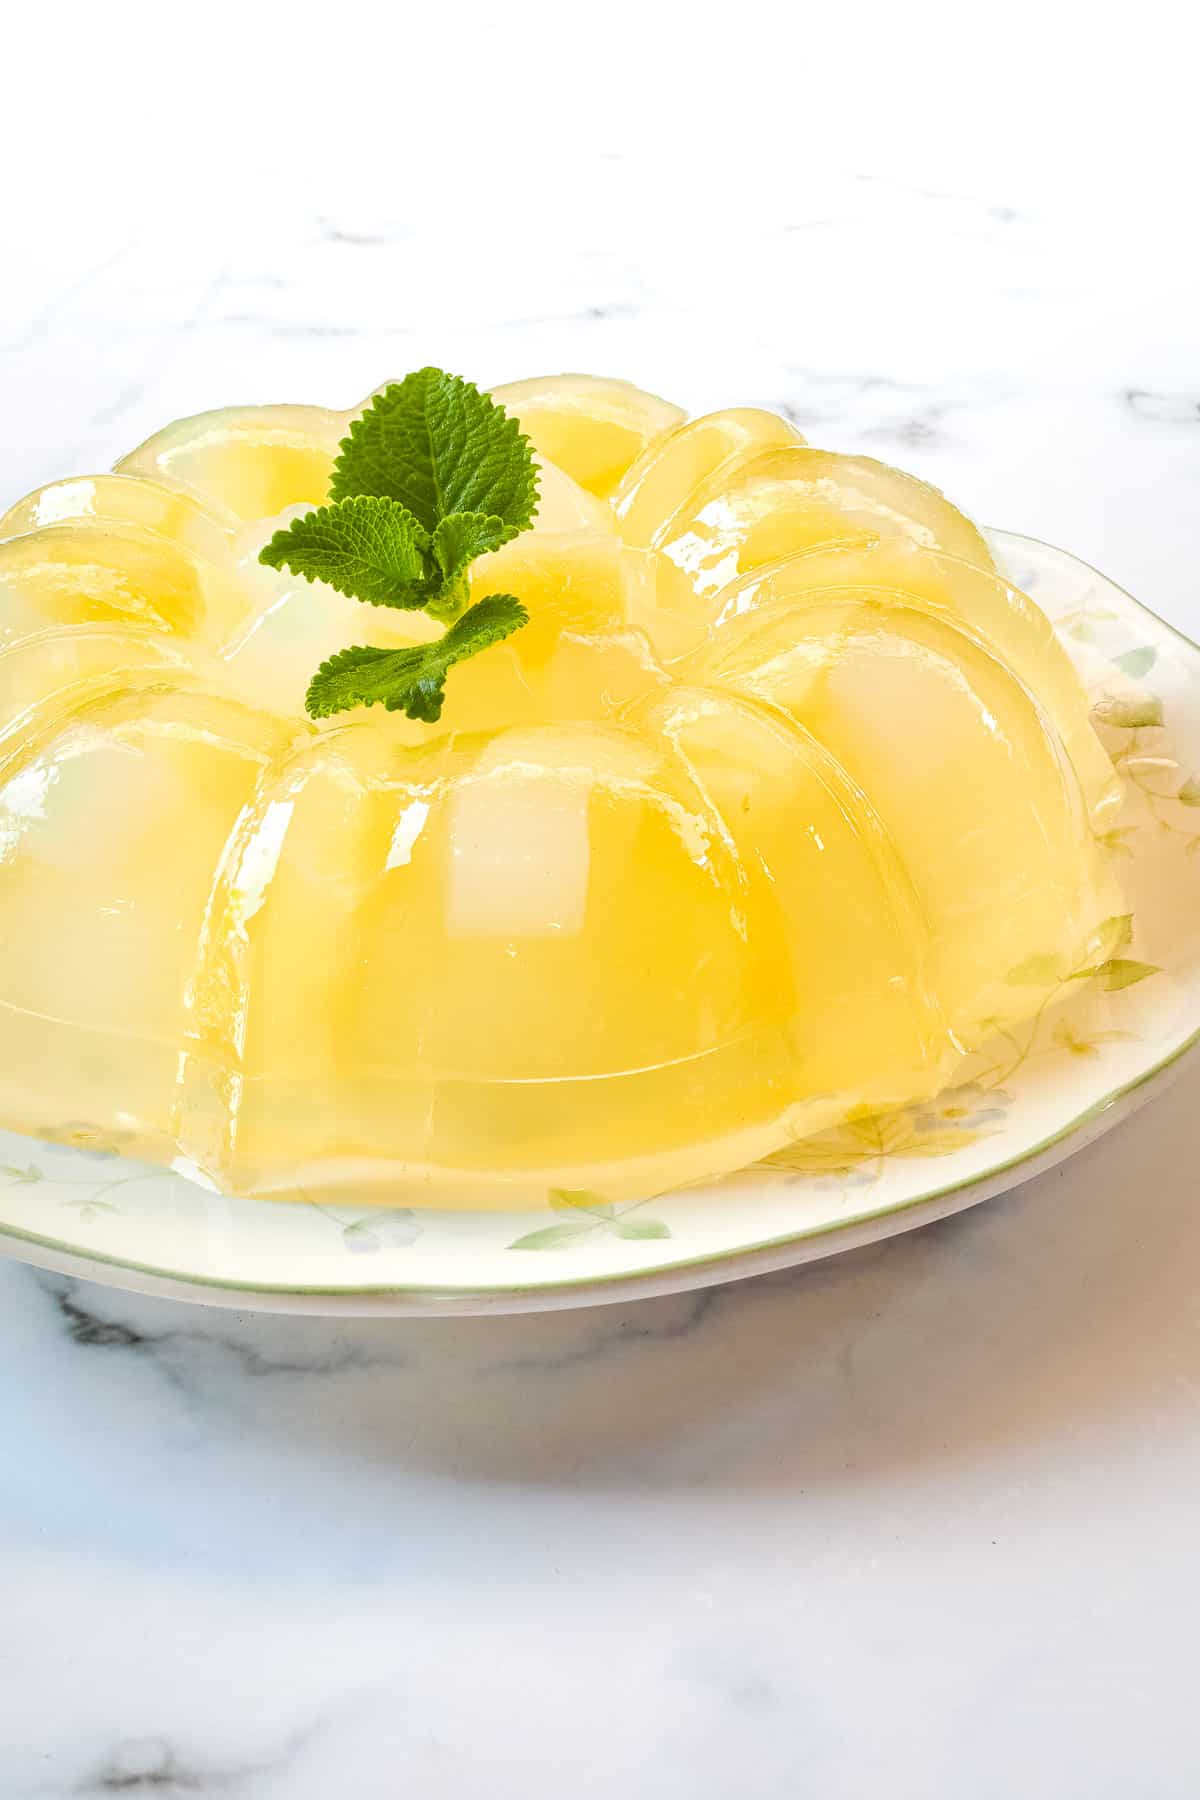
Step 4: Unmold the jelly and serve. Once the nata de coco jelly is completely set and chilled, it can be served. Use a jam knife or a plastic spatula to very gently loosen the sides without poking the knife in too much or cutting the sides of the jelly.
Turn it out onto a serving plate, shaking or tapping the tin lightly to allow the jelly to loosen out.
This pineapple nata de coco jelly can be served as it is, chilled. Alternatively, you can also add more fruits in the center and serve it that way.
💡Expert Tips
- If the jelly package comes with instructions on the amount of water to use, it is best to follow the instructions on the package. Mine indicated 950ml hence the total liquid (pineapple sugar syrup + water) I use in making the jelly is 950ml.
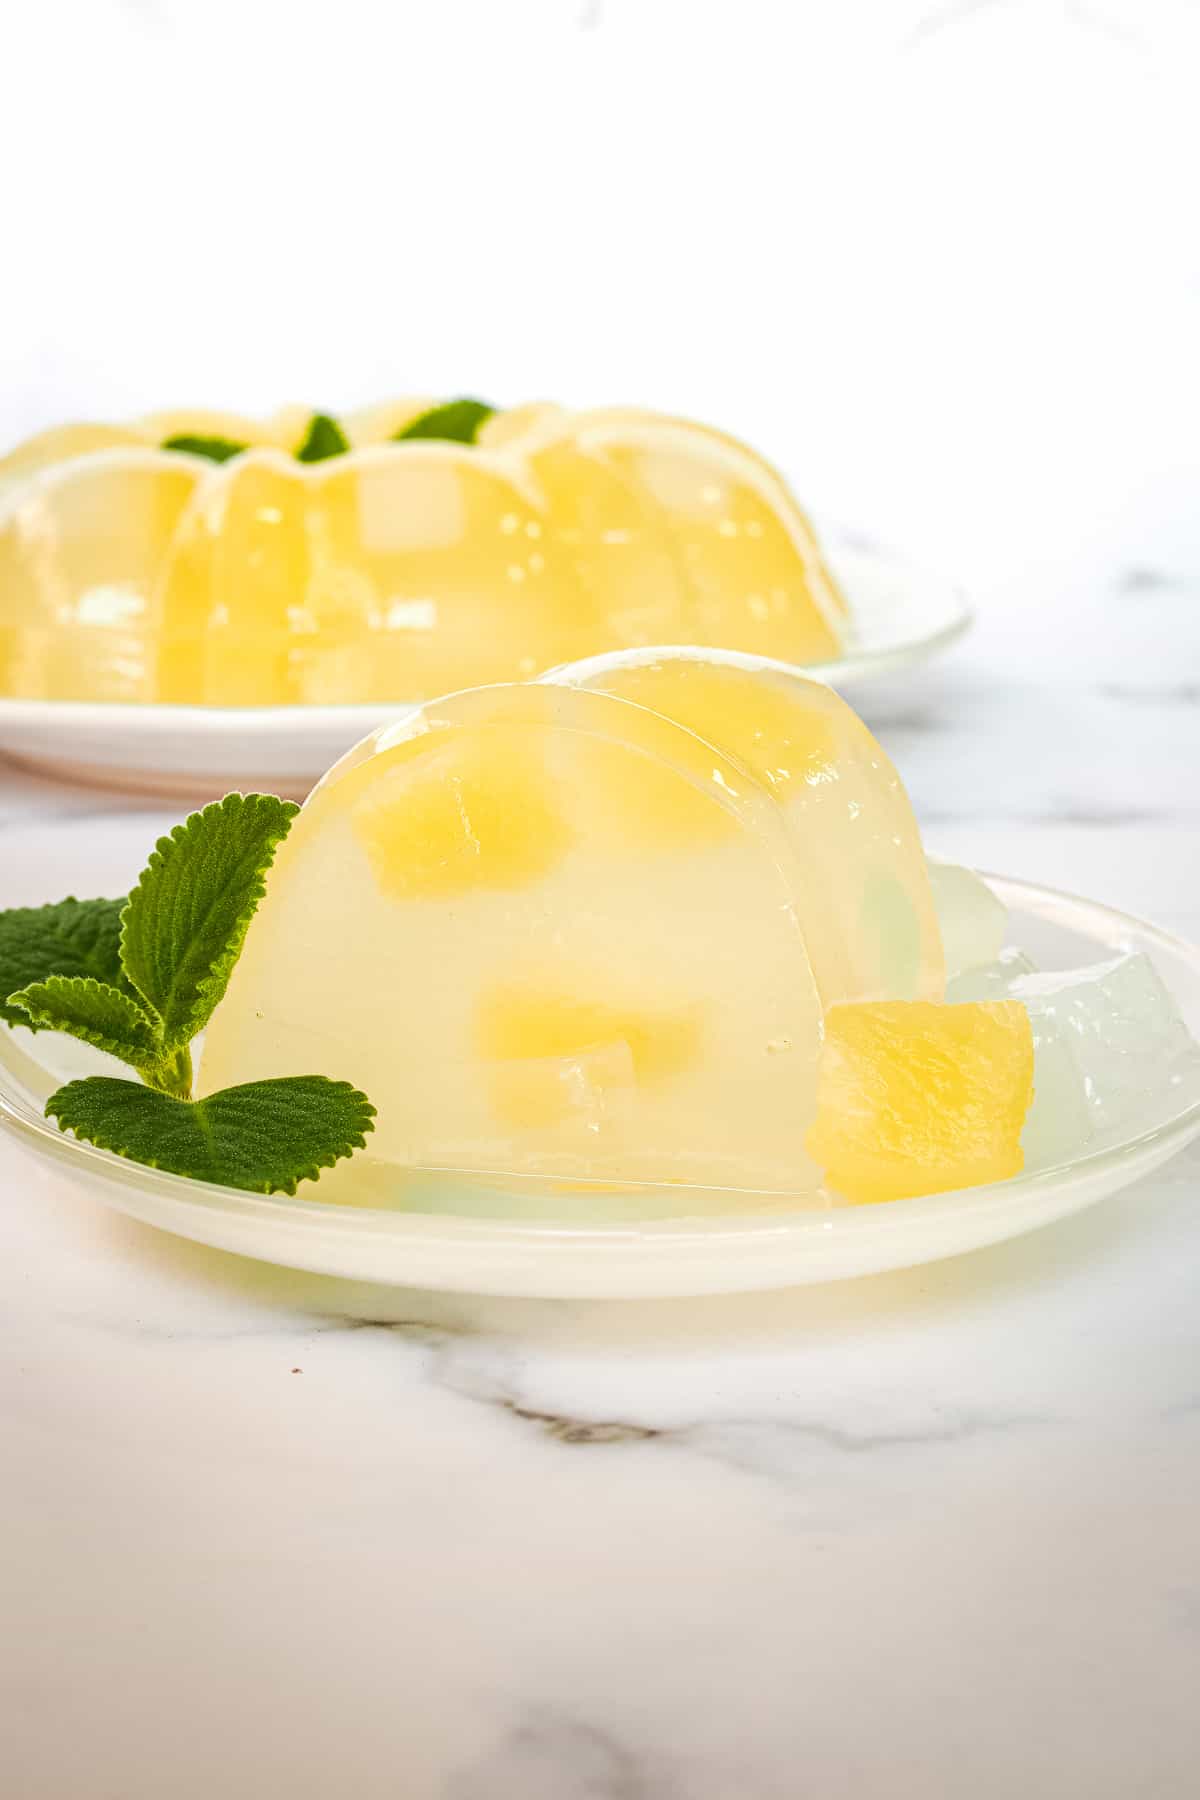
- Konnyaku jelly or Japanese jelly is of a slightly chewier texture as compared to normal agar agar jelly. Because of this, is it harder to break and chew. Hence, when serving children and old people (who are unable to chew the jelly well), it is advisable to cut the jelly into small pieces to avoid choking risk.
💭FAQs
Konnyaku is the Japanese term for a plant-based jelly made from the plant Konjac. You can read all about it here on Wikipedia.
No. Jelly molds typically do not require any lining. Simply pour the melted jelly solution into the molds and let them set.
Silicone molds are easier to work with for jellies as they can be twisted and pushed to get the jellies out. Metal molds tend to be harder, but you can use a jam knife or even toothpicks to loosen the jellies from the molds before tapping them out.
Mixing the jelly with sugar helps avoid the jelly powder from forming lumps as it is added to the liquid. If you accidently add the jelly powder separately on its own, you will notice that the jelly lumps will take a very long time to dissolve and some might not even dissolve, leaving you with a lumpy jelly.
There are a few reasons to this. Firstly, the jelly may be undercooked and is not dissolved completely.
Secondly, you could have used too much liquid. Always follow the instructions at the back of your jelly packet or if none, as indicated in the recipe.
Thirdly, you may not have given sufficient time for the jelly to set before unmolding. Jelly poured in shallow and wide molds will set quicker than those poured in deep and narrow molds. Placing the jelly in the fridge will also expedite the setting.
To test if the jelly is set, press it down lightly with your finger. If it is firm to the touch, the jelly is ready. You can also try to shake the mold. If it is no longer wobbly, the jelly in set.
This nata de coco jelly lasts for a good 2 to 3 days, however, keep it chilled in the fridge. Keep it in a covered container to prevent it from drying out in the fridge.
Sometimes, you will notice excess liquid in the jelly container after a day or two. This is normal, the jelly tends to release some liquid as you keep it longer. The jelly is still as good to eat, nevertheless.
Yes, you certainly can. Do take note, however, that too much fruits in the jelly can cause the jelly to break easily when transferring out of the cake pan.
Yes. Konnyaku or Japanese jelly is from plants and is absolutely vegan. It's a great dessert choice for both vegetarians and vegans.
❤️More Recipes You Will Love
Do you like this recipe? Please leave a 5-star ⭐⭐⭐⭐⭐rating in the recipe card below and consider a review further down this page. I would love to hear from you. Thank you!
Do you like this recipe? Please leave a 5-star ⭐⭐⭐⭐⭐rating in the recipe card below and consider a review further down this page. I would love to hear from you. Thank you!
📖Recipe
Nata de Coco Jelly with Pineapple
For best results, use the metrics measurements. US customary measurements have not been tested and are only meant for guide.
Ingredients
- 10 g konnyaku jelly powder (Japanese jelly/agar)
- 150 g granulated sugar
- Water
- 550 g pineapple cubes in syrup (approximate can size )
- 550 g nata de coco (approximate can size)
Instructions
- Prepare the mold. Set it aside (see Note 1).
- Combine the konnyaku powder and sugar in a small bowl. Mix until both are well combined (see Note 2). Set aside.
- Drain the nata de coco. Discard the syrup and set the fruit aside.
- Drain the pineapple syrup from the can into a measuring cup. Add water to the syrup until it reaches 950ml (see Note 3). Pour the measured liquid into a medium sized pot.
- Add the sugar-jelly powder into the pot and cook it until the sugar and jelly is all dissolved and reaches a rolling boil. This should take approximately 10 minutes over low heat. Turn off the heat (see Note 4).
- To assemble the nata jelly, arrange a layer of pineapple cubes and nata de coco at the bottom of the tin. Spoon a layer of jelly into the bundt tin until the fruits are about two-thirds submerged in the jelly (see Note 5).
- Let the jelly set, for about 3 to 4 minutes. To speed up the setting process, place the bundt tin in a larger tray filled with cold water.
- Once the first layer of the nata jelly is set, pour the second layer of jelly and arrange another row of pineapple cubes and nata de coco on the jelly layer as it cools down (should still be liquid so that you can press the fruits in slightly. Let the jelly set again.
- Spoon on the final layer of jelly into the mold. Transfer the mold into the refrigerator and let the jelly set completely (for about 4 hours) before serving.
- Turn the jelly out onto a serving plate. Add more pineapple cubes and nata de coco in the center if you wish.
Notes
- The first step when making jellies is to prepare the containers or molds. This is because the jelly will start to set as it cools down, so it is important that the molds are prepared in advance.
- Mixing the jelly powder with sugar will avoid the powder from clumping when added to liquid.
- If the jelly package comes with instructions on the amount of water to use, it is best to follow the instructions on the package. Mine indicated 950ml hence the total liquid (pineapple sugar syrup + water) I used in making the jelly was 950ml.
- If the jelly powder is not fully dissolved, you jelly will not set properly. You can follow the cooking time indicated on the jelly package (if any).
- The reason for not submerging the fruits completely is to make sure they are connected to the next layer of jelly. If there is nothing to connect the layers, they will separate as you remove the jelly from the mold and when you cut it.
Leave a Reply