

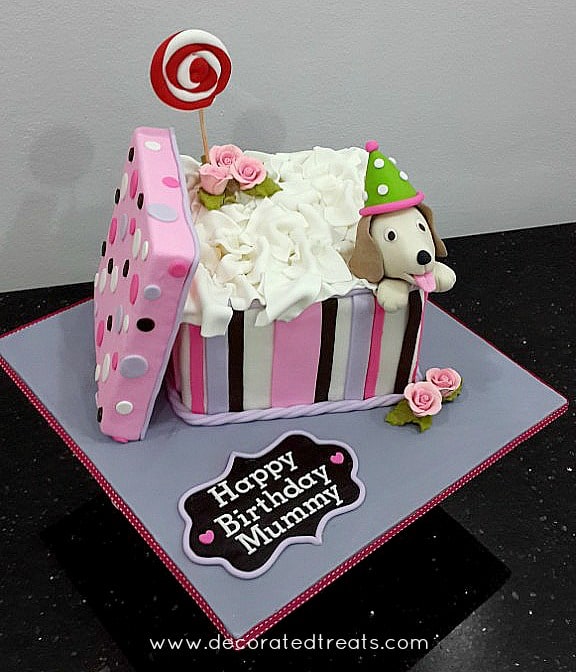
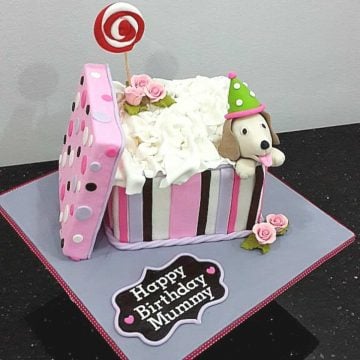
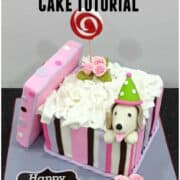
Here is a cute puppy dog cake design for dog lovers! It's a simple square cake decorated to look like a gift box with a cute puppy head poking out from one corner. Fondant lollipops, a leaning box lid and pink roses provide the perfect finishing touches to this lovely cake.
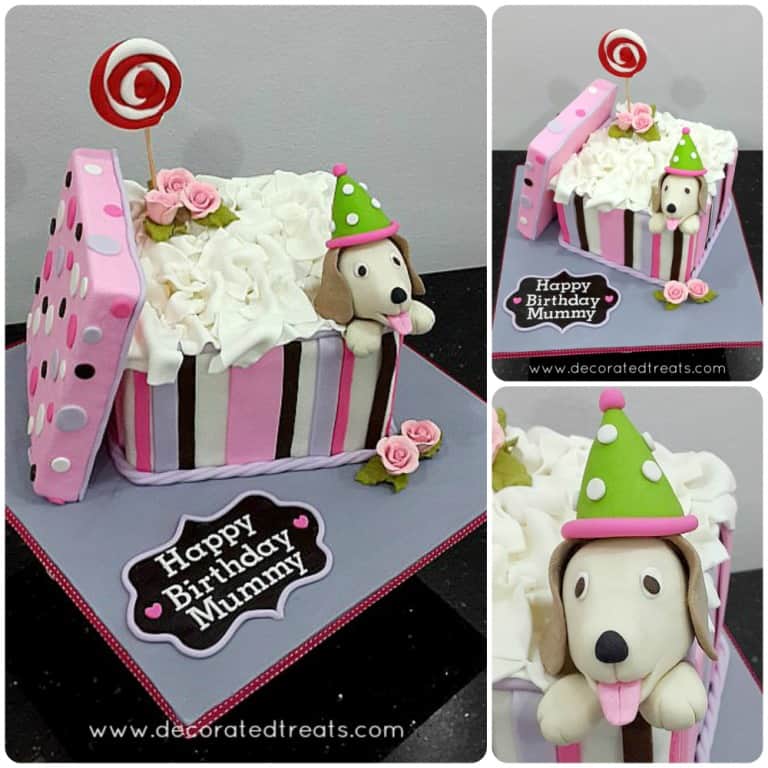
The cake is pretty straightforward to decorate. The box cover that is leaning against the cake made in Styrofoam and covered in fondant. And the puppy head is made of fondant that has been added CMC. The lollipop is hand made with fondant and the pink roses on the cake were store-bought.
You can easily customize the puppy to any breed you like.
Note: This is an intermediate cake decorating tutorial and some basic knowledge about frosting a cake with buttercream and fondant is required.
📋Supplies Required
- Butter pound cake - 2 layers of 7 inches square cake. (Please refer the recipe card below for list of ingredients and exact measurements).
- Buttercream – to fill the cake as well as to crumb coat it.
- Fondant
– to cover the cake and decorate. Satin Ice is my choice. All the deco pieces on the cake including the puppy head and the lollipop are in fondant. I added CMC powder
- Gum paste - to make the letters.
- Gum paste roses – you need 5 small gum paste roses. Mine are store-bought. You can also make your own gum paste roses.
- Extruder tool
- Plaque cutter
- Tappit alphabet cutters - for the alphabets on the cake.
- Styrofoam dummy
- Round plunger cutter
- Fondant shaping tools.
- Food coloring - these are used to tint the fondant.
- Fondant glue and shortening - act as glue for the project.
👩🍳How to Make
Start with the 3D fondant decorations on the cake and the box lid which is made of styrofoam. That way, you have sufficient time for your fondant pieces to set well and you do not have to rush for time when assembling the cake.
Step 1: Make the Puppy Face Topper
Form these by hand with the help of fondant tools. Add some CMC powder to fondant so that the fondant sets firm. Attach the facial features and ears of the puppy with shortening or fondant glue and attach the face to a lollipop stick for easy positioning on the cake.
Note: If you find the head too heavy, you can use a small styrofoam ball and cover it in fondant to make the face.
Step 2: Make the Fondant Lollipop
Form these by hand as well, with 2 strips of white and red fondant. Also add CMC to these pieces, twist them together into a rope and then swirl the rope into a circular piece to make the lollipop. Attach to a long skewer and set aside in a flat position until it firms up.
Step 3: Make the Box Lid
Use a square styrofoam block and cover it with fondant. Add the circle cuts and trimmings and let is set in a flat position until ready to be assembled on the puppy dog cake.
Step 4: Bake the Cake and Make the Buttercream
I used butter pound cake recipe and vanilla buttercream. The cake is baked in two seven inches cake tins. Sandwich it with buttercream and it a crumb coat before covering in fondant.
Place the cake on a 7 inches square cake board. You will be lifting the cake along with the cake board and placing in on a larger cake board.
Step 5: Prepare the Cake Board
Use a large square cake board that can hold the cake and the Styrofoam lid at the side as well as the fondant plaque at the front.
Cover it in purple fondant and attach a pink ribbon around it. Secure with hot glue.
Step 6: Decorate and Assemble the Cake
Cover the cake in white fondant and then lift and place in on the main cake board. Position it to allow space for the lid and the plaque.
Decorate the sides, add the borders, the fondant tissues.
Step 7: Make the Fondant Plaque
Use chocolate fondant and cut out with a plaque cutter. Attach the lettering on it. Decorate with pink heart cut outs.
Step 8: Add the Lollipop and Puppy Toppers, the Box Lid and the Roses
Position the box lid and secure it with fondant glue. Attach the lollipop topper.
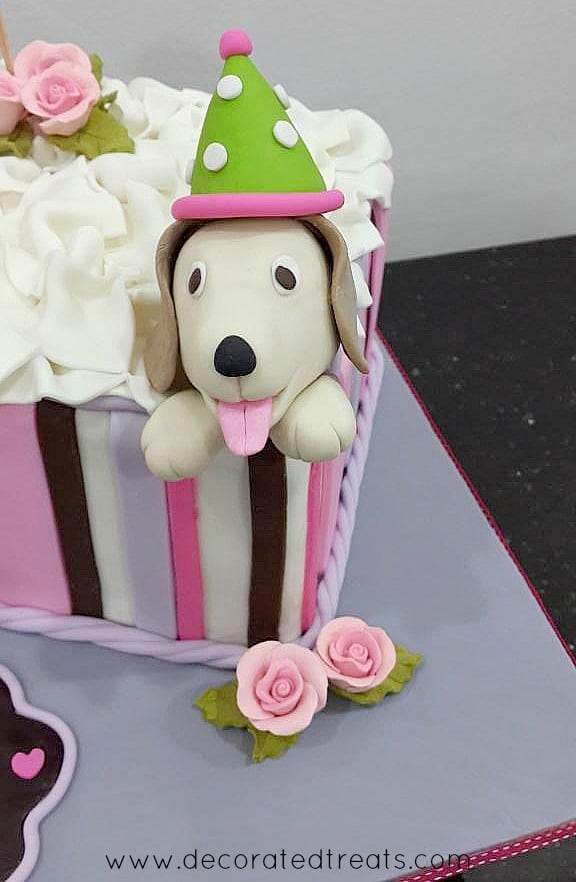
Before adding the puppy dog, add its 2 front legs and complete the decoration with the pink roses on the cake and at the side.
Note: You can also make the gum paste roses by hand. Here is the tutorial on how to make the gum paste roses.
💡Expert Tips
- When cooling the cakes, keep them covered in a kitchen towel and as soon as they warm down slightly, wrap them in plastic wrap and refrigerate them until they cool down completely. This helps keep the cakes moist.
- Fondant glue (made by mixing CMC powder with water) and shortening both act as glue. The former is more suitable for heavier fondant decoration as it is able to hold the pieces firmly in place but once attached, you will not be able to remove the pieces. Shortening, on the other hand, can only be used for lighter pieces but you can peel off the deco pieces and reattach them without tearing or distorting them, hence is very useful small letters and numbers.
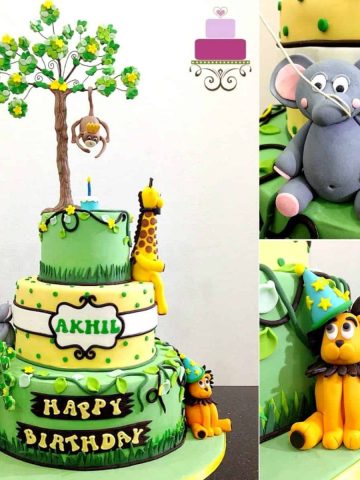
❤️More Designs You Will Love

Do you like this tutorial? Please leave a 5-star ⭐⭐⭐⭐⭐rating in the recipe card below and consider a review further down this page. I would love to hear from you. Thank you!
📖Recipe
Puppy Dog Cake
Equipment
- Extruder tool
- Plaque cutter
- Tappit alphabet cutters
- Styrofoam dummy (7 inches square)
- Round plunger cutter
- Fondant shaping tools
For best results, use the metrics measurements. US customary measurements have not been tested and are only meant for guide.
Ingredients
Decoration
- Fondant
- CMC powder
- Gum paste
- Food coloring
- Fondant glue and shortening
- Gum paste roses
Cake
- 480 g butter (salted)
- 480 g granulated sugar
- 480 g self-raising flour
- 8 eggs
- 120 ml milk
- ⅓ teaspoon salt
- 1 teaspoon baking powder
- 1 ¼ teaspoon vanilla extract
Buttercream
- 500 g powdered sugar
- 250 g butter (salted)
- 2 tablespoon milk optional
- 1 teaspoon vanilla extract
Instructions
Make the puppy dog face and his birthday hat
- For the puppy's face, tint the fondant to a very light brown. Knead some CMC powder to it so that it is able to better hold its shape. The face is shaped by hand, and you can use the sugar craft knife to cut the mouth and mark the line above it. Attach it to a lollipop stick dipped in fondant glue (see Note 1).
- Add the ears in a slightly darker shade of brown and the tongue in pink. Use fondant glue to hold these pieces in place on the face.
- For the eyes, roll 2 tiny balls in white, press them flat with your fingers and do the same for the black eyeballs as well. Attach these to the cake with fondant glue.
- For the party hat, use green-tinted fondant that has been added CMC to form a cone. The hat need not be hollow on the side. Add a pink rolled strip at the bottom and a round pink ball on top. Decorate with white polka dots. You can cut these using a large round piping tip (dip it in cornstarch each time you cut a dot for easy release). Attach all these to the hat with fondant glue. Set it aside to firm up and wait until the puppy's head has also firmed up before attaching with glue.
Make the fondant lollipop
- Roll a piece of white fondant and another piece of red fondant into thin rolls. Also add CMC to these pieces. Twist them together into a rope and then swirl the rope into a circular pendant to make the lollipop.
- Apply glue lightly to parts of the rolled strips so that they stay in place in a circular pattern.
- Dip a long wooden skewer in fondant glue and gently insert it into the lollipop. Set aside in a flat position until it firms up.
Make the box lid
- The box lid in a square styrofoam block. Brush the block with water to allow the fondant to stick to it. Set aside.
- Roll some pink fondant thin, and cover the block as you would a cake. Trim the bottom. Turn it over and cover with another piece of pink fondant. Cover the trims with a long purple strip. You can roll this strip by hand or use an extruder tool with a round disc. Use fondant glue to hold it in place.
- Cut out small circles in random sizes (with the round plunger cutter set) in purple, chocolate, pink and white and attach them to the top and sides of the lid.
- Set aside in a flat position until ready to be assembled on the cake.
Bake the cake
- Preheat oven to 170℃. Line and grease two 7 inches square cake tins.
- In a large bowl, cream the butter and sugar until light and fluffy.
- Add the eggs, one at a time and beat well after each addition.
- Combine flour, baking powder and salt in a bowl and sift these ingredients into the creamed mixture in 3 batches. Alternate each batch with milk. Fold gently and do not over mix.
- Add vanilla extract and mix again until well combined.
- Pour the batter into the prepared tins and bake in the preheated oven for 40 to 45 minutes until a skewer inserted in the center of the cakes comes out without any wet batter.
- Remove the cakes from the oven, let them rest in the tin for a few minutes and then turn them over onto wire racks. Let them cool completely to room temperature.
Make the buttercream
- While the cake is cooling down, make the buttercream.
- Measure butter into a mixing bowl and beat until creamy and smooth.
- Sift in the powdered sugar and mix briefly with a spatula to moisten it before using the mixer to cream it with the butter. This will help avoid the sugar from flying all over as you turn on your mixer.
- Add vanilla extract and combine well. If the buttercream is too stiff, add some milk and beat well. Add the milk in small increments of one teaspoon or half a tablespoon at a time to avoid it from becoming too soft.
Prepare the cake board
- Brush the cake board with water and attached rolled purple fondant to it. Trim the excess on the sides with a small sharp knife.
- Attach pink ribbon all around it with hot glue.
Stack the cake layers and crumb coat the cake
- Once the cakes have cooled down completely, level the tops to make them flat.
- Sandwich the layers with buttercream and give them a thin layer of crumb coat. Place the stacked cake on a 7 inches square cake board.
Decorate and assemble the cake
- Roll some white fondant thin and cover the cake in full.
- Lift the cake and place it on the fondant covered cake board. Make sure to position is such that there is enough space to place the lid on the side and the name plaque in front.
- Attach vertical strips of purple, pink, and brown all around the cake with shortening to hold them in place.
- Next, roll some purple fondant into a long thin strip (or use the extruder tool) and attach it on the top edges of the cake. Use shortening to hold it in place. For the bottom border, use the extruder tool to pipe out a rope border in purple and attach it to the cake.
- Add the fondant tissues on top of the cake. To make the tissues, roll some white fondant very thin. Cut it into squares and place them on the cake, crumpled. Hold them in place with shortening.
Make the fondant plaque on the cake board
- Roll some chocolate fondant thin and use a plaque cutter to cut it out. Place it on the cake board (use shortening to hold it in place).
- Use the extruder tool to pipe out a long thin purple fondant strip and attach is as the border for the plaque. Use shortening to attach.
- For the letters, cut them with the alphabet cutter in very thin rolled gum paste. Arrange them on the plaque to make sure they properly aligned before securing them with light brushing of shortening.
- Add 2 pink fondant cut outs on either side of the plaque.
Add the lollipop and puppy toppers and the box lid
- Poke in the lollipop and position the box lid. Secure it in place with fondant glue.
- Before placing the puppy cake topper, shape the puppy's front legs and attach them to the corner of the cake (with fondant glue). Poke in the puppy topper.
Add the roses
- To complete the decoration, add the gum paste roses, 3 at the base of the lollipop topper and 2 more at the front corner of the cake.
Notes
- If you find the head too heavy, you can use a small styrofoam ball and cover it in fondant to make the face.
- When cooling the cakes, keep them covered in a kitchen towel and as soon as they warm down slightly, wrap them in plastic wrap and refrigerate them until they cool down completely. This helps keep the cakes moist.
- Fondant glue (made by mixing CMC powder with water) and shortening both act as glue. The former is more suitable for heavier fondant decoration as it is able to hold the pieces firmly in place but once attached, you will not be able to remove the pieces. Shortening, on the other hand, can only be used for lighter pieces but you can peel off the deco pieces and reattach them without tearing or distorting them, hence is very useful small letters and numbers.
Leave a Reply