

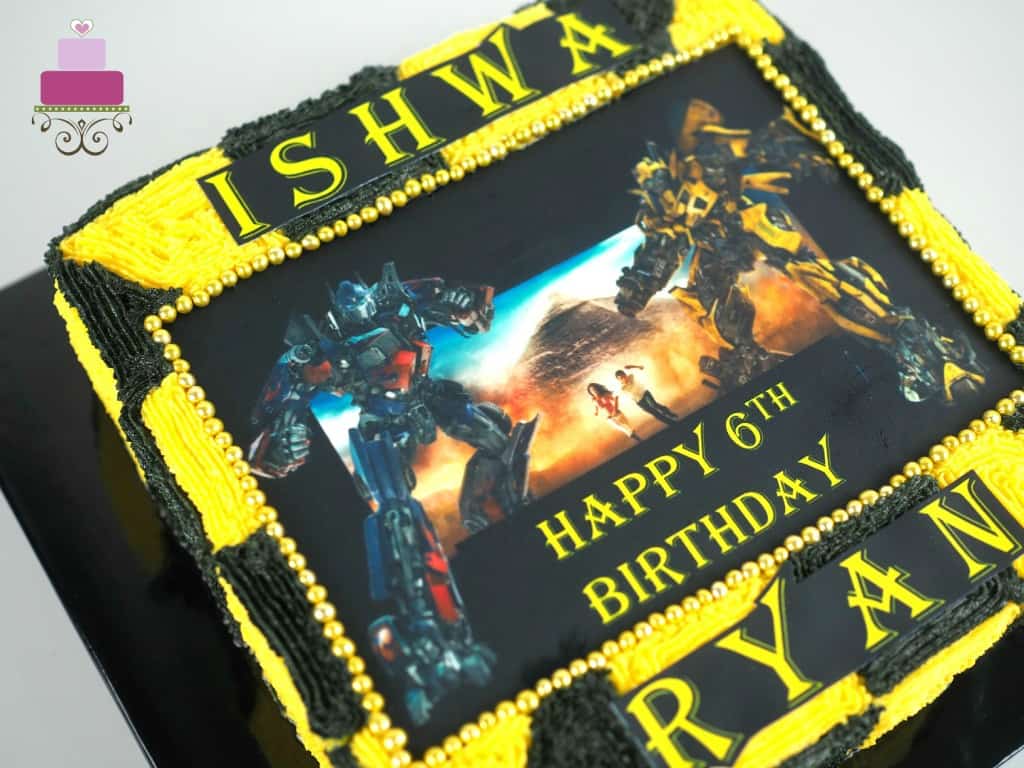
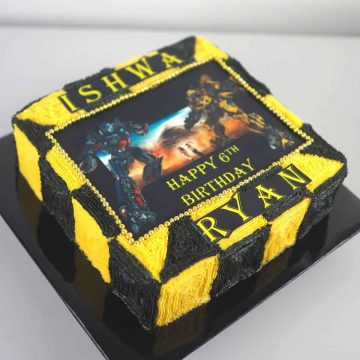
Here is a simple Transformers cake I decorated for a 6th birthday. The birthday boy's favorite character was Bumblebee, hence the yellow and black overall theme for the cake. This is a simple cake decorating tutorial and is a perfect idea for a quick birthday cake fix and one that does not require extensive decorating skills.
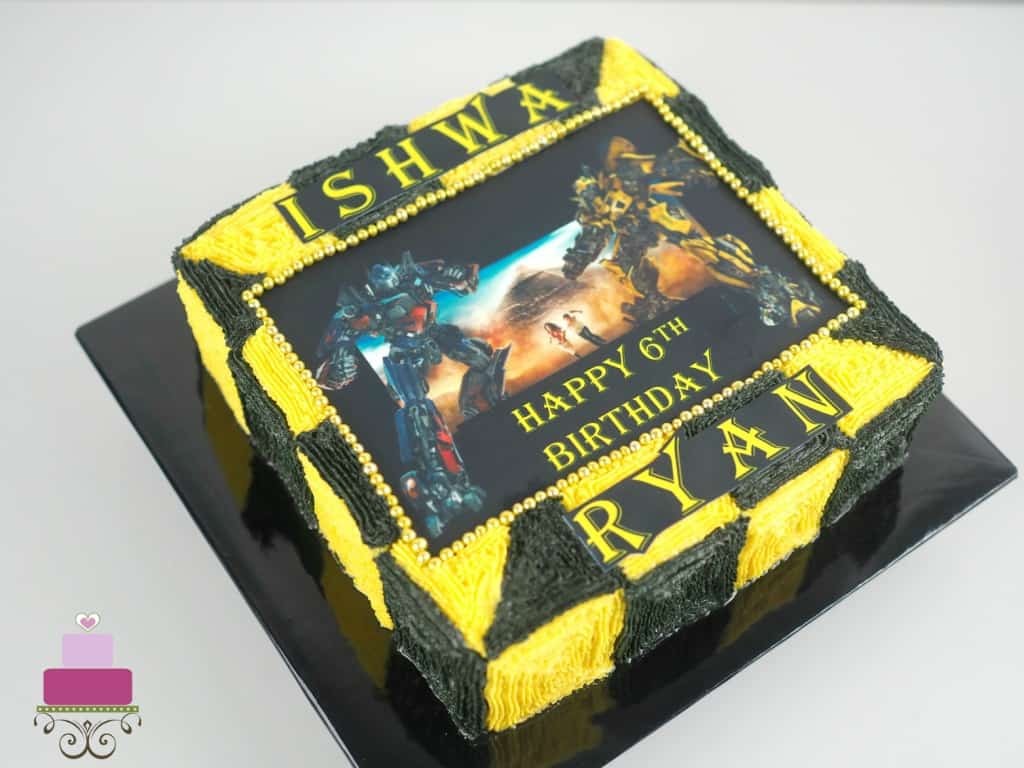
This is a fairly simple cake for 2 reasons. Firstly, it is a relatively small single tier cake measuring 8 inches square and a height of about 3 inches. Secondly, it is decorated with basic piped buttercream design and topped with a printed edible image of Transformers. All this do not require as much time, hence makes this Transformers cake design a pretty simple decorating idea.
Jump to:
❤️Why You Will Love This Tutorial
- A quick and simple cake design and can be easily decorated by anyone with minimal decorating skills.
- No fondant used and therefore no special fondant tools required.
- A great way to start your cake decorating skills and showcase your creation to others.
- The tutorial has all the list of all required supplies and step by step decorating guide for easy reference.
📋Supplies Required
- Chocolate cake - An 8 inches square sheet cake (single layer)
- Buttercream - To crumb coat the cake as well as to decorate it.
- Cocoa powder - To provide a brown base for the black buttercream
- Edible Image - Custom order or purchase a ready made one from your local cake decorating stores or online stores
- Sugarcraft knife - To cut out the edible image sheet.
- Edible gold dragees
- Food coloring - Wilton golden yellow and Americolor black food coloring
- Wilton star tip number 18
- Disposable piping bags
- Wooden skewer and clean ruler - To measure and mark the squares on the cake.

👩🍳How to Make
Step 1: Bake the Cake
Bake the cake and let it cool down completely to room temperature. Level the top and apply a coat of base buttercream.
Step 2: Attach the Edible Image
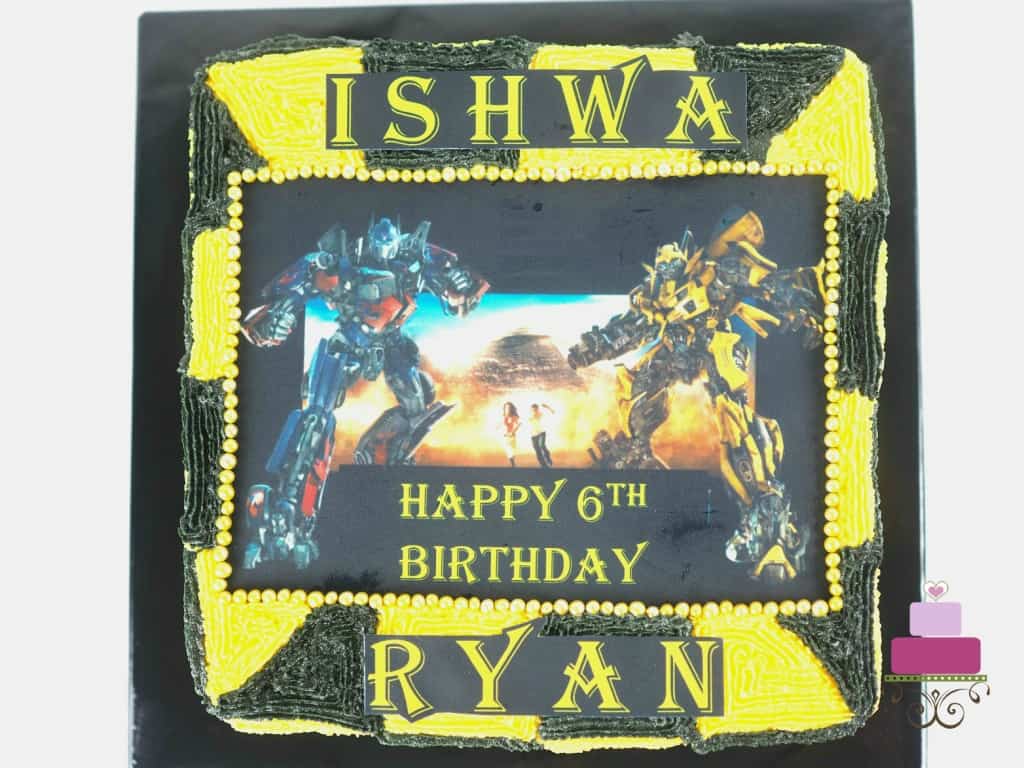
Cut out the Transformers image and place it right in the center of the cake. The buttercream crumb coat on the cake will be able to hold the image in place.
Step 3: Mark the Square Designs on the Cake
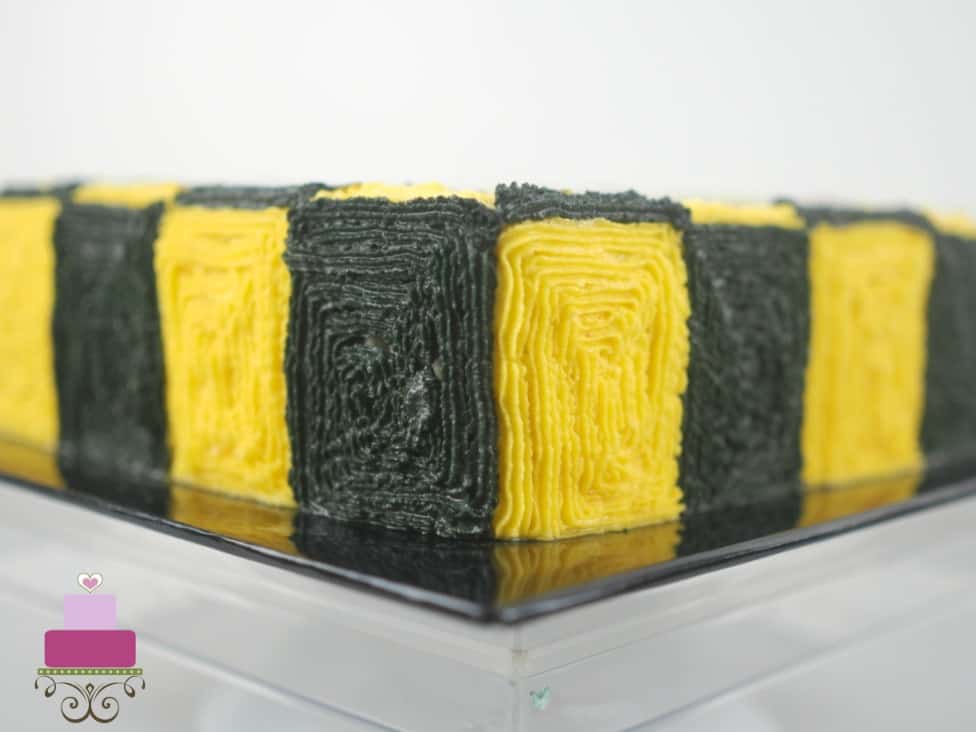
Once the image is in place, mark the square patterns on the cake. Start with the sides and then continue on top. For each side of the cake, measure and divide the length into 4 squares. Once you have all the 4 sides marked, follow the same lines to create the squares on the top of the cake, stopping the marks at the border of the image.
For the top corners, mark them into triangles instead.
Step 4: Pipe the Buttercream
Next, colors into the buttercream icing. Divide the icing into 2 portions. Add yellow food coloring for the first portion. For the second portion, add some cocoa powder to make it brown first. And then add black food coloring to it.
Fill both the colored buttercream into one disposable piping bag each.
In another empty piping bag, snip the tip and drop the star piping tip into it. You can also use an icing coupler. Place the yellow icing bag into this empty piping bag.
Start piping with the yellow icing first before moving to the black one. For each square, pipe the lines continuously from the outer edge all the way until you reach the center and the square is all covered in buttercream. In piping the lines, I make sure they were piped close to one another so that there is no gap in between them that could show the crumb coat underneath.
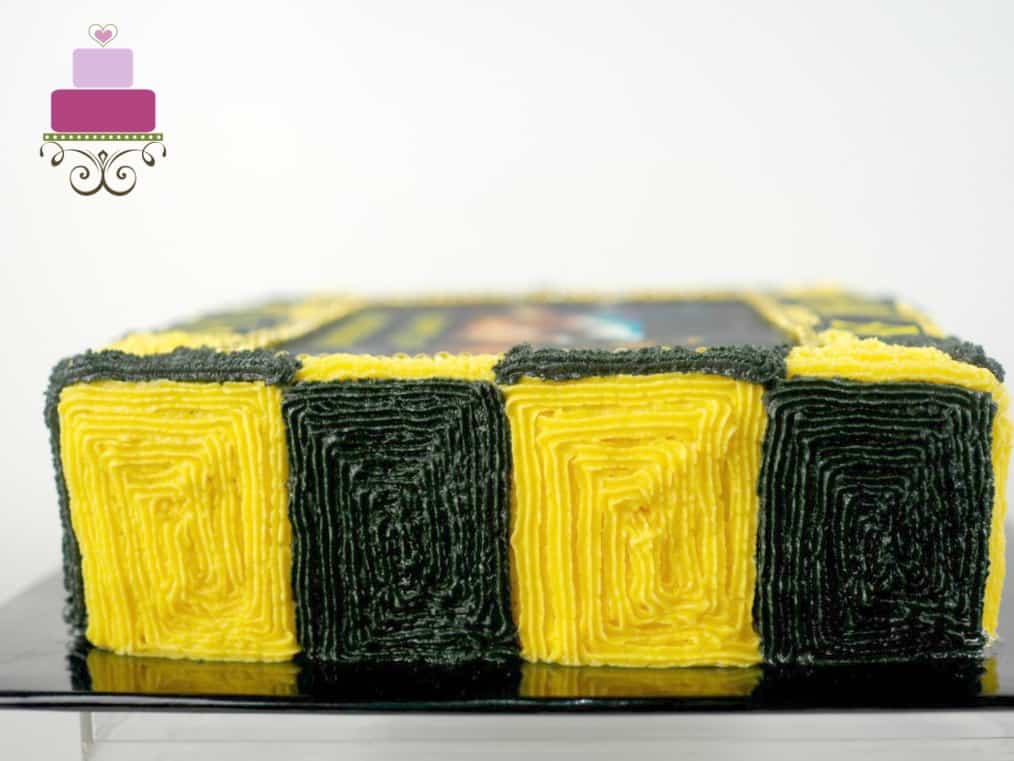
Once all the yellow piping is done, remove the yellow piping bag from the piping bag fitted with the star tip and replace with the black icing bag. Similar to the yellow squares, start piping the lines from the outer edges of the squares to the centers.
Complete the sides of the cake before moving to the top.
Step 5: Add the Name
The next step is adding the birthday boy's name. Cut the name from the edible image sheet (if you have ordered it along with the image) and place it on the birthday cake. Again, no 'glue' is required for the name to stick to the cake. The buttercream will hold it well in place.
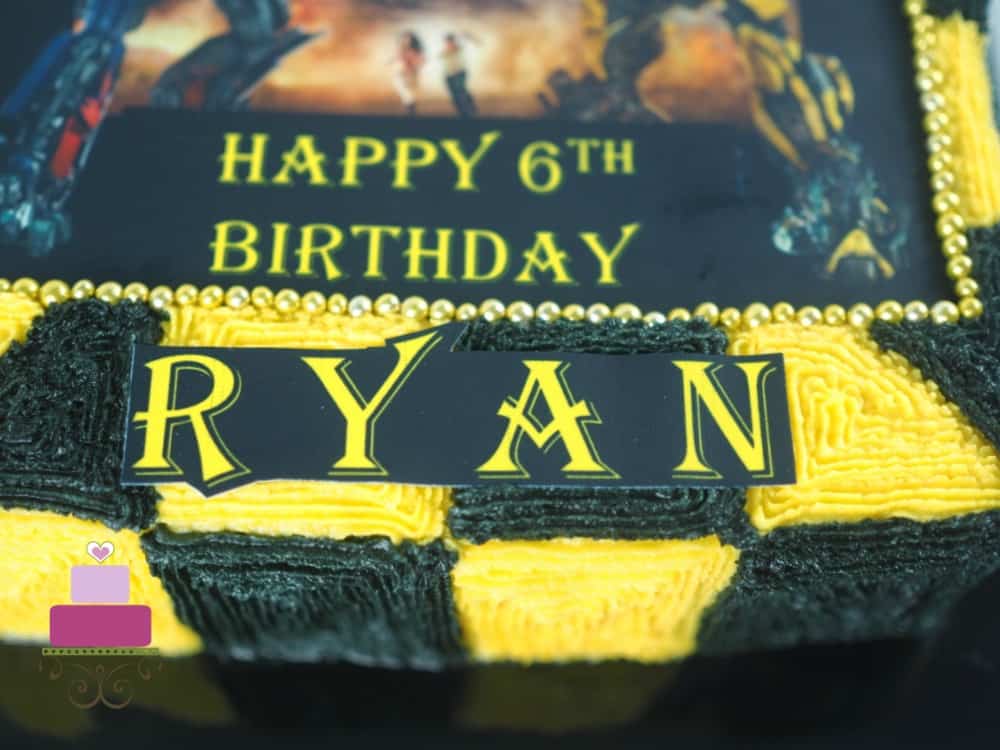
Step 6: Add the Gold Frame
And finally, for the finishing touch, add a row of gold dragees or gold sprinkles all around the Transformers edible image, framing it on the cake.
Again, there is no glue required to hold them in place, merely push them into the buttercream around the image and they should stay in place.
And that completes the Transformers cake decoration.
💡Expert Tips
- Order the edible image in advance so that you have it ready before your party or event. In ordering the image, make sure the size fits your cake.
- Mixing cocoa powder to buttercream will make it easier to achieve black frosting without using too much of black food coloring.
- Another option for adding the birthday person's name on the cake would be to cut it out of fondant or gum paste with letter cutters.
❤️More Tutorials You Will Love


Do you like this tutorial? Please leave a 5-star ⭐⭐⭐⭐⭐rating in the recipe card below and consider a review further down this page. I would love to hear from you. Thank you!
📖Recipe
Transformers Cake
Equipment
- Sugarcraft knife
- Wilton star tip number 18
- Disposable piping bags
- Wooden skewer and ruler
For best results, use the metrics measurements. US customary measurements have not been tested and are only meant for guide.
Ingredients
- 1 Eight inches square chocolate cake
- Buttercream
- Cocoa powder
- Edible Image
- Edible gold dragees or sprinkles
- Wilton golden yellow and Americolor black food coloring
Instructions
Bake the cake and crumb coat
- Bake the cake and let it cool down completely to room temperature.
- Level the top and apply a coat of base buttercream.
Attaching the edible image
- Cut out the Transformers image and place it right in the center of the cake.
- The buttercream crumb coat on the cake will be able to hold the image in place.
The square pattern on the cake
- Once the image is in place, mark the square patterns on the cake. Start with the sides and then continue on top.
- For each side of the cake, measure and divide the length into 4 squares. Once you have all the 4 sides marked, follow the same lines to create the squares on the top of the cake, stopping the marks at the border of the image.
- For the top corners, mark them into triangles instead.
The buttercream piping
- Next, colors into the buttercream icing. Divide the icing into 2 portions. Add yellow food coloring to the first portion.
- For the second portion, add some cocoa powder to make it brown first. And then add black food coloring to it.
- Fill both the colored buttercream into one disposable piping bag each.
- In another empty piping bag, snip the tip and drop the star piping tip into it. You can also use an icing coupler. Place the yellow icing bag into this empty piping bag.
- Start piping with the yellow icing first before moving to the black one. For each square, pipe the lines continuously from the outer edge all the way until you reach the center and the square is all covered in buttercream.
- In piping the lines, I make sure they were piped close to one another so that there is no gap in between them that could show the crumb coat underneath.
- Once all the yellow piping is done, remove the yellow piping bag from the piping bag fitted with the star tip and replace with the black icing bag. Similar to the yellow squares, start piping the lines from the outer edges of the squares to the centers.
- Complete the sides of the cake before moving to the top.
Adding the name
- The next step is adding the birthday boy's name. Cut the name from the edible image sheet (if you have ordered it along with the image) and place it on the birthday cake.
- Again, no 'glue' is required for the name to stick to the cake. The buttercream will hold it well in place.
Adding the gold sprinkles border (gold dragee frame)
- And finally, for the finishing touch, add a row of gold dragees or gold sprinkles all around the Transformers edible image, framing it on the cake.
- Again, there is no glue required to hold them in place, merely push them into the buttercream around the image and they should stay in place.
- And that completes the Transformers cake decoration.
Notes
- Order the edible image in advance so that you have it ready before your party or event. In ordering the image, make sure the size fits your cake.
- Mixing cocoa powder to buttercream will make it easier to achieve black frosting without using too much of black food coloring.
- Another option for adding the birthday person's name on the cake would be to cut it out of fondant or gum paste with letter cutters.
Leave a Reply