

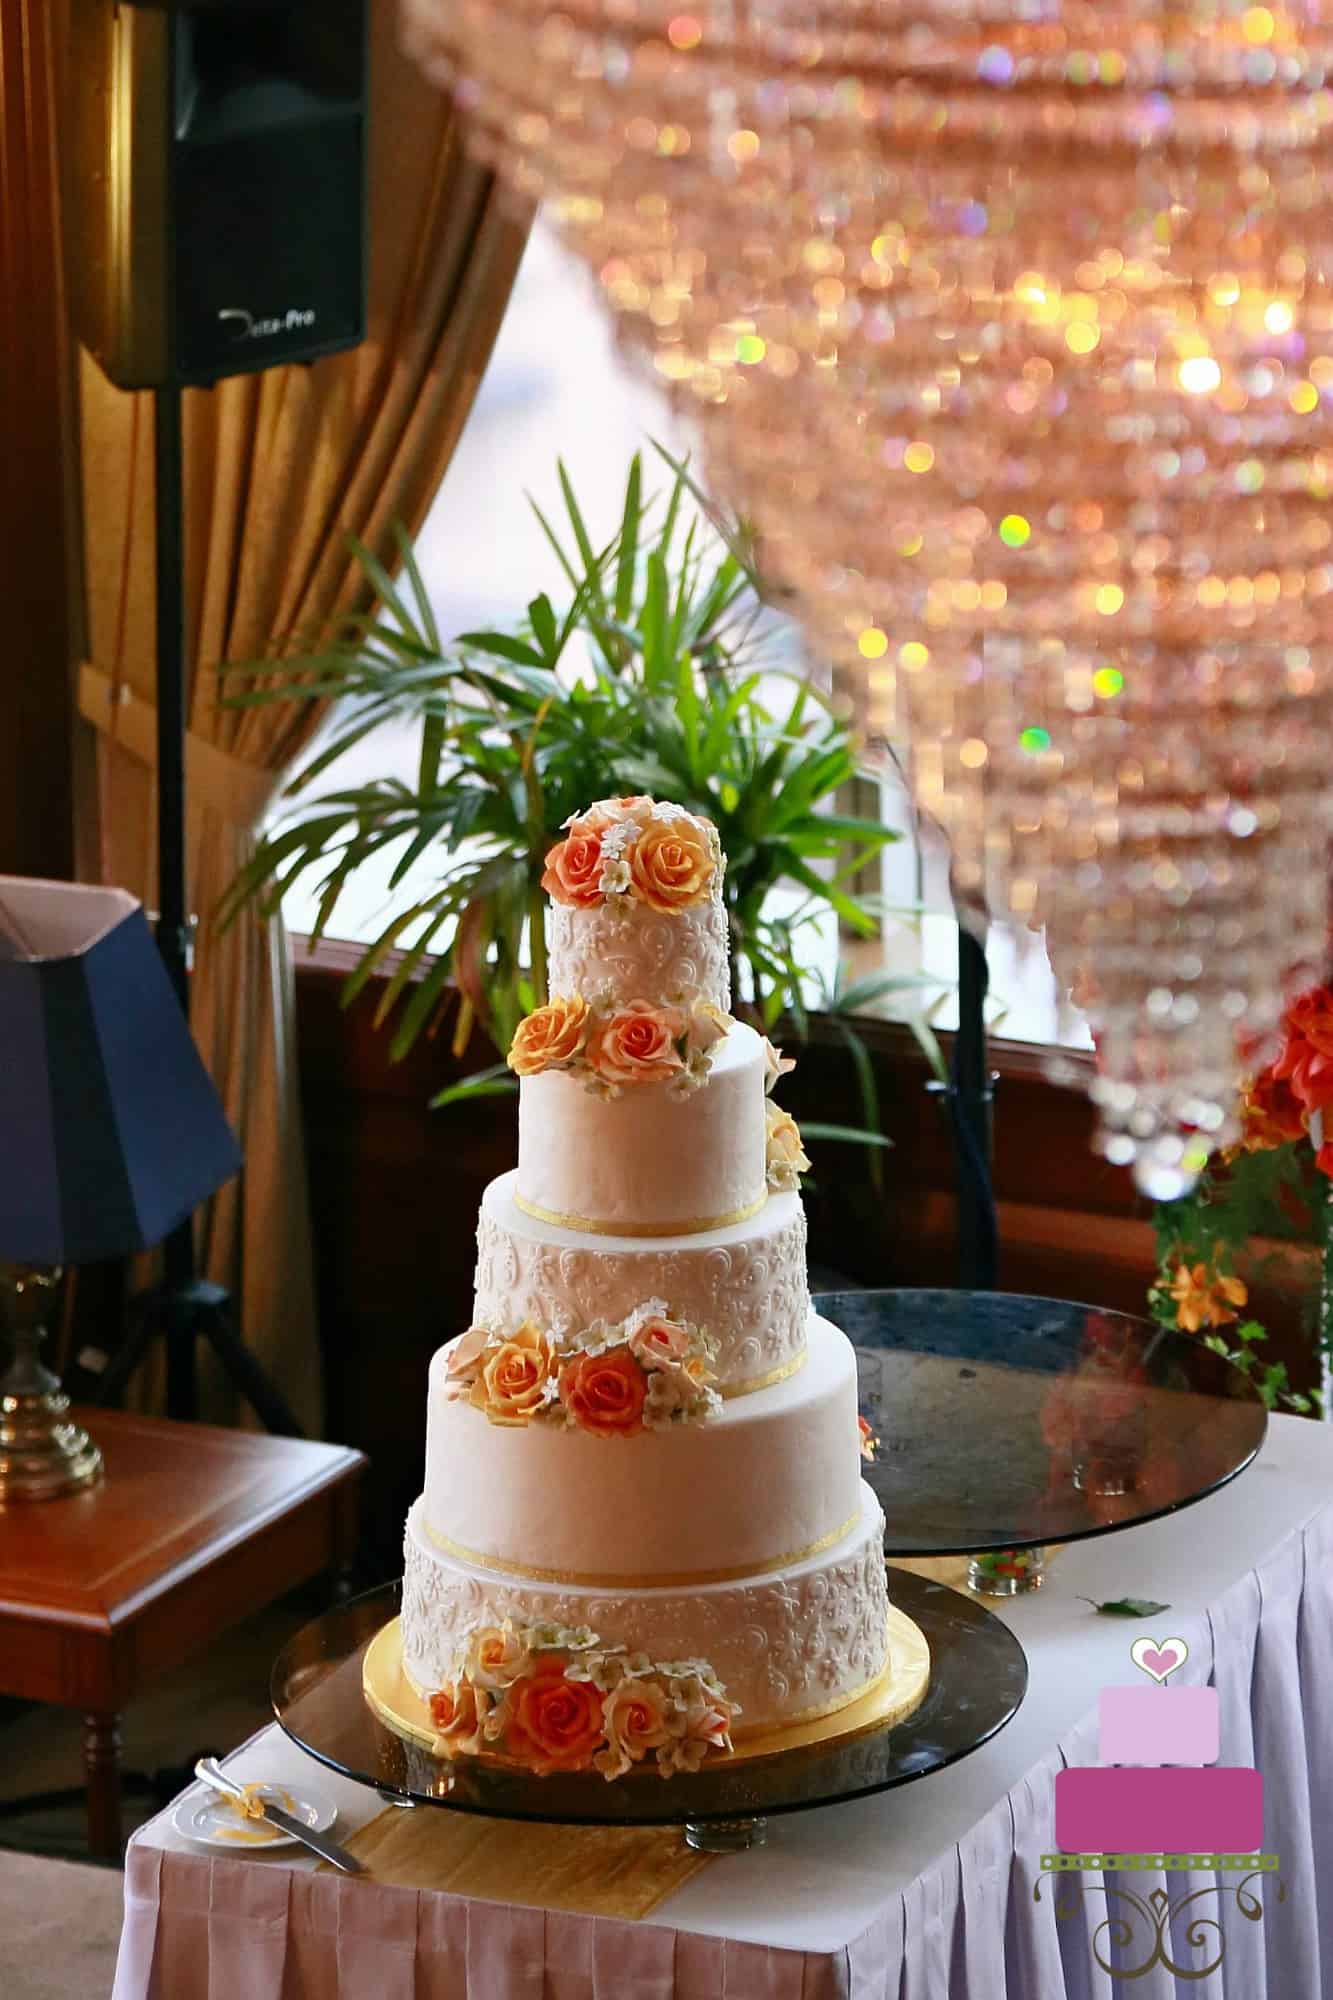
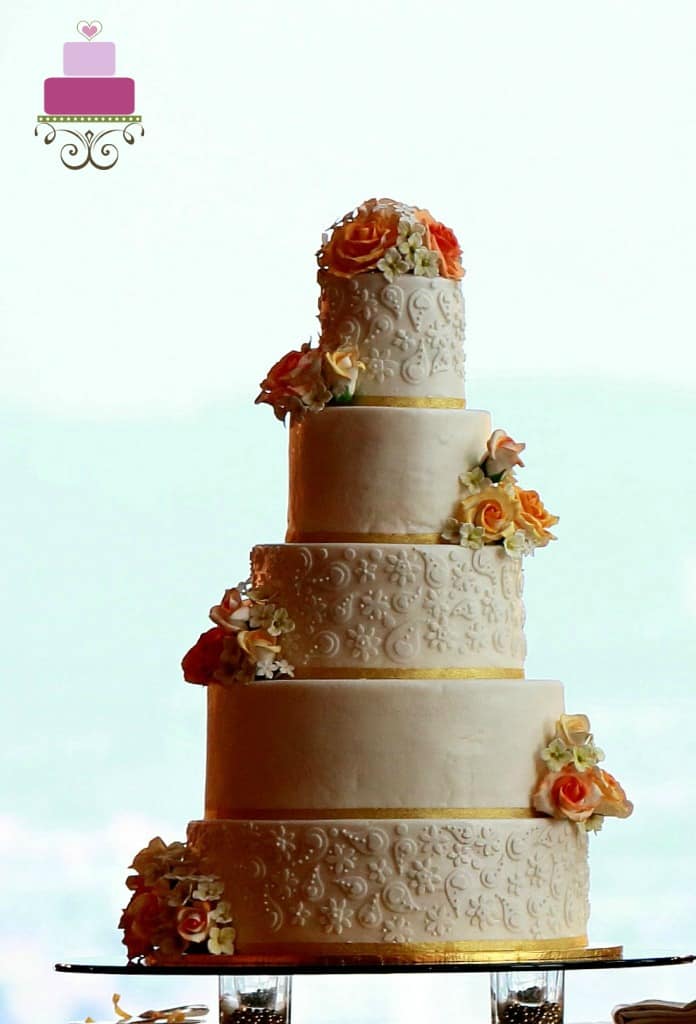
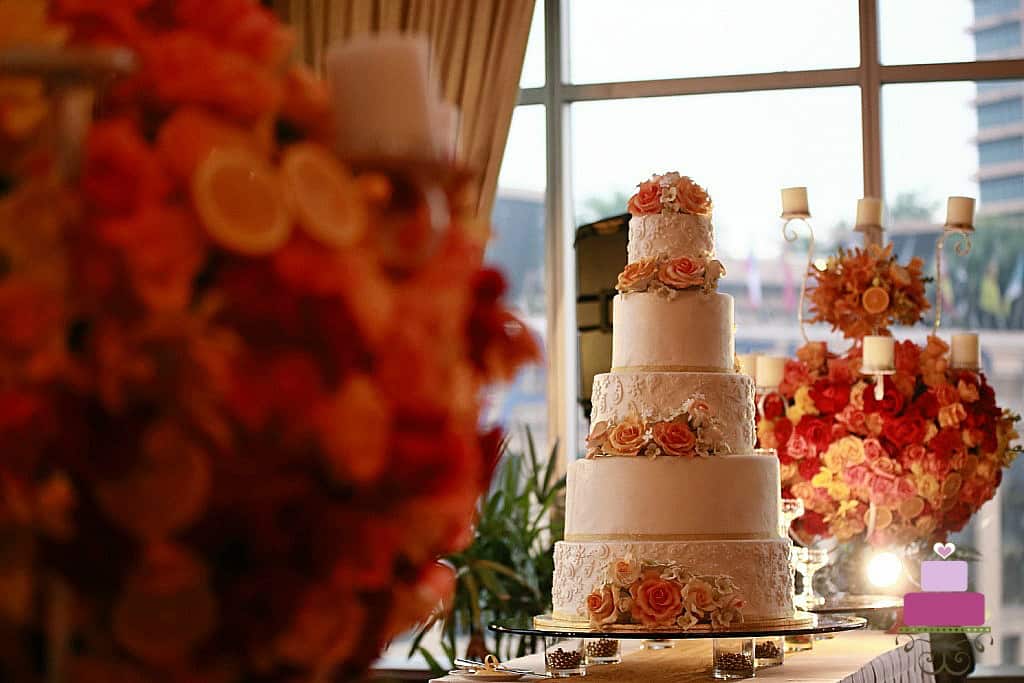
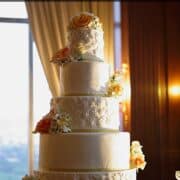
This elegant 5 tier wedding cake makes a really tall wedding cake. It is made up of a combination of real cake and dummy tiers and was decorated with handmade gum paste roses and hydrangeas and filler flowers. Decorated in autumn colors, this wedding cake design is perfect for an autumn wedding!
🧾Supplies Required
- Cake – The real cake sections of this wedding cake was baked using my orange cake recipe.
- Styrofoam dummy – the sizes I used are 9, 15 & 17 inches round dummies. Since I was only able to get Styrofoams that were 3 inches high, to increase the height to 6 inches, I attached 2 dummies in each size with hot glue.
- Buttercream – I used buttercream to fill and crumb coat the top tier of the cake as well as to fill it. I also used buttercream to fill the small cake section on the 4th tier of the cake.
- Royal icing – this was used to accent the lace design on the cake.
- Fondant – The whole cake was covered in Satin Ice ivory fondant. I also used fondant for the lace deco on the cake.
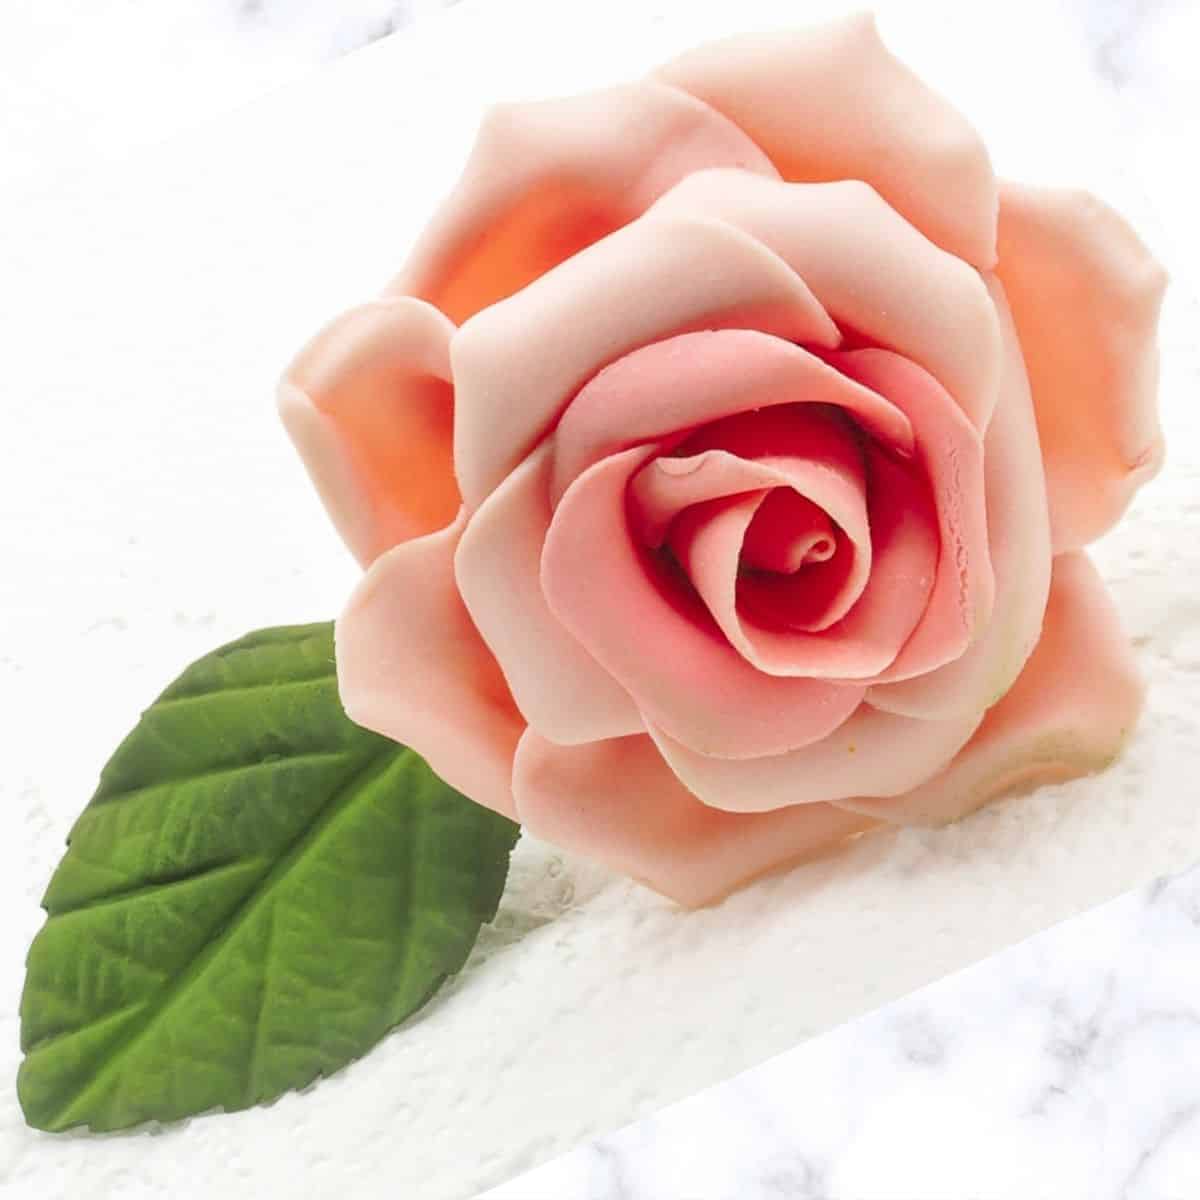
- Gum Paste – I used Satin Ice white gum paste for all the flowers on the cake.
- Petal dusts - I made all my flowers white and then dusted them with petal dusts. For the roses, I used orange and yellow, while for the hydrangeas, I used a light apple green color.
- Fondant glue - this was mainly to make the flowers.
- Shortening – I used this to stick all my fondant lace cut outs on the cake.
- Pearl sheen airbrush color – I used pearl sheen airbrush color to coat the whole 5 tiers of the cake with a pretty pearl sheen.
- Lollipop sticks – I used these sticks to insert my floral wires so as to avoid direct contact of the wires with the cake. And these were only used on the first tier. For the rest of the cake (including the 4th tier), I was able to poke the wires directly into the cake since they were all Styrofoam dummies. The cake section on the 4th tier was positioned in such a way that it avoided the floral arrangement on that tier.
- Cutters for lace – I used a number of different cutters I had to make the lace design – these were paisley, daisy, small & medium 5 petal flower cutters as well plunger cutters in heart and flower shapes.
- Styrofoam cutter
- Gold ribbon - to wrap around the base of each of the 5 tiers of the cake.
👩🍳How to Make
Step 1: Make the Gum Paste Flowers
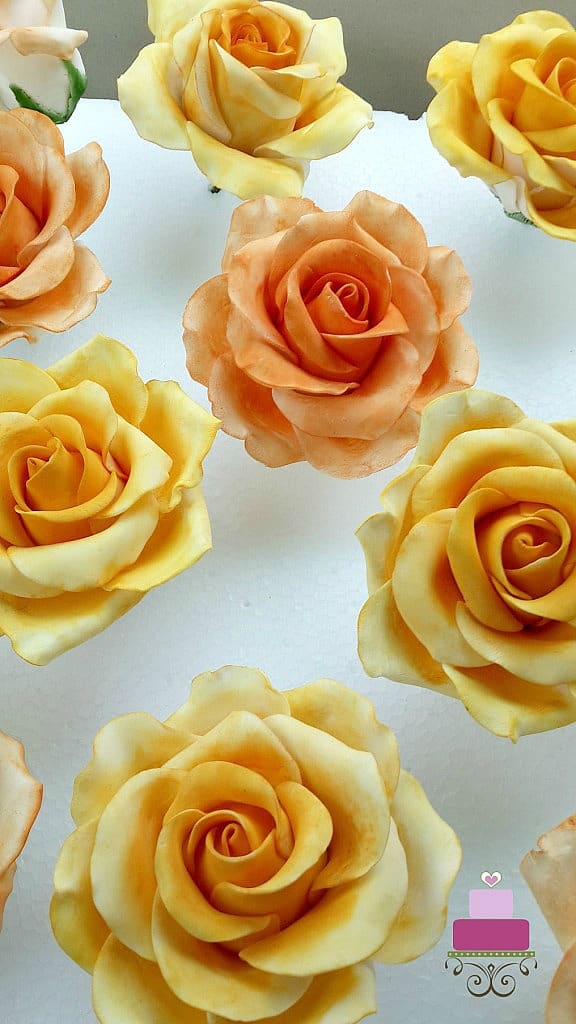
I started working on the gum paste flowers 2 weeks in advance. For this 5t tier cake, I used roses (full blooms as well as half blooms and buds), hydrangeas and jasmines. I made all the flowers in white and dusted them to their final colors once they were dry and set. And each flower was individually wired.
Click on the images below for step by step tutorials on making the gum paste roses and gum paste hydrangea flowers. I do not have a tutorial for the jasmines, and will definitely update here once the tutorial is ready.

Step 2: Prepare the Dummy Cakes
Once I had the flowers done, I prepared my dummy cakes. Since I was unable to find those that came in 6 inches height, I had to purchase the 3 inches ones and stick two of the same size together to make up the 6 inches height. Click here for my tutorial on how to stack dummy cake tiers.
For the 4th tier, since part of it was to be replaced with cake, I cut out a section of the Styrofoam dummy. I marked the section that is to be cut out and then used my Styrofoam cutter to remove the section. I then wrapped it with cling film so that once I fill real cake in the cut out section, it will not get into direct contact with the foam.
And then, except for the 4th tier, I covered the remaining 3 tiers in fondant.
Step 3: Bake and Prepare the Real Cakes
Next was the cake itself. The top tier and the 4th tier of the cake which was made up of actual cake measuring 6 inches in diameter and 12 inches in diameter. Each tier was 6 inches high. I used 1.5 times the measurement of my orange cake recipe for this. The cakes was baked in 3 separate tins for each tier.
Once baked and cooled, I leveled each layer, filled and crumb coated with buttercream. And then I covered them in fondant.
Step 4: Make the Lace Pattern
Once I had all the tiers covered in fondant, I did the lace patterns. For this, I used my cutters, and randomly attached the fondant cutouts all over the top tier, third tier and the bottom tier. I used shortening to stick them to the cake.
And then I used royal icing to pipe decorative dots on the cutouts. And finally, before starting the assembling work, I gave each tier a layer of pearl sheen coating using my airbrush.
Step 5: Assemble the Cake
The wedding cake assembly was done at the wedding venue. To assemble the cake, I started with the 1st and 2nd tiers. I stacked them first, and then arranged the flowers on the top tier.
And then, I went to the remaining 3 tiers, and stacked them starting from the bottom tier before placing the earlier stacked 1st and 2nd tiers on them.
And then I attached the gold ribbon border around each tier with the help of royal icing. And finally, all the flowers went on. I stared with the full bloom roses and then added the half blooms and buds before accenting and finishing off with the hydrangeas and jasmines.
And that was how I decorated this 5 tier lace wedding cake.
Leave a Reply