

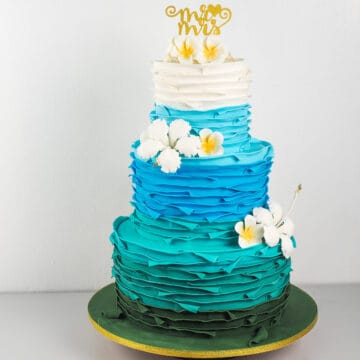
This 3 tier sea cake makes an excellent design for a tropical beach wedding. Decorated in ombre blue and green colors to depict the colors of the sea, and gum paste plumeria flowers and gum paste hibiscus flowers for a tropical feel, this cake is easy to decorate and can be put together fairly quickly.

This is a 3 tier cake. However, only the top and middle tiers are made of real cake. The bottom tier is a styrofoam dummy that was decorated to look like cake.
Note: This is an intermediate cake decorating tutorial and some basic knowledge about making tiered cakes and working with fondant is required.
Jump to:
❤️Why You Will Love This Tutorial
- This is a very pretty cake design.
- You get to learn how to make sea waves effect on cakes with fondant.
- You can customize your cake to make a smaller 2 tier cake or a larger cake.
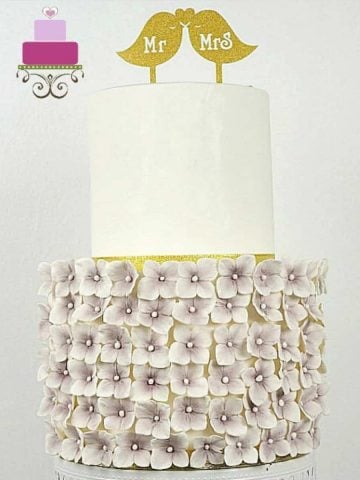
If you like sea and beach themed cakes, you should also check out my beach birthday cake. And for more tropical and floral wedding cakes, check out my 2 tier wedding cake with plumeria, easy DIY hydrangea cake and 5 tier wedding cake in autumn colors.
🧾Supplies Required
- Butter pound cake - 2 layers of 9 inch round cakes.
- Chocolate cake - 2 layers of 6 inch round cakes.
- Styrofoam dummy - 12 inch round block measuring 6 inches in height (or 2 blocks of 12 inch round dummies measuring 3 inches high each).
- Buttercream - to fill the cake layers and crumb coat the tiers before covering with fondant.
- Fondant - you can make your own from scratch with this easy homemade fondant recipe or marshmallow fondant recipe. Alternatively, you can use store bought fondant.
- Mr & Mrs cake topper - this is made of glitter paper and attached to a lollipop stick. The topper can be purchased online or from cake decorating shops.
- Gold ribbon and hot glue - to wrap the sides of the cake board.
- Gum paste plumeria (frangipani) and gum paste hibiscus flowers - you can make these on your own or purchase from any cake decorating shops. I made mine on my own. Click here to learn how to make the gum paste plumeria and here for the gum paste hibiscus flowers.
- Pizza cutter - general fondant cutting tool.
- Shortening - as a glue to stick the fondant decorations.
- Cake decorating brush - to apply shortening to fondant.
- Food coloring - to tint the fondant. I used a combination of blue, green and turquoise.
👩🍳How to Make
Step 1: Make the Gum Paste Flowers
If you are making the plumeria and hibiscus on your own, it is best that they are made in advance. Click here for step by step tutorial on how to make the gum paste plumerias and here on how to make the gum paste hibiscus.
Step 2: Bake the Cakes and Make the Buttercream
Bake 2 layers of 6 inch round cakes and 2 layers of 9 inch round cakes. Each layer should be approximately 2 inches high.
Let the cakes cool completely before decorating. In the meantime, make the buttercream.
Step 3: Stack the Cake Tiers
Start with the styrofoam bottom tier. If using a single block with 6 inches high, rinse the block with water and cover it with fondant. The water will help the fondant to stick to the styrofoam. Roll white fondant and cover the dummy.
Note: If using 2 blocks of 3 inch high pieces, stick them together with hot glue and patch the joints with royal icing. Refer to my post on dummy cakes for further details.
For the real cake layers, level them. Stack the 6 inch layers together with buttercream. Do the same for the 9 inch cake layers. Crumb coat each tier with buttercream and cover them with white fondant.
Note: Each cake tier should be placed on a separate cake board that is of the exact size of the cake diameter. It should not show underneath the cake.

To stack the cake, place the dummy tier on a large cake board (at least 16 inches in diameter). Top it with the 9 inch cake tier.
Insert bubble tea straws into the 9 inch cake layer (within 6 inches diameter from the center of the cake) and place the 6 inch cake tier on top. Make sure all the cake tiers are well centered (image 1).
Note: Bubble tea straws help support the weight of cakes placed on top of the cakes they are poked into and prevent the cakes from being compressed. Dummy cake layers can fully support the weight of the top tier cakes hence you need not poke bubble tea straws into it.
Step 4: Tint the Fondant
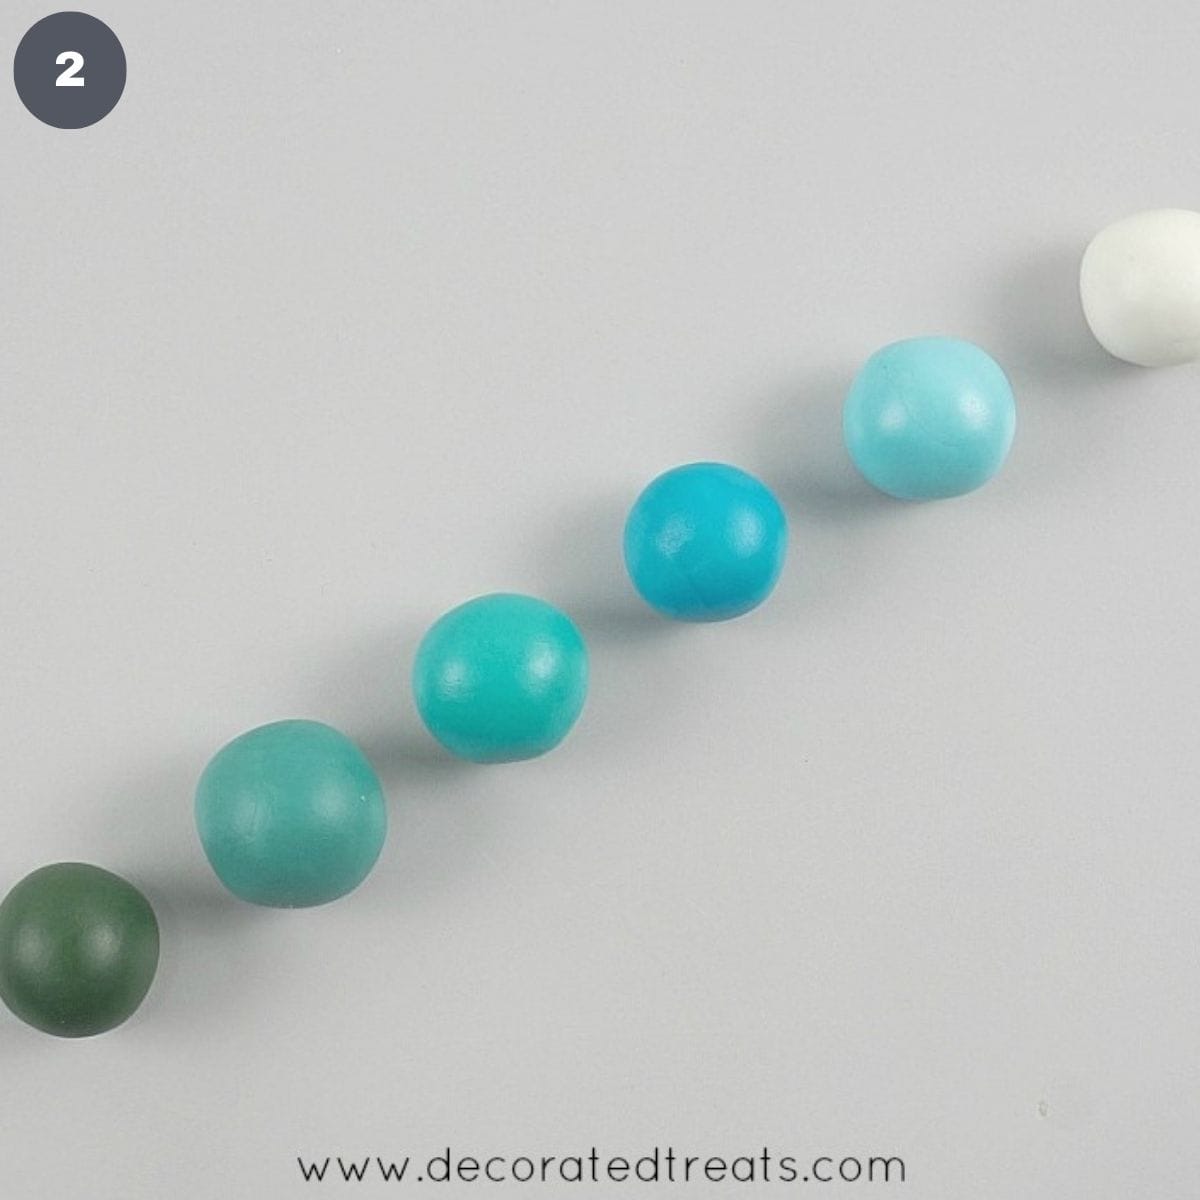
You will need a total of 6 colors for the sea waves (including white). Tint your fondant with these shades. They are a mix of blues and greens (image 2).
Step 5: Attach the White Sea Waves
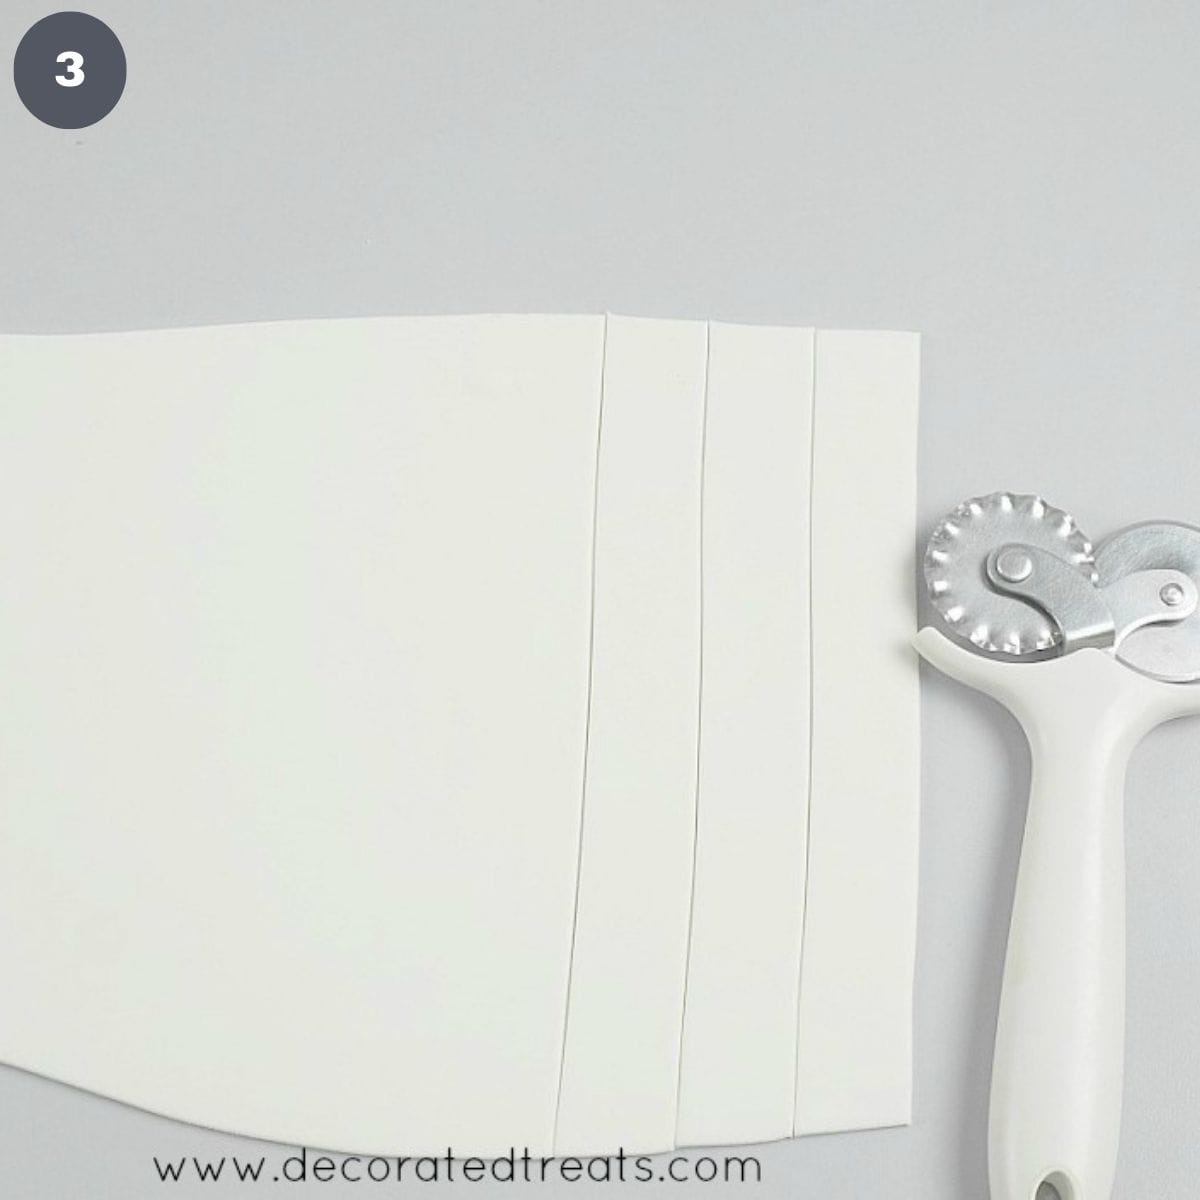
Start with the white waves. Roll white fondant into ⅛ of an inch thickness and cut out medium-sized strips. The ones shown here are about 15cm long (image 3).
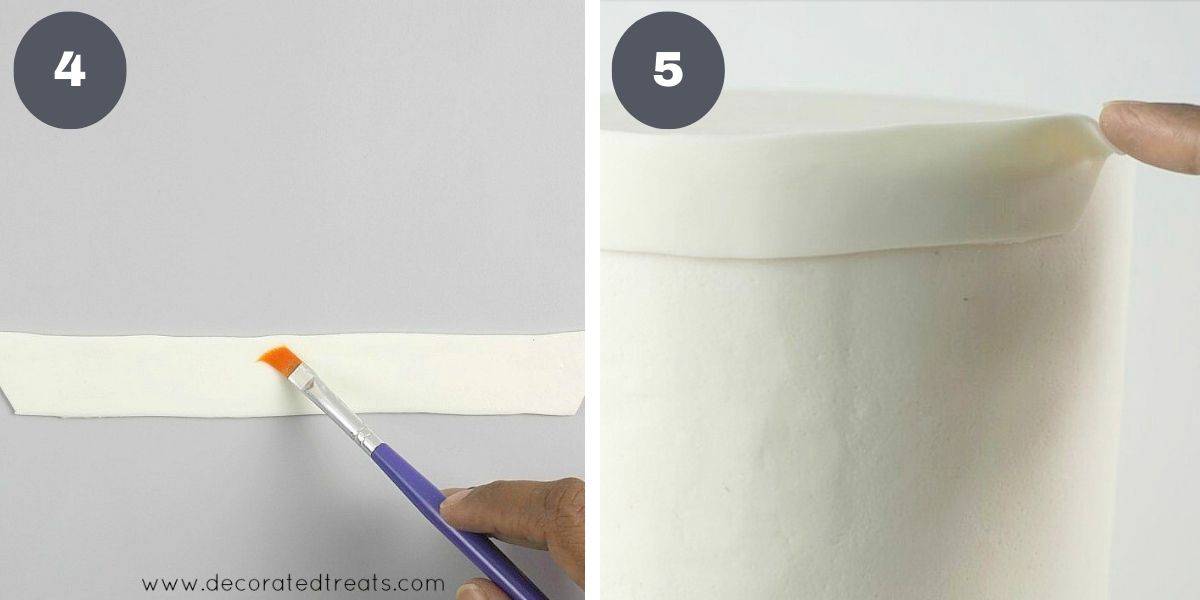
Apply shortening on each strip and attach to the cake, starting right from the top . And then, using your finger, curve the top corners lightly (on both ends of each strip) (images 4 & 5).
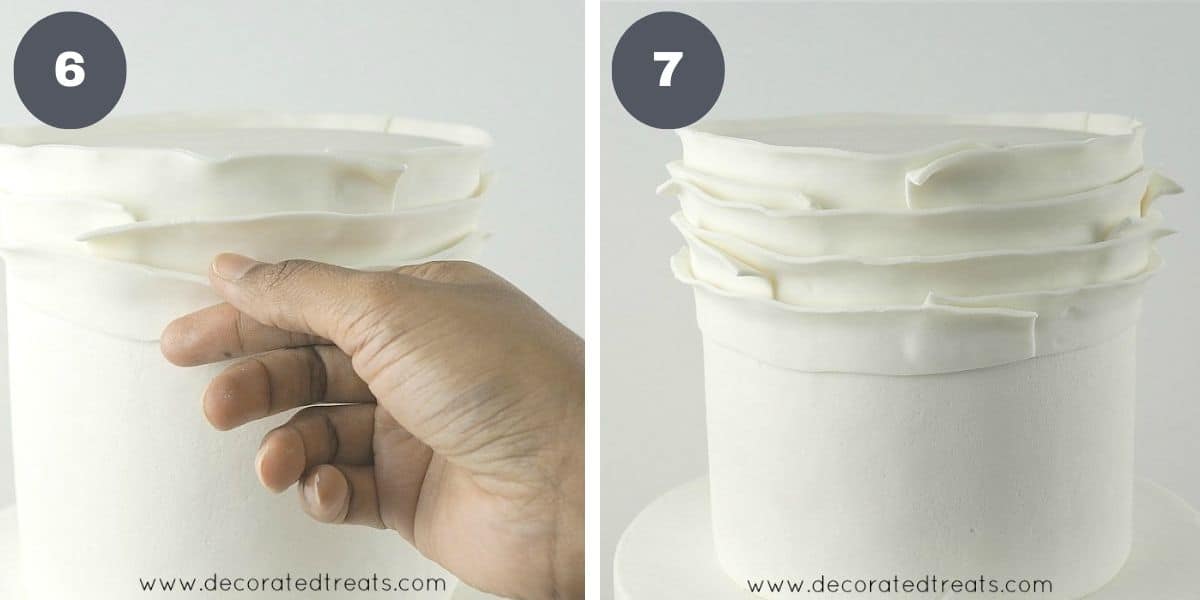
Adjust the top of the strips so that they don't lay too flat on the cake, instead form light frills to resemble sea waves. Make 4 layers of white before moving on to the next color (image 6 & 7).
Step 6: Add the Second set of Sea Waves
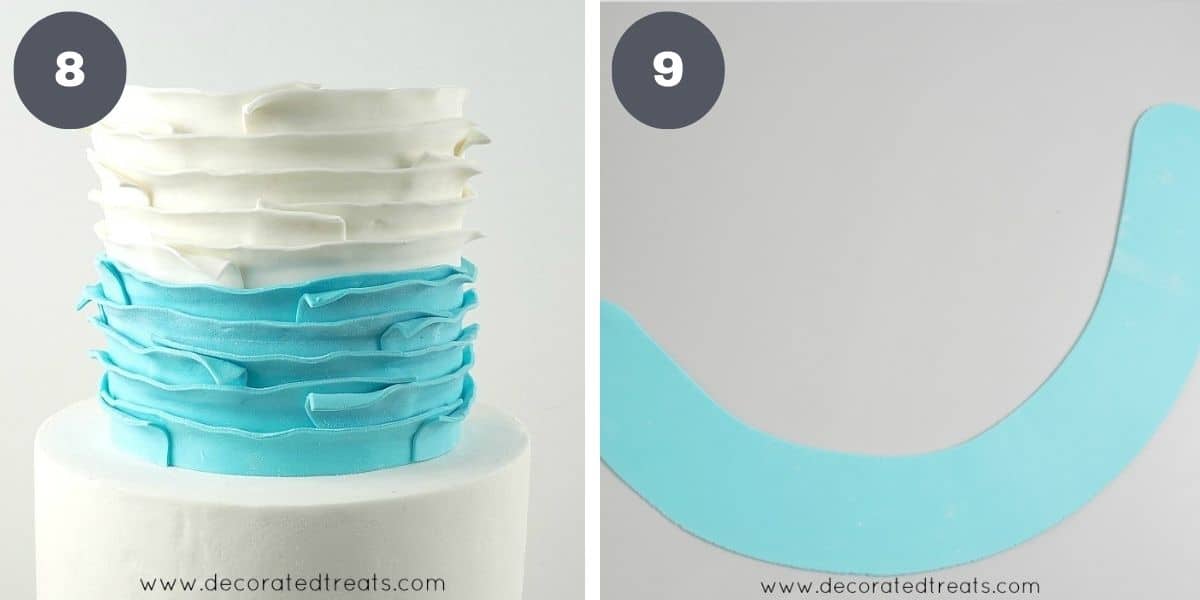
Continue to cover the top tier in blue strips until the bottom (image 8). Roll a long piece of fondant in the same shade of blue in a curved shape (image 9)
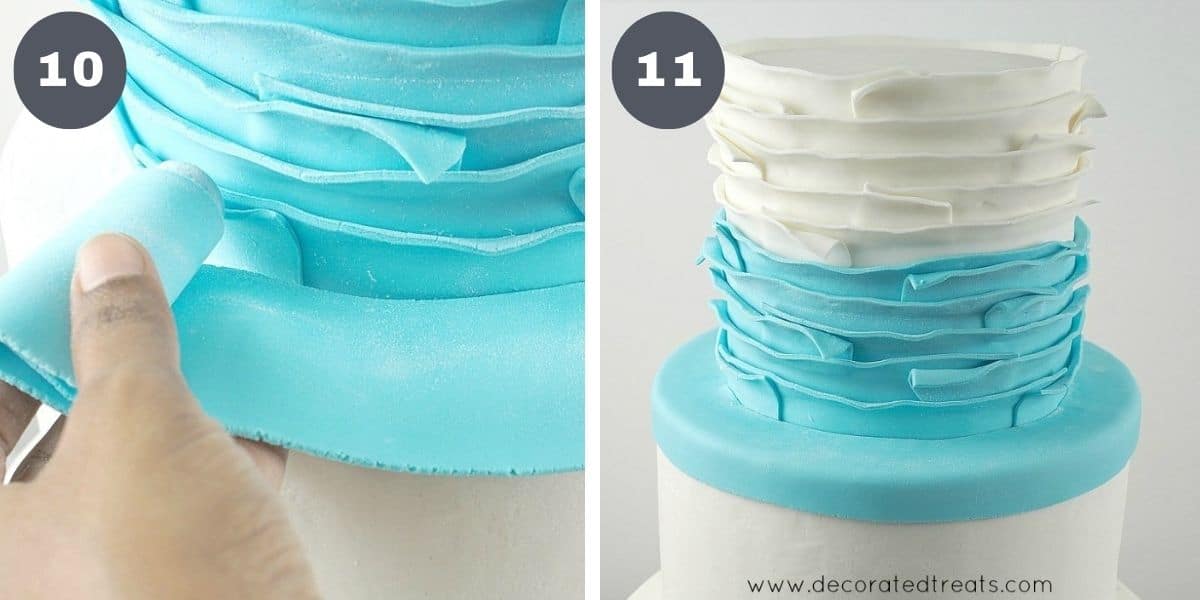
Brush a light coat of shortening to the top of the second cake tier and attach the fondant to it (images 10 & 11).
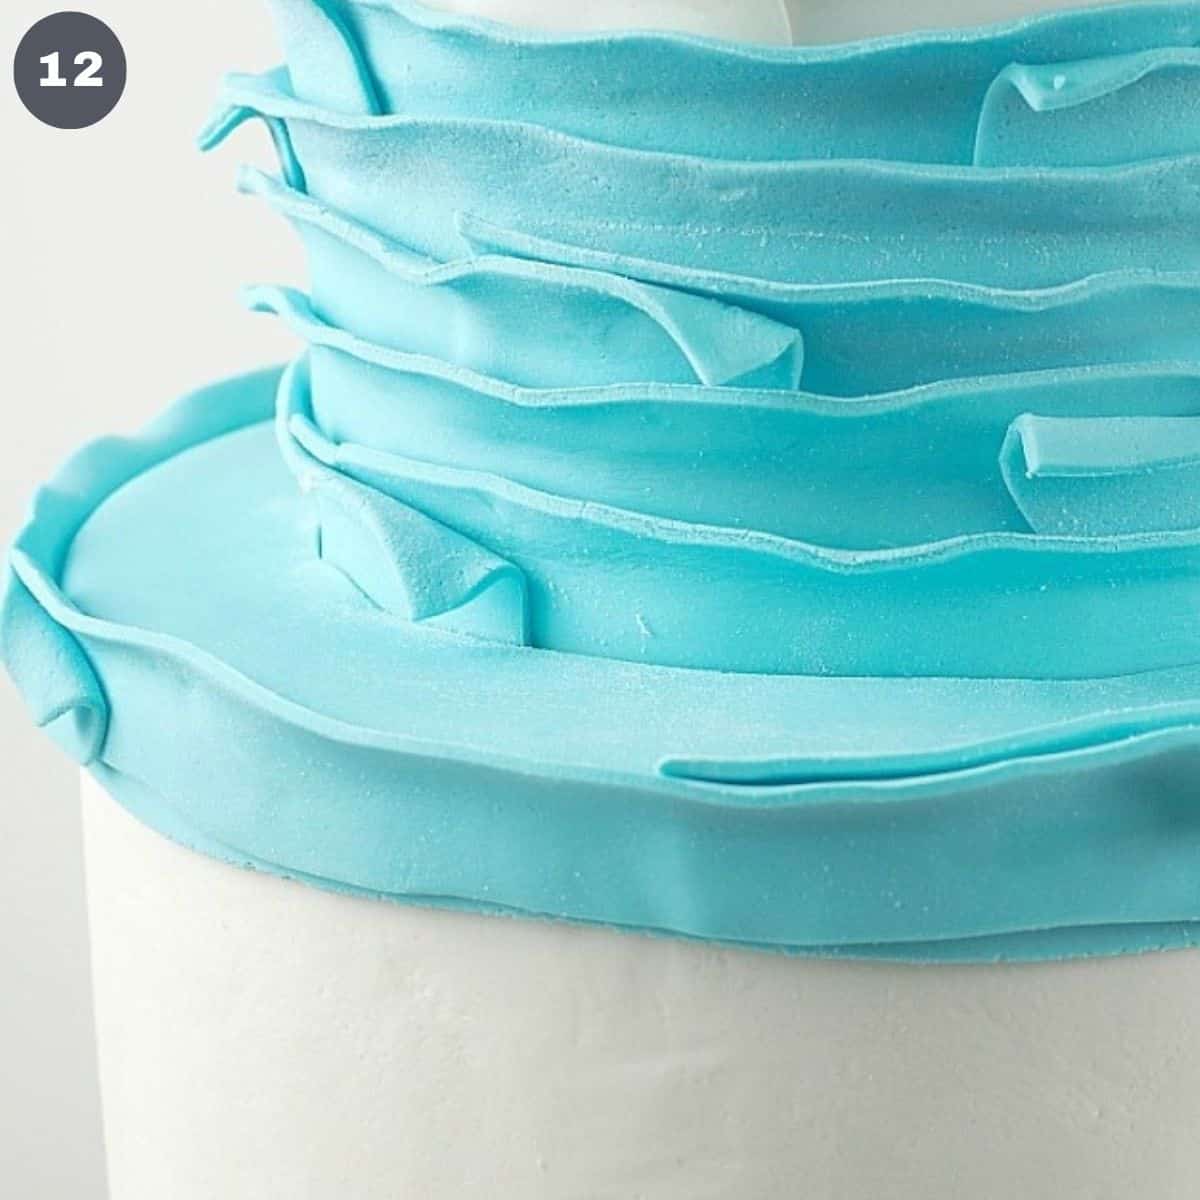
Continue with another layer of waves, still in the same shade blue (image 12).
Step 7: Add the Next 4 Sets of Sea Waves
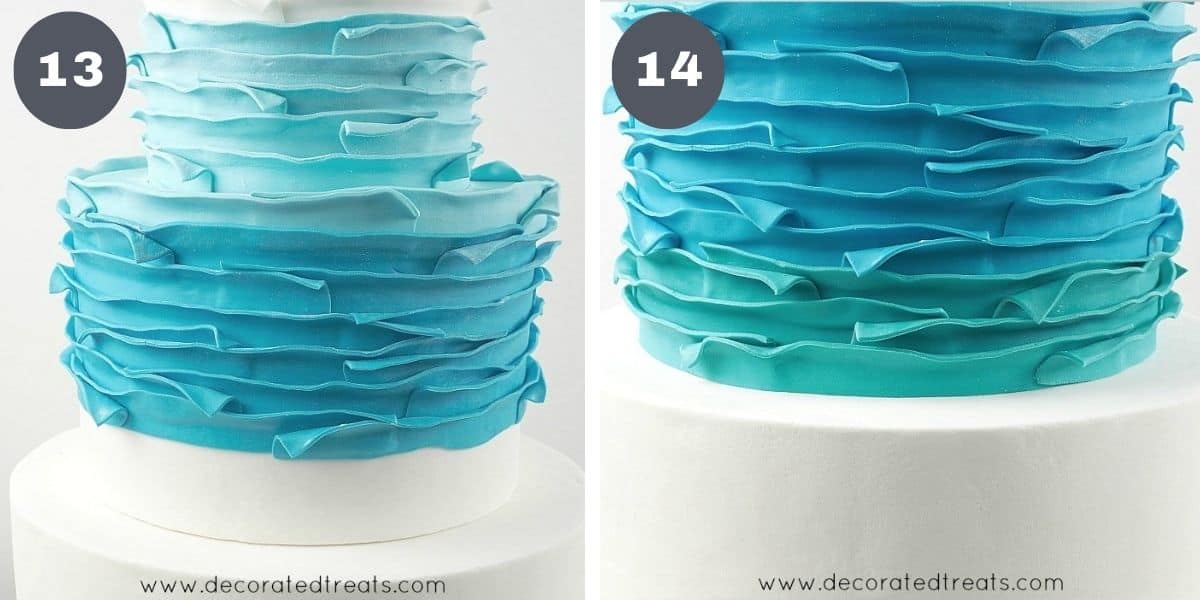
Add a total of 6 layers in a darker blue shade (image 13) followed by 3 layers of turquoise (image 14).
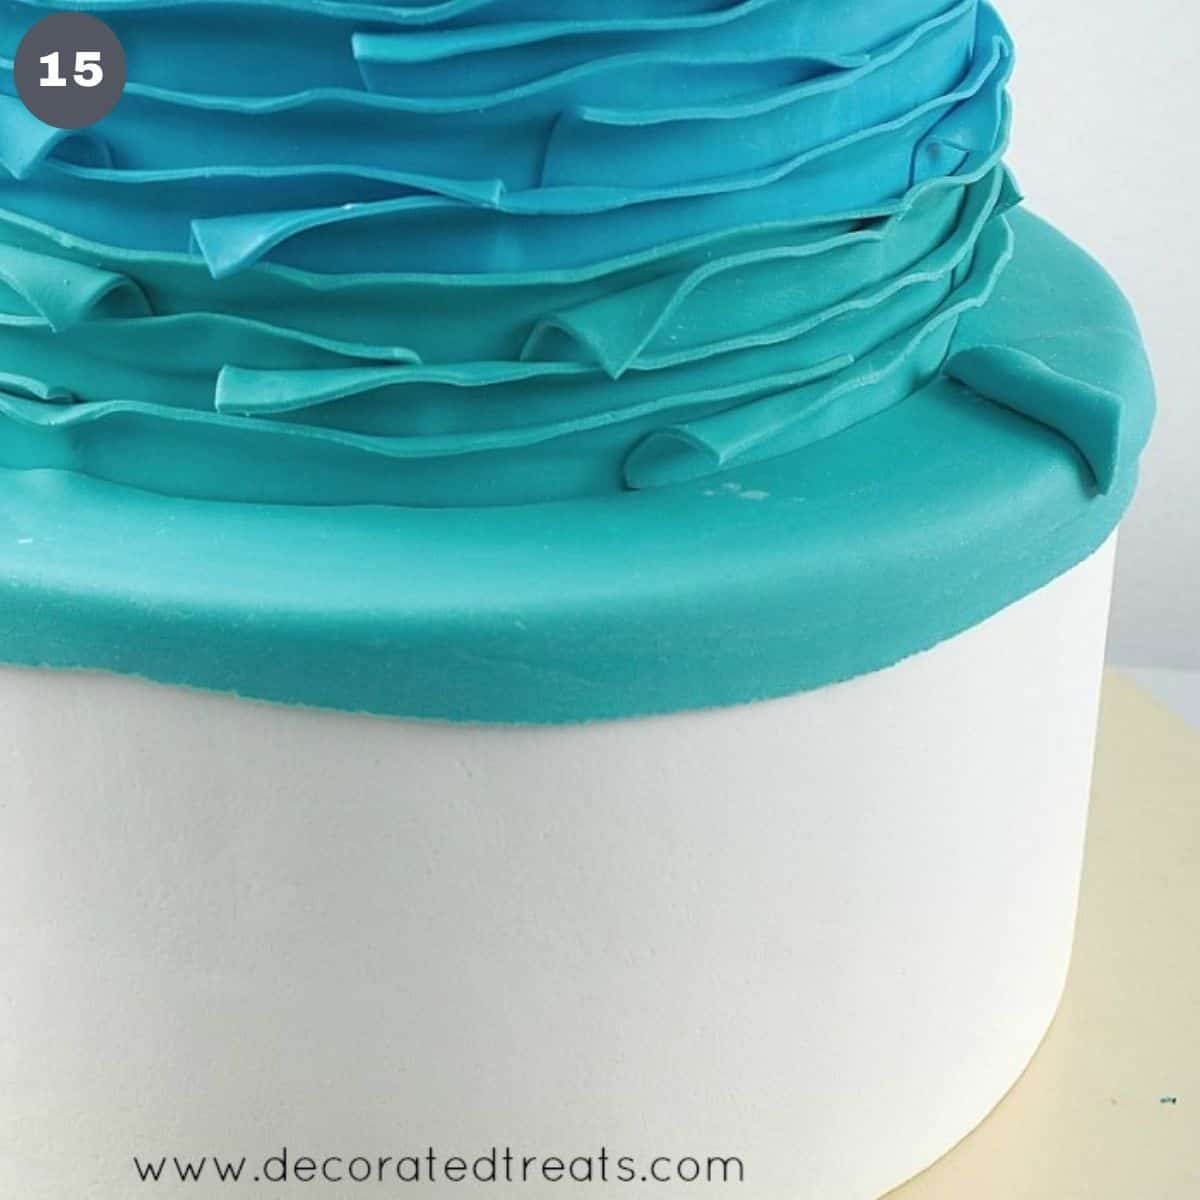
Cover the top of the third tier with a layer of turquoise fondant similar to the second layer (image 15).
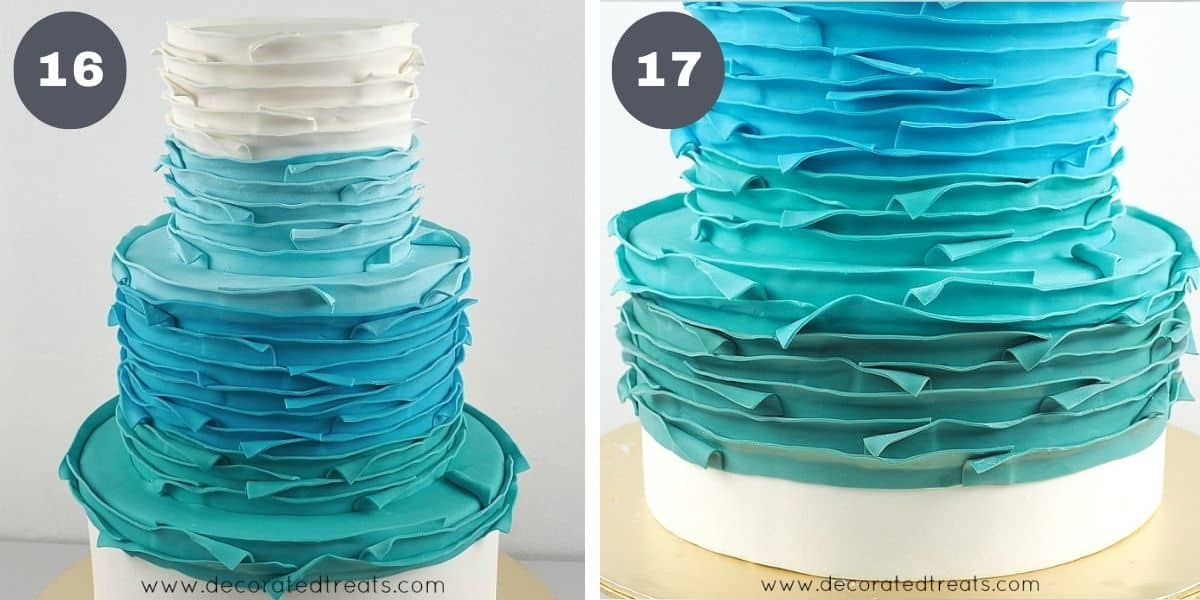
Continue with 2 more rows of the same turquoise layers of waves (image 16) before moving on to a darker shade of turquoise. Make a total of 5 layers of sea waves in dark turquoise (image 17).
Step 8: Add the Final Set of Fondant Sea Waves
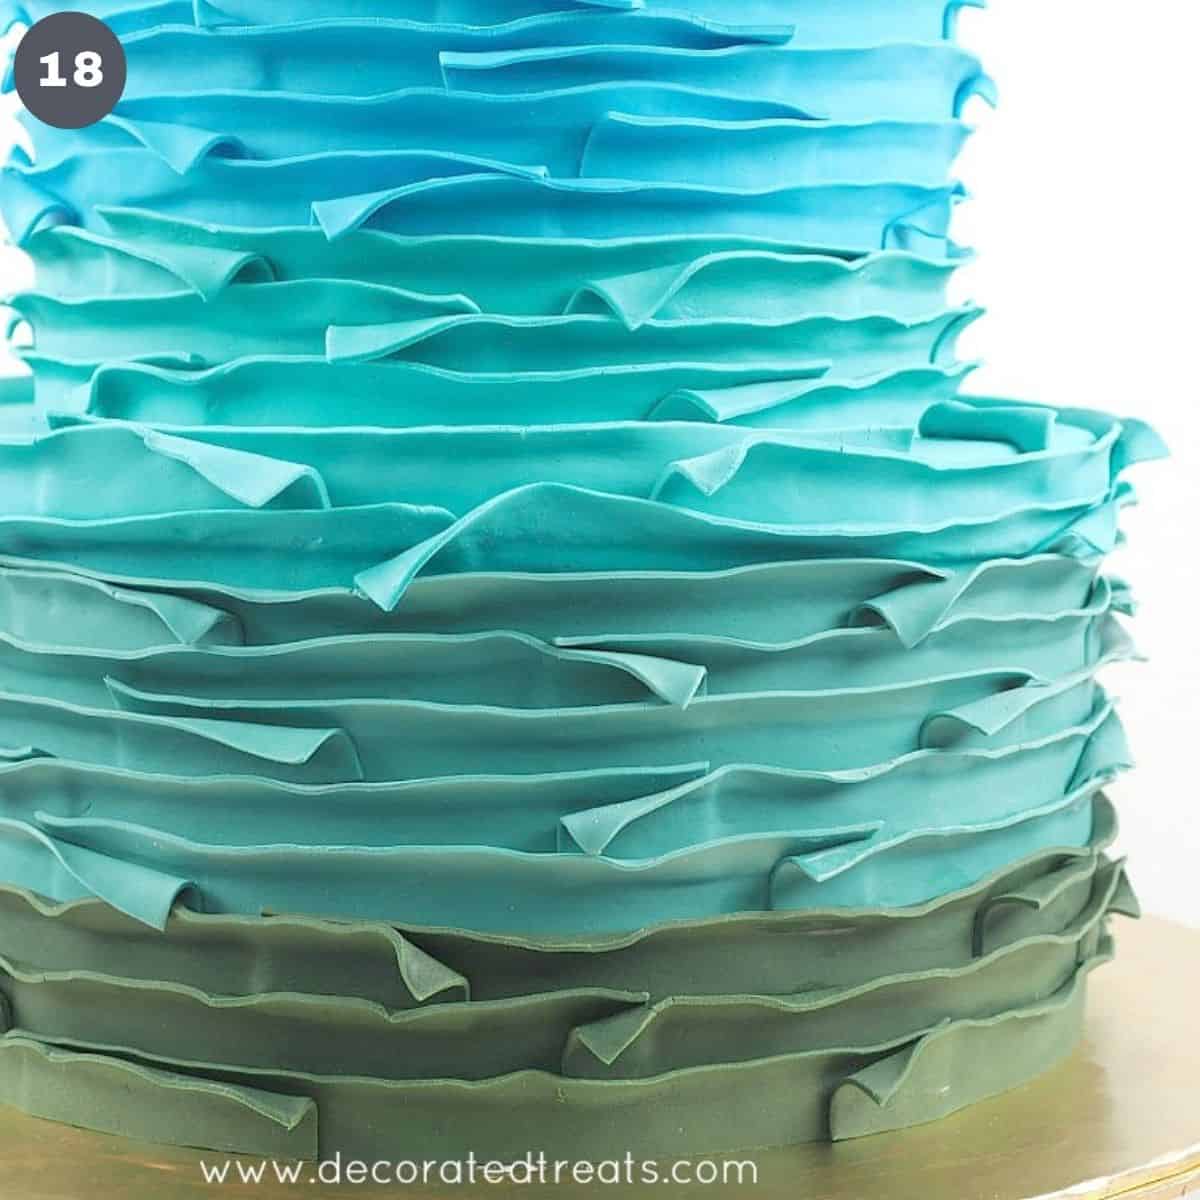
The final shade of sea waves a deep green color. Add these layers until the bottom of the third cake tier (image 18).
Step 9: Cover the Cake Board
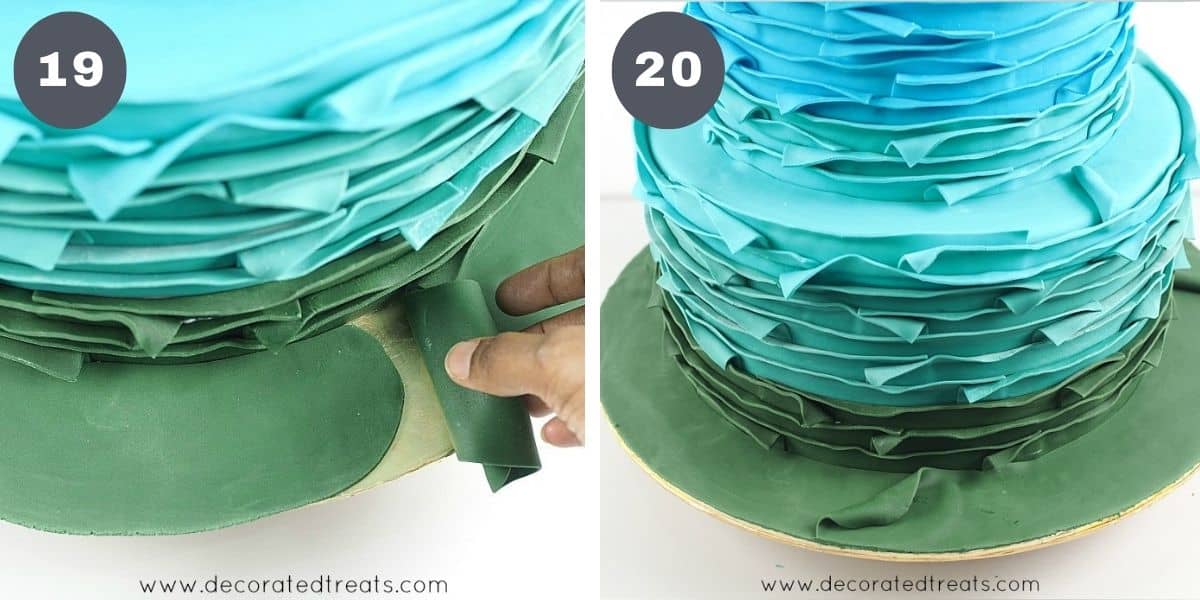
Using the same shade of deep green fondant, roll it into 3 long strips. Brush the cake board with shortening and attach the strips to it. Curl the joints of each strip to repeat the waves pattern (images 19 & 20).
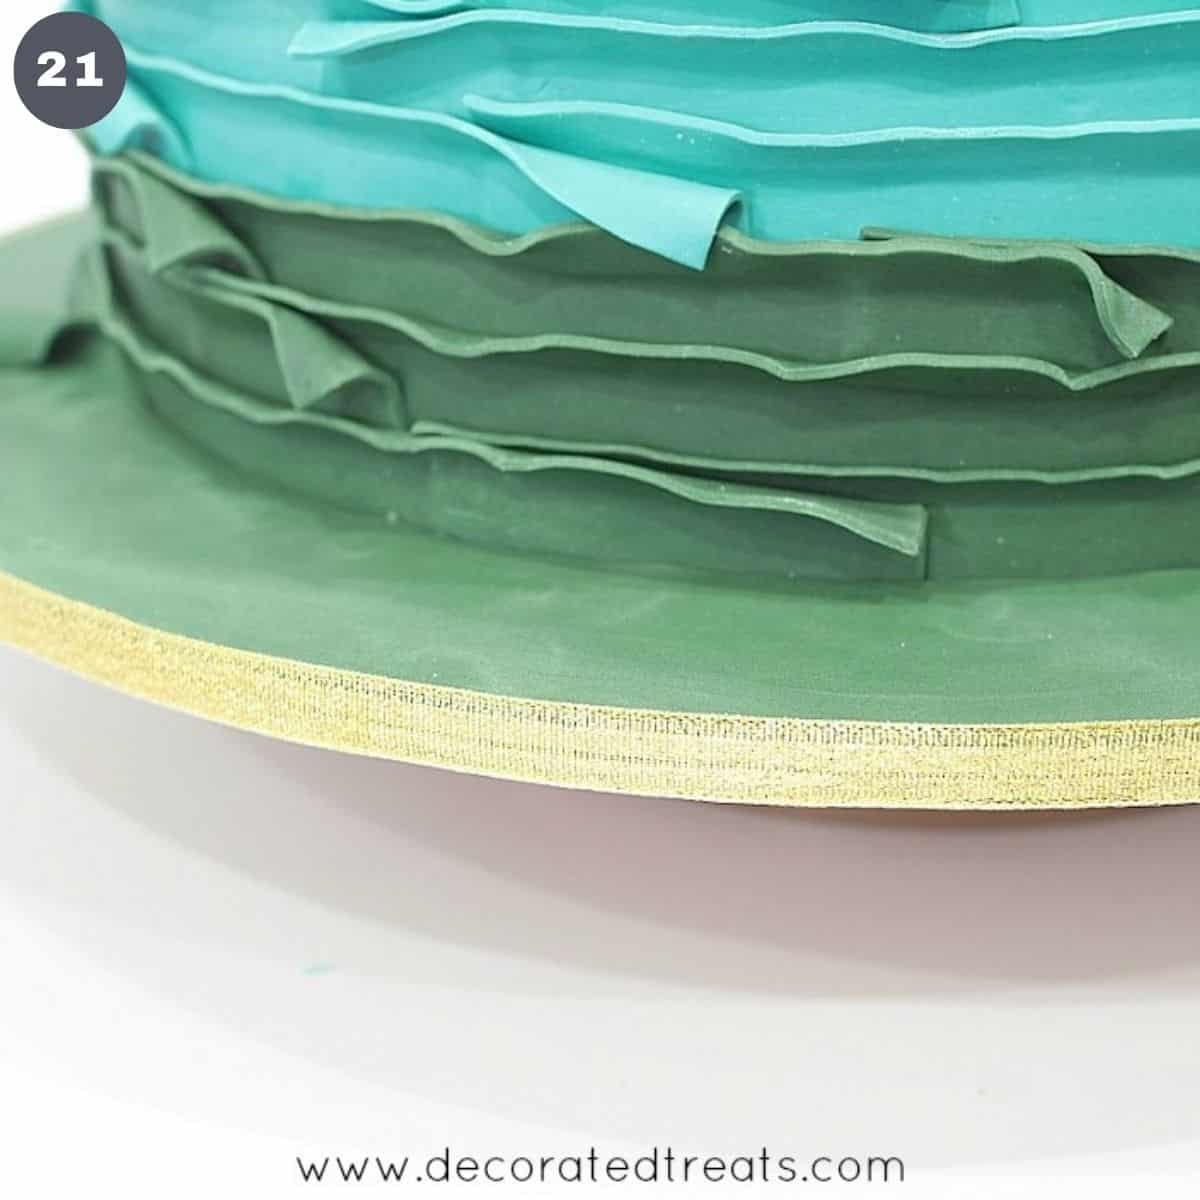
Trim the excess off the cake board and attach a gold ribbon around the cake board with hot glue (image 21).
Step 10: Add the Flowers and Cake Topper
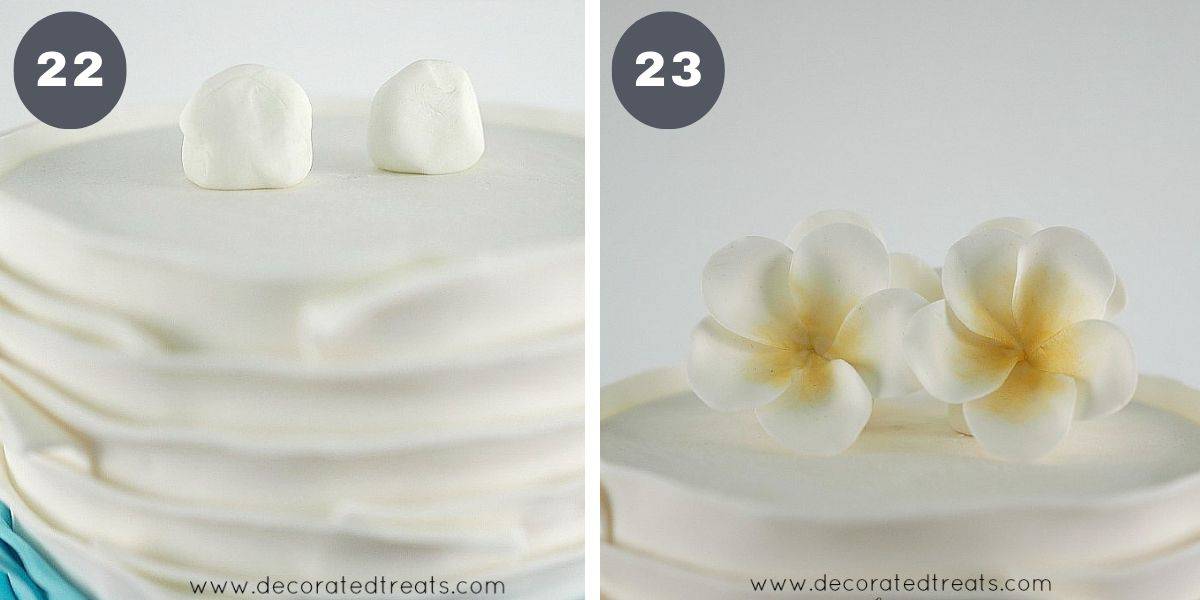
Glue 2 small lumps of fondant on the top cake tier (image 22).
Attach one plumeria flower to each of the lumps with shortening (image 23).

Repeat with 2 more plumerias on the opposite and one each on the sides (image 24).
Insert the "Mr & Mrs" topper in the center (image 25).
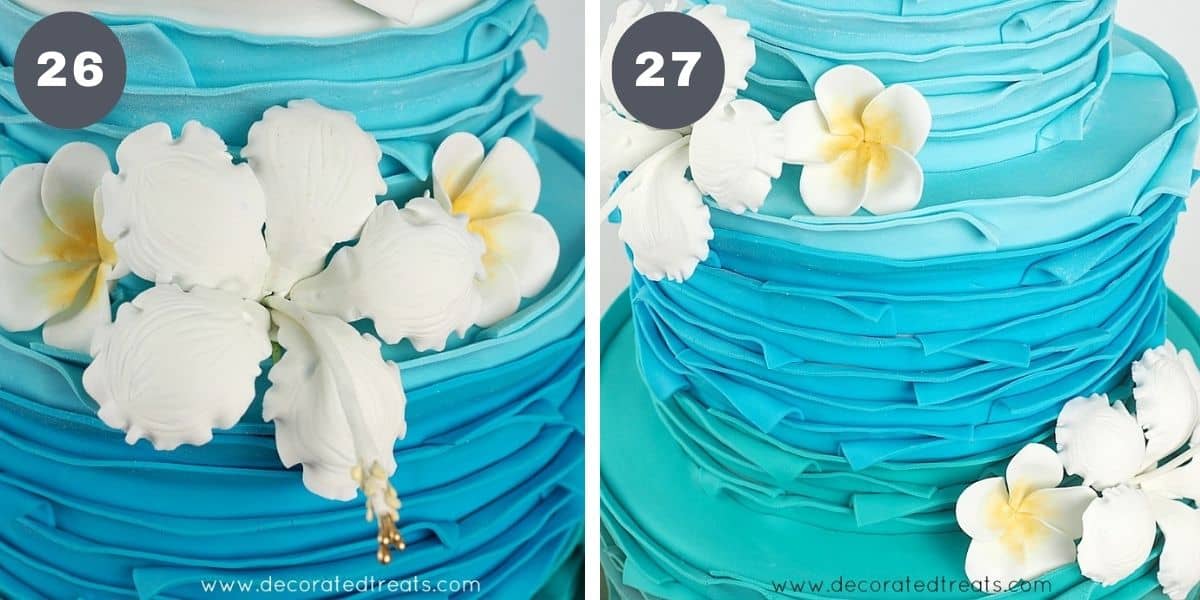
For the sides, add one hibiscus flanked with two plumerias. Do this at the base of first and second tiers (images 26 & 27) .
Note: when poking wired flowers into real cake, make sure the wires that get poked into the cake are wrapped with plastic wrap or foil. See my post here on how to attach flowers to cakes for more details.
And that completes the tropical sea cake.
❤️More Cake Designs You Will Love
Do you like this tutorial? Please leave a 5-star ⭐⭐⭐⭐⭐rating in the recipe card below and consider a review further down this page. I would love to hear from you. Thank you!
📖Recipe
Tropical Sea Cake
Equipment
- Mr & Mrs cake topper
- Gold ribbon and hot glue
- 10 Gum paste plumeria (frangipani)
- 2 Gum paste hibiscus flowers
- Pizza Cutter
- Cake decorating brush
For best results, use the metrics measurements. US customary measurements have not been tested and are only meant for guide.
Ingredients
- 2 nine inch round cakes
- 2 six inch round cakes
- 1 Styrofoam dummy (12 inch round and 6 inch high)
- Buttercream
- Fondant
- Shortening
- Food coloring
Instructions
Prepare the gum paste flowers
- If you are making the plumeria and hibiscus on your own, it is best that they are made in advance. Click here for step by step tutorial on how to make the gum paste plumerias and here on how to make the gum paste hibiscus.
Bake the cakes and make the buttercream
- Bake two layers of 6 inch round cakes and two layers of 9 inch round cakes. Each layer should be approximately 2 inches high.
- Let the cakes cool completely before decorating. In the meantime, make the buttercream.
Stack the cake tiers
- Start with the styrofoam bottom tier. Rince the block with water and cover it with fondant (see Note 1). The water will help the fondant stick to the styrofoam. Roll white fondant and cover the dummy.
- For the real cake layers, level them. Stack the 6 inch layers together with buttercream filling. Do the same for the 9 inch cake layers. Crumb coat each tier with buttercream and cover them with white fondant (see Note 2).
- To stack the cake, place the dummy tier on a large cake board (at least 16 inches in diameter). Top it with the 9 inch cake tier.
- Insert bubble tea straws into the 9 inch cake layer (within 6 inches diameter from the center of the cake) and place the 6 inch cake tier on top (see Note 3). Make sure all the cake tiers are well centered.
Tint the fondant
- You will need a total of 6 colors for the sea waves (including white). Tint the fondant into 5 shades of sea water colors with each shade transitioning from light blue to turquoise to deep green.
Attach the fondant sea waves
- Start with the white waves. Roll white fondant into ⅛ of an inch thickness and cut out medium-sized strips (approximately 15cm long).
- Apply shortening on each strip and attach to the cake, starting from the top. Curve the top corners lightly (on both ends of each strip).
- Adjust the top of the strips so that they don't lay too flat on the cake, instead form light frills to resemble sea waves. Make 4 layers of white before moving on to the second color (light blue). Use this color to cover the remaining of the top tier cake.
- Next, roll a long piece of fondant in the same shade of blue into a curved shape. Brush a light coat of shortening to the top of the second cake tier and attach the fondant to it. Continue with the first layer of waves on the second tier using the same blue fondant.
- Repeat adding the sea waves with 6 layers of darker blue fondant followed by 3 layers of turquoise until the entire second cake tier is covered.
- Use the same turquoise to cover the top of the third cake tier (similar to the second cake tier earlier).
- Continue with the first two layers of waves on the third tier in the same turquoise fondant.
- Change the color to a deeper shade of turquoise and add 5 layers of the fondant sea waves before changing the color again to a deep green. Continue with the sea waves in this deep green color until the entire cake tier is covered to the bottom.
Cover the cake board
- Roll the same shade of deep green fondant into 3 long strips. Brush the cake board with shortening and attach the strips to it. Curl the joints of each strip to repeat the waves pattern on the cake board.
- Trim excess fondant off the cake board and attach a gold ribbon around it with hot glue
Attach flowers and cake topper
- Glue 2 small lumps of fondant on the top cake tier. Attach one plumeria flower to each of the lumps with shortening.
- Repeat with 2 more plumerias on the opposite and one each on the sides.
- Insert the "Mr & Mrs" topper in the center.
- For the sides of the cake, add one hibiscus flanked with two plumerias. Do this at the base of first and second tiers (see Note 4).
- And that completes the wedding cake.
Notes
- If using 2 blocks of 3 inch high pieces, stick them together with hot glue and patch the joints with royal icing. Refer to my post on dummy cakes for details).
- Each cake tier should be placed on a separate cake board that is of the exact size of the cake diameter. It should not show underneath the cake.
- Bubble tea straws help support the weight of cakes placed on top of the cakes they are poked into and prevent the cakes from being compressed. Dummy cake layers can fully support the weight of the top tier cakes hence you need not poke bubble tea straws into it.
- When poking wired flowers into real cake, make sure the wires that get poked into the cake are wrapped with plastic wrap or foil. See my post on how to attach flowers to cakes for more details.

Leave a Reply