

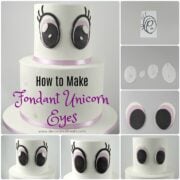
Learn how to make fondant eyes for unicorn cakes with this easy tutorial. It teaches you how to make cute, dreamy eyes made of fondant and you can use them not just for unicorn cakes but also other cakes.
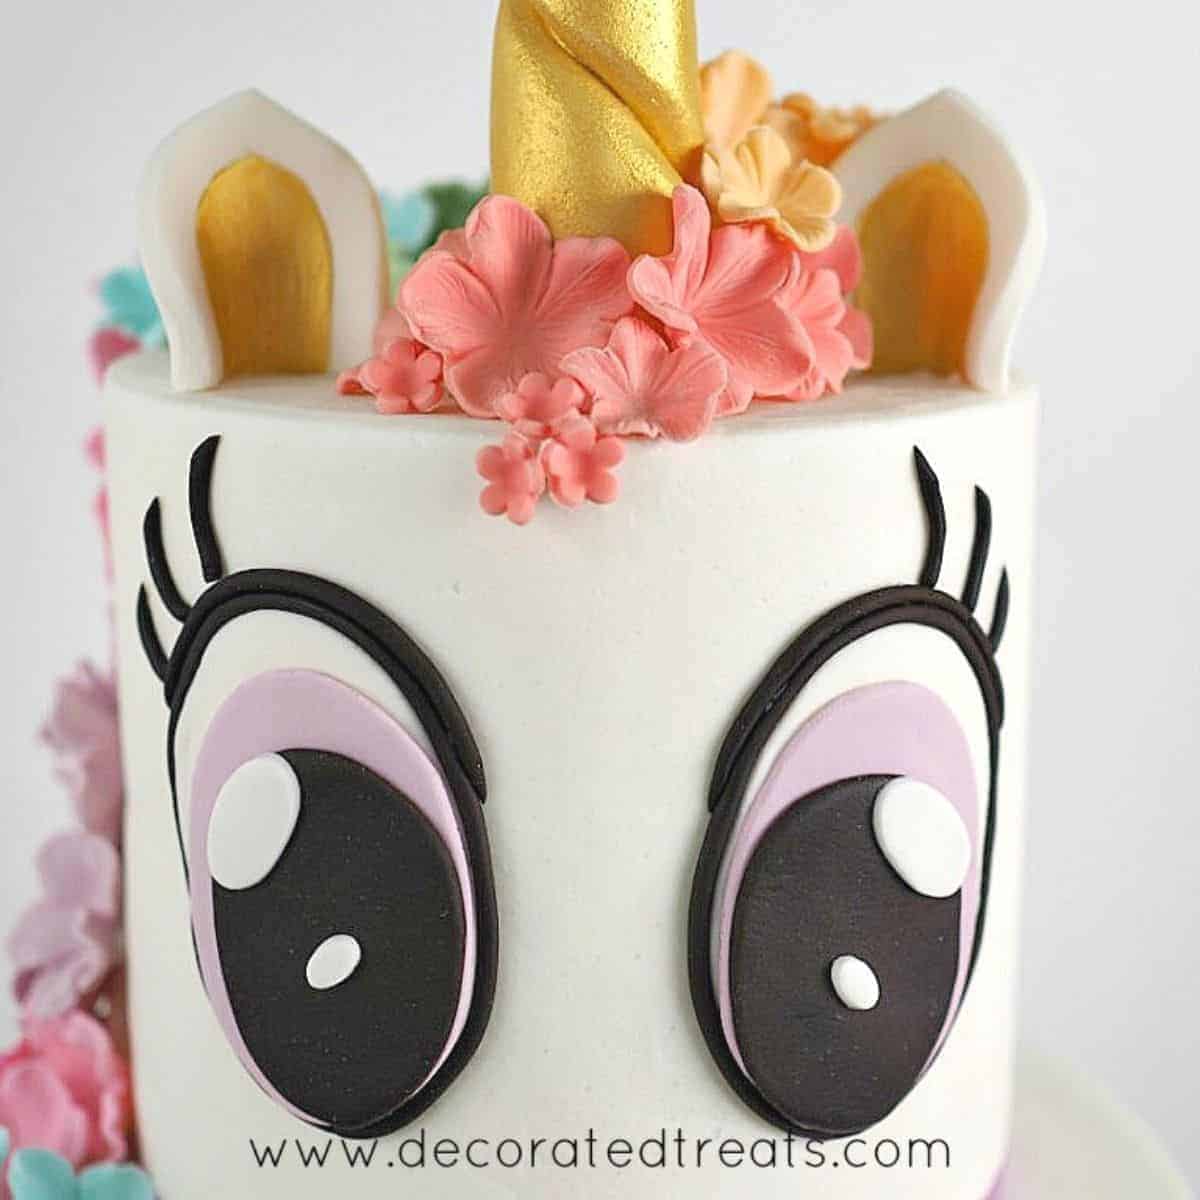
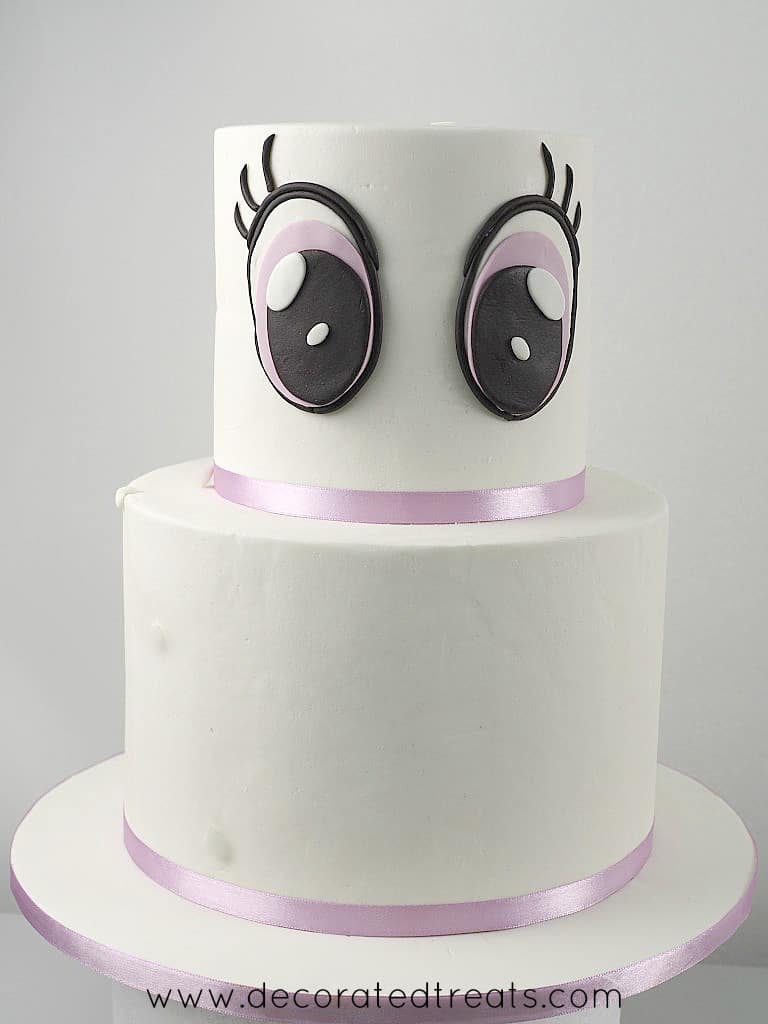
I made these fondant eyes for my unicorn birthday cake. Along with the gold unicorn horn, and the cascading floral mane made of fondant flowers in rainbow colors, these eyes definitely added to the cuteness of the cake.
Jump to:
❤️Why you will love this tutorial
- The tutorial is easy to follow.
- The fondant eyes are very cute and dreamy.
- You do not need any special cutters to make the eyes.
- You can use these technique and make fondant eyes in any size you like.
If you like this tutorial, you might also want to check out my other tutorials on how to make fondant hearts, how to make fondant lace without any lace mats and how to make standing number cake topper.
🧾Supplies required
- Eyes template - I drew mine freehand guided by images I searched on the internet. You can do the same or trace it from any image you like.
- Fondant - I used Satin Ice fondant in white and black. For the purple part of the eyes, I used Americolor Electric Purple food color. You can make your own fondant if you like, with this homemade fondant recipe or marshmallow fondant recipe and tint it with food coloring.
- Extruder tool - This is used to make the black fondant outlines for the eyes and the eye lashes.
- Oval plunger cutters - These are used to make the white twinkle dots in the eyes.
- Sugar craft knife - This is the general cutting tool for the project and is used to cut the fondant.
- Needle tool or toothpick - I used the needle tool to mark the position of the eyelashes on the cake. You can also use a toothpick.
- Ruler - Use a ruler to measure the spacing for the eyes so that both the eyes are aligned.
- Shortening - This is the glue for this project.
- Spatula - To adjust the outlines for the eyes.
- Cake decorating brush - To apply shortening to the fondant eye pieces.
👩🍳How to Make
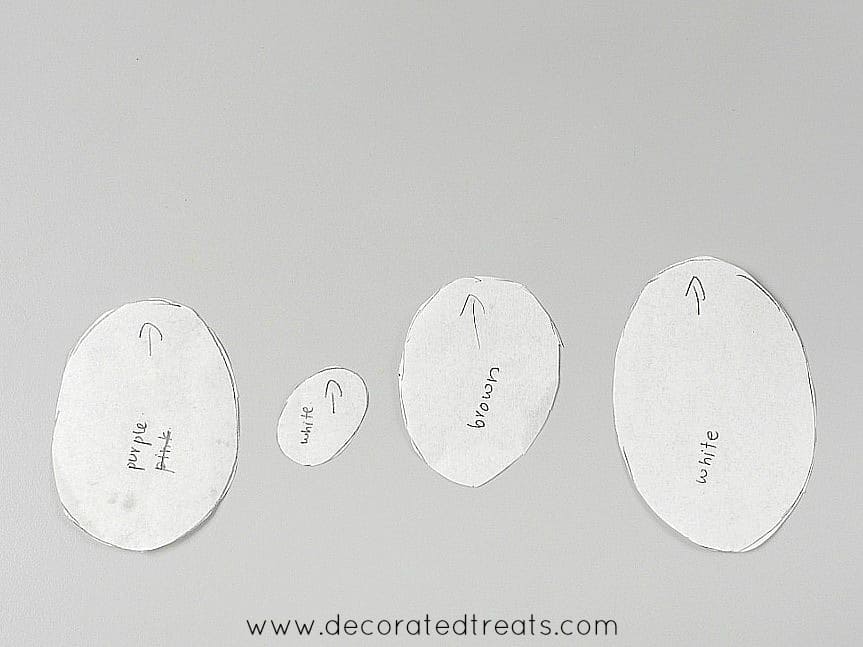
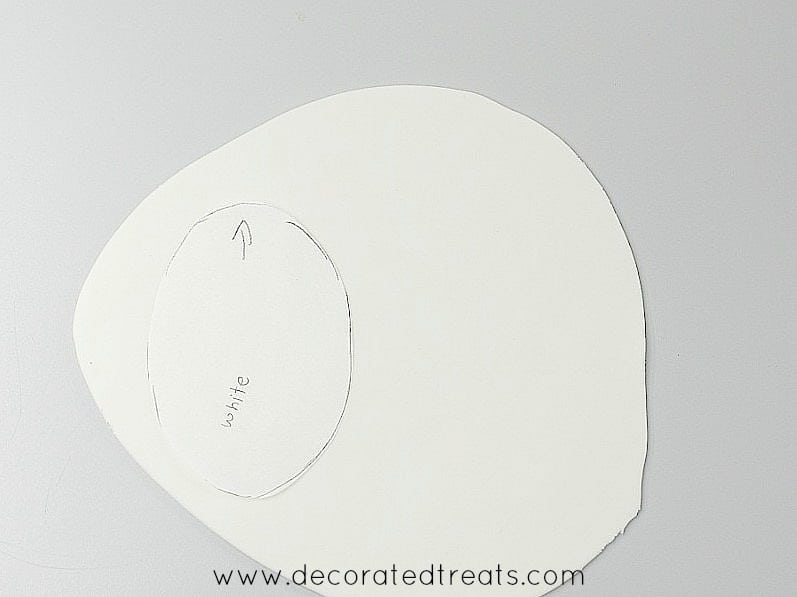
Step 1: Prepare the template
I got this eye design from an internet search. I copied and resized it to the size I needed for my cake and then printed it out. You can follow my tutorial here on how to resize templates for cake decorating.

If you notice, the eye has both top and bottom lashes, but my final fondant eyes only has the top lashes. I decided not to proceed with the lower lashes as I felt that the top lashes were sufficient to make the unicorn eyes cute and dreamy.
You can also draw the eyes free hand if you like.
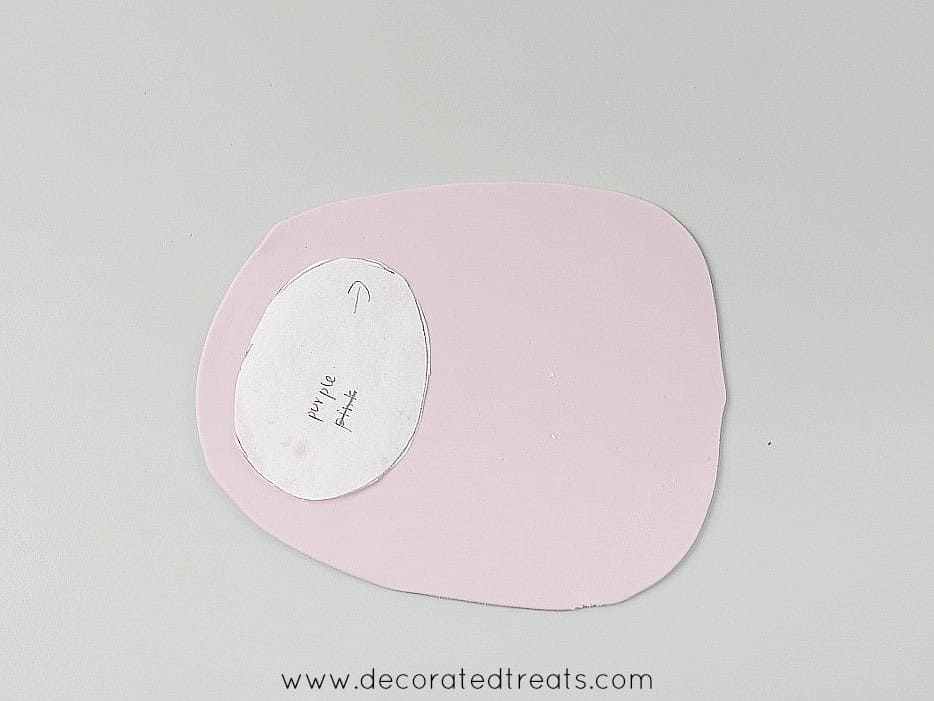
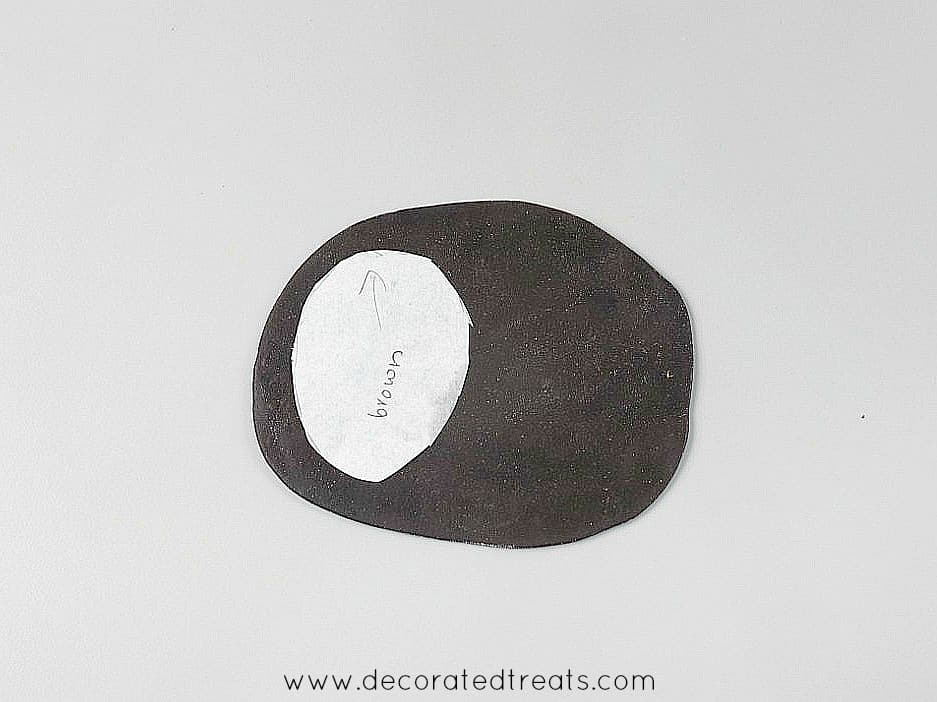
Trace each component of the eyes separately onto parchment paper and cut them out.
Indicate the color and direction of the shapes by drawing a simple arrow on each paper cut out so that you know how to position them when assembling the eyes in the later steps.
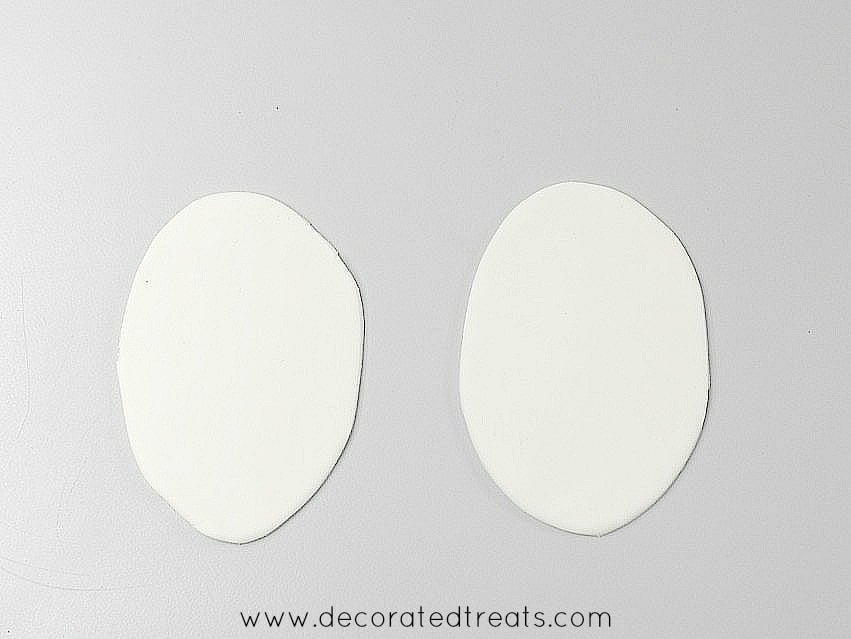
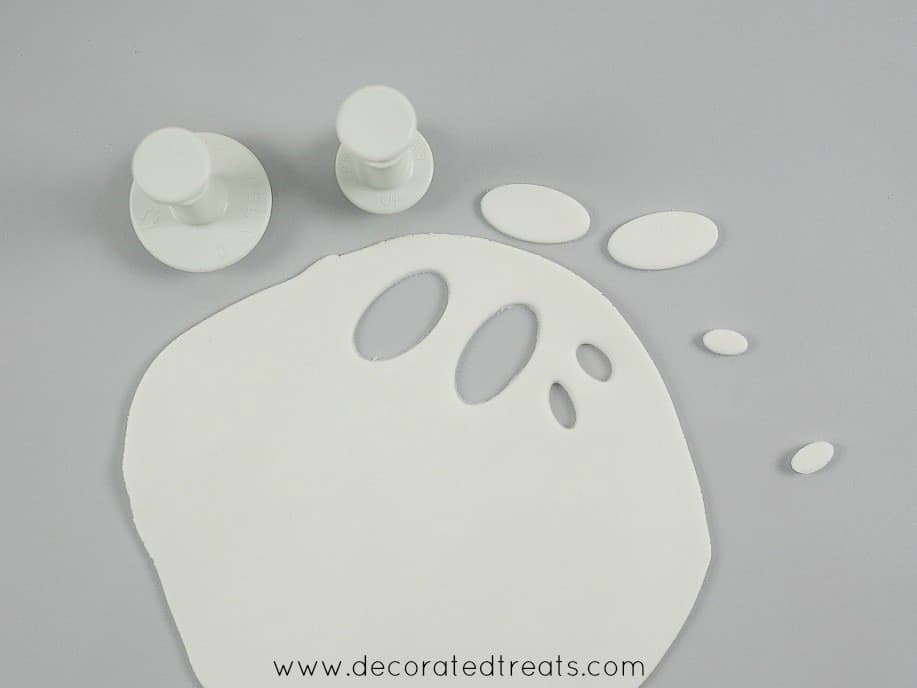
Step 2: Cut the fondant
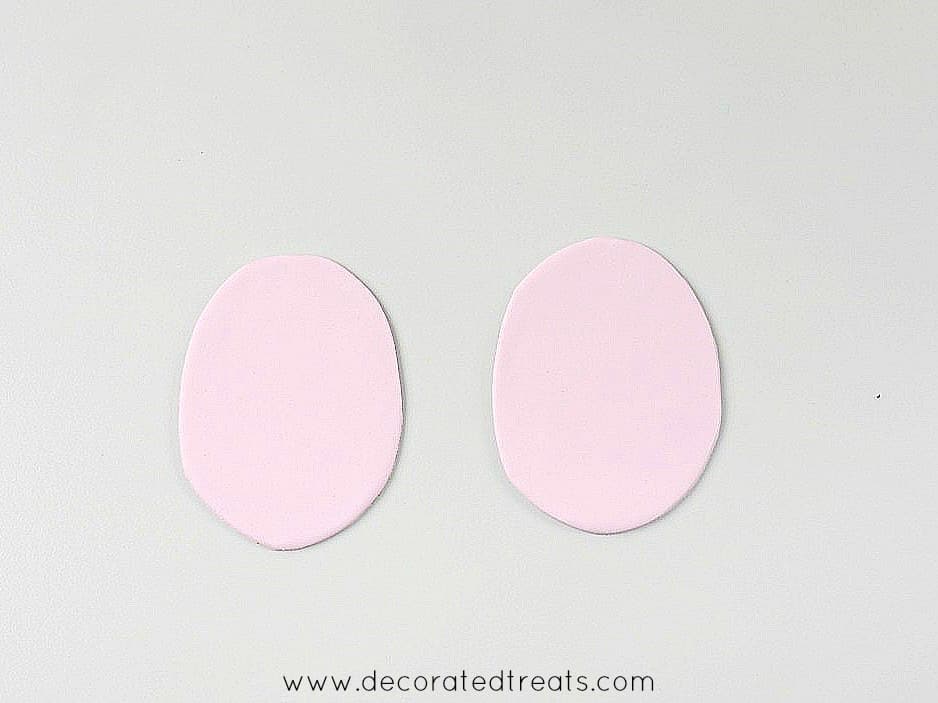
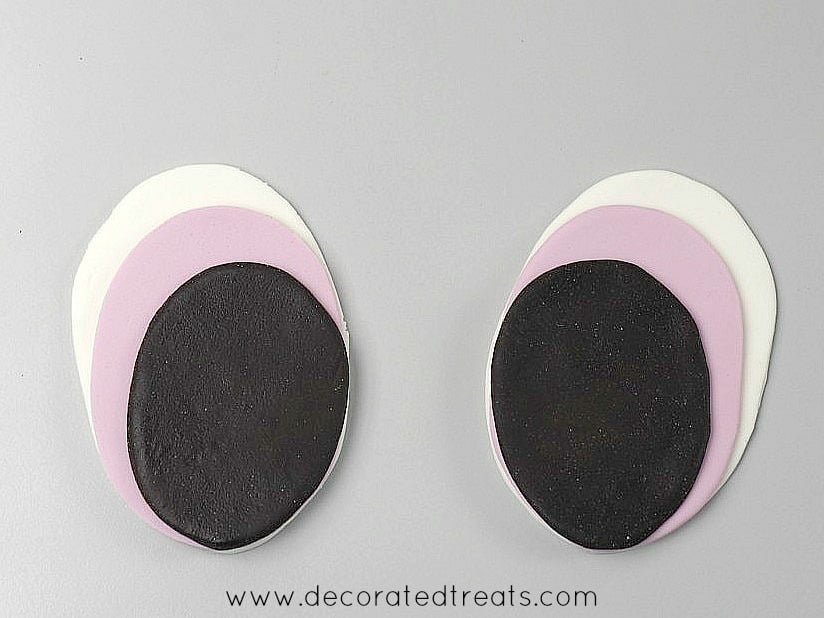
Start with the white fondant. Roll it thin and cut out two pieces of white ovals.
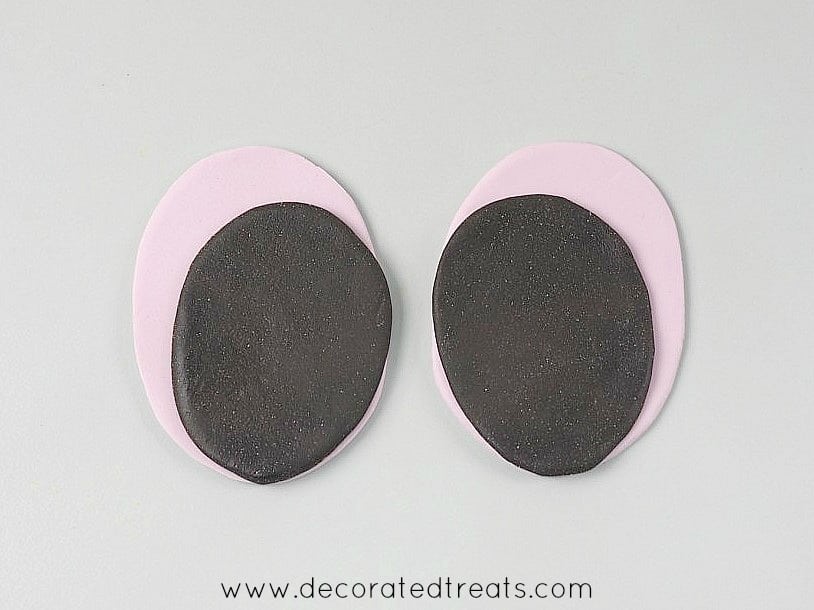
And then cut out the purple ovals.
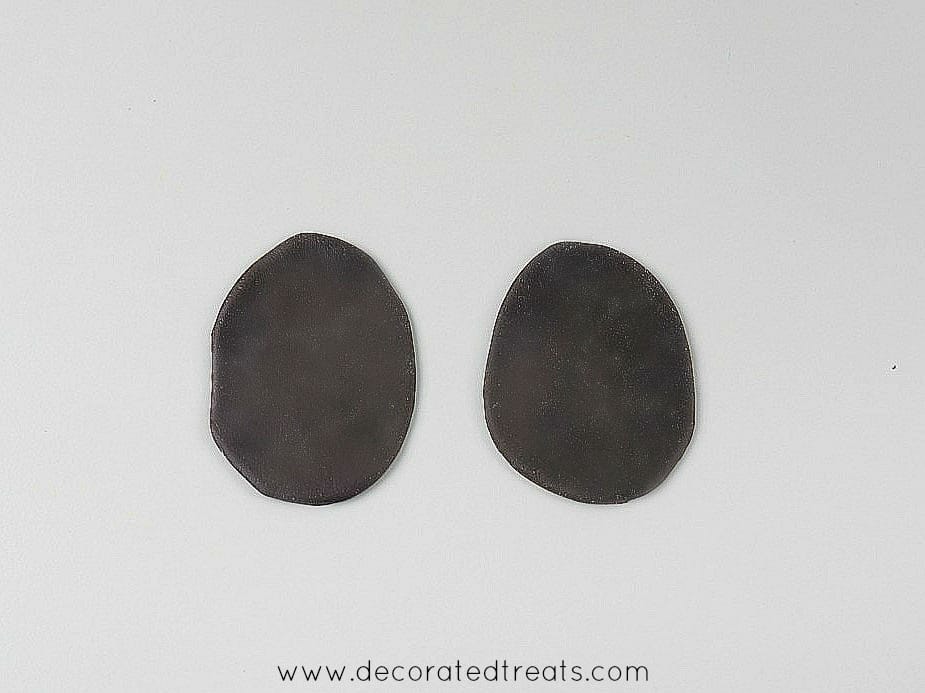
And finally, the black ovals.
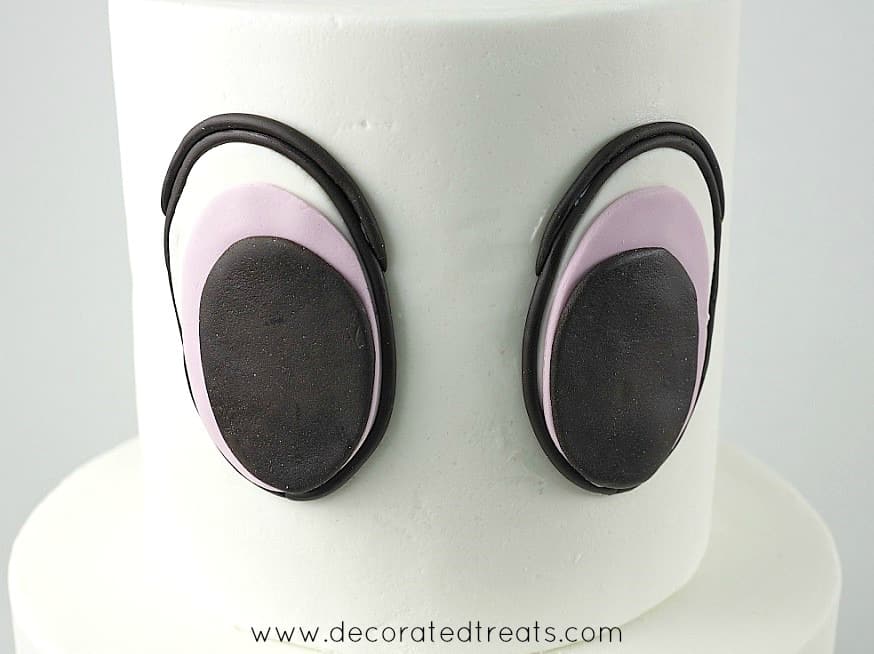
Step 3: Assemble the eyes
You will have to stack the cut outs and attach them with shortening.
Before you apply shortening, stack the pieces to make sure you get the correct direction and positioning for each of the pieces. That way, you can adjust and get the correct position before sticking them together.

Once you are happy with the position and shape, apply shortening and glue the pieces together.
Step 4: Attach the eyes to the cake
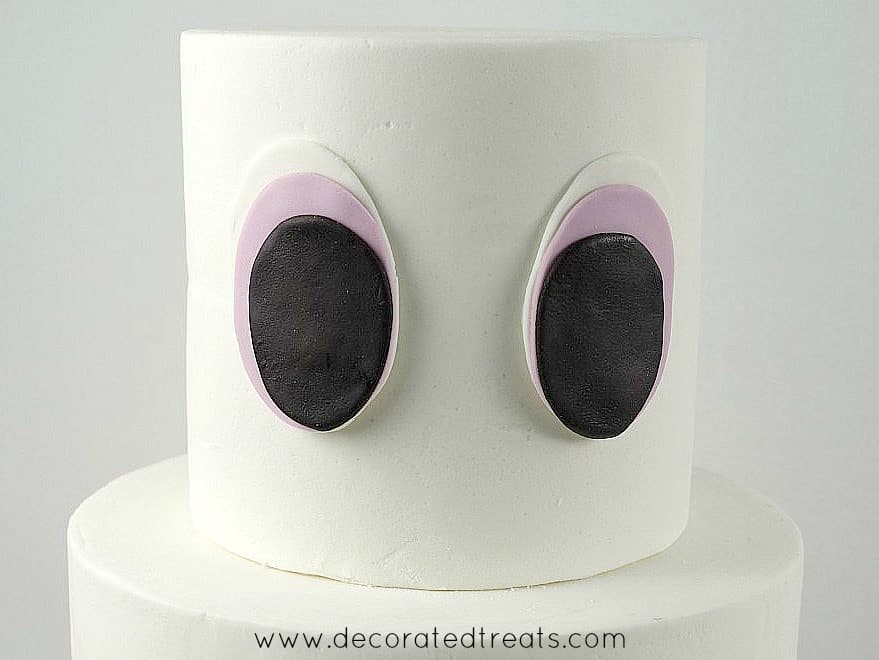
The next step is to place the eyes on the cake. The challenge here is to make sure both the eyes are aligned on the cake.
To ensure this, attach one eye first. And then measure the spacing of the eye from the top and bottom of the cake and use these measurements to attach the second eye.
And since the eyes are attached using shortening, adjusting their position on the cake is not a problem. You can peel them off the cake and reposition them should you find them not aligned after attaching to the cake.
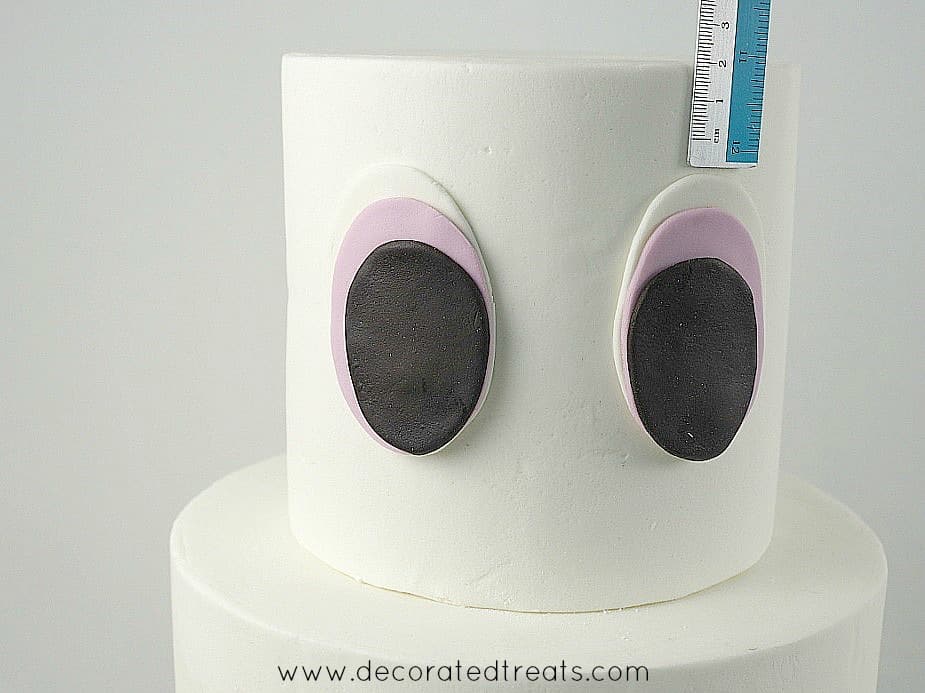
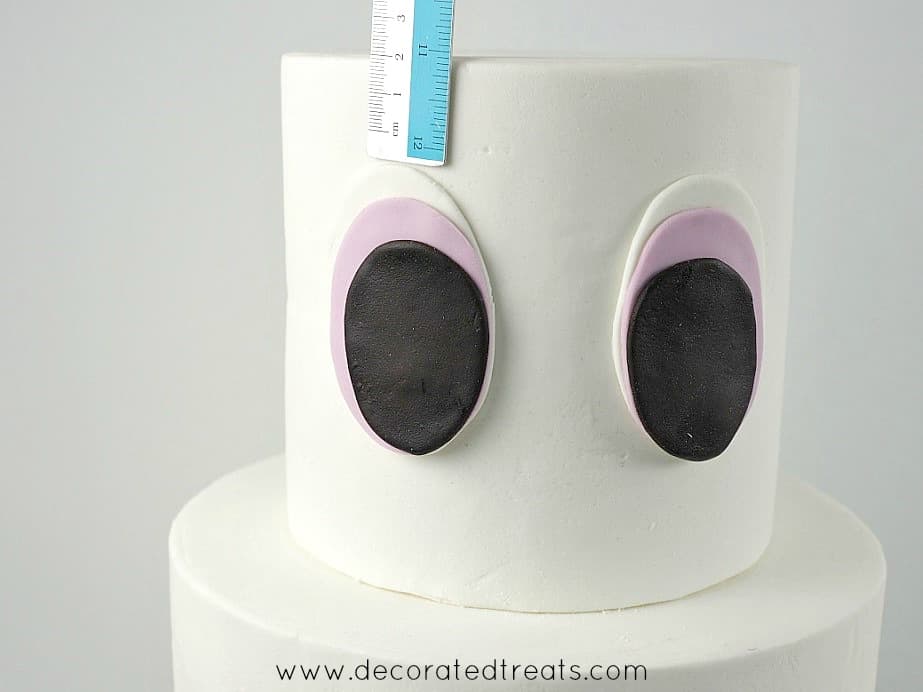
This is how the eyes should look like after measuring and alignment.
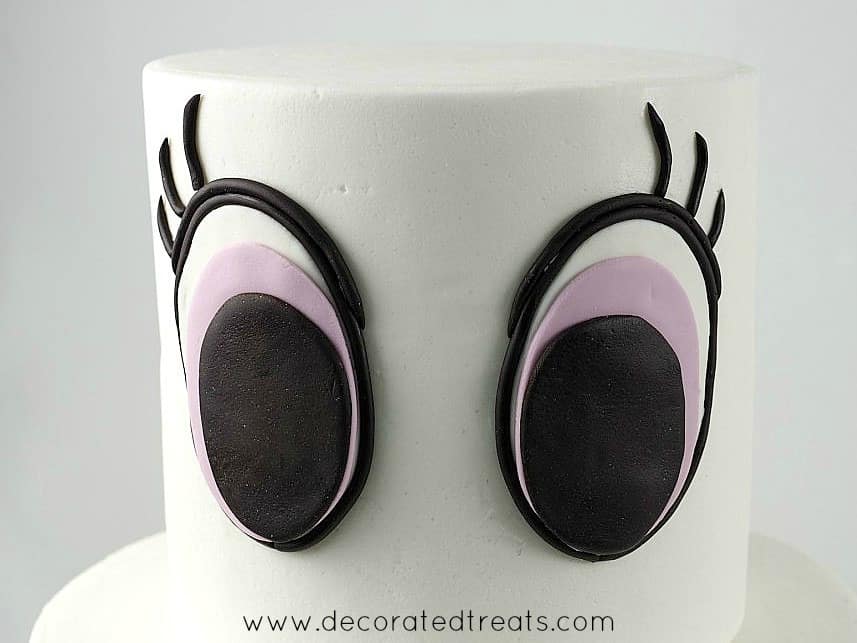
Step 5: Attach the outline and eye lashes
Start with the outline for the eyes. Use an extruder tool with a small round disc to produce thin black strips of fondant.
Note: If you do not have the tool, you can roll the fondant by hand.

To attach the black strip to the eyes, apply shortening all around the unicorn eyes and carefully attach the black strip around each eye.
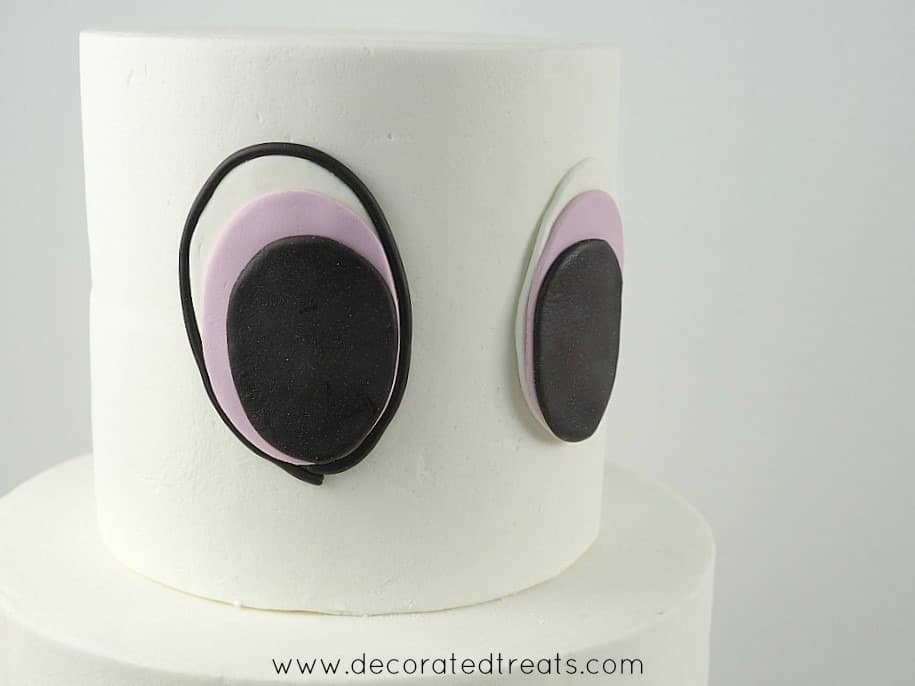
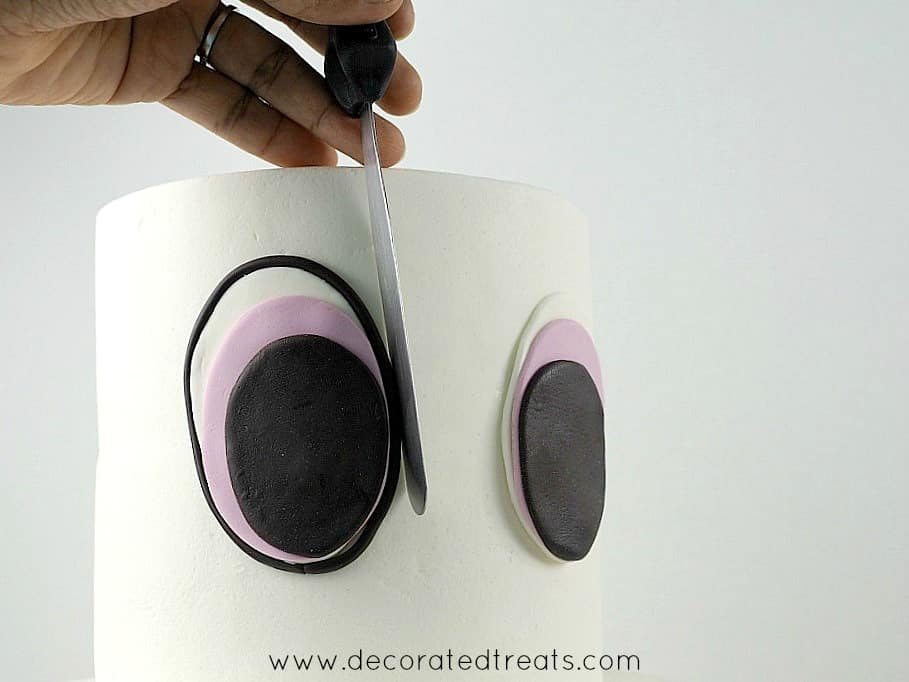
Use a spatula to gently press and smoothen the strip close to the unicorn eyes.
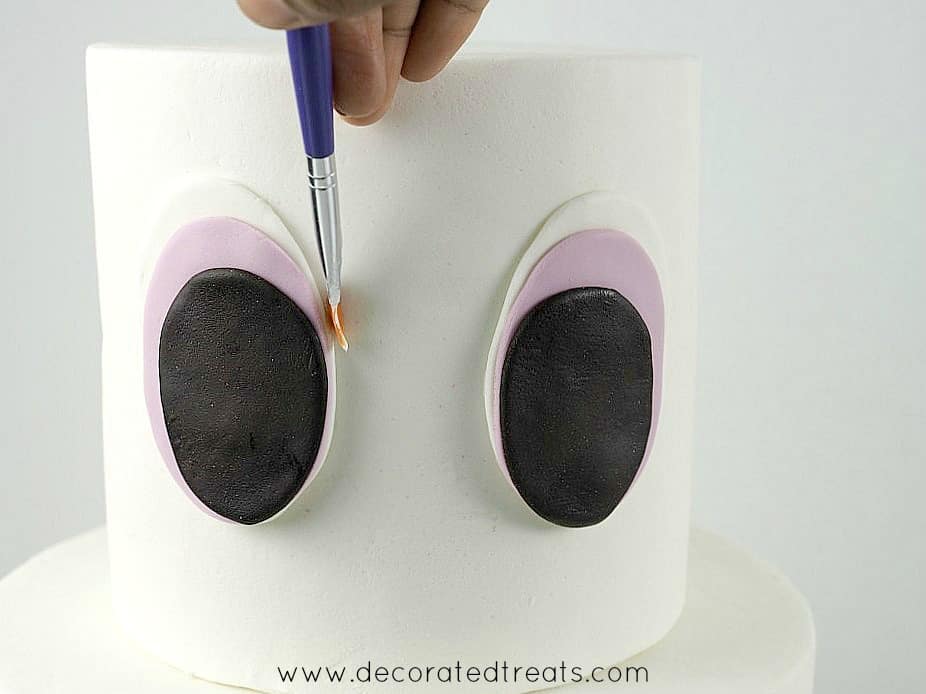
Once the outline is done, you can add the eye lashes. Use your template earlier as a guide and mark tiny dots on the cake where each lash would begin and end.

Before attaching the lashes, add another layer of the black fondant strip to the top portion of the eyes. Roll the ends of the strip to make them pointy before attaching to the eyes.
Similarly, for each of the lashes, roll the ends to make them slightly pointy before attaching to the cake. And then, attach them with shortening.
Step 6: Make and attach the white eyeballs
The final step for making the fondant eyes is to add the white eyeballs and twinkles to each eye.
Roll some white fondant thin and cut out 2 oval shapes for each eye, one large and one small.
Attach them to the black eyes as shown below:
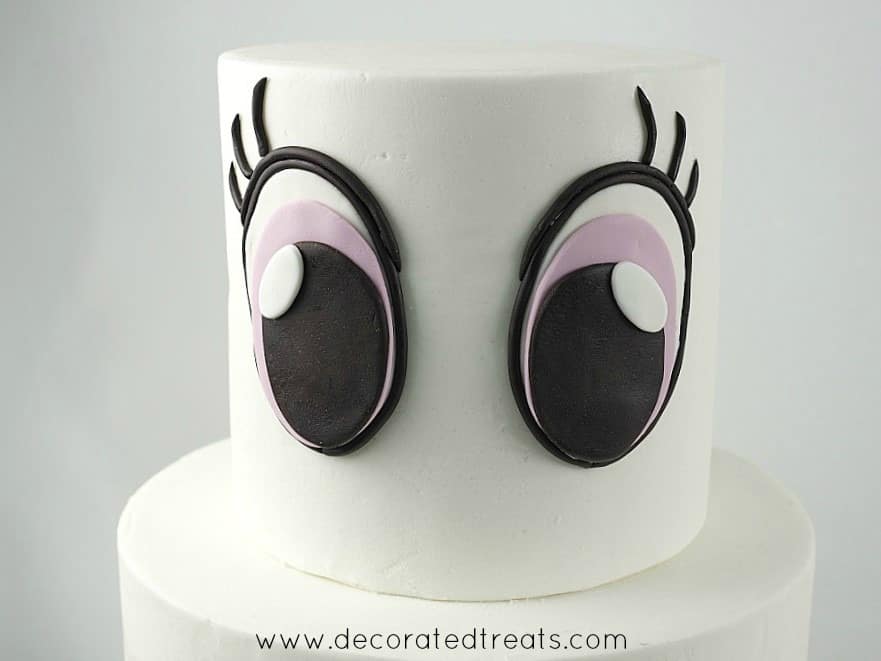
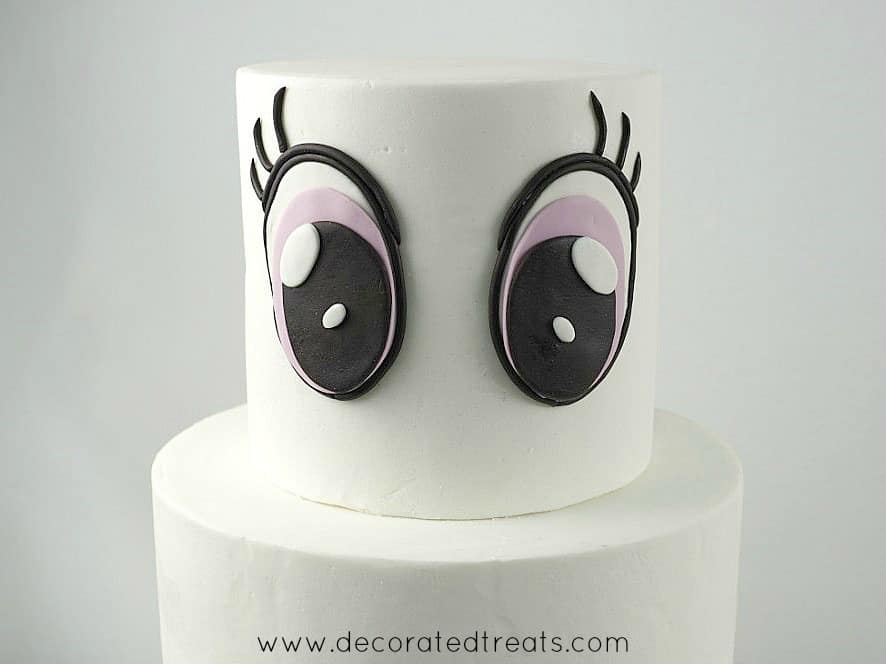
And that completes the eyes for the unicorn cake.
Hope you enjoyed this tutorial as much as I enjoyed putting it together.
And if you would like to read on here is how I decorated the rest of the unicorn cake.


Leave a Reply