

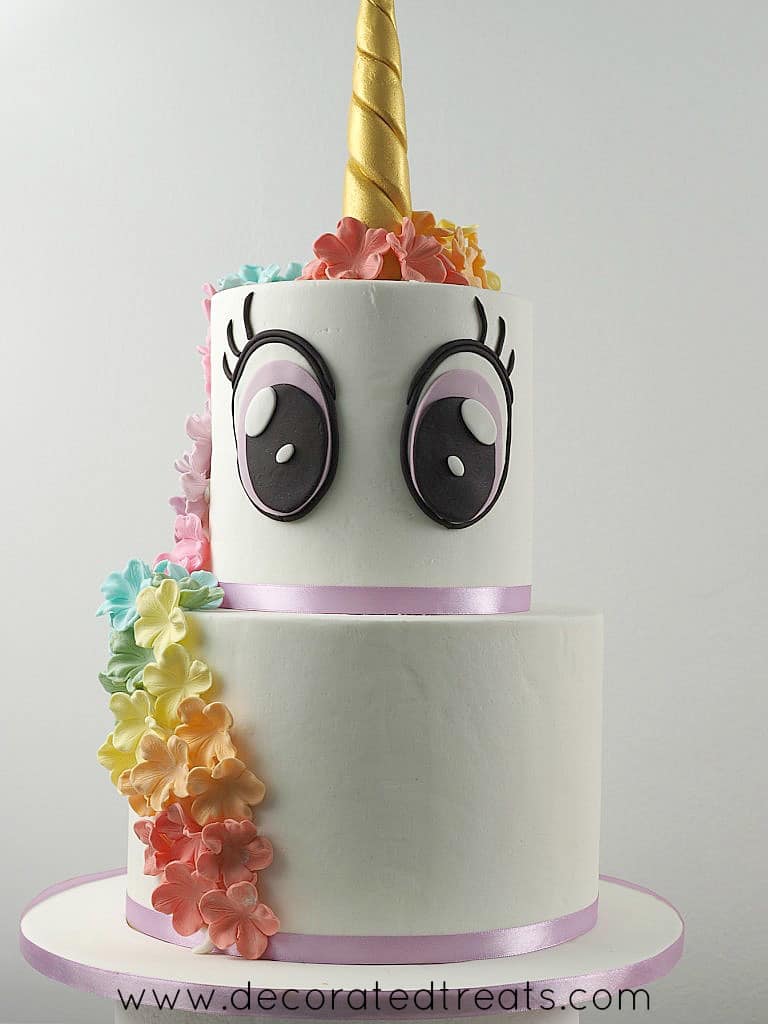
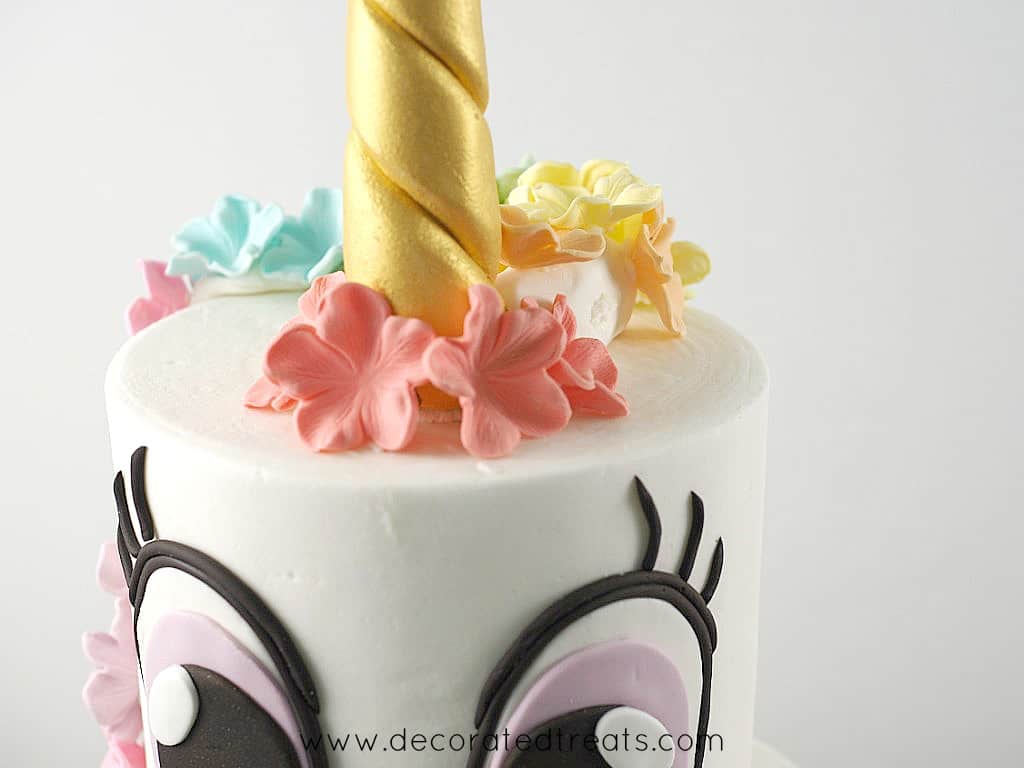
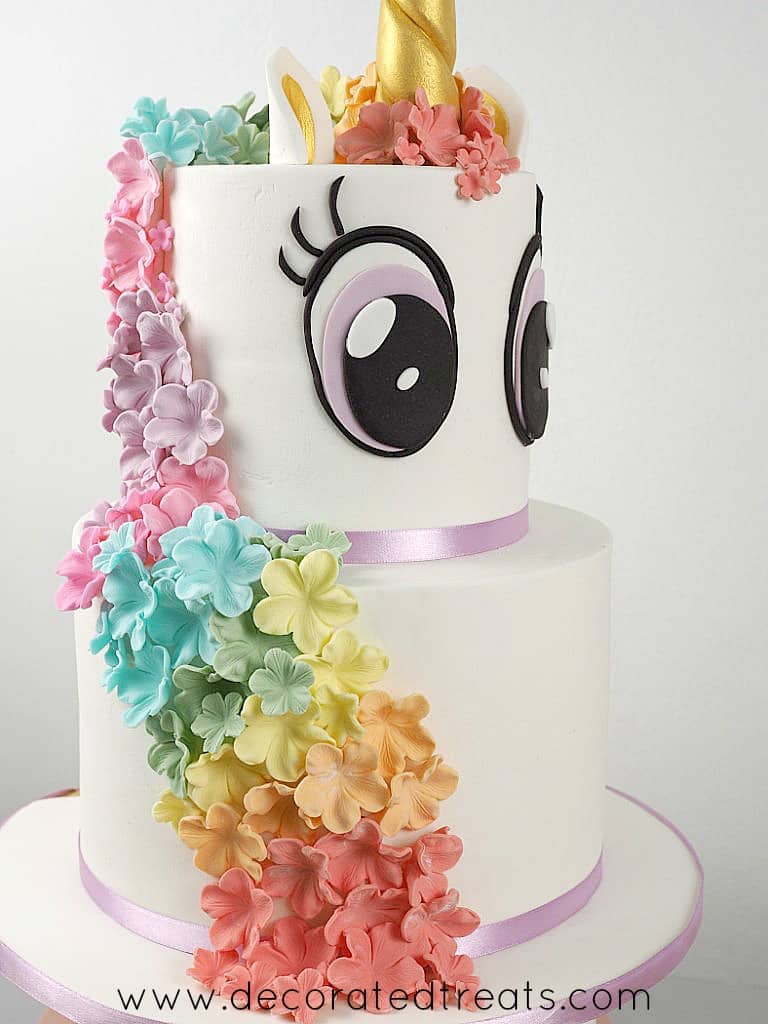
This unicorn cake makes a great special occasion cake and kids’ birthday cake. With the handmade fondant unicorn horn, large dreamy fondant eyes and pretty sugar flowers in rainbow colors as the mane, this cake makes a very pretty unicorn cake. The rainbow colored mane on the cake also makes this cake a great rainbow themed cake.
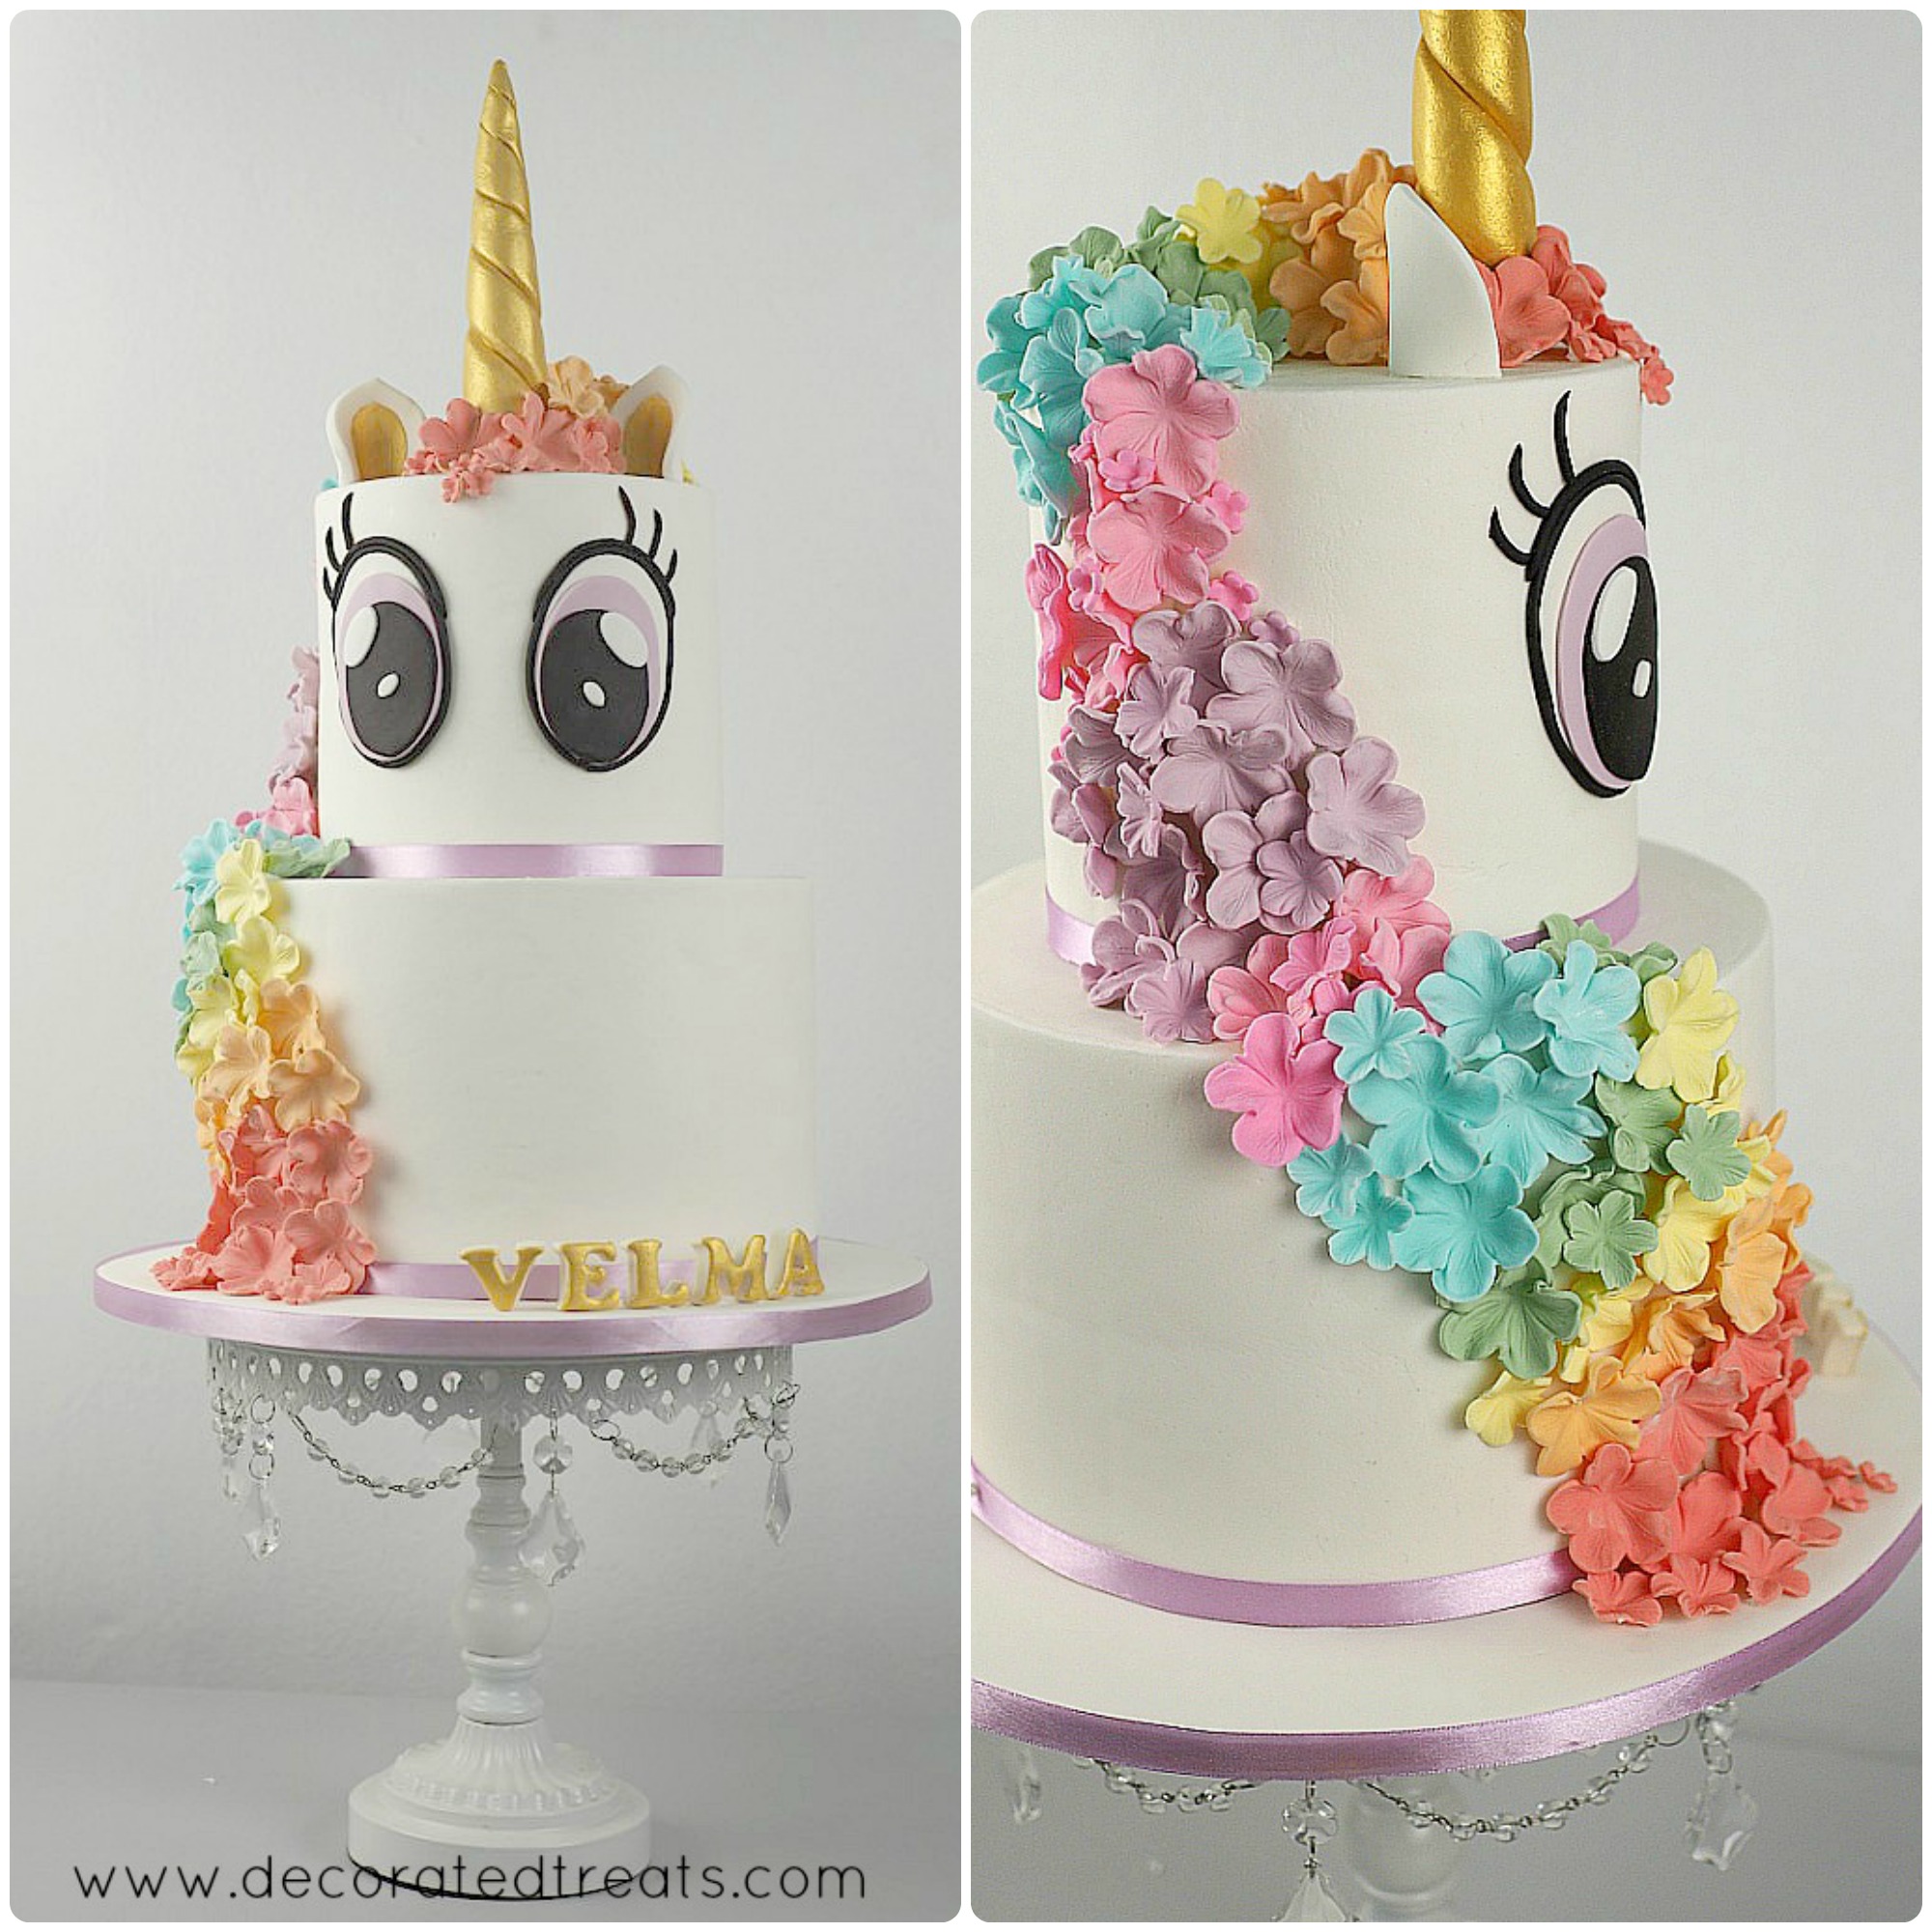
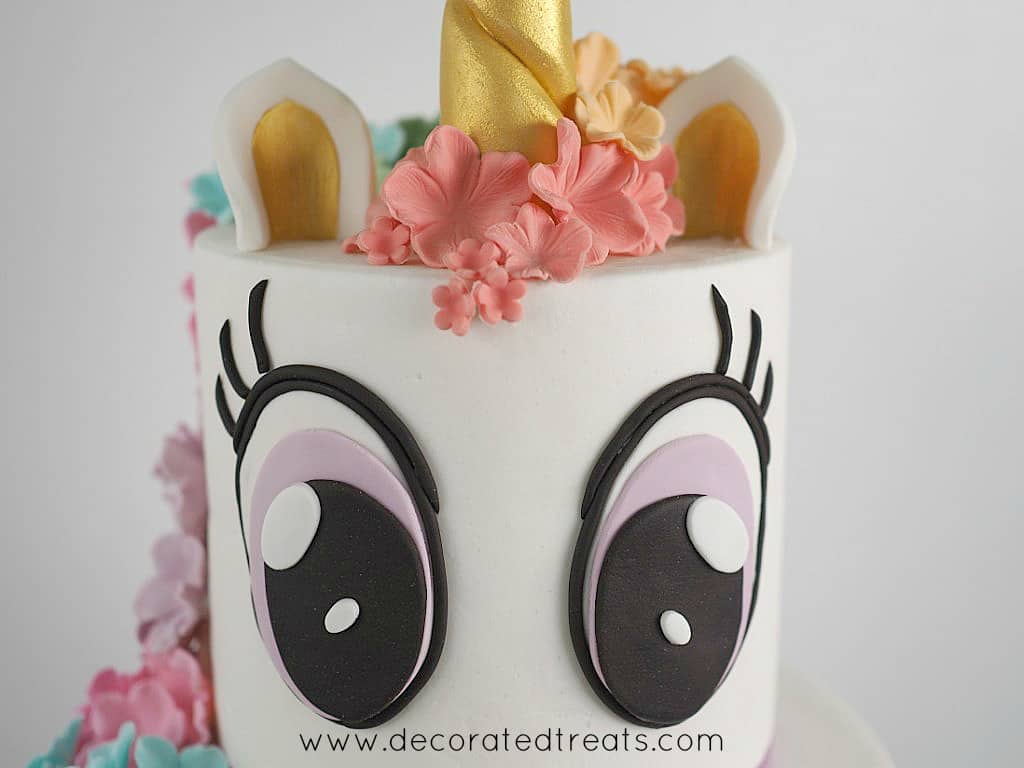
The cake was decorated entirely in fondant and has big twinkly eyes and rainbow-colored mane. Since it was a 2 tier cake, the large eyes filled up the front of the cake nicely.
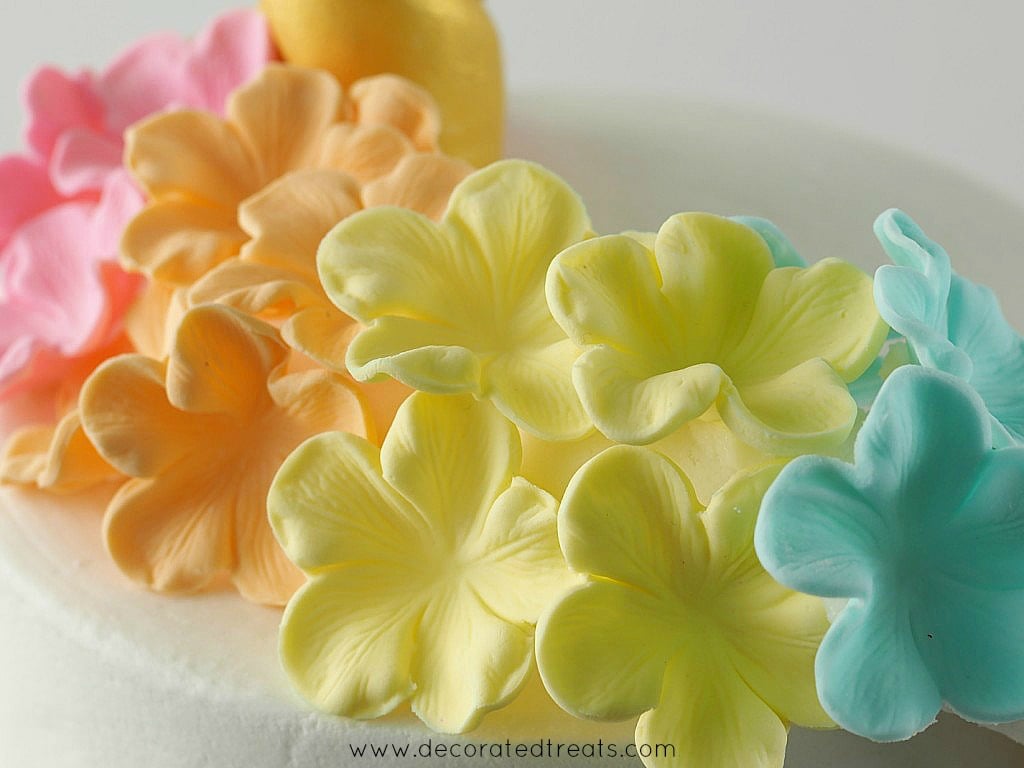
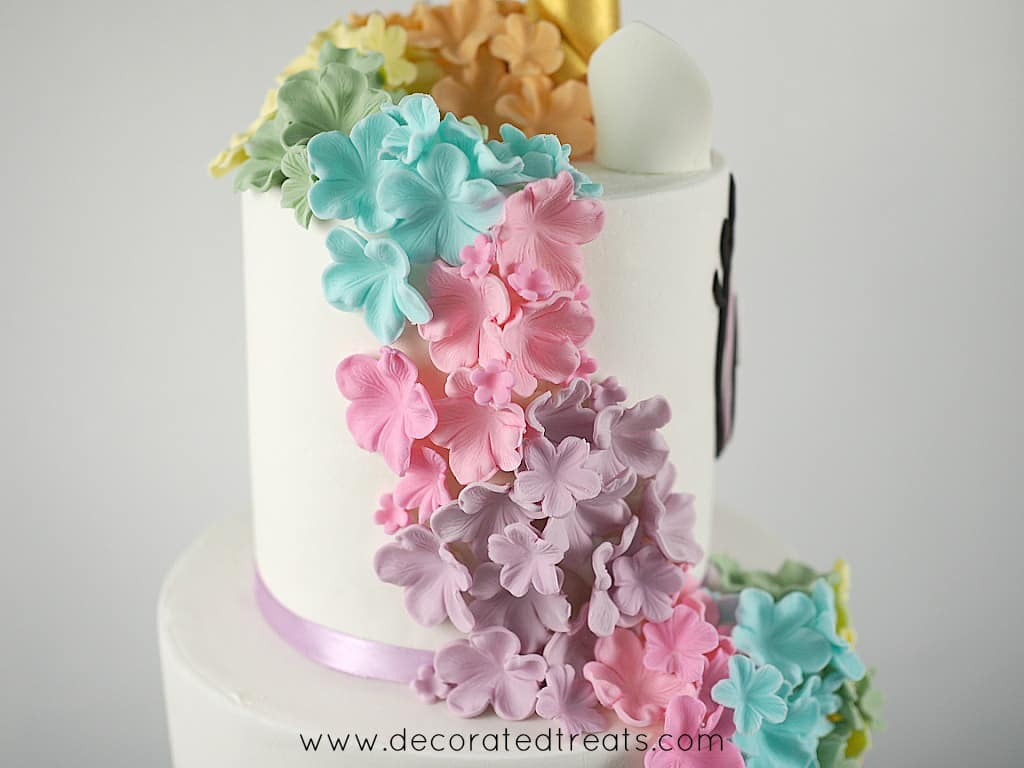
The unicorn’s mane, on the other hand, was made using lots of simple sugar flowers in the colors of the rainbow. Each color came in 3 different sizes. Though it looks like a lot of work with the flowers, they were in fact quite easy and fun to make.
If you like this cake, you should also check out this rainbow birthday cake. And for more cakes check out this square gift box cake, jungle animals cake, penguin cake and castle birthday cake.
🧾Supplies Required
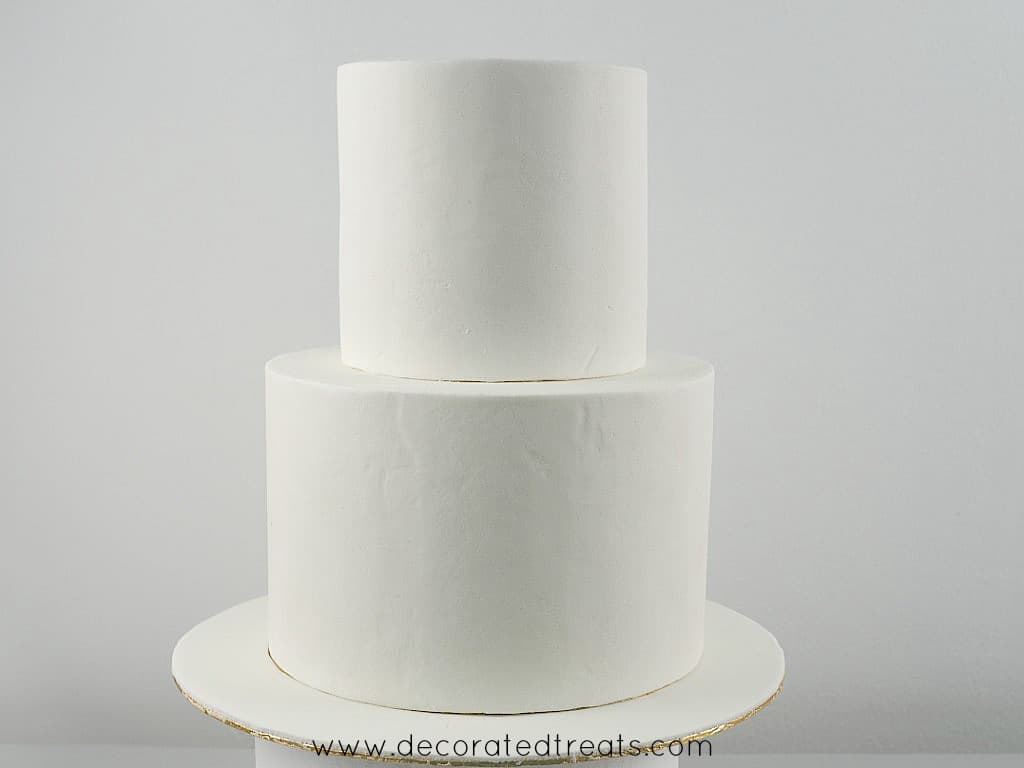
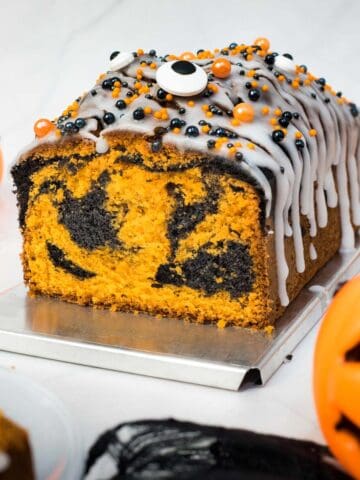
- Cake - This was a 2 tier round cake with the top tier measuring 6 inches and the bottom tier measuring 9 inches. Each tier measured 6 inches in height. The cake itself was made in 2 flavors - top tier was a marble cake and the bottom tier was orange cake.
- Buttercream - Each tier consisted of 3 cake layers and filled with buttercream. I also used buttercream to crumb coat the cakes before covering them with fondant.
- Fondant - I used Satin Ice in white to cover the cakes. I also used Satin Ice to make the unicorn horn, floral mane, the eyes, and the upright alphabets.
- Edible gold paint - I used the gold paint for the unicorn's horn and ears as well as to paint the birthday girl's name.
- Shortening - Shortening was used to attached the unicorn eyes to the cake as well as to attach the flowers.
- Purple satin ribbon - This was used to cover the sides of the cake board, and as borders for each of the cake tiers.
- Fondant glue - I used this glue to attach the upright alphabets, and ears on the cake.
- CMC powder - This was added to the fondant when making the 3D deco (horn, flowers, ears and name) to help these deco pieces set firmly.
- Food coloring - Americolor and Wilton gel based food colors.
- Gum paste flower cutter or flower shaped cookie cutter - for the unicorn's mane.
- Flower former to shape the fondant flowers.
👩🍳How to Make
Step 1: Bake the Cake
Grease your cake pans with vegetable oil or shortening. Line them with parchment paper or dust them with flour.
Start with the orange cake layers. Follow the instructions provided in the recipe card below to prepare the cake batter. Once ready, divide batter into the prepared cake tins and bake until a skewer inserted in the center of the cakes come out without any wet batter sticking to it.
Similarly for the marble cake, follow the instructions in the recipe card. To achieve the marbled effect, estimate one third of the batter and transfer batter into a small bowl. Add cocoa paste to it and mix well. Alternate the plain vanilla batter and chocolate batter into the prepared cake pans and use a jam knife to cut through the cake batter for a marbled effect.
Bake cakes until done. Cool cakes on wire racks. Once they turn warm, wrap them in plastic wrap and refrigerate to cool completely before frosting and assembling the cake.
Step 2: Make the Unicorn Horn
The unicorn horn makes the cake topper. It is best that the horn is made at least one day in advance to allow it to set and harden. I have prepared a detailed step by step tutorial on how to make the unicorn horn. Here is the summary:
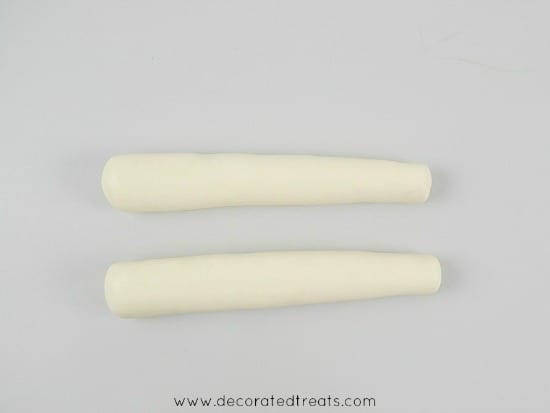
Roll 2 pieces of fondant into thick sausages with one end of each slightly narrower.
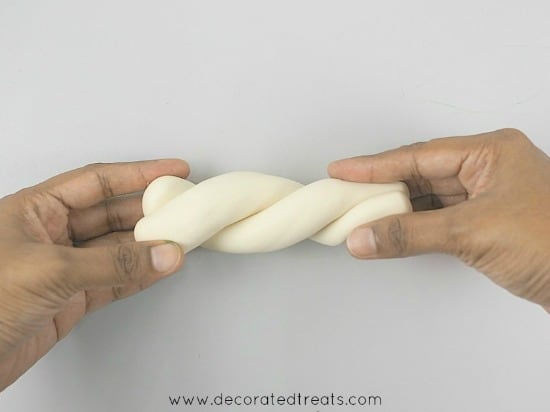
Hold both and twist gently.
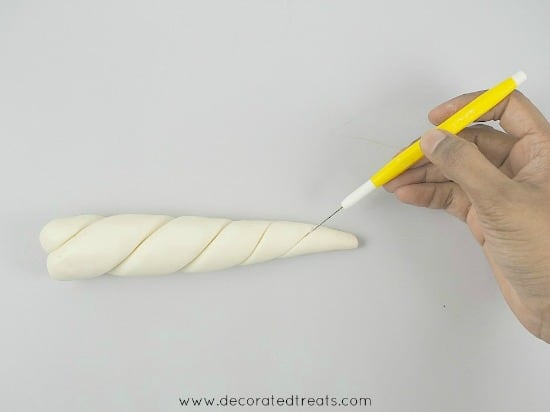
Roll the top to make it pointy and use a needle to to reinforce the lines that would have blurred from the rolling.
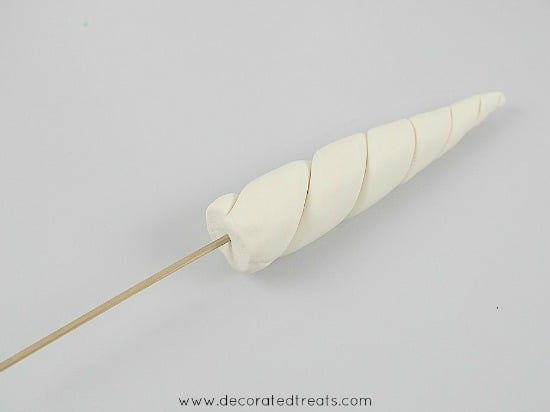
Apply glue to a skewer and insert into the horn from the bottom.

Poke the skewer into a styrofoam block and rest it on a drinking glass.
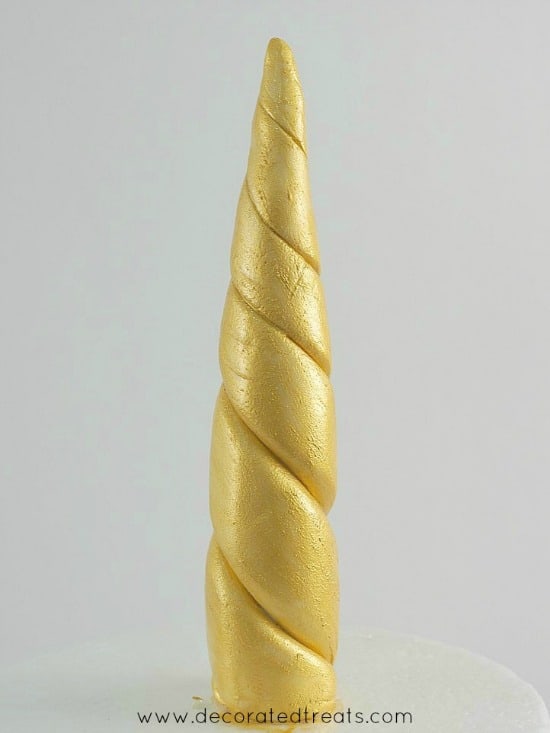
Paint the horn gold with edible gold paint and let it set completely before using.
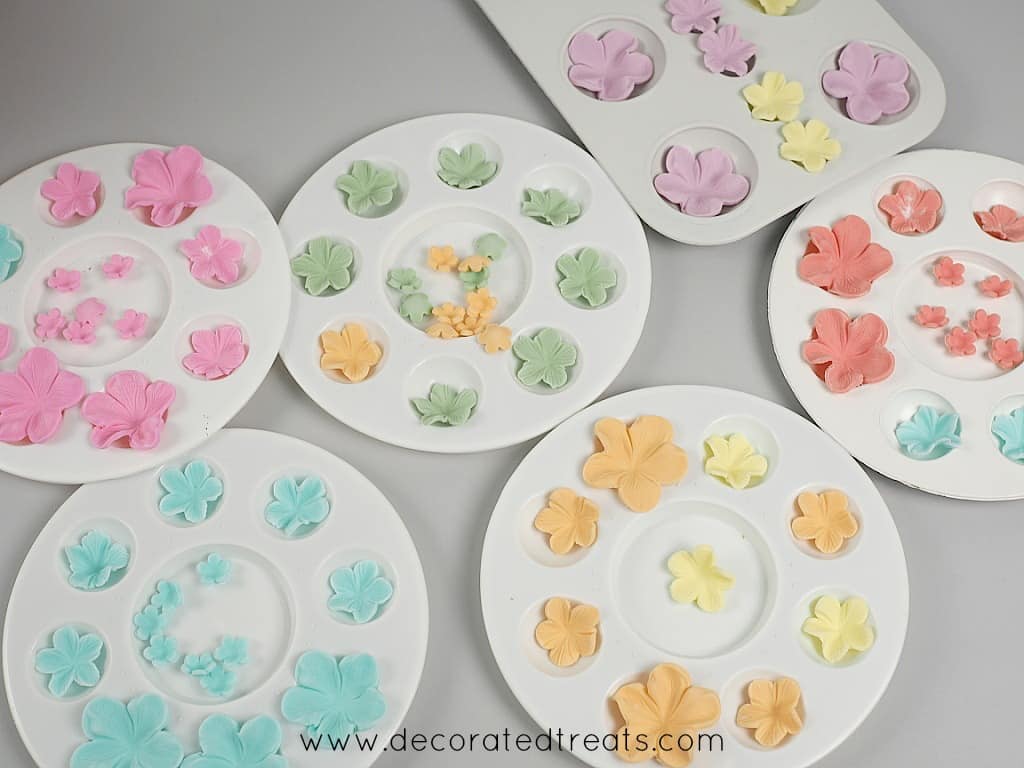
Step 3: Make the Rainbow Colored Sugar Flowers
You need to make these in 3 sizes. Both are made in the same way, except that the smaller flowers are cut using a smaller petal cutters.
These flowers are also best made a day in advance or earlier to allow them to set in shape. I have prepared a step by step tutorial for making this easy sugar flowers. Here is a summary:
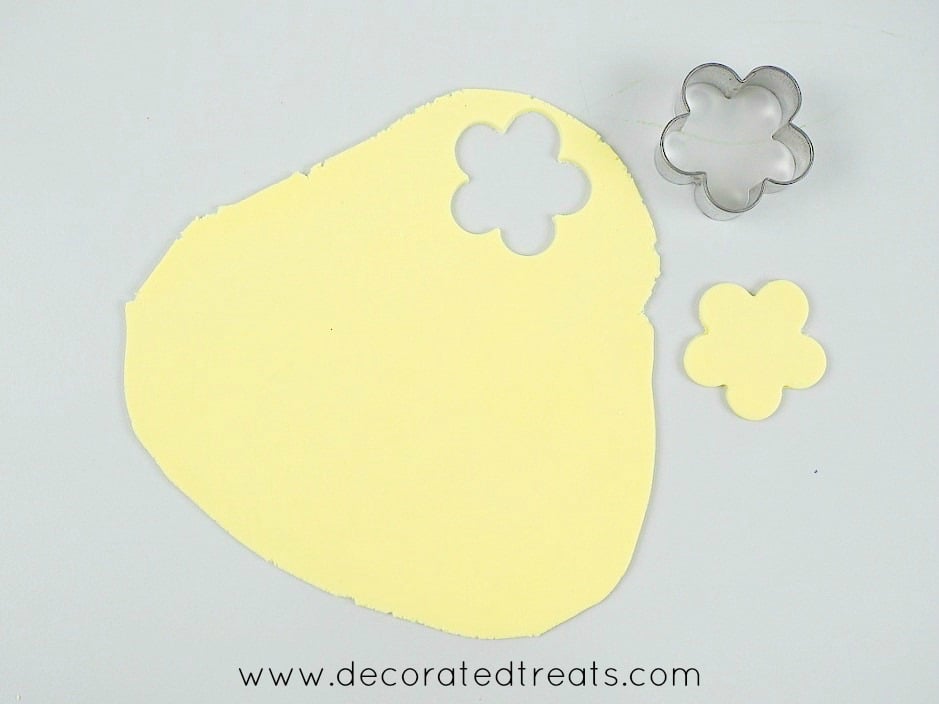
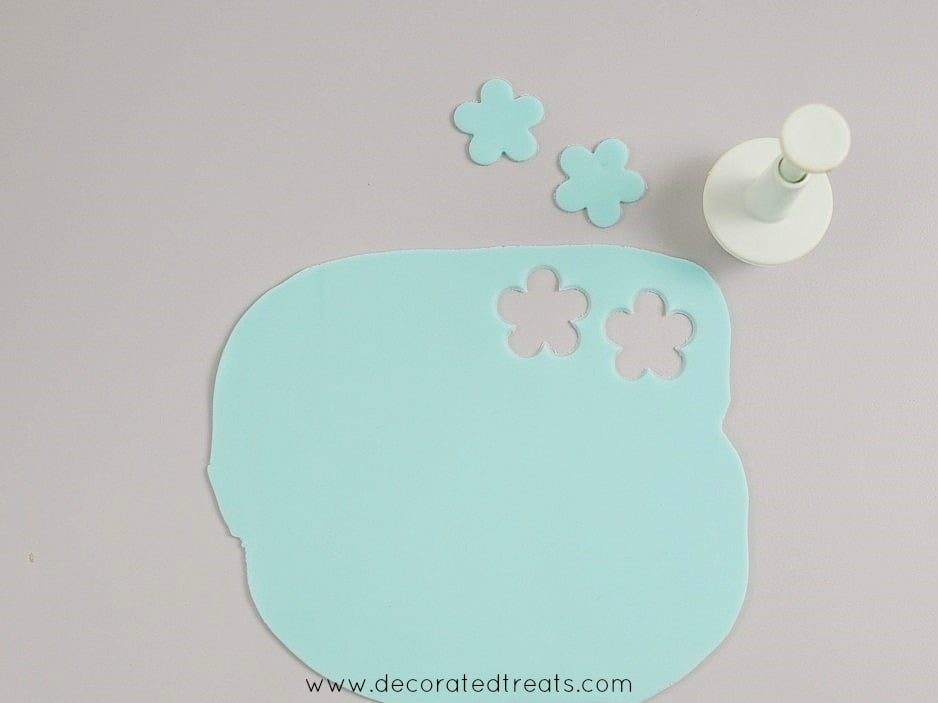
Roll the fondant thin and cut out the flowers with a flower cutter.
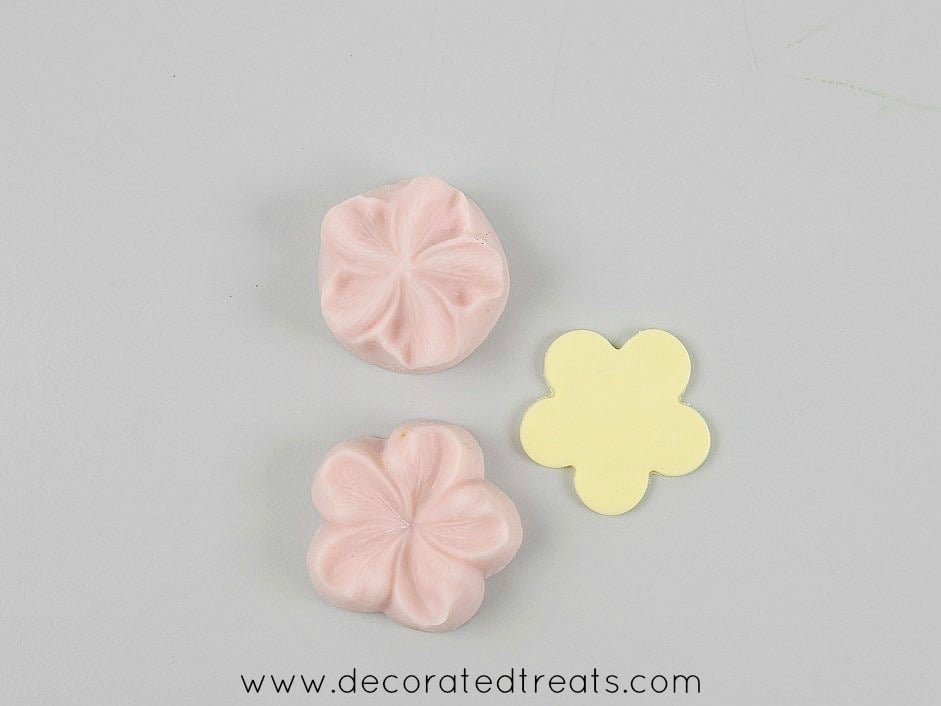
Use a silicone veining mold to mold the flowers.
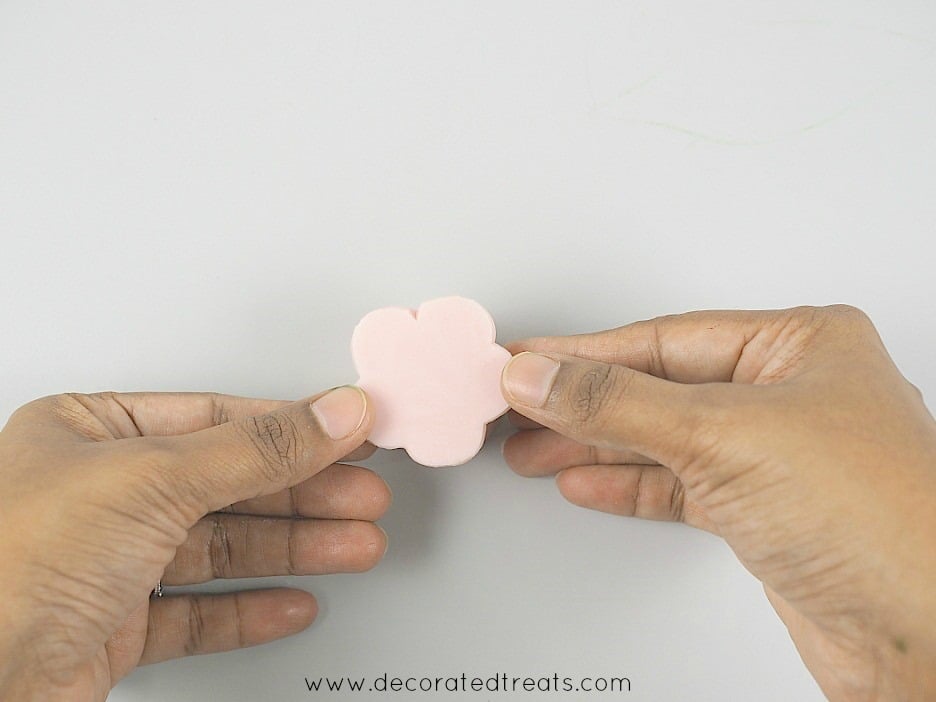
Press gently to imprint the veins.
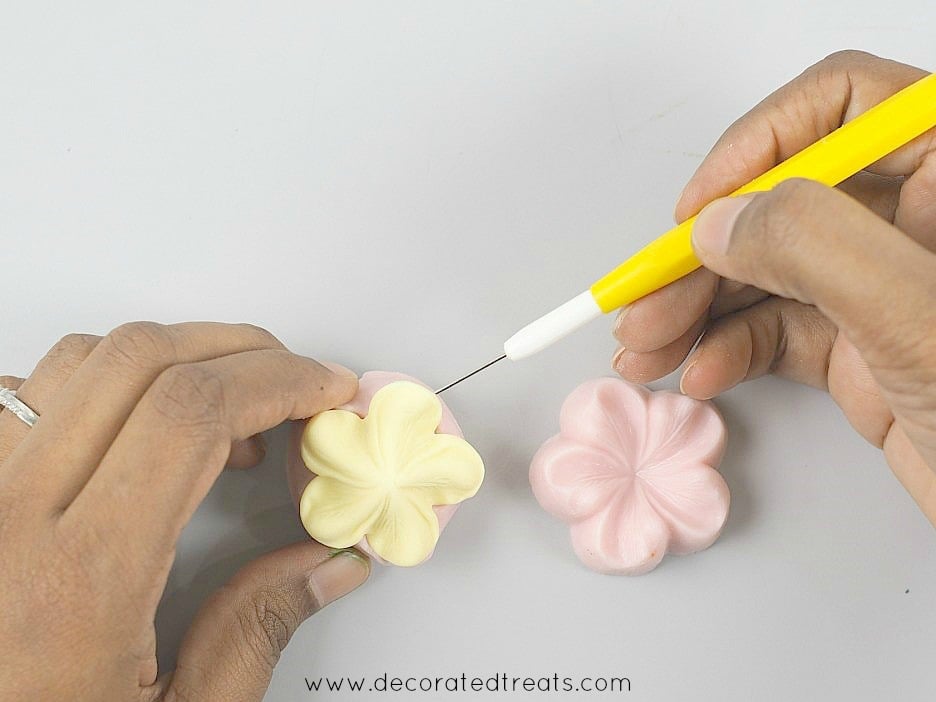
Remove the flowers from the mold.
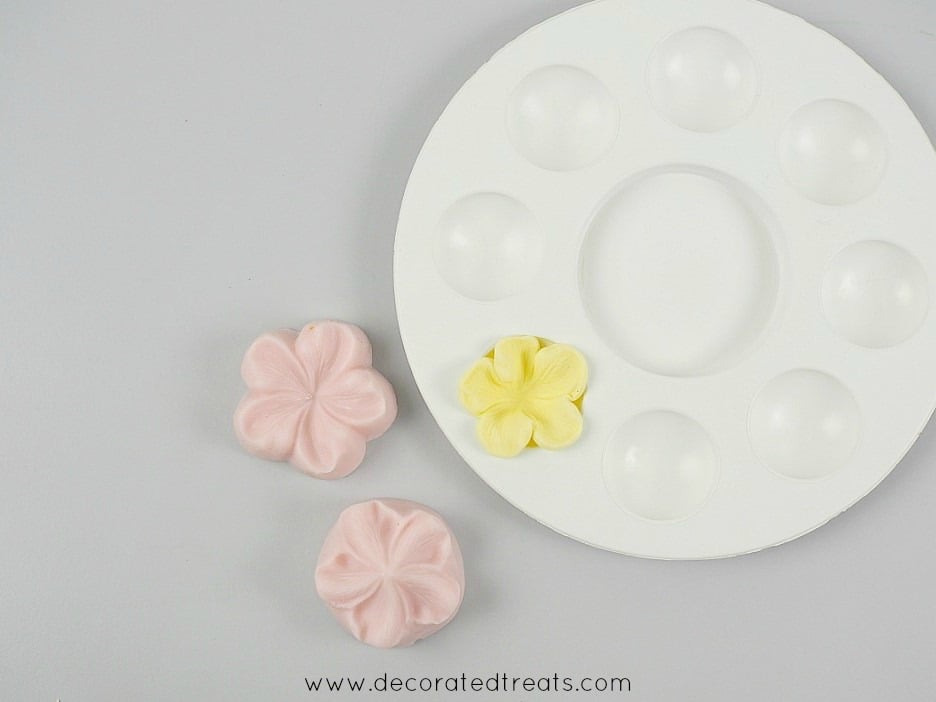
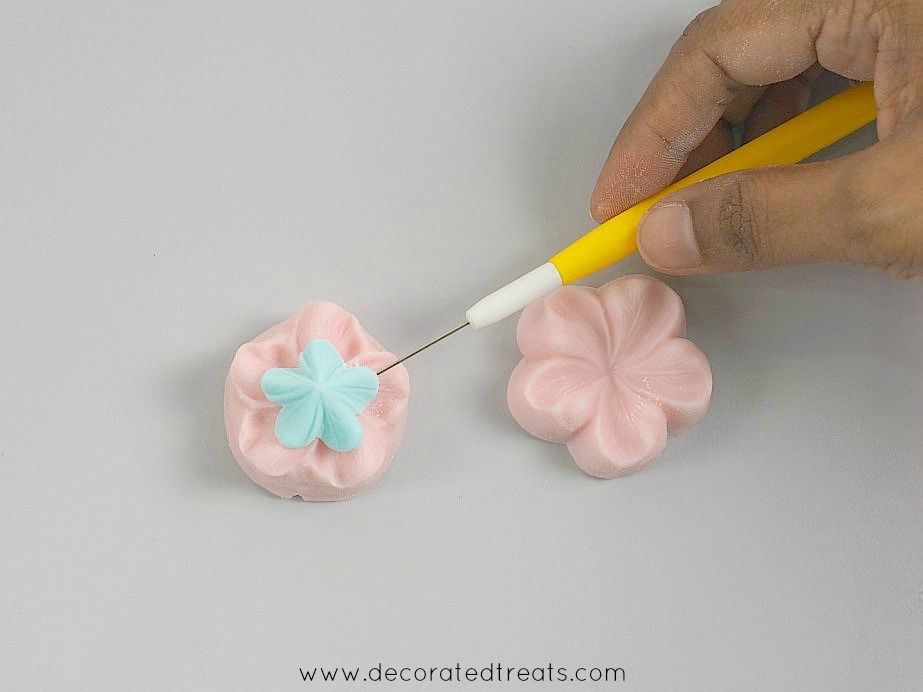
Place the flowers in a flower former so that they set in a curved position.
Repeat the process to make the flowers in the colors of the rainbow.
Repeat the process to make smaller flowers.
Roll and cut the fondant with a smaller flower cutter.
Use the same flower veining tool to vein the petals.
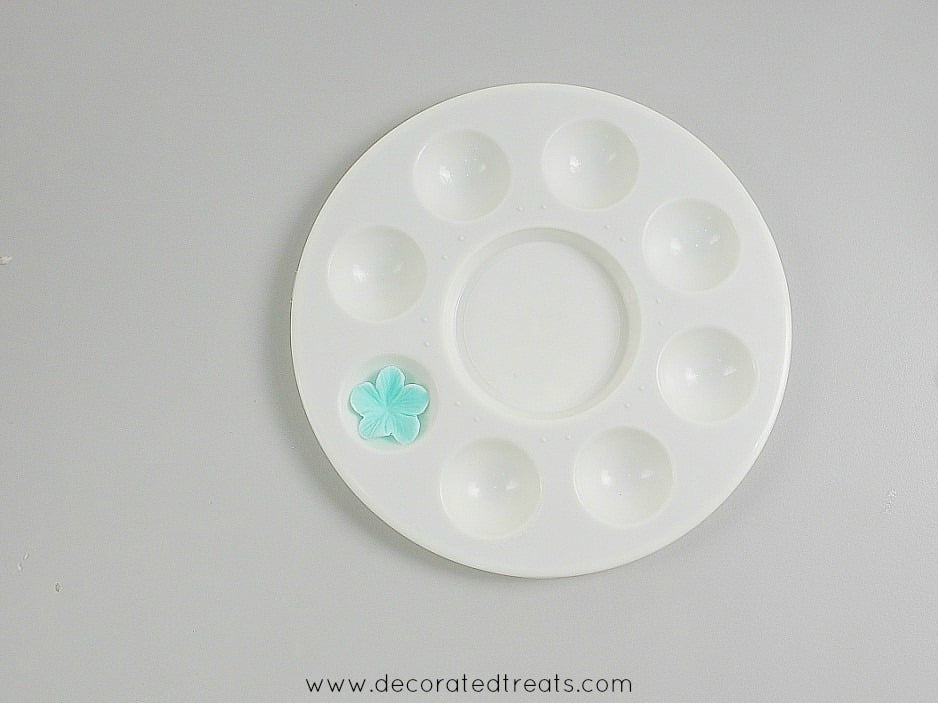
Place the flowers in a flower former to set.
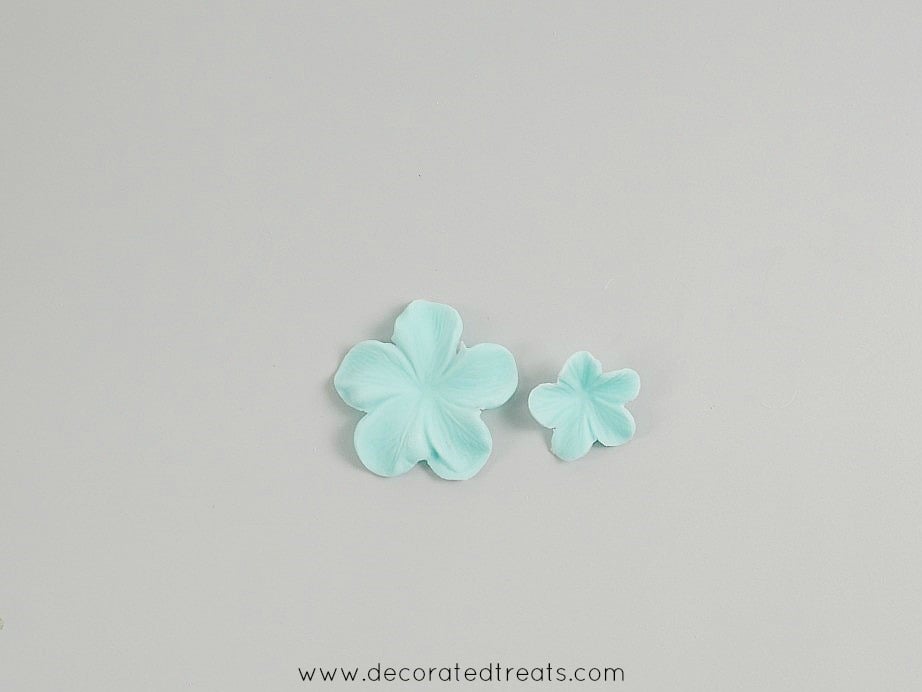
The difference between the larger and smaller flowers.
Step 4: Bake and Prepare the Cakes
Next were the cakes. I leveled and filled the layers of cake with buttercream. And then I applied a thin layer of buttercream as the crumb coat and covered each tier separately in fondant. I then stacked them on top of each other with the support of bubble tea straws. I also covered the cake board with fondant.
Step 5: Make the Unicorn Eyes
The first decoration that went on the rainbow unicorn birthday cake was the unicorn eyes. I drew the eyes on a parchment paper and cut them out of fondant. I have prepared a separate detailed tutorial on how to make the unicorn eyes. Here is the summary:

Draw the eyes on a paper.
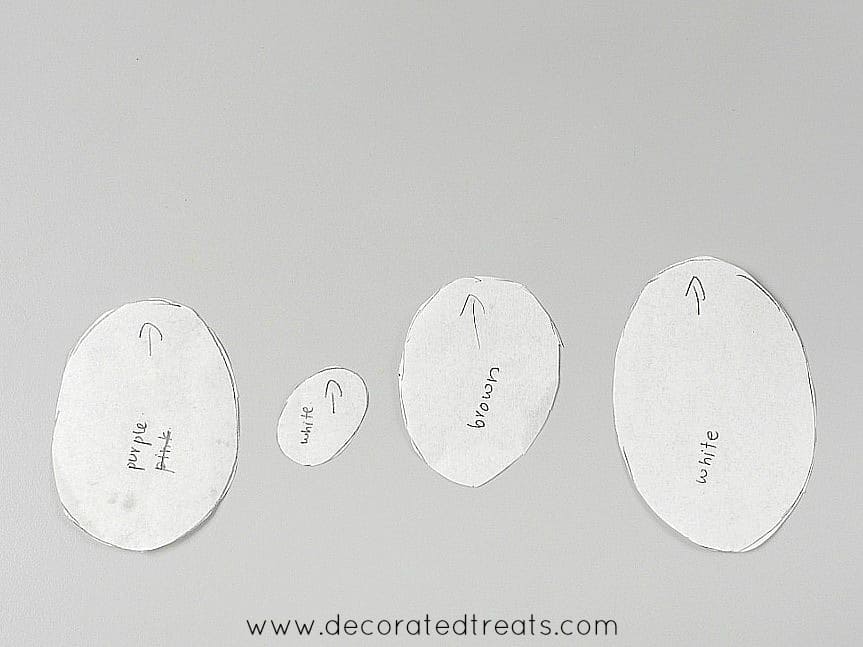
Make a few copies of the paper templates. Cut out each part of the eyes into separate templates and label them.
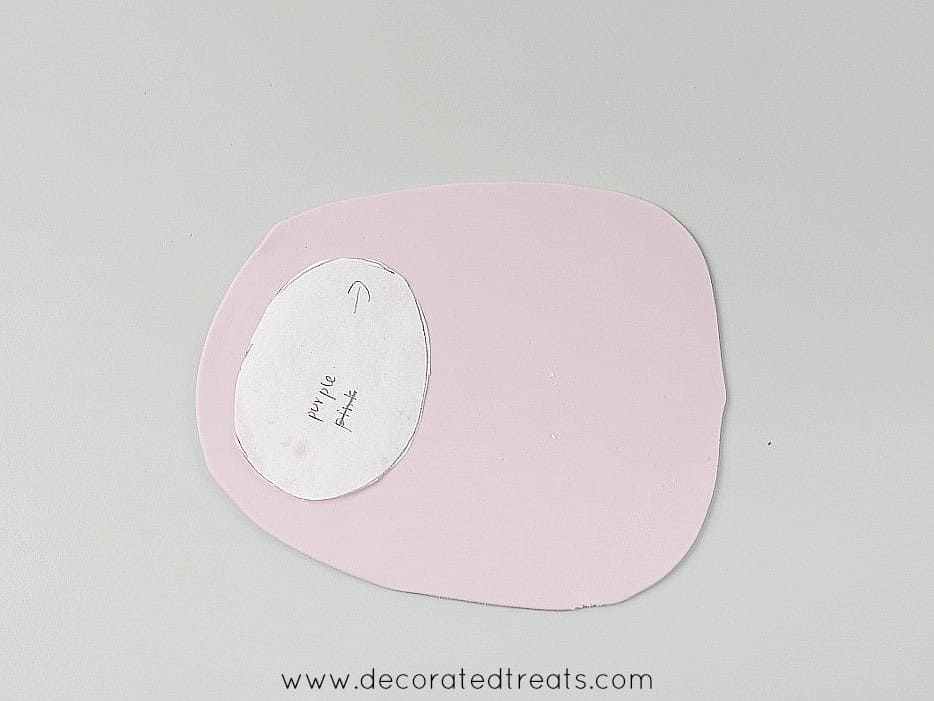
Roll some purple fondant thin and cut out the middle part of the eyes.
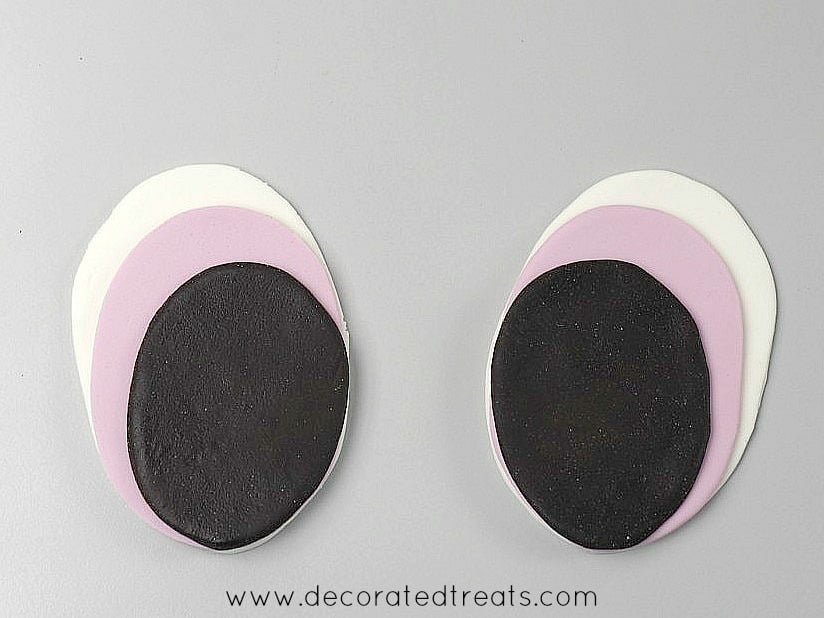
Repeat the process for the chocolate and white parts and attach them in order with shortening.
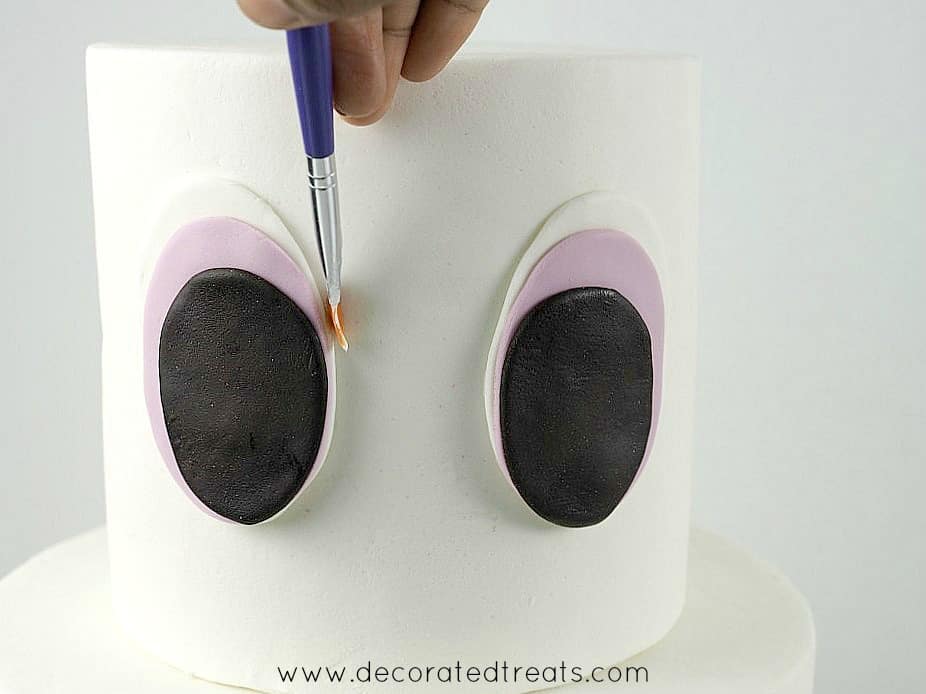
Attach the eyes to the cake and apply a layer of shortening all around.
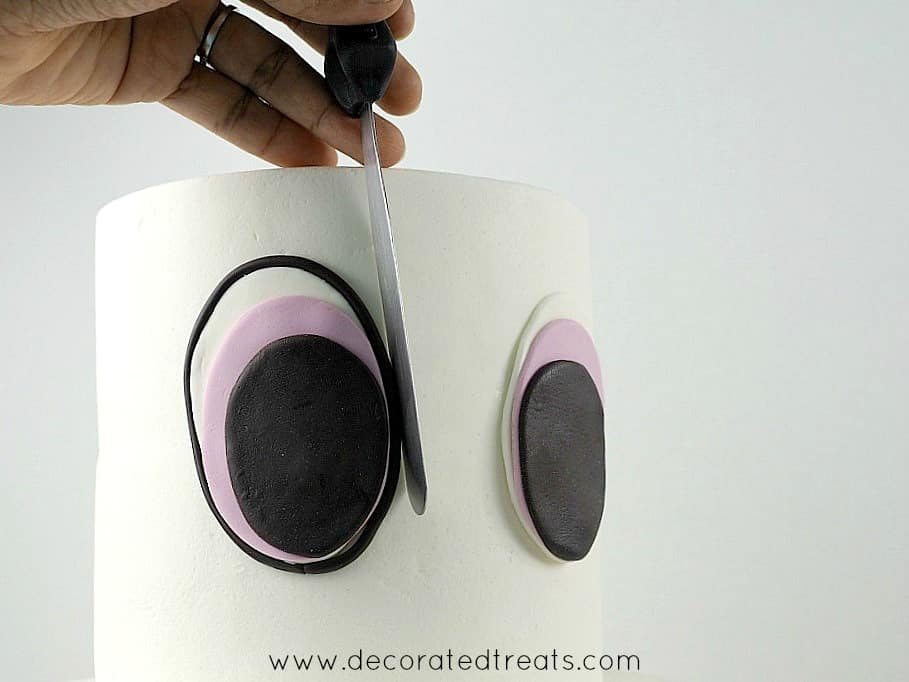
Roll chocolate fondant into a thin strip and attach around the eyes.

Use the paper template to mark the position for the eyes lashes.
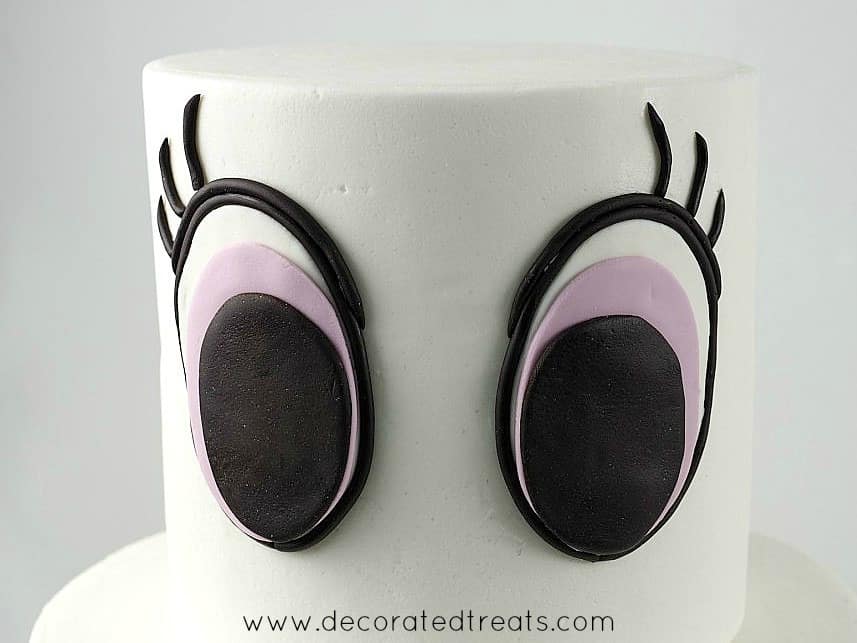
Attach the lashes with shortening.
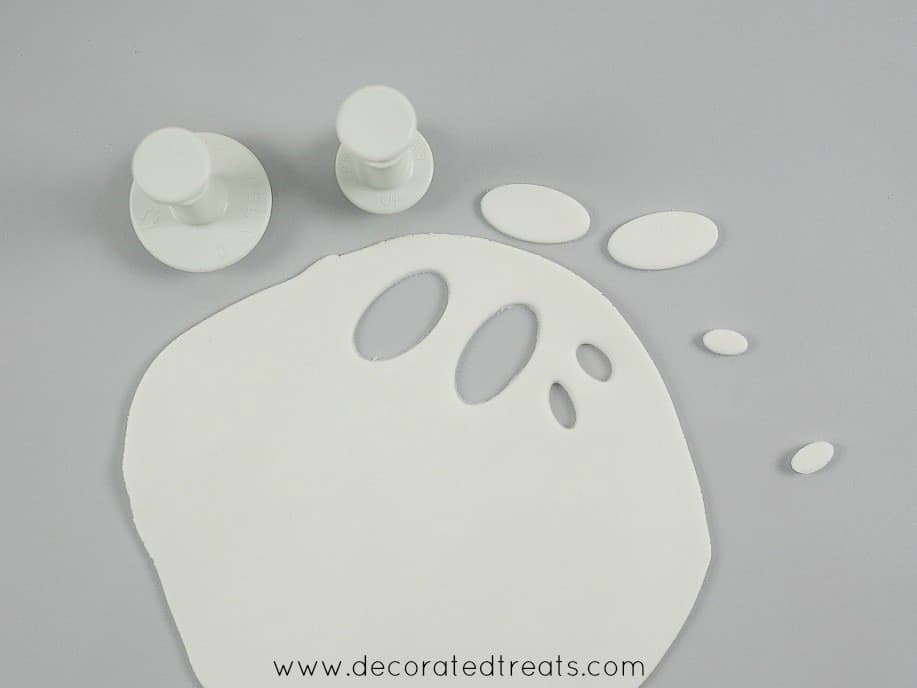
Next, roll some white fondant thin and cut out oval shapes.
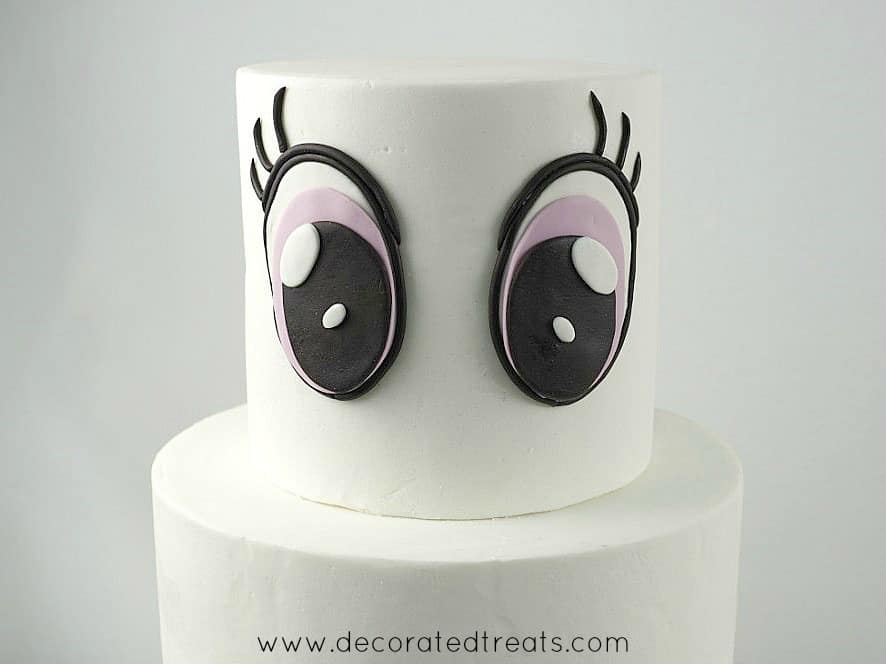
Attach the shapes to the eyes to complete the eyes.
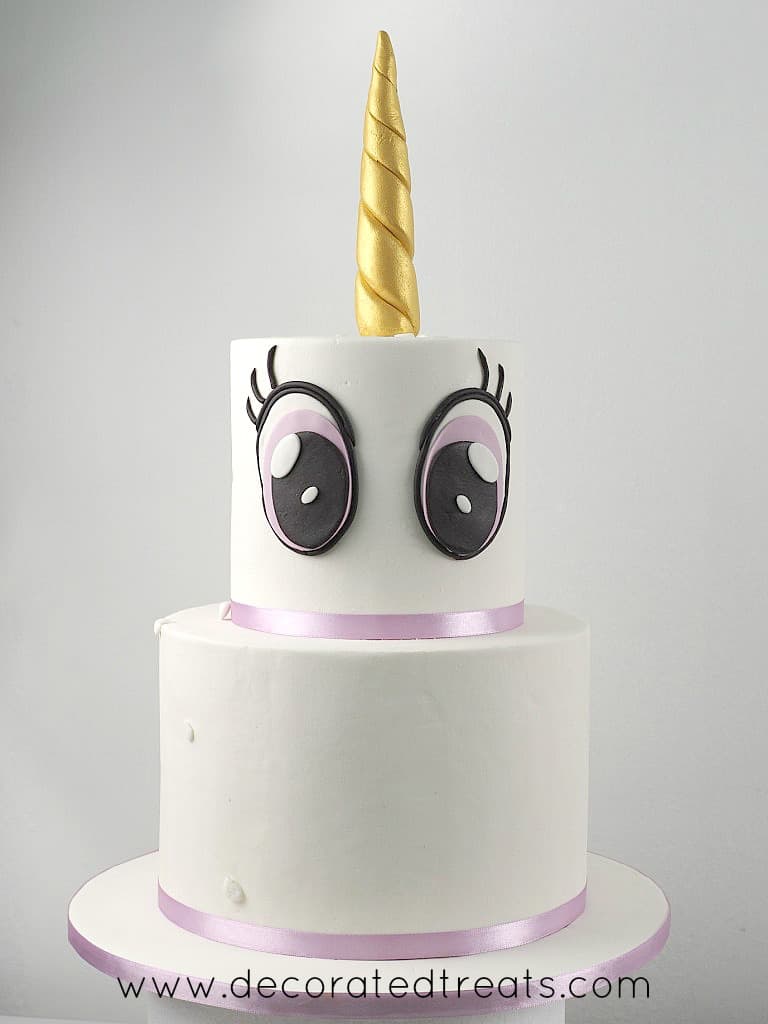
Step 6: Attach the Purple Ribbon and Unicorn Horn
I also wrapped the cake board and each tier with purple satin ribbon. Next was the gold horn. I positioned it on the top tier.
Step 7: Make the Unicorn's Mane
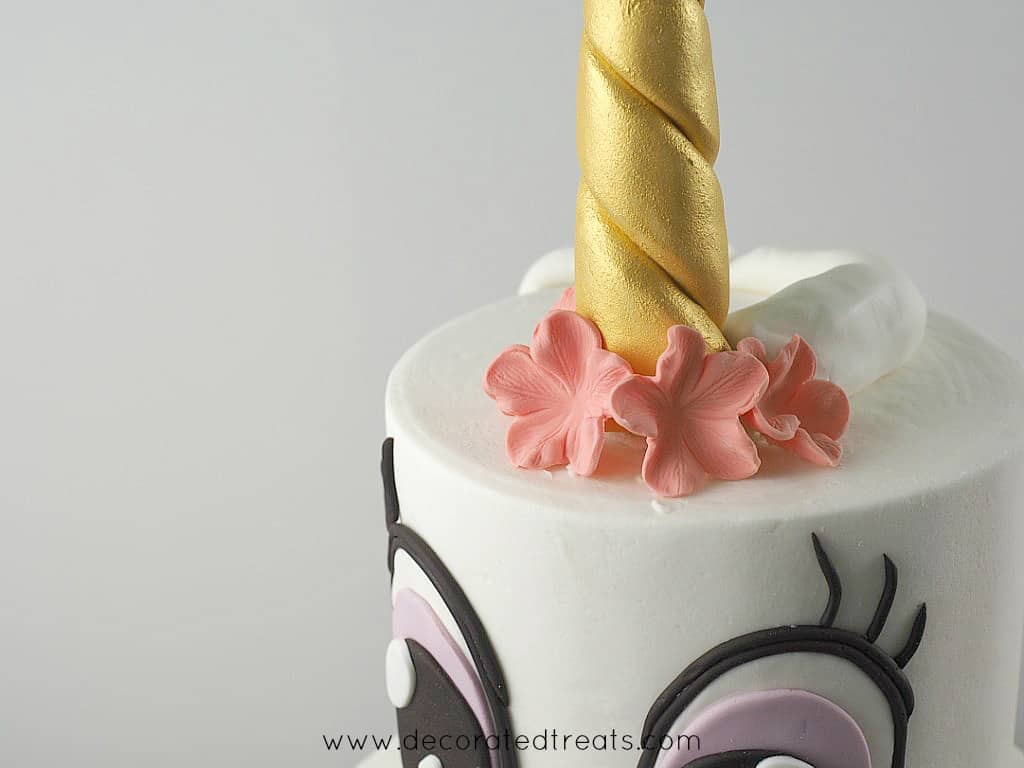
And then, I marked the line for the unicorn's rainbow colored mane using tiny pinches of fondant.
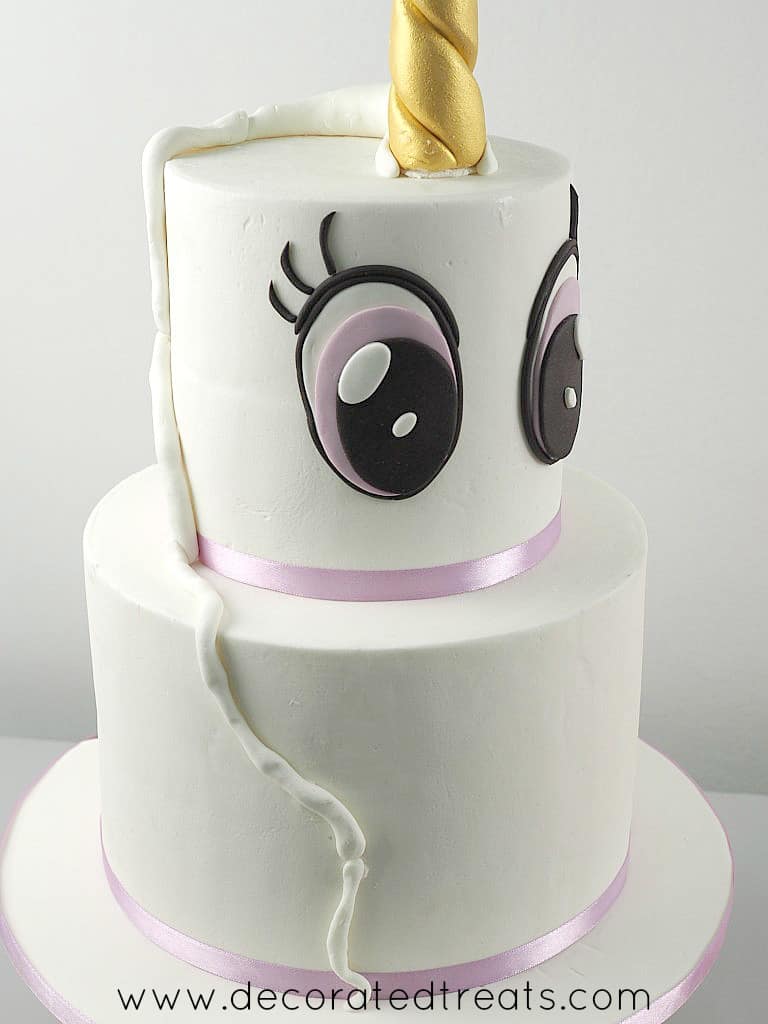
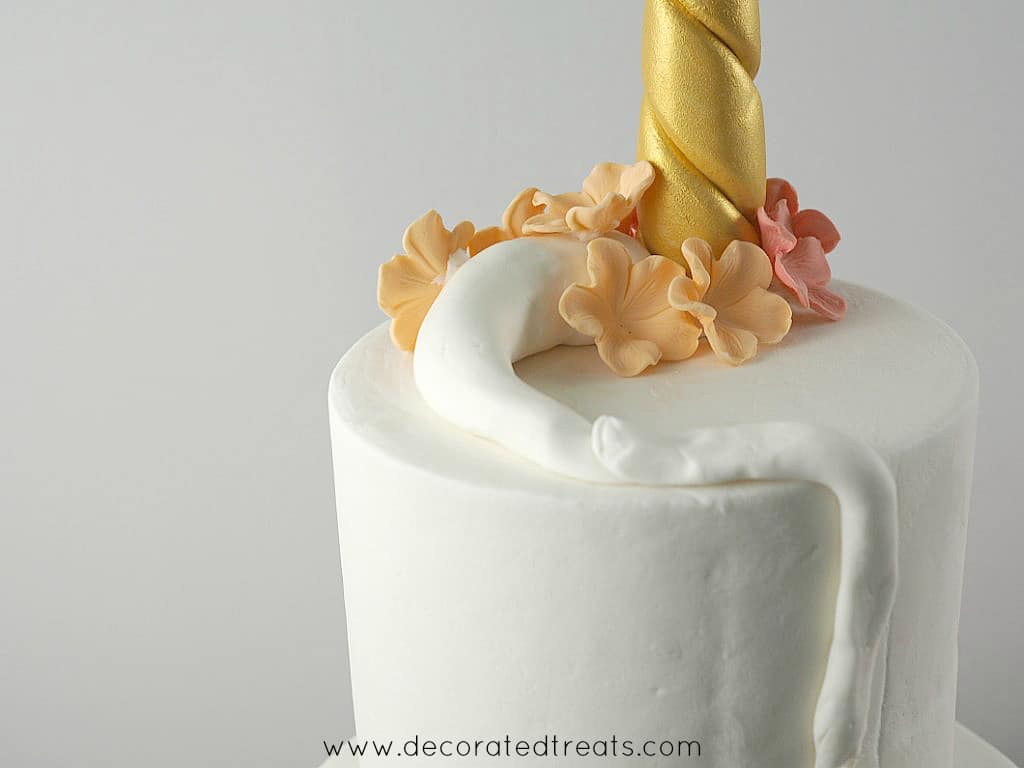
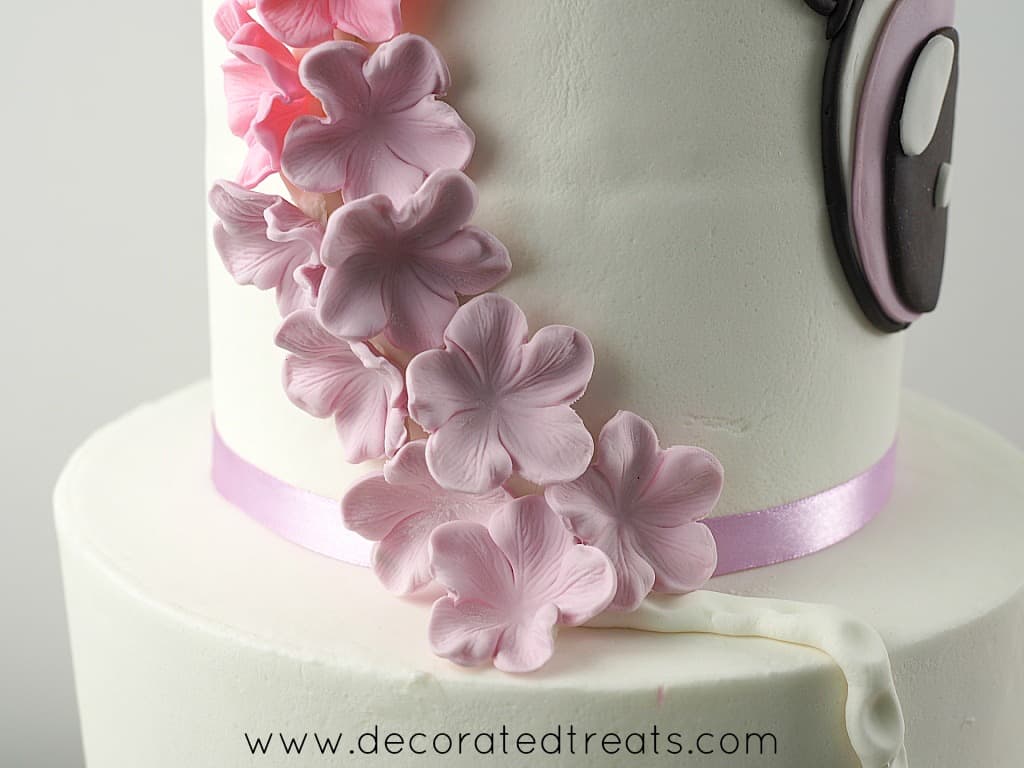
Once I was able to visualize the position of the unicorn’s mane using the tiny fondant markings, I replaced them with a long strip of fondant that started from the unicorn horn at top of the cake, flowing down the back and side and ending towards the bottom front of the cake.
This fondant strip was to guide the placement of rainbow-colored fondant flowers as well as to provide a slight bump so that the flowers do not appear too flat on the cake especially on the top layer of cake.
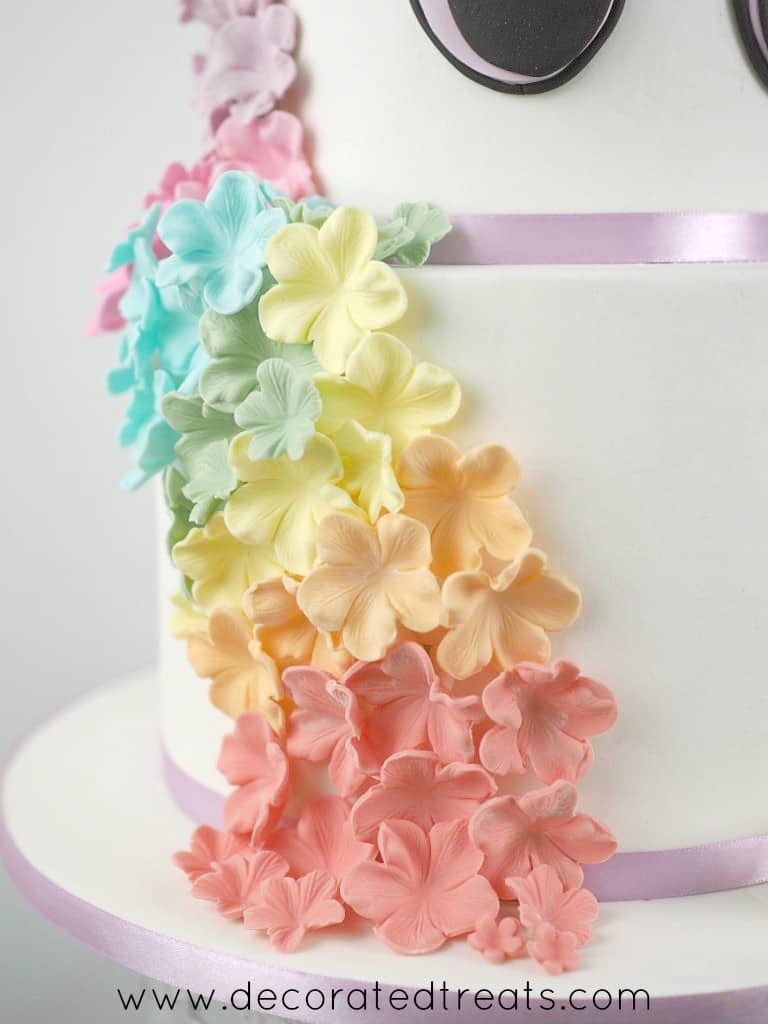
And then I arranged the flowers on the birthday cake. I started with larger flowers first. Red flowers went first.
Followed by the orange and yellow.
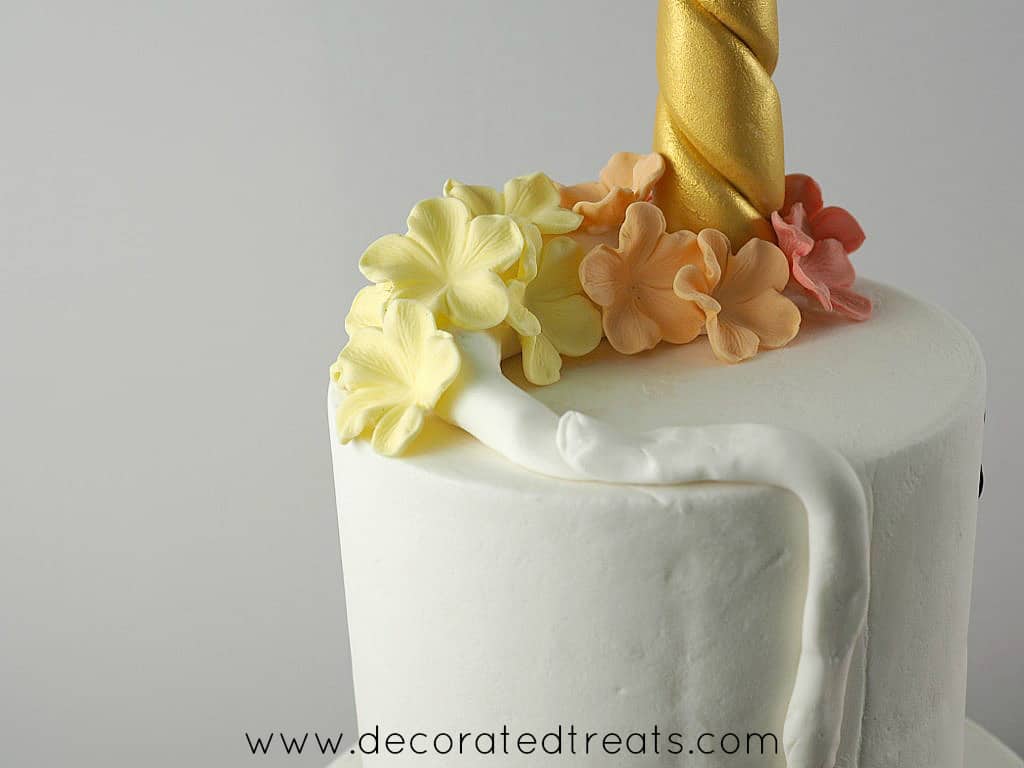
Next were the green, blue and pink flowers:

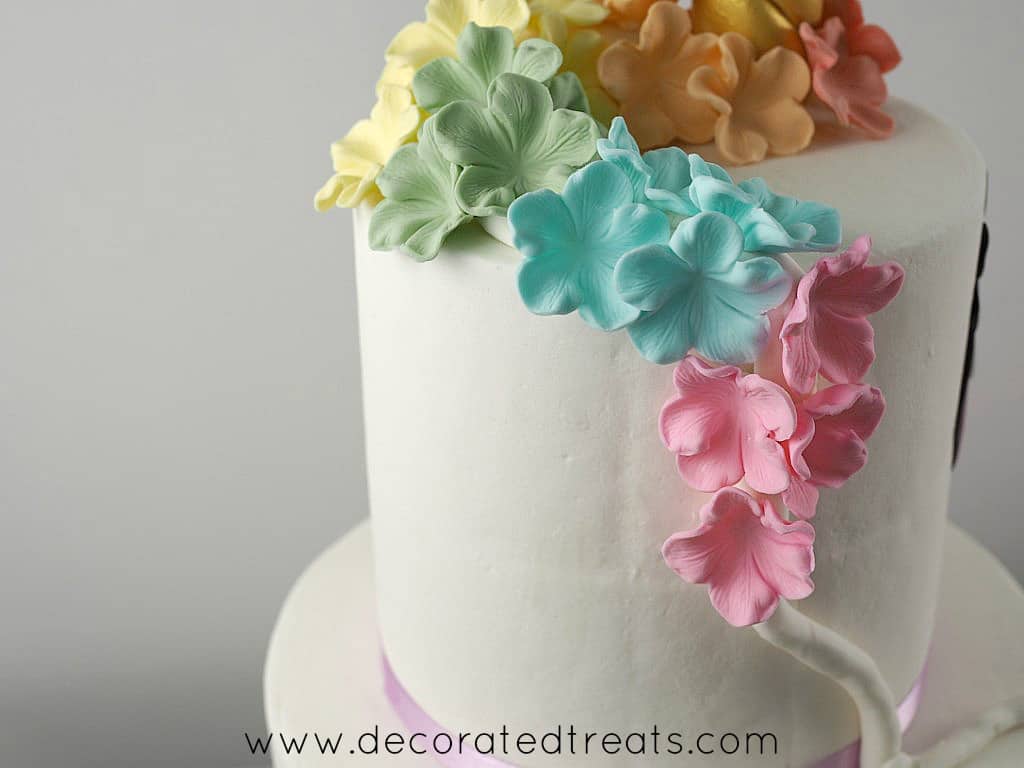
And the final color in the order was light lavender color. This was in the order of rainbow colors too.
And I continued with the placement of the flowers, but this time is the reverse order of the rainbow colors, starting with pink, followed by blue, green, yellow, orange, and red:
Step 8: Make the Unicorn Ears
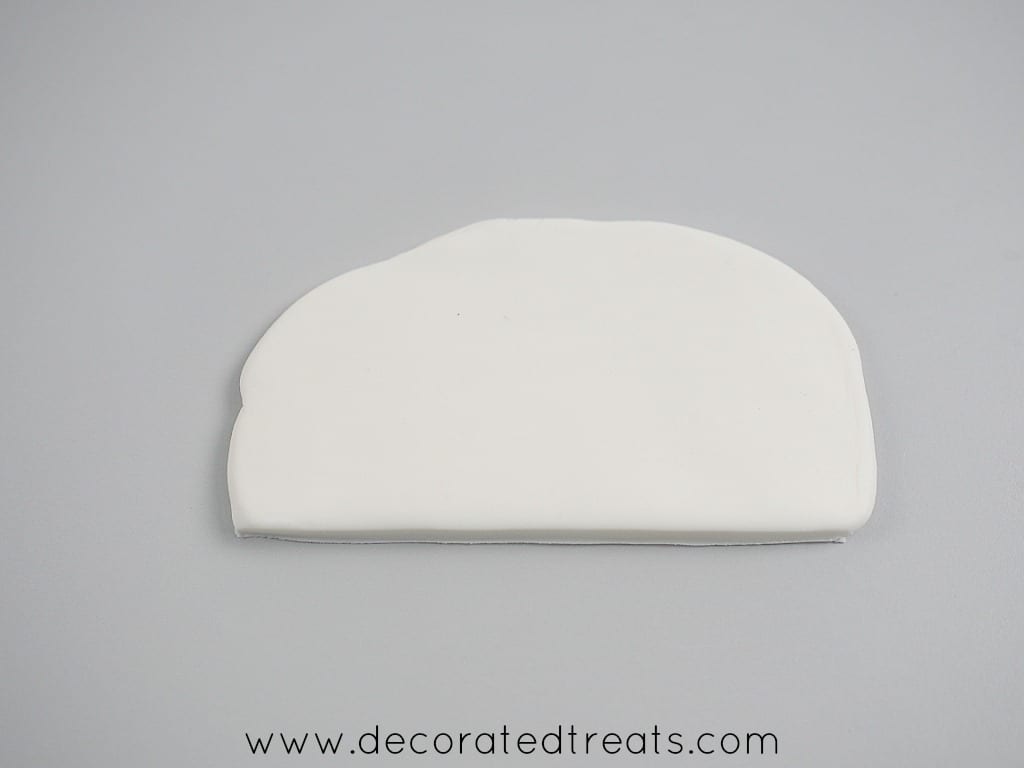
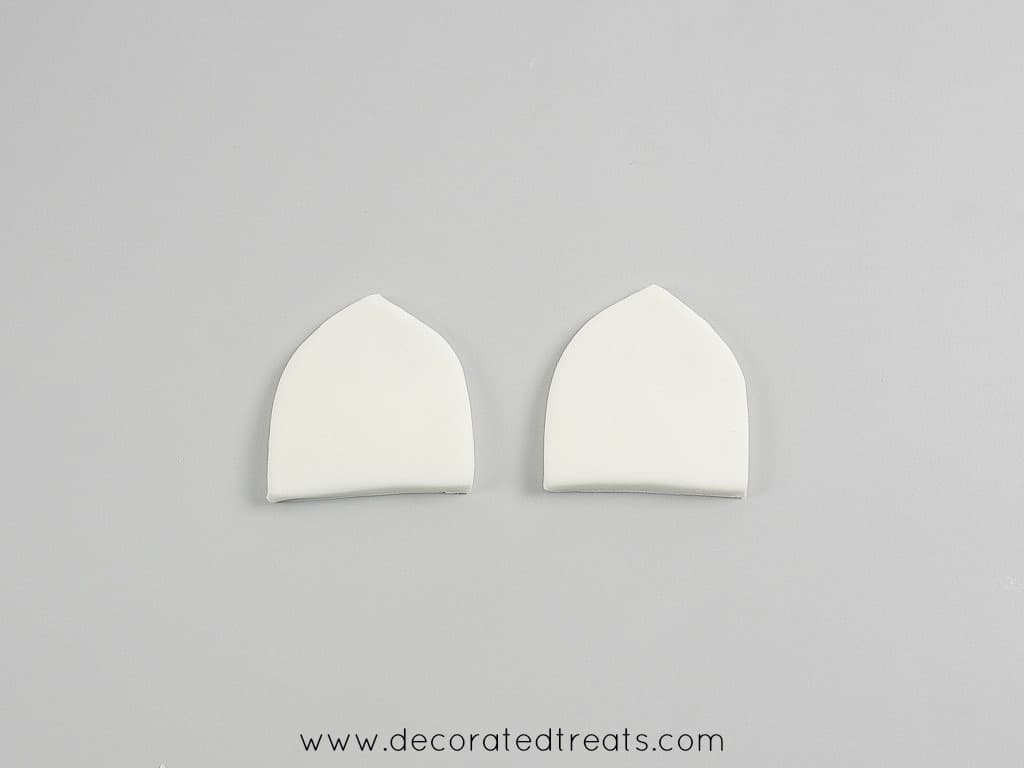
Once I had the flowers in order, I made the ears for the unicorn birthday cake. I dusted my work surface with powdered sugar and rolled a piece of white fondant with considerable thickness as shown:
I drew the ear template on a piece of paper and cut out two pieces of fondant ear shapes for the 2 ears:
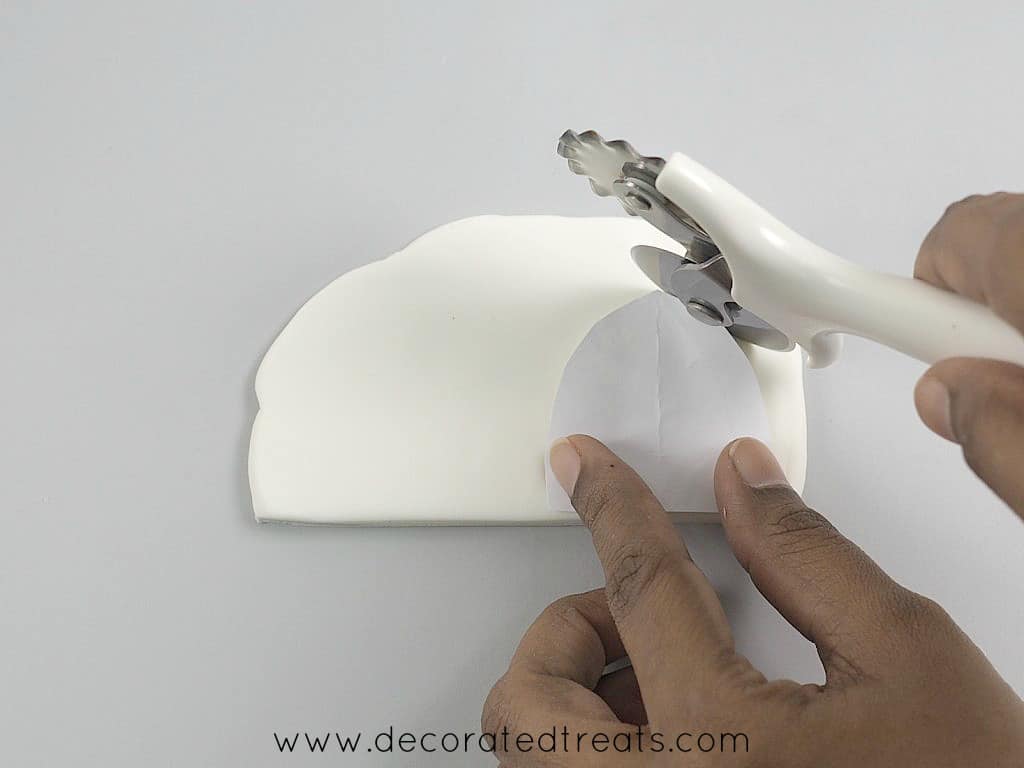
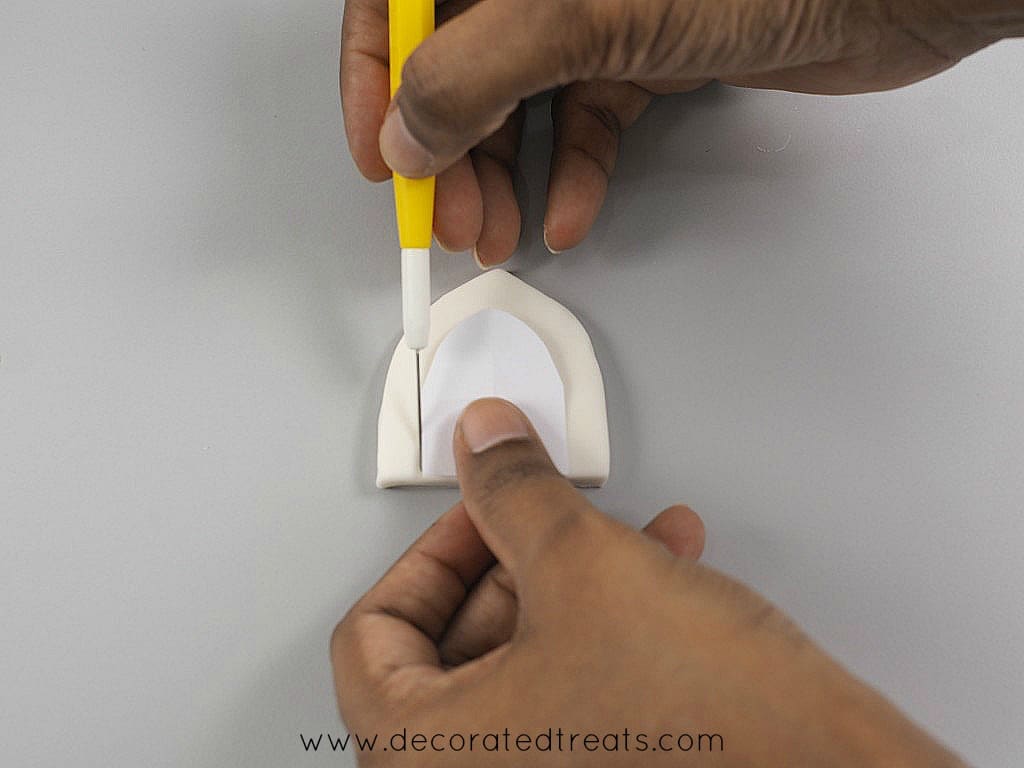
For the inner part of the unicorn ears, I trimmed the paper template and marked the shape on each ear using my needle tool.
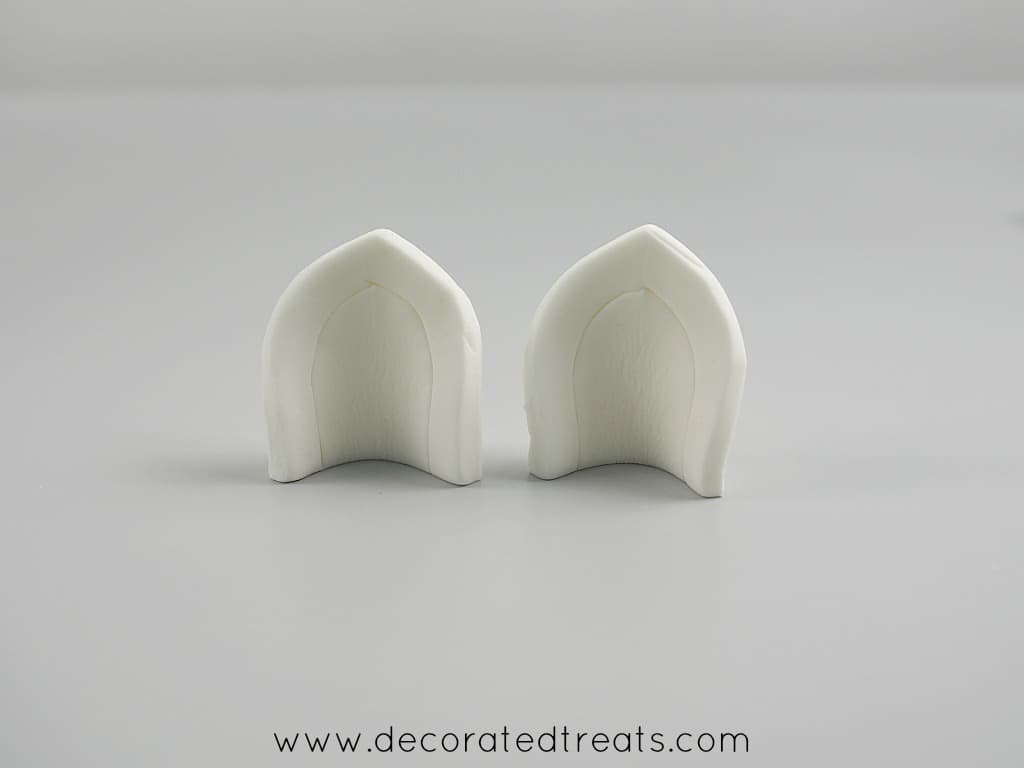
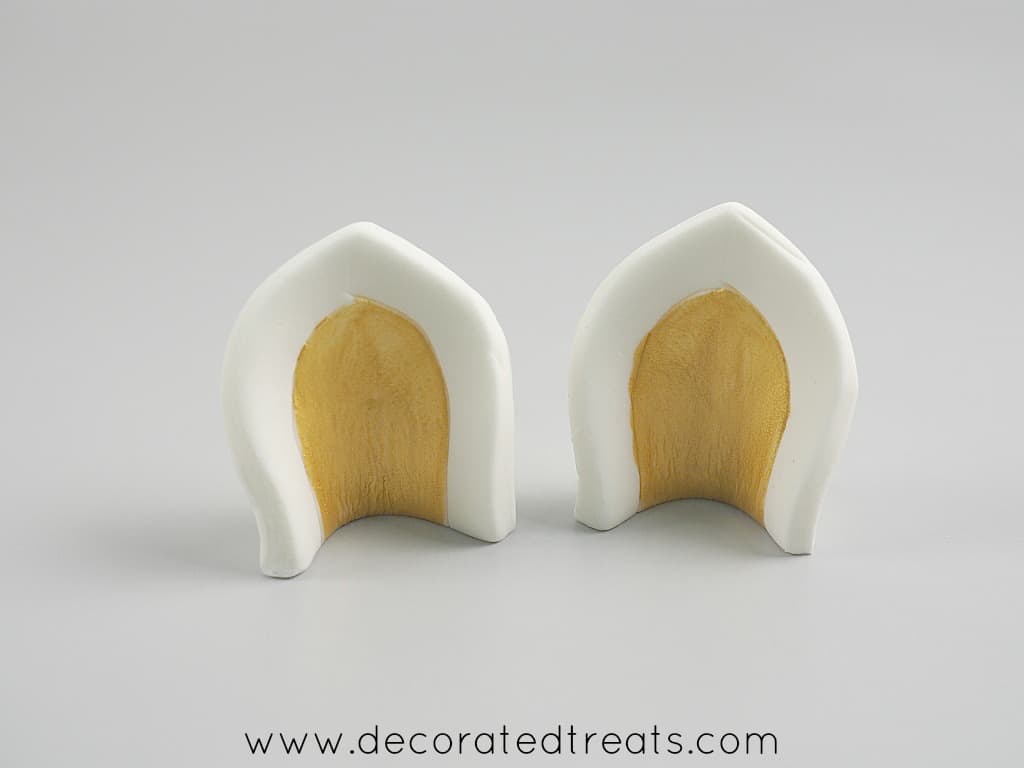
I then curved the base of the ears and left them in a upright position to set. Using the same edible gold dust and lemon extract mixture as the horn, I painted the ears as shown below. You can also add some edible glitter to the ears for a more magical effect to the cake.
To place the ears on the unicorn cake, I had to make slight adjustments to the flowers on the top tier by removing one of the orange flowers.

And then, I attached the ears with fondant glue. The next step was to fill the gaps in unicorn's mane with the medium and small flowers. I also placed a few red flowers on the front of the unicorn horn as shown:
This was how the back and side of the rainbow unicorn cake looked like with all the flowers on it:
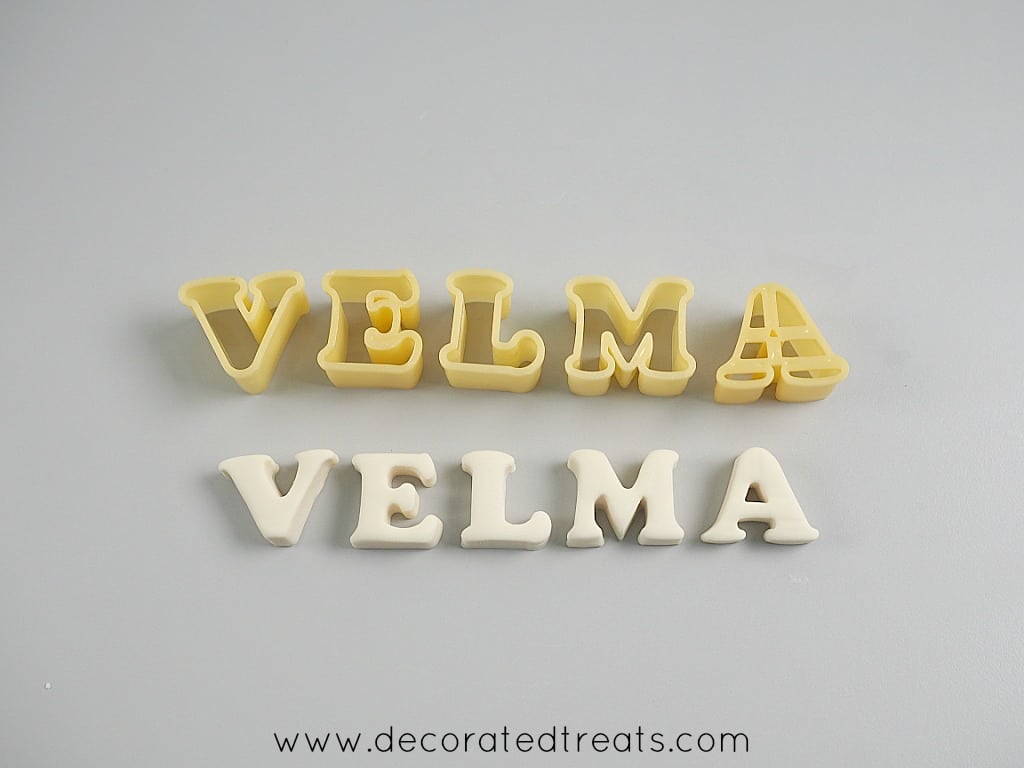
Step 9: Add the Cake Lettering
Once I have put all the flowers, I went on with the wordings for the birthday cake. I placed the birthday girl's name in upright font on the cake board, totally away and outside of the cake . To make the upright standing alphabets, I rolled some fondant (mixed with a little CMC powder) to a thickness of about ¾ cm and cut the letters out using the cutters below:
I then painted just the surface of the letters with gold paint. Again, similar to the ears, you can decorate these fondant letters with edible glitter if you like.
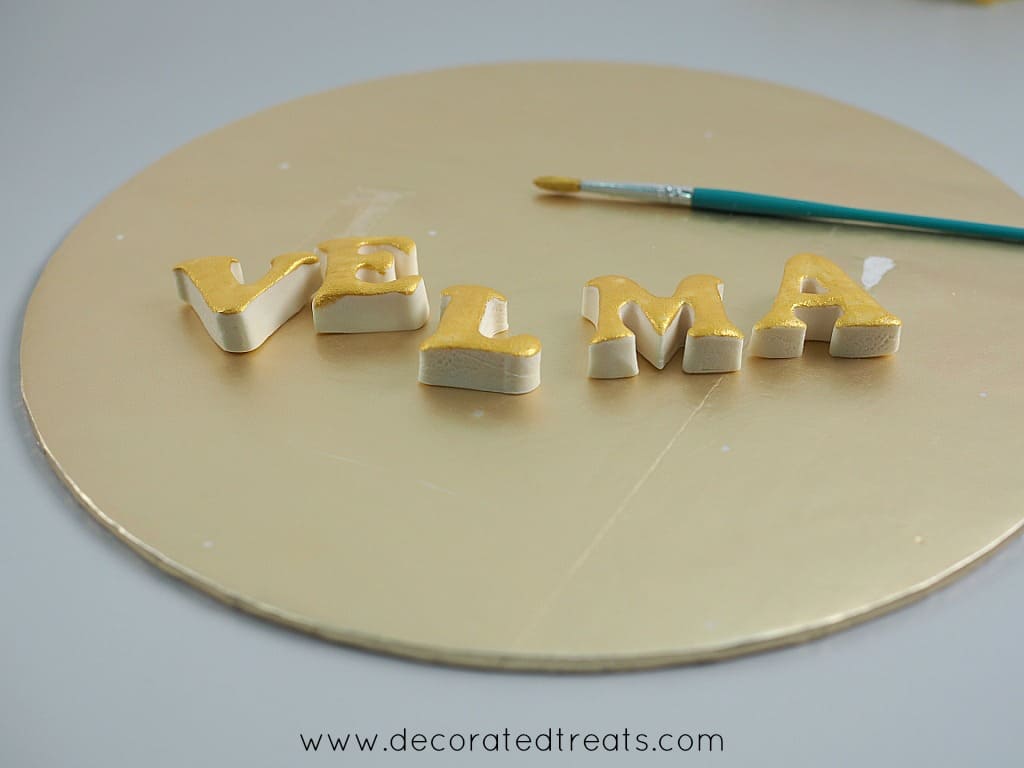
I let the paint dry and then attached the letters to the cake with fondant glue so that they stay in place securely:
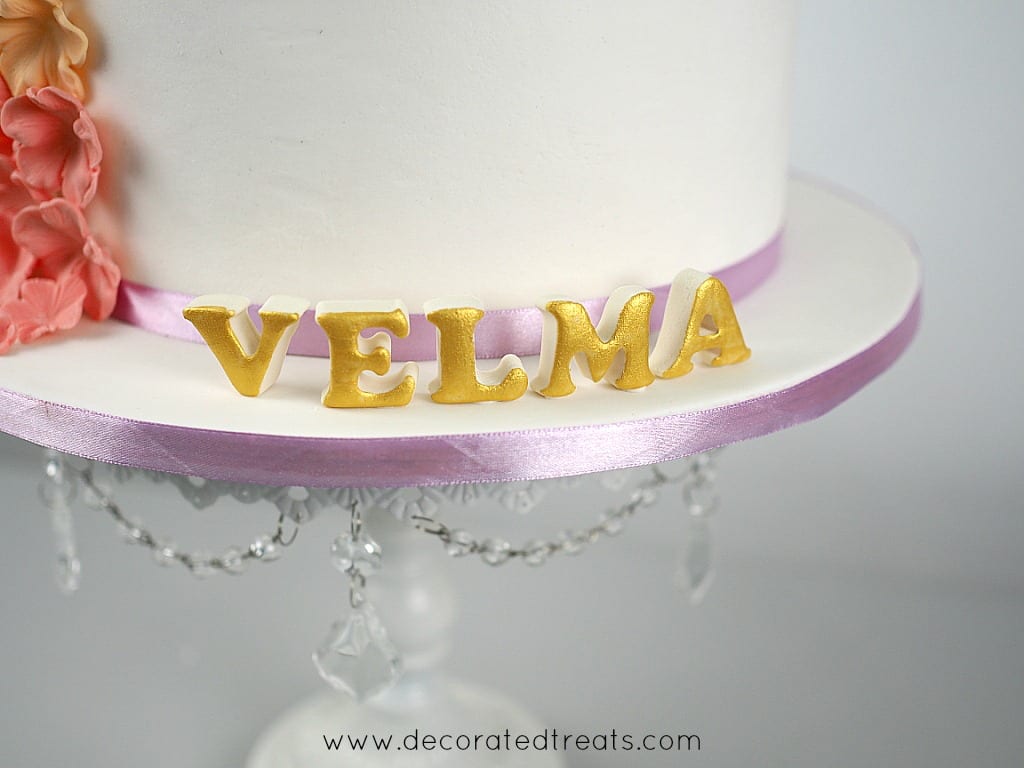
And that completes the unicorn cake tutorial. This was how my completed cake looked like:
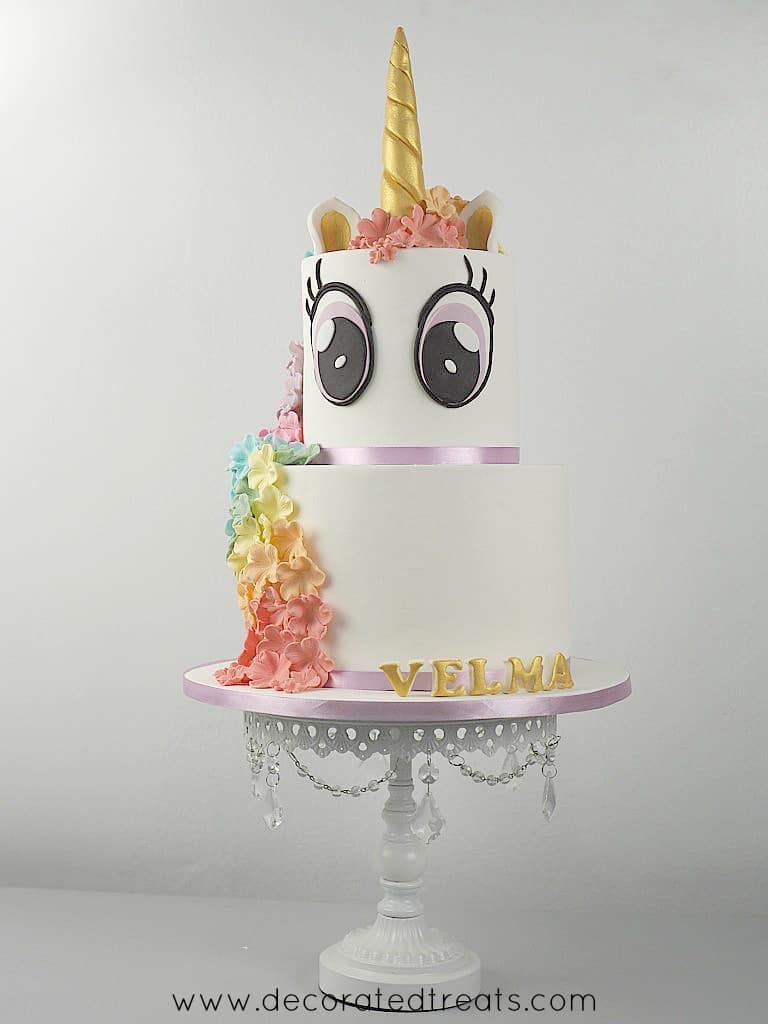
Here was how the rainbow unicorn birthday cake looked like sideways:
💡Expert Tips
Options for the mane - If you wish to decorate the unicorn's mane in buttercream, you can replace the fondant flowers with buttercream rosettes. The buttercream rosettes can be used on a fondant covered cake as well as a buttercream covered cake.
Prepare vanilla buttercream frosting in a large bowl and then divide it into smaller separate bowls to tint the icing in rainbow colors. Fill the icing into separate piping bags and snip the pointed ends.
Fit a large star tip in a separate piping bag. To start with, insert the red buttercream filled piping bag into the star piping tip fitted piping bag. Start piping the rosettes in place of the fondant flowers, following the order of the colors as with the fondant flowers above. Once the red is done, remove the red icing filled piping bag and fit in the next different icing color. Continue to pipe rosettes in all the colors until the unicorn's mane is completed.
Options for the unicorn horn - An easy alternative for the fondant unicorn horn is a horn made out of ice cream cone.
Use the ice cream cone as the base, roll your fondant into thin strip and wrap it around the cone, starting from the pointed tip of the cone all the way to the other end. Make sure you do not leave any gaps. Paint the fondant in gold paint.
💭FAQs
Yes, you can.
Bake the cakes as instructed in the recipe card below. Once baked, let the cakes cool slightly on a wire rack.
Level, fill and crumb coat them the same way you do for fondant covering, but instead of fondant, coat the cakes with a final layer of buttercream.
You can also choose to decorate the unicorn's mane with piped rosettes to replace the fondant flowers.
The unicorn cake recipe on this page uses 2 different flavors. Top tier is a marble cake and bottom tier is an orange cake. You can customize the cake flavor into a single flavor.
If you prefer a plainer vanilla cake recipe, use my butter pound cake recipe which is flavored with vanilla extract.
Yes, you can. You can bake your cake using white cake mix or your favorite box mix or flavor. Follow the box instructions in baking the cakes.
Follow the baking instructions closely. Place the cakes on wire racks to cool and cover the cakes with a kitchen towel until they turn warm. Covering them with kitchen towel helps prevent the cakes from becoming dry.
Once the cakes turn warm, remove the kitchen towels and wrap the warm cakes in plastic wrap. Refrigerate the wrapped cake layers until they become cold. This process of wrapping the entire cake layers and refrigerating them helps lock the moisture in the cake, making them moist.
Another tip is to make sure not overbake the cakes. Test the cakes by inserting a skewer in the center 5 minutes before the baking time is up. Turn off the oven if the skewer comes out without any wet batter sticking to it.
❤️More Designs You Will Love


Do you like this tutorial? Please leave a 5-star ⭐⭐⭐⭐⭐rating in the recipe card below and consider a review further down this page. I would love to hear from you. Thank you!
📖Recipe

Unicorn Cake
For best results, use the metrics measurements. US customary measurements have not been tested and are only meant for guide.
Ingredients
Top tier cake (6 inches round marble cake)
- 540 g self-raising flour
- 540 g granulated sugar
- 540 g butter
- 9 eggs
- 150 ml milk
- 22.5 g cocoa powder
- 1 ½ teaspoon vanilla extract
- 1 teaspoon baking powder
- ⅓ teaspoon salt
Bottom tier cake (9 inches round orange cake)
- 900 g self-raising flour
- 900 g butter
- 825 g granulated sugar
- 15 eggs
- 6 oranges grated orange rind
- 225 ml orange juice (freshly squeezed)
- ⅓ teaspoon baking powder
- ¾ teaspoon salt
Frosting and Decoration
- Buttercream
- Fondant
- Royal Icing (to attach the ribbon to the cake)
- Edible gold paint
- Shortening
- Food coloring (for the flowers and eyes)
- Purple ribbon
- CMC powder (added to the fondant to make upright standing alphabets)
Instructions
Marble Cake
- Preheat oven to 170 °Celsius. Grease and line three 6-inches round cake tins.
- Mix cocoa powder with ¼ of the milk and leave aside.
- In a separate bowl, beat butter and sugar till soft and creamy.
- Add eggs, one at a time, beating well after each addition.
- In another separate bowl, sift flour, baking powder and salt. Fold in the sifted ingredients into the creamed mixture alternately with milk, starting and ending with flour.
- Finally, add in vanilla extract and combine well.
- Transfer ⅓ of the batter into a separate bowl and add the milk-cocoa mixture to it. Mix well.
- Scoop the plain batter and chocolate batter alternately into the prepared cake tins.
- Bake the cakes for approximately 45 to 50 minutes until the top of the cake springs back when lightly pressed. The cakes are done when a skewer inserted in the center of the cake comes out without any wet batter.
- Remove cakes from the oven and let them cool completely before frosting and decorating.
Orange Cake
- Preheat oven to 170 °Celsius.
- Beat butter and sugar till soft and creamy.
- Add eggs, two at a time, beating well after each addition.
- In a separate bowl, sift flour, baking powder, and salt. Fold in the sifted ingredients into the creamed mixture alternately with orange juice, starting and ending with flour.
- Finally, add in the grated orange rind and combine well. Pour batter into three 9-inches greased and floured round cake tins and bake for 45 to 50 minutes until a skewer inserted in the center of the cakes comes out clean.
- Baking time for larger cakes may be slightly longer than smaller ones. Use a skewer to check that your cakes have cooked completely. Your cakes are also done when they start to separate from the sides of the cake tins and the top of the cakes spring back when lightly pressed with a finger.
- Remove cakes from the oven and let them cool completely before decorating.
Decorating the Unicorn Birthday Cake
- Prepare the fondant flowers and allow them to set.
- Prepare the fondant unicorn horn and let it set.
- Once the cakes have cooled down, level and sandwich the cake layers with buttercream.
- Cover each of the 2 tiers with white fondant and stack them together. Use bubble straws for support.
- Cover the cake board with white fondant.
- Attached the fondant unicorn eyes on the side of top tier with shortening.
- Wrap the sides of the cake board with purple ribbon. Secure it in place with some hot glue.
- Using the same colored satin ribbon, wrap it around the border of each cake tier. Secure it to the cake with some royal icing.
- Attached the prepared fondant unicorn horn on the top tier.
- Next is the fondant flower mane. To guide the placement of the flowers, roll a long thin strip of fondant and attach it to the sides of the cake, in the way you wish to place the flowers.
- Start attaching the flowers from the top tier, right at the horn. The first color is red, followed by orange, yellow, green, blue, pink and purple. And then repeat the colors in the reverse order, such that the last color at the bottom of the second cake tier is red. Attach the flowers with shortening.
- Next, make and attached the unicorn ears on the top tier of the cake with some fondant glue.
- Finish decorating the unicorn's floral mane by filling up the gaps in the mane with smaller fondant flowers.
- For the birthday girl's name, mix CMC powder into some white fondant. Knead it well and roll and cut out the letters for the birthday girl's name.
- Paint the front of each fondant letter with edible gold paint. Let the paint set.
- Finally, attach the fondant letters to the cake board with fondant glue to complete the decoration for the unicorn birthday cake.
Leave a Reply