

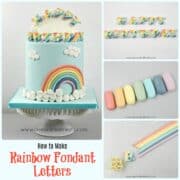
Learn how to make rainbow colored fondant letters for cake with this easy tutorial. It teaches you how to make completely edible 3D block letters in rainbow colored fondant. They make perfect cake lettering for a rainbow themed cake.
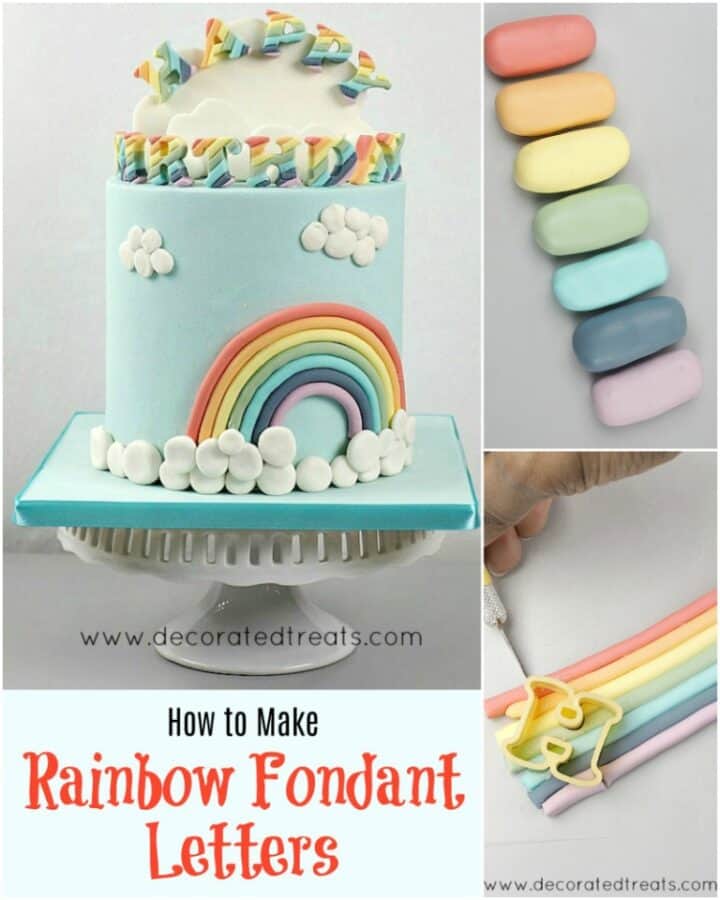
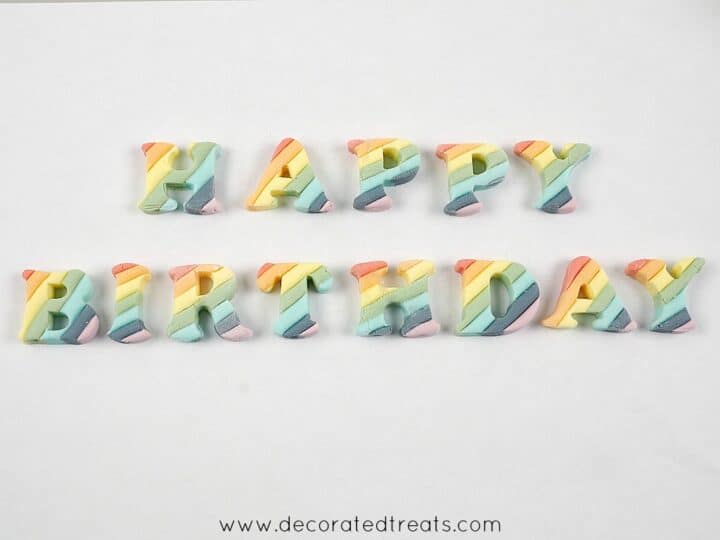
I made these rainbow-colored fondant letters for a rainbow-themed birthday cake, and I must say, they turned out very beautiful.
And making these pretty fondant letters was not hard. Let me show you how I made these rainbow beauties in my step by step tutorial below.
Jump to:
❤️Why you will love this tutorial
- Each letter comes in an array of rainbow colors and is very beautiful.
- The letters are very easy to make and are completely edible.
- They make perfect cake lettering for a children cakes and rainbow themed parties.
- You can make these letters in advance and have them ready when you need to use them.
If you like this tutorial, do also check out my other tutorials on how to make fondant clouds, how to make fondant rainbow, how to make fondant unicorn horn and unicorn eyes, how to make rainbow colored fondant flowers and how to make standing 3D number cake topper. They all make very pretty cake decorations.
🧾Supplies required
- Fondant - I used Satin Ice fondant. You can also make your own fondant with this homemade fondant recipe or marshmallow fondant recipe.
- Food colors - I tinted the fondant in 7 colors to match that of a rainbow. And I used both Wilton as well as Americolor food coloring to create the rainbow color shades.
- Fondant letter cutters - I purchased these from a local cake decorating supplies shop. They are perfect for making 3D lettering on cakes and I have used these cutters for many of my cake projects.
- Extruder Tool and medium-sized round disc - I used the extruder tool fitted with a medium-sized round disc to create fondant strips in rainbow colors.
- Fondant glue
- Powdered sugar to dust - you can also make your own dusting pouch with this easy DIY dusting pouch tutorial.
- Needle tool and rolling pin - The 2 tools assisted in removing the cutout fondant letters from the cutters.
👩🍳How to make
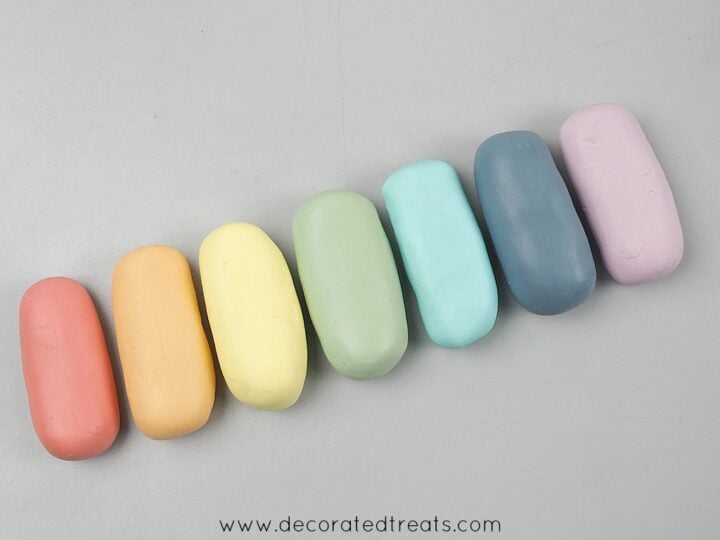
Step 1: Mix the fondant colors
The first step in making these rainbow-colored letters is to tint fondant in the colors of the rainbow. And here is how I mixed my colors:
- Red - White fondant + Americolor Red Red
- Yellow - Yellow fondant + white fondant
- Orange - Orange fondant + white fondant
- Green - White fondant + Americolor Avocado
- Blue - Baby Blue Fondant
- Indigo - White fondant + Americolor Royal Blue (2 parts) + Americolor Red Red (1 part)
- Violet - White fondant + Americolor Electric Purple.
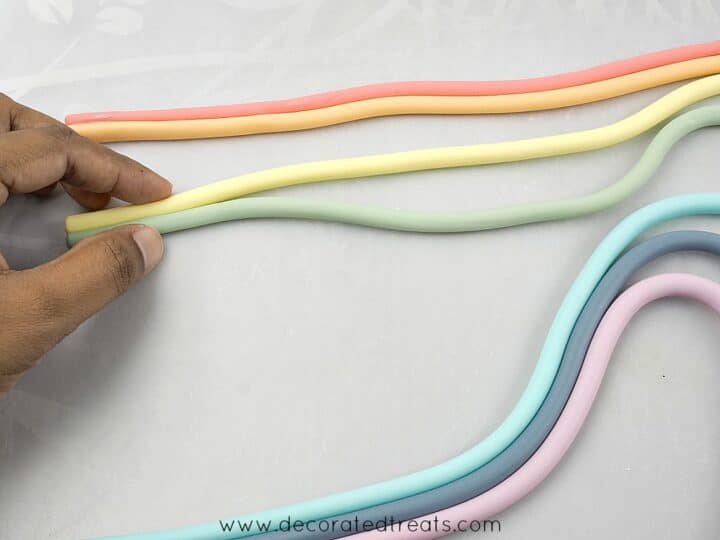
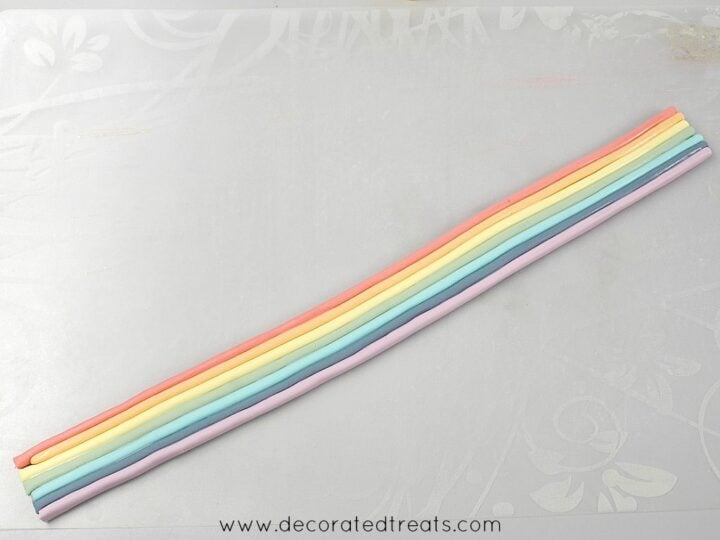
Step 2: Make rainbow colored fondant strips
Next, using the extruder tool fitted with medium sized round disc, pipe out long strips of fondant, one in each of the seven colors of the rainbow.
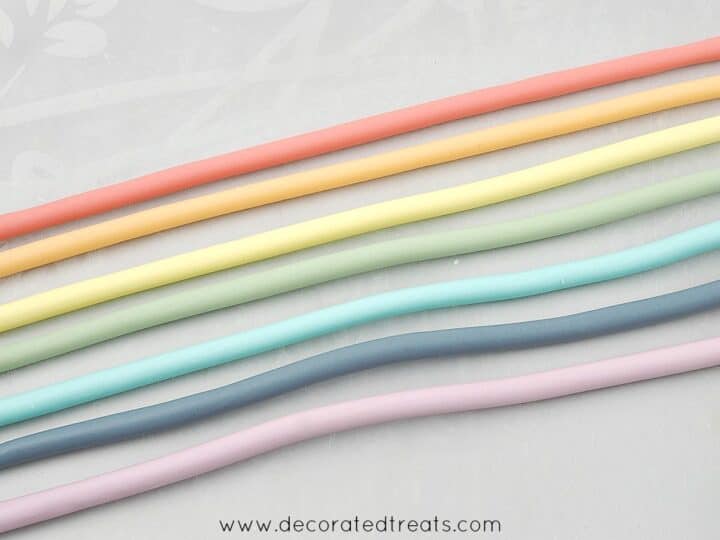
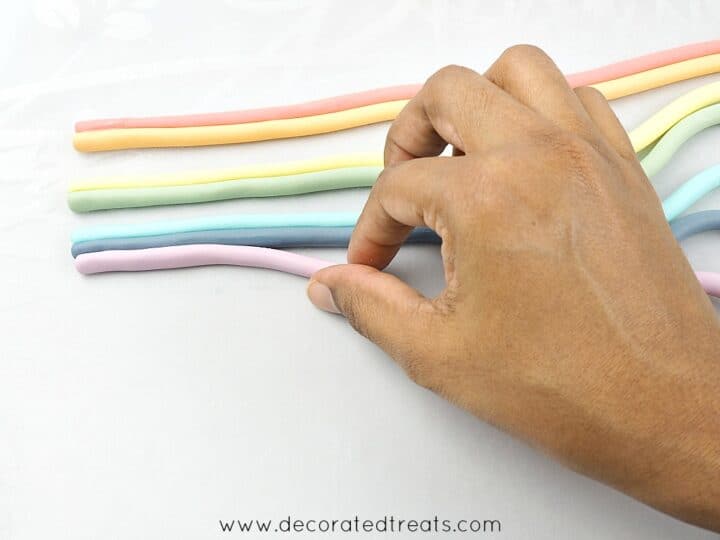
Arrange the strips in the order of the colors of the rainbow, starting with red and ending with violet.
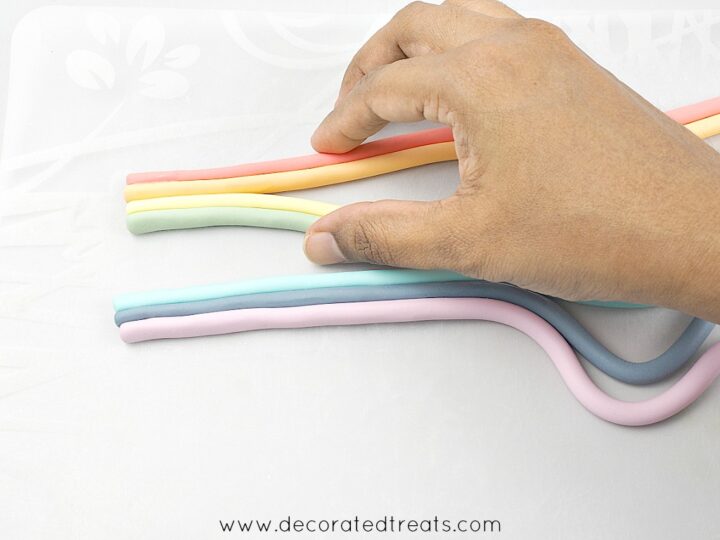
And then, attach them together with fondant glue. Glue the red and orange, yellow and green and blue and indigo first.
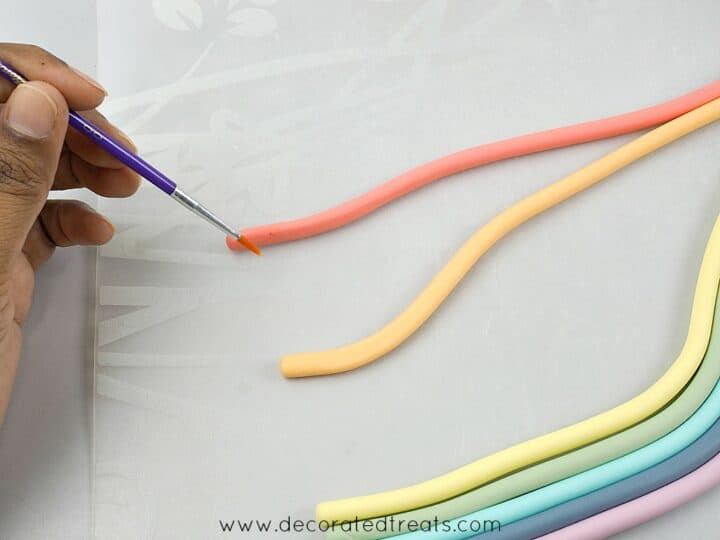
And then glue the violet to the blue-indigo group.
Finally, join the red-orange, yellow-green and the blue-indigo-violet groups together.
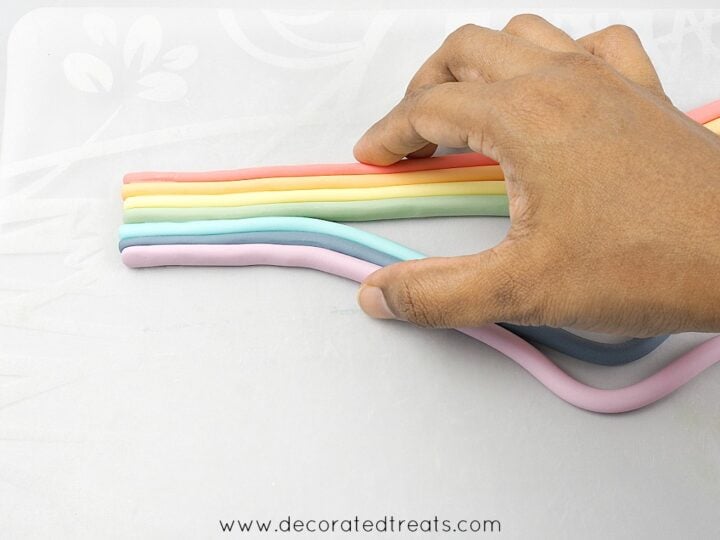
Use a long ruler to level the sides so that the width of the strip fits the letter cutters.
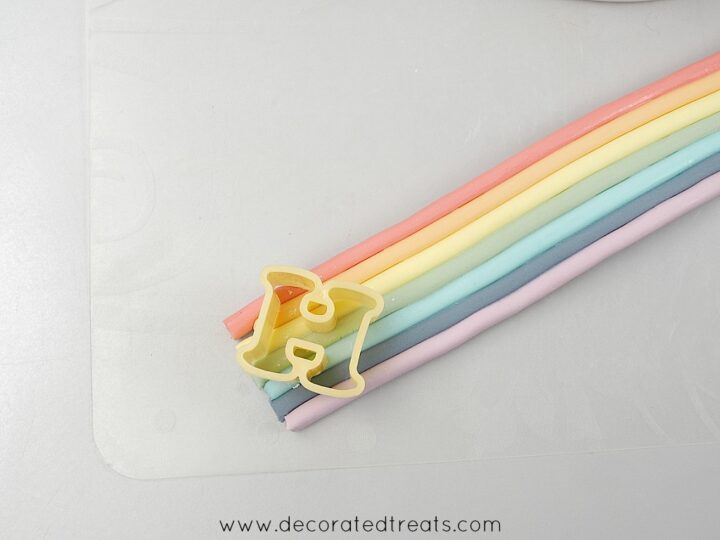
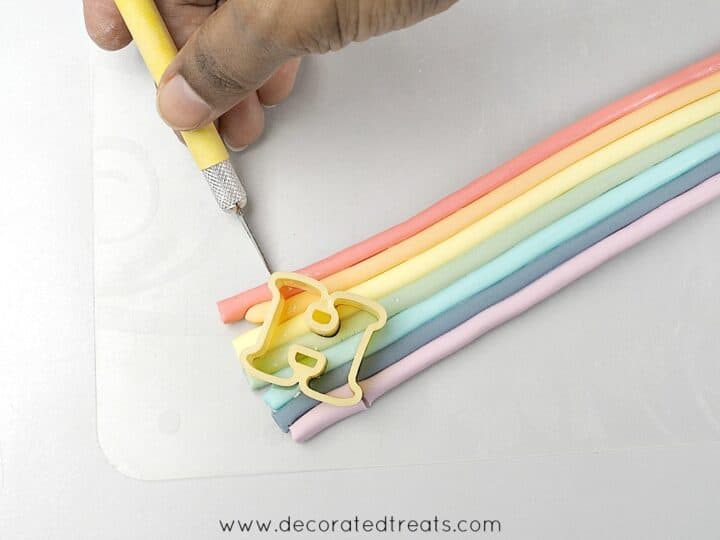
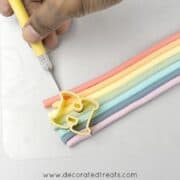
Step 3: Cut the letters
Position the rainbow-colored fondant strip diagonally. Position the letter cutters on the strip such that all the 7 colors could be seen in each letter and the colors appear diagonally in each of the letters.
And before pressing the cutters into the fondant, dip them into some powdered sugar to dust them.
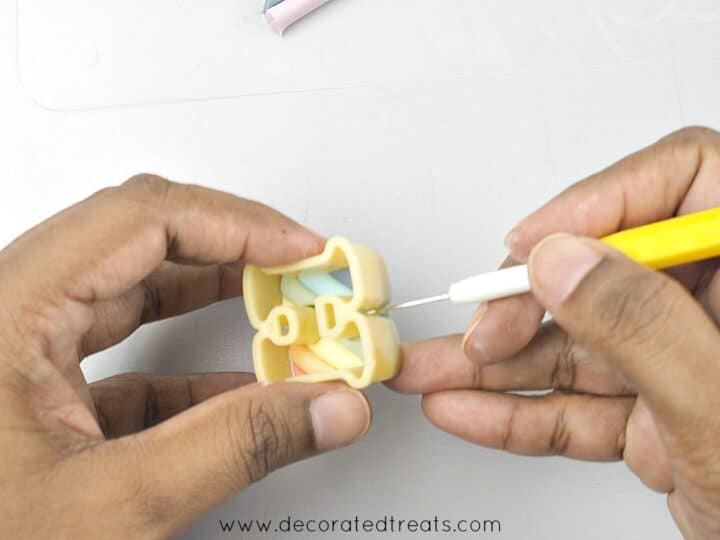
To remove the fondant letters from the cutters, you can use a rolling pin to tap the letters out. You can also use the needle tool to remove excess fondant from the cutters.
And this was how the complete set of rainbow fondant letters should look like.
Leave the fondant letters aside to allow them to set. Attach them to your cake with fondant glue. You can also attach toothpicks to the bottom of each of the letters and poke them into your cake if you like.
And that's how easy it is to make the rainbow fondant letters for cakes.


Leave a Reply