

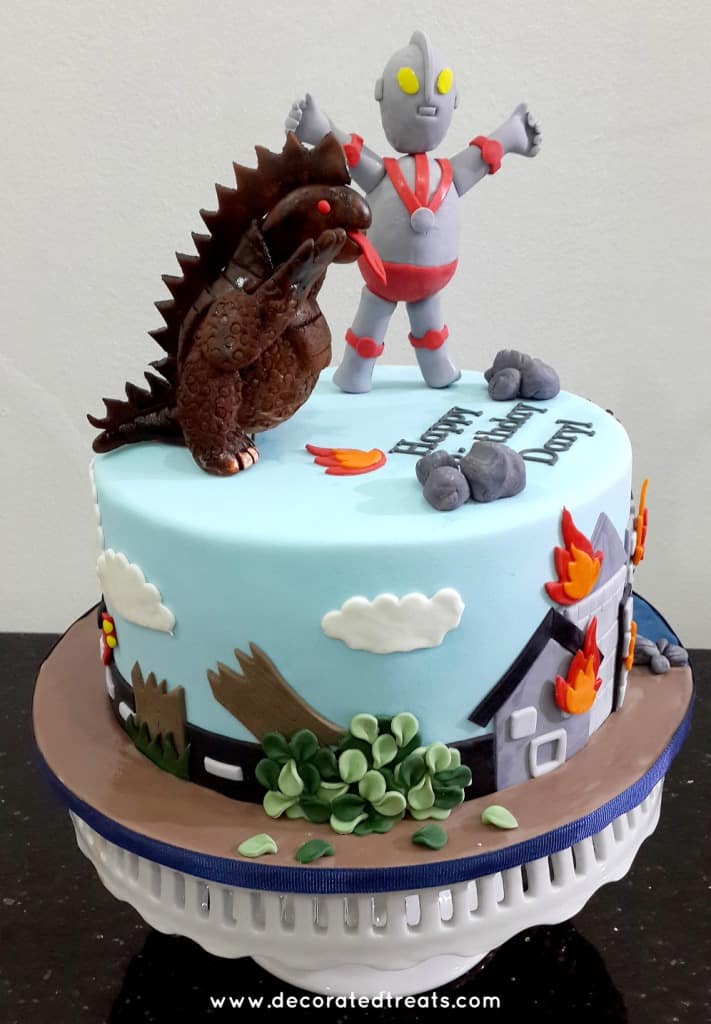
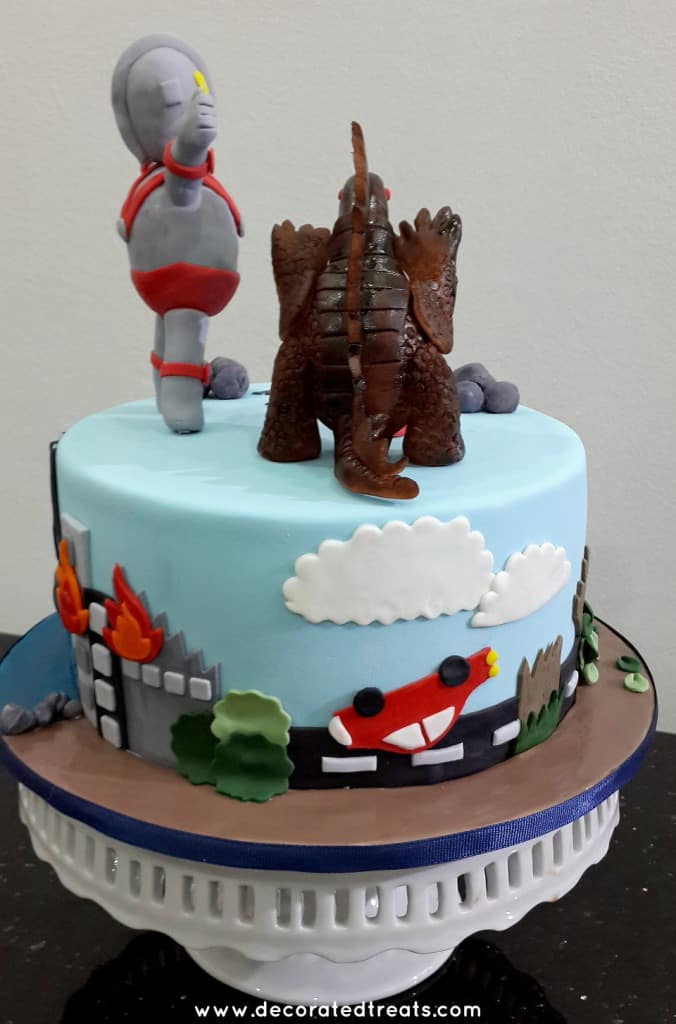
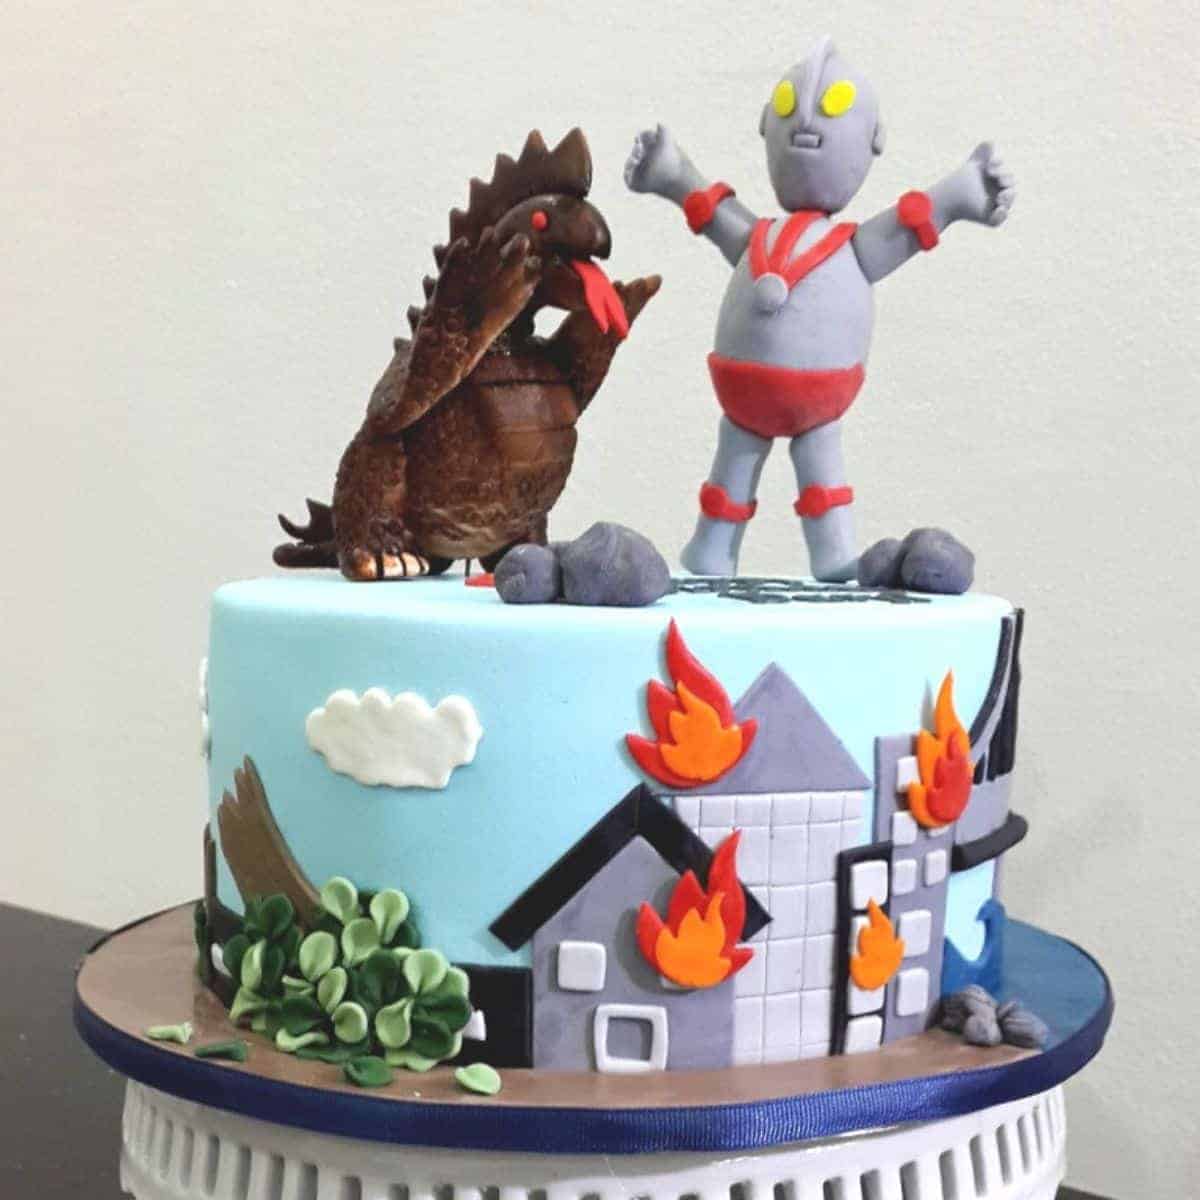
I made this Ultraman cake for little Daryl on his birthday. This is a single tier round cake with handmade Ultraman and monster figurines. The cake is covered in fondant and all the decoration on the side of the cake were cut out of fondant.
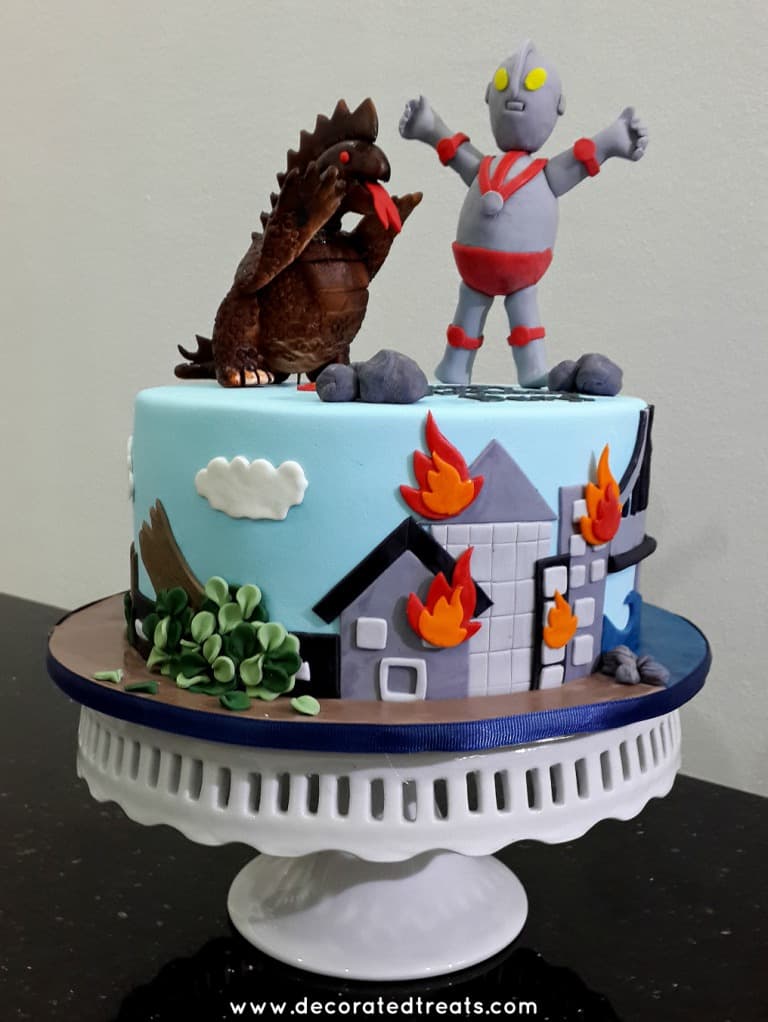
The design of the cake portrays an attempt to capture Ultraman in his bid to save the town from being destroyed by an ugly brown creature.
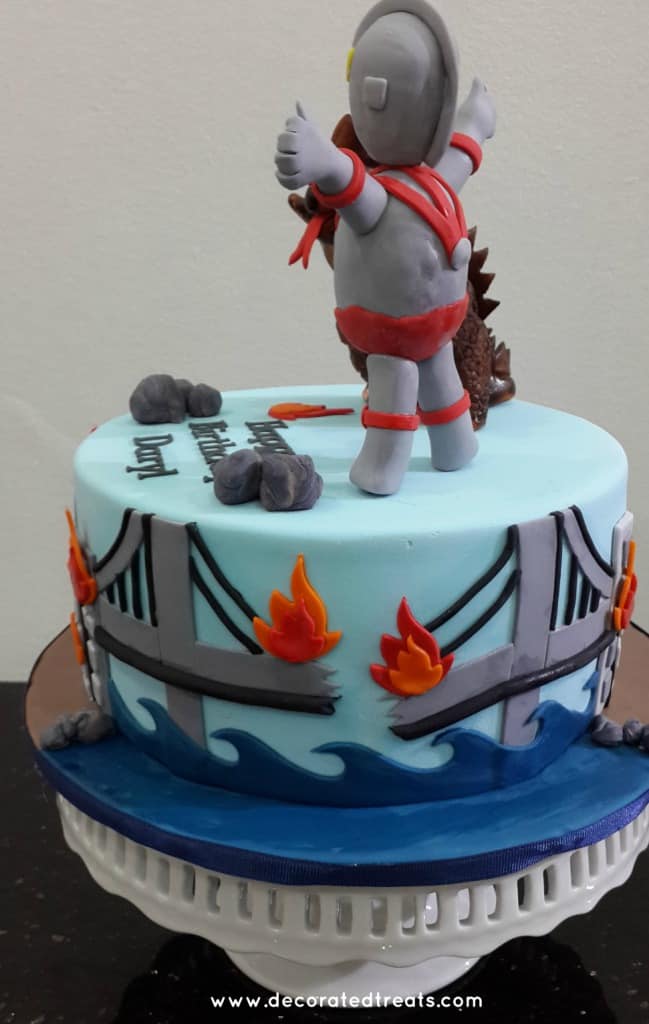
The sides of the cake basically featured 4 different scenes. One was with burning buildings. The second one was with a torn down tree. And the third and fourth were an overturned car and a broken bridge.
On top of the cake were Ultraman and the beast. Despite a lot going on on the cake, it was pretty easy to decorate it. The only time consuming and tricky bit was making the Ultraman figurine and the monster.
I used Styrofoam balls as the base for both the figurines. They don’t take too much time to set this way. Plus they are way lighter than if I were to use fondant throughout.
If you like this cake, you should check out this Marvel Superhero cake, Transformers cake, Star Wars birthday cake, PJ Masks birthday cake and Godzilla cake.
🧾Supplies Required
- Cake – this was a 7 inch round cake and measured approximately 4 inches high. I used my butter pound cake recipe.
- Buttercream – I used buttercream to fill and crumb coat the cake.
- Fondant - The entire cake was covered in fondant and all the deco on the cake were also made of fondant. I used Satin Ice fondant.
- Styrofoam balls - I used these balls for Ultraman’s body and head and the monster’s body.
- Extruder tool - I used this tool for all the rolled fondant strips on the cake particularly the bridge railings.
- Fire cutters - These came in a set of two different sizes. I used them interchangeably with red, orange-yellow fondant to create fire flames all around the cake.
- Oval plunger cutters - I used my tiny oval-shaped ones for the leaves of the broken tree. I formed the leaves out individually in dark green and light green fondant. And then I pinched the pointed ends to form the leaves.
- Square plunger cutters - these were also my small plunger cutters. I used them for the windows for the buildings on the sides of the cake.
- Ocean waves cutter - I used these to make the sea waves under the broken bridge.
- Tappit alphabet cutters in block letters - These were for the birthday message and for the birthday boy’s name.
- Sugar craft knife
- Needle tool - I used this tool to draw lines on the tree trunk.
- Scalloped round cutter set - I used two of the smaller ones to cut out green bushes on the side of the cake (in the overturned car scene).
👩🍳How to Make
Step 1: Make the Ultraman and the Monster Cake Toppers
I started with the Ultraman and the monster figurines first. I made them a few days in advance with styrofoam balls. The balls were covered with fondant that has been mixed with CMC. And then I went on to attach the rest of the body parts to form the figurines. There was a wire going through both figurines. That made it easier to hold them in place on the cake.
I hand-painted the monster in brown food coloring ( I used Wilton Brown color here). I don't have a separate tutorial for these 2 figurines. However, you have any questions, please leave them in the comments section below and I will revert as soon as I can.
Step 2: Prepare the Cake
Next was the cake itself. Once baked and cooled, I levelled and filled it with buttercream. I also crumb coated the cake with buttercream before covering it with light blue fondant.
Step 3: Decorate the Sides of the Ultraman Cake
And then I went on to the decorate on the sides. The sides were basically divided into 4 different scenes. One with a burning building, the other with a fallen down tree, a broken bridge, and an overturned car. I used shortening to attach all the fondant cut-outs of the cake.
The first scene was the burning buildings. The buildings were all cut by hand with the guide of a ruler. And the small square windows on the buildings were cut using my square plunger cutter. The flames were cut using my fire cutter (which is actually a fantasy flower cutter).
Next was the side with the broken bridge. All the grey sections of the bridge were cut by hand with the guide of my ruler. The black strings were piped using my extruder tool fitted with a tiny circle disc. And again, I added the flames on the bridge. The sea waves were cut using my sea waves cutter.
Next was the side with a fallen tree. I cut the tree trunk by hand using my craft knife. And I formed the wood pattern on the trunk using my needle tool. As for the leaves, I cut each leaf individually using my oval plunger cutter.
And I pinched one end to form the leaves. I used 2 different shades of green fondant for the leaves and attached them to the cake with shortening. The clouds were cut by hand using my craft knife.
The final scene was the overturned car. I cut the car freehand with my craft knife and so were the clouds. And I used my round scalloped cutters to cut the green bushes at the end of the road.
Step 4: Decorate the Cake Board
As for the cake board, I used fondant in two different colors to make the scenes above it. For the broken bridge, I used blue fondant and for the rest of the board, I used brown. I used tiny lumps of grey fondant (as stones) to hide the joint between the brown and blue fondant on the cake board. The stones were basically a mixture of black and white fondant. And I left the color slightly marbled on purpose so that it looked more natural for stones.
The monster and Ultraman were the last ones to go on the cake. To ensure food safety, I poked the wires of Ultraman and the monster into lollipop sticks before poking them into the cake.
And that's pretty much my Ultraman cake decorating guide.
Happy Decorating 🙂


Leave a Reply