

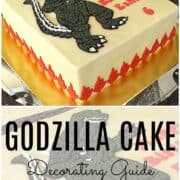
Learn how to make a Godzilla cake with this tutorial and decorating guide. This is a single tier cake covered in butter icing and decorated in buttercream. It is an easy cake with the Godzilla image piped in buttercream and a fairly quick one to make too.
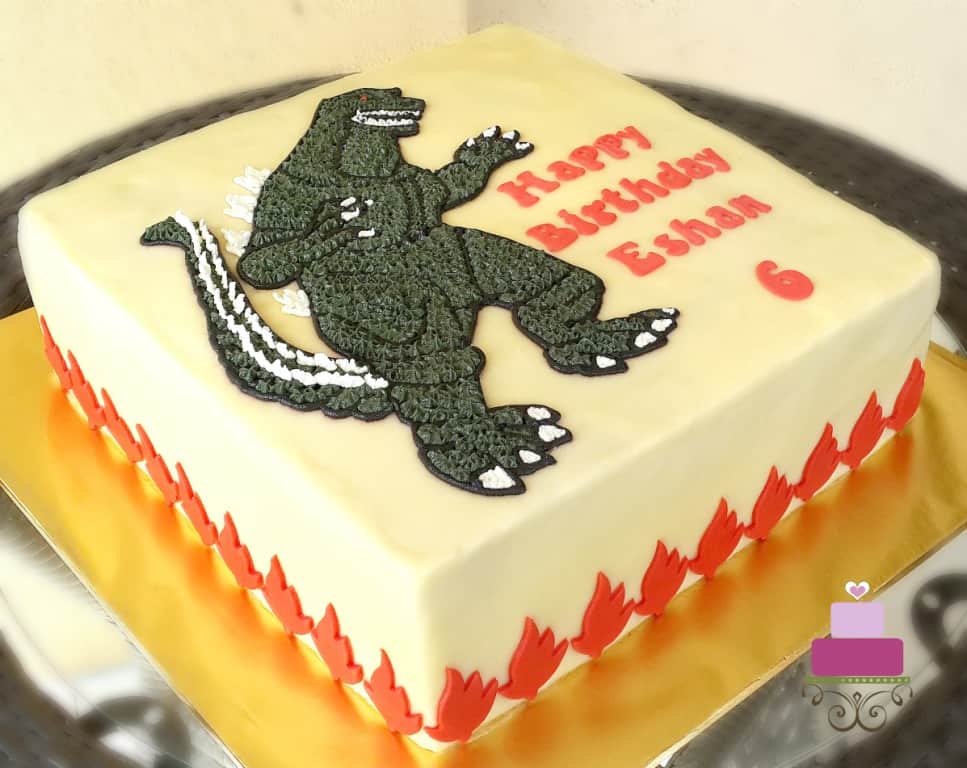
I made this Godzilla cake for a 6 year old boy. This was a last-minute request. And the birthday boy’s mom was very accommodative about the cake design so I agreed to make it. All she wanted was a Godzilla themed cake. Knowing that time was not on my side, she was ok with simple cake design, so long as Godzilla was on it.
The entire cake was decorated in butter icing and the Godzilla image was piped in buttercream. The cake lettering and the decoration on the side are all in fondant. Overall, this was a pretty quick and easy cake to make.
If you like this cake, you should also check out this Ultraman cake, Jake and the Neverland Pirates cake, Lion cake, Lion King cake, airplane cake and Lego Star Wars cake. They make great cake designs for little boys.
🧾Supplies Required
- Cake – This was a 9 inches square cake baked using my butter pound cake recipe. The layers were sandwiched with buttercream and the total height of this cake was approximately 4 inches.
- Buttercream – I used buttercream to fill the cake as well as to crumb coat it.
- Butter Icing – Butter icing is a stiffer version of buttercream and I used this icing to cover the entire cake. The yellow hue on the icing was from the butter and not due to any coloring.
- Fondant – The only fondant used on this cake was for the side deco as well as the wordings. I used the Satin Ice Red fondant. You can also make your own fondant with this homemade fondant recipe or marshmallow fondant recipe.
- Clikstix Groovy Alphabet Cutter – I used these for the birthday message as well as the birthday boy’s name.
- Food colors – I used Wilton Moss Green, Wilton Black and Americolor White to tint my buttercream. All these colors were used for the Godzilla image on the cake.
- Disposable piping bags – These were used to pipe out Godzilla onto the cake.
- Piping tips – I used Wilton round tip number 3 for the outlines of Godzilla's image. Wilton star tip number 18 was to fill the image. And Wilton leaf tip 349 was for the white spiky patterns on Godzilla’s tail. Finally, Wilton round tip number 1 was for the eyes.
- Sugar craft knife and scriber needle tool – these were used mostly for tracing of Godzilla image onto the cake.
- Fantasy flower cutter - I used this for the red flame-like shaped fondant cutouts on the sides of the cake. I am unable to provide any links to purchase this cutter. I have tried searching but cannot seem to find it online anymore 🙁 .
- Godzilla template – This was a paper template that I prepared based on an image I obtained from the internet.
👩🍳How to Make
Step 1: Prepare the Godzilla Template
I started by getting my Godzilla template ready. I did not draw this myself. In fact, I traced it out from the internet and made slight changes to suit my cake.
In doing this, I also made sure the size of the template fitted the size of my cake. Use this guide on how to resize templates for cake decorating. And then I traced the image onto a parchment paper, ready to be used on my cake.
Step 2: Bake the Cake and Cover in Butter Icing
Next was the cake itself. Once baked and cooled down, I leveled the layers, sandwiched them with buttercream and crumb coated them with a thin layer of buttercream.
And then I added a layer of butter icing and smoothed it well all over the cake.
Step 3: Pattern Transfer the Godzilla Image onto the Cake
Next was the fun part, i.e. transferring the Godzilla image on my template to the cake. To do this, I used 3 things – my paper template, sugarcraft knife, and needle tool.
The first order was placing the template in the exact position I wanted it on the cake. Since the cake was covered in butter icing, the template remained well in place with the help of the grease from the butter.
And then the tracing process started. I used my needle tool to mark the outlines first. After that, I followed by my sugar craft knife to mark the remaining lines on the template.
In marking these lines, I literally cut through the template to mark them. That way, I got very clear lines on the cake and was very helpful when piping the outlines later on. I did this for the most part of the template, except for very tiny details like the eyes and other smaller features. These, I drew by hand using my needle tool.
Once the entire template has been transferred, I began the piping work. I started with the outlines using black buttercream and round #3 piping tip.
Step 4: Fill the Godzilla Image with Buttercream
And then I filled the Godzilla design with dark green icing. To achieve the dark green tone, I mixed Wilton Moss Green with a tiny bit of black color.
The Godzilla image was filled using the star piping technique. This is basically piping buttercream using a medium-sized star piping tip to cover the design on the cake.
Since the Godzilla was predominantly dark green in color, once I was done with the dark green piping, the image was almost done.
To finish it off, I used white buttercream fitted with Wilton tip #2 to fill the claws, teeth, and the design on its back. For the design on the tail, I used a leaf tip and piped short upright strokes of buttercream.
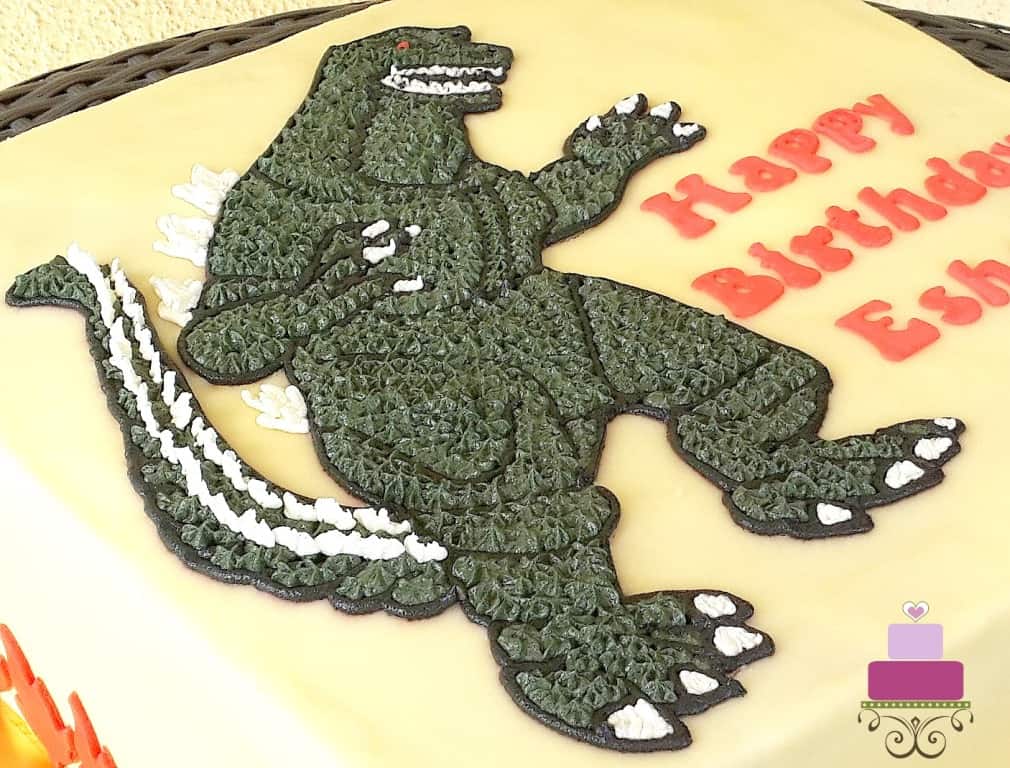
For the Godzilla’s icing, I piped a tiny dot of red icing (using round tip #3). This was followed by a tiny dot of black buttercream in the center (using round tip #1).
With that, the Godzilla image on the cake was complete.
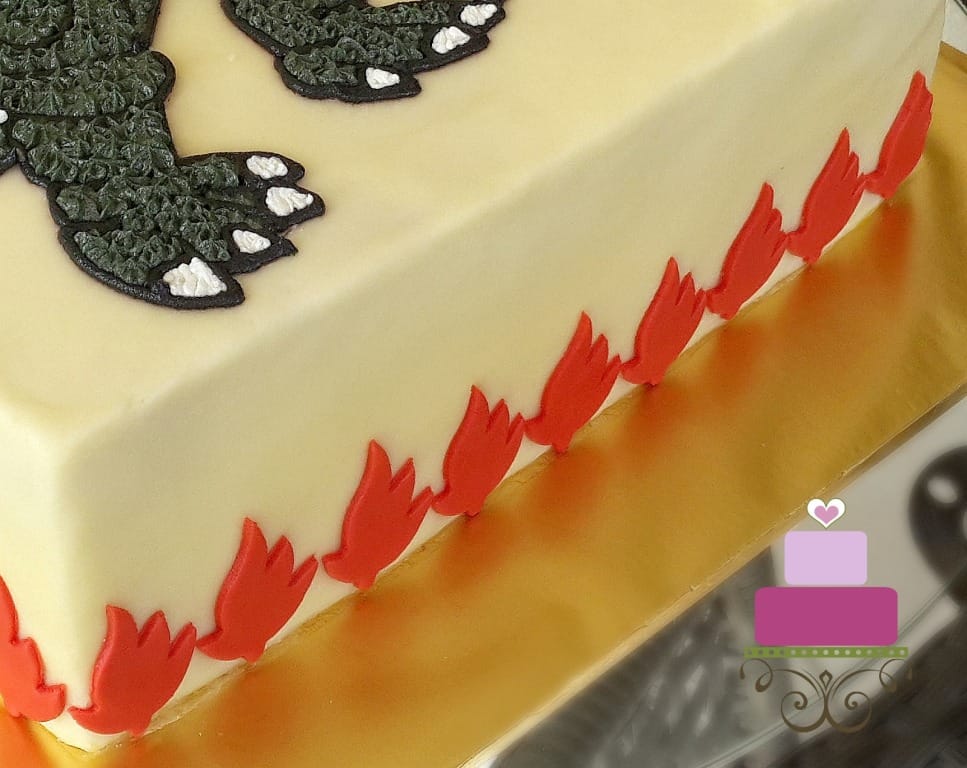
Step 5: Add the Cake Border
For the finishing touches, I used my fantasy flower cutter to cut out the flame-like patterns on the sides of the cake in red fondant.
And then, using the same red fondant, I cut out the birthday message and the birthday boy’s name and placed it on the cake. I did not use any ‘glue’ to stick the fondant pieces onto the cake. The butter in the butter icing covering the cake was sufficient to hold these pieces in place.
And that’s that. A simple Godzilla birthday cake design.
Happy Decorating 🙂


Baking mommy
Hi. Can you share where you got the godzilla template image for transfer to cake?
Priya Maha
Hi Baking Mommy,
I did an image search for Godzilla on the internet. You can try to search for 'godzilla coloring pages'. Hope this helps.