

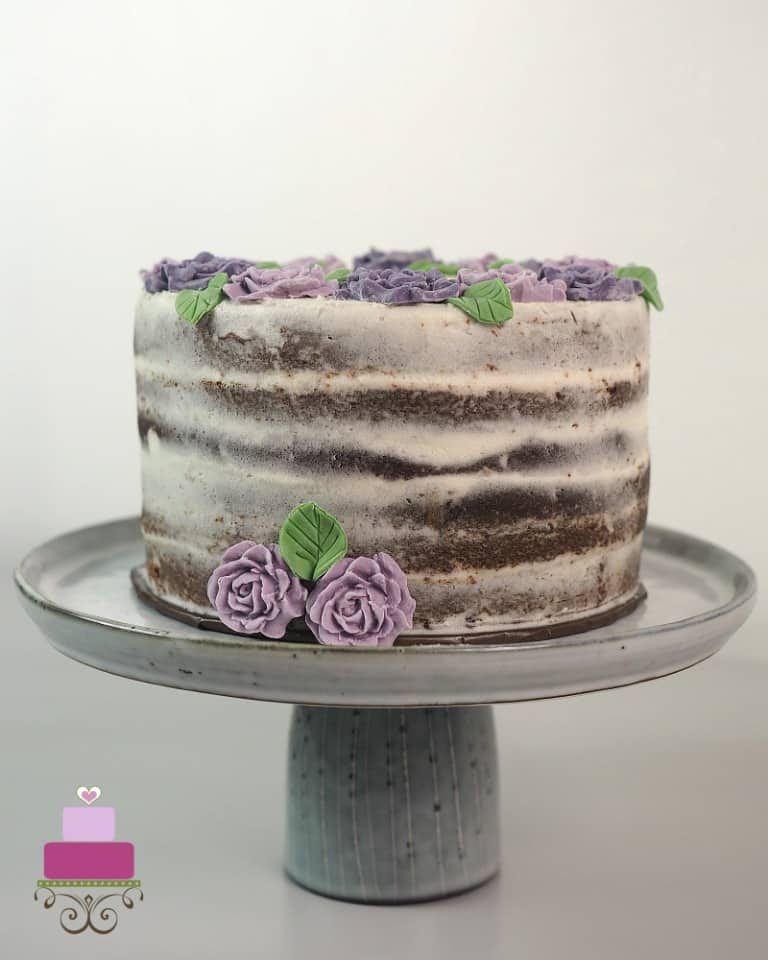
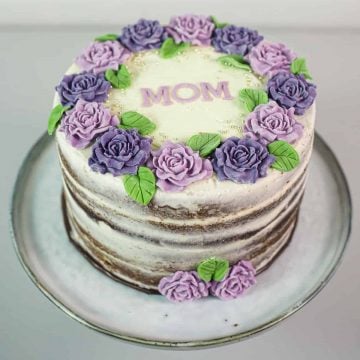
This elegant birthday cake makes a truly elegant cake. It is a simple eggless chocolate cake covered in cream cheese frosting and molded fondant roses in lovely violet tones. The cake is very easy to make and absolutely beautiful.

If you like this cake, you should also check out this 70th birthday cake with flowers, rosette cake, buttercream flowers cake, flower bouquet cake, flower cake with 3D butterflies, flower pot cake and easy Mother's Day cake. They make very pretty floral themed cakes too.
🧾Supplies Required
- Cake – I used my eggless chocolate cake recipe for this project. It was baked it in two 6 inches round cake tins.
- Cream Cheese frosting – I used this to fill the cake layers as well as to cover the cake.
- Serrated knife – I used this to slice each of the 2 layers of cakes into 2 resulting in a total of 4 cake layers for the project.
- Roses silicone mold
- Fondant – This was used for the roses, leaves, and the letters on the cake. I used Satin Ice in white and tinted it into violet and green.
- Food coloring – Wilton Violet, Wilton Pink, Wilton Juniper Green
- Teardrop plunger cutter – this was used to make the fondant leaves on the cake.
- Cornstarch – I used cornstarch to dust my silicone mold. You can also use icing sugar for dusting.
- Needle scriber tool– This was used to make the veins on the leaves.
- Sugar craft knife
- FMM Block Letters cutter set
- Silver dragees
- Icing scraper (tall)
👩🍳How to Make
Step 1: Bake and Frost the Cake
I started by baking the cake in 2 separate cake tins. Once baked, I leveled the cakes and then sliced each cake into 2 layers. That means I had 4 layers of cake in total.
I sandwiched all the four layers with cream cheese frosting and covered the top and sides with the same cream cheese frosting. To achieve the ‘scraped’ icing look on the sides of the cake, I used my tall icing scraper and scraped the icing on the sides of the cake (while turning the cake on a turntable) as close as possible to the cake. And then I leveled the top but did not scrape the icing off.
Step 2: Make the Molded Fondant Flowers
Once the background was done, I made the flowers. The flowers were made using fondant and rose silicone mold.
The key to using the mold is to dust it well with powdered sugar or cornstarch. I chose cornstarch. I sprinkled the cornstarch liberally on it and tapped it on the table a couple of times to make sure the flour had a chance to fall into all the tiny nooks and corners of the rose mold.
And then, I turned it over, and tapped it on the table lightly to remove all the excess cornstarch, leaving just a fine layer of the flour in. Here is my comprehensive guide on how to use silicone molds for cake decorating.
After that, I pinched some of my fondant, rolled it smooth, and then pressed it into the mold. Make sure to press it in firmly as you want the fondant to go it to all the nooks and corners of the rose mold. This is important to ensure you get complete rose petals on your fondant.
Once firmly pressed, remove any excess bulges on the top and the sides of the mold before turning it over and carefully pushing the rose out using your fingers from the back of the mold.
You may need to twist and bend it to ease the flower out, and since it’s made of silicone, all the twisting and bending is perfectly ok with it.
Once the rose is out, place it on a cake board and allow it to sit for a while before brushing off all the cornstarch that is visible on it. Brushing the flowers immediately after easing them out could leave the brush marks on the flowers as the fondant is still soft. Resting for a few minutes allows the flowers to set a little and helps in avoiding the brush marks.
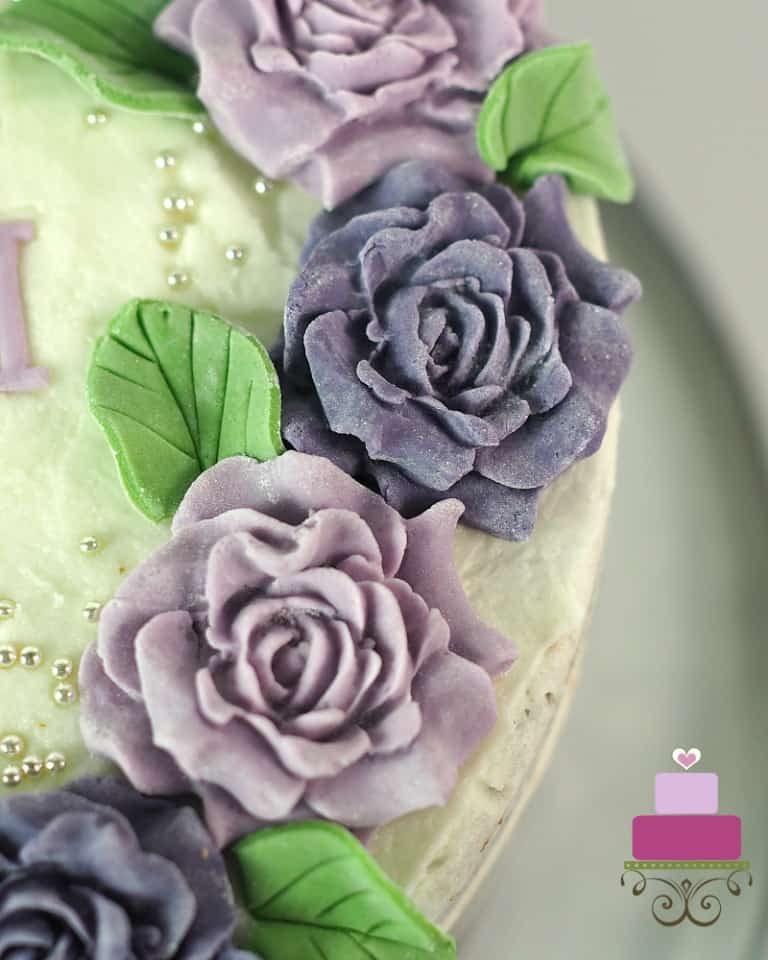
I made my roses in 2 tones of violet. To achieve the tone of violet, I used a mix of Wilton Violet and Pink. I started with the darker shade and then for the lighter ones, I simply added some white fondant to it to make it lighter.
Step 3: Make the Rose Leaves
For the leaves, I used the largest of my teardrop plunger cutter and cut the leaves out in fondant (white tinted with Wilton Juniper Green color). I then used my needle tools to mark the veins on the leaves and then cut the rounded edges off with my sugar craft knife before attaching them to the cake.
Step 4: Assemble the Cake
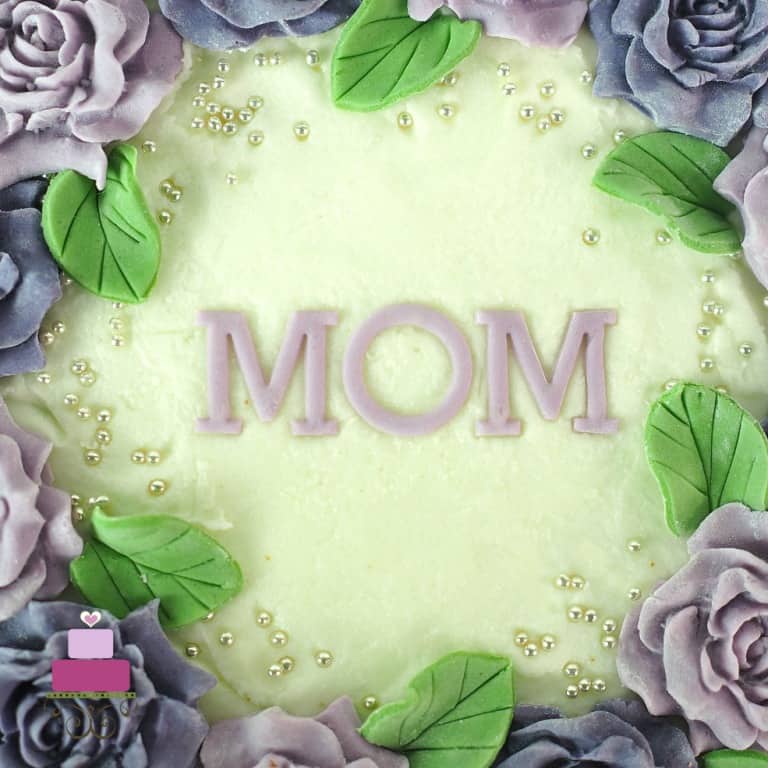
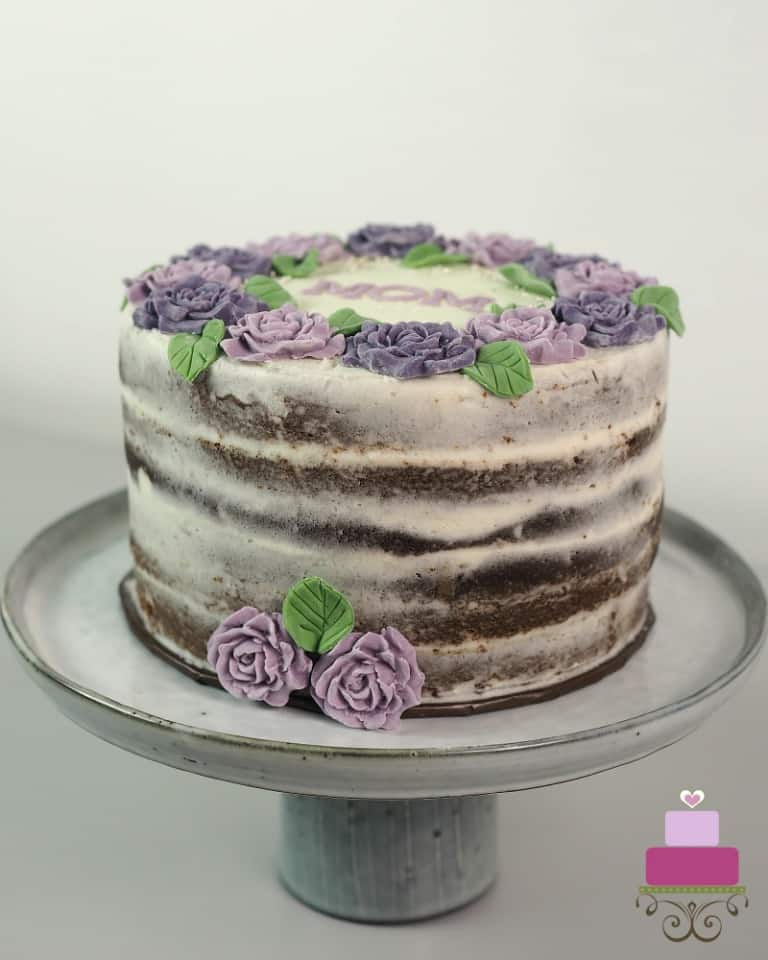
In assembling the cake, I started by arranging the flowers in alternate tones and then sprinkled some silver dragees on the inside of the roses circle. And then I added the leaves. The roses and leaves were attached with little dots of cream cheese frosting to held them stick to the cake.
I also attached 2 roses and a leaf on the front side of the cake, right at the bottom.

Step 5: Add the Cake Lettering
After that, I cut out the word “MOM” using my FMM Block letters alphabet cutters. I used the same shade of violet I used for the flowers. I rolled the fondant as thin as possible, and then let it sit for a few minutes to allow it time to set slightly before using it to cut the letters out.
Letting the fondant dry out a little before cutting helped and I was able to get the letter out perfectly. I attached these right in the middle of the cake.
And with that, my elegant birthday cake was ready.
❤️More Cake Designs You Will Love


Do you like this tutorial? Please leave a 5-star ⭐⭐⭐⭐⭐rating in the recipe card below and consider a review further down this page. I would love to hear from you. Thank you!
📖Recipe
Elegant Birthday Cake
Equipment
- Teardrop plunger cutter (to make the fondant leaves on the cake.)
- Cornstarch (to dust your silicone mold. You can also use icing sugar for dusting.)
- Needle scriber tool (to make the veins on the leaves.)
- Sugar craft knife
- FMM Block Letters cutter set
- Serrated knife (To slice each of the 2 layers of cakes into 2 resulting in a total of 4 cake layers for the project.)
- Roses silicone mold
- Icing scraper (tall)
For best results, use the metrics measurements. US customary measurements have not been tested and are only meant for guide.
Ingredients
- 300 g all purpose flour
- 30 g cocoa powder
- 1 ½ teaspoon baking soda
- ½ teaspoon salt
- 280 g granulated sugar
- 250 ml oil
- 240 ml hot water
- 120 ml milk
- ½ tablespoon vinegar
- 2 tablespoon instant coffee optional
- 2 teaspoon vanilla extract
Frosting and Decoration
- Cream Cheese frosting
- Fondant (Satin Ice white tinted in violet and green)
- Food coloring – (Wilton Violet, Wilton Pink, Wilton Juniper Green)
- Silver dragees
- Cornstarch (for dusting)
Instructions
Cake
- Grease and flour two 6 inches round cake tins or grease and line them with parchment paper.
- Mix instant coffee powder into hot water and leave aside.
- Sift the flour, cocoa powder, baking soda and salt into a large bowl. Add castor sugar and mix well.
- Make a well in the center and pour in all the wet ingredients (oil, water + coffee, milk, vinegar and vanilla extract).
- Using a hand whisk, mix all ingredients until the batter becomes smooth and free of lumps.
- Divide the mixture into prepared tins and bake at 175 degrees Celsius for about 30 minutes until the toothpick entered in the center of the cake comes out clean.
- Remove cakes from oven and let them rest in the pans for 2 minutes before turning them over onto wire racks. Let the cakes cool completely before frosting them.
Frosting the cake
- Once the cake are baked and have cooled down, level and slice each cake into 2 layers.
- Sandwich all the four layers with cream cheese frosting and cover the top and sides with the same cream cheese frosting. To achieve the ‘scraped’ icing look on the sides of the cake, use a tall icing scraper and scrape the icing on the sides of the cake (while turning the cake on a turntable) as close as possible to the cake. And then level the top but do not scrape the icing off.
Flowers
- Next, make the flowers. You will need a rose silicone mold.
- The key to using the mold is to dust it well with icing sugar or cornstarch. Sprinkle the cornstarch liberally on the mold and tap it on the table a couple of times to make sure the flour gets a chance to fall into all the tiny nooks and corners of the rose mold. And then, turn it over, and tap it on the table to remove all the excess cornstarch, leaving just a layer of the flour dust in it.
- After that, pinch some fondant, flatten it and then press it into the mold. Make sure to press it in firmly as you want the fondant to go it to all the nooks and corners of the rose mold. This is important to ensure you get complete rose petals on your fondant. Once firmly pressed, remove any excess bulges on the top and the sides of the mold before turning it over and carefully pushing the rose out using your fingers from the back of the mold. You may need to twist and bend it to ease the flower out, and since it’s made of silicone, all the twisting and bending is perfectly ok with it.
Completing the flowers
- Once the rose is out, place it on a cake board and allow it to sit for a while before brushing off all the cornstarch that is visible on it. Brushing the flowers immediately after easing them out could leave the brush marks on the flowers as the fondant is still soft. Resting for a few minutes allows the flowers to set a little and helps in avoiding the brush marks.
- Make the roses in 2 tones of violet. Start with the darker shade and then for the lighter ones, simply add some white fondant to it to make it lighter.
The rose leaves
- For the leaves, use the teardrop plunger cutter and cut the leaves out in fondant (white tinted with Wilton Juniper Green color). Next, use the needle tools to mark the veins on the leaves and then cut the rounded edges off with a sugar craft knife before attaching them to the cake.
Assembling the cake
- In assembling the cake, start by arranging the flowers in alternate tones and then sprinkle some silver dragees on the inside of the roses circle. And then add the leaves. Attach the roses and leaves with little dots of cream cheese frosting to held them stick to the cake.
- To complete the flowers decoration, attach 2 roses and a leaf on the front side of the cake, right at the bottom.
Wordings on the cake
- Cut out the word “MOM” using the FMM Block letters alphabet cutters in the same shade of violet fondant used for the flowers.
- Roll the fondant as thin as possible, and then let it sit for a few minutes to allow it time to set slightly before using cutting the letters out. Letting the fondant dry out a little before cutting helps to get the letter out perfectly. Attach these right in the middle of the cake. And that completes the cake decoration.

Leave a Reply