

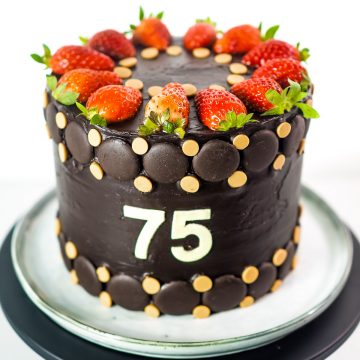
Looking for 75th birthday cake idea? Here is an easy design you can make. This is a round chocolate cake covered in chocolate ganache and decorated with fresh strawberries, chocolate buttons and butterscotch studs. It's delicious, quick and easy to make.
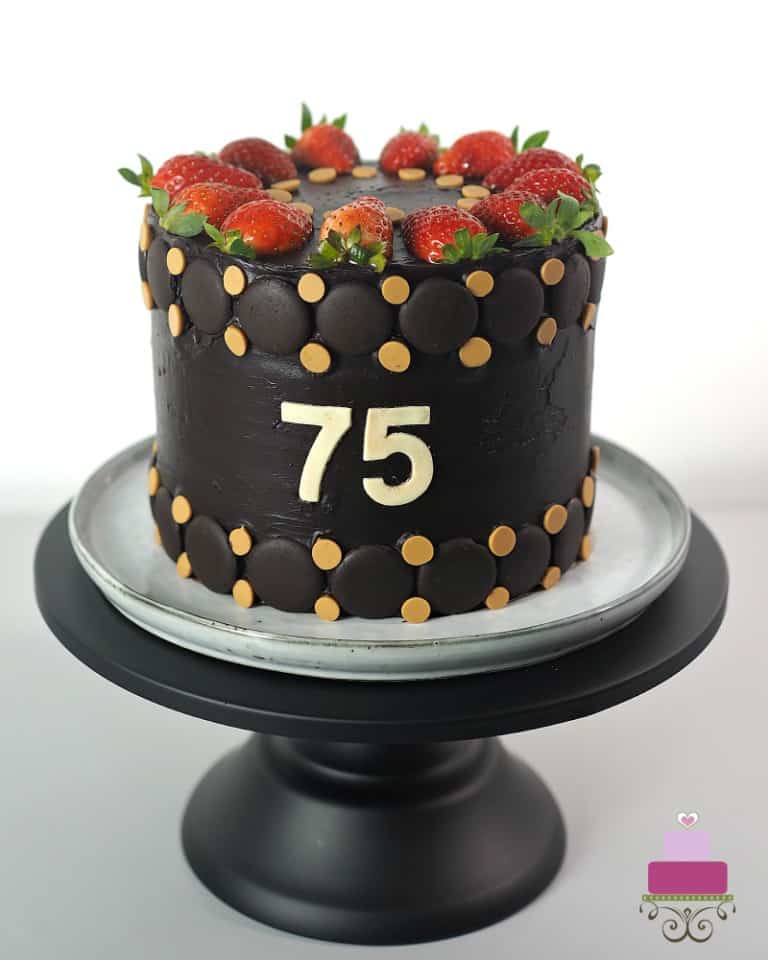
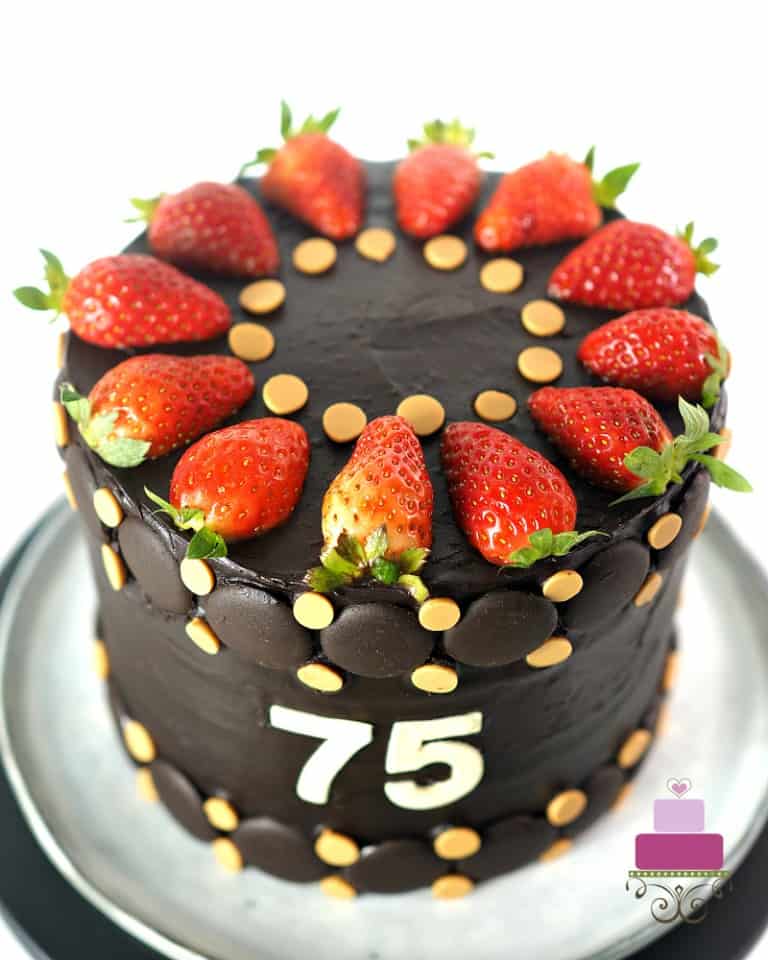
This is a 3 layers chocolate cake, filled and covered in dark chocolate ganache. The top of the cake is decorated with fresh strawberry halves and butterscotch chips studs.
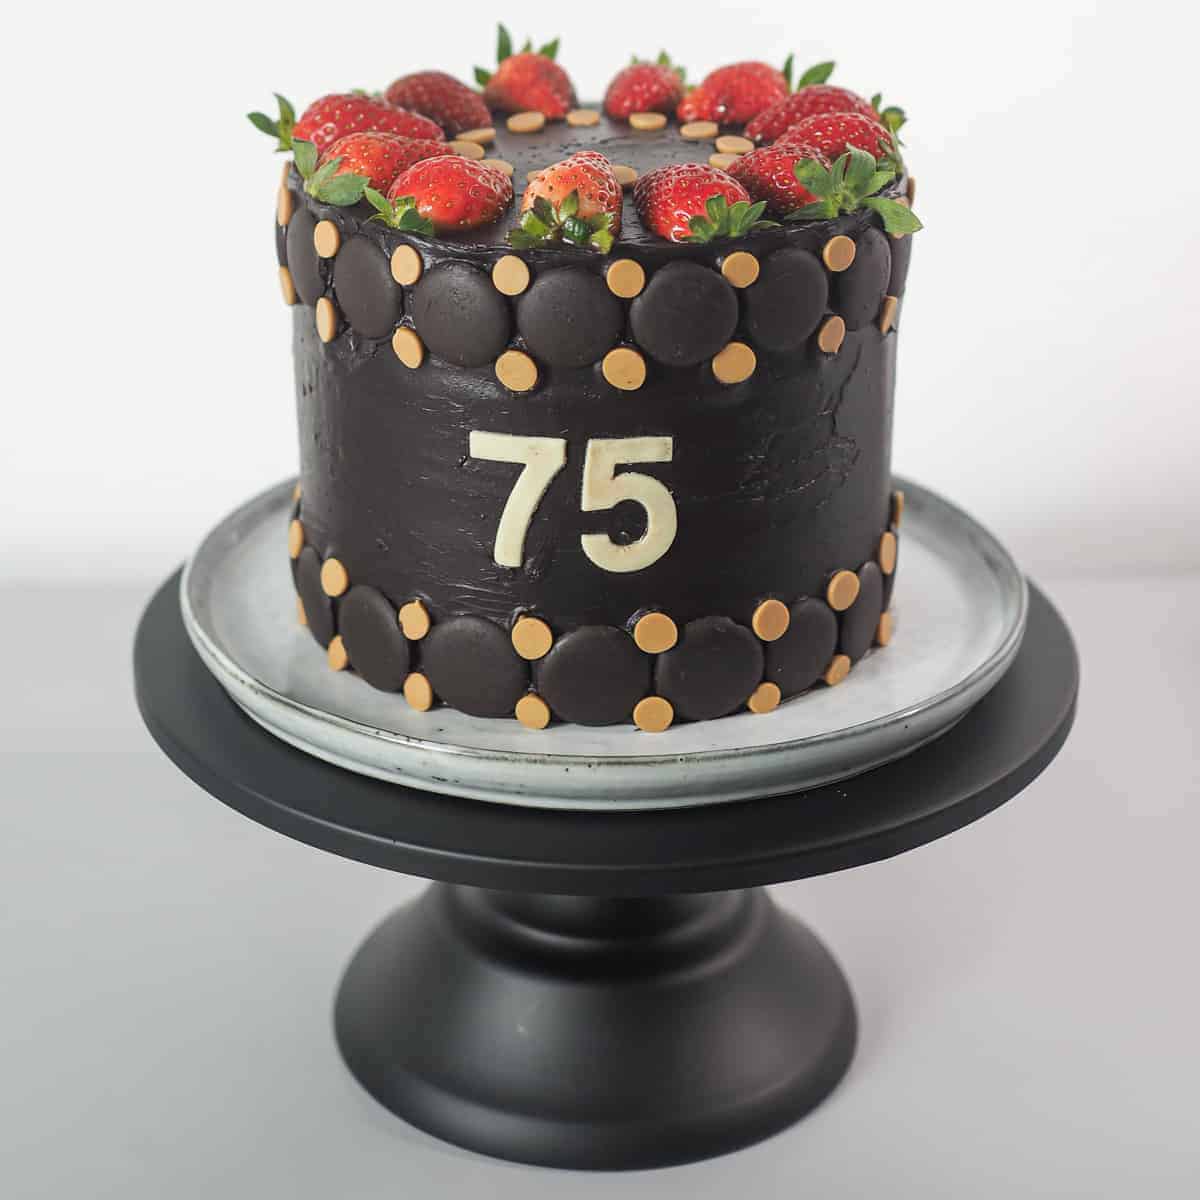
The side decoration for this chocolate birthday cake is a simple design of dark chocolate buttons and butterscotch chips studs arranged in 2 rows around the cake, one at the top edge and another at the bottom.
The front side of the cake is decorated with the numbers 75 and these were cut in white fondant.
If you like this cake, you should also check out this 70th birthday cake with flowers, black and silver 60th birthday cake, tool cake design, puppy dog cake, guitar cake design, elegant birthday cake with molded fondant roses, flower pot cake and laptop cake.
🧾Supplies Required
- Cake - The cake was baked in 6 inch round cake tins. I used my chocolate cake recipe for the cake, and used the measurements for 5 eggs. I baked a total of 3 layers of cakes.
- Chocolate ganache - The cake was filled and covered with ganache. I used a ratio of 2:1, the 2 parts being dark chocolate and the 1 part being the cream.
- Dark chocolate buttons - I purchased these from a local cake decorating shop.
- Butterscotch chips - These were purchased from a local cake decorating supplies shop too.
- Fondant - I used a tiny bit of fondant here for the numbers 7 & 5. I used Satin Ice fondant in White and added Wilton ivory food color to it.
- Number cutters - These were used to cut out the numbers 7 & 5 for the cake.
- Icing scraper and spatula - These tools were for applying the ganache on the cake as well as for smoothing the icing.
- Strawberries
👩🍳How to Make
Step 1: Bake the Cake
I started by baking the cakes. You can refer to the instructions for mixing the cake batter in my chocolate pound cake recipe. I divided the batter into 3 cake tins and once the cake were baked, I cooled at room temperature for about 30 minutes and them wrapped them in cling wrap and refrigerated them to cool them down faster.
The wrap helps the cakes from drying out in the refrigerator.
Step 2: Make the Ganache and Frost the Cake
While waiting for the cakes to cool down, I prepared the ganache. And again, since it needs time to thicken, I placed it in the fridge too, to fasten the cooling process.
Once the cakes have cooled down completely, I unwrapped them and leveled the tops. And then I sandwiched and covered the top and sides with ganache too. My ganache, at the ratio of 2 parts chocolate and 1 part cream was in a pipeable consistency and therefore still very soft. To help with smooth sides, I placed the cake in the fridge to chill a bit before giving it one last final smoothing.
Step 3: Add the Chocolate Buttons and Butterscotch Chips
Once that was done, I attached the chocolate buttons and the butterscotch chips. I started with the bottom layer and added the dark compound buttons all around the cake before adding the butterscotch chips in between the buttons.
And when adding the chips, I poked the pointed ends into the frosting to make use of the flat bottoms. That way, I had nice flat round studs all around the cake.
Once the bottom was completed, I moved to the top edge. Again, I started with the dark buttons and then completed with the butterscotch chips.

Step 4: Add the Numbers 7 and 5 for the 75th Birthday Cake Design
And then I added the numbers 7 & 5 for the 75th birthday. There was not much space on the birthday cake for any other wordings. So I decided to go with just the numbers. Again, I placed the cake in the fridge to get the ganache to set a little.
Adding the fondant numbers onto a soft ganache cake is not a good idea especially if you don't get the cutouts placed correctly in the first attempt. So I choose to refrigerate the cake until the ganache has hardened and then attached the numbers. No special glue was necessary, the fondant stayed well in place on the ganache.
Step 5: Attach the Strawberries
Next to go on my dad's 75th birthday cake were the strawberries. I selected a total of 6 strawberries that were as similar as possible in size. I then cut each into half. To ensure the fruits were well spaced on the birthday cake top, I started by adding 2 exactly on the opposite of each other (in a 12 o'clock and 6 o'clock position).
Then I added another 2, in between the earlier 2 pieces (at 3 o'clock and 9 o'clock position). At this point, I had 4 pieces on the cake, each in a quarter position on the cake. Next, I added 2 pieces of strawberries in between each quadrant. That way, it was easier for me to space the fruits evenly on the cake.
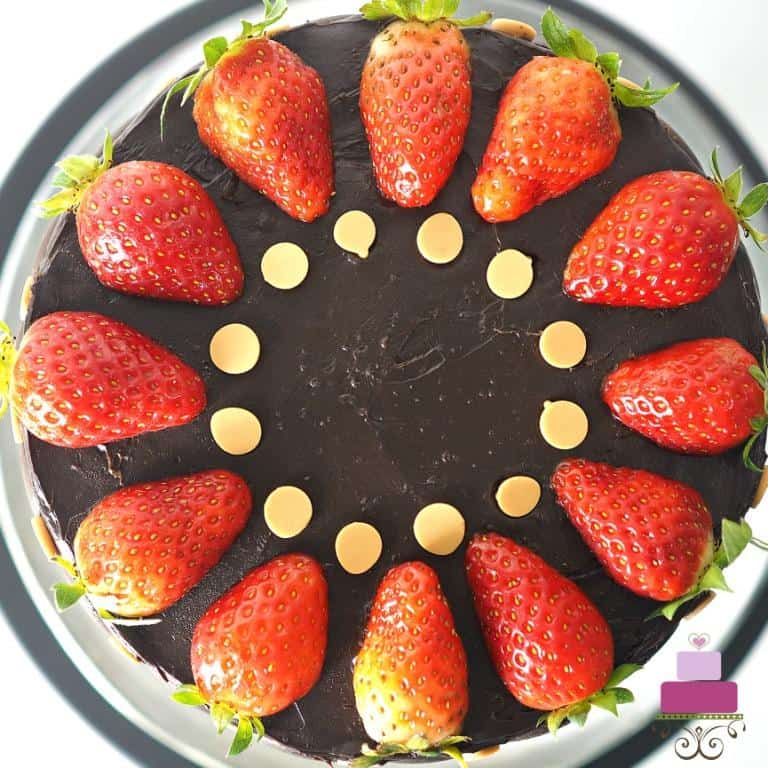
For the final touch on my dad's 75th birthday cake, I added one butterscotch chip each in between each strawberry half on the cake. And with that, the chocolate birthday cake was complete.
❤️More Designs You Will Love


Do you like this tutorial? Please leave a 5-star ⭐⭐⭐⭐⭐rating in the recipe card below and consider a review further down this page. I would love to hear from you. Thank you!
📖Recipe
75th Birthday Cake
Equipment
- Numbers Cutter
- Icing scrapper and palette knife
For best results, use the metrics measurements. US customary measurements have not been tested and are only meant for guide.
Ingredients
- 300 g butter
- 300 g granulated sugar
- 275 g self-raising flour
- 25 g cocoa powder
- 5 eggs
- 75 ml milk
- ¼ teaspoon salt
- ¾ teaspoon baking powder
- ¾ teaspoon vanilla extract
Frosting and Decoration
- Chocolate Ganache
- Chocolate Buttons
- Butterscotch Chips
- Strawberries
- Fondant
Instructions
Baking the cakes
- Preheat oven to 170°Celsius.
- Beat butter and castor sugar till soft and creamy. Add eggs, one at a time, beating well after each addition.
- In a separate bowl, sift flour, cocoa powder, baking powder and salt 3 times. Fold in the sifted ingredients into the creamed mixture alternately with milk, starting and ending with flour.
- Finally add vanilla extract and combine well.
- Pour the batter into three well greased and floured 6-inches round cake tins. Level the tops and bake the cakes for 40 to 45 minutes or until a skewer inserted in the center of the cakes come out without any wet batter.
Chocolate Ganache
- While waiting for the cakes to cool down, prepare the ganache. Since it needs time to thicken, place the frosting in the fridge fasten the cooling process.
- Once the cakes have cooled down completely, level the tops. Remove the ganache from the fridge. Fill each cake layer with a thin layer of icing and stack all the 3 cake layers on top of one another.
- Next, use the remaining ganache to cover the top and sides of the cake. If the ganache is too soft, place the cake in the fridge after covering it. It will be easier to smooth the icing when it is slightly firm.
- Smooth the sides and top of the cake with an icing scraper.
Cake Decoration - Chocolate Buttons and Butterscotch Chips
- Once the cake is fully covered with smooth icing, attach the chocolate buttons and the butterscotch chips. Start with the bottom layer and add the dark compound buttons all around the cake before adding the butterscotch chips in between the buttons. And when adding the chips, poke in the pointed ends into the frosting to make use of the flat bottoms. That way, you will get nice flat round studs all around the cake.
- Once the bottom is completed, move to the top edge. Again, start with the dark buttons and then complete with the butterscotch chips.
Adding the numbers 7 and 5 for the 75th Birthday Cake Design
- Next add the numbers 7 & 5 for the 75th birthday. For easy attaching, place the cake in the fridge to allow the ganache to set. It will be easier to attach the fondant numbers when the ganache is set rather than when it is soft.
- No special glue is necessary, the fondant will stay well in place on the ganache.
Attaching the Strawberry Halves
- Select a total of 6 strawberries that were as similar as possible in size. Cut each fruit into half. To ensure the fruits were well spaced on the birthday cake top, I started by adding 2 exactly on the opposite of each other (in a 12 o'clock and 6 o'clock position).
- Then add another 2, in between the earlier 2 pieces (at 3 o'clock and 9 o'clock position). At this point, you will have 4 halves of the fruits on the cake, each in a quarter position on the cake. Next, add 2 pieces of strawberries in between each quadrant. This way, the fruits will be evenly spaced on the cake top.
- For the final touch, add one butterscotch chip each in between each strawberry half on the cake.
Nutrition
Happy Decorating 🙂

Leave a Reply