

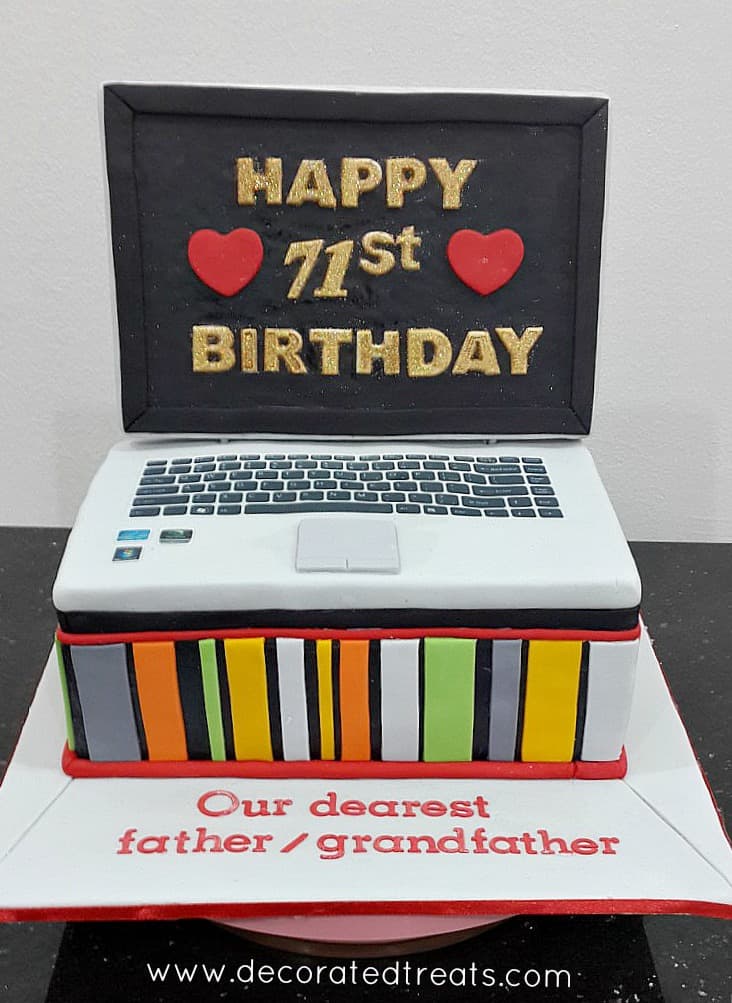
Learn how to make an easy laptop cake with this decorating tutorial. This 3D computer cake is shaped like a laptop and comes complete with an edible keyboard. It is easy to make and is a perfect idea for anyone looking for a computer themed cake design.
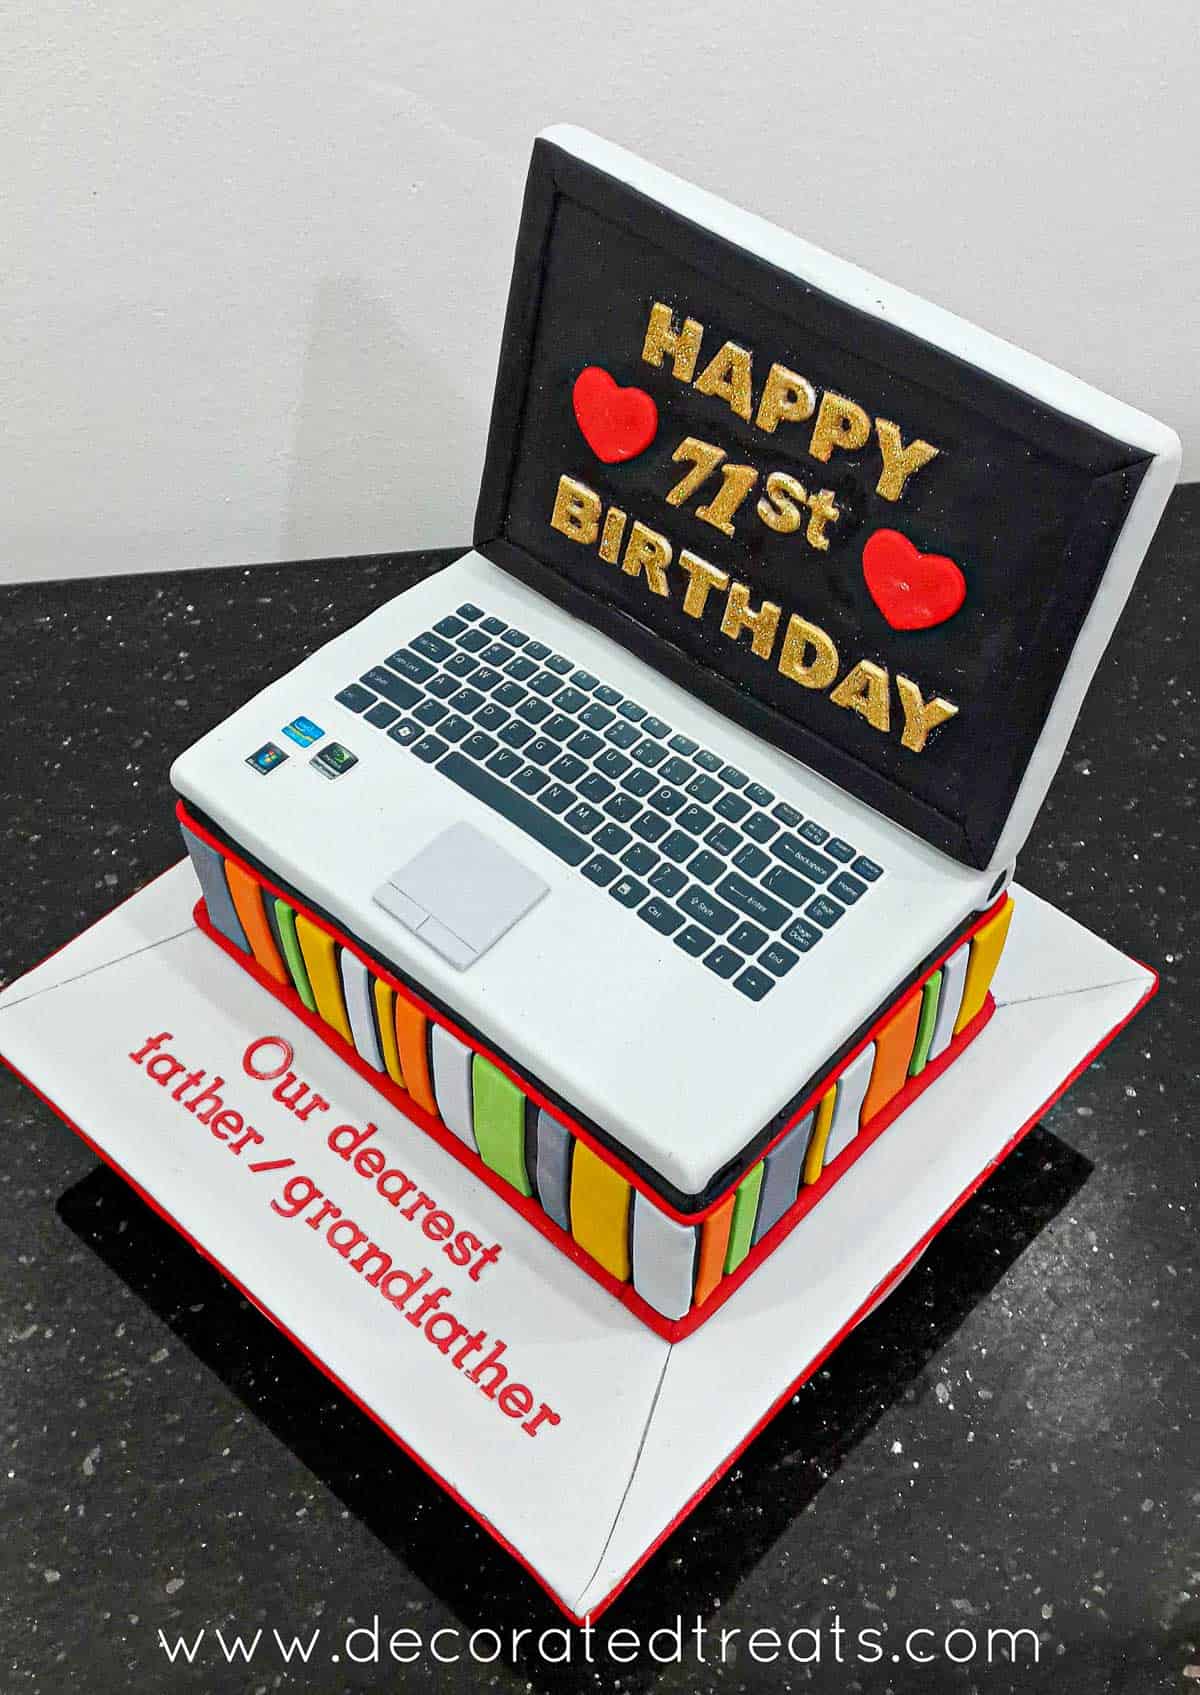
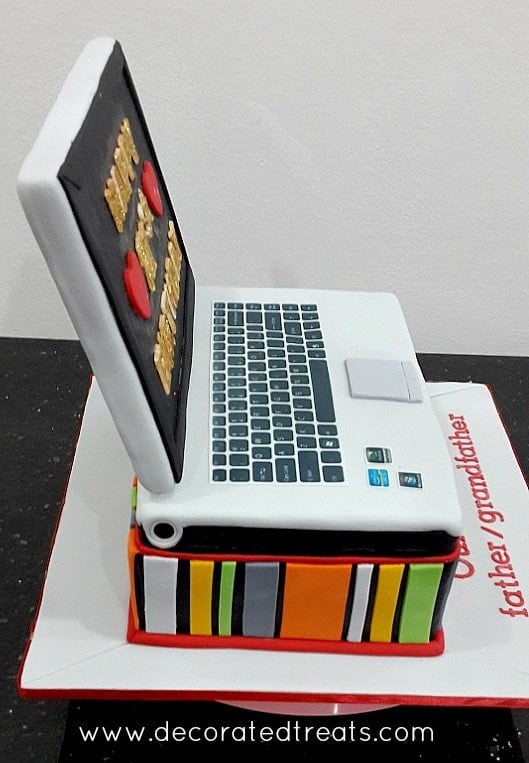
This is a rectangle cake measuring approximately 10 inches by 6 inches. The computer screen is a flat styrofoam dummy covered in fondant and attached to the cake with skewers at the bottom.
The keyboard and the 3 logos on the side below the keyboard are all edible images which I ordered from a local edible images shop.
If you like this cake, also check out this Louis Vuitton cake with edible handbag toppers, black and silver 60th birthday cake, open book cake design, tools birthday cake, 75th birthday cake idea and this Nissan GTR car birthday cake.
🧾Supplies Required
- Cake – the cake measured 10 inches by 6 inches rectangle. I have a cake pan in that measurement, so I just baked 2 layers of cake in it. Each layer was approximately 2 inches high so when stacked, the cake was close to 4 inches high. I used my butter pound cake recipe for the cake.
- Buttercream – I used buttercream to fill the cake layers and crumb coat the cake.
- Fondant
– The whole cake was covered in fondant. I used Satin Ice fondant in white, black and orange and mixed food coloring into white fondant for the rest of the colors on the cake.
- Styrofoam sheet – I used this for the laptop screen. I purchased the foam uncut from a local stationary shop and cut out a rectangle piece for the computer screen.
- Edible Image – I used an edible image for the laptop keyboard. I downloaded the image off the internet and ordered a print of it from a local edible images printing vendor.
- Glitter dust – I used gold glitter dust for the “Happy 71st Birthday” wordings on the cake.
- Shortening – I used shortening as the glue for the entire project.
- Skewers – I used food-grade wooden skewers to attach the laptop screen to its body.
- Alphabet cutters – I used 2 different types of letter cutters on this cake, one is a Clikstix cutter while the other one (smaller font) is an FMM cutter
- Gum paste
👩🍳How to Make
Step 1: Order the Edible Images
If you are not printing your own images, order them a few days in advance so that they reach you on time. I ordered mine one week in advance.
Step 2: Make the Laptop Screen
I also prepared the laptop screen in advance. I measured and cut out the Styrofoam and covered it with white fondant. And then I cut out a rectangle piece of black fondant and attached to one side of the Styrofoam.
I then cut out additional strips of black fondant and attached a frame for the black screen. After that, I added the wordings on the cake and the 2 large red hearts.
Step 3: Bake the Cake and Cover with Fondant
Next was the cake itself. Once baked, I levelled and filled and crumb coat it with buttercream. Then I covered it with black fondant. And then, with the help of a skewer, I marked a horizontal line all around the cake to separate the laptop and the striped base the laptop was sitting on.
I then rolled a piece of white fondant, covered the top of the cake, trimming it off just slightly after the top edge of the cake.
Step 4: Decorate the Cake
And then I completed the colored strips all around the cake. Next, I rolled my red fondant and attached it all around the cake, both at the top and bottom of the colored strips.
And before placing the edible image keypad on the cake, I attached the screen first so that I could estimate the right placing for the keyboard and the rest of the images on the keyboard.
Finally, I added the birthday message on the cake board. And the cake was ready.
And that was how I made my laptop cake.
Happy Decorating 🙂


RoseMarie
Hi i want to do this lap top cake for my Husbands 80th birthday but Im a little confused on the top of the cake on how you did it is it the cake or is it styrofoam sitting on top of the cake
Thank you in advanced for your help
Priya Maha
Hi RoseMarie,
Only the screen is styrofoam, the rest is all cake. For the body of the laptop (which is made of cake), I covered it with black fondant. And then, with the help of a skewer, I marked a horizontal line all around the cake to separate the laptop and the striped base the laptop was sitting on.
I then rolled a piece of white fondant, covered the top of the cake (for the laptop body), trimming it off just slightly after the top edge of the cake.
Hope this helps.
Noreen
Hi how did you add the screen to the base of the cake please?
Priya
Hi Noreen,
I attached the screen with wooden skewers. I poked one end of the skewers to the bottom of the screen and the other ends to the base of the cake.