

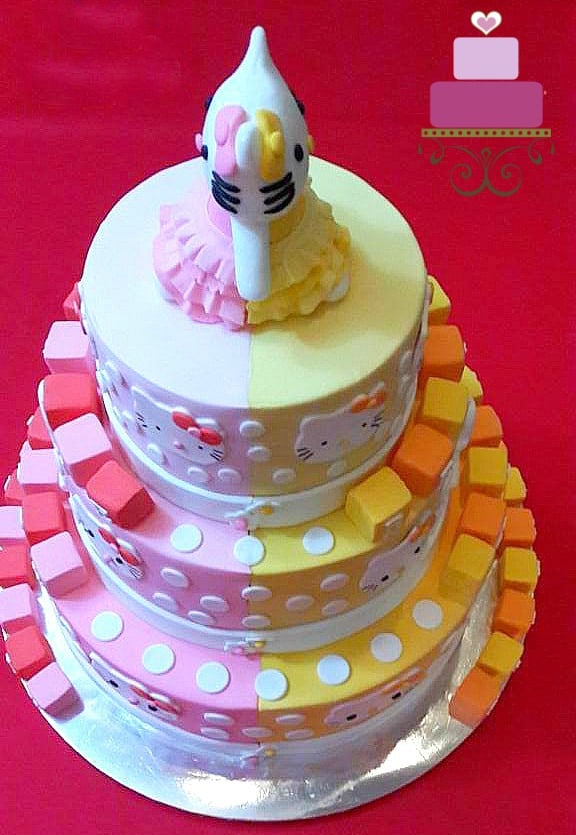
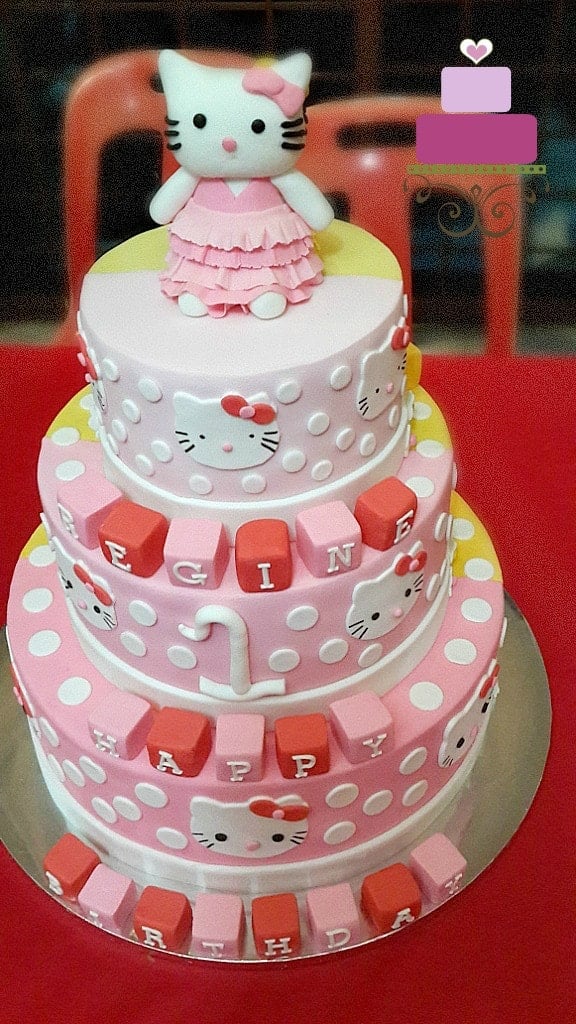
I made this cute Hello Kitty cake for a little girl's 1st birthday celebration. It is a dual colored fondant cake with a cute handmade Hello Kitty topper also in dual colors.
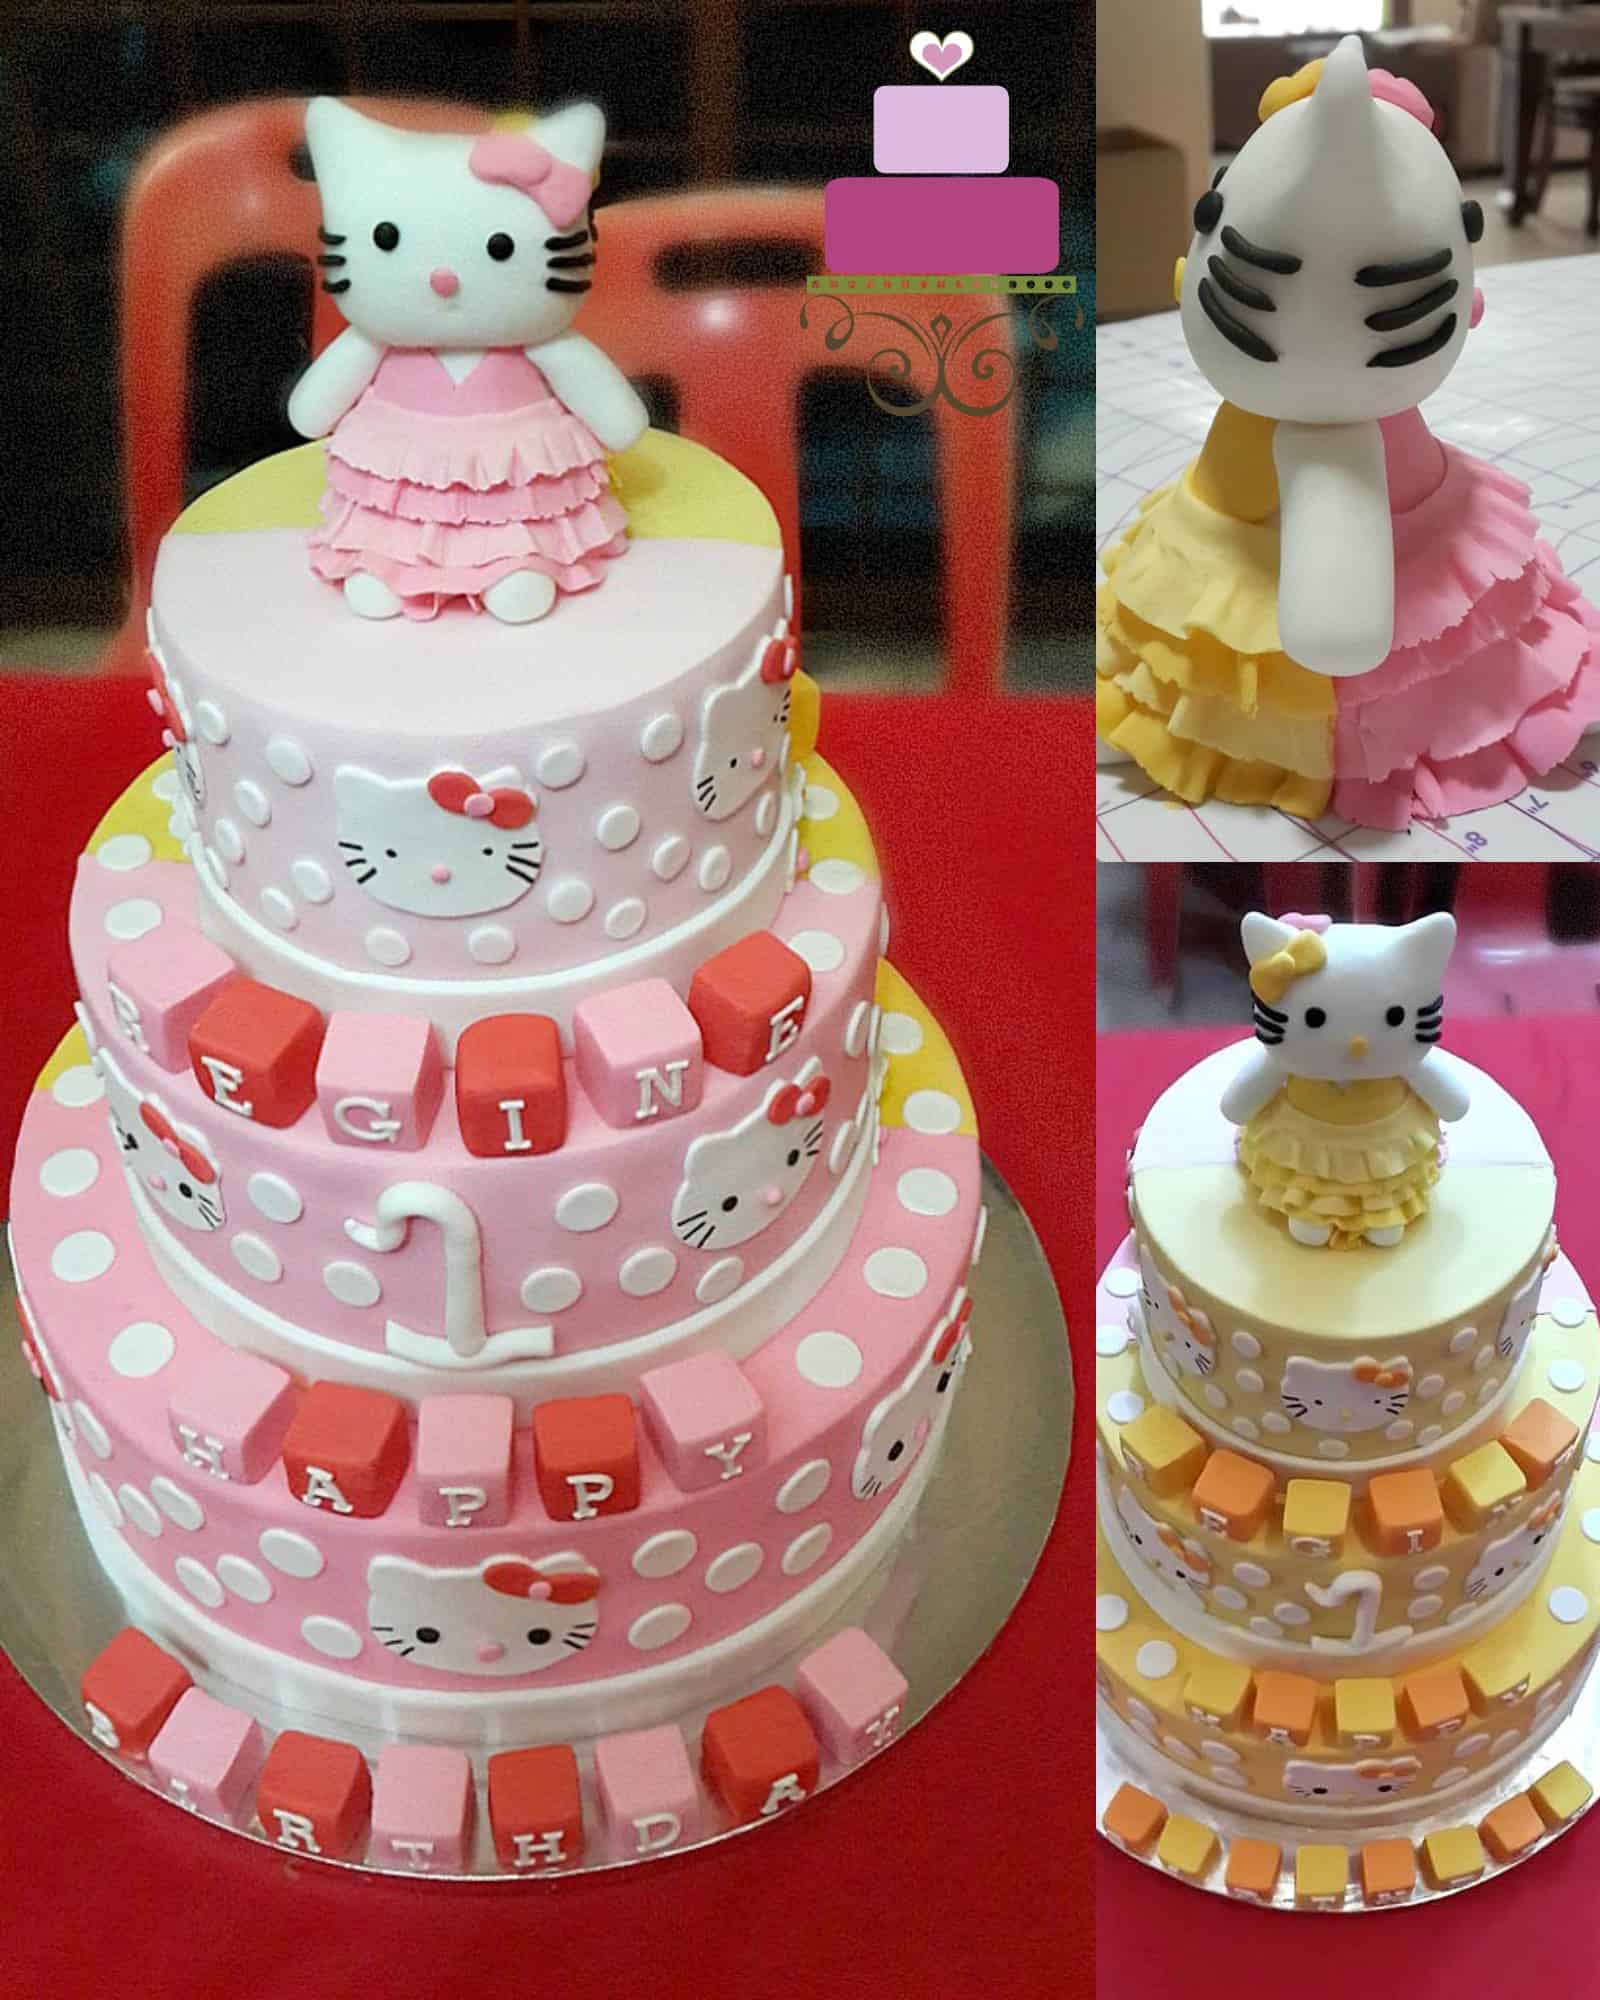
This is not my original design. It is a remake of an original design from Ginas Cakes.
If you like this cake, you should also check out this other Hello Kitty birthday cake. And for 1st birthday cakes, check out this purple Minnie Mouse cake, 1st birthday Minnie Mouse cake, Minion cake and Minion cupcakes, Mickey Mouse Clubhouse cake, jungle animals cake and this Timmy Time cake.
🧾Supplies Required
- Cake - this was a 3 tier cake, measuring 6 inches, 9 inches, and 12 inches. Each tier was 4 inches high. I used my butter pound cake recipe for the cake.
- Buttercream - I used buttercream to fill the cake layers as well as to crumb coat it.
- Fondant - I used Satin Ice for the entire cake including the Hello Kitty Topper.
- Satin Ice gum paste - I used very little gum paste on the cake, and that was for the lettering.
- CMC powder - I added CMC powder to fondant when making the Hello Kitty topper.
- Fondant modelling tools - these were for making the Hello Kitty topper.
- Round plunger cutters - I used the plunger cutter set for the white polka dots on the cake, as well as for Kitty's ribbon centers, eyes and nose.
- Alphabet cutters - I used FMM block letter cutter for all the lettering on the cake.
- Sugar craft knife
- Pizza cutter wheel
- Hello Kitty cookie cutters
- Oval plunger cutters – this was to cut out Kitty’s bow.
- Toothpick – to create the frills on Hello Kitty’s dress
- Shortening and fondant glue.
- Food coloring in yellow, pink, black and orange.
👩🍳How to Make
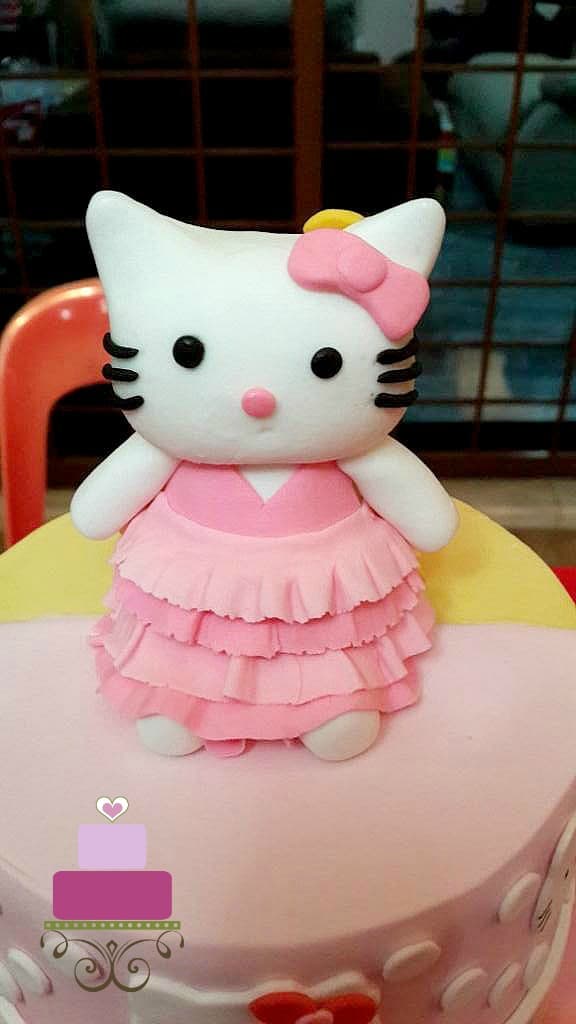
Step 1: Make the Hello Kitty Cake Topper
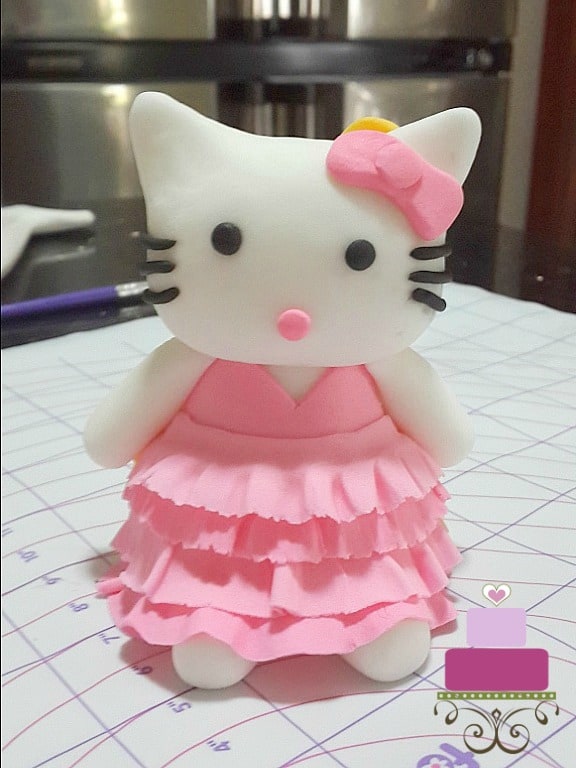
I started by making the 3D fondant Hello Kitty cake topper first. The topper was made using fondant. I added CMC powder to some white fondant so that the fondant would dry quicker and firmer.
Kitty was shaped by hand with the help of fondant shaping tools and was pink on one side and yellow on the other. To make the frills on the dress, I cut strips of pink and yellow fondant and used a toothpick to make the frills on the dress.
The dress was attached to the cake topper with shortening. The eyes, nose, and whiskers were also shaped by hand. I attached these parts to the face using glue.
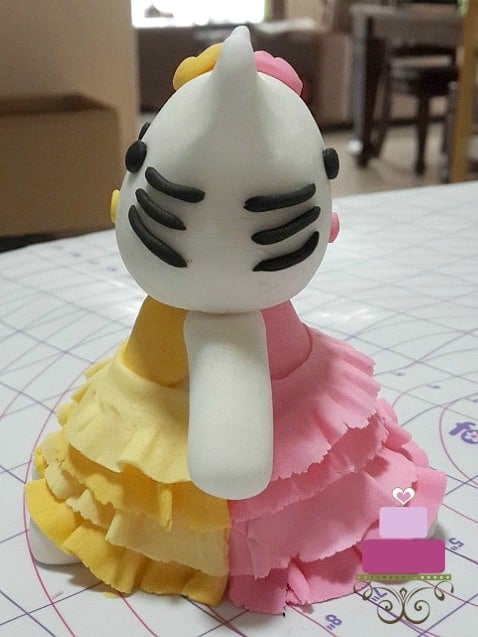
The Kitty had 2 pairs of legs, one pair on each side. To make the legs, I rolled 4 small white fondant pieces into short logs and attached 2 each on either side of the cake topper.
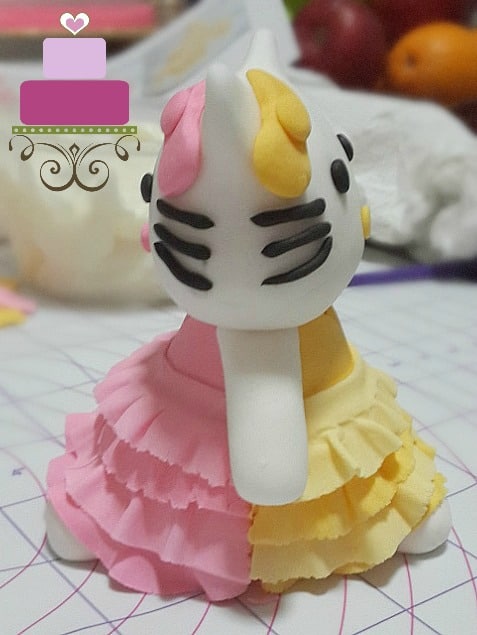
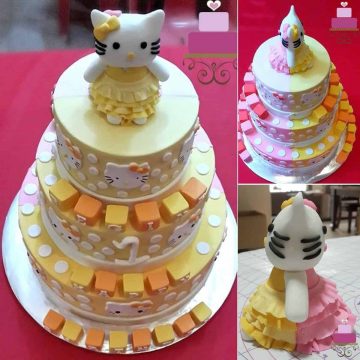
Once the cake topper was completed, I left it aside to set. Here was how the topper looked sideways on both sides:
Step 2: Prepare the Cake
As for the cake, once baked and cooled, I leveled each layer and then sandwiched them with buttercream. And then I covered each tier separately with fondant before stacking them together.
Before covering each tier with fondant, I marked a line on the crumb coated cakes right at the midpoint. This was to guide me in making sure the yellow and pink covering on each tier is balanced and is of the same size on both sides.
To get the half pink and half yellow fondant covering on each tier, I simply rolled some pink fondant and used it to cover half of the cake, using the line I marked earlier as a guide.
And I repeated the process with the yellow fondant. In doing this, I let the fondant pieces overlap slightly at the line marking. Once both the colors were on the cake, I used my pizza cutting tool to gently cut across the fondant layers.
Once cut, I removed the excess yellow fondant and then lifted the yellow fondant and removed the excess pink fondant underneath.
And then I used some fondant glue to dampen the yellow and pink fondant joints and gently smoothened them to ensure they stick together and there is no gap in between.
I repeated the process for the remaining 2 cake tiers before stacking 3 tiers together. In stacking the cakes, I made sure that the pink and yellow colors are all aligned.
Step 3: Make Hello Kitty Face Decoration
To start off the rest of the decoration on the Hello Kitty themed cake, I added Hello Kitty face fondant cuts on the sides of the cake. The cutouts were in 3 different sizes, with the largest on the bottom tier and the smallest on the topmost tier.
I had a set of Hello Kitty cookie cutters and they were perfect to make the cutouts. But I only had them in 2 sizes and so had to manually cut the smallest Hello Kitty faces for the top tier.
The eyes, nose, and whiskers, on the other hand, were shaped by hand. I attached these with shortening.
Finally, the bow on Kitty was cut out using my teardrop plunger cutter and round plunger cutter. I attached these to Kitty with shortening too.
It is easier to attach all the facial features on the face before attaching them to the sides of the cake.
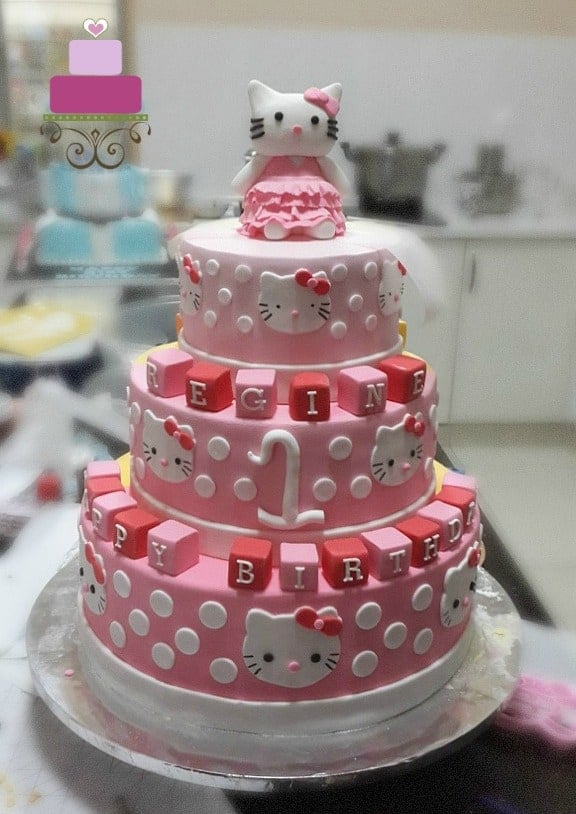
Step 4: Add the White Polka Dots
Next were the white polka dots. These were also in 3 different sizes, starting with the largest on the bottom tier and smallest on the top tier. I cut these using my round plunger cutter set and attached them to the cake with shortening.
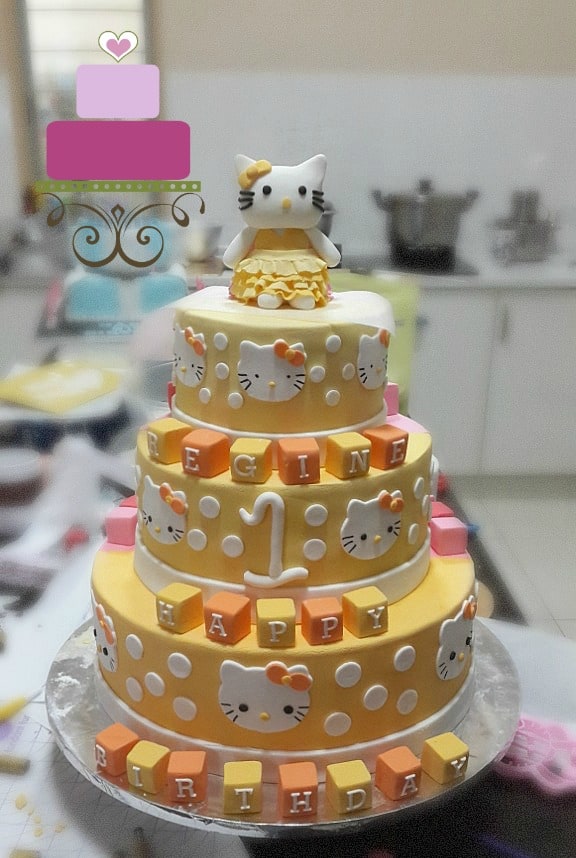
Step 5: Make the Name Cubes
Finally, were the fondant cubes on both sides of the cake. The cubes were cut out of fondant, and I must admit, it was not easy to get the edges to be sharp. The cubes were in 4 different colors - pink, deep pink, yellow, and orange. I had the birthday message and Regine's name on these blocks.
The lettering were cut out of thinly rolled gum paste. I used my FMM block letters cutter for the letters. And I attached the letters to the cubes using shortening. The cubes, on the other hand, were attached to the cake with fondant glue.
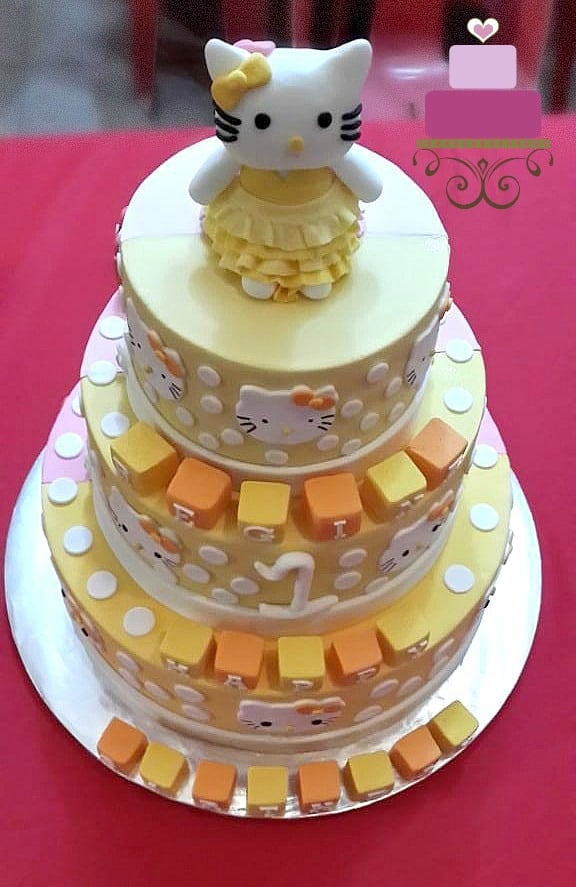
Step 6: Attach the Cake Topper
The Hello Kitty topper was the finishing touch for the cake. I attached this little cutie to the cake with fondant glue.
❤️More Cake Designs You Will Love


Do you like this tutorial? Please leave a 5-star ⭐⭐⭐⭐⭐rating in the recipe card below and consider a review further down this page. I would love to hear from you. Thank you!
📖Recipe
Hello Kitty Cake
Equipment
- Fondant modelling tools
- Round plunger cutters
- Alphabet cutters
- Sugar craft knife
- Pizza cutter wheel
- Hello Kitty cookie cutters
- Oval plunger cutters
- Toothpick
- Shortening
For best results, use the metrics measurements. US customary measurements have not been tested and are only meant for guide.
Ingredients
6 inch round cake
- 360 g self-raising flour
- 360 g granulated sugar
- 360 g butter
- 6 eggs
- 90 ml milk
- ¾ teaspoon baking powder
- ¼ teaspoon salt
- 1 teaspoon vanilla extract
9 inch round cake
- 600 g butter
- 600 g granulated sugar
- 600 g self-raising flour
- 10 eggs
- 150 ml milk
- ½ teaspoon salt
- 1 ¼ teaspoon baking powder
- 1 ⅔ teaspoon vanilla extract
12 inch round cake
- 960 g butter
- 960 g granulated sugar
- 960 g self-raising flour
- 16 eggs
- 240 ml milk
- ¾ teaspoon salt
- 2 teaspoon baking powder
- 2 ½ teaspoon vanilla extract
Frosting and Decoration
- Buttercream
- Fondant
- Gum Paste
- CMC Powder
- Food coloring in pink, yellow, orange and black.
Instructions
Baking the Cakes
- Preheat oven to 170 °Celsius.
- Beat butter and sugar till soft and creamy for about 2 minutes. Add eggs, one at a time, beating well after each addition.
- In a separate bowl, sift flour, baking powder, and salt. Fold in the sifted ingredients into the creamed mixture alternately with milk, starting and ending with flour.
- Finally, add in vanilla extract and combine well. Pour batter into two greased and floured cake pans and bake for 45 to 50 minutes until the top of the cake springs back when lightly pressed. The cakes are done when a skewer inserted in the center of the cake comes out without any wet batter.
- Remove cakes from oven and let them cool completely before icing and decorating.
- Repeat the process for all the cake tiers. Each tier will have 2 layers of cake.
Hello Kitty Cake Topper
- Start by making the 3D fondant Hello Kitty cake topper first. Add CMC powder to some white fondant and knead well. Shape the Kitty by hand.
- To make the frills on the dress, cut strips of pink and yellow fondant and use a toothpick to make the frills on the dress. Attach it to the cake topper with shortening. The eyes, nose, and whiskers are also to be shaped by hand. Attach these parts to the face using glue.
- The Kitty has 2 pairs of legs, one pair on each side. To make the legs, roll 4 small white fondant piece into short logs and attach 2 each on either side of the cake topper.
- Once the cake topper is completed, leave it aside until the rest of the cake is ready.
Preparing the Cake
- Once the cakes are all baked and cooled, level each layer and then sandwiched them with buttercream.
- Next, cover each tier separately with fondant before stacking them together. Before covering each tier with fondant, mark a line on the crumb coated cakes right at the midpoint. This is to guide you in making sure the yellow and pink fondant covering on each tier is balanced and is of the same size on both sides.
- To get the half pink and half yellow fondant covering on each tier, simply rolled some pink fondant and used it to cover half of the cake, using the line marked earlier as a guide.
- Repeat the process with the yellow fondant. In doing this, let the fondant pieces overlap slightly at the line marking. Once both the colors are on the cake, use a pizza cutting tool to gently cut across the fondant layers.
- Once cut, remove the excess yellow fondant and then lift the yellow fondant and remove the excess pink fondant underneath.
- And then use some fondant glue to dampen the yellow and pink fondant joints and gently smoothen them to ensure they stick together and there is no gap in between.
- Repeat the process for the remaining 2 cake tiers before stacking all 3 tiers together. In stacking the cakes, make sure that the pink and yellow colors are all aligned.
Hello Kitty Face Decoration on the Sides of the Cake
- To start off the rest of the decoration the the Hello Kitty themed cake, add Hello Kitty face fondant cut outs on the sides of the cake. The cutouts should be in 3 different sizes, with the largest on the bottom tier and the smallest on the topmost tier. You can use cookie cutters to cut out the fondant faces or you can draw out a paper template and use it as a guide to cut them out of fondant.
- The eyes, nose, and whiskers can be shaped by hand. Attach these to the faces with fondant glue. Finally, make the bow on Kitty using the teardrop plunger cutters and round plunger cutters. Attach these to Kitty with shortening too.
- It is easier to attach all the facial features for on the face before attaching them to the sides of the cake.
The White Polka Dots
- Next are the white polka dots. These are to be cut in 3 different sizes, starting with the largest for the bottom tier and smallest for the top tier. Cut these using the round plunger cutter set and attach them to the cake with shortening.
The Name Cubes and the Lettering
- Cut the cubes out of fondant in pink, deep pink, yellow, and orange colors. For the letters, roll out some white gum paste thin. Cut them using the FMM block letters cutters. Attach the letters to the cubes using shortening and the cubes to the cake with fondant glue.
Adding the Cake Topper
- Once the rest of the decoration in completed, attached the Hello Kitty cake topper onto the top tier with fondant glue.
Leave a Reply